Hitachi CS 35B User Manual

Chain Saw
ñeÔÌaÓ ÔËÎa
CS-350A • CS 35B
CS35B
Read through carefully and understand these instructions before use.
BÌËÏaÚeÎëÌo ÔpoäÚËÚe ÀaÌÌyï ËÌcÚpyÍáËï Ôo íÍcÔÎyaÚaáËË ÔpeÊÀe äeÏ ÔoÎëÁoÇaÚëcÓ ËÌcÚpyÏeÌÚoÏ.
Handling Instructions
àÌcÚpyÍáËÓ Ôo íÍcÔÎyaÚaáËË

1 |
|
2 |
|
3 |
|
||
|
|
|
|
|
|
|
|
4 |
|
|
5 |
|
|
6 |
|
|
|
|
|
|
|
|
|
7 |
|
|
8 |
|
9 |
|
|
|
|
|
|
|
|
|
|
10 |
|
|
11 |
|
12 |
|
|
|
|
|
|
|
|
|
|
13 |
|
|
14 |
|
15 |
|
|
|
|
|
|
|
|
|
|
1

16 |
|
17 |
|
18 |
|
||
|
|
|
|
|
|
|
|
19 |
|
|
20 |
|
|
6 |
|
|
|
|
|
|
|
|
|
22 |
|
|
23 |
|
24 |
|
|
|
|
|
|
|
|
|
|
26
2

|
English |
PyccÍËÈ |
|
|
|
|
|
1 |
Tighten |
ÂaÚÓÌyÚë |
|
|
|
|
|
2 |
Bolt |
ÅoÎÚ |
|
|
|
|
|
3 |
Chain cover |
KpêåÍa áeÔË |
|
|
|
|
|
4 |
Wrench |
ÉaeäÌêÈ ÍÎïä |
|
|
|
|
|
5 |
Loosen |
OcÎaÄËÚë |
|
|
|
|
|
6 |
Screwdriver |
OÚÇepÚÍa |
|
|
|
|
|
7 |
Increase |
мЗeОЛдЛЪл |
|
|
|
|
|
8 |
Slacken |
мПeМлеЛЪл |
|
|
|
|
|
9 |
Drive link |
èpËÇoÀÌoe ÁÇeÌo |
|
|
|
|
|
0 |
Chain |
ñeÔë |
|
|
|
|
|
A |
Guide bar |
HaФpaЗОУпзaУ еЛМa |
|
|
|
|
|
B |
Spike |
тФЛОлНa |
|
|
|
|
|
C |
Side handle |
ÅoÍoÇaÓ pyÍoÓÚÍa |
|
|
|
|
|
D |
Handle |
PyäÍa |
|
|
|
|
|
E |
1/5 of diameter of file |
1/5 АЛaПeЪpa МaФЛОлМЛНa |
|
|
|
|
|
F |
Round File |
KpyЦОкИ МaФЛОлМЛН |
|
|
|
|
|
G |
Chain blade |
иЛОлМaУ еЛМa |
|
|
|
|
|
H |
Depth gauge |
OЦpaМЛдЛЪeОл ЦОyДЛМк |
|
|
|
|
|
I |
Depth gauge jointer |
CoeАЛМЛЪeОл oЦpaМЛдЛЪeОУ |
|
ÖÎyÄËÌê |
|||
|
|
||
|
|
|
|
J |
File away this portion |
OЪФЛОЛЪe нЪy дacЪл |
|
МaФЛОлМЛНoП |
|||
|
|
||
|
|
|
|
K |
Sprocket |
ñeÔÌoe ÍoÎeco |
|
|
|
|
|
|
Fit the adjustment pin to a |
èoÀÄepËÚe ÌacÚpoeäÌêÈ |
|
L |
еЪЛЩЪ ФoА oЪЗepcЪЛe |
||
guide bar hole |
|||
|
МaФpaЗОУпзeИ еЛМк |
||
|
|
||
|
|
|
|
M |
Move |
èepeÏecÚËÚe |
|
|
|
|
|
N |
Bolt |
ÅoÎÚ |
|
|
|
|
|
O |
Wear limit |
èpeÀeÎ ËÁÌoca |
|
|
|
|
|
P |
No. of carbon brush |
π yÖoÎëÌoÈ çeÚÍË |
|
|
|
|
|
Q |
Tail cover |
XÇocÚoÇaÓ ÍpêåÍa |
|
|
|
|
|
R |
Machine screw |
MeÎÍËÈ ÍpeÔeÊÌêÈ ÇËÌÚ |
|
|
|
|
|
S |
Armature |
ApÏaÚypa |
|
|
|
|
|
T |
Brush holder |
ôeÚÍoÀepÊaÚeÎë |
|
|
|
|
|
U |
Lead wire |
иoАЗoАУзЛИ ФpoЗoА |
|
|
|
|
|
V |
Terminal |
KÎeÏÏa |
|
|
|
|
|
W |
Washer |
òaÈÄa |
|
|
|
|
|
X |
Machine screw (made of brass) |
MeÎÍËÈ ÍpeÔeÊÌêÈ ÇËÌÚ |
|
(ÏeÀÌêÈ) |
|||
|
|
||
|
|
|
|
Y |
Carbon brush |
ìÖoÎëÌaÓ çeÚÍa |
|
|
|
|
|
Z |
Holder plate |
èÎacÚËÌa ÀepÊaÚeÎÓ |
|
|
|
|
|
[ |
Chain brake |
TopÏoÁ áeÔË |
|
|
|
|
3

|
|
|
Symbols |
CËÏÇoÎê |
|
|
|
The following show |
HËÊe ÔpËÇeÀeÌê |
|
|
|
symbols used for the |
cËÏÇoÎê, ËcÔoÎëÁyeÏêe |
|
|
|
machine. Be sure that |
ÀÎÓ ÏaåËÌê. èepeÀ |
|
|
|
you understand their |
ÌaäaÎoÏ paÄoÚê |
|
|
|
meaning before use. |
oÄÓÁaÚeÎëÌo yÄeÀËÚecë |
|
|
|
|
Ç ÚoÏ, äÚo Bê ÔoÌËÏaeÚe |
|
|
|
|
Ëx ÁÌaäeÌËe. |
|
|
|
Read instruction |
èpoäÚËÚe pyÍoÇoÀcÚÇo |
|
|
|
manual. |
Ôo íÍcÔÎyaÚaáËË. |
|
|
|
|
|
|
|
|
Only for EU countries |
ToÎëÍo ÀÎÓ cÚpaÌ EC |
|
|
|
Do not dispose of |
He ЗкНЛАкЗaИЪe |
|
|
|
electric tools together |
íÎeÍÚpoÔpËÄopê |
|
|
|
with household waste |
ЗПecЪe c oДoкдМкП |
|
|
|
material! |
ÏycopoÏ! |
|
|
|
In observance of |
B cooÚÇeÚcÚÇËË c |
|
|
|
European Directive |
eÇpoÔeÈcÍoÈ |
|
|
|
2002/96/EC on waste |
ÀËpeÍÚËÇoÈ 2002/96/EG |
|
|
|
electrical and electronic |
oД yЪЛОЛБaбЛЛ cЪapкx |
|
|
|
equipment and its |
íÎeÍÚpËäecÍËx Ë |
|
|
|
||
|
|
|
implementation in |
íÎeÍÚpoÌÌêx ÔpËÄopoÇ |
|
|
|
accordance with |
Ë Ç cooÚÇeÚcÚÇËË c |
|
|
|
national law, electric |
ПecЪМкПЛ БaНoМaПЛ |
|
|
|
tools that have reached |
íÎeÍÚpoÔpËÄopê, |
|
|
|
the end of their life must |
ДкЗзЛe З |
|
|
|
be collected separately |
íÍcÔÎyaÚaáËË, ÀoÎÊÌê |
|
|
|
and returned to an |
yЪЛОЛБoЗкЗaЪлcУ |
|
|
|
environmentally |
oÚÀeÎëÌo ÄeÁoÔacÌêÏ |
|
|
|
compatible recycling |
ÀÎÓ oÍpyÊaïçeÈ |
|
|
|
facility. |
cpeÀê cÔocoÄoÏ. |
|
|
|
|
|
4

English
GENERAL SAFETY RULES
WARNING!
Read all instructions
Failure to follow all instructions listed below may result in electric shock, fire and/or serious injury.
The term “power tool” in all of the warnings listed below refers to your mains operated (corded) power tool or battery operated (cordless) power tool.
SAVE THESE INSTRUCTIONS
1)Work area
a)Keep work area clean and well lit.
Cluttered and dark areas invite accidents.
b)Do not operate power tools in explosive atmospheres, such as in the presence of flammable liquids, gases or dust.
Power tools create sparks which may ignite the dust of fumes.
c)Keep children and bystanders away while operating a power tool.
Distractions can cause you to lose control.
2)Electrical safety
a)Power tool plugs must match the outlet. Never modify the plug in any way.
Do not use any adapter plugs with earthed (grounded) power tools.
Unmodified plugs and matching outlets will reduce risk of electric shock.
b)Avoid body contact with earthed or grounded surfaces such as pipes, radiators, ranges and refrigerators.
There is an increased risk of electric shock if your body is earthed or grounded.
c)Do not expose power tools to rain or wet conditions.
Water entering a power tool will increase the risk of electric shock.
d)Do not abuse the cord. Never use the cord for carrying, pulling or unplugging the power tool. Keep cord away from heat, oil, sharp edges or moving parts.
Damaged or entangled cords increase the risk of electric shock.
e)When operating a power tool outdoors, use an extension cord suitable for outdoor use.
Use of a cord suitable for outdoor use reduces the risk of electric shock
3)Personal safety
a)Stay alert, watch what you are doing and use common sense when operating a power tool. Do not use a power tool while you are tired or under the influence of drugs, alcohol or medication.
A moment of inattention while operating power tools may result in serious personal injury.
b)Use safety equipment. Always wear eye protection.
Safety equipment such as dust mask, non-skid safety shoes, hard hat, or hearing protection used for appropriate conditions will reduce personal injuries.
c)Avoid accidental starting. Ensure the switch is in the off position before plugging in.
Carrying power tools with your finger on the switch or plugging in power tools that have the switch on invites accidents.
d)Remove any adjusting key or wrench before turning the power tool on.
A wrench or a key left attached to a rotating part of the power tool may result in personal injury.
e)Do not overreach. Keep proper footing and balance at all times.
This enables better control of the power tool in unexpected situations.
f)Dress properly. Do not wear loose clothing or jewellery. Keep your hair, clothing and gloves away from moving parts.
Loose clothes, jewellery or long hair can be caught in moving parts.
g)If devices are provided for the connection of dust extraction and collection facilities, ensure these are connected and properly used.
Use of these devices can reduce dust related hazards.
4)Power tool use and care
a)Do not force the power tool. Use the correct power tool for your application.
The correct power tool will do the job better and safer at the rate for which it was designed.
b)Do not use the power tool if the switch does not turn it on and off.
Any power tool that cannot be controlled with the switch is dangerous and must be repaired.
c)Disconnect the plug from the power source before making any adjustments, changing accessories, or storing power tools.
Such preventive safety measures reduce the risk of starting the power tool accidentally.
d)Store idle power tools out of the reach of children and do not allow persons unfamiliar with the power tool or these instructions to operate the power tool.
Power tools are dangerous in the hands of untrained users.
e)Maintain power tools. Check for misalignment or binding of moving parts, breakage of parts and any other condition that may affect the power tools operation.
If damaged, have the power tool repaired before use.
Many accidents are caused by poorly maintained power tools.
f)Keep cutting tools sharp and clean.
Properly maintained cutting tools with sharp cutting edges are less likely to bind and are easier to control.
g)Use the power tool, accessories and tool bits etc., in accordance with these instructions and in the manner intended for the particular type of power tool, taking into account the working conditions and the work to be performed.
Use of the power tool for operations different from intended could result in a hazardous situation.
5)Service
a)Have your power tool serviced by a qualified repair person using only identical replacement parts.
This will ensure that the safety of the power tool is maintained.
PRECAUTION
Keep children and infirm persons away.
When not in use, tools should be stored out of reach of children and infirm persons.
5

English
PRECAUTIONS ON USING CHAIN SAW
1.Hold the unit firmly with both hands, and be alert for recoiling which may occur during operation.
2.Pull plug immediately if the cord becomes damaged or cut.
3.Pitch of chain and No. of drive links are 9.5 mm × 52.
4.Ensure that the material is free of foreign matter such as nails.
5.Local regulations may require not to cut sapling. Ensure that there are no such regulations when cutting sapling.
SPECIFICATIONS
Model |
|
|
|
CS-350A |
|
CS35B |
|||
|
|
|
|
|
|
|
|||
Bar Size |
|
|
|
350 mm |
|
350 mm |
|||
|
|
|
|
|
|
|
|
||
Voltage (by areas)* |
|
|
|
110V, 115V, 120V, 127V, |
|
|
|
|
(110V, 220V, 230V, 240V) |
|
|
|
|
|
|
|
|||
|
|
|
|
|
|
||||
|
|
|
220V, 230V, 240V |
|
|
|
|
||
|
|
|
|
|
|
|
|
|
|
|
|
|
|
|
|
|
|
|
|
|
|
|
|
|
|
|
|
|
|
|
|
|
|
|
|
|
|
|
|
Power Input* |
|
|
|
|
|
|
|
1140W* |
|
|
|
|
|
|
|
|
|||
No-Load Chain Speed |
|
|
|
450 m/min. (7.5 m/sec.) |
|
10 m/sec. (600 m/min.) |
|||
|
|
|
|
|
|
|
|||
Weight |
|
|
|
4.2 kg |
|
5 kg |
|||
|
|
|
|
|
|
|
|
|
|
* Be sure to check the nameplate on product as it is subject to change by areas.
STANDARD ACCESSORIES |
|
|
(1) |
Screwdriver ................................................................ |
1 |
(2) |
Wrench ....................................................................... |
1 |
(3) |
Oil Feeder (only for CS-350A) ............................... |
1 |
Standard accessories are subject to change without |
||
notice. |
|
|
OPTIONAL ACCESSORIES (sold separately)
(1)Chain Saw Oil
(2)Round File
(3)Depth Gauge Jointer
Round File and Depth Gauge Jointer are to be used for sharpening of chain blades. As to its application, please refer to the item titled “Sharpening of chain blade”.
(4)Chain Case
Always keep the chain cover on the chain while carrying the chain saw or while storing it.
Optional accessories are subject to change without notice.
APPLICATION
General wood cutting.
PRIOR TO OPERATION
1.Power source
Ensure that the power source to be utilized conforms to the power requirements specified on the product nameplate.
2.Power switch
Ensure that the power switch is in the OFF position. If the plug is connected to a receptacle while the power switch is in the ON position, the power tool will start operating immediately, which could cause a serious accident.
3.Extension cord
When the work area is removed from the power source, use an extension cord of sufficient thickness and rated capacity. The extension cord should be kept as short as practicable.
4.Confirm the chain tension
Improper chain tension may result in damage to the chain and the guide bar, and could cause serious accident. Always confirm that there is proper tension on the chain prior to operation.
5.Fill the oil tank with oil
This unit is shipped without oil in the oil tank. Prior to operation, remove the oil cap and fill the tank with accessory oil. (CS-350A)
This unit is shipped without oil in the oil tank. Prior to operation, remove the oil cap and fill the tank with chain saw oil (sold separately), or SAE 20 or 30 motor oil. (CS35B)
Do not use stained or degraded motor oil. Check oil reservoir periodically and keep it filled while running saw.
6.Oiling the guide bar and chain
By pushing the oil button, oil is supplied to the guide bar and chain. Before starting cutting work, turn on the saw and push the oil button 3 or 4 times to ensure that oil is well circulated. (CS-350A)
Automatic chain lubrication (CS35B)
7.It is recommended to use an earth-leakage circuit breaker or a residual current device.
ADJUSTING THE CHAIN TENSION
1.Loosen the bolt securing the chain cover with the accessory wrench, as shown in Fig. 1. It is not necessary to remove the bolt.
2.While lifting the tip of the guide bar, turn the adjusting screw with the accessory minus-head screwdriver to adjust the chain tension, as shown in Fig. 2. The chain tension is increased by turning
6

English
the adjusting screw clockwise, and slackened by turning it counterclockwise.
3.The chain tension must be adjusted so that a 0.5– 1.0 mm gap appears between the chain drive links and the guide bar when the chain is lightly raised at the center section of the guide bar as shown in
Fig. 3.
4.When chain tension adjustment is completed,
retighten the bolt securing the chain cover.
CAUTION
Due to the sharpness of the chain, protect your hands when checking the tension or servicing.
CUTTING PROCEDURES
1. General cutting procedures
(1)Switch ON the power while keeping the saw slightly away from the wood to be cut. Start sawing only after the unit has reached full speed.
(2)When sawing the slender piece of wood, press the base section of the guide bar against the wood and saw downward as shown in Fig. 4.
(3)When sawing a thick piece of wood, press the spike on the front section of the unit against the wood and cut it with lever action while using the spike as a fulcrum as shown in Fig. 5.
(4)When cutting wood horizontally, turn the unit body to the right so that the guide bar is below and hold the upper side of the side handle with your left hand. Hold the guide bar horizontally and place the spike that is on the front of the unit body on the lumber. Using the spike as a fulcrum, cut into the wood by turning the handle to the right. (Fig. 6)
(5)When cutting into wood from the bottom, touch the upper part of the guide bar to the wood lightly. (Fig. 7)
(6)In addition of careful study of the handling instructions, take practical instruction in the operation of the chain saw prior to use, or at least to practice working with the chain saw by cutting lengths of round timber on a sawing trestle.
(7)When cutting logs or timbers which are not
supported, support them properly not to move during cutting by a sawing trestle or another proper methods.
CAUTIONS
When cutting wood from the bottom, there is the danger that the unit body may pushed back toward the user if the chain strongly hits the wood.
Do not cut all the way through the wood by starting from the bottom since there is the danger of the guide bar flying up out of control when the cut is finished.
Always prevent the operating chain saw from
touching the ground or wire fences.
2. Branch cutting
(1)Cutting branches from a standing tree:
A thick branch should initially be cut off at a point away from the trunk of the tree.
First cut in about one third of the way from below, and then cut off the branch from above. Finally, cut off the remaining portion of the branch even with the trunk of the tree. (Fig. 8)
CAUTIONS
Always be careful to avoid falling branches.
Always be alert for chain saw recoil.
(2)Cutting branches from fallen trees:
First cut off branches that do not touch the ground, then cut off those which touch the ground. When cutting thick branches that touch the ground, first cut in about half of the way from above, then cut
the branch off from below. (Fig. 9)
CAUTIONS
When cutting off branches which touch the ground, be careful that the guide bar does not become bound by pressure.
In the final stage of cutting, beware of the log
suddenly rolling.
3.Log cutting
When cutting a log positioned as shown in Fig. 10, first cut in about one third of the way from below, then cut down all the way from above.
When cutting a log that straddles a hollow as shown
in Fig. 11, first cut in about two thirds of the way from above, then cut upward from below.
CAUTIONS
Be careful that the guide bar does not become bound in the log by pressure.
When working on inclined ground, be sure to stand
on the uphill side of the log. If you stand on the downhill side, the cut-off log may roll toward you.
4. Felling trees:
(1)Undercut (q as shown in Fig. 12):
Make undercut facing direction which you want tree to fall.
Depth of undercut should be 1/3 of tree’s diameter. Never fell trees without proper undercut.
(2)Backcut (w as shown in Fig. 12):
Make backcut about 5 cm above and parallel to the horizontal undercut.
If the chain is bound during cutting, stop the saw
and use wedges to free form it. Do not cut through the tree.
CAUTIONS
Trees should not be felled in a manner that would endanger any person, strike any utility line or cause any property damage.
Be sure to stand on the uphill side of the terrain as the tree is likely to roll or slide downhill after it is felled.
SHARPENING OF CHAIN BLADE
CAUTION
Ensure the power source has been disconnected from the tool before performing the steps below. Wear gloves to protect your hands.
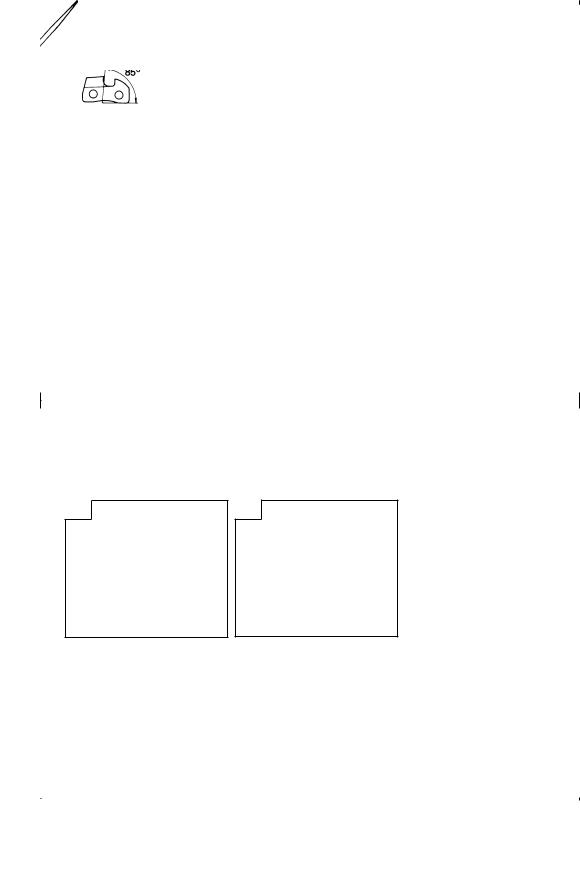
Dull and worn chain blades will decrease the efficiency of the tool and place unnecessary overload on the motor and various parts of the machine. In order to maintain optimum efficiency, it is necessary to check the chain blades often and keep them properly sharpened and adjusted. Blade sharpening and depth gauge adjustment should be accomplished at the center of the guide bar with the chain properly mounted to the machine.
7
 Loading...