


LE32C800C
01 SafetyWarnings
Welcome 2
2
Important Information 2
2
Safety notice


 3
3
Warning and cautions


 4
4
02 Introduction
Main Parameter


 5
5
Base Stand Assembly Instruction


 7
7
Wall Mounting Installation Guidelines


 8
8
Control Panel


 9
9
Rear/Side Sockets


 9
9
Connecting to your HaierTV


 10
10
Common Interface


 12
12
03 Remote Control
Remote Control


 13
13
Teletext


 14
14
04 Operation
Installation Guide


 15
15
CHANNEL MENU


 15
15
AutoTuning(DVB-T)


 15
15
AutoTuning(DVB-C)


 16
16
DTVManualTuning(DVB-T)


 17
17
DTVManualTuning(DVB-C)


 17
17
ATV ManualTuning


 17
17
Program edit


 17
17
CommonInterface


 18
18
SignalInformation


 18
18
SoftwareUpdated(USB)


 18
18
PICTURE MENU


 18
18
Audio MENU 


 18
18
Clock MENU


 18
18
SETUP MENU 


 19
19
LOCK MENU


 19
19
EPG Menu(Electronic Program Guide)


 20
20
PVR function


 20
20
Preparetorecordtheprogram


 20
20
Recordtheprogram


 21
21
DTVRecording


 21
21
Timeshift function


 22
22
USB Player


 23
23
05 Trouble shooting
Trouble shooting 


 25
25
Specification


 28
28
01 Safety warnings
Thanksforbuyingthis32" LEDLCDTV. Thisguidewillhelpyousetupand beginusing yourTV.
32"HDReadyDigitalLEDLCDTV
Remote control
AAAbattery x2
InstructionManual
Quickstartguide
YPbPrConnectCable Stand
Nowyoucangetstarted!
IMPORTANT INFORMATION
READALLINSTRUCTIONSBEFOREUSEANDKEEPFORFUTUREREFERENCE.
CAUTION
TOREDUCETHERISKOFELECTRICSHOCK,DONOTREMOVECOVER(ORBACK).NOUSERSERVICEABLEPARTSINSIDE. FORANYPROBLEMS,REFERSERVICINGTOTHECUSTOMERHELPLINE.THEREISALIGHTNINGARROWSYMBOLIN THETRIANGLE:THISSYMBOLINDICATESHIGHVOLTAGEISPRESENTINSIDE.ITISDANGEROUSTOMAKEANYKINDOF CONTACTWITHANYINSIDEPARTOFTHISPRODUCT.
THEREISAEXCLAMATIONMARKINTHETRIANGLE:THISSYMBOLALERTSYOUTHATIMPORTANTLITERATURE
CONCERNINGOPERATIONANDMAINTENANCEHASBEENINCLUDEDWITHTHISPRODUCT.
CAUTION:TOREDUCETHERISKOFELECTRICSHOCKANDFIRE,DONOTPUTTHETVSETNEAR
SOURCESOFHUMIDITY.DONOTUSEANYABRASIVECLEANERSWHICHMAYSCRATCHORDAMAGE
THELCDSCREEN.AVOIDCONTACTWITHOBJECTSTHATMAYSCRATCHTHELCDSCREEN.
NOTE:SERVICINGTHEUNITYOURSELFISUNAUTHORISEDANDCOULDLEADTOINJURYORPRODUCT
DAMAGE.REFERALLSERVICINGTOTHECUSTOMERHELPLINE.

Safety notice
EN-3 

WARNING AND CAUTIONS
Warning
Highvoltagesareusedintheoperationofthis televisionreceiver.Donotremovethecabinet backfromyourset. Referservicingtoqualified servicepersonnel.
Warning
Topreventfireorelectricalshockhazard,do notexpose thetelevisionreceivertorainor moisture.
Warning
Donotdroporpushobjectsintothe televisioncabinet slotsoropenings.Never spillanykindofliquidonthetelevision receiver.
Caution
Donotblocktheventilationholesintheback cover.Adequateventilationisessentialto preventfailureof electricalcomponents.
Caution
Donottrapthepowersupplycordunderthe televisionreceiver.
Caution
Neverstandon,leanon,orsuddenlypushthe televisionoritsstand.Youshouldpayspecial attentiontochildren.Serious injurymayresultif itshouldfall.
Caution
Donotplaceyourtelevisiononanunstablecart, stand,shelfortable.Seriousinjurytoan individual,anddamagetothetelevision,may resultifitshouldfall.
Caution
Whenthetelevisionreceiverisnotusedforan extendedperiodoftime,itisadvisableto disconnecttheACpowercordfromtheAC outlet.
Caution
Ifthetelevisionistobebuiltintoacompartment orsimilarenclosure,theminimumdistancesmust bemaintained.Heatbuild-upcanreducethe servicelifeofyourtelevision,andcanalsobe dangerous.
 EN-4
EN-4
Introduction
02 Introdution
CAUTION
Nevertamperwithanycomponentsinsidethe
TV,oranyotheradjustmentcontrolsnot describedinthismanual.AllLED-TV'sarehigh voltageelectricalequipment.
Whenyoucleandustoranywaterdropsoffthe SCREENorCABINEToraroundanyofthe buttonsorconnectors,thepowercabledshould beremovedfromthepowersocket.WipetheTV withasoft,dry,dustfreecloth.
Duringthunderstorms,unplugthepowercable andaerial/antennacabletopreventdamageto yourTVandanyotherdevicesconnectedtoit.
AllrepairstothisTVshouldonlybeperformed byqualifiedTVservice
personnel.
INSTALLATION
*LocatetheTVintheroomwherelightdoes notstrikethescreendirectly.
*Totaldarknessorareflectiononthepicture screencancauseeyestrain.Softand indirect lightingisrecommendedforcomfortable viewing.
*AllowenoughspacebetweentheTVandthe walltopermitventilation.
*Avoidexcessivelywarmlocationstoprevent possibledamagetothecabinetor premature componentfailure.
*Donotcovertheventilationopeningswhen usingtheTV.
Main features
1 |
Used as Television, |
display |
terminal, |
4 |
NICAM |
|
PCdisplay |
|
|
|
|
2 |
High luminance, wide viewingangle |
5 |
Time-shift |
||
3 |
HDMI interface and SCART Interface |
|
|
||
Main parameter |
|
|
|
|
|
|
|
|
|
|
|
Panel |
|
32 |
|
|
|
TVSystem |
|
PAL-B/G,I,D/K |
|
|
|
|
SECAM-B/G,D/K,L |
|
|||
|
|
|
|
||
|
|
|
DVB-T,DVB-C |
|
|
VideoSignalSystem |
|
PAL/SECAM/MPEG2/MPEG4/H.264 |
|||
|
|
|
|
||
Storagechannelnumber |
|
1000(DTV);100(ATV) |
|
||
InputPowerVoltage |
|
AC 100-240V |
50/60Hz |
||
Powerconsumption |
|
50W |
|
|
|
StandbyPowerconsumption |
<0.30W |
|
|
||
AudioOutputPower(THD |
7%) |
2x8W |
|
|
|
SignalInput |
|
Analog RGB(PC)x1;PCaudiox1 |
|||
High-DefinitionMultimediaInterface(HDMI)x2
CompositeInputx1
YPbPrx1
SCARTInputx1
CIx1
USBx1
RFCo-Axx1
Headphonex1
Signaloutput S/PDIFx1
SCARTOutputx1
Horizontaldefinition (TV line) |
Compositevideoinput >=350 |
||
YPbPr |
>=400 |
||
|
|||
EN-5 

Introduction
PC
PRESET MODE
|
RESOLUTION |
V.Freq.(KHz) |
H.Freq.(KHz) |
|
|
|
|
1 |
640x480 |
60 |
31.47 |
|
|
|
|
2 |
800x600 |
60 |
37.88 |
|
|
|
|
3 |
1024x768 |
60 |
48.36 |
|
|||
|
|
|
|
4 |
1360x768 |
60 |
47.7 |
|
|||
|
|
|
|
5 |
1280x1024 |
60 |
63.98 |
|
|
|
|
 EN-6
EN-6

Introduction
Base Stand Assembly Instruction
1.PlacetheTVwiththedisplaysidedownona |
2.Attachthestandbaseplatetothestandpole |
flatsurface.Useaclothtoprotectthe |
byfirmlytighteningthesuppliedscrews. |
display.Positionthestandbaseplateontothe |
|
bottomofthestandpole. |
|
 INSTALLATION NOTES
LocatetheTVinaroomwherelightdoesnotstrikethescreendirectly.Totaldarknessor a reflectiononthescreencancauseeyestrain.Softandindirectlightingisrecommendedfor comfortableviewing.
AllowenoughspacebetweentheTVandthewalltopermitventilation.
PleasedonotattempttorotatetheTVonthestand.
Avoidexcessivelywarmlocationstopreventpossibledamagetothecabinetorpremature componentfailure.
EN-7 

Introduction
WALL MOUNTING INSTALLATION GUIDELINES
Thistelevisioncanbewallmountedasfollows:
1.PlacetheLEDLCDTelevisionontoasolid surface.Pleaseplacesomesoftmaterial overthefrontofthescreentoprotectit fromanydamage.
2.Removethescrewsfromthelowerpartofthe television,wherethebasejoinstotheTV,andtake awaythestand(putthestandsomewheresafefor futureuse).
3.UsethefourscrewsprovidedtofixtheTVontoawallmountingbracket (notincluded) viathefourVESA standardholesonthebackofthetelevision.
|
200mm |
|
|
M4X10 |
100mm |
M4X10 |
|
M4X10 |
M4X10 |
||
|
 EN-8
EN-8

Introduction
Front control panel

 1
1


 3 2
3 2
≤8m |
30 30 |
1 Remotecontrolsensor.
2IndicatorLED: RED:STANDBY.
3Keyboard.
1 |
2 |
|
3 |
4 |
5 |
SOURCE |
MENU |
CH+ |
CH- |
VOL- |
VOL+ STANDBY |
1 |
SOURCE |
Displaytheinputsourcemenu. |
|
2 |
MENU |
Displaymain MENU. |
|
3 |
CH+/CH- |
InTVmode,pressCH+orCH- |
tochange |
|
|
thechannelupanddown. |
|
4 |
VOL+/VOL- |
InMENU,pressCH+orCH-to |
selectitems. |
Adjustsoundlevel. |
|
InMENU,adjusttheitemthat youselected.
5STANDBY
Rear/Side Sockets
AC-INPUT |
|
|
|
|
|
100-240V~ 50/60Hz |
YPbPr VIDEO |
L |
R |
SPDIF OUTPUT |
SCART |
|
1 |
2 |
3 |
4 |
|
5 |
|
6 |
USB |
HDMI2 |
HDMI1 |
|
COMMON INTERFACE (CI) PC AUDIO |
VGA |
RF |
|
|
|
|
HEADPHONE |
|
|
||
7 |
8 |
9 |
10 |
11 |
12 |
13 |
14 |
1 |
ACPowerSource |
input |
2 |
YPbYr |
input |
3 |
VIDEO |
input |
4 |
L/RAUDIO |
input |
5 |
S/PDIF |
digitalaudiooutput |
6 |
SCART |
input/output |
7 |
USB |
input |
8 |
HDMI2(withARC) |
input |
9 |
HDMI1 |
input |
10 |
HEADPHONE |
analogueaudiooutput |
11 |
COMMON INTERFACE(CI) |
input |
12 |
PCAUDIO |
input |
13 |
VGA |
input |
14 |
RF |
input |
EN-9 


Introduction
Connecting to your HaierTV
CVBS, DVD Playerorother
machinewithYPbPr/YCbCr.
G B R
Amplifier
AC-INPUT |
|
|
|
|
|
100-240V~ 50/60Hz |
YPbPr VIDEO |
L |
R |
SPDIF OUTPUT |
SCART |
|
Y W R
CVBS, DVDPlayerorother machinewithCVBS/S-Video.
|
|
|
|
|
|
|
|
|
|
|
|
|
|
|
|
|
|
|
|
|
|
|
|
|
|
VGA |
|
RF |
|
|
|
|
|
|
|
|
|
|
|
|
|
|
|
|
|
|
|
|
|
|
|
|
|
|
|
|
|||
|
|
|
|
|
|
|
|
|
|
|
|
|
|
|
|
|
|
|
|
|
|
|
|
|
|
|
|||
USB |
HDMI2 |
|
|
|
HDMI1 |
|
|
|
|
||||||||||||||||||||
|
|
|
|
|
|
|
|
|
|
|
|
|
|
|
|
|
|
|
HEADPHONE |
COMMON INTERFACE (CI) PC AUDIO |
|
|
|||||||
|
|
|
|
|
|
|
|
|
|
|
|
|
|
|
|
|
|
|
|
|
|
|
|
|
|
|
|
|
|
|
|
|
|
|
|
|
|
|
|
|
|
|
|
|
|
|
|
|
|
|
|
|
|
|
|
|
|
|
|
|
|
|
|
|
|
|
|
|
|
|
|
|
|
|
|
|
|
|
|
|
|
|
|
|
|
|
|
|
|
|
|
|
|
|
|
|
|
|
|
|
|
|
|
|
|
|
|
|
|
|
|
|
|
|
|
|
|
|
|
|
|
|
|
|
|
|
|
|
|
|
|
|
|
|
|
|
|
|
|
|
|
|
|
|
|
|
|
|
|
|
|
|
|
|
|
|
|
|
|
|
|
|
|
|
|
|
|
|
|
|
|
|
|
|
|
|
|
|
|
|
|
|
|
|
|
|
|
|
|
|
|
|
|
|
|
|
|
|
|
|
|
|
|
|
|
|
|
|
|
|
|
|
|
|
|
|
|
|
|
|
|
|
|
|
|
|
|
|
|
|
|
|
|
|
|
|
|
|
|
Audio/Videomachine withHDMIinterfaces
GGreen(Y)
BBlue(Pb/Cb)
W White(AUDIO-L)
RRed(AUDIO-R, Pr/Cr)
YYellow(VIDEO)
 EN-10
EN-10

Introduction
Connecting to your HaierTV
Connecting a DVD player / Satellite / cable set top box receiver / games console / PC or Laptop
ThereareseveraloptionstoconnectingaDVD player/SatelliteorCablesettopbox receiver/ gamesconsole/PCorLaptoptoyourTV.
Option1SCART
 ConnectaSCARTcable(notsupplied) fromtheSCARTsocketontheTVtotheDVD player/Satelliteorcablesettopboxreceiveror gamesconsol.
 Toselectthedeviceconnectedwiththe SCARTcablepresstheSOURCE buttononthe remoteandusethe
 keystoselectSCART andpresstheOK button.
Note:-TheTVwilldefaulttotheSCART connectionwhentheTVisswitchedon.
Option2HDMI1/HDMI2
 IfthedeviceyouwanttoconnecttotheTV isswitchedon,switchoffthedevicefirst.
ConnectaHDMIcable(notsupplied)from theHDMIsocketontheTVtotheDVDplayer/ Satelliteorcablereceiverorgamesconsol.
 Switchonthedeviceyouhavejust connectedtotheTV
 Toselectthedeviceconnectedwiththe
HDMIcablepresstheSOURCE buttononthe remoteandusethe keystoselectHDMI and presstheOK button.
Option3AV AudioVisual
(Yellow/White/Red)
MakesurethatbothTVandthedeviceare switchedoffbeforeconnecting.
ConnecttheAVcables(notsupplied)from theVideo(yellow)andAudio(white,red) socketsontheTVtotheDVDplayerorgames consoleetc.
 Toselectthedeviceconnectedwiththe AVIcablepresstheSOURCEbuttononthe remoteandusethe
 keystoselectAVand presstheOKbutton.
Option4COMPONENT
(Green/Blue/Red)+(White/Red)
 MakesurethatbothTVandthedeviceare switchedoffbeforeconnecting.
 Connectthecables(notsupplied)fromthe COMPONENTINsocketsY,Pb,Pr(green,
blue,red)andL-Audio-R(white,red)ontheTV totheDVDplayerorgamesconsoleetc.
 Toselectthedeviceconnectedwiththe
Component cablepresstheSOURCEbuttononthe
remoteandusethe keystoselectCOMPONENT
andpresstheOK button.
Option5 VGA (15pinSub-D)
 ConnectaVGAcable(notsupplied)fromthe VGAsocketontheTVtothePC/Laptop.
 ToselectthePC/Laptopconnectedwiththe VGAcablepresstheSOURCEbuttononthe remoteandusethe
 keystoselectPC and presstheOK button.
NoteVGAisvideoonly.Foraudiofromyour PC/Laptopyouneedtoconnectaseparate cablefromthePCAudio(3.5mmjack)tothe headphonesocketonyouPC/Laptop(3.5mm jack)
Option6 USB
 MostUSBstickscanbeconnectedtoyourTV andsomedigitalcamerasmayalsowork.
 ConnectUSBstick(notsupplied)oraUSB cable(notsupplied)totheTV.
 ToselecttheUSBdeviceconnectedtotheTV, presstheSOURCEbuttonontheremoteand usethe
 keystoselectUSBandpressthe
OK button.
Note1:Only*.jpgand*.mp3fileswillwork, otherfiletypesarenotguaranteedandmaynot.
Note2.AppleiPhonesandiPodsarenot compatiblewithyourTV.
Note3.WhenconnectinganydevicetotheUSB connection,keeptheUSBcablelengthasshort aspossible.
Option7 HEADPHONE OUTPUT
Insert theplugoftheearphoneintotheheadphone socketontheTV.TheTVspeakersarenowmuted. Alternativelyyoucanalsopluginexternalspeakersif required.
Option8 S/PDIF OUTPUT
S/PDIFisadigitalaudioconnectionusedto connectaudioequipment,forexamplehome theatresandotherdigitalHiFisystemsover shortdistances.Thesignalistransmittedover eitheracoaxialcablewithRCAconnectors.  MakesurethatbothTVandthedeviceare switchedoffbeforeconnecting.
 ConnecttheAVcables(notsupplied)from theS/PDIFsocketontheTVtotheHomeTheater soundsystemordigitalHiFisystemetc.
EN-11

Introduction
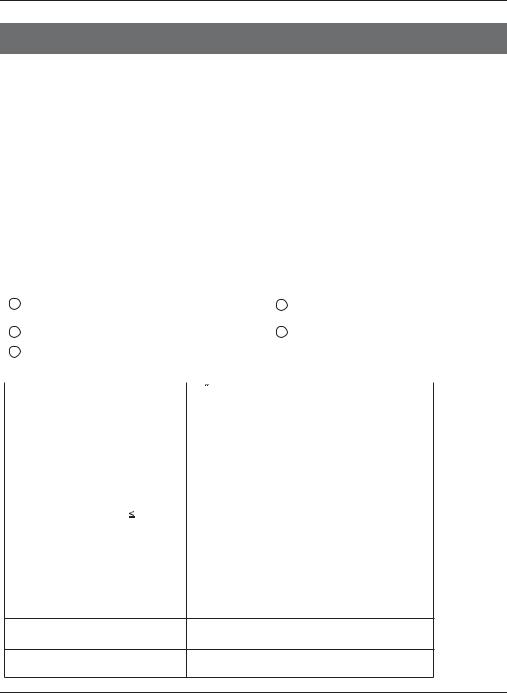
COMMON INTERFACE
Thecommoninterface(CI)slotisdesignedto
accepttheconditionalAccess(CA)Moduleand SmartcardinordertoviewthepayTV
programmesandadditionalservices.
ContactyourCommonInterfaceserviceprovider togetmoreinformationaboutthemodulesand
subscription. PleasenotedthatCAmodulesandsmartcards
areneithersuppliednoroptionalaccessories
fromus.
CAM Removed
CAM Inserted


 CommonInterfaceoption.
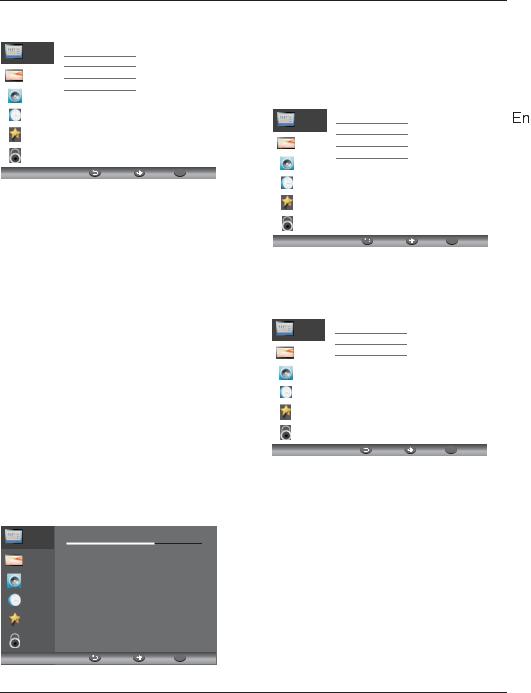
Channel |
Auto Scan |
|
|
Manual Scan |
|
Picture |
Program Edit |
|
Audio |
Common Interface |
|
Signal Information |
||
|
||
Clock |
Software Update(USB) |
|
|
||
Setup |
|
Lock
MENU |
Move OK OK |
 EN-12
EN-12

RemoteControl
03 Remote Control
Insert Batteries Into the Remote Control
1.Removethebatterycover.
2.Insertingthe2AAA1.5Vbatteriesmaking surethepolarity(+or-)ofthebatteriesmatches thepolaritymarksinsidetheunit
3.Mount thebatterycover.Replacewithnew batterieswhentheTVsetbeginsto showthe followingsymptoms:Operationisunsteadyor erratic.SometimestheTVsetdoesnotfunction withRemoteControlUnit.
Remark:
1)AlkalineBatteryRecommeded.
2)Removebatterieswhentheyareexhausted oriftheremotecontrolisnottobeusedforlong time.
1.POWER:PresstoturnontheTV.
2.D.MENU:Nofunction.
3.P.Mode:Toswitchpicturemode.
4.INFO:Presstodisplaythecurrentsignalstatus,including inputsourceandchannelaudiomode.
5.AUDIO I/II: PresstoselectMONO,Nicam stereo forATV channel.Select AudiolanguageforDTVchannel.
6.SUBTITLE:Presstoswitchthesubtitlelanguageorturnoff. 7.Number Buttons:Fordirectaccesstochannels. 8.SOURCE:Toselectinputsource.
9.MUTE:Todisableorenablethesoundoutput. 10.Volume Control:Toadjustsoundlevel. 11.MENU:TodisplayTVmenu.
12.OK:Toconfirmselection.
13.EXIT:Toreturntothepreviousmenuorexitmenu.
14.Teletext Index/USB PLAY 15.REPEAT:Nofunction
16.Teletext Green Button / USB Movie Fast Forward 17.Teletext Red Button / USB Movie Fast Rewind 18.Teletext Mix
19.TeletextText 20.Teletext Reveal 21.Teletext Size
22.TeletextTime/ANGLE/REC.LIST/Display Record List(teletexttimeisnofunction)
23.Teletext Mode:Nofunction
24.Teletext Hold
25.Teletext Subcode:Teletext Subpage 26.Teletext Blue Button / USB Movie Next File 27.TeletextYellow Button / USB Movie Previous File 28.USB STOP
29.USB PAUSE 30.START RECORD
31.UP,DOWN,LEFT,RIGHT Cursor:Presstonavigateyour selection.
32.Fav:Toaccessyourfavouritechannelslist inTVorDTV mode.
33.Select Programme:Press |
Buttontoselectthenext or |
previousTVchannel. |
|
34.GUIDE:PresstodisplayelectronicprogrammeguideinTV mode.
35.Q.View:Toaccessthepreviouslyviewed channel. 36.CH.LIST: Presstodisplaythechannellist. 37.Screen:Tochangepictureaspectratio. 38.Sleep :SettimertoturnofftheTV.
39.S.Mode:Toswitchsoundmode.
40.OPEN/CLOSE:NoFunction


 :AlsoapplicabletoTV'swithbuiltin DVDplayer
EN-13

RemoteControl
TELETEXT
Teletextisaninformationsystembroadcastbycertainchannelswhichcanbeconsultedlike anewspaper.Italsooffersaccesstosubtitlesforviewerswithhearingproblemsorwhoare notfamiliarwiththetransmissionlanguage(cablenetworks,satellitechannels,etc.)
Press:
TEXT
SELECTING A PAGE
DIRECT ACCESS TOTHEITEMS
INDEX
SUBPAGE
HOLD
REVEAL
LIST
You willobtain: |
E |
|
Thisisusedtocallorexitteletextmodes.Thesummaryappearswithalist ofitemsthatcanbeaccessed.Eachitemhas a corresponding 3digitpage number.If thechannelselecteddoesnotbroadcastteletext,theindication 100willbedisplayedandthescreenwillremainblank(inthiscase,exit teletextandselectanotherchannel).
Enterthenumberofthepagerequiredusingthe0to9up/down.Example: page120,enter120.Thenumberisdisplayedtopleft,thecounterturnsand thenthepageisdisplayed.Repeatthisoperationtoviewanotherpage.If thecountercontinuestosearch,thismeansthatthepageis not transmitted.Select anothernumber.
Colouredareasaredisplayedatthebottomofthescreen.The4coloured keysareusedtoaccesstheitemsorcorresponding pages.Thecoloured areasflashwhentheitemorthepageis notyetavailable.
Thisreturnstothecontentspage(usuallypage100).
Certainpagescontainsub-pageswhichareautomaticallydisplayed successively.Thiskeyisusedtostoporresumesub-page acquisition. Theindication appearstopleft.
Tofreezethepage.
Todisplayorhidetheconcealedinformation(gamessolutions).
Theusercansetfourfavoritepagestobedirectlylinkedtothefourcolor keys.Whilelistmodeisactivated,itisnotpossibilitytouseTOPorFLOF navigationwiththecolorkeys.Thefavoritepagenumbersshouldbestored andrestoredto/fromnonvolatilememoryforeachchannelbythesystem software.
 EN-14
EN-14

Operation
04 OPERATION
Installation Guide
TheFirstTimeSetupscreenwillappearwhentheTV isfirstswitchedonorresettothefactorysetting.
First Time Setup
|
OSD Language |
|
|
English |
|
|
|
|
|
|
|
|
Mode Setting |
|
|
Home Mode |
|
|
|
|
|
|
|
|
Country |
|
|
Germany |
|
|
|
|
|
|
|
|
Antenna Type |
|
|
Air |
|
|
|
|
|
|
|
|
Auto Scan |
|
|
DTV+ATV |
|
|
|
|
|
|
|
|
|
|
Start |
|
|
1).Pressthe |
buttonstonavigatethemenuand |
||||
buttonstochangethesettings.Selectyourdesired language,Home/ShopModetobedisplayedonthemenu.
HOME or Shop modes
1.HomeModeisanenergy-savingMode.Home Modeisrecommendedfornormalviewingsettingand issetasdefaultduringmanufacturer.
2.ShopModeisanoptionforretailersforadvertisingor productpresentation.ShopModehasabrighterimage thanHomeMode,alsoitcanpopupapopmenuevery
30seconds.
3.YoumayswitchbetweenHomeorShopMode
asyouchoose.IfyouchooseShopMode,itwillenter HDMI1sourceautomatically,andyouwilpressExitkey toexitPOPmenu.
2).Pressthe |
buttonstoselectAIR/Cablemeans |
DVB-T/DVB-C. |
|
|
First Time Setup |
connectedtotheTV.PleaserefertothecableTV's instructionsmanualforfurtherdetails.
IfyouselectDVB-C,youwillselectFullorQuickway toscan.
AlsoyoucanselectAutoScanmode.DTV+ATVor
DTVonly,orATVonly.
3).Channeltuningwillcommence.Thisoperation
maytakeupto6minutes.Thedisplaywillshow
theprogressofthetuningandthenumberof
channelsfound.
4).IfyouwanttoskiptheDTVtuning,pressthe
MENUbuttontointerruptthetuninghalfway.
YouwillthengostraighttoATVtuning.
5).Aftertuningiscomplete,thechannelsare
arrangedinapresetorder.Ifyouwishtoskipchannels,
modifythepresetorderorrename
channels,selectProgrammeEditunderthe
Channelmenu.
DTV |
DigitalTV |
ATV |
AnalogueTV(notusedinUK) |
DTV-C DigitalTVviacable
1. CHANNEL MENU
1. 1)AutoTuning (DVB-T)
1).PresstheMENUbuttonandthenpressthe buttons toselecttheCHANNELmenuandthenpresstheOKbutton orRightbutton.
|
|
|
|
|
2).Pressthe |
buttonstoselectAutoScanandthen |
||
|
OSD Language |
|
English |
|
||||
|
|
|
presstheOKbutton. |
|
|
|||
|
|
|
|
|
|
|
||
|
Mode Setting |
|
Home Mode |
|
|
|
|
|
|
|
|
|
|
Channel |
Auto Scan |
|
|
|
|
|
|
|
|
|||
|
Country |
|
Germany |
|
|
|
||
|
|
|
|
|
|
Manual Scan |
|
|
|
|
|
|
|
|
|
|
|
|
Antenna Type |
|
Cable |
|
Picture |
Program Edit |
|
|
|
|
|
|
|
|
Common Interface |
|
|
|
Cable |
|
Quick |
|
Audio |
Signal Information |
|
|
|
|
|
|
|
|
Software Update(USB) |
|
|
|
Auto Scan |
|
DTV+ATV |
|
Clock |
|
|
|
|
|
|
|
|
|
|||
|
|
|
|
|
|
|
|
|
|
|
Start |
|
Setup |
|
|
|
|
|
|
|
|
|
Lock |
|
|
|
IntheUKtoconnecttocableTVyouwillrequirethe |
|
MENU |
Move OK OK |
|
||||
appropriatecableTV'scompany's'settopbox'tobe |
|
|
|
|
||||
EN-15
Operation
3).Pressthe |
buttonstoselectAntennaTypetoAir |
||||
meansDVB-T. |
|
|
|
|
|
|
|
|
|
|
|
Channel |
|
Antenna Type |
Air |
|
|
|
Country |
Germany |
|
||
|
|
|
|||
Picture |
|
Mode |
DTV+ATV |
|
|
Audio |
|
Start |
|
|
|
|
|
|
|
|
|
Clock |
|
|
|
|
|
Setup |
|
|
|
|
|
Lock |
|
|
|
|
|
|
|
MENU |
Move OK OK |
|
|
4).InCountrymode,pressthe |
buttonstoselectthe |
||||
countrywhereyouwilloperatetheTV.
5).IntheModeitem,pressthe buttonstoselecttune
mode:ATV/DTV/DTV+ATV.Pressthe button toselect
Starttostart.
6).Channeltuningwillcommence.Thisoperationmaytake
upto6minutes.Thedisplaywillshowtheprogressofthe
tuningandthenumberofchannelsfound.
7).IfyouwanttoskiptheDTVtuning,presstheMENU
buttontointerruptthetuninghalfway.Youwillthengo
straighttoATVtuning.Youmayrepeattheabovestepif
youalsowanttoskiptheATVtuning.Aninstallation
reminderwillappearthenexttimeyouturnontheTV,
ifnochannelisfound.
8).Aftertuningiscomplete,thechannelsarearrangedina
presetorder.Ifyouwishtoskipchannels,modifythepreset
orderorrenamechannels,selectProgrammeEditunderthe
channelmenu.
Scanning Ch12
Channel
Digital Channels Found:
Picture |
DTV: |
3 |
|
|
|
|
|
||
Audio |
Radio: |
0 |
|
|
Data: |
0 |
|
|
|
|
|
|
||
Clock |
Analog Channels Found: 0 |
|
||
|
|
|
|
|
Setup |
|
|
|
|
Lock |
|
|
|
|
|
|
MENU |
Move |
OK OK |
1.2 )AutoTuning (DVB-C)
1).PresstheMENUbuttonandthenpressthe buttonstoselecttheCHANNELmenuandthen presstheOKbutton.
2).Pressthe |
|
buttonstoselectAutoTuningand |
|
||||||
thenpresstheOKbutton,selectAntennaTypetocable |
|
||||||||
meanDVBC. |
|
|
|
|
|
|
|
|
|
|
|
|
|
|
|
|
|
||
|
|
|
|
|
|
|
|
|
|
|
Channel |
|
Antenna Type |
Cable |
|
|
|
|
|
|
|
Country |
Germany |
|
|
|
|
||
|
|
|
|
|
|
|
|||
|
Picture |
|
Mode |
DTV+ATV |
|
|
|||
|
Audio |
|
Start |
|
|
|
|
|
|
|
|
|
|
|
|
|
|
|
|
|
Clock |
|
|
|
|
|
|
|
|
|
Setup |
|
|
|
|
|
|
|
|
|
Lock |
|
|
|
|
|
|
|
|
|
|
|
MENU |
Move |
OK |
OK |
|
|
|
3).Pressthe |
buttonandthenpressthe |
|
buttons |
|
|||||
toselectthecountry youwilloperatetheTV. |
|
|
|
|
|||||
4).IntheModemenu,pressthe |
buttonstoselectATV/ |
|
|||||||
DTV/DTV+ATV. |
|
|
|
|
|
|
|||
|
|
|
|
|
|
|
|
|
|
|
Channel |
|
Quick |
|
|
|
|
|
|
|
|
|
Full |
|
|
|
|
|
|
|
Picture |
|
Advanced |
|
|
|
|
|
|
|
Audio |
|
|
|
|
|
|
|
|
|
Clock |
|
|
|
|
|
|
|
|
|
Setup |
|
|
|
|
|
|
|
|
|
Lock |
|
|
|
|
|
|
|
|
|
|
|
MENU |
Move |
OK |
OK |
|
|
|
5).Channeltuningwillcommence.Thisoperationmay takeupto6minutes.Thedisplaywillshowthe progressofthetuningandthenumberofchannels found.
6).IfyouwanttoskiptheDTVtuning,presstheMENU buttontointerruptthetuninghalfway.Youwillthengo straighttoATVtuning.Youmayrepeattheabovestepif youalsowanttoskiptheATVtuning.Aninstallation reminderwillappearthenexttimeyouturnontheTV,ifno channelisfound.
7).Aftertuningiscomplete,thechannelsarearranged inapresetorder.Ifyouwishtoskipchannels,modify thepresetorderorrenamechannels,selectProgramme Editunderthechannelmenu.
 EN-16
EN-16

Operation
AllthechannelsincludingATV, DTVandRadio canbetuningbyonetime,iftheTuneTypeis DTV+ATV.
Allthestoredchannelswillbedisappearafter autotuning.
Afterautotuning,thechannelwillskipto thefirstDTVchannel.
2. 1 )DTV ManualTuning (DVB-T)
1).PresstheMENUbuttonandthenpressthe buttonstoselecttheCHANNELmenuandthen presstheOKbutton.
2).Pressthe buttonstoselectDTVManualTuning andthenpresstheOKbutton,ifyouselectAirinAuto Scan,youwillenterDVB-Tmanualscanmenu.
Channel |
|
Digital Scan |
|
Ch5 |
|
|
Start |
|
|
||
|
|
|
|
|
|
Picture |
|
Strength |
|
54 |
|
Audio |
|
|
|
|
|
Clock |
|
|
|
|
|
Setup |
|
|
|
|
|
Lock |
|
|
|
|
|
|
|
MENU |
Move |
OK OK |
|
|
|
|
|
|
|
3).TheDTVManualTuningscreenwillpopup.
Pressthe buttonstoselectthedesiredUHFchannel orpresstheOKbuttontheninputchannelnumber.Select Starttocommencethesearchofthatchannel.Whenthe signalhasbeentuned,thepicture andsignalstrengthwill bedisplayedonthescreen.
4).PresstheMENUbuttontoreturnbacktothe mainmenu.
5).PresstheEXITbuttontoexitthemenu.
2.2 )DTV ManualTuning (DVB-C)
1).PresstheMENUbuttonandthenpressthe buttonstoselecttheCHANNELmenuandthen
presstheOKbutton.IfyouselectCableinAutoscan,you willenterDVBCmanualscanmenu.
Channel |
Frequency |
474000K |
|
Symbol Rate |
6875K |
||
|
|||
Picture |
Modulaton |
Auto |
Start
 Audio
Audio
 Clock
Clock
Setup
Lock
MENU |
Move OK OK |
2).TheCADTVManualTuningscreenwillpopup.
Pressthe buttonstoselect(Frequency/Symbol (ks/s/QAMTypeQAM)pressStart tocommencethe searchofthatchannel.Whenthesignalhasbeentuned, thepictureandsignalstrengthwillbedisplayedonthe screen.
3).PresstheMENUbuttontoreturnbacktothe mainmenu.
4).PresstheEXITbuttontoexitthemenu.
3)ATV Manual tuning :
YoucanchangethesoundsystemtosearchtheanalogTV channelsandfinetunethechannels,thenstoragethe channelsyouselected.
ATV Manual Tuning
Save to 1
System BG
Current CH1
Search
Fine tune
Frequency 44.25 MHz
 Save
Save
1.Press teletextred buttontostoragetochannels aftermanualtuning.
2.Ifthenumbersavetoisthesameasthenumber CurrentCH,whenyoupressRedbutton,thesaveto numberwillcovertheCurrentCHnumber.
4). Program edit:
Pressthe or ButtonstoselectProgramEditinthe
ChannelMenu.ThenpresstheOKButtontoenterthesubMenu.Thenyouwillneedtoselecttheprogramyouwish toedit.
EN-17

Operation
Programme Edit
001 The HITS |
|
|
DTV |
002 TMF |
|
|
DTV |
003 UKTV Br’tldeas |
|
DTV |
|
004 f th |
|
|
DTV |
005 Ideal World |
|
DTV |
|
006 Colourbars100 |
|
DTV |
|
001 Kiss |
|
|
Radio |
002 Smash Hits! |
|
Radio |
|
003 Kerrang! |
|
|
Radio |
Delete |
Skip |
|
|
Move |
Rename |
|
Favorite |
FAV |
|||
Delete: PresstheRedButtontodeletethechannelyou highlighted.
SKIP: PresstheYellowButtontoselecttheSkipfunction andaSKIPiconwillbedisplayednexttotheprogramand itwillbeskippedwhenchangingthechannel.
MOVE: PresstheGreenButtontohighlighttheselectthe channelyouwanttomove.Aniconwilldisplayaheadthe channelnumber.Thenpressthe / Buttonstoanew positionandpresstheGreenButtontoconfirm.
Rename: (ForATVonly)PresstheBlueButtonforrenaming thechannel.Pressthenumberkeycircularlytoenteranew nameandpresstheOKButtontoconfirm(thenumberkey asthefollowingtable).
1 |
2 |
3 |
|
abc |
def |
4 |
5 |
6 |
ghi |
jkl |
mno |
7 |
8 |
9 |
pqrs |
tuv |
wxyz |
|
|
|
FAV: PresstheFAVButton(insteadofcolorButtons)toset thefavouritechannel.(IfyouwanttoviewtheFavorite ChannelListyouneedtoexitProgramEditMenuandthen presstheFAVButton.)
5). Common Interface
ThismenucandisplaytheCIcard'sinformation.
6). Signal Information (Only for DTV)
Pressthe / ButtonstoselecttheSignalInformation intheChannelMenu.ThenpresstheOKButtontoshowthe relatedinformationofthecurrentchannel.
7). Software Updated (USB)
Pressthe or ButtonstoselectSoftwareUpdate(USB) intheChannelMenu.ThenpresstheOKButtontoupdate softwarebyusingaUSB.Followthesoftwareupgrade instructionsprovidedwiththesoftware.
Note:Werecommendyouperformafactoryreset(referto
RestoreFactoryDefaultinSetupmenu)toensuretheunit issuccessfullyupgraded.
2. PICTUREMENU
TheseconditemoftheMENUisPICTUREMENU. Youcanadjustpictureeffecthere,suchas contrast,brightness,etc.
Press |
tomove,pressOKtoadjust. |
|
|
|
|
|||
|
|
|
|
|
|
|
|
|
|
|
|
|
|
|
|
||
|
Channel |
|
Picture Mode |
Standard |
|
|
|
|
|
|
|
|
|
||||
|
|
|
Brightness |
|
50 |
|
|
|
|
Picture |
|
Contrast |
|
45 |
|
|
|
|
Audio |
|
Sharpness |
|
60 |
|
|
|
|
|
|
|
|
|
|||
|
|
Color |
|
45 |
|
|
|
|
|
|
|
|
|
|
|
||
|
Clock |
|
Tint |
|
0 |
|
|
|
|
|
NR |
Medium |
|
|
|||
|
|
|
|
|
||||
|
Setup |
|
Dynamic Contrast |
Medium |
|
|
||
|
|
|
|
|
|
|
|
|
|
|
|
Aspect Ratio |
|
16:9 |
|
|
|
|
Lock |
|
Color Temp |
Standard |
|
|
||
|
|
|
|
|
|
|
|
|
|
|
|
MENU |
Move |
OK OK |
|
|
|
1).Therearefourcolorstemperaturemodes canbeselectedstandard,warm,cool,user 2).Screen isavailableinPCmodeonlywhich canadjustHorizontalposition,vertical position,sizeandphase.
3.AUDIO MENU
ThethirditemoftheMENUistheAUDIO
MENU.
Youcanadjustthesoundeffecthere suchas
treble,bass,balanceetc. |
|
||
Press |
tomove,pressOKtoadjust. |
||
|
|
|
|
|
Channel |
SoundMode |
Standard |
|
|
Treble |
0 |
|
Picture |
Bass |
0 |
|
Audio |
Balance |
0 |
|
Auto Volume |
On |
|
|
|
||
|
Clock |
Surround Sound |
Off |
|
SPDIF |
Auto |
|
|
|
||
|
Setup |
Audio Description |
|
|
|
|
|
|
|
Audio Only |
On / Off |
|
Lock |
|
|
|
|
MENU |
Move OK OK |
1.Autovolume:onlyavailablewhentheinput signalvolumeistoolargeordistortion.
2.AudioOnly:setontoturnofftheTVscreen, andthenyoucanlistenTV.
4.CLOCK MENU
 EN-18
EN-18

Operation
ThefourthitemofthemenuistheCLOCKMENU
Youcanadjusttheclock,poweron/offtime, sleeptimeretc.Press tomove,pressOK toadjust.
Channel |
SleepTimer |
Off |
|
|
Date |
2010/04/30 |
|
Picture |
On Time |
|
|
Audio |
Off Time |
|
|
Auto Sleep |
On |
|
|
|
|
||
Clock |
Time Zone |
|
|
|
|
|
|
Setup |
|
|
|
Lock |
|
|
|
|
MENU |
Move |
OK OK |
|
|
|
|
Auto Sleep
Ifafter15minutesthereisnosignalinput,theTVwillswitch offtoAutoSleep,whentheAutoSleepfunctionissettoON. TheclocktimeisautomaticallysetwhentheTVisableto receiveDTV.
5.SETUP MENU
ThefifthitemoftheMENUistheSETUPMENU.Youcan adjusttheOSDlanguage,Audiolanguage,Subtitle languageetc.
Channel |
|
OSD Language |
English |
|
|
Audio Languages |
|
||
|
|
|
|
|
Picture |
|
Subtitle |
|
|
|
Country |
Germany |
||
|
|
|||
Audio |
|
PVR FileSystem |
|
|
|
|
TimeshiftRecordTime |
1hour |
|
Clock |
|
AutoStandby(4hr) |
On(4hours) |
|
|
|
ModeSetting |
HomeMode |
|
Setup |
|
HDMICECControl |
On |
|
|
|
OSDTime |
Off |
|
Lock |
|
Restore Factory Default |
|
|
|
|
MENU |
Move OK OK |
|
Auto Standby(4hr)
1.Ifafter4hoursfromswitchonandnochangeshave beenmadetotheTV,forexamplenochannelorvolume changes,theTVwillstarttheautomaticpowerdown sequence.
Andpop-upwindowwillappearonscreen.
After150secondstheTVwillautomaticallyswitchto standby.Tooverridetheautomaticshutdownpressany buttonontheremotecontrol.
2.Tocanceltheautomaticpower-down
OntheOptionMenuselectAutostandby(4hr),TheTV screenreturnstotheOptionMenuandAutostandby (4hr)optionwilldisplay.
Autostandby(4hr) |
OFF |
Toreturntoautoshutdownafter4hoursrepeatthe aboveexceptusetheleftarrowkeytoselectYES.
InPVRFilesystemmenuyoucansetupUSB diskforPVR.
PVR Settings
Move Left
Move Right
OK Select
EXIT Exit |
File Manager |
Device List Scheduled Record |
Timeshift RecordTime:TosetthemaxTimeshift RecordTime.
Auto Standby (4hr):Tosettheunittostandby afterany4hoursoperation.
Mode Setting:TosetHomemodeorStoremode.
HDMI CEC Cntrol: TosetCECfunctiontoonoroff. OSDTime: Press◄or►toselectthemenu displaytime.
Restore Factory Default
Pressthe or ButtonstoselectRestoreFactory DefaultandpresstheOKButtontoenterthefirst setup.Onceconfirmed,allthesettingswillbe cleared.Thisshouldbeusedifyouexperience anyissueswithyourTV.
Restorefactorydefaultwillclearalltheprograms andpassword.
6.LOCK MENU
ThesixthitemofthemenuistheLOCKMENU Youcanlocksystem,setpassword,blockprogram andsetparental guidanceOnceyousetthelock systemonyoucannotsearchthechannelsor change anyprograms.
Channel |
|
Enter Password |
|
---- |
|
|
Enable |
|
Off |
||
|
|
|
|||
Picture |
|
Channel Locks |
|
|
|
|
Parental Rating |
None |
|||
|
|
||||
Audio |
|
New Password |
|
---- |
|
Clock |
|
|
|
|
|
Setup |
|
|
|
|
|
Lock |
|
|
|
|
|
|
|
MENU |
Move |
OK OK |
|
|
|
|
|
|
|
Thedefaultpasswordis0000,Ifyouforgetthe password,youcanusethesuperpassword:9443.
Blockprogram:Press tochoosethe program,pressteletextgreenbuttontoblock theprogram. Ifyouwantunblocktheprogram, plsenterthemainmenu,inputthepassword, thenpressgreenbuttonagain.Parental guidance:Press tochooserating.
EN-19
Operation
7.EPG Menu(Electronic Program Guide)
TheEPG(ElectronicProgrammeGuide)Menuprovides youwithdetailedbroadcastprograminformation.Press theEPGButtonandapop-upMenuwillbedisplayedwith programinformationaboutthechannelyouarecurrently watching.Youwillbeabletoseeuptosevendaysof programinformation.Toviewthenextdayormoreuse the or Buttonstohighlightthedateandthenpress the◄or►Buttonstoscrollthroughtheavailabledates.
PROGRAM GUIDE
2010/04/29 02:19
001 Nine Digital |
NINE MORNING NEWS |
002 Nine Digital... |
NINE MORNING NEWS |
003 GO! |
TMZ |
|
|
|
|
|
|
|
|
|
|
 Record
  Schedule
  Reminder
|
PROGRAM GUIDE |
|
|
|
001 Nine Digital |
|
|
01:00-02:00 |
NINEMORNINGNEWS |
||
02:00-03:00 |
THEELLENDEGENERESS... |
||
03:00-04:00 |
THEVIEW |
|
|
04:00-05:00 |
DAYSOFOURLIVES |
||
05:00-05:30 |
ENTERTAINMENTTONIGHT |
||
05:30-06:00 |
MAGICALTALES |
|
|
06:00-06:30 |
THESHAK |
|
|
06:30-07:00 |
NINEAFTERNOONNEWS |
||
Record |
Information |
Service |
Reminder |
|
|
|
|
Toseewhatisgoingtobebroadcastafterthecurrent program,pressYellow(Schedule)Button.Pressit(Service) againtoreturn.Toviewadifferentchannel,usethe or
Buttonstohighlightthechannelandthenpressthe◄ or►Buttons.ToexittheEPGMenu,presstheEPGorEXIT Button.
PleaseensureacompatibleHardDiscDriveorUSB deviceisinsertedintotheUSBinputtoschedule recordings.Ifyourstoragedeviceisnotcompatible,you
willbeaskedtoformatit.PresstheIndexButtontoenter thePVRSettingMenuDeviceListtoformatyourdevice.
WARNING
WhenformattingtheUSBdeviceitwilldeleteallthefiles storedontheUSBdevice.
Ifyouhavesetatimedrecording,yourTVwillautomatically turnonwhentheprogramissettorecordandwill automaticallyturnoffaftertherecordingiscomplete. Duringatimedrecordinghoweverthepictureandvolume willbemute(therewillbenodisplay),howevertheunit willbeon.YoucanpresstheSTANDBYButtontoturnthe pictureandvolumebackon.
Reminder (Blue Button)
IntheEPGMenu,presstheBLUEButtontosetaprogram reminder.ThebelowReminderMenuwillthenbedisplayed andyoucanusethe◄or►Buttonstosettheprogram reminderdetails.Youwillbeabletosetremindertooccur once,DailyorWeekly.
Reminder |
17:03 19/11/2004 |
|
|
|
|
|
|
|
Frequency |
|
Off |
Channel |
|
The HITS |
Minute |
0 |
|
Hour |
17 |
|
Month |
|
Nov |
Date |
19 |
|
Schedule List |
|
|
OK |
|
|
YoumaypressRedbuttontoviewthescheduledprograms list.Alsoyoumaydeletetheprogramsyouhavescheduled.
INFO (Green Button)
PleaserefertothebottomoftheEPGscreen forthebasicremotecontrolkeyfunctions.
Record
InEPGmode,presstheRedButtonontheremotecontrol toselectaprogramtoberecorded.Youwillthenenter
ScheduledRecordmenuforrecordsetting.(Refertothe sectionofPVRfilesystem.)
IntheEPGMenu,presstheGREENButtontoviewmore informationaboutthecurrentprogram.
8.PVR File System (only for DTV)
Pressthe or ButtonstoselectPVRFileSystem,then presstheOKButtontoentersub-Menuandthenusethe ◄or►Buttonstoscrollthroughtheoptions.
 EN-20
EN-20

Operation
PVR Settings
Move Left
Move Right
OK Select
EXIT Exit |
File Manager |
Device List Scheduled Record |
File Manager:Youmayviewalltherecorded programshere.Pressbluekeytoplaywithfull screen.
File Manager
Scheduled Record Standby
Function
Play
Delete One
EXITT Delete All
Zoom
Hot Key
Move Up
Move Down
EXOKITT Select
MENU Return
EXIT Exit
UKTV Br’tldeas_Good Food Bites_20041119_161021.ts
BBC ONE_Olympics 2012_20120808_114427.ts
UKTV Br’tldeas_Good Food Bites_20041119_162019.ts
Current Playing File Into
Channel Name |
BBC ONE |
Program Name |
Olympics 2012 |
Recorded Time |
2012/08/09 11:44 |
Total Time |
00:08:06 |
Description |
Matt Baker and Clare Balding |
present coverage of the eager...
Device List:ThissubmenuwilllisttheUSBdevices connectedtotheTVset.Youcanselectthedeviceand thenpressredbuttontoformattheUSBdevice.
Device List
Device Available Space FileSystem
 sda1 192 MB FAT32
Function
Format
Hot key
Move Up
Move Down
EXOKITT Select
MENU Return
EXIT Exit
Scheduled Record:Youmaysetthescheduledrecord Listhere.Andyoumayalsodeletethescheduledrecords youhaveset.
Scheduled Record Setting List
Scheduled Record Standby
Group |
Frequency |
Channel |
Date |
StartTime Duration |
1 |
Once |
0 Colourbars100 |
2004.12.25 |
18:17 00:30 |
2Off
3Off
Function |
4 |
Off |
Delete One |
5 |
Off |
6Off
EXITT |
DeleteAll |
7 |
Off |
|
Hot Key |
8 |
Off |
||
9 |
Off |
|||
|
Move Up |
|||
|
10 |
Off |
||
|
Move Down |
11 |
Off |
|
|
|
12 |
Off |
|
EXOKITT |
Select |
13 |
Off |
|
MENU |
Return |
14 |
Off |
|
15 |
Off |
|||
|
|
|||
EXIT |
Exit |
16 |
Off |
|
Enterthesubmenuyoumaysettherecordingfrequency asOnce,Daily,Weekly,Weekday,oroff.
Scheduled Record - Group 1
|
Setting Status |
|
|
Setting Is Not In Use |
|
HotKey |
Frequency |
Once |
Move Up |
Channel |
6 Colourbars 100 |
|
||
Move Down |
Start Time |
2004-12-25 |
|
||
Adjust |
|
18:17 |
Adjust |
End Time |
2004-12-25 |
EXOKITT Select |
|
18:47 |
MENU Return
EXIT Exit
Record the program:
AsplayingtheDTVsource,choosethechannelandclick “record”,therecordframewillpopup.Click“record” again,therecordframewilldisappearandthe“REC” iconstillonthelefttop.Itwilldisappearuntilyouclick “stop”.
Play the recording:
Theprogramrecordedonthe“USB”willbe savedinthefolder“USBrecord”onthe device.
YoucanplayitinPVRSettingMenuandinFilemanager submenu.
1.TheUSBstoragesizecanbebetween
128MBand500GBinsize,butforpracticaluse2GBto 500GBisrecommended.
2.VideomaybecomepixelatedwhenVideo
bitrateistoolow.Thiscanbecausedbyconnectinga
USBextensioncableinsteadofpluggingtheUSBdirectly intotheTV.
3.NotallUSBdevicesarecompatible. BelowisalistofrecommendedUSBdrives.
Modelsthatarenotlistedmaybecompatible,butitis notguaranteedtowork.
TheUSBsupportlistarethesameasTimeshiftfunction, seethefollowingpagesfordetails.
DTV Recording
Torecordtheprogramyouarecurrentlywatchingpressthe
RECButtonandaredRECiconwillappearonthescreen.
Therecordtime/lengthandremainingrecordtimewillbe displayedinthemenubelow.
Recording
Recorded Time : 00 : 00 : 40
Available Time : 25 Minute
ToconcealorrevealthemenupresstheRECButtonagain. Tostoprecording,presstheStopButtonormovethecursor toselecttheStopoptionwhentheabovemenuisdisplayed andthenfollowthepop-upguide.
YoumayalsoentertheMediaPlayerMenutoviewyour recordedprogramsviaMoviemode.
EN-21

Operation
 Ensurethestoragedeviceusedtorecordisinsertedinto theUSBInputonthebackoftheunitandiscompatible forrecording.Ifyourstoragedeviceisnotcompatible, youwillbeaskedtoformatit.PresstheIndexButtonto enterthePVRSettingandselectDeviceListtoformat yourdevice.
 Duringrecording,youwillonlybeabletowatchthe programyouarerecordingasthisisasingletunerunit. Allthefunctions(Play,FB,FF,Prev.,Next,PauseandStop) inthemenucanonlybeperformedwhenthemenuison. YoumaydirectlypresstheButtonormovethecursorto selecttheoptionwhenthemenuisontoperformthe function.
 Duringrecording,onlythePlayandStopfunctionsare available.Theotherfunctionsinthemenuwillonlybe availablewhenplayingbacktherecordedfile.
 Therewillbenorecordfunction,whenthechannelis
CI+channel.
9.Time Shift
PresstheIIButtontopausetheprogramyouare watchingtoactivateTimeShiftfunction.Thebelow menuwillbedisplayed.ThisMenuwillautodisappear afterseveralseconds.
00:00:00
00:00:05
|
|
Available Time |
Play Pause |
Stop FB FF |
00:00:00/04:13:20 |
Pressthe |
Buttonagaintoresumeplaying,andawhite |
|
playiconwillappearattherightofthescreen,which showsthattimeshiftisbeingperformed.
TocancelorrevealthemenupressMENUButton.Tostop timeshifting,presstheStopButtonormovethecursor toselecttheStopoptionwhenthemenuison,andthen followthepop-upguide.
 Ensurethestoragedeviceusedforrecordingis insertedintotheUSBInputonthebackoftheunitandis compatibleforrecording.Ifyourstoragedeviceisnot compatible,youwillbeaskedtoformatit.Pressthe IndexButtontoenterthePVRSettingandselectDevice Listtoformatyourdevice.
 Allthefunctions(Play,FB,FF,Prev.,Next,Pauseand Stop)inthemenucanonlybeperformedwhenthe menuison.
 TherewillbenoTimeshiftfunctionwhenthe channelisCI+channel.
TimeShiftPlayback
TheHaierTVrecordstheprogramontheUSBstickin*.ts format"TimeShift".IfanotherTV,PC,Laptop,DVD, or anyotherdeviceorperipheralsdonotsupportor recognisethe*.ts(timeshift)filethenitwillnotplay. "ts"istheformatusedtobroadcasthigh-definitionTV. Youcanplay"ts"filesonacomputerorlaptopwiththe correctsoftware.RefertotheInternetororanIT suppliermoreinformationaboutthemostappropriate software.
Caution:Haierdoesnottakeanyresponsibilityforany softwaredownloadedbyanycustomerorretailerand maycontainvirusesorforanymalfunctionresultingof installingthesoftware.Thecustomerusesitattheir ownrisk.
ProvidelistofmajorfiletypesthatplayfromaUSBdevice
Photo .jpgfiles
Audio .mp3
Video .MPEG2
Text .txt
 EN-22
EN-22

Operation
10.USB Player
Presssourcekey,andselectUSBinsourcelist,pressOKbuttontoentertheUSBmenu.
Haier Innovation Life
PHOTO |
MUSIC |
MOVIE |
TEXT |
||
Usb2.0 |
|
|
|
Move |
OK Select |
|
|
|
|||
PleasemakesurethattheUSBdevicehavepluggedintheslot.Therearefourtypemediaitemcanbeselected,suchas photo,music,Movie,andtext.Selectthetypemediaitembypressing◄►,pressOK buttontoenterthediskselectionmenu.
 Music
Music
 USB1/Music
.. |
|
1/1 |
|
|
Title: |
|
|
|
|
|
|
|
Album: |
|
|
10547672.mp3 |
|
|
|
|
Artist: |
|
|
14953359.mp3 |
|
|
|
|
Track |
|
|
|
|
|
|
Year: 2010-09-30 |
|
||
|
|
|
|
1 / 2 |
|
|
|
|
|
|
|
10547672 |
|
|
|
|
|
|
|
PLAY |
|
|
|
|
|
|
|
00:00:53 |
|
00:00:00 |
|
|
|
|
|
|
|
|
|
Select |
OK Enter |
Exit |
Quick Menu |
Media Pad |
|||
Pressthe |
/ |
toselecttherightdiskandfolder,pressOK toenterthemediafileslist.PressRedbuttontobacktothe |
|||||
mediatypeselectionmenu. |
|
|
|||||
 Photo
Photo
 USB1/Pic
Select OK Enter |
Exit Quick Menu Media Pad |
|
|
Selectthemediafilebypressing◄►or |
,thenthepreviewframewillpopup.Pressthe►buttontoplaythemediafile |
||
infullscreen.Whenthemoviefileisplaying,pressthe buttoncandisplaythecontrolbar. |
|||
PHOTO |
|
|
|
BasicFunction |
|
|
|
When photos are playing, press“ |
”key on the remote control, a help bar will display under the |
||
screen. |
|
|
|
|
|
||
Play/Pause |
Press”Play/Pause”keyontheremotecontroltoplayorpause. |
||
|
|
||
Prev. |
Press”Left”keyontheremotecontroltoreadthepreviousphoto. |
||
|
|
||
Next |
Press”Right”keyontheremotecontroltoreadthenextphoto. |
||
|
|
||
Stop |
Press”Left/Right”keyontheremotecontroltoselectthisfunction,press”ok”key |
||
tostopplayingandreturntothepreviousmenu. |
|||
|
|||
|
|
||
Repeat |
Press”ok”keydisplayoneorslideshowall. |
||
|
|
||
QuickMenu |
PressBluekey,youcanenterQuickMenutoadjustIntervaltime,Repeat,slideshoweffect, |
||
andBackgroundMusic(youmayplaymusicfirst). |
|||
|
|
|
|
|
|
|
|
EN-23

Operation
MUSIC
When music are playing, press“►”key to select toolbar.
Basic Function
FB:Press”Left/Right”key on the remote control to select this function,press”ok” key to to fast back. Press”PLAY”key to play normally.
FF:Press”Left/Right”key on the remote control to select this function,press”ok” key to fast forward. Press”PLAY”key to play normally.
Back ground music:Press”Left/Right”key on the remote control to select this function,press”ok” key to turn on / off.
Other functions are similar to the ”PHOTO”, Please refer to ”PHOTO” options.
MOVIE
The operations are similar to the ”PHOTO”.Please refer to ”PHOTO” options.
Basic Function
Set A:Press”Left/Right”key on the remote control to select this function,press”ok” key to set A and B, the film will circulating play in the time of A to B.
Zoom in:Press”Left/Right”key on the remote control to select this function,press”ok” key to enlarge picture.(if the document is larger than 1920x1080,this function is unsupported.)
Zoom out:Press”Left/Right”key on the remote control to select this function,press”ok” key to reduce picture.(This function does not support more than 1920x1080 HD video.)
SelectTime:Press”Left/Right”key on the remote control to select this function,press”ok” key to select the time to play.
TEXT
Press” / ”toselectprevious/nextpage,InputthenumberkeyandOK tojumptothepageyouwant.
 EN-24
EN-24
TroubleShooting
05 Trouble shooting
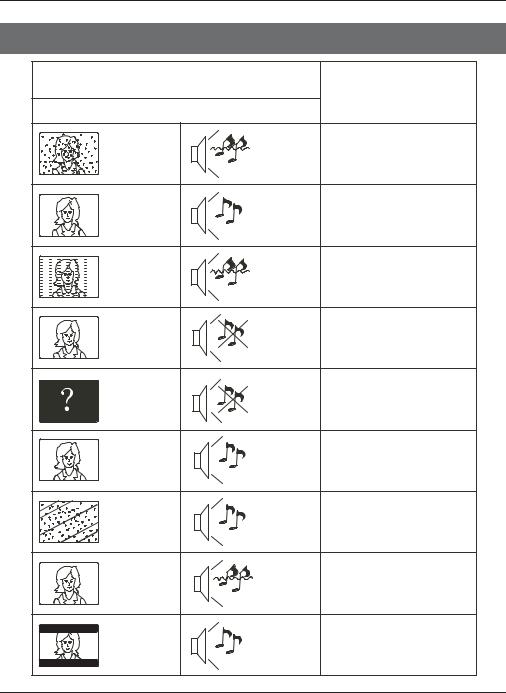
TroublephenomenonSymptom
InspectionCheck
Picture |
Audio |
Snow
Ghost
Interference
NormalPicture
Nopicture
Noise |
antennaposition,direction |
|
orconnection |
||
Normalaudio |
antennaposition,direction |
|
orconnection |
||
Noise |
electronicequipment,car/ |
|
motorcycle,fluorescentlight |
||
|
||
Mute |
Volume(checkifmuteis |
|
activatedoriftheaudiosystem |
||
|
connectionsare notcorrect) |
|
|
Powercordisnotinserted |
|
|
Powerswitchisnotopened |
|
Mute |
Contrastandbrightness/volume |
|
setup |
||
|
Pressstandbykeyontheremote |
|
|
controlforinspecting |
Nocolour |
Normalaudio |
Colourcontrol |
|
Picture |
Normalaudio |
retunechannel |
|
breakingup |
orweak |
|
|
Nocolour |
Noise |
TVsystem |
|
|
|||
|
|
||
Thereisblackbar |
Normalaudio |
Changeaspecttozoom |
|
ontopandbottom |
|||
|
|
EN-25

TroubleShooting
Trouble Shooting
MyTVdoesnotdisplaythepicture |
MostPC'sandlaptopswhenconnectedwithaVGAPlug(the |
|
blue15pinplugonyourPCorlaptop)requireyoutopress |
||
onmylaptop/PCwhenconnected. |
||
somebuttonsonyourkeyboardtogetapictureonaTVor |
||
|
||
|
otherexternaldisplay.ThisisusuallytheF7(Dell)orF4(HP/ |
|
|
Samsung)orF5(Toshiba).Onlaptops,youhavetopressthe |
|
|
“Fn”keyatthesametimeasthe“F”key. |
|
|
TheVGAcableonlycarriesthevideoorpictureinformation. |
|
IhaveconnectedmyPC/Laptopto |
||
Youneedtoconnectaseparatecableconnectedtothe |
||
theTVandgetapicturebutno |
earphonesocket(3.5mmjack)onyouPC/Laptoptothe3.5m |
|
sound.Why? |
(PCAudioIN)socketonyourTV.Youwillneedtoselect“PC” |
|
|
usingtheSourcebuttononyourremote. |
|
|
AlternativelyconnectyourPC/LaptopusingaHDMIcableif |
|
|
youPC/LaptophasaHDMIconnector.HDMIisbothaudioand |
|
|
video. |
|
Thepictureisnotautoresizing |
CheckthattheTVpictureAspectRatioissetto'Auto'onall |
|
inputsATV,DTV,SCART,HDMI1,2etc. |
||
whenchangingchannels. |
||
Tosettheaspectratio,(Auto,4:3or16:9).PressSourcebutton |
||
|
||
|
startatATVandrepeatthesequencebelowforallinput |
|
|
sourcesATV,DTV,SCART,HDMI1and2aseachinputsourceis |
|
|
controlledseparately. |
|
|
PressTVMenubutton |
|
|
PressRightArrowtoaccessPicturesubmenu |
|
|
PressDownArrowtoselectAspectRatio |
|
|
SelectAuto |
|
|
PressExit |
|
|
Repeatforallinputsources. |
|
IhavejustpluggedinaDVDplayer |
ThisisapplicabletoanyitemofequipmentpluggedtotheTV |
|
1.TurnbothTV&DVDplayeroff(plugsoutofthewallsocket, |
||
oranotheritemintomyTVandit |
||
notstandby). |
||
doesn'twork. |
||
2.TurnoffanyequipmentconnectedtotheSCARTsocket. |
||
|
||
|
3.DisconnecttheSCARTplugfromtheTV. |
|
|
4.PluginandturnTVon |
|
|
5.PluginandturnDVDplayeron |
|
|
6.SelectHDMIfromSourceMenu |
|
|
7.PressplayonDVDplayerandcheckmovieplaysok |
|
|
NOTE: TheSCARTsockethaspriorityoverHDMIanditis |
|
|
importantthattheequipmentconnectedtotheSCARTsocket |
|
|
ontheTVisswitchedOFF(notinstandby). |
|
|
Pleasefollowthisinformation.Iftheadviceworksandthe |
|
|
DVDplayerworks,theTVisOKitisjustabitconfused. |
|
|
ProbablyHDMIplugshavebeenremovedandpluggedbackin |
|
|
whentheTVisswitchedon. |
|
|
NeverremoveorpluginHDMIcablesoranydigitalequipment |
|
|
withtheequipmentswitchedon. |
|
|
Alwaysswitchoffallequipmentwhenunpluggingor |
|
|
connectinganydigitalequipment. |
 -26
-26

TroubleShooting
Trouble Shooting DigitalTV Problems and possible Solutions.
Picture Breaks into Pixels
Atypicalexampleofareceptionproblemincludesthebreak up of pictures (pixilation)orthepicture freezing, sometimesthereareclicking or squeaking soundsorthesound drops out orthereisNO reception atall.
Yourpicturemaybreakintopixelsduetothedigitalvideosignaldropping.Thesignaldroppingmayoccurbecauseof eitherproblemswith weaksignals(seeTVAerials)orifyouareconnectedbycableaweakcablesignal.Iftheproblem isweaksignals,useanamplifiertostrengthenthesignal.Acabletechniciancanhelpyouinstallaninlineamplifierora pre-amplifier.Thiswillboostyoursignalstrengthandfixthepixelproblem.
IfyouarereceivingyourTVsignalbysatellite,checkyourdishhasnotmovedfollowinghighwinds,orthatthesignalis blockedbytrees.TreescanbeaproblemastheTVsignalcanchangedependingifatreebetweenthesatellitedishand satelliteisinbareorinfullleaf.
Missing channels
Itmaybethatyoufindthattherearechannels missing,oryou'rereceivingchannelsfromthewrongregion. Sometimestheinteractive services (red button) doesn't work.Thisisusuallycausedbyweaksignal,seeTVAerials
TV Aerials
Digitalterrestrialtelevision(Freeview)comestoyourTVviaanaerial,TheoldaerialthatwasgoodforanalogueTVmay notworkwellfordigitalsomayneedupgrading.IfyouaregettingsomebutnotallofthedigitalchannelsonDTV
(Freeview)forexampleyougetBBC1,BBC2,Channel4,butnotITVorChannel5,thisisusuallybecauseyouraerialisa narrowbandtype,andneedstobechangedtoawidebandtype.
Faulty Leads and Cables
CheckyourTV.Aretheleadsattheback-tothemains,theaerial,theset-topbox,thevideoorDVDplayerorrecorder properlyconnected?SCARTleadsareknowntoworklooseovertimeandcanresultinbothaudioandvideo(picture) problems.Eitherleftorrightorbothaudioismissingandthecoloursarepoorormuddylooking.PushtheSCART plugsfirmlyin,thisshouldfixtheproblem.
HDMIplugsneedtobepushedinfirmly;it'sonlythelastmillimetrethatthecontactsmake.Typicallytheblackplastic partoftheHDMIplugshouldbeverycloseortouchingthebodyoftheTVorcomponent.
WhenplugginginanyHDMIcablesyoumayexperienceproblemsiftheHDMIcablesarepluggedinwhentheTVorthe othercomponentisswitchedon.AlwaysswitchoffboththeTVandthecomponentyouarepluggingin.Ifyouhave checkedtheplugsandsockets,switchofftheTVandwhateveryouhavepluggedintotheTVandthenswitchthemon again.
I have connected my PC to theTV.There is no sound.
IfyouconnectyourPCorLaptoptotheTVusingaVGA(15pinSubD)cablethereisnoaudio,youneedtoconnecta separateaudiocabletotheTVfromthePCorlaptop.
Unnatural Colours and FleshTones
UnnaturalfleshtonesandothercolourscouldpresentanotherproblemeveninanewHDTV.ThisisduetotheTV picturesettings,whichareoptimizedforashowroomenvironment.Fixthisbychangingthepicturemodetonaturalin thepicturemenu.Formoreprecision,trymanuallysettingthecolour,contrastandbrightnessoptionsinthepicture menu.
White Outlines
WhiteoutlinesaroundobjectsandpeoplegenerallyappeareitheriftheTVsharpnessissettoveryhigh,orifyour televisionsetusessomeedge-enhancementprocessingtechnology.Gotothepicturemenuandadjustthesharpness tillthewhiteoutlinedisappears.Ifedge-enhancementisenabled,trytodisableitusingtheservicemenu.
ChoppyVideo
Attimesthevideomightbecomechoppy.Whenthishappens,checkwhetherthesignalisstrongenough.Ifthesignal isstrongtheproblemiswiththecableoperator.Ifthesignalstrengthisweak,tryboostingthesignalstrengthwiththe helpofanamplifier.
The picture does not fill the screen
WhenconnectingPC'sorlaptopstotheTV,thepicturemaynotfillthescreen.CheckthedisplaysettingsonyourPCor laptop(Windows>Start>ControlPanel>AppearanceandPersonalization>Displaysettings)andselectthebest resolution.OnyourTVselect:- TVMenu>Picture>SettingsandthentryAUTO,ZOOM1orZOOM2forthebestdisplay.
USB Connection
TheUSBconnectionwillworkwith*.jpg(photo)and*.mp3(music)files.PleasenotetheTVdoesnotrecognizeApple iPhone,oriPod'sconnectedtotheUSBconnectorontheTV.TheTVmayplayotherfiles,butduetothemultiple differentfileformats,thereisnoguaranteethattheseotherfileformatswillwork.
EN-27

TroubleShooting
Specification
32" HDReadyDigitalLEDLCDTV
|
HDReady |
|
|
Television picture quality: |
Integrateddigital. |
|
|
ScreenSize:81cm |
|
|
|
|
|
|
|
|
Resolution1366x768pixels50Hz. |
|
|
|
DVB-T,DVB-C |
|
|
DTVTuner Decorder |
16/32/64/128/256QAMmodulation |
|
|
|
MPEG2,MPEG4,H.264 |
|
|
|
2HDMIsockets. |
|
|
|
1SCARTsocket. |
|
|
|
PCinputsocket. |
|
|
|
Componentvideosocket. |
|
|
|
Composite. |
|
|
|
1USBport. |
|
|
Connectivity: |
1Headphoneport. |
|
|
1SPDIFport. |
|
|
|
|
SupportedSystems:PAL+SECAM |
|
|
|
Storage channelnumber:1000(DTV),100(ATV) |
|
|
|
TV(RF):75 Imbalance |
|
|
|
AVVideo-Input:75 |
,1V-P,RCA |
|
|
AVAudio-Input:20K |
,500mBRMS |
|
|
YPbPr/HDMIVideoInput:480i, 480p, 576i, 576p, 720p, 1080i, 1080p |
|
|
|
|
|
|
Sound quality: |
NICAMstereosoundsystem. |
|
|
|
2x8wattsRMSpoweroutput. |
|
|
|
|
|
|
|
|
|
|
Standby Power |
<0.30W |
|
|
consumption |
|
|
|
|
|
|
|
|
|
|
|
|
Digitallyinteractive. |
|
|
|
Digitaltext. |
|
|
|
Digitalvideobroadcasting(DVB)subtitlesavailable. |
|
|
|
Autosetup. |
|
|
Digital features: |
Autoscanfornewchannels. |
|
|
|
Nowandnextprogrammeguide. |
|
|
|
7dayelectronicprogrammeguide(EPG). |
|
|
|
TopupTVcompatible. |
|
|
|
CIslot. |
|
|
|
Audiodescriptioncompatible. |
|
|
|
|
|
|
|
UHF/VHFtuner;Sleeptimer;Childlock;Pictureandtext |
|
|
Additional features: |
Remotecontrolbatteriesrequired2xAAA(included). |
|
|
VESAMountSize:200x100mm |
|
||
|
PackageSize(WxHxD):886x585x132mm |
|
|
|
SetSize(WxHxD)withStand:750.3x511.8x210mm |
|
|
|
SetSize(WxHxD)withoutStand:750.3x459.8x73mm |
|
|
|
Packageweight:7.7kg |
|
|
|
Setweightwithstand:6.0kg |
|
|
|
Setweightwithoutstand:5.6kg |
|
|
*ThepartspecificationsofthisTVsetprovidedhere areforreferenceonly. Difierencesmayoccurasproducttechnologyis updated.
Designandspecificationsaresubjecttochange withoutnotice.
Scart Output description :
1.WhencurrentsourceisATV/AV/SCART,scartoutputsignalisATV.
2.WhencurrentsourceisDTV,therewillbenoSCARToutputsignal.
3.OthersourcehavenoSCARToutputsignal.
EN-28

 Loading...