


HWF80BW2
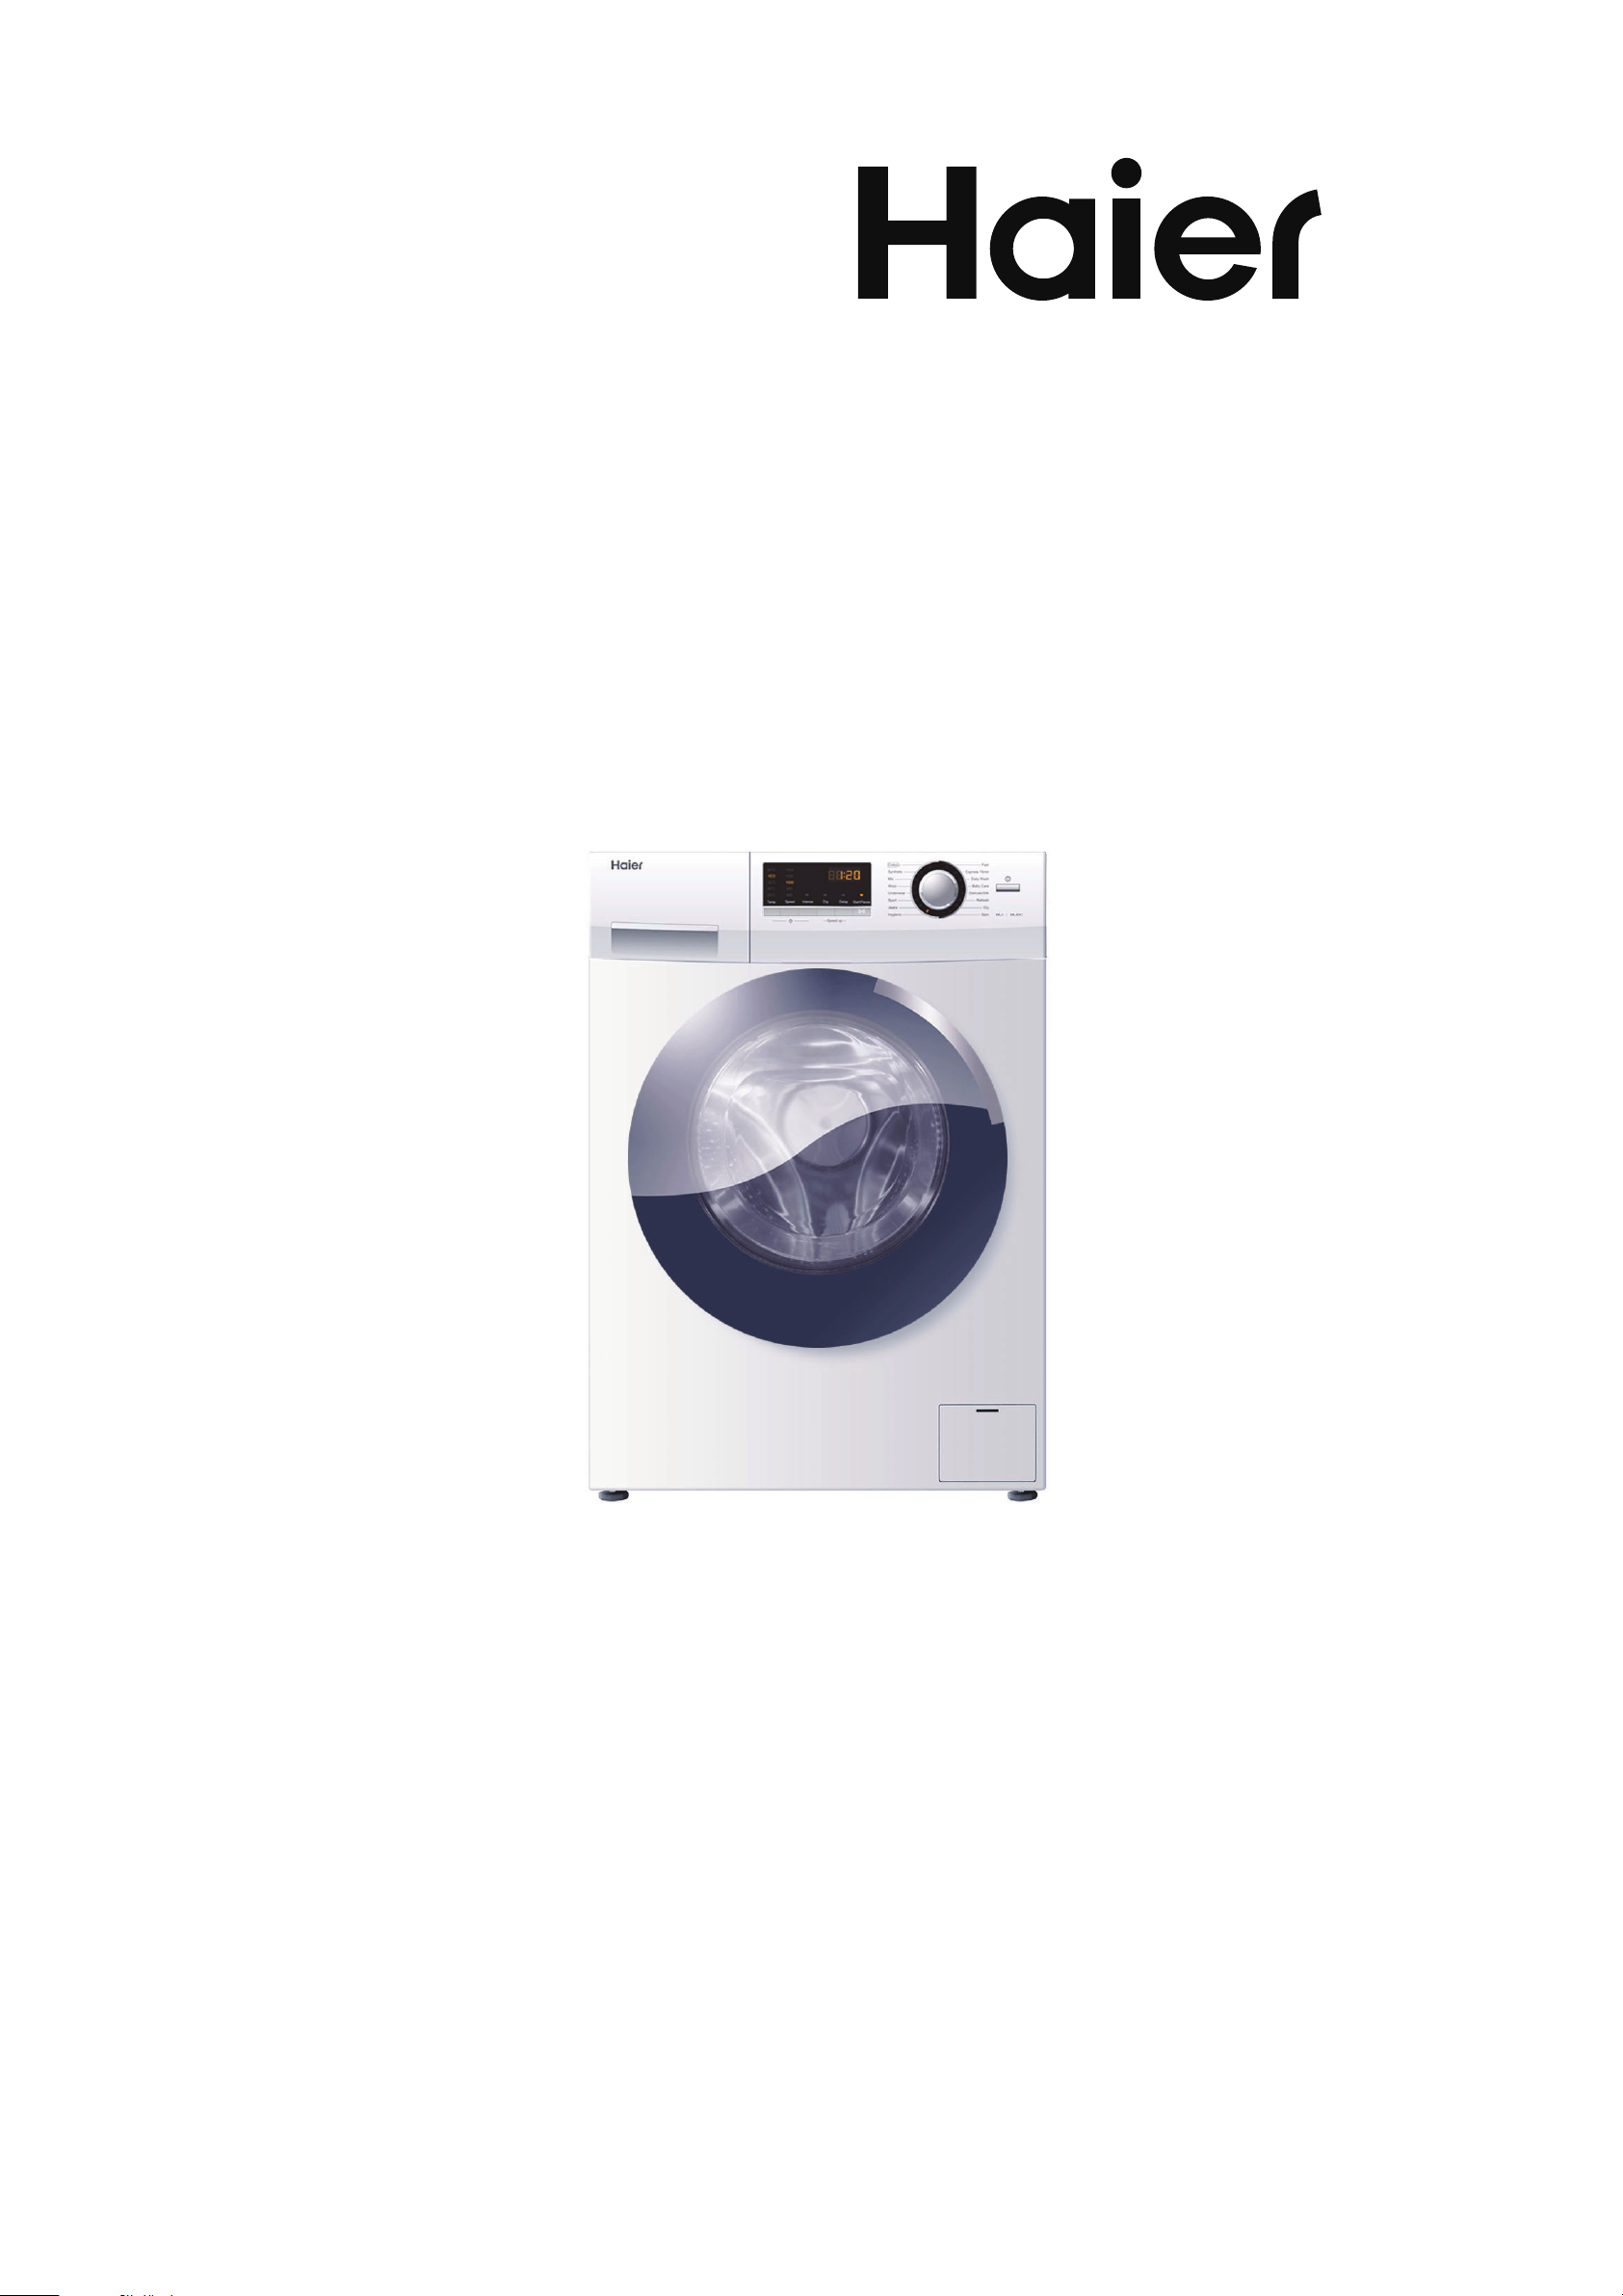
User Manual
HWF80BW2
HWF85BW1

1
Thanks for purchasing a Haier Product
Please read these in
ons carefully before using this appliance. The ins ons contain
important informa
on which will help you get the best out of the appliance and ensure safe and
proper installa
on, use and maintenance.
Keep this manual in a convenient place so you can always refer to it for the safe and proper use of
the appliance.
If you sell the appliance, give it away, or leave it behind when you move house, make sure you also
pass on this manual so that the new owner can become familiar with the applian
ce and safety
warnings.
Accessories
Check the accessories and literature in accordance with this list:
1x User Manual
1x Bo
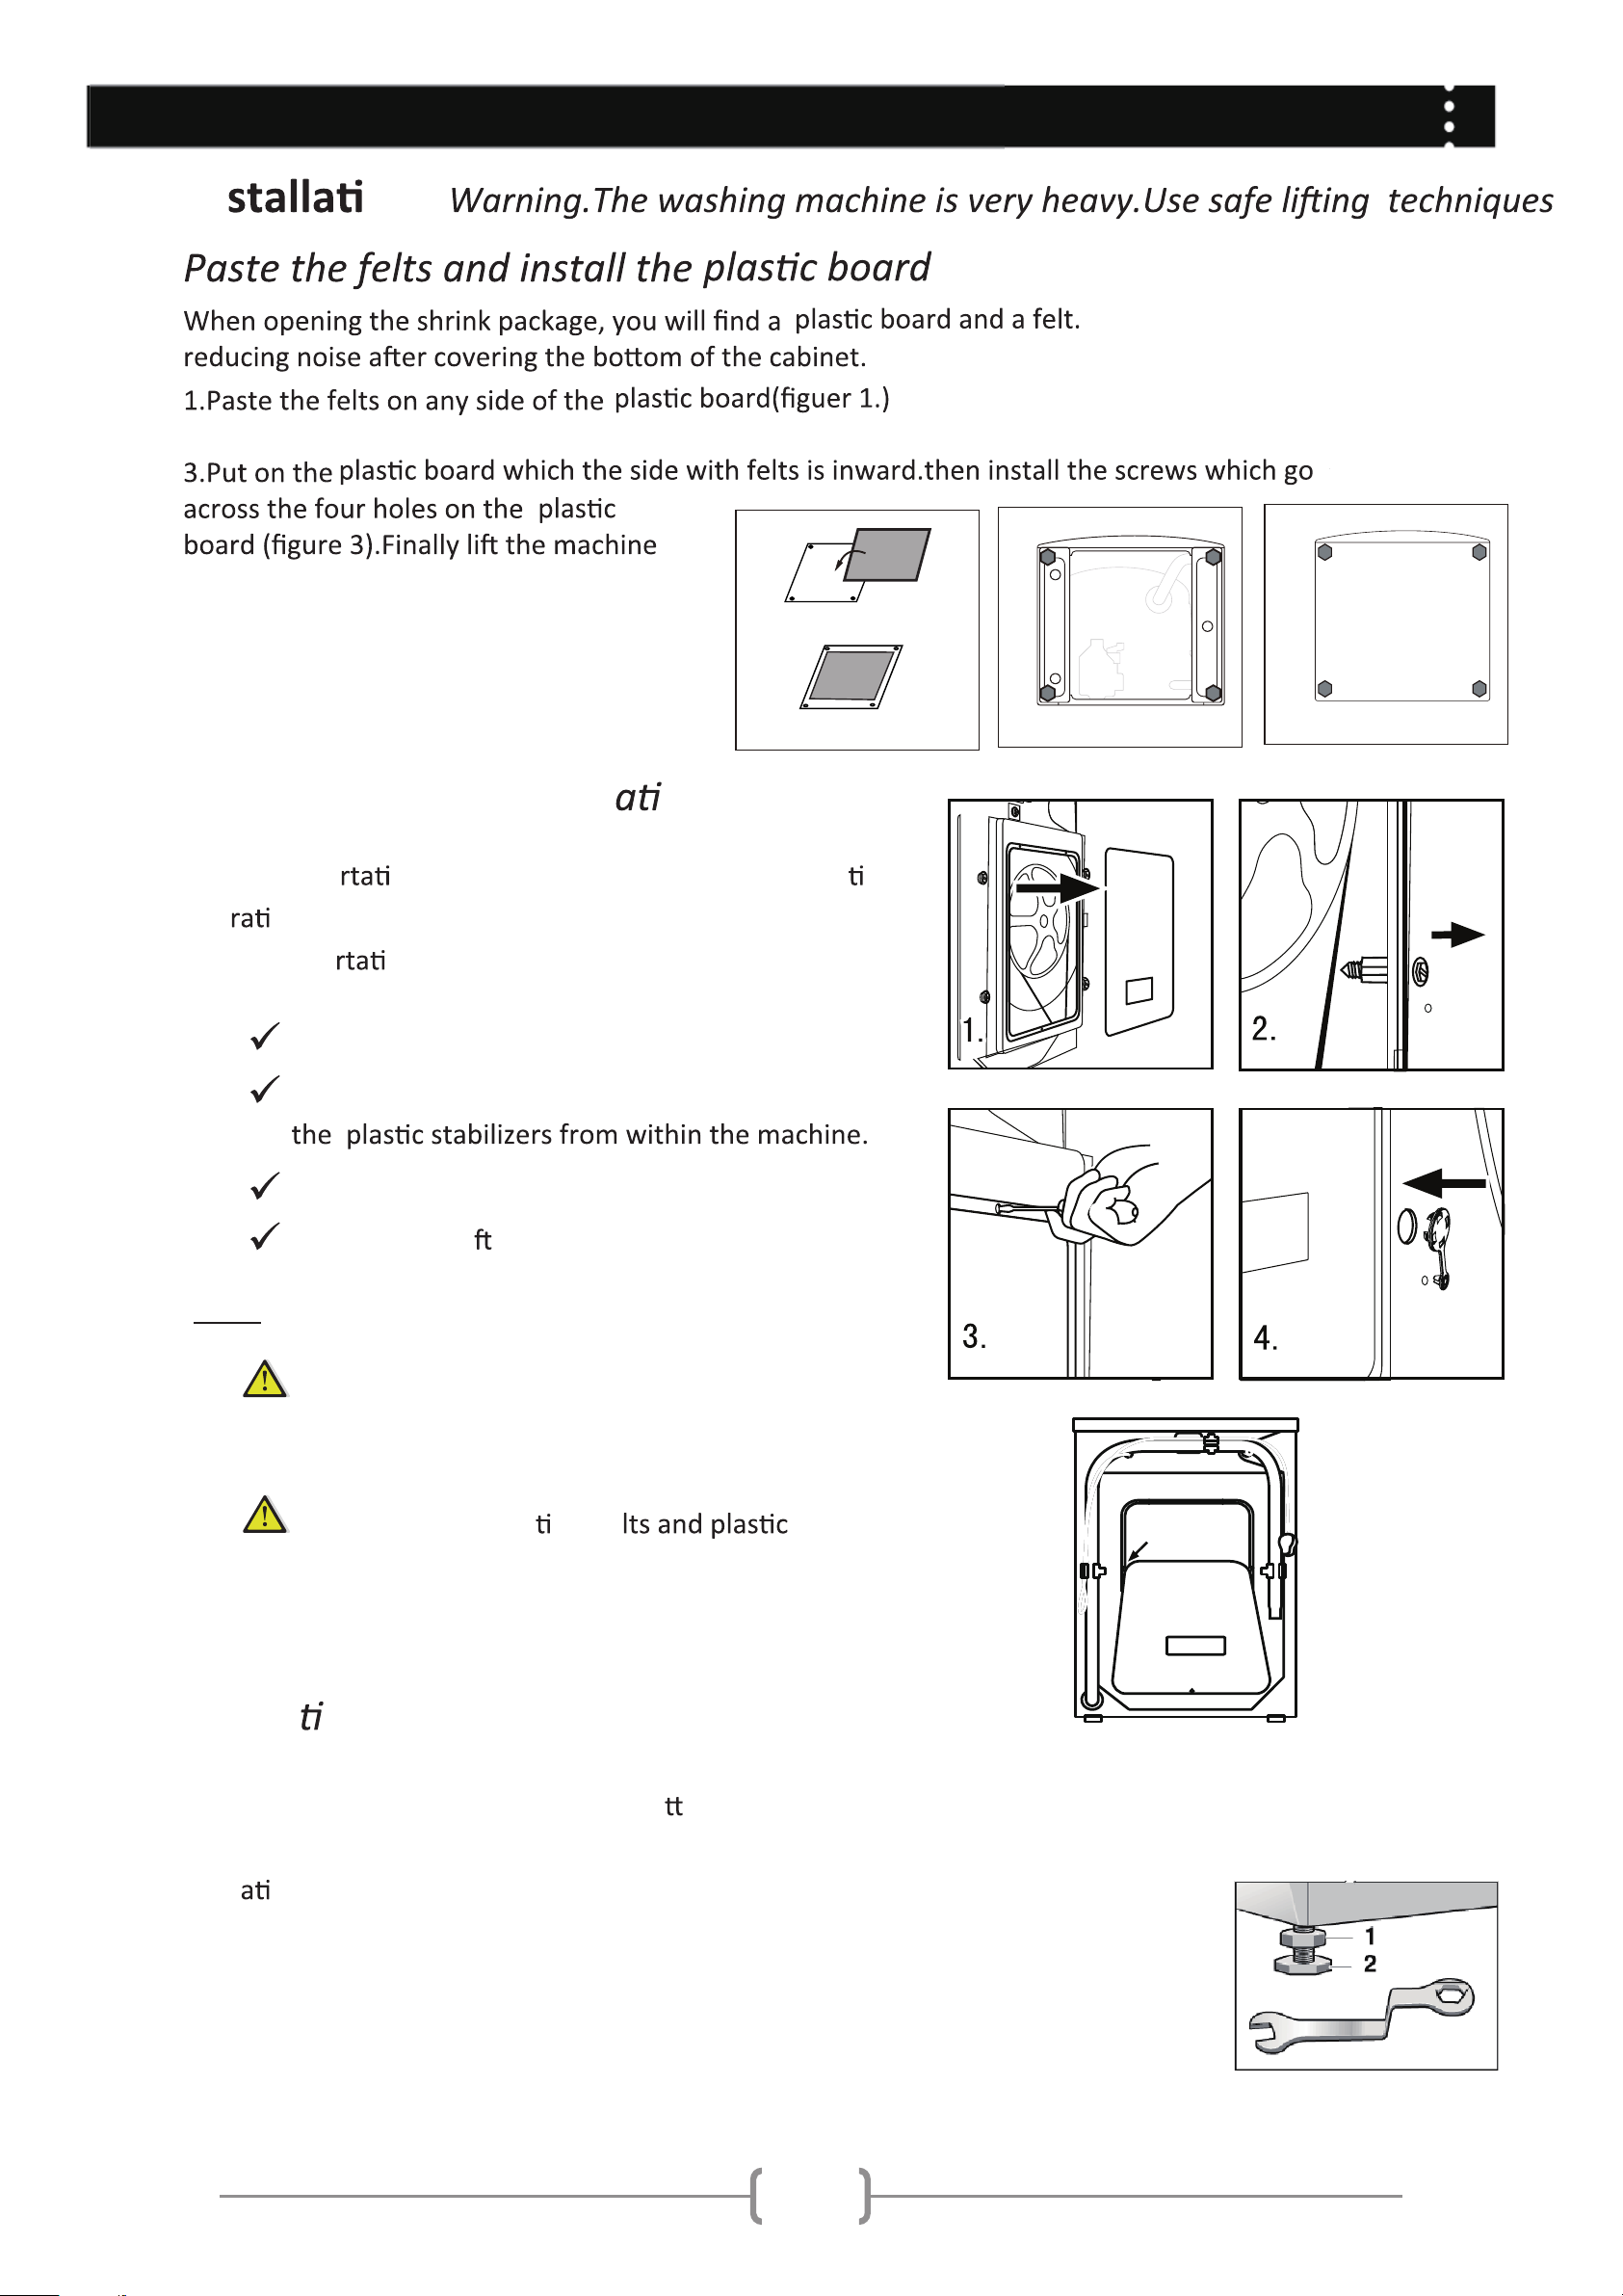
om Cover
1x Drain hose bracket
5x Blanking Plugs
1x Inlet hose assembly
Elements
User Manual HWF80BW1
1x Felt
2
................................................................................................................................................. 3
re e ........................................................................................... .................................................... 5
............................... .......................................................................... ........................................8
e ............................... ......................................................................... ...................................16
Tr
ubl g ...................................................................................................................................19
Technical data .......................................................................................................................................20
rvi e ...................................................................................................................................21
Legend
Ye
N
O
l
Index
Disposal
The pre
b h i l e r a
a f life he el r a i
i h a
T
pr a ge he r r l
l a p a e e i e r e
e e e . Th e e f a
ur .
h i he re her h e
p
e relev h e k
r r l afe re fety .
r
k he
rele i a urp ihT .eahrup a e h
r a .
not
not
3
Do…
Make sure that the transport bolt is removed.
Use a separate earthed socket for the power supply.
Make sure that the plug is accessible.
Hold the plug and not the electric cable when unplugging the
power supply.
Make sure that the fuses in the power circuit are rated for 15A.
and rubber components from aging.
Make sure that the power card is not caught under or in the appliance and avoid damage to
the power cable.
there will be leakage, turn o the water supply an x it. Do not use the washing
.
Do not…
Touch or use the appliance when barefoot or with wet or damp hands or feet.
ammable detergent or dry cleaning agent.
Use any
ammable sprays in close vicinity to the appliance.
Remove or insert the plug in presence of
e gas.
Allow children or
persons to play with the appliance or packing materials.
Install the appliance outdoors in a damp place, or in an area which may be prone to water
leaks such as under or near a sink unit. In the event of a water leak allow the machine to dry
naturally.
Place the washing machine directly on a carpet, or close to a wall or furniture.
This appliance is not intended for use by persons (including children) with reduced physical,
!" #$%&#$&'!"()*&+),)-.*./! 0&#$&*)+1&!3,!$.!"+!&)"4&1"#5*!46!0&7"*! &(8!%&8)9!&-!!"&
6.9!"& 7,!$9. .#"&#$&." ($7+/#"&+#"+!$"."6&7 !&(8!&),,*.)"+!&-%&)&,!$ #"&$! ,#" .-*!&2#$&
their safety.
Children should be supervised to ensure that they do not play with the appliance.
This washing machine is used for the following places:
– sta: kitchen areas in shops, o;ces and other working environments;
– farm houses;
– bed and breakfast type environments;
Make sure that the water pressure range in 0.03MPa-1MPa
If the supply cord is damaged, it must be replaced by the manufacturer, its service agent or similarly
qualified persons in order to avoid a hazard.
This appliance incorporates an earth connection for functional purposes only.
4
Let the power cord be replaced by the manufacturer, his service agent or other accordingly
, in case it is damaged.
Do not…
.t o h steg t i ,ss e co r p gnihsaw eht gn i rud rood re h saw eht hcuoT
Place heavy objects or sources of heat or damp on top of the appliance.
Hot wash from rubber or sponge-like materials
Force the w asher d o o r t o open, th e d oo r y l t rohs nepo l liw dna e c iv e d kc o l- f les a htiw de
he washing procedure is ended.
Open the washer door if the water level is visibly over the porthole.
Cover the washing machine with c cover so that the washing machine can dry out when not in use
Saving Tips
Achieve the best use of energy, water, detergent e by using the recommended
maximum load size
Do not exceed the detergent dosages indicated in the manufacturer’s instruc
ns.
Use “Prewash” for heavily soiled laundry only. Save detergent me, water and energy
consump
by not s ng “Prewash” for slightly to normally dirty laundry.
Save
me by n speed to reduce the water content in laundry
before using a tumble dryer.
tluser doog yrev htiw hsaw nac stnegreted nredoM .erutarepmet gnihsaw tcerroc eht esoohC
ytrid yrev rof C°06 naht erutarepmet rehgih esu ylnO .C°06 naht erutarepmet rewol ni ydaerla
laundry.
electricity, and for safety. Wipe clean the lower part of th
e porthole.
odors.
During daily use of the appliance
Do…
loose threads to prevent the items from being entangled. If necessary, put
small items into a small bag or net
Use the hose-set supplied with the appliance.Old hose-sets should not be reused.
Do not overload the washing machine:
HWF80BW2 Max.load is 8kg
HWF85BW1 Max.load is 8.5kg
5
Before Use
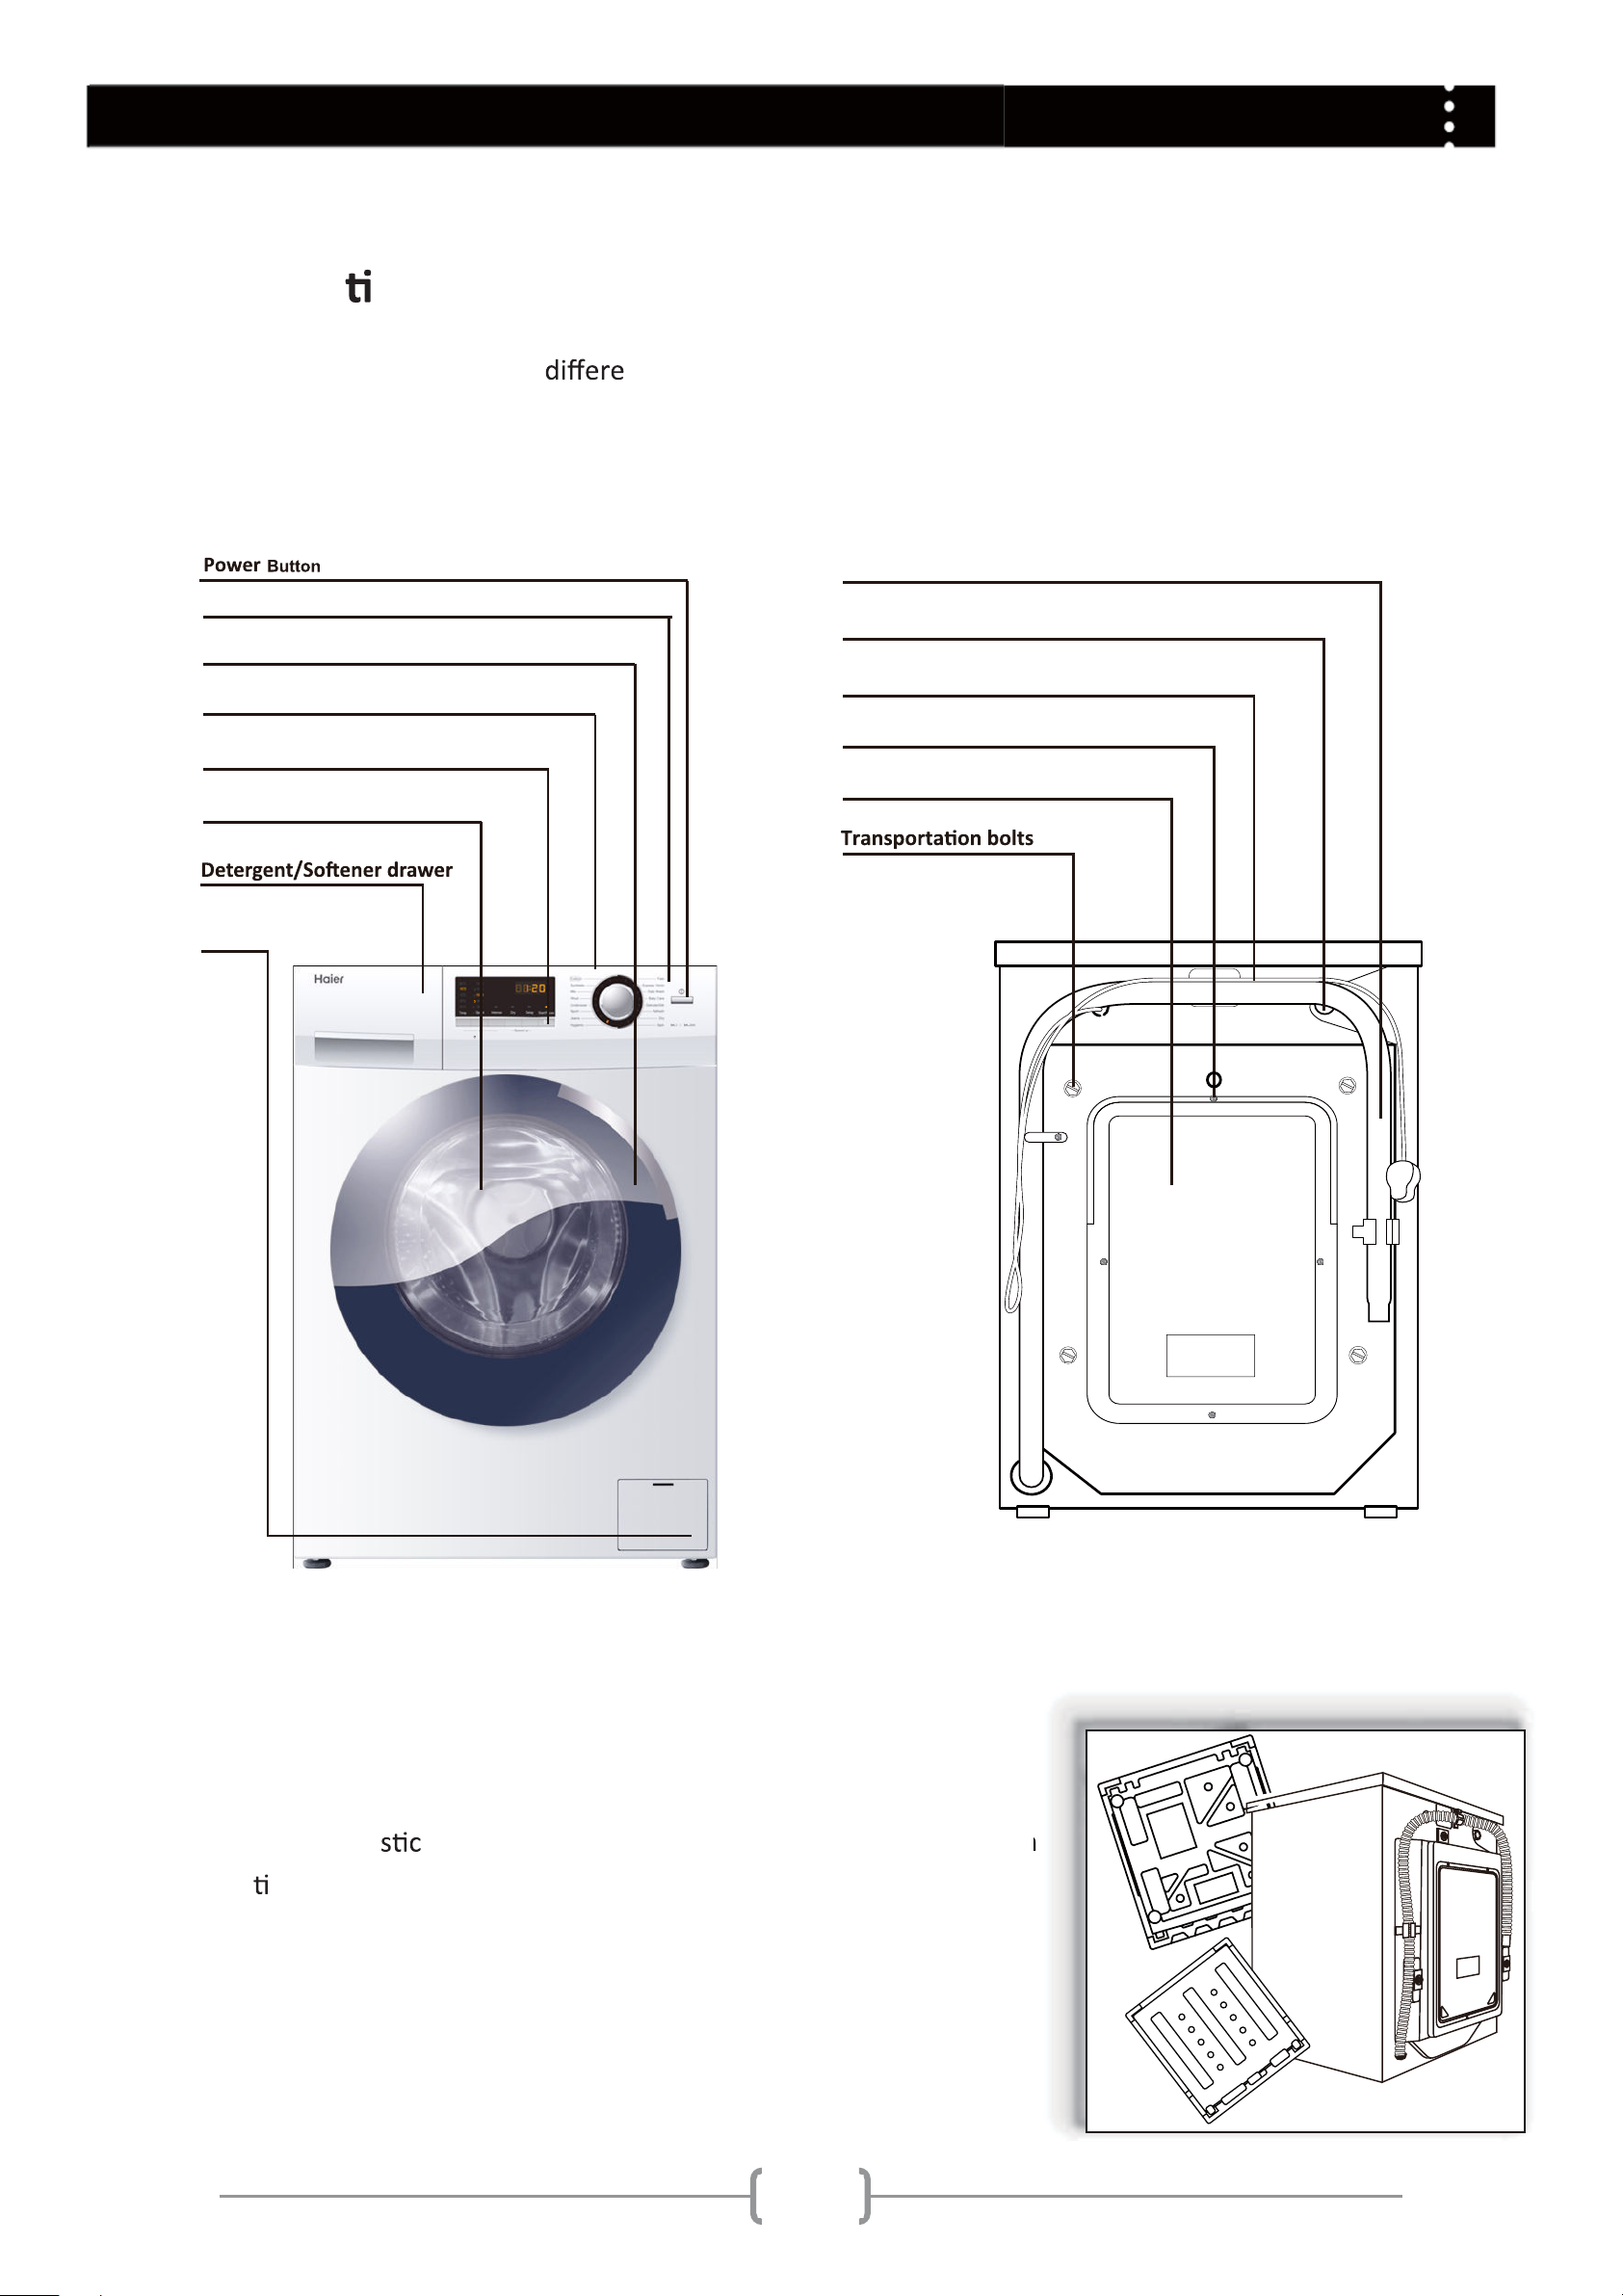
Descrip on
This diagram may be slightly
nt from the layout of the washing machine you have just
purchased.
Preparing the machine
Remove all the packing materials to prevent unsteadiness, including
the polystyrene base. Upon opening the package, water drops may be
seen on the pla
bag and the porthole. This is normal phenomenon
resul
ng from water tests in the factory.
Before Use
T1
T2
T3
S1
S2
S4
S3
T4
Drain hose
Water inlet valve
Power cord
Back cover screws
Back cover
Control panel
Start/Pause
Door handle
Work top
Washer door
Filter cover
6
In on
Dismantle the transport
on bolts
The transpo
on bolts are designed for clamping an -
vib
on components inside of the washing machine during
the transpo
on process.
Remove the back cover.
Remove the four bolts on the rear side and take out
Replace the back cover.
Fill the holes le
by the bolts with blanking plugs.
Note:
When you replace the back cover, the convex
must face to outside, and you have to insert the
back cover from the two gaps as sho !"#!"$%&'&"
Keep the transporta on bo
stabilizers in a safe place for later use.
Before Use
5.
(&)*+",- !"+./"012.#!/"3124 15,67"8/0-9/"+./":-*5"625/ 6";$%*5/"(&<
upright.
1.
3.
2.
They are used for
There are adjustable feet under the bo om of the washing machine. Before
use, they should be adjusted so that the machine is level. This will minimize
vibr
ons and thus noise during use. It will also reduce wear and tear. We
recommend to use a spirit level for adjustment.Floor should be as stable and
=1+"16">-66#3?/&
1. @--6/"+./"?-24"!*+";A<"3B"*6#!%"1" 5/!2.&
2. C,D*6+"+./".#%."3B"+*5!#!%"+./":--+";(<&
3. E#%.+/!"+./"?-24"!*+";A<"1%1#!6+"+./".-*6#!%&
Adjus ng the feet and locking nut
7
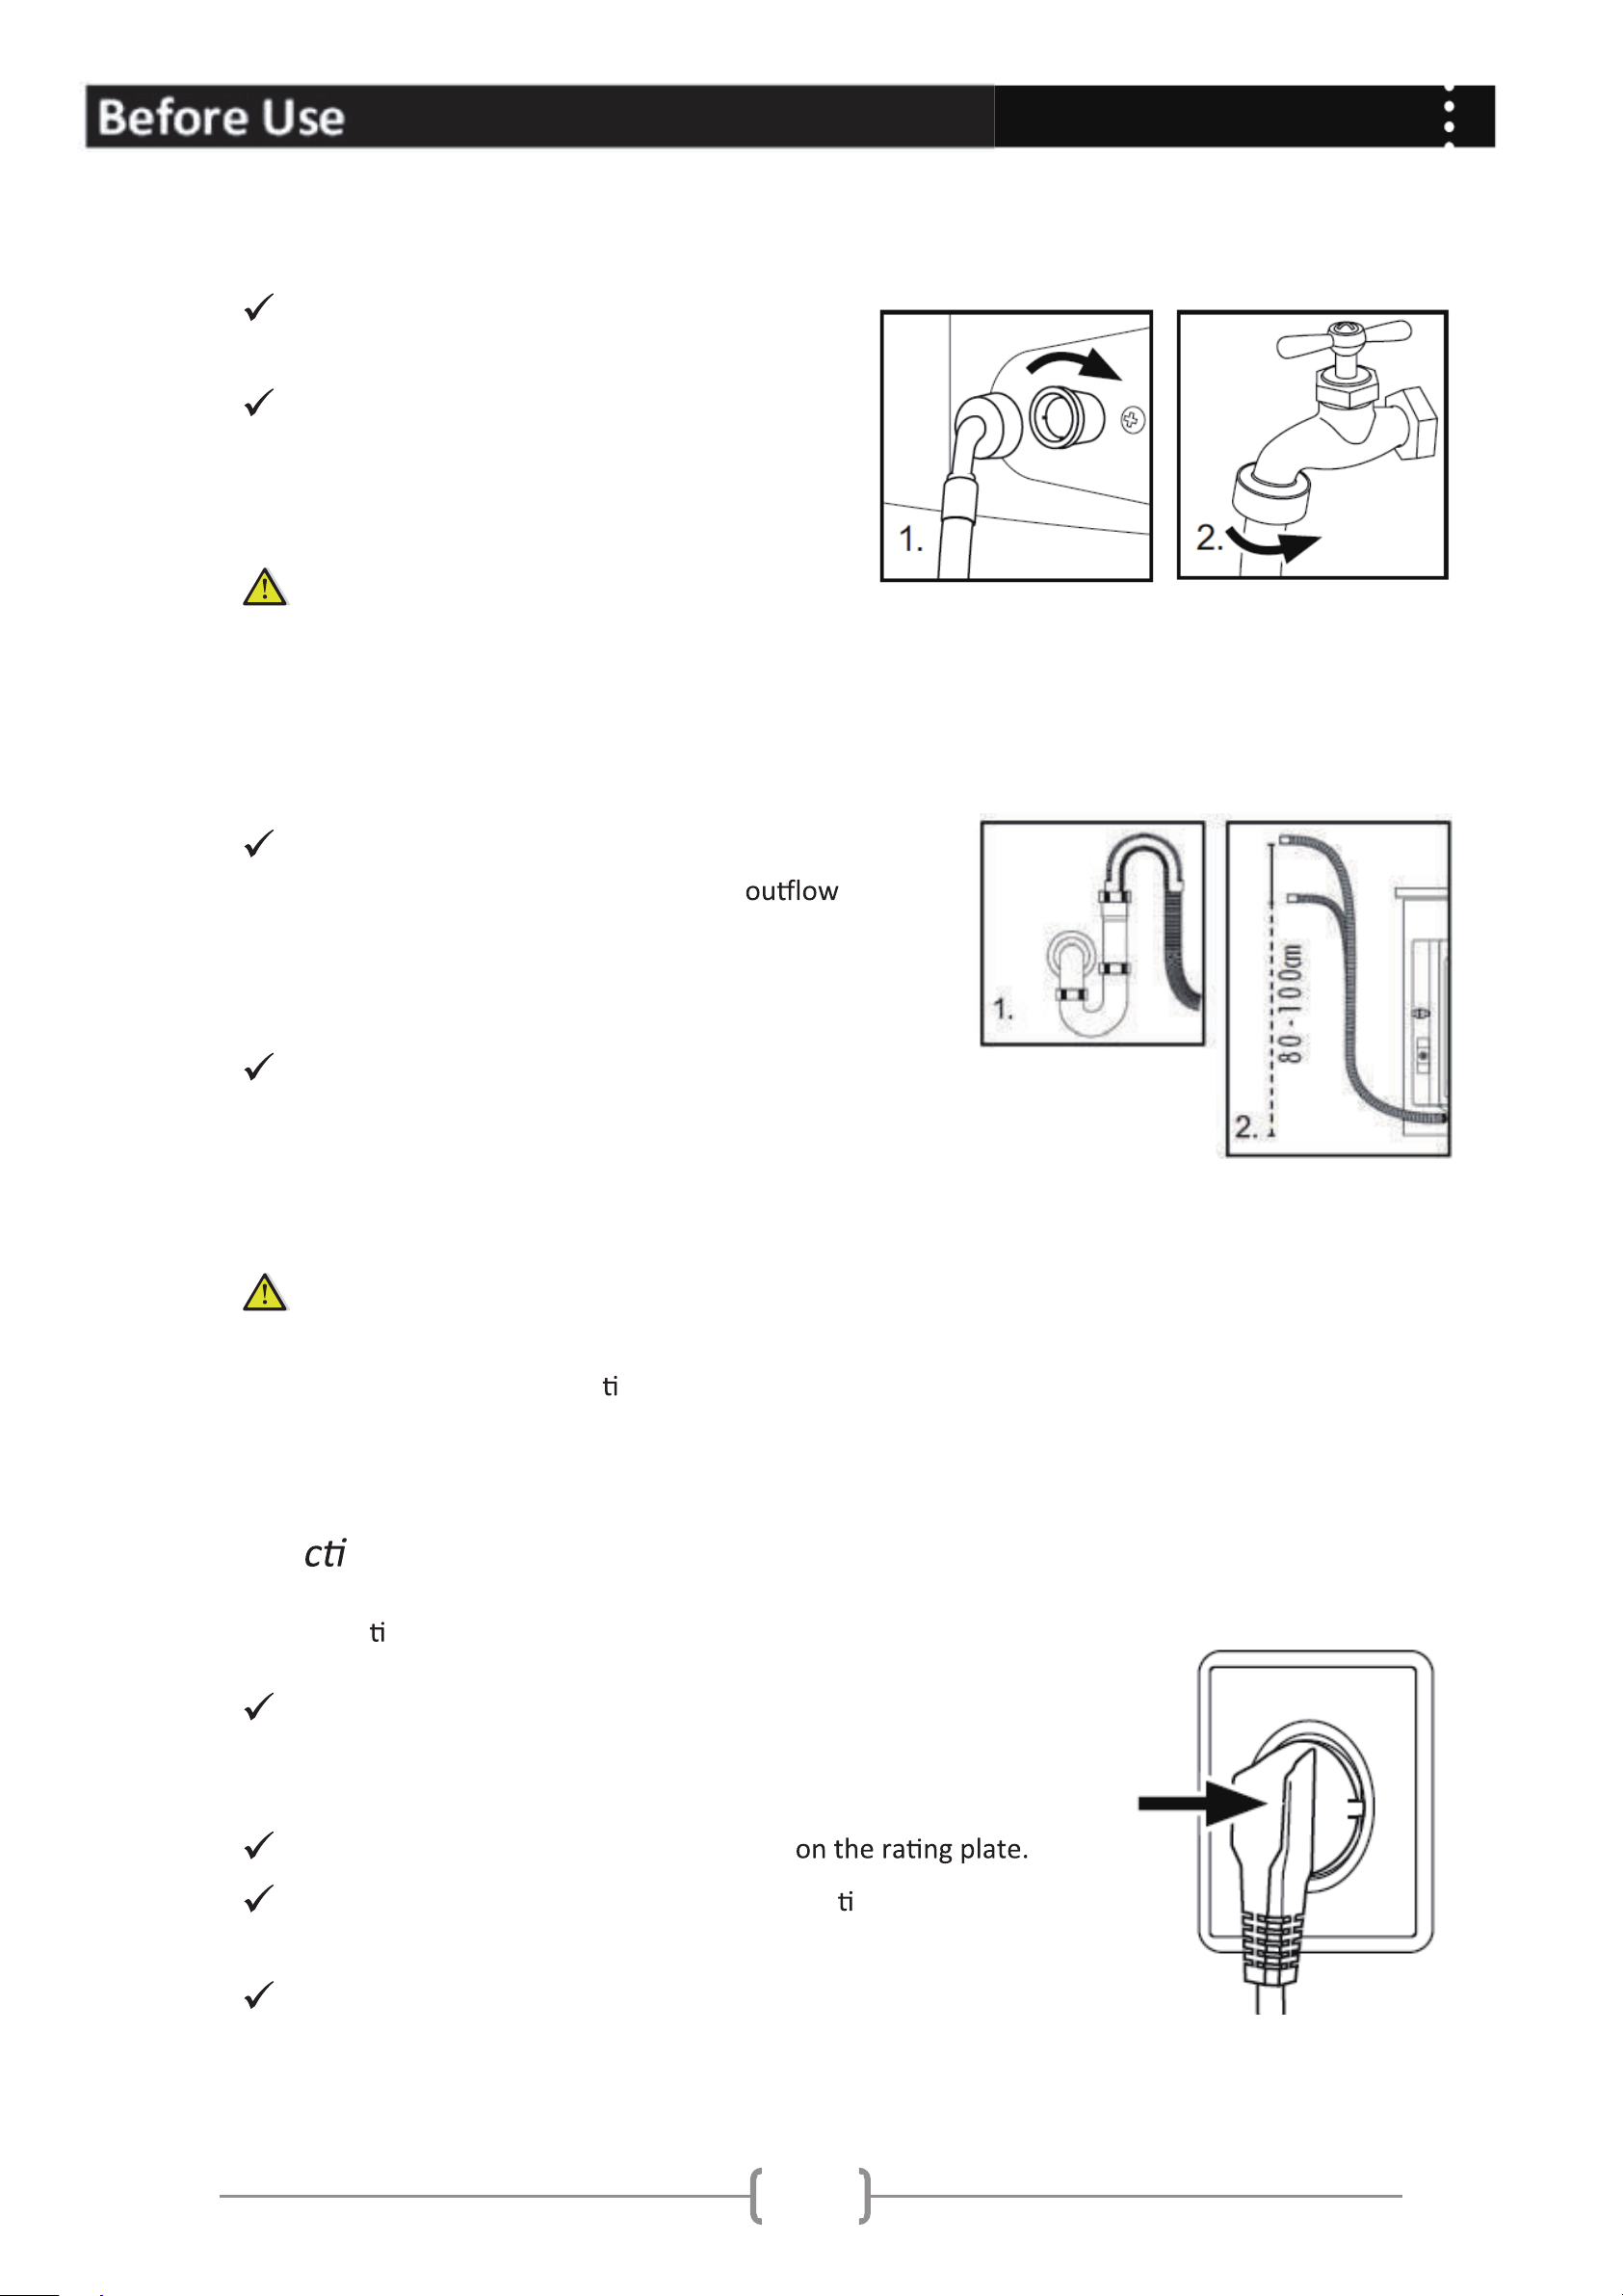
Inlet Hose
Connect the nut on the inlet hose to the
connector on the water valve.
Connect inlet hose to a water tap with cold,
fresh water.
Use the hose-set supplied with the appliance.
Old hose-sets should not be reused.
Drain Hose
Use the drain hose bracket to keep the end of the
drain hose retained and prevents the
of
water. Don't extend the length of the drain hose; if
an extended hose is required, please consult a
serviceman or plumber.
The height of the drainage outlet must be 80-100
cm. Fix the drain hose to the clip at the back of the
washing machine to prevent it from dropping o .
The drain hose should not be submerged in water and should be securely !xed and leak-free.
If the drain hose is placed on the ground or if the pipe is at a height of less than 80cm, the
washing machine will con
nuously drain while being !lled (self-siphoning).
Conne
ng to Power Supply
Before connec
ng to the power supply, check:
The socket is adequate for the maximum power of the washing
machine (For safety, fuses in the power circuit should be rated
for no less than 15A).
The voltage should meet the requirement
The power outlet should be capable of accep
ng the washing
machine plug.
Connect the machine to an earthed socket outlet.
 Loading...