

Page 1
Page 2
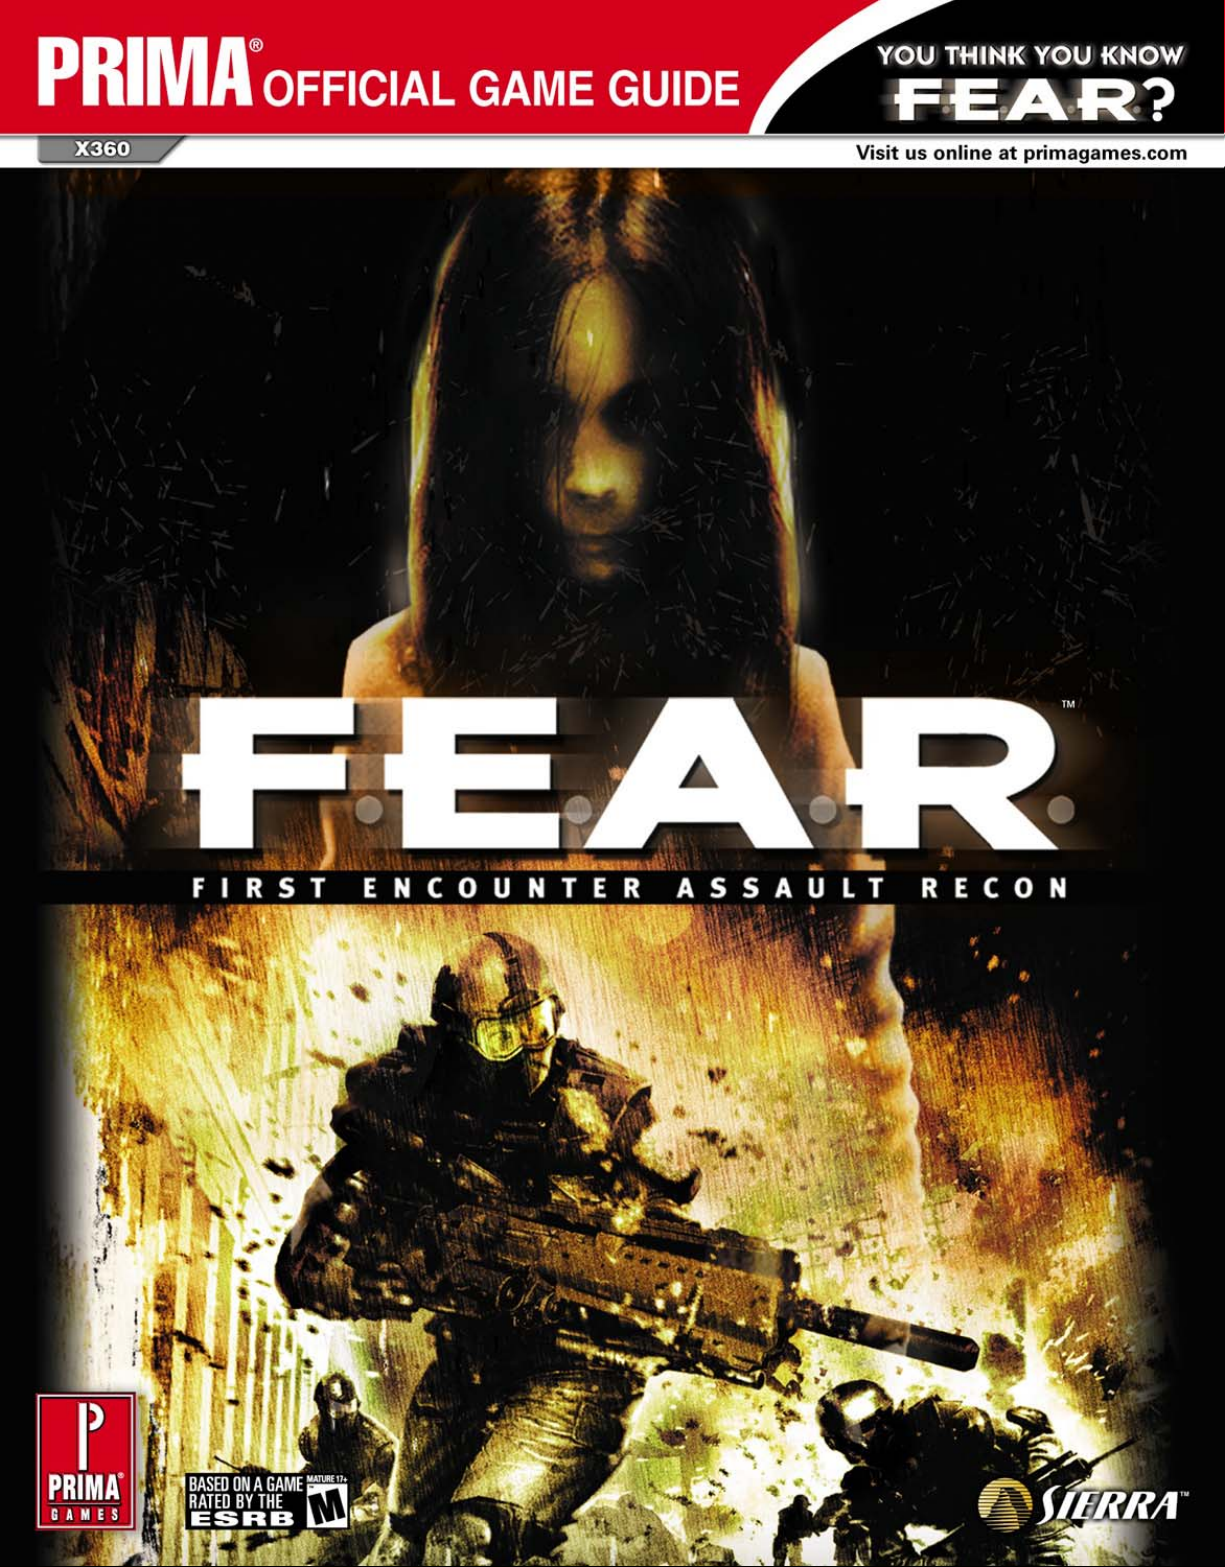
PRIMA OFFICIAL GAME GUIDE
Welcome to First Encounter Assault Recon
You are the newest member of the top-secret First Encounter Assault
Recon team, otherwise known as F.E.A.R. The F.E.A.R. team is a
government military and scientific outfit created to combat paranormal
threats. Their focus is on action and containment. Although new to
F.E.A.R., you have been given the role of point man because of your
superior reflexes and combat abilities. F.E.A.R. must defuse a
potentially disastrous operation: A top-secret experimental weapon has
gone missing. And that weapon happens to be a psychotic, cannibalistic
telepath.
F.E.A.R. is more than your typical first-person shooter. For one thing,
it’s very creepy, and you can expect to be startled on more than
one occasion. As you proceed with your investigation, you
uncover a very complex story that adds a great deal of suspense
to the action.
But the action is the most important thing, here:
F.E.A.R. is a challenging but rewarding
shooter, and one that often
requires a more tactical approach
to combat. In this guide, you’ll
learn some tricks for surviving the
many challenging engagements in
which you’ll find yourself. You’ll also
find detailed statistics for each of the many weapons you can use, as
well as how to use your weapons most efficiently.
This guide also helps you make sure you get the most out of the
story, which is revealed in bits and pieces as you progress. It’s possible
to miss important pieces of the puzzle, so this guide makes sure you
don’t miss a single voicemail or whispered clue. Please note that
nothing is revealed in this guide before it is revealed in the game, but
you may want to resist browsing through the walkthrough before you
play the game, because story elements are explained at the various
points where you’ll encounter them.
The single-player campaign is just the beginning. Take your newly
acquired combat skills online and try against human players, who,
despite the game’s excellent artificial intelligence, can be even more
clever and challenging. The final chapter gives you detailed guides to
each of the available multiplayer maps, as well as some tricks for
surviving in the multiplayer arena.
The author would like to thank Geoff
Bent of Sierra Entertainment for his
assistance in preparing this guide.
2
Page 3
F.E.A.R. Operative Basic Training
F.E.A.R. Operative Basic Training
F.E.A.R. has been widely, and rightfully, praised for the excitement of
its combat. The single-player campaign is notable for the challenging
firefights and the realistic behavior of the opponents you’ll face.
F.E.A.R. has a great and complex story, but fighting is the core of the
game. In this chapter, we’ll look at the basics of combat, including
tricks and strategies for stealth attacks, large firefights, and even
punching your way to victory.
Before getting too deep into combat specifics, though, let’s take a
quick look at the basics of moving through and interacting with the
game’s world. It’s important that you understand the basics of the
heads-up display (HUD) and the movement interface before you
engage the enemy.
THE HUD
Your HUD is unobtrusive, but it provides you with vital data regarding
your current condition and inventory, as well as who is communicating
with you over the comlink that connects you to your F.E.A.R. teammates
and other colleagues in the field.
PRIMAGAMES.COM
You can carry up to
10 med kits at a time.
WHEN MED KITS ARE IN SHORT SUPPLY AND YOU ARE VERY HURT, FIND SOMEWHERE
TO HIDE AND WAIT FOR YOUR HEALTH TO REGENERATE TO ITS THRESHOLD.
OTHERWISE, THE MED KIT WILL BE USED TO HEAL POINTS YOUR BODY CAN
REGENERATE ON ITS OWN, AND MAKES THEM LESS EFFICIENT. REMEMBER THAT THERE
IS NO HEALTH REGENERATION ON EXTREME DIFFICULTY.
The HUD is your
window to the world.
Health
The HUD’s lower left corner shows two numbers: the left is your current
health, and the right is your current armor. As you health gets lower, the
display box changes color from green to red. When your health is below
40, it turns red, indicating that you are in great danger of being killed.
When your health reaches zero, you die. Using a med kit restores 50
points of health, and you can have up to 199 points of health in the
single-player campaign, although you begin with 100 points. To increase
you health, look for Health Boosters, which add five points to your
maximum health.
Luckily, you regenerate a small amount of health. When you drop below
a certain threshold, you begin regenerating health. If you stop moving,
you regenerate five points a second, and if you are moving you
regenerate one point a second. It is important to remember, though, that
you cannot regenerate to full health. How much health you can
regenerate depends on which difficulty level you are playing. On Easy
difficulty, your health begins regenerating when you drop below 40 points
and stops regenerating once you are back to 40 points of health. On
Normal and Hard difficulties, you begin (and end) your regeneration at 25
points. Multiplayer games, likewise, have a regeneration threshold/limit of
25. On Extreme difficulty, there is no health regeneration.
Armor
Your armor is shown in the lower left corner, to the right of your health.
Armor absorbs some, or all, damage from attacks. How much damage
your armor absorbs depends on the type of weapon your assailant uses
(see the Weapons and Equipment section for specific information about
each weapon’s armor penetration). When you have no armor, all damage
is taken to health, so, obviously, more armor is always better. Armor is
accumulated by picking up armor in the field. Each piece of armor you
find adds 35 points to your armor, and you can have a maximum of 100
points of armor. Unlike with your health, this maximum number cannot
be increased.
SlowMo
In the HUD’s bottom center is your SlowMo meter. This meter shows how
much energy you have to activate your SlowMo ability. The F.E.A.R.
operative you control in the game has almost superhuman reflexes, which
allow you to, essentially, slow down time around you. Though you move
slightly slower as well, you move faster than your foes, and SlowMo
allows you a great advantage over opponents. The ability to use this
heightened awareness is limited, and you must rest before it can be
activated again.
WHILE SLOWMO IS ACTIVE, YOU DO MOVE SLOWER, SO ACTIVITIES SUCH AS
RELOADING CAN TAKE MUCH LONGER THAN NORMAL. MAKE SURE YOUR WEAPONS
ARE ALWAYS FULLY LOADED BEFORE ACTIVATING SLOWMO—IT ISN’T FUN TO SPEND
MOST OF YOUR SLOWMO TIME RELOADING YOUR COMBAT SHOTGUN.
3
Page 4
PRIMA OFFICIAL GAME GUIDE8PRIMAGAMES.COM
Leaning around
corners provides you
with great cover, and
often grants you the
element of surprise.
COVER IS NOT A SUREFIRE SAFETY MEASURE. IT OFTEN INSPIRES THE ENEMY TO TOSS
A GRENADE YOUR WAY TO FLUSH YOU OUT. STAY ALERT FOR THE SOUND OF
GRENADES. IN SINGLE-PLAYER GAMES, THE ENEMY USUALLY ANNOUNCES A GRENADE
AS IT’S THROWN, GIVING YOU A BRIEF OPPORTUNITY TO MOVE TO A SAFER
POSITION.
Grenades
Grenades are very effective weapons when used properly. There are three
types of grenades and, unlike weapons, you don’t need to select which
type you want to carry. You can have up to five of each type of grenade at
any time, but each has its own uses.
Your standard grenade is the fragmentation grenade, which explodes
shortly after it’s thrown, or when it hits an enemy target. A direct impact
is usually fatal, but even if it isn’t fatal, it can stun an opponent, making
him an easy target. Fragmentation grenades are great for flushing
enemies out into the open from entrenched positions.
Proximity mines and remote bombs are less effective for heat-of-themoment combat, but they’re well suited for setting up traps for incoming
enemies. Both, however, can be offensively effective with some practice.
A proximity mine thrown into a group of enemies, for example, detonates
as soon as it’s armed and they try to flee, usually eliminating the group.
Remote bombs can be detonated at any point after they leave your hand,
so with practice you can learn to activate them right as they pass an
opponent or group of opponents.
Use grenades to flush
the enemy out from
covered positions.
Stealth and Melee
One of the best ways to survive an engagement is to have it end before it
even really begins. If you keep the enemy unaware of your presence, you
can usually kill him with a single attack, and if you use a melee attack,
you can do it silently.
CREEPING AROUND
The enemies you encounter are very in tune with their surroundings.
They react to noises, and they go on alert if you knock something over or
they hear gunfire from a nearby room. They also go on alert if they see
you, or even your flashlight beam.
F.E.A.R. isn’t a stealth game, but there are ways to use silence to your
advantage. Enemies that are at their stations and unaware of threats are
much easier to kill than those who are on the defensive, so try to make as
little noise as possible, and keep your flashlight off unless you absolutely
need it.
Use your flashlight
sparingly, because it
can alert the enemy
to your presence.
SURPRISE SHOTS
If an enemy is unaware of your presence, your attacks actually do more
damage. Because of this, taking careful aim on an unwary opponent is
important. If you miss, you lose the advantage of surprise. Surprise shots
only work on a single enemy in a heavily populated area, because the
shot puts everyone on alert.
MELEE
Melee attacks on an unwary opponent not only have the surprise benefit,
they are also nearly silent, so as long as you or the body isn’t spotted,
nearby enemies won’t be alerted. If you see an enemy with his back to
you, quietly move up behind him and hit him with your fists or your
gunstock. He’ll crumple like a cheap suit, and you can still get the drop on
any other enemies nearby.
If an enemy hasn’t
seen you, you can
usually kill him with
a single shot or melee
attack.
YOU CAN SHOOT A PROXIMITY MINE TO MAKE IT EXPLODE, WHICH IS A GOOD WAY
TO DISARM ENEMY MINES WHEN YOU SPOT THEM.
MELEE ATTACKS ARE VERY POWERFUL, EVEN ON OPPONENTS WHO ARE AWARE OF
YOUR PRESENCE. SEE THE WEAPONS AND EQUIPMENT SECTION FOR A MORE DETAILED
LOOK AT THE DAMAGE DONE BY YOUR FEET AND FISTS.
Page 5

F.E.A.R. Operative Basic Training
Environmental Factors
Taking cover isn’t the only way you can use the environment to your
advantage. Many items you encounter can be used as offensive weapons
if you know where to look.
Fire extinguishers, power boxes, and barrels containing flammable
contents all explode if shot, and the ensuing damage is far more
devastating than that from all but your most powerful weapons. Keep an
eye out for these, and if you can, try to lure the enemy near them. When
an enemy or, even better, a group of enemies approaches, fire at the item
to take them out. Even if they aren’t close enough to be killed by the
blast, as long as they are in the blast radius, the explosion will stun and
disorient them, and you can easily finish them off as they recover.
Power boxes, fire
extinguishers, and
explosive barrels can
all be used to kill or
injure an enemy, or
several enemies, with
a single bullet.
SlowMo
SlowMo always increases your advantage in combat. There’s never really a
bad time to use it, and it can make large battles much easier, giving you
time to take out a few enemies and lessen their overwhelming odds. It’s
also an excellent way to take out more powerful enemies, such as Heavy
Armors and REV6 Power Armors, that are otherwise very difficult to kill.
The only issue with SlowMo is that it takes a while to regenerate, so
you don’t want to waste it on an easy fight, only to find that you don’t
have enough for a major battle around the corner. Use it sparingly, or
wait for it to regenerate before proceeding.
Use SlowMo as much
as you want, but be
sure it’s fully charged
in situations where
you really need it.
ALWAYS RELOAD YOUR WEAPON BEFORE ACTIVATING SLOWMO. IN FACT, GET IN THE
HABIT OF CONSTANTLY RELOADING YOUR WEAPON AFTER A BATTLE, SLOWMO OR NOT.
ONLY YELLOW BARRELS WITH THE FLAMMABLE WARNING EXPLODE IF SHOT. LIKEWISE,
SHOOT ONLY AT POWER BOXES WITH THE VOLTAGE WARNING. STANDARD GRAY
POWER BOXES WON’T DO ANYTHING WHEN SHOT.
DUST
One environmental element is more detrimental than helpful: dust. When
shooting in dirty areas, or areas with concrete walls, stray shots can stir
up a great deal of dust. When the air gets too cloudy, your visibility can
be seriously impaired. When this happens, try to get to a new position. If
necessary, leave the room and wait for the dust to settle before
attempting to engage the enemy inside.
In rare cases, dust can be beneficial. When fighting Assassins, who have
the ability to cloak themselves, kicking up dust from walls or the floor
makes them easier to spot while they are invisible.
Dust can become a
major visibility issue
in certain
environments.
DIFFICULTY ADJUSTMENT
There are four difficulty levels in the single-player missions. These
affect several factors about how deadly your enemies are, but they do
not affect how many enemies you face, or how they behave. Note
that the damage percentage is calculated on the base damage for a
weapon when it is fired by an enemy in the single-player game. In the
Weapons and Equipment section, we’ll look at these specific numbers.
EASY
On Easy difficulty, enemy weapons do only 25 percent of their base
damage. Enemies also have accuracy penalties, and your health
begins regenerating when it goes below 40.
NORMAL
On Normal difficulty, enemy weapons do 65 percent of their base
damage. Enemies are more accurate, but still suffer some penalties.
Your health regenerates under, and up to, 25 points.
HARD
On the Hard difficulty setting, enemies are very accurate, and their
weapons do 85 percent of the base damage. Your health regenerates
when it goes below 25 points.
EXTREME
Extreme difficulty is very, very difficult. Enemies are very accurate,
and their weapons do 120 percent of the base damage. There is no
health regeneration on extreme difficulty.
9
Page 6

PRIMA OFFICIAL GAME GUIDE
WEAPONS AND EQUIPMENT
GUNS
You can carry only three weapons at a time, so it’s good to understand
their pros and cons. Each weapon has its strengths, and each has
drawbacks, but you can select an inventory of weapons that gives you
strong options for almost any situation. Choosing a well-balanced
complement of weapons is a key to effective combat.
Though you’ll inevitably find a favorite weapon arrangement of your
own, it’s not a bad idea to always carry a combat shotgun and an assault
rifle, then keep the third slot open for the high-end weapon of your
choice. You can use a submachine gun or a HV Penetrator instead of an
assault rifle, but the former isn’t as powerful a weapon and the latter is
rarer, making ammunition a problem. Regardless, you want the shotgun
for close quarters and the assault rifle (or similar) for medium-range
combat. Always save your big guns for tough opponents. As tempting as it
may be to attack two Replicas with a rocket launcher, you’ll be sorry you
did when you’re face to face with a REV6 Power Armor.
In the next section, we’ll look at the weapons individually, and point out
some of their strengths and weaknesses. In the descriptions, several stats
are called out. Here’s a brief explanation of what each stat means.
AMMUNITION
These numbers show you both how many rounds you can have in the
magazine at once, and how many rounds you can carry, total. Note that
the maximum number includes the current magazine, so with the AT-14
pistol, for instance, if you had a full magazine of 18 rounds, you could
only carry 82 rounds in reserve.
With some weapons, the number of rounds carried and loaded differs
from single-player to multiplayer. For each weapon, both numbers are
shows, with the single-player (SP) first, and the multiplayer (MP) second.
SOME STATISTICS CHANGE FROM SINGLE-PLAYER TO MULTIPLAYER. IN THE FOLLOWING
LISTINGS, “SP” IS THE SINGLE-PLAYER STATISTIC, WHILE “MP” IS THE MULTIPLAYER
STATISTIC. IN CASES WHERE THE STATISTIC IS UNIQUE FOR COMPUTER-CONTROLLED
OPPONENTS, THAT STATISTIC IS INDICATED BY “AI.”
ARMOR PENETRATION
This percentage indicates how much damage from a single round will go
through a player’s armor and damage his or her health. Some weapons
cannot pierce armor, in which case all damage is applied to the armor.
Some weapons, though, such as the HV Penetrator, are great at piercing
armor. In its case, it has 80 percent armor penetration, so a player’s armor
can absorb only 20 percent of the damage.
MOVEMENT PENALTY
Weapons have weight, and that weight affects you. This number shows
what percentage your speed will be reduced when the weapon in
question is your active weapon. Weapons in your inventory do not affect
your speed, so holstering your weapon eliminates all reduction penalties.
Note that your speed also affects your jumping distance, so put your guns
away if you’re trying to make a tricky leap.
AT-14 PISTOL
IN THE SINGLE-PLAYER CAMPAIGN, AMMUNITION FOR A WEAPON CAN BE FOUND
ONLY IN A WEAPON OF THE SAME TYPE, SO IT DOESN’T MAKE ANY SENSE TO CARRY
AN EMPTY WEAPON. NO MATTER HOW MUCH YOU LIKE THE WEAPON, IF IT’S EMPTY,
DISCARD IT IN FAVOR OF A NEW WEAPON. YOU CAN PICK IT BACK UP ONCE YOU FIND
AMMO ANYWAY, BECAUSE IT’LL BE IN THE GUN ITSELF.
BASE DAMAGE
This is the damage done by a single round from a weapon before
modifiers are applied. Modifiers include headshots (which can add a 1.5x
or 2x multiplier to damage, depending on the target) and difficulty level,
which affects only computer-controlled enemy damage. The base damage
of a weapon can differ for the player in single-player and multiplayer
games, and is often different for enemies in the single-player campaign.
All three numbers are listed for each weapon, when applicable.
10
Rounds per magazine (SP/MP): 18/18
Rounds, maximum (SP/MP): 100/200
Base damage (SP/MP): 40/35
Armor penetration (SP/MP): 30%/27%
Movement penalty: 5%
IN THE SINGLE-PLAYER GAME, ENEMIES NEVER CARRY PISTOLS.
The AT-14 pistol is a single-shot weapon that does only a moderate
amount of damage. It’s a decent weapon that can be fired quickly and has
very little kick. When aimed properly, pistols are effective against
standard enemies, such as ATC guards and Replica soldiers. The biggest
problem with the pistol is that, in the single-player game, enemies don’t
carry them, making dropped ammunition difficult to find (though pistols
are one of the more common weapons placed throughout levels).
Page 7

WEAPONS AND EQUIPMENT
PRIMAGAMES.COM
You can dual wield pistols. If you pick up a second pistol while already
armed with one, the second pistol is placed in your left hand. When
carrying two pistols, your accuracy is reduced slightly, but your rate of fire
is effectively doubled. Also note that when armed with two pistols in a
single-player game, your max ammunition raises to 200 (you can always
carry up to 200 in a multiplayer match).
For all their seeming negatives, though, pistols’ accuracy and rate of fire
make them one of the best weapons to use against Nightmares, against
whom speed and accuracy are far more important than stopping power.
RPL Submachine Gun
Rounds per magazine (SP/MP): 50/50
Rounds, maximum (SP/MP): 500/500
Base damage (SP/AI/MP): 15/15/13
Armor penetration (SP/AI/MP): 30%/30%/30%
Movement penalty: 5%
Don’t be put off by the submachine gun just because you start with it—it
is a great weapon against standard enemies. Its low damage and armor
penetration values are somewhat misleading. The submachine gun is an
automatic weapon that shoots quickly and is accurate even when you
aren’t aiming precisely. It does have some recoil, but with practice, you
can learn to adjust your aim as you fire, basically making it a damage
hose. It has a good range, but it is less effective at longer ranges than the
assault rifle or, especially, the ASP rifle.
Submachine guns are especially useful early in the single-player game,
when a good number of the enemies you face are carrying them. This
makes ammunition abundant, and makes the submachine gun more
useful than more powerful guns with less common ammunition. Its high
rate of fire means you can use up the ammunition quickly, but because it
is so abundant, and because you can carry a great deal of submachine
gun ammunition, this is only a slight drawback.
VK-12 Combat Shotgun
Rounds per magazine (SP/MP): 12/12
Rounds, maximum (SP/MP): 180/180
Base damage (SP/AI/MP): 30/15/20
Armor penetration (SP/AI/MP): 30%/30%/30%
Movement penalty: 5%
For close-range combat, you can’t do better than the combat shotgun. For
almost every enemy you face, the combat shotgun is an instant kill if
aimed at the head or the torso, and can severely cripple an opponent if
aimed at the legs. The shotgun fires a single round of six pellets, each of
which can do the base damage (meaning that it has a potential base
damage of 180/150/120). And, at close range, you generally hit for
maximum. It’s never a bad idea to keep a shotgun with you.
It’s a somewhat bad idea, though, to use the combat shotgun as your
primary weapon. Because of its inaccuracy, it’s less effective at medium
range, and basically useless at long range.
The shotgun also has significant recoil, requiring a noticeable recovery
time between shots, and it takes a fair amount of time to reload when
emptied. If you don’t kill, or at least maim, an enemy with your first shot,
the shotgun’s drawbacks can become problematic. Luckily, even a
nonfatal shot has a good chance of stunning an opponent, so you should
have time to reload, switch weapons, or get to cover if needed. Finally,
the shotgun doesn’t have great armor penetration. At close range, that
becomes less of an issue because it does so much raw damage it can tear
through armor.
All that said, the shotgun is a great weapon to keep with you at all
times, provided you have ammunition for it. It does have its downsides,
but when fighting in tight (or even relatively tight) quarters, it’s the best
weapon you can ask for.
G2A2 Assault Rifle
Rounds per magazine (SP/MP): 45/45
Rounds, maximum (SP/MP): 450/450
Base damage (SP/AI/MP): 22/20/20
Armor penetration (SP/AI/MP): 40%/40%/40%
Movement penalty: 15%
Along with the shotgun, the G2A2 assault rifle should be a constant part
of your arsenal. It’s a fully automatic weapon. Though it’s somewhat
inaccurate when used on the run, it’s powerful enough to take down
standard enemies quickly when aimed, and its high rate of fire makes it a
great choice for laying suppression fire while moving to safety.
In the single-player game, it’s uncommon in the beginning, making the
submachine gun a better choice for medium- to long-range combat.
When the assault rifle becomes more common, however, it should be
your default weapon for all but close-range, and very difficult, combat
situations. It’s slightly less accurate than the submachine gun when
moving, but its recoil is about the same. As with the submachine gun, you
can learn to adjust as you fire this automatic weapon to compensate for
the recoil. And, more importantly, it does more damage and has a higher
armor penetration rate.
The assault rifle is slightly heavier, and it reduces your movement
slightly more when it is the active weapon. It’s not a heavy weapon,
though, and the speed reduction isn’t a hindrance.
After the early single-player missions, ammunition for the assault rifle
becomes plentiful, which is good, because you’ll go through it quickly.
You can carry a good amount of ammunition, though, so you’ll rarely find
yourself lacking. If you do, the submachine gun makes a good alternative.
A SHOTGUN ROUND IS MADE UP OF SIX INDIVIDUAL PROJECTILES, EACH OF WHICH
CAN DO THE BASE DAMAGE.
11
Page 8

PRIMA OFFICIAL GAME GUIDE20PRIMAGAMES.COM
WHEN ASSASSINS ARE NEAR, SHOOT THE FLOOR AND WALLS TO KICK UP DUST. DUST
CLOUDS MAKE THEM EASIER TO SPOT WHEN THEY ARE CLOAKED.
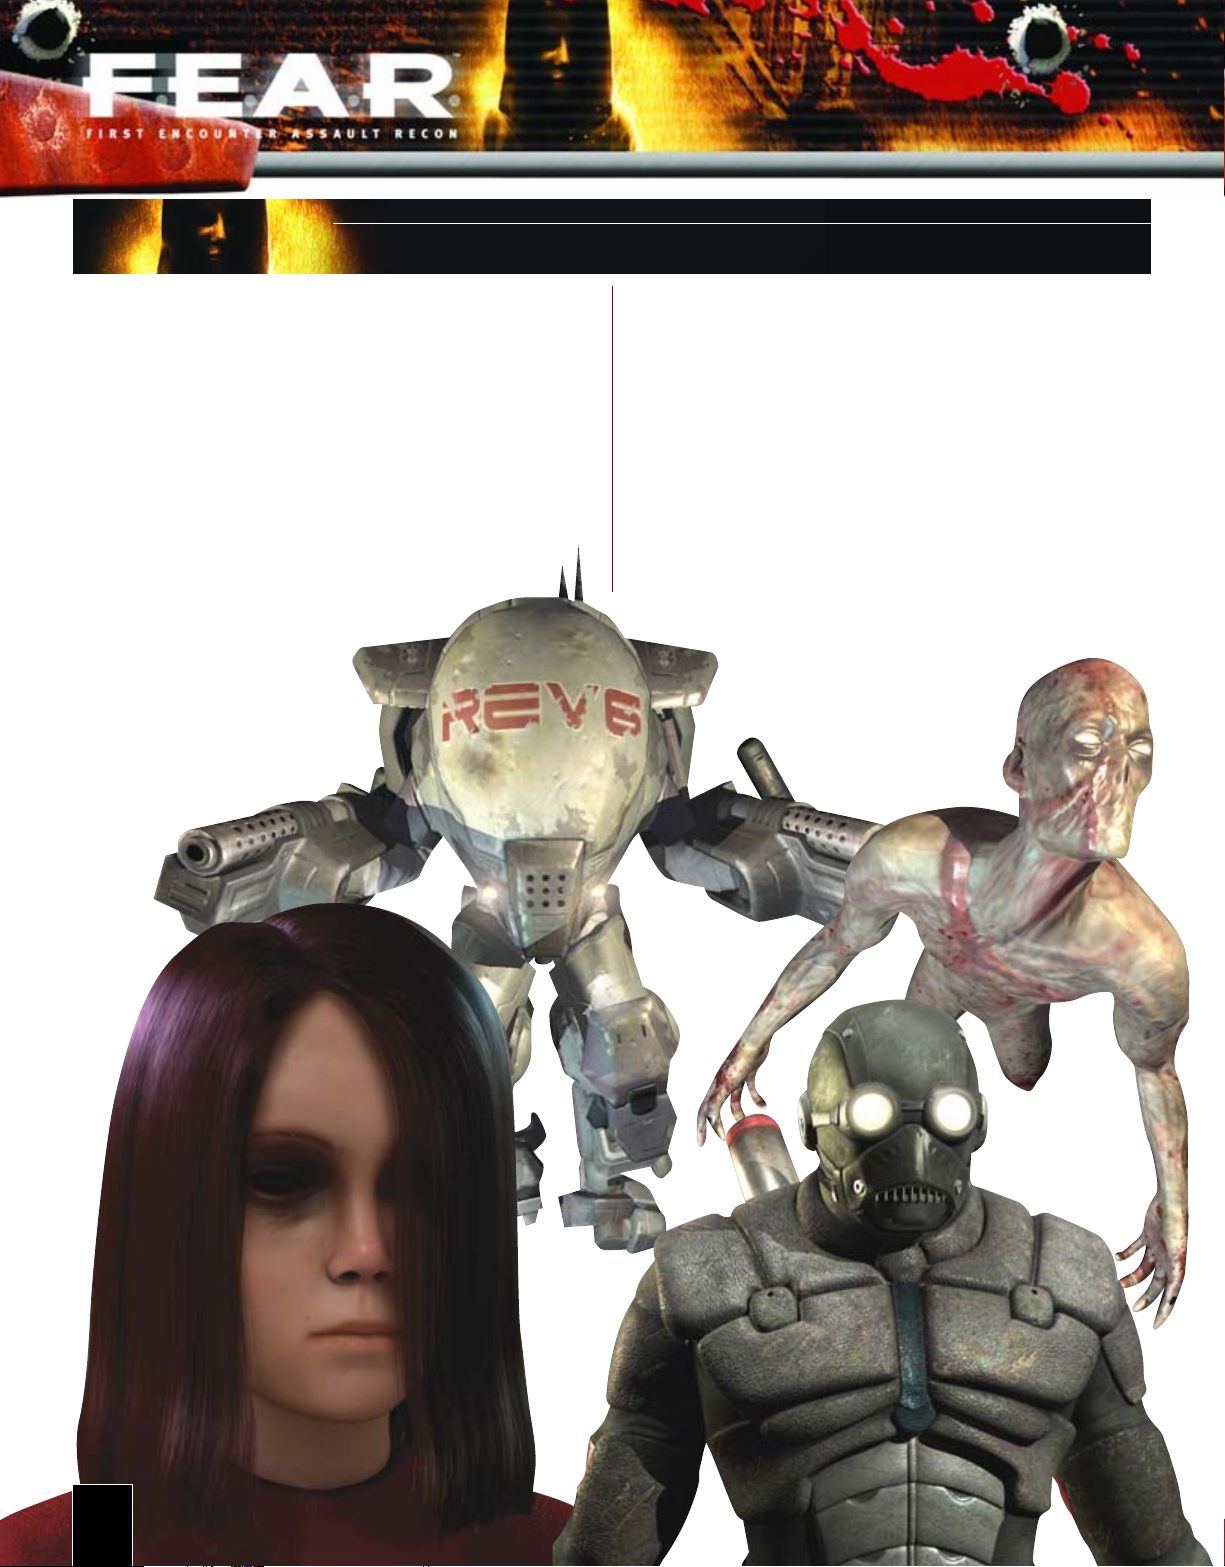
Heavy Armor
REV6 POWER ARMOR
Health: 800
Armor: 400
Primary weapons: 10mm HV
Penetrator
The Heavy Armor is a slow-moving,
lumbering enemy wearing a heavy
suit of metal armor. They have a great
deal of health and armor, making
them very difficult to kill. They
typically carry HV Penetrators, but
occasionally they have better weapons,
including Type-7 particle weapons and
rocket launchers.
Though Heavy Armors are tough, they
aren’t as intimidating as they seem.
Because they are so slow, they are easy
to trap with proximity mines and
remote bombs, and they have a weak spot on their faceplate that allows
you to get headshot damage. Heavy Armors have large metal plates on
their shoulders that they use to cover their face if given a chance, so use
SlowMo to get in as many shots as possible before they block you. Highend weapons can take down a Heavy Armor quickly, but the shotgun at
close range is also very effective.
They typically come with one or two soldier escorts. The soldiers who
usually come with a Heavy Armor will use him for cover. Soften up the
Heavy Armor and take out his escorts with a grenade, or take out any
soldiers around him first while avoiding his shots. Then deal with the
heavy by himself once you can afford to get in close. If you focus on the
heavy without dealing with his allies, they will tear you up. Better to face
one powerful gun than to face four guns.
Health: 1,000
Armor: 1,500
Primary weapons: Missile
launcher (unique), laser
machine gun (unique)
The REV6 Power Armor is the toughest opponent you face. A hulking
mechanized armor suit equipped with two powerful missile launchers
that can fire up to six rockets at once, the Power Armor is surprisingly
agile and will incessantly hunt you down once it’s spotted you.
Standard weapons aren’t much use against Power Armors, so use any
better weapon in your arsenal. Rocket launchers are your best bet, and
repeating cannons are also very effective. If you face a Power Armor in an
open space, use SlowMo and circle it, emptying your best weapon into its
hull. Keep moving to avoid its rockets, and then get to cover to let your
SlowMo regenerate once it’s low. If you have them, use proximity mines
and remote bombs to set traps and hurt them as they come after you.
Some Power Armors are equipped with laser weapons instead of missile
launchers. These are less deadly but should still be feared.
POWER ARMOR MISSILE LAUNCHER
Base damage: 30
Armor penetration: 0%
Area damage: 30
Area damage armor penetration: 35%
POWER ARMOR LASER MACHINE GUN
Base damage: 15
Armor penetration: 30%
UAV FLYING DRONE
WHEN FACING A HEAVY ARMOR, THE BEST TACTIC IS TO USE SLOWMO AND RUSH
THEM WITH THE SHOTGUN, THEN HIT THEM WITH SEVERAL HEADSHOTS.
Health: 250
Armor: 0
Primary weapons: Laser (special)
The UAV flying drone is a prototype
defensive weapon developed by the
Armacham Technology Corporation. It’s fairly weak, and its unique laser
gun isn’t too devastating. The drones are quick moving, though, and can
fire quickly. What’s most worrisome, though, is that they tend to attack in
groups of two or three. This can make them more difficult if you don’t
take them out quickly, because the damage adds up. When facing flying
drones, activate SlowMo and hammer on them with an assault rifle. It’s a
basic tactic, but they don’t have armor and can get out of close range
quickly, make the assault rifle the ideal weapon against them.
UAV FLYING DRONE LASER GUN
Base damage: 10
Armor penetration: 30%
Page 9

ENEMIES AND ALLIES
Other Enemies
ATC SECURITY
Health: 100
Armor: 40
Primary weapons: RPL submachine gun, G2A2 assault rifle, VK-12
combat shotgun, N6A3 fragmentation grenade
Armacham Technology Corporation security forces provide in-house
muscle for ATC, but they are easier opponents than Replica soldiers.
Because they aren't genetically engineered for combat, they tend to have
slightly worse aim, as well as fewer hit points and less armor. They also
don’t execute their tactics quite as well, though they do take cover and
try to flank you.
ATC security guards, or “goons” as Betters calls them, carry most
standard weapon types, though occasionally they are equipped with ASP
rifles for sniping or a Penetrator. Fight them as you would Replica soldiers.
materialize out of thin air and sail quickly at you. If they touch you, they
do a small amount of damage and vanish. When you face many
Nightmares, though, the damage adds up quickly and can kill you.
Nightmares are weak and can be destroyed with a single shot from any
weapon. Because they move so quickly, though, it’s best to use
weapons with a fast rate of fire. Pistols are excellent, and
submachine guns are even better. When you see the telltale cloud
of a Nightmare appearing, quickly fire at the point where it’s
materializing to destroy it as it appears.
NIGHTMARE ATTACK
Base damage: 40
Armor penetration: 0%
TURRETS
Health: 500
Armor: 0
Primary weapons: Turret
ATC employs security turrets in its offices and other structures to protect
its assets. Turrets can do a great deal of damage quickly, and lock-on to
targets, relentlessly firing until it’s time to reload. When a turret has
locked-on to you, find cover. Wait until it stops firing, then use SlowMo
and attack.
Type-7 particle weapons are good against turrets. Or hit it with a
remote bomb, which will stick to the turret, allowing you to remotely
detonate it from safety. Alternately, you can run right underneath it,
where it has difficulty targeting you, and blast it with a shotgun. This is
advised only in situations where other options aren’t available, or when
you can get underneath before it can target you, because getting to the
turret requires you to run through its line of fire.
NIGHTMARES
Health: 35
Armor: 0
Primary weapons: Special
You typically encounter Nightmares only in your
visions. Even there, though, they can hurt you.
These are not to be confused with the Nightmares
of characters you may encounter. These Nightmares
are legless floating creatures with glowing eyes that
21
Page 10

PRIMA OFFICIAL GAME GUIDE WRITTEN BY RON DULIN
Prima Games
A Division of Random House, Inc.
3000 Lava Ridge Court, Suite 100
Roseville, CA 95661
1-800-733-3000
www.primagames.com
The Prima Games logo is a registered trademark of Random House,
Inc., registered in the United States and other countries.
Primagames.com is a registered trademark of Random House, Inc.,
registered in the United States.
© 2006 by Prima Games. All rights reserved. No part of this book
may be reproduced or transmitted in any form or by any means,
any information storage or retrieval system without written permission from Prima
Games. Prima Games is a division of Random House, Inc.
Product Manager: Jason Wigle
Senior Project Editor: Brooke N. Hall
Design & Layout: Winter Graphics North
© 2006 Monolith Productions, Inc. All rights reserved. Published by Sierra
Entertainment, Inc. under license from Monolith Productions, Inc. F.E.A.R. is a
trademark of Vivendi Games, Inc. Sierra and the Sierra logo are registered trademarks
or trademarks of Sierra Entertainment, Inc. in the U.S. and/or other countries.
MONOLITH and the MONOLITH Logo
Developed by Day 1 Studios, LLC. Microsoft, Xbox, Xbox 360, Xbox Live, the Xbox
logos, and the Xbox Live logo are either registered trademarks or trademarks of
Microsoft Corporation in the U.S. and/or other countries. All other copyrights and
trademarks are the propertyof their respective owners.
All products and characters mentioned in this book are trademarks of their respective
companies.
Please be advised that the ESRB Ratings icons, “EC,” “E,” “E10+,” “T,” “M,” “AO,” and
“RP” are trademarks owned by the Entertainment Software Association, and may only
be used with their permission and authority. For information regarding whether a
product has been rated by the ESRB, please visit www.esrb.org. For permission to use
the Ratings icons, please contact the ESA at esrblicenseinfo.com.
Important:
Prima Games has made every effort to determine that the information contained in
this book is accurate. However, the publisher makes no warranty, either expressed or
implied, as to the accuracy, effectiveness, or completeness of the material in this
book; nor does the publisher assume liability for damages, either incidental or
consequential, that may result from using the information in this book. The publisher
cannot provide any additional information or support regarding gameplay, hints and
strategies, or problems with hardware or software. Such questions should be directed
to the support numbers provided by the game and/or device manufacturers as set
forth in their documentation. Some game tricks require precise timing and may
require repeated attempts before the desired result is achieved.
ISBN: 0-7615-5454-8
Library of Congress Catalog Card Number: 2006932851
Ron Dulin is the former managing editor of LAPTOP Magazine, and former executive
editor of GameSpot.com. He has been a contributor to almost every PC and video
gaming magazine, including Computer Gaming World, Computer Games Strategy Plus,
GMR, Surge, and Electronic Gaming Monthly. He has also been a roadie for numerous
bands, a private investigator, and a cab driver. He currently resides in New York City,
where he works in post production for film and television.
Ron has written Prima’s official guides for both Empire Earth 2 and Black & White II.
electronic or mechanical, including photocopying, recording, or by
TM
& © Warner Bros. Entertainment, Inc.
CONTENTS
INTRODUCTION. . . . . . . . . . . . . . . . . . . . . . . . . . . . . . . . . . . . . . . . 2
BASIC TRAINING . . . . . . . . . . . . . . . . . . . . . . . . . . . . . . . . . . . . . . . 3
THE HUD . . . . . . . . . . . . . . . . . . . . . . . . . . . . . . . . . . . 3
COMBAT BASICS. . . . . . . . . . . . . . . . . . . . . . . . . . . . . . . 5
WEAPONS AND EQUIPMENT . . . . . . . . . . . . . . . . . . . . . . . . . . . . . 10
GUNS . . . . . . . . . . . . . . . . . . . . . . . . . . . . . . . . . . . . . . 10
GRENADES . . . . . . . . . . . . . . . . . . . . . . . . . . . . . . . . . . 14
EQUIPMENT . . . . . . . . . . . . . . . . . . . . . . . . . . . . . . . . . 15
ENEMIES AND ALLIES. . . . . . . . . . . . . . . . . . . . . . . . . . . . . . . . . . . 17
CHARACTERS . . . . . . . . . . . . . . . . . . . . . . . . . . . . . . . . 17
OPPONENTS . . . . . . . . . . . . . . . . . . . . . . . . . . . . . . . . . 19
WALKTHROUGH . . . . . . . . . . . . . . . . . . . . . . . . . . . . . . . . . . . . . . 22
INTERVAL 1—INCEPTION: POINT OF ORIGIN . . . . . . . . . . . . . . . . . 22
INTERVAL 2—INITIATION: FIRST ENCOUNTER . . . . . . . . . . . . . . . . 26
INTERVAL 3—ESCALATION: INFILTRATION . . . . . . . . . . . . . . . . . . . 33
INTERVAL 3—ESCALATION: HEAVY RESISTANCE. . . . . . . . . . . . . . . 38
INTERVAL 3—ESCALATION: BAD WATER . . . . . . . . . . . . . . . . . . . . 43
INTERVAL 3—ESCALATION: EXEUNT OMNES . . . . . . . . . . . . . . . . . 47
INTERVAL 4—INFILTRATION: LZ IS HOT. . . . . . . . . . . . . . . . . . . . . 52
INTERVAL 4—INFILTRATION: WATCHERS . . . . . . . . . . . . . . . . . . . . 56
INTERVAL 5—EXTRACTION: BISHOP . . . . . . . . . . . . . . . . . . . . . . . 64
INTERVAL 5—EXTRACTION: BLINDSIDE . . . . . . . . . . . . . . . . . . . . . 72
INTERVAL 6—INTERCEPTION: SAYONARA, SUCKER . . . . . . . . . . . . 78
INTERVAL 6—INTERCEPTION: UNAUTHORIZED PERSONNEL . . . . . . 82
INTERVAL 6—INTERCEPTION: AFTERIMAGE . . . . . . . . . . . . . . . . . . 90
INTERVAL 7—REDIRECTION: ALICE WADE . . . . . . . . . . . . . . . . . . . 96
INTERVAL 7—REDIRECTION: FLIGHT . . . . . . . . . . . . . . . . . . . . . . 104
INTERVAL 8—DESOLATION: URBAN DECAY . . . . . . . . . . . . . . . . . 110
INTERVAL 8—DESOLATION: POINT OF ENTRY . . . . . . . . . . . . . . . 115
INTERVAL 9—INCURSION: LAPDOG. . . . . . . . . . . . . . . . . . . . . . . 123
INTERVAL 9—INCURSION: BYPASS . . . . . . . . . . . . . . . . . . . . . . . 128
INTERVAL 10—REVELATION: THE VAULT . . . . . . . . . . . . . . . . . . . 133
INTERVAL 11—RETALIATION: GROUND ZERO . . . . . . . . . . . . . . . 137
BONUS MISSION: HOLIDAY . . . . . . . . . . . . . . . . . . . . . . . . . . . . . 142
INSTANT ACTION MAPS. . . . . . . . . . . . . . . . . . . . . . . . . . . . . . . . 144
MULTIPLAYER . . . . . . . . . . . . . . . . . . . . . . . . . . . . . . . . . . . . . . . 151
1
Page 11

The Prima Games logo is a registered trademark of Random House, Inc., registered in the United States and other countries.
Primagames.com is a registered trademark of Random House, Inc., registered in the United States.
 Loading...