


GANGSTERS-CRIME DOES PAY
HOW DOES THE BANK SURVIVE? • WHO’S IN CHARGE OF THE CITY? • WHERE CAN YOU GET YOUR WEAPONS FROM? IT’S ALL INSIDE!
EVENING
EDITION
CINEMA
PROGRAM
The Edition
GANGSTERS
CRIME DOES PAY...
WANNA BE A GANGSTER IN A CHICAGO
STYLE CITY OF THE 1920’S?
Wanna control an underground organization dealing in
extortion, illegal liquor, prostitution, violence, intimidation,
gambling, gang warfare, bribery of officials, permanent elimination
of individuals and a host of moneymaking activities?
Can you simultaneously maintain a decent and honest
reputation on the surface by supporting good causes, helping the
police and running legitimate businesses? Will you be able to meet
the challenge of balancing these two personas to gain influence and
control over the city?
Gangsters is a highly original game that blends together three
major elements of successful strategy gaming; real-time game
world, interaction man-management and business management.
The aim of this game is to build your gang and business empire
to rule the city. To do this you will have to beat three other gangs
operating in the city, and avoid arrest by the authorities. The
specific win conditions balance a need to gain wealth, honour and
influence.
Gangsters is set in a non-specific Chicago-like city in the 1920s
called ‘New Temperance’. The city, in which most of the in-game
activity takes place, is viewed by an isometric multi-level map
contained in the main window of a Windows 95 style environment.
Thursday, February 14, 1929One CentNo.
MASSACRE
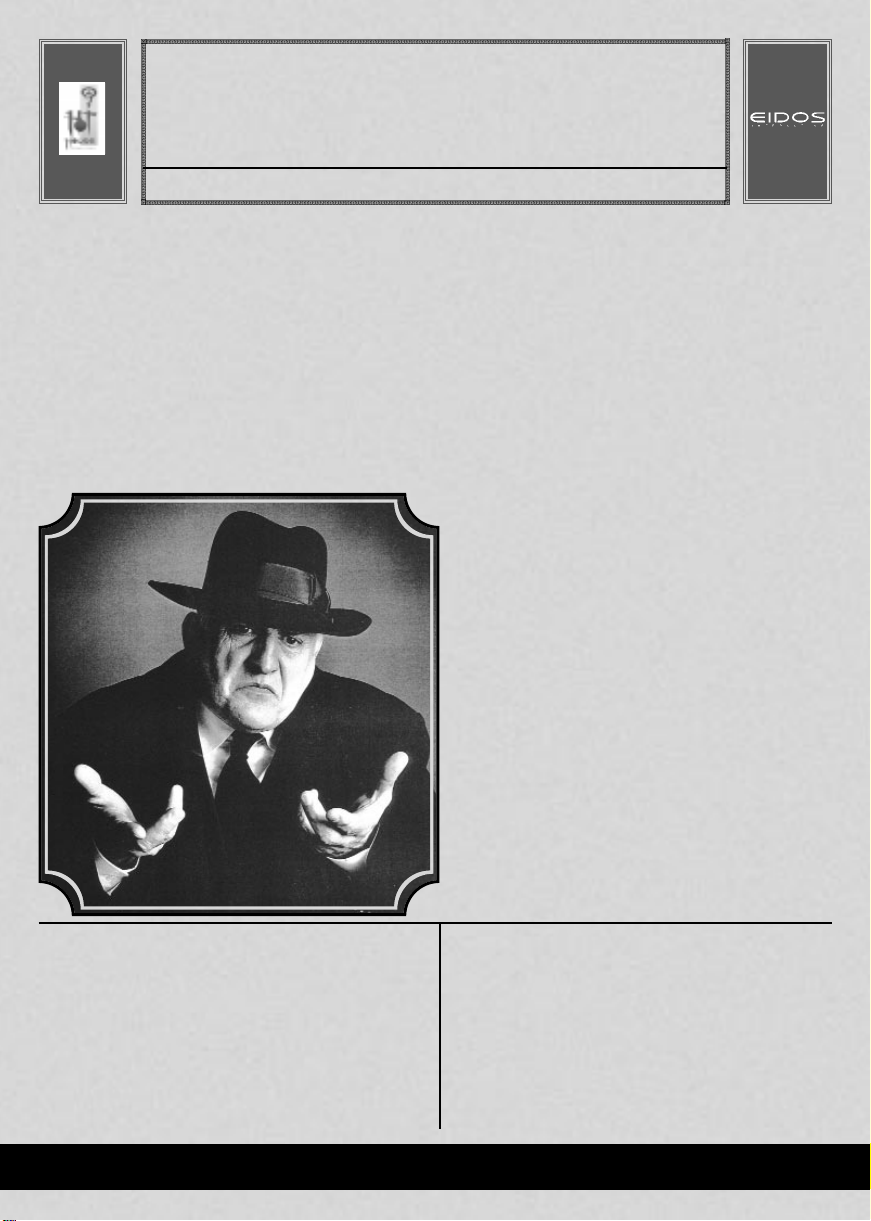
One February evening in North
Chicago, seven well-dressed men
were found riddled with bullets
inside the S.M.C Cartage Co.
garage. They had been lined up
against a wall, with their backs to
their executioners and shot to
death. With the exception of Dr.
Reinhardt H. Schwimmer these
men were mobsters working under
the leadership of gangster and
bootlegger, “Bugs ” Moran. Within
a few seconds, while staring at a
bare brick wall, these seven men
had become a part of Valentine’s
Day history: the St. Valentine’s
Day Massacre.
[Continued back cover]
CORRUPTION?
POLICE
During the height of prohibition
and the never-ending
competition between gangster
rivals Al “Scarface” Capone and
George “Bugs” Moran, bloody
warfare was nothing new to the
authorities of Chicago.
However, investigators on the
scene found the Valentine’s Day
Massacre to be somewhat
puzzling. The victims were
mobsters, with an endless
supply of weapons and well
known capability for brutality.
ORGANIZED CRIME
ORGANIZED CRIME
GANGSTERS PAGE 3
HEALTH WARNING
CONTENTS
INTRODUCTION 5
GAME OVERVIEW
6
INSTALLING GANGSTERS
6
PLAYING GANGSTERS
6
ABOUT THIS MANUAL
6
QUICK START
7
USING HELP
7
CONTROL CONVENTIONS
8
TUTORIALS 9
TUTORIAL 1: THE GANG ORGANIZER
11
TUTORIAL 2: THE FIRST WORKING WEEK
15
TUTORIAL 3: EXPANDING FURTHER
20
TUTORIAL 4: ACTION IN THE WORKING WEEK
24
REFERENCE GUIDE 27
GAME MENUS
28
LOADING GANGSTERS
28
STARTING A NEW GAME
28
THE MAIN MENU
28
NEW GAME MENU
29
CHANGE DETAILS MENU
29
LOAD GAME MENU
30
TUTORIALS SCREEN
30
GAME OPTIONS SCREEN
30
SCENARIO SCREEN
31
SHORT GAME MENU
32
ADVANCED OPTIONS SCREEN
32
THE GANG ORGANIZER 33
LIEUTENANTS SECTION
33
Layout of the Lieutenant’s Section
33
The Lieutenants
34
The Lieutenant’s Team
35
Allocating Hoods, Weapons and Vehicles
36
Giving Orders to your Lieutenants
36
The Lieutenant’s Orders
39
The Lieutenant’s Reports
41
THE ACCOUNTANT SECTION
43
Layout of the Accountant Section
43
The Accountant
43
The Accountant’s Orders
44
Giving the Accountant a Vehicle
45
The Accountant’s Reports
45
THE LAWYER SECTION
46
Layout of the Lawyer Section
46
The Lawyer
46
The Lawyer’s Orders
47
Giving the Lawyer a Vehicle
49
The Lawyer’s Reports
49
DIPLOMACY
50
Viewing the Diplomatic Status
51
Setting the Diplomatic Level
51
Viewing your Gang Details
51
Viewing other Gang Details
51
Using Snitches
52
THE NEWSPAPER
53
GRAPH REPORTS
54
THE CITY MAPS
54
GAME OPTIONS
60
THE CLIPBOARD
62
People
62
Buildings
62
Using the Clipboard with Orders
62
RESOURCES
63
Pool
64
Vehicles
65
Weapons
66
GOODS
67
LAUNCHING THE WORKING WEEK
68
THE WORKING WEEK
68
THE WORKING WEEK SCREENS
68
THE GAME CLOCK
68
THE ICON BARS
69
THE ROOFTOP VIEW
73
THE STREET VIEW
74
MESSAGES
75
ACCELERATED TIME
77
TAGGED WINDOWS
78
STREET ORDERS
80
THE END OF THE GAME
82
WINNING THE GAME
82
LOSING THE GAME
82
SCORE
83
THE HALL OF FAME
83
MULTIPLAYER GAMES
84
APPENDICES 87
APPENDIX 1: PEOPLE
88
APPENDIX 2: GANGSTER SKILLS
92
APPENDIX 3: WEAPONS
94
APPENDIX 4: VEHICLES
95
APPENDIX 5: BUILDINGS AND BUSINESSES
96
APPENDIX 6: SHORTCUT KEYS
97
CREDITS 98
TECHNICAL SUPPORT 100
LIMITED WARRANTY 100
NOTES 101
EPILEPSY WARNING
Please read before using this computer game or allowing your children to use it. Some people
are susceptible to epileptic seizures or loss of consciousness when exposed to certain flashing
lights or light patterns in everyday life. Such people may have a seizure while watching
certain television images or playing certain computer games. This may happen even if the
person has no medical history of epilepsy or has never had any epileptic seizures. If you or
anyone in your family has ever had symptoms related to epilepsy (seizures or loss of
consciousness) when exposed to flashing lights, consult your doctor prior to playing. We
advise that parents should monitor the use of computer games by their children. If you or
your child experience any of the following symptoms: dizziness, blurred vision, eye or muscle
twitches, loss of consciousness, disorientation, any involuntary movement or convulsion,
while playing a video game, IMMEDIATELY discontinue use and consult your doctor.
PRECAUTIONS TO TAKE DURING USE
• Do not stand too close to the screen. Sit a good distance away from the
screen, as far away as the length of the cable allows.
• Preferably play the game on a small screen.
• Avoid playing if you are tired or have not had much sleep.
• Make sure that the room in which you are playing is well lit.
• Rest for at least 10 to 15 minutes per hour while playing a computer game.
PAGE 4 GANGSTERS
BEFORE YOU READ ON YOU BETTER CHECK THIS
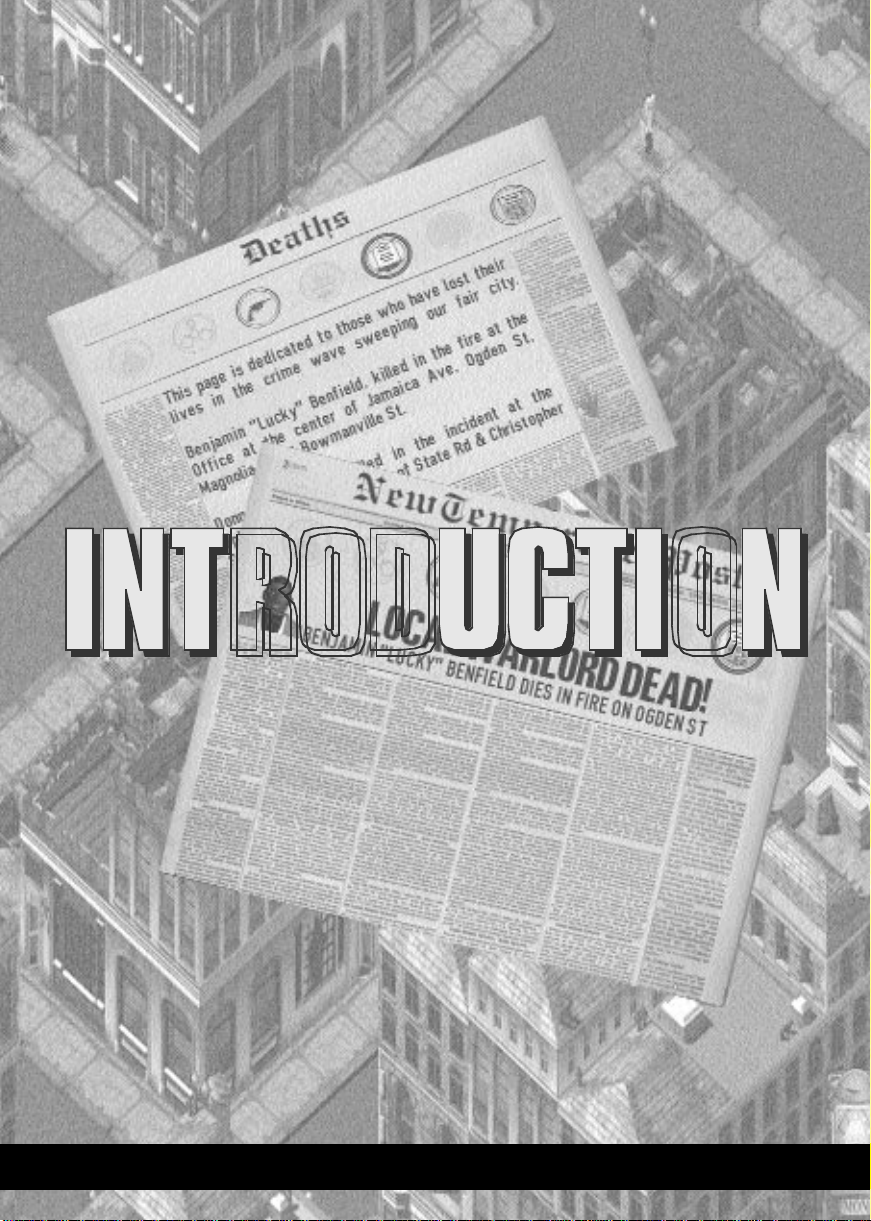
GANGSTERS PAGE 5
INTRODUCTION
W elcome to New Temperance, a city of opportunity at the heart
of America. The right opportunity, for the right kind of person.
For the last 11 years, since the ratification of the 18th
Amendment enforced the ban on the production and sale of
alcohol, New Temperance has been a liquor free city. The
crime rate is the lowest within the state, thanks to effective
policing and the strong, sober, sense of community that has
existed ever since the settlers first halted their covered wagons
and decided to call this place home.
Money is plentiful, and industry strong.
The parks and rivers are clean, and the air is sweet.
Everyone is neighbourly , and childr en still respect their elders.
But things are about to change….
This city has been overlooked by the bootleggers, whilst
Chicago and other cities have been drowned in illegal liquor.
But do not spend too much time congratulating yourself in
finding this gold mine; others have undoubtedly come to the
same conclusion. Even now they are putting down roots in
the city, building the strength to take control of areas of the
city that could so easily be yours.
It’s time to get out there, and show them who’s Boss.
GAME OVERVIEW
In Gangsters, your goal as a new mobster is to become the
city’s crime overlord. You take the role of one of four rival
Gang Leaders. Each one starts off in a different quarter of the
city and has the task of eliminating the competition!
The game has two main sections: the Gang Organizer
and the Working Week.
The Gang Organizer is where you organize your teams,
view city information and give orders to your Gang. The
Working Week is where you see the results of the orders, look
for new targets and take immediate action against any intruders.
INSTALLING GANGSTERS
Insert the Gangsters CD into your CD-ROM drive. If
autorun is enabled, Gangsters will automatically take you
into the Autoplay Screen.
Click on the Install button, then follow the on-
screen instructions as directed.
If the Autoplay feature has been disabled, double click on the
CD-ROM drive icon from My Computer, and select
Setup.Now.Exe Once installed, Gangsters will appear
in the Program Group on the Start Menu.
PLAYING GANGSTERS
To play Gangsters, place the CD into its drive.
Once the Autoplay screen has loaded, click on the Install
Game button.
If Autoplay is disabled, or the computer was turned on with
the CD already in its drive, click on the Start Menu button,
then select the Programs Group and click on Gangsters.
Alternatively , open the Hothouse Cr eations folder, situated in
My Computer \ C \ Program Files, and double click on the
Gangsters icon.
ABOUT THIS MANUAL
This manual is divided into three sections:
TUTORIALS
These have been written for people who are experiencing
their first outing to New Temperance. There are four
tutorials, which guide through important stages of the game:
The Gang Organizer
The Working Week
Expanding further
Action in the Working Week
REFERENCE GUIDE
The reference guide allows you to look up information as you
play the game. This section contains details of all the options
available to the player, and is designed to help you navigate
the screens and the city as quickly as possible.
APPENDICES
Appendices at the back of the manual contain other useful
information.
PAGE 6 GANGSTERS
QUICK START
It is strongly recommended that you start by working
through the tutorials.
TO LOAD A TUTORIAL
Click on Tutorials in the Main Menu.
Click on a tutorial in the Tutorials Screen.
Click on Load Tutorial.
If you want to start a new game immediately, this can be
done from the Main Menu.
TO START A NEW GAME
Click on New Game in the Main Menu.
Click on Start Game.
If you start a new game in the way
described above, you will begin with
the following settings:
1. The game will be a full game.
The winner is the first to eliminate the other Gang
Leaders, become Mayor or Go Straight.
2. Y our name and face will be taken fr om the last stored face.
If you have not played Gangsters before, this face will be
random.
3. All opponents will be set to a random difficulty.
4.
You will start the game with one office and a suitable front.
5. Your team will consist of six hoods.
One will be placed into the front, two into a team and the
remainder placed in the pool.
6. You will possess one car, and three pistols.
7. Your bank balance will be $6000.
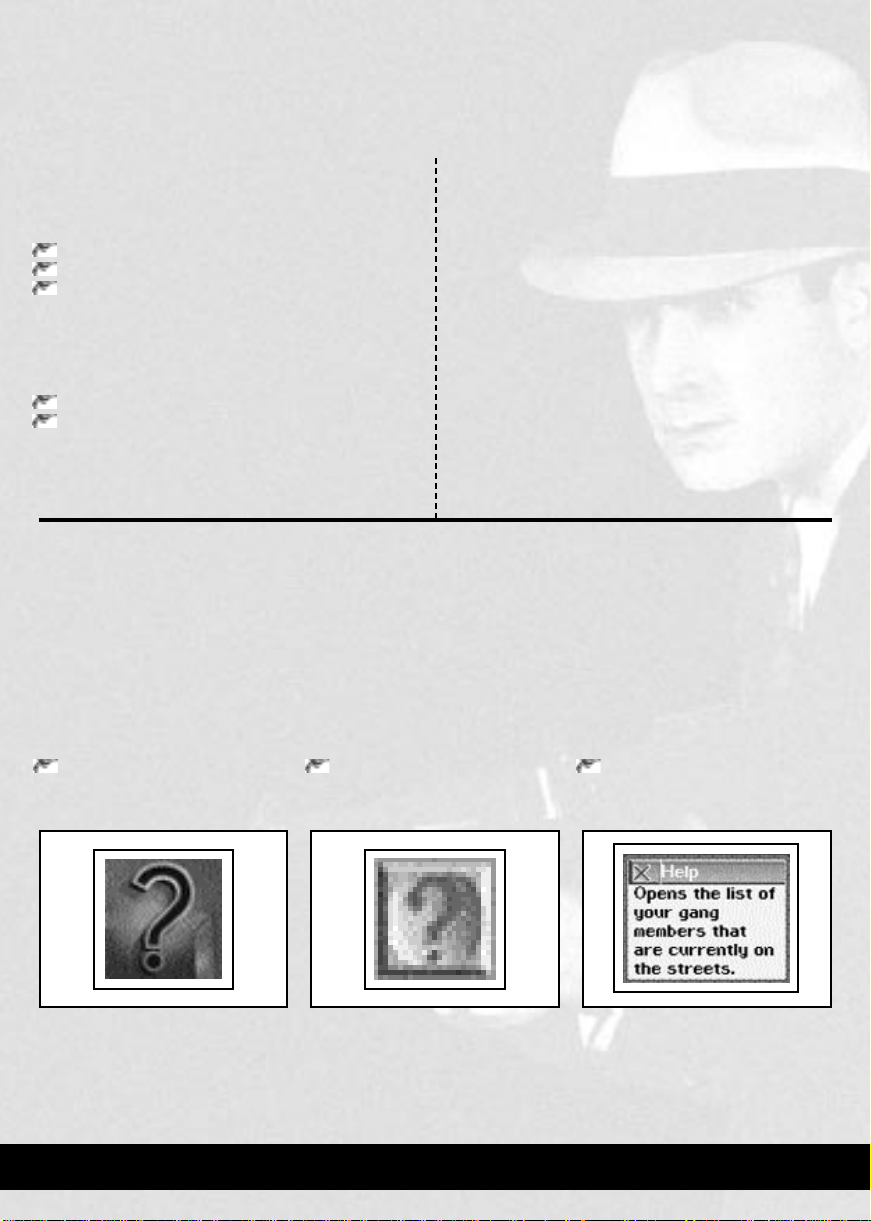
Help is available
throughout
Gangsters. Depending on which screen you are currently viewing, the help button is available in
one of three places:
In the Gang Organizer, the help
button is a question mark, located
in the top right corner.
In the Working Week, the
help button is a question mark,
located on the icon bar.
Clicking on the help button
attaches a question mark to the
mouse cursor.
The next time you click on an object, help for that object will appear. F or quick refer ence, you will find that all items are t ool tipped.
USING HELP
GANGSTERS PAGE 7
CONTROL CONVENTIONS
Throughout this manual, you will find terms used to describe
the mouse actions. These are:
CLICK
Move the mouse cursor over an object and press the Left
Mouse Button (LMB).
RIGHT CLICK
Move the mouse cursor over an object and press the Right
Mouse Button (RMB).
DOUBLE CLICK
Move the mouse cursor over an object, and pressing the LMB
twice in quick succession.
DRAG AND DROP
Certain features of the game allow you to “drag and drop”
objects from one group or area to another.
• DRAG
Place the mouse cursor over the object to be moved, then
click and hold down the LMB. While the LMB is held
down, the object will move as the mouse cursor.
• DROP
To drop an object, release the LMB when the object and
mouse cursor are over the destination.
BOUND
You may be asked to select an area of the City Map, which
may be performed either by “clicking” on individual items, or
by “Bounding” an area. To do this, move the mouse cursor to
the corner of the area to be selected and press the LMB.
Then, with the LMB held down, move the cursor diagonally
to cover the desired area. Release the mouse button to finalise
the selection.
To cancel a selection, repeat the process or click on blocks.
MURDER
HAVE YOU SEEN, HEARD... ANYTHING?
CALL YOUR NEAREST POLICE STATION
PAGE 8 GANGSTERS
GANGSTERS PAGE 9
TUTORIALS
In the tutorials, you will look at getting your criminal empire
started, and look at some of the game’s features that you will
need to use later on.
TUTORIAL ONE: THE GANG ORGANIZER.
An introduction to the Gang Organizer and the first
week’s orders.
TUTORIAL TWO: THE FIRST WORKING WEEK.
Watching your Gang’s progress.
TUTORIAL THREE: EXPANDING FURTHER.
Empire expansion and preparing for conflict.
TUTORIAL FOUR: ACTION IN THE WORKING WEEK.
Keeping an eye open for events, and how to use the Street
Orders.
Each tutorial can be loaded separately, or you can run
through Tutorial 2 by continuing with Tutorial 1. Tutorial 4
can also be played by completing Tutorial 3.
LOADING A TUTORIAL
To load a tutorial, follow the instructions below:
Click on the Tutorials button, from the Main Menu.
Y ou will no w see the Tutorials Screen. The tutorials are titled
“Tutorial 1” through to “Tutorial 4”.
Click on the desired tutorial.
Information about the tutorial will now be displayed in the
window at the bottom
of the screen.
Click on the Load button.
The game will now take a few moments to construct the city ,
depending on the speed of your computer.
TUTORIALS
PAGE 10 GANGSTERS
In this first tutorial, you will look at the Gang Organizer,
and give the first week’s orders to get your empire started.
The Gang Organizer takes the form of a journal, such as
might be owned by any respected gentleman of the 1920s.
When you first see it, it will be on the Newspaper, where you
can see the headline heralding the arrival of crime in New
Temperance.
Before giving any orders, you will perform three quick
routines:
Team check
Territory check
Finance check
These quick checks should be done regularly, since they help
you spot at a glance if there are any
problems concerning your hoods,
the situation in the city and your
financial situation.
To do these checks, you need to
access the Lieutenant’s Section.
Click on
the Lieutenant
Section Tab.
You will now see
the Lieutenant’s
Section of the Gang
Organizer. From
here you can perform
the three checks
mentioned above.
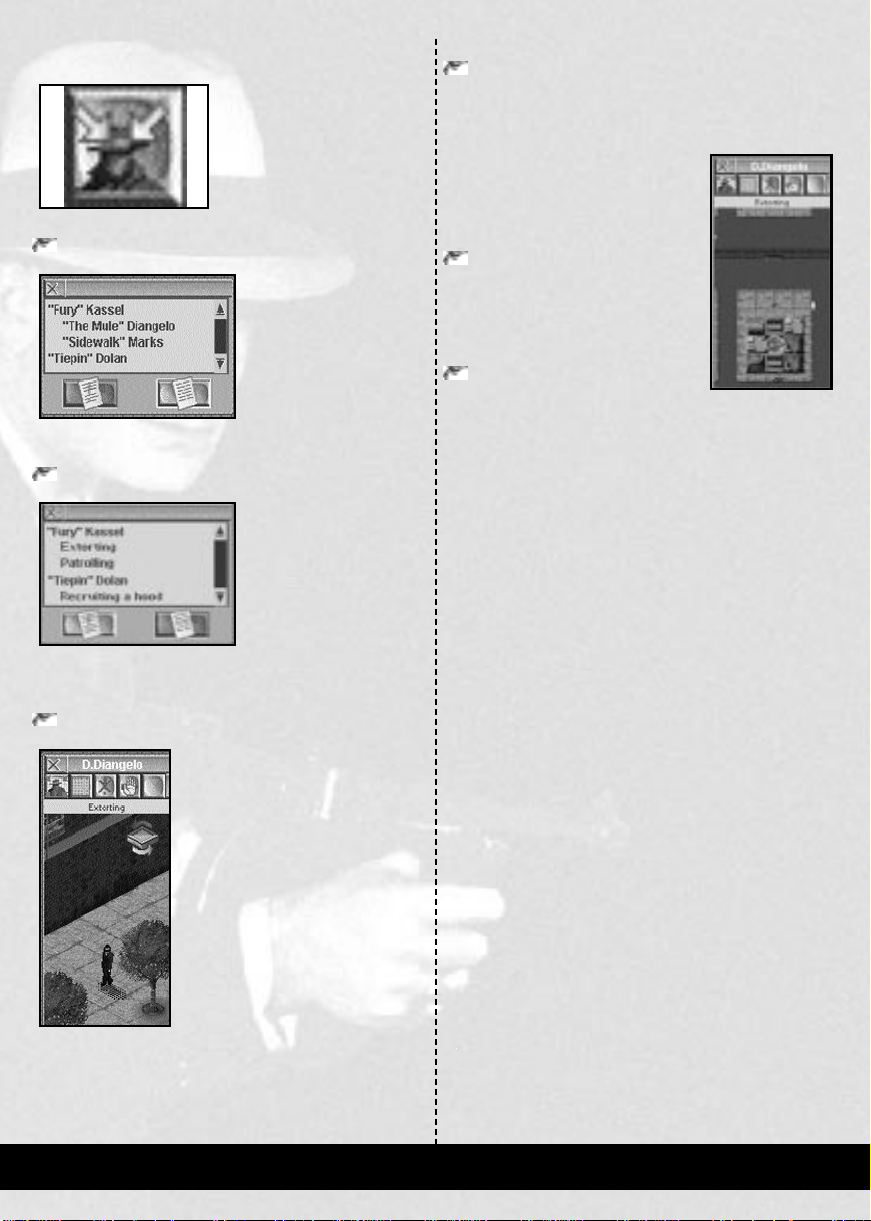
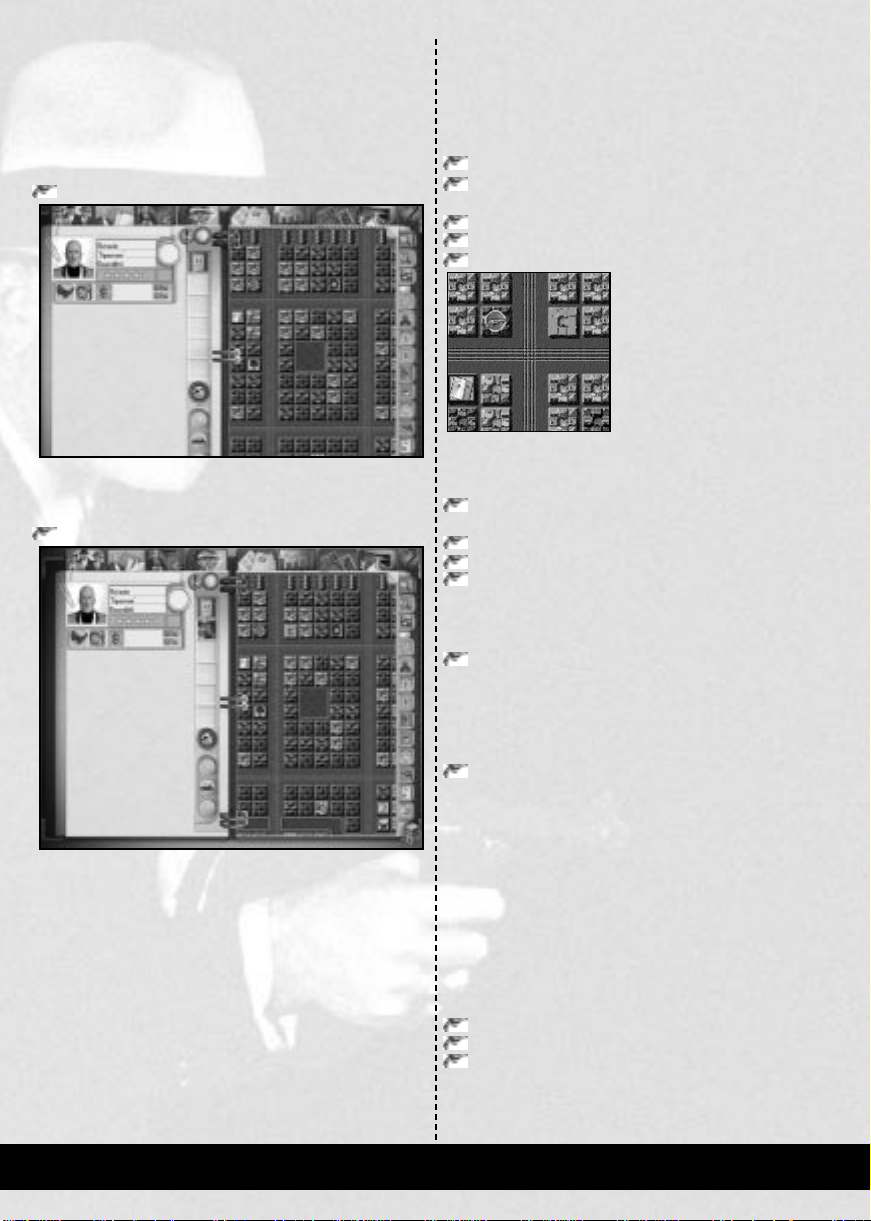
TEAM CHECK
The Team Check takes stock of the people in your Gang. You
will see a character’s face and name at the top left of the page.
This is William “Fury” Kassel, your first Lieutenant. The
team name above Kassel’s own name shows that he is to be in
charge of your first “Protection” racket.
Looking at the indicators
below Kassel’s name, you will
notice the following:
Kassel has two hoods in his
team, (these are Domingo
“The Mule” Diangelo and
Ezekiel “Sidewalk” Marks)
their names will be visible at the bottom of the page.
Kassel has three weapons.
Kassel has one vehicle.
Now you have looked at Kassel, you need to check your other
Lieutenant.
Click on the second
Lieutenant Tab, situated on
the left side of the page.
This is Connall “Tiepin” Dolan.
If you look at the team name, it
simply indicates that he is in control of “Connall’s team”.
Unlike Kassel, Dolan is not in charge of anyone but does
have a weapon.
RENAMING A TEAM
Y ou need to make Dolan r esponsible for r ecruiting, and name
his team accordingly.
Click in the team name box.
Delete the team name currently in place and type in the
word “recruiting”.
Hit Return.
You have now appropriately renamed Dolan’s team. This acts
as an instant reminder of the role for which Dolan has been
made a Lieutenant.
Now that you have performed a team check, you will
perform a Territory Check.
GANGSTERS PAGE 11
TUTORIAL 1:
THE GANG ORGANIZER
SECTION TABS HELP
RESOURCE
DETAILS
PANEL
MAP
BUTTONS
HIT THE STREETSRESOURCES
DETAILS
PANEL
REPORTS
PANEL

TERRITORY CHECK
Checking your territory regularly helps you keep an overview
of where you are situated, where key sites are, and how large
your empire has grown. The first thing you need to do is
switch to the Maps.
Click on the seventh Section Tab; Maps.
You will now be viewing the City Plan map, full screen. This
map shows the city from the highest possible altitude.
Your Headquarters can be seen in the top left of the map,
marked by the pistol icon.
Click the fourth button on the right side of the map,
marked Territory.
A red outline will appear around the block that your
Headquarters is situated on. This red outline shows your
territory, blocks on which you either own or protect a
business.
Hold down the right-mouse-button, and move the mouse.
This scrolls the map. You do not have to move the pointer
to the edge of the map; the map moves around the
pointer, wherever it is positioned.
Scroll the map, then return back to your Headquarters.
You will not have been able to see any of the territories of
your opponents since you do not know the location of any of
their Headquarters, or any businesses they control. This
situation will change as the game progresses.
When you have finished looking around the map, you will
perform a Finance Check.
FINANCE CHECK
The Finance Check allows you to keep track of your income
and expenditure.
Click on the Accountant Section Tab.
The Accountant Section will appear. Even though you do not
have an accountant, you can still view your Finances page. This
page gives details of the money that has come in and gone out
in the last week. Currently, this will show the following:
A legal income from a Removals Company that you own.
A small loss showing for the illegal income. This is due to
the costs of your Headquarters.
The substantial cost of approximately $750 in wages for
your five Gang members. (There is also a hood running
the Removals Company. You will look at the details of
this hood in the second tutorial.)
In the bottom half of the page is the summary of your
finances. This shows tax details, along with your total cash
and assets. As you can see, you have $6000 in cash. Although
you have plenty of cash for now, the negative profit figure
above the tax details shows that you are running at a loss. You
need to start making money, or you will soon go bankrupt.
Now that you know your current personnel, territory and
financial status, you can start planning orders to make gains
in all three areas.
GIVING ORDERS
Before giving any orders, it is essential to decide exactly what
to do. There will usually be more to do than time and
manpower allows. You must prioritise your orders. In this
case, it is essential you increase your income and desirable
that you expand your personnel and territory, while securing
your current area.
To do this, you must give your hoods the following
orders:
Recruit
Extort
Patrol
PAGE 12 GANGSTERS
RECRUITING GANG MEMBERS
The Recruit order will be used to increase the number of
people in your team. At this stage of the game, you will be
looking only to increase the number of hoods in your Gang.
Later in the game it is possible to recruit Accountants and
Lawyers. The task of recruiting will be given to Dolan, the
Lieutenant of the “Recruiting” team.
Click on the Lieutenant’s Section Tab.
Click on the second Lieutenant Tab.
This makes Dolan the selected Lieutenant.
Click on the Orders button.
This changes the Reports Panel to the Orders Panel. The
Orders Panel shows the four order types available to your
Lieutenants:
Business Orders.
Personnel Orders.
Minor Crimes.
Violent Crimes.
Click on the button marked Personnel Orders.
The Right Panel changes, to show the available Personnel Orders.
Click on the Recruit button.
A job card appears, with the order to “recruit” a hood and
asking you to select the required territory or hood. You will see
that a number of blocks on the map are highlighted in blue.
These are all the pool halls and gyms in the city, along with the
Labour Exchange and the Docks. These are all the sites from
which you can recruit hoods.
A set of three buttons at the bottom of the Right Insert
allows you to select the character type you wish to recruit:
Accountant Lawyer Hoods
The default is always to recruit hoods. This is what you
require, so no action further need be taken here.
Click the highlighted block two above your Headquarters.
Also click on the highlighted block across the main road.
These blocks will turn red, to indicate that they have been selected.
Click on the Confirm Order button on the job card.
The Time Indicator, to the right of Dolan’s name, is partially
filled with red. This shows that he thinks the recruit order
will take almost half the week. A miniature version of
this indicator has appeared on Dolan’s Lieutenant Tab, on
the left. Now that you have taken steps to recruit some more
hoods, the next step is to Extort some businesses and star t
the protection racket.
EXTORTING
By using Extortion, you can collect protection money. You
will also increase your Territory , since every block partially or
wholly extorted becomes part of your Territory.
Click on the first Lieutenant Tab, to select Kassel.
You will now have Kassel as your selected Lieutenant.
Click on the Minor Crimes button.
The Right Panel will change to show the minor crimes that
you can perform.
Click on the Extort button.
A new job card will appear
on the left side, below
Kassel’s face and name. This
card shows Kassel’s name,
and the fact that you are
giving an “Extort” order . The
job card also prompts you to select the territory for the order.
Y ou will notice that the majority of the blocks on the map have
changed to a blue color. This color denotes the blocks that are
available for extortion, currently most of the city!
HINT
While you can select anywhere in the city, it is advisable to stay
close to your current territory. The further afield you try to
extort, the greater the chance of a business owner rejecting your
attempts. They might even inform the police about your hood,
which is known as “squealing”.
You are now going to define the area for extortion. This will
be the block that your headquarters is on, plus those to the
North, West and Northwest, forming an area 2 blocks square.
Bound an area around the four blocks.
You will see that the blocks are highlighted in red.
Click on the manpower button, to raise the manpower
level to two.
Click on the Confirm Order button on the job card.
The Time Indicator, to the right of Kassel’s name, is filled
approximately half way around with red. This shows that he
thinks the extortion of the area selected will take two people half
the week. You will also see that a miniature version of this
indicator has appeared on Kassel’s Lieutenant Tab, on the left.
You can now see at a glance which Lieutenants have been given
orders, and which can be given extra tasks. Now that you have
given the order to start the protection racket, the last remaining
order is to instruct a hood to Patrol your current territory.
GANGSTERS PAGE 13
PATROLLING
The Patrol order will secure your territory, by having a hood
constantly walking around the block. As Dolan has already
been given a task, and one of Kassel’s team is still free, you
will give the patrol order to Kassel.
Click on Personnel Orders, in the Orders Panel.
Click on the Patrol button.
Your territory will already be highlighted, and the job card
will state “Territory selected”. This is because the area has
already been allocated to Kassel. (See Tutorial 3 for further
details of allocating Lieutenant’s Area.)
Click on Confirm Order, on the job card.
Having given these orders, you will have covered all the
requirements for the week. You will now take the step that
normally follows the completion of orders; Hitting the
Streets.
HIT THE STREETS!
Hitting the Streets is
the final step to
sending your Gang
members out on their
tasks. It is also the
final step of this
tutorial, for once you
click on this button
you will be starting
Tutorial 2; the First
Working Week.
Click on the
button at the
bottom right,
labelled
Hit the
Streets!
PAGE 14 GANGSTERS
THE FIRST
WORKING WEEK
In this tutorial, you will run through the basic parts of the
Working Week. This will involve looking at what is going on
in the city, and finding your way around the city easily.
The Working Week is the part of the game where your
Gang members go out on their jobs. These errands can be
anything from opening businesses and making donations, to
collecting protection money and killing people who get in
your way . Street Orders are also available for use in the week,
allowing you to divert patrols and other members of your
Gang to intercept intruders or any other people that you
want killed or hurt.
Before you can achieve any of this, you need to be
proficient in the basic control and manipulation of the maps
and windows available in the Working Week.
If you are entering this tutorial from Tutorial 1, please begin
at the steps under the heading “The Start of the Working
Week”. If you have loaded Tutorial 2 from the Tutorials
Screen, You will be viewing the Gang Organizer.
Before Hitting the Streets, you may like to perform the
checks as covered in Tutorial 1:
Team Check
Territory Check
Finance Check
If you need help with these, please refer to Tutorial 1.
You might also like to check
your Lieutenant’s orders.
Click on the This Week’s
Orders button in the
Reports Panel.
You will now see a rolodex appear at the bottom left of the
page. The rolodex gives the names of people who have been
given orders, what their orders are, and any target that may
have been selected. The map will also highlight areas selected
for orders.
To see the other orders that have been given, you need to
cycle through the cards on the rolodex.
Click on the Next and Previous Orders arrows on the
rolodex
Once you are satisfied with your position, the next thing to
do is to Hit the Streets. This is where you will see your hoods
attempt to fulfil the orders they were given in the Gang
Organizer. N ow that you ar e familiar with your situation, you
can now Hit the Streets.
Click on the button at the bottom right, labelled Hit the
Streets!.
After the enemy Gangs have planned their actions, you will
be taken into the city.
THE START OF THE WORKING WEEK
The Street Viewwill appear. Pause the game, so that you can
take a look around at your own leisure.
Click on the first icon in the icon bar, labelled Pause.
The game will stop running, although you will still be able to
perform other actions such as scrolling and locating your
base. Being able to locate your base quickly is essential, as
attacks on your Headquarters need prompt responses from
both you and your hoods.
Click on the button in the icon bar, labelled Center on
Headquarters.
If you have scrolled away from your Headquarters, you will
be taken back immediately . If you have not mo ved the scr een,
there will be no visible changes.
GANGSTERS PAGE 15
TUTORIAL 2:
VIEWING BUILDING DETAILS
The block that is directly in the center of your view is the one
where your Headquarters are located. Your Removals
Company is also on this block.
Double click on the center location of the block.
This will open a Building Details Window, displaying your
Office. You will notice that your face and name are displayed.
You will also see how much money you have, along with
other details. When you have finished looking at the details
of your office, look at the Removals Company.
Close the Office window, by clicking on the X at the top
left of the window.
Click on the building at the bottom of the block.
This is part of the Removals Company that occupies the
whole side of the block. You will see a small box stating that
the business is a Removals Company.
Click on the box containing the words “Removals
Company”.
The Building Details Window for the Removals Company
shows that this business belongs to you and is the “Front ” for
your office: All people who wish to enter or leave your office
must do so through here. The window shows that the site is
being run by Lech “Artful” Marivich, who is one of your
hoods. You are also shown how much money the site has
made, how much the site is worth, and what its market
conditions are.
Close the window, by clicking on the X at the top left of
the window.
Different buildings give different levels of information, based
on how involved with them you are; your own buildings give
full detail, those you have no involvement with show scant
details.
Open and Close different Building Details Windows
around the area.
During the week, this is a method of spotting potential
extortion or robbery targets. The clothes of the person
running a business are reflective of their income.
Open a Building Details Window on the Small Bank.
This is situated one block to the East, just across the main
road from your Headquarters. Notice that the manager of the
bank is wearing a suit. This, with the fact that the bank is a
fairly large building, means that it should produce a lucrative
income for either protection or robbery. Checking potential
targets is a process that you should perform whenever
possible. Some targets, such as banks, can have a police
guard, so it is vital that you know the situation before you
send your hoods there.
Having looked around the places in the immediate area, you
can now look at moving around the city in greater steps. This
will be performed using scrolling and the different map
levels. Becoming effective at moving around the city is a vital
part of Gangsters. Fleeting sights of people can save your
hoods, your businesses and even your own life.
SCROLLING
To scroll the map
Click and hold the RMB.
Move the mouse in the direction required.
If you wish to locate your Headquarters again
Click on the button in the icon bar, labelled Center on
Headquarters.
Try scrolling around the map over reasonable distances, then
finding your way back again, using both scrolling and the
Center on Headquarters button. You can also try scr olling to
and from other notable landmarks, such as bridges, parks or
prominent buildings.
The more confident you become at navigating distances
and finding people and places just by the “feel” of the city,
the more effective you will be at finding your own people and
places. This will help enormously when you are in combat, or
have enemy hoods intruding on your territory.
Once you are happy with scrolling around this level, you
can begin moving between the different map levels.
PAGE 16 GANGSTERS
CHANGING MAP LEVELS
In the week, you are able to zoom in and out to any map level
you wish. This helps with the navigation of greater distances
than can be comfortably achieved within the Street View, and
can also help with monitoring your hoods.
Changing maps is achieved by
using the three zoom buttons
in the icon bar. These three
buttons all have the picture of
a magnifying glass on them, and have a single letter to denote
the level to which the button will take you:
L (Low magnification): The City Plan
M (Medium magnification): The Rooftop View
H (High magnification): The Street View
The button for the level you are currently on is never
displayed, to avoid accidental selection.
Click on the City Plan button.
The view will change to show the City Plan. If you have
already run through Tutorial 1, you will notice that this map
is identical to the one that is in the Gang Organizer.
A small frame will briefly flash on the map. This signifies
the area you were viewing in the previous map level.
You are going to use this map for a quick move of
viewpoint, from one side of the city to the other. This
becomes very useful for performing quick checks on vital
points within the city.
Scroll the map, until you find the bridge furthest to the
right of the city.
Click on the button for the Street View.
Click on the bridge.
The view will change back to the Street View, with the bridge
displayed. Try scrolling around the map, and zooming from
one level to another; the aim of this exercise is for you to
become proficient at moving around the city. Now that you
are familiar with scrolling and zooming as an aid to quick
navigation, you are going to take a look at the city itself.
Before doing this, make sure that you have done the
following:
Close any Building Details Windows that you have open.
Change the map to the Rooftop View.
Center the map on your Headquarters.
These actions will result in you seeing a view similar to the
one shown in the picture above. You are in the Rooftop View.
This allows us to view people and buildings and covers a
larger area than the Street View. Now that you are in the
correct place, you can take a look at what is happening. T o do
this, you need to start time passing again.
Click on the Pause button.
The cars and people in the city will start moving. People are
shown as colored dots. Some of the dots will be dark blue, the
remainder shades of brown. The brown people are normal
citizens, whilst the dark blue dots are police officers.
After a few seconds, you will see some red dots appear out
of your Removals Company. These are your hoods, who
are on their way to perform the orders they were given in the
Gang Organizer.
Now your hoods are out on the streets, you can look at
ways of monitoring their progress.
GANGSTERS PAGE 17
USING TAGGED WINDOWS
To keep an eye on your people,
you can use Tagged Windows.
Tagged Windows are small
display panels that follow your
Gang members, tell you what
orders they are currently
performing and also allow you to
give some directions to the individuals.
Click on the button marked Tagged Characters.
A window will appear,
listing the names of the
people from your Gang that
are currently out on the
streets and showing the
weapons that they are
carrying. The names that are
positioned right to the left
are your lieutenants and those slightly indented are the hoods
working below them.
Click on the button in the window, marked Orders.
This changes the list to
show the activities of the
hoods, which will reflect the
four tasks allocated in the
Gang Organizer. The two
names shown are the names
of your two lieutenants and
the tasks beneath each of the
names are the orders they have been given. Open a window
on one of the hoods performing the extortion order, so that
you can follow him as he carries out his task.
Click on the word Extorting in the window.
A Tagged Window will appear. In the
window, you will see a number of
buttons plus the name of the hood in
the icon bar at the top. The hood will
appear in the main part of the window,
in a small section of the Street View.
The word “Extorting” shows the
current activity of the hood. You can
watch your hood walk in and out of
each building, as he visits each site
nominated for extortion.
The Tagged Windows can display
either the Rooftop or Street View,
whilst the windows themselves can be
used in any of the three available views.
There is no limit to where or when you can use Tagged
Windows during the Working Week.
You will now look at one of the combinations of views
available, so that you can see the difference more than one
perspective makes.
To change the view of the window
Click on the second button in the Tagged Window,
labelled Change View.
This changes the view within the Tagged Window to that of
the Rooftop View. You will see that your hood is surrounded
in the window by a flashing square. This
makes it easier to see exactly where your
hood is in the window, which is
especially useful if he or she is within
either a crowd or a building.
Click on the Change View button
again.
This takes the Tagged Window back to
the Street View. You now need to find
exactly where your hood is in the city.
Click on the first button in the
Tagged Window, labelled Center
View.
The Main Window will now instantly scr oll until the hood is
positioned centrally in the map. There are other options
associated with the Tagged Windows, but the two covered
above are the most important for finding and orientating any
of your hoods. You will find that different situations demand
different window combinations. Using the Tagged Window
in Street View and the Main Window in the Rooftop View is
probably best for monitoring, whilst the other way around is
more useful for combat.
PAGE 18 GANGSTERS
THE CLOCK
Now you are familiar with moving around the map and
monitoring your hoods, you can take a look at the uses of the
Clock, situated at the bottom right of the Main Window.
The Clock runs from
Monday through Friday,
when the week will end.
The clock can also be used
to accelerate time.
Click on the right
shoulder of the clock.
The needle at the top of the
clock will move a fraction
to the right, and the speed
of both the clock hand and
the activity on screen will
increase noticeably.
Click on the left shoulder of the clock.
The needle and the on-screen activity will slow down again.
The right and left shoulders of the clock are used to
accelerate and decelerate time respectively. You can also use
the less than and greater than keys, < and >. For now, you can
happily accelerate the week to its conclusion.
Click four times on the right shoulder of the clock.
The needle will be positioned far to the right of the dial at the
top, and the hands of the clock will have disappeared. The
game is now running at its fastest possible speed. Leave the
game running at this speed, until the week has concluded.
This is the end of the second tutorial.
Click on the OK button in this window to take you out
of this tutorial, and back to the Tutorials Screen.
You should now be comfortable with moving around the
different map levels, monitoring the position and progress of
your hoods, and able to manipulate the basic features of the
Working Week. When you have reached a high level of
confidence in the operation of the Working Week, you will be
able to control your Gang members more effectively, and
thereby incur fewer lost hoods and activities.
The next tutorials will look at additional features of both the
Gang Organizer and the Working Week. It is advisable that
you become fluent with the basics of the Working Week
before attempting the more advanced commands and
controls.
To proceed with the next tutorial, you need to load Tutorial
3 from the Scenarios Screen.
GANGSTERS PAGE 19
TUTORIAL 3:
EXPANDING FURTHER
This tutorial expands on the progress you made following
Tutorials 1 and 2. As your Gang expands, things will
inevitably start to go wrong. You may find that you have
fewer hoods than you would like, Gang members will
become unhappy and business owners will start to refuse to
pay protection. As a Gang Leader, it is your task to ensure
that these situations are dealt with promptly.
In this tutorial, you will learn the following:
Completing the recruitment order
Keeping your Gang members happy
Dealing with unruly business owners
You will also learn three new orders:
Bomb
Collect Protection
Go to
Although not all subjects will be covered by the end of this
tutorial, you should be comfortable with the Gang Organizer.
Once the tutorial has loaded, you will find yourself in the
Gang Organizer. The first thing you should do is to appraise
your situation. To do this, perform the three checks as
mentioned in the first tutorial:
Team Check
Territory Check
Finance Check
If you need help with these,
please refer to Tutorial 1.
You might also like to
check the orders your
Lieutenants have already
been given; those that were covered in the first
tutorial. If you need help with viewing “This
Week’s Orders”, please refer to Tutorial 2.
When you are happy with your position, you
need to hire some hoods.
RECRUITING
You should already be familiar with issuing the “Recruit”
order. The “Recruit” report is produced as the result of a
successful “Recruit” order that was given in the previous
Working Week, and is covered in Tutorial 1. When the week
has concluded, all the people available for recruitment can be
seen. These are the hoods, accountants or lawyers that were
visited and spoken to by your Gang members during the
previous Working Week. To view or recruit the people you
must access the “Recruit” report. This is located in the Reports
section of the Lieutenant Section. If you are not in this screen
Click on the Lieutenant Section Tab.
Click on the Reports button.
Click on the Recruit People button.
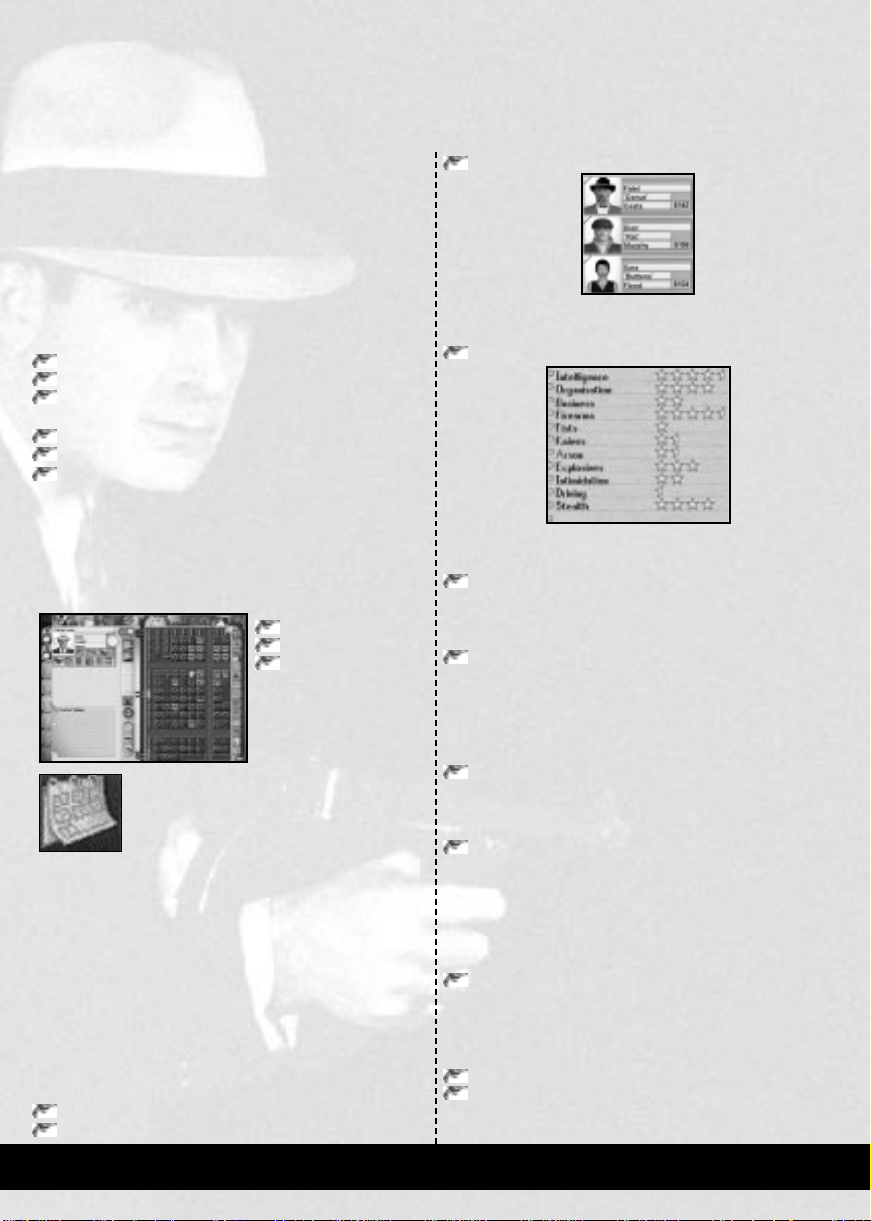
The recruit report displays all the hoods available for hire.
Each shows their photograph, their name and wage demand.
Click on the face of Fidel “Donut” Costa.
Costa’s details appear at the bottom of the page. Costa has a
very high firearms, stealth, organisation and intelligence rating.
Click on the button marked Recruit as New Lieutenant.
A window appears, stating that Costa will require an extra $50
a week to be a Lieutenant and asking you to confirm the action.
Click Yes.
Costa becomes a new Lieutenant and can be accessed from
the third Lieutenant tab. All new Lieutenants become
immediately selected, so you will now see Costa displayed at
the top left of the page.
Click on the face of the next hood, Dion “Rat” Murphy.
Murphy, like Costa, has high firearms and stealth ratings, but
is not so good in other areas.
Click on the button next to Murphy’s attributes list,
labelled Recruit to Team.
When you have done this, rename Costa’s team “Security”.
and give Fidel the two Tommy Guns that are in your
weapons pool. Please refer to Tutorial 1 if you need help with
this actions.
Click on the face of the last hood; Sara “Buttons” Flood.
Flood has high ratings across most of the range of skills, but
is especially good with explosives. She will make an excellent
Lieutenant for a team involved with bombing activities.
Promote Flood to the fourth Lieutenant tab.
Rename Flood’s team “Bombers”.
You have now recruited three additional people. You will be
giving them orders shortly.
PAGE 20 GANGSTERS
DEALING WITH UNHAPPY
GANG MEMBERS
Now that you have expanded your team, you need to look at
dealing with an unhappy Gang member.
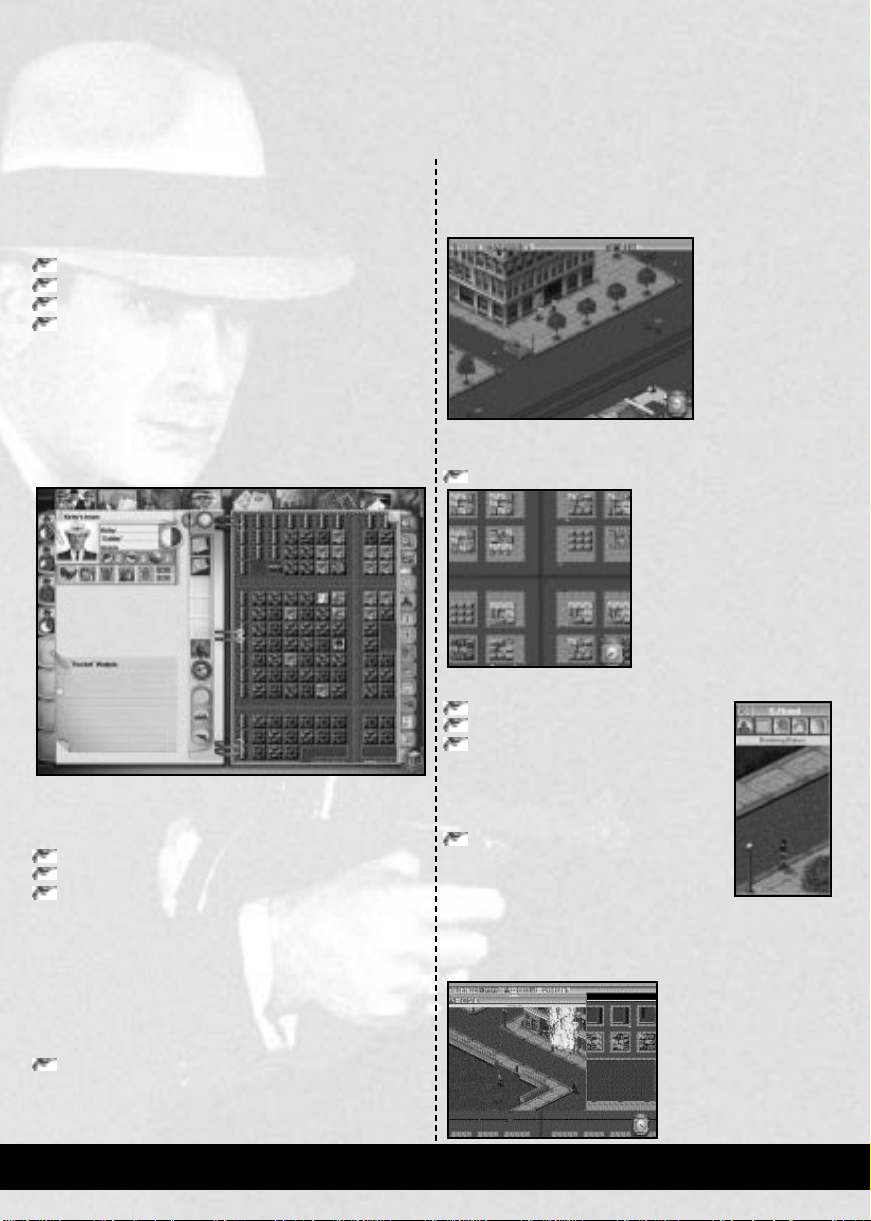
Click on the first Lieutenant tab, to select Kirby “Gabby”
Green.
Green’s hood, Uladislas “Rocket” Wojtyla, is not happy.
There are several possible causes of his unhappiness; having
been attacked, demoted or feeling underpaid.
Whatever the reason, his name is now displayed in red. If
his name remains red too long, he may leave you to work for
a rival Gang.
Click on Uladislas’ name.
This displays his face and name just below those of Kirby
“Gabby” Green. You will see that Uladislas’ pay demand is
$40 higher than the amount he is actually being paid.
Click on the Hoods Pay button.
The money roll appears, showing
the amount Uladislas is being paid
each week.
Click on the Increase Pay
arrow, situated on the money
roll, until the amount reaches
the same as his pay demand.
This is the amount that Uladislas wants to be paid each week.
Hoods are always mercenary, and only increases in money
will keep them happy.
Click on the Hoods Pay button again.
This confirms Uladislas’ wage increase, and r educes any threat
of his leaving the Gang. As soon as the money clip is closed,
Uladislas’ name will turn black again.
USING THE “GO TO” ORDER
Now that your team members are all content, you must check
out something that you may have noticed in your Territory
Check; the border of the green Gang meets the border of the
orange Gang.
First, access the Maps.
Click on the seventh top tab, labelled Maps.
You will now see the City Plan. You are going to perform
another Territory Check, but this time you will need to look
more carefully at what is happening in the city.
Click on the Territory button.
Scroll towards the bottom of the map.
You know the territories of each of the rival Gang Leaders.
You can clearly see that there are points where the border of
the Green Gangmeets that of the Orange Gang. This could
prove to be an area of extreme violence in the weeks to come,
so you will need to use a Go to order to secure this region.
Near to the conflict area between the Gr een and Orange Gangs,
there is a key strategic point that could be worth guarding.
This is the bridge crossing just to the South
of the Public Baths. Strategic points such
as these are good places to send hoods. A
patrol order could be used to guard this
point, but it is better to send hoods to the
bridge to stay there and watch for enemy
hoods attempting to cross into your territory.
Click on the Lieutenant Tab for the third team, lead by
Fidel “Donut” Costa.
Click on the Orders button.
Click on the Personnel Orders button.
Click on the button labelled Go to.
The map is highlighted blue throughout. This shows that
you can select to go anywhere, although this instruction does
not guarantee the safety of any area for your hoods.
Click on the bridge.
The map zooms in to the Rooftop View.
Some orders require you to make a further
definition of a target, which can only be
done using the clipboard or this map level.
Click on the pavement area half way down the bridge, to
the right of the main road.
The job card will fill in the name of the road.
Click once on the manpower button, to raise it to 2.
Click on the Confirm Order button.
GANGSTERS PAGE 21
DEALING WITH UNRULY
BUSINESS OWNERS
Now that you have taken steps to prevent any violence
between the Green and the Orange Gang, you should look at
dealing with unruly business owners.
Click on the Lawyer Section tab.
In this tutorial set-up, you have already recruited a Lawyer.
Please refer to Tutorial 1 if you need information regarding
the recruiting of people.
Click on the report labelled Squealers.
You will see that a block is highlighted on the map and one
name also appears on the clipboard; Eno Colburn. Eno will also
appear in the squealer category of business owners in the
clipboard, should you not have a Lawyer.
Eno Colburn is a business owner who has refused to pay
protection money. This must be dealt with promptly, before
other business owners realise that refusal is an option.
There are a number of choices for dealing with people
who refuse to pay protection money. Most people can simply
be intimidated or assaulted; this often helps change their
mind. For some others, more extreme measures are needed.
Eno is one of the latter. Not only did he refuse to pay
protection, but he also told the police about your actions.
This is called squealing and is an activity you cannot afford
to ignore, since the police will now be hunting the hood who
performed the extortion.
You are therefore going to bomb Eno’s store. This is the
convenience store two blocks to the right of your
Headquarters.
Click on the Lieutenant’s Section Tab.
Click on the Lieutenant Tab for Sara Flood; the
“Bombers” team.
Click on the button for Orders.
Click on the button for Violent Crimes.
Click on the Bomb button.
Small areas of the map should now be colored blue. These are
the areas that are valid targets for bombing, and currently
consist of buildings that fall into the following categories:
Those occupied by, or belong to, people who have
squealed on you.
The City Hall and the Courthouse.
The Police Department and the F.B.I. Headquarters.
Known enemy owned sites.
Eno belongs to the first group, so the block he is on is
highlighted.
Click on the highlighted block two to the right of your
Headquarters.
This is where Eno is. Since he is the only valid target from the
above list to live on the block, his business is automatically
selected and filled in on the job card.
Confirm the order.
This will send Sara on her way to bomb Eno’s business.
COLLECTING
PROTECTION MONEY
Before sending out people to collect the protection money,
you will first of all give Kirby “Gabby” G r een, the Lieutenant
responsible for collecting protection, an area to cover. This is
not essential, but will allow you to leave certain activities to
your Lieutenants without the need for repeated orders.
Click on the Maps tab.
Click on Territory.
Click on the button below Territory, labelled
Lieutenant’s Area.
PAGE 22 GANGSTERS
A small window will open, in which you will see a Lieutenant
and their name displayed. Since Kirby Green is the
Lieutenant of the first team, it is his face and name that you
will now see.
Bound an area of the map, so that the bound area encloses
the whole of your territory.
The selected area will turn white. Should you have missed
any blocks, you can add them by clicking on the blocks
individually. If you select any blocks twice, they will become
deselected.
Click on the Lieutenant’s Area button again.
The area is now allocated to Kirby. You must now take the
following steps to start collecting the protection money:
Click on the Lieutenant’s Section Tab.
Click on the Orders button.
Click on the button for Business Orders.
Click on the Collect Protection button.
The map will now show all of your area selected, and the job
card will state that the territory has been selected.
Click once on the Manpower button.
This increases the number of hoods sent on the order to two.
Click on the Repeat Order button.
This button instructs Kirby to issue orders to collect
protection money each week, until told otherwise.
Click on the Confirm Order button.
Now that the orders have been given, you need to Hit the
Streets so your hoods can get on with their tasks.
Click on the button at the bottom right, labelled
Hit the Streets!
This ends the third tutorial and starts Tutorial 4.
GANGSTERS PAGE 23
TUTORIAL 4:
ACTION IN THE
WORKING WEEK
This tutorial covers:
Monitoring people in the Rooftop View
Moving people using Street Orders
Messages
Combat with Street Orders
By the end of this tutorial, you should know enough to
always be aware of what is going on and how to take action
should the need arise.
If you are entering this tutorial from Tutorial 3, please
begin at the steps under the heading “The Start of the
Working Week”.
When loaded, this tutorial will begin in the Gang Organizer.
Before launching the Working Week, you may like to perform
the checks as covered in Tutorial 1:
Team Check
Territory Check
Finance Check
If you need help with these, please refer to Tutorial 1.
You might also like to check what orders your lieutenants
have been given, using the “This Week’s Orders” report. For
help with this action, please refer to Tutorial 2.
When you are satisfied with your position, the next thing
to do is to Hit the Streets.
To launch the Working Week
Click on the button at the bottom right, labelled Hit the
Streets!
When the computer players have planned their actions, you
will be taken into the city.
THE START OF
THE WORKING WEEK
When the week has
begun, you will find
yourself in the Street
View. The first
thing to do is to
monitor one of your
Gang members. The
person you will use
for this is Sara Flood, the Lieutenant that was given the
“Bomb” order.
Click on the button to switch to the Rooftop View.
When your hoods have emerged, you must find Sara Flood.
Click on the Tagged Characters button.
Click on the Orders button.
Click on the text displaying “Bombing”.
A T agged Windowwill open on Flood. This
will follow her around the city, always
remaining centerd.
Click and hold the left mouse button on
the bottom right corner of the Tagged
Window and drag the mouse down
and right a short distance.
This will expand the window , allowing you to see mor e of the
area around Sara.Using the combination of S tr eet View in the
T agged W indow and Rooftop View in the main, y ou can keep
track of several of your
Gang members.
You can now watch Flood
complete the bombing of
Eno Colburn’s store.
PAGE 24 GANGSTERS
USING THE
“GO TO” STREET ORDER
Your next objective is to give a simple “Go to” order, using
the Street Orders.
The Street Orders can be used at any time during the
week, although typically it will be to move patrols to
intercept intruders, or to instruct hoods to follow a character.
You will now give a Go to order, useful for moving patrols or
guards to places of combat. Use Dion M urphy for this action.
Both he and Fidel Costa will be approaching the bridge to
which they were sent by the time Sara Flood has bombed Eno
Colburn’s store.
Scroll down the map, until you find the bridge where
Dion and Fidel are heading.
Zoom into the Street View, with the zoom frame centerd
on the bridge.
The two hoods will soon arrive at the bridge. When they do
so they will start to look around, keeping watch for enemy
activities and hoods. You are now going to select Murphy to
the major road junction directly South of where he and Costa
are currently standing.
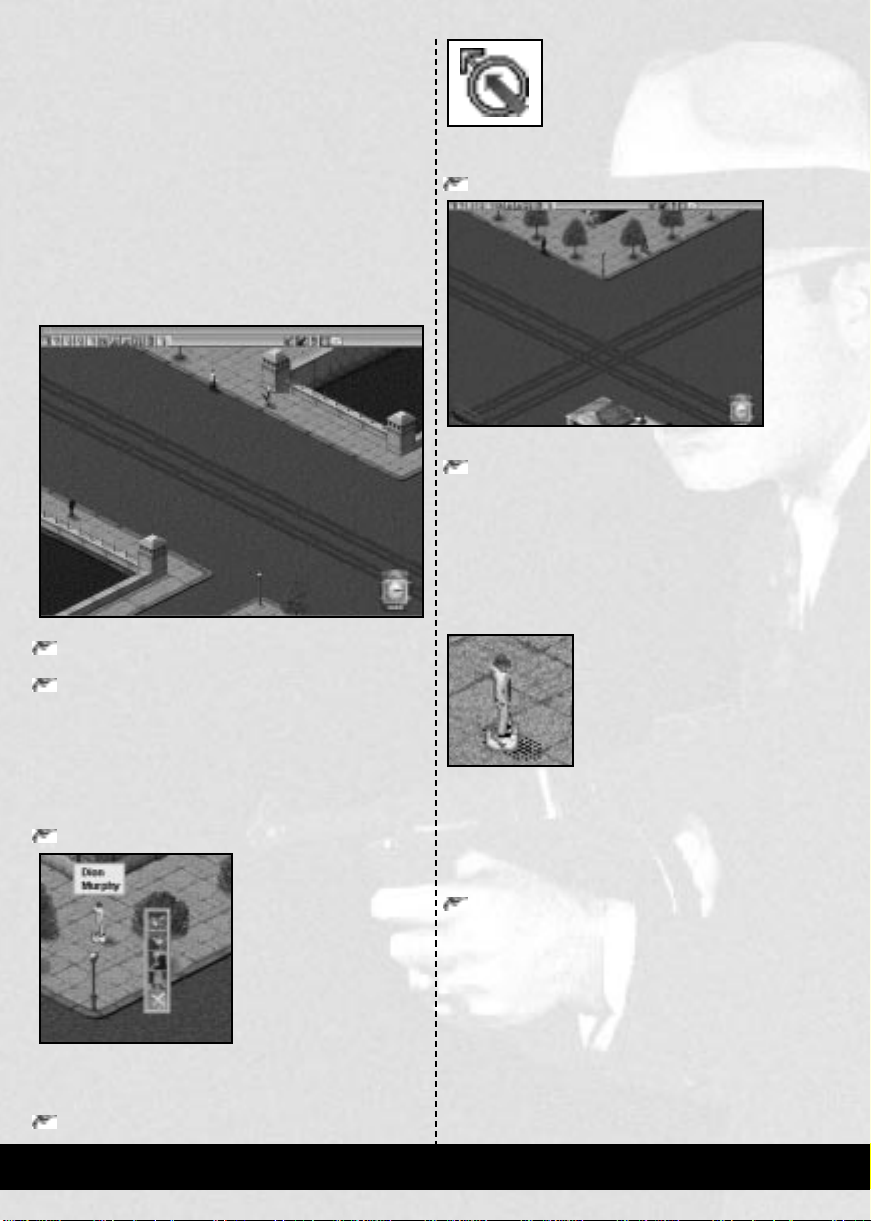
Click on Murphy.
The floor marker around Murphy’s feet will begin to flash
and an order box will appear. The order box contains the
commands that can be given to Murphy.
Click on Go to.
The mouse pointer will now change to show that a “Go to”
order has been selected.
Scroll down to the junction of the two major roads.
The major roads are the widest visible in the city.
Click on the corner to the South-East of the major road
junction.
This is where you are going to send Murphy. This point is
well within the territory of the Green Gang, and will
consequently allow us to keep an eye open for enemy hoods.
You will see that when you have selected the destination the
orders box disappears and the mouse pointer returns to
normal. Murphy will start to walk towards the junction.
When Murphy arrives, he will stand at the corner. A hand
will be visible beneath him. This shows that he is waiting for
your next instruction.
Soon after Murphy arrives, you will hear a ringing noise
and a button will flash at the end the icon bar, This marks
the arrival of a message.
Pause the game.
MESSAGES
You may have noticed buttons flashing and ringing noises.
Each time this happens, a new message has been placed in the
Message Box.
The Message Box is used to store and relay messages
concerning events that are taking place in the city as they
happen. Older events are also stored, but these are pushed
out as the Message Box overflows.
The icon that appeared will have been to report that Dion
has spotted an enemy Gang member.
GANGSTERS PAGE 25
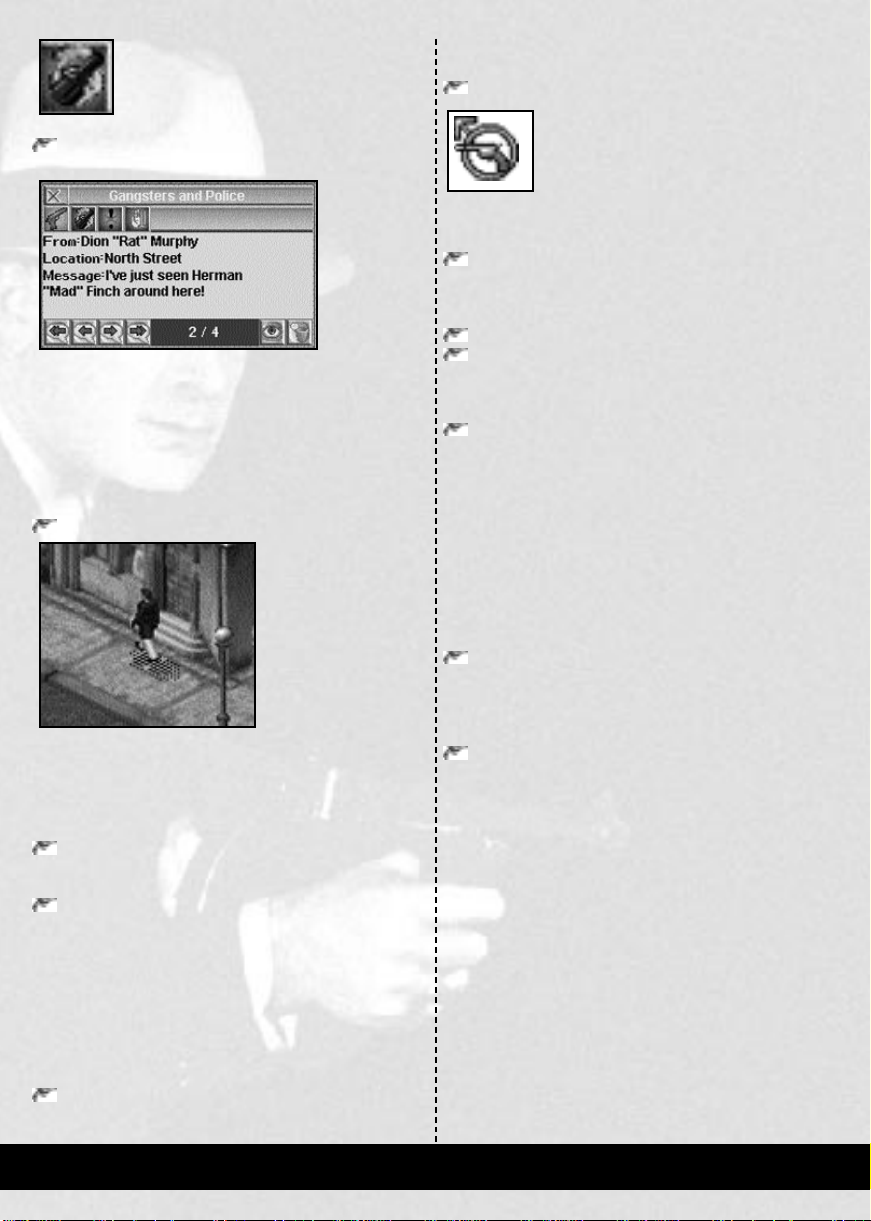
Click on the second messages button; Gangsters and
Police Messages.
This opens the message box at the reports of enemy Gangsters,
Police and the FBI agents that have been seen. The message
states that Murphy has spotted an enemy Gang member.
The buttons at the top of the Message Box allow you to
choose the messages that you wish to receive. The buttons at
the bottom of the Message Box are used for scrolling
backwards and forwards through the messages and viewing or
disposing of a particular message.
Click on the View Event button
in the Message Box.
This action will center the view on Murphy.
Nearby, you will find a person with either a green or an
orange marker around their feet. This will be a member of
the Green Gang or the Orange Gang accordingly.
Click on the X at the top of the Message Box.
This closes the Message Box.
Open a Tagged Window on the member of the Green Gang.
Now that you have found a member of an opposing Gang, you
are going to attempt to kill them with another Street Order.
Combat orders during the week are given in much the
same way as the Go to order was. The only difference is that
a person rather than a place becomes the target.
You can use this order with the game still paused. As you
become familiar with this action, you will probably give the
command whilst the game is still running.
Click on Murphy.
The floor marker around Murphy’s feet will begin flashing
again and the order box once more appears.
Click on Kill.
The mouse pointer will now change to show that a “Kill”
order has been selected.
Click on the Center button in the Green Gang member’s
Tagged Window.
The Main window view will center on the target.
Click on the opposing Gang member.
Click on their name to complete the order.
The Orders Box will disappear, and Murphy is ready to
continue.
Click on the Pause button to start time passing again.
Murphy will now start to move towards the enemy hood.
Once he is in range, he will open fire.
Murphy is a first rate shot, and is carrying a Tommy Gun.
The enemy Gang member does not stand a chance against a
hood of Murphy’s quality, and will soon fall to the floor,
dead.
Having completed the order, Murphy will immediately
vacate the area before any police arrive. When he has travelled
a small distance he will return to the site, pretending to be an
innocent bystander.
Using a Go to order, send Murphy back to the bridge
where Costa is positioned.
You will find that a large portion of the Working Week has
passed at this point.
Click four times on the right shoulder of the clock, to
accelerate the week to its conclusion.
When the Working Week has completed, the tutorial will
finish. The game will drop back out to the Tutorials Screen.
A SUMMARY
OF THE TUTORIALS
When you have completed the tutorials, you should find that
you can manipulate the major features of both the Gang
Organizer and the Working Week.
Although many features of the game are not directly
covered in the tutorials, if you apply similar operating
principles to them you will find that you can use them
effectively in a short space of time.
Should you find it useful, you can replay any tutorial, in
any order. Simply load the desired tutorial from the Tutorials
Screen.
PAGE 26 GANGSTERS
The reference guide allows you to look up information as you play the
game. This section contains details of all the options available to
the player, and is designed to help you navigate the
screens and the city as quickly as possible.
GANGSTERS PAGE 27
GAME MENUS
The Game Menus are used to configure the following options:
The type of game.
Game parameters.
Controls.
Effects.
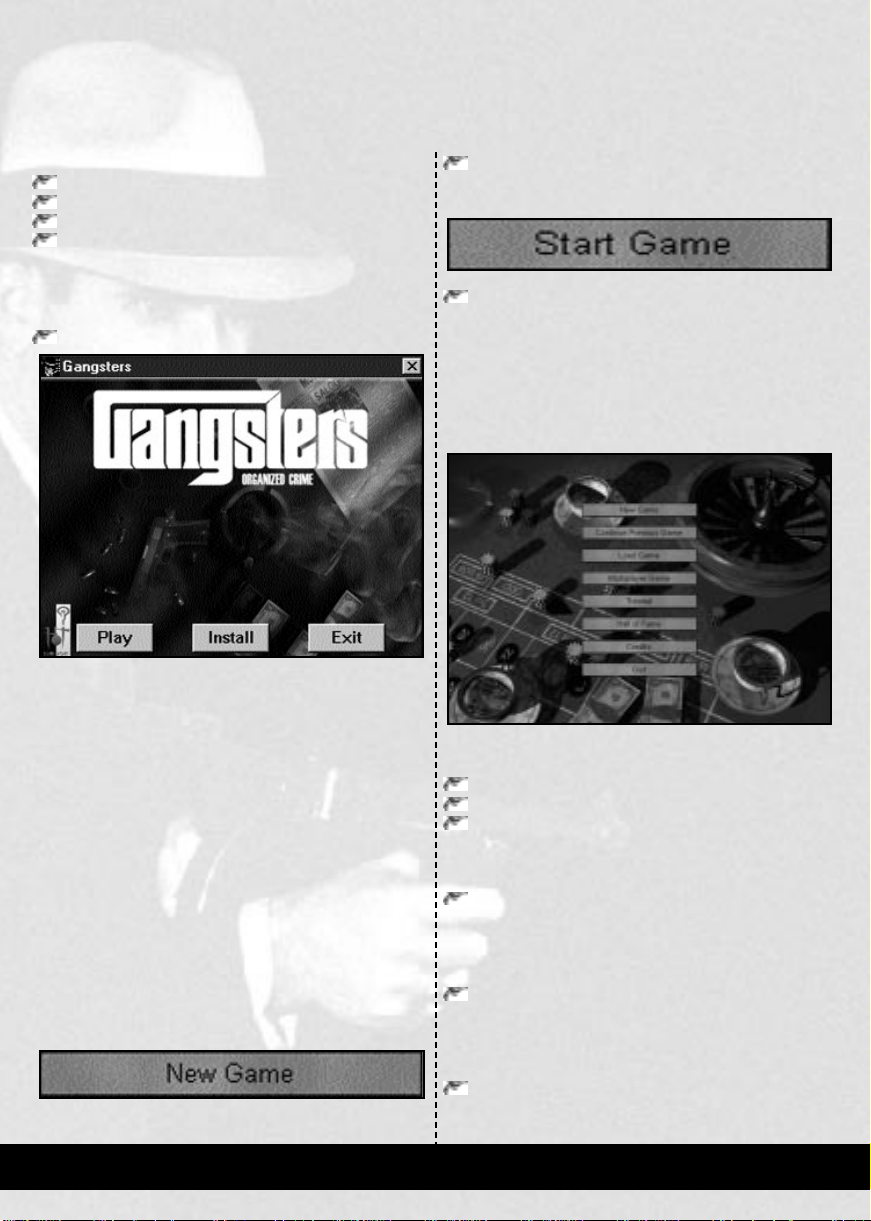
LOADING GANGSTERS
To load Gangsters, place the CD into its drive.
Once the Autoplay screen has loaded, click on the Playbutton
If Autoplay is disabled, or the computer was turned on with
the CD already in its drive, click on the Start Menu button,
then select the Programs Group and click on Gangsters.
Alternatively, open the Hothouse Creations folder,
situated in My Computer \ C \ Program Files, and double
click on the Gangsters icon.
Once the game has loaded, the first screen you will see is
the Main Menu.
STARTING A NEW GAME
By default, the game settings will be to play a full game. If
this is the type of game you wish to play, you can bypass the
menus using the Quick Start method, although you might
want to change your character’s name first. To change your
character’s name, please refer to the New Game Menuin this
chapter.
QUICK START
In order to Quick Start a game,
Click on the button marked New Game.
This will take you to the New Game Menu.
Click on the button marked Start Game, in the Single
Player Menu.
This will take you straight to the Gang Organizer for the first
week.
THE MAIN MENU
The Main Menu will be the first screen displayed once you
have launched the game. This screen allows you to:
Start a new game
Load a previously saved game
View the Hall of Fame
The buttons on the screen have the following functions:
NEW GAME
Click this button to play a single player game.
In a single player game, all of your opponents will be computer
players. The button will take you to the New Game Menu.
CONTINUE PREVIOUS GAME
Click this button to continue the game where you last left it.
Deciding to continue with the previous game loads the last Autosave
file. This will always take you directly to the Gang Organizer.
LOAD GAME
Click this button to load a previously saved game.
The Load Game button takes you to the Load Game Screen,
where you can load any previously saved single player game.
PAGE 28 GANGSTERS

MULTIPLAYER GAME
Click this button to play a Multiplayer Game.
This button will take you to the Multiplayer Menu, where
you can create or join a Multiplayer game. For further details
on Multiplayer Games, please turn to page 84.
TUTORIALS
Click this button to load a tutorial.
This button takes you to the Tutorials Screen, where you can
select to play one of the four tutorials.
HALL OF FAME
Click on this button to view the Hall of Fame.
This button will take you to the Hall of Fame Screen,
where you can view the achievements of great criminals that
have gone before you. For a description of the H all of Fame,
please turn to page 83.
CREDITS
Click on the Credits button to view the game credits.
QUIT
Click on this button to exit the game.
NEW GAME MENU
The New Game Menu is the screen from where you can
launch a new single player game.
CHANGE DETAILS
Your details appear at the top of the screen. These are:
Your face
Your name
The color of Gang you will be playing
Click on the Change Details if you wish to change any of
the above items.
GAME OPTIONS
Below your details is shown a description of the game you are
about to play.
Click on the Game Options button to change the game options.
The Game Options button accesses the Game Options
Screen, where you can change the type of game to be played.
For further details of Game Options, please turn to page 60.
START GAME
Click on Start Game to begin a new game of Gangsters.
CANCEL
Click on Cancel to return to the Main Menu.
CHANGE DETAILS MENU
The Change Details Menu allows you to change any of the
following features:
Your face
Your name
The Gang color you want to play with.
CHANGING YOUR FACE
A default face is always displayed, but you may like to choose
your own face. There are a number of buttons below your
face to do this:
Click on the top button to change the gender between
male and female.
Click on the buttons below the gender button to change
the nationality and traits.
Click on the last set to change the facial features.
CHANGING YOUR NAME
A default name is always displayed, but you may like to
change this. To change any of the names
Click in the name box.
Type in your name.
CHANGING YOUR GANG COLOUR
In a normal or short game of Gangsters, you will always start
as the red Gang. To change your Gang color:
Click on a colored square below the name entries.
The color that you click on is the color you will play the game
with.
GANGSTERS PAGE 29
ACCEPTING AND REJECTING CHANGES
Click on OK to accept any changes and return to the
New Game Menu.
Click on Cancel to reject any changes and return to
the New Game Menu.
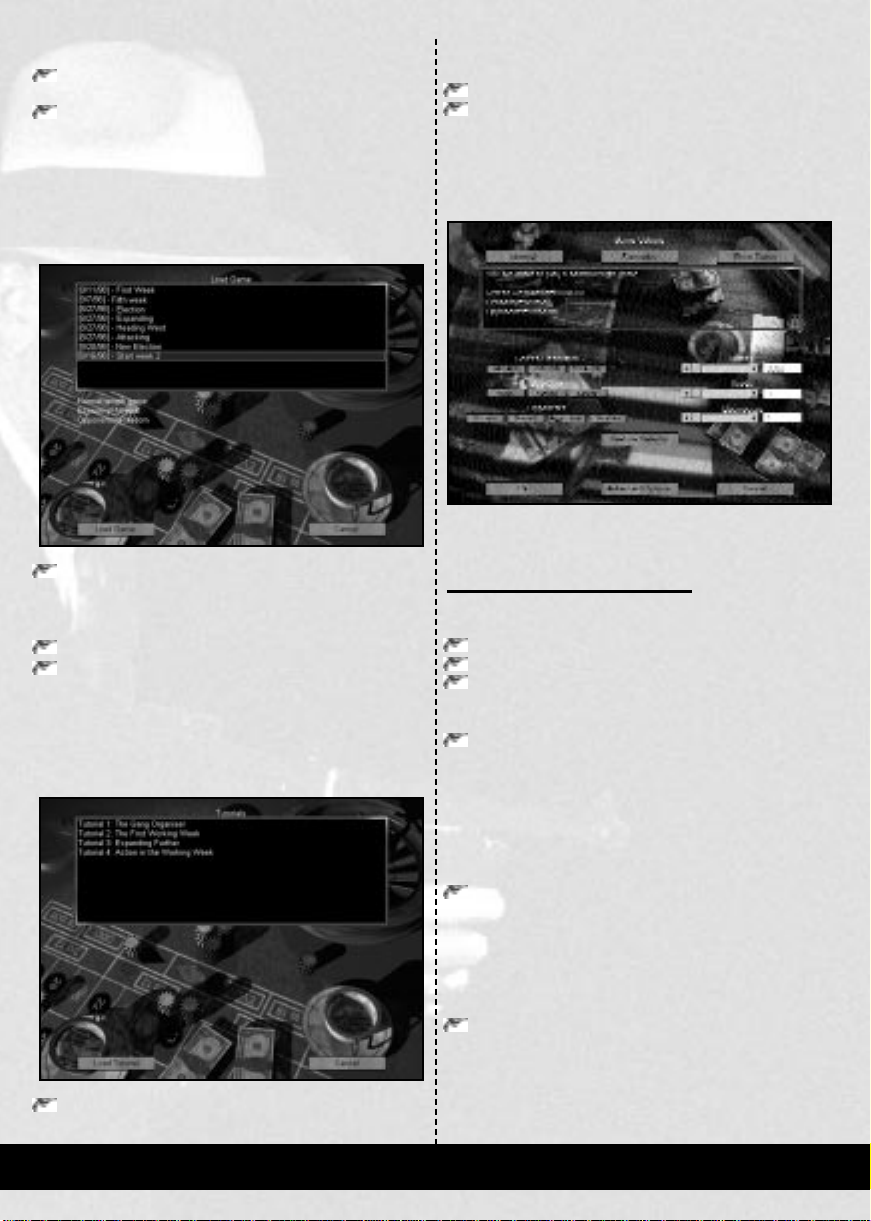
LOAD GAME MENU
The Load Game Menu allows you to retrieve previously
stored games. The window at the top of the screen contains
the list of saved games.
Click on a saved game to view its details.
The details are shown in the window below the list of saved
games.
Click on Load Game to play the selected saved game.
Click on Cancel to return to the Main Menu.
TUTORIALS SCREEN
The Tutorials Screen allows you to play any of the four
tutorials. The window at the top of the screen contains the list
of tutorials.
Click on a tutorial to view its details.
The details are shown in the window below the list of
tutorials.
Click on Load Tutorial to play the selected tutorial.
Click on Cancel to return to the Main Menu.
GAME OPTIONS SCREEN
The Game Options Screen allows you to change the type of
game you are playing.
The settings that you can change are the duration of the
game and setting a target amount of money or territory.
SETTING THE GAME TYPE
The three buttons at the top of the screen are used to define
the game type:
Normal game
Scenario
Short Game
NORMAL GAME
Click on Normalto select a full length game of Gangsters.
The Nor mal selection is the default setting. A full game is
played through from beginning to completion. The win
criteria for this game are that you must either eliminate the
rival Gang Leaders, become mayor or Go Straight.
SCENARIO
Click on Scenario to access the Scenario Screen.
This button accesses the Scenario Screen, where you can
select to play one of a number of challenging games of
Gangsters.
SHORT GAME
Click on Short game to access the Short Game Menu.
This button accesses the Short Game Menu, where you can
select to play a shorter game of Gangsters.
PAGE 30 GANGSTERS
 Loading...