


TABLE OF CONTENTS
First Things First . . . . . . . . . . . . . . . . . . . . . . . . . . . . . . . . . . . . . . . . . . . . . . . . . .3
System Requirements . . . . . . . . . . . . . . . . . . . . . . . . . . . . . . . . . . . . .3
The ReadMe File . . . . . . . . . . . . . . . . . . . . . . . . . . . . . . . . . . . . . . . . . . .3
Setup and Installation . . . . . . . . . . . . . . . . . . . . . . . . . . . . . . . . . . . . . . . . . . . .4
Introduction . . . . . . . . . . . . . . . . . . . . . . . . . . . . . . . . . . . . . . . . . . . . . . . . . . . . . . .5
Main Menu . . . . . . . . . . . . . . . . . . . . . . . . . . . . . . . . . . . . . . . . . . . . . . . . . . . . . . .5
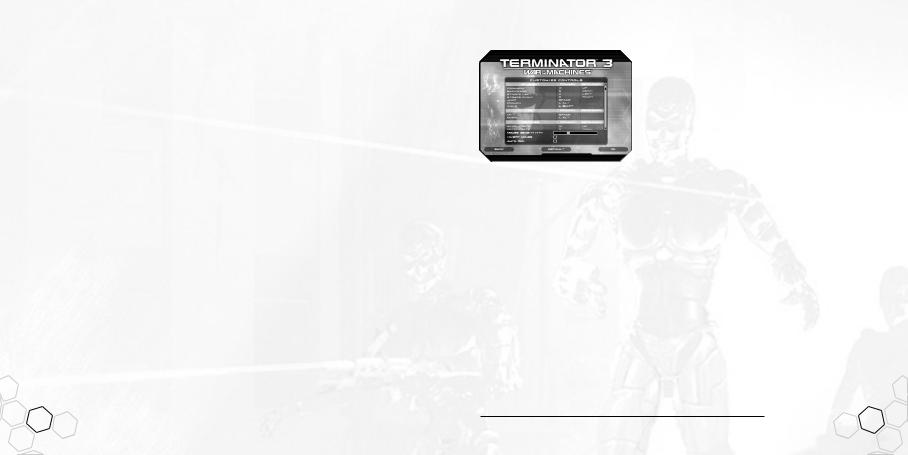
Controls . . . . . . . . . . . . . . . . . . . . . . . . . . . . . . . . . . . . . . . . . . . . . . . . . . . . . . . . . . .7
Options Menu . . . . . . . . . . . . . . . . . . . . . . . . . . . . . . . . . . . . . . . . . . . . . . . . . . . .8
Heads-Up Display . . . . . . . . . . . . . . . . . . . . . . . . . . . . . . . . . . . . . . . . . . . . . . .9
Character Classes . . . . . . . . . . . . . . . . . . . . . . . . . . . . . . . . . . . . . . . . . . . . . .10
Weapons . . . . . . . . . . . . . . . . . . . . . . . . . . . . . . . . . . . . . . . . . . . . . . . . . . . . . . . .12
Other Items . . . . . . . . . . . . . . . . . . . . . . . . . . . . . . . . . . . . . . . . . . . . . . . . . . . . . .13
Vehicles . . . . . . . . . . . . . . . . . . . . . . . . . . . . . . . . . . . . . . . . . . . . . . . . . . . . . . . . .14
Levels . . . . . . . . . . . . . . . . . . . . . . . . . . . . . . . . . . . . . . . . . . . . . . . . . . . . . . . . . . .16
Terminator 3®: War of the Machines™ on GameSpy Arcade . .18 Credits . . . . . . . . . . . . . . . . . . . . . . . . . . . . . . . . . . . . . . . . . . . . . . . . . . . . . . . . . . .20 Atari Web Sites . . . . . . . . . . . . . . . . . . . . . . . . . . . . . . . . . . . . . . . . . . . . . . . . . .25 Technical Support . . . . . . . . . . . . . . . . . . . . . . . . . . . . . . . . . . . . . . . . . . . . . . .26 End-User License Agreement . . . . . . . . . . . . . . . . . . . . . . . . . . . . . . . . .28
FIRST THINGS FIRST
System Requirements
Operating System: |
Windows® 98/Me/2000/XP |
Processor: |
Pentium® III 1GHz or higher (Pentium® 4 2 GHz recommended) |
Memory: |
128 MB RAM (256 MB recommended) |
Hard Disk Space: |
1 GB Free |
CD-ROM Drive: |
4X Speed or faster |
Video: |
64 MB Windows® 98/Me/2000/XP-compatible |
|
video card that supports hardware T&L* |
Sound: |
Windows® 98/2000/Me/XP-compatible sound card* |
Internet Connection: |
56 Kbps dial-up modem connection (DSL or cable modem connection |
|
recommended) |
DirectX®: |
DirectX® version 9.0b or higher (DirectX® version 9.0b included) |
* Indicates device should be compatible with DirectX® version 9.0b or higher.
The ReadMe File
The Terminator 3®: War of the Machines™ CD-ROM game has a ReadMe file where you can view both the License Agreement and updated information about the game. We strongly encourage you to read this file in order to benefit from changes made after this manual went to print.
To view this file, double-click on it in the Terminator 3: War of the Machines directory found on your hard drive (usually C:\Program Files\Atari\Terminator 3–War of the Machines). You can also view the ReadMe file by first clicking on the Start button on your Windows® taskbar, then on Programs, then on Atari, then on Terminator 3: War of the Machines, and then on the
ReadMe file.
2 |
3 |

SETUP AND INSTALLATION
1.Start Windows® 98/Me/2000/XP.
2.Insert the Terminator 3: War of the Machines CD-ROM game disc into your CD-ROM drive.
3.If AutoPlay is enabled, a title screen should appear. If AutoPlay is not enabled, or the installation does not start automatically, click on the Start button on your Windows® taskbar, then on Run. Type D:\Setup and click on OK. Note: If your CD-ROM drive is assigned to a letter other than D, substitute that letter.
4.Enter the CD key code found on the back cover of this manual.
5.Follow the remainder of the on-screen instructions to finish installing the Terminator 3: War of the Machines CD-ROM game.
6.Once installation is complete, click on the Start button on the Windows® taskbar and choose Programs/Atari/Terminator 3-War of the Machines/Terminator 3-War of the Machines to
7.
Note: to
The
you do not have DirectX® 9.0b or higher installed on your computer, click “Yes” to accept the DirectX® 9.0b License Agreement. This will then launch the DirectX® 9.0b Install.
GameSpy Installation
To play a multiplayer game online, it is recommended that you install GameSpy Arcade. All server locating and matchmaking are done from inside the game. Choose “Multiplayer” from the Main Menu and then click “Refresh” in the in-game browser to find a server. For details, see
“Terminator 3: War of the Machines on GameSpy Arcade” on page 18.
INTRODUCTION
Humanity Sits On the Brink of Extinction
The inevitable battle between man and machine is underway. As this apocalyptic nightmare ravages the land, you must make a choice: Join the technologically superior Skynet Terminators or lock-and-load with the human Tech-Com rebels.
The massive conflict has begun. The future of humanity lies in the balance.
MAIN MENU
The launcher opens at the start of a Terminator 3: War of the Machines game. From here, you can select the following options:
Profiles
Manage your player information. All saving is handled automatically. The name of the profile is displayed above the text box. The Profile Manager Screen contains the following functions:
New: Create a new profile.
Delete: Remove a selected profile.
.
you select a profile, all progress made while using that
the map you want to play. Click the Start button to begin.
4 |
5 |
Multiplayer
Set up a multiplayer battle online. Choose from the following game modes:
Termination – Classic domination gameplay with a twist. Capture and hold as many bases as possible. Once captured, the bases can be used as forward respawn points. The highest scoring player on the human side can respawn as the Terminator himself, Arnold Schwarzenegger. Teams score by shooting down enemies. Players occupying any of the bases can also score by holding a dominated base for 10 seconds. The round ends when a team reaches the frag limit or the time expires.
Team Deathmatch – Battle it out to see which side can rack up the most kills. You can set limits for either time or number of frags. The team that kills more opponents wins. The round ends when a team reaches the frag limit or the time expires. Each kill scores a point for the player and the team.
Mission – One team defends an object or area while the other tries to destroy or take it over. There is a time limit. If the attacking team can’t destroy the target, the defending team wins the game. The round ends when a team achieves the specified task or the time expires. Operating as a team is very important.
Options
Adjust the game settings for video, sound, network, etc. See “Options Menu” on page 8 for details.
Credits
View the names of the people that brought you Terminator 3: War of the Machines.
Quit
Quit the game and exit to the Windows® desktop.
CONTROLS
HUMAN
|
CONTROL |
ACTION |
|
W |
Forward |
|
S |
Backward |
|
A |
Strafe left |
|
D |
Strafe right |
|
Spacebar |
Jump |
|
Left Alt |
Toggle crouch and prone |
|
|
(Humans and Infiltrators only) |
|
Left Shift |
Walk |
|
ESC |
Respawn menu |
|
Del |
Suicide |
FK |
|
|
CONTROL |
ACTION |
W |
Forward |
S |
Backward |
A |
Strafe left |
D |
Strafe right |
Spacebar |
Up |
Left Alt |
Down |
VEHICLES
CONTROL |
ACTION |
E |
Enter or exit vehicle |
W |
Accelerate |
S |
Brake |
A |
Turn left |
D |
Turn right |
Spacebar |
Hand brake |
1 – 8 |
Switch positions in vehicle |
V |
Toggle first- / third-person view |
6 |
7 |

ACTIONS
CONTROL |
ACTION |
Mouse 1 |
Fire |
Mouse 2 |
Alt Fire / Scope (if available) |
] or Mousewheel |
Next Weapon |
[ or Mousewheel |
Previous Weapon |
R |
Reload |
E |
Use |
Q |
Binoculars / Night Vision |
C |
Zoom in (scopes and Terminator vision) |
X |
Zoom out (scopes and Terminator vision) |
OTHER
CONTROL |
ACTION |
T |
Talk to team |
G |
Talk to all |
Tab |
Info table |
M |
Map zoom |
I |
Mission info (in mission mode) |
F1-F12 |
Commands (cannot be remapped) |
OPTIONS MENU
To type
8
Sound
Adjust the sounds settings.
Game Settings
Set crosshairs, network and other options.
HEADS-UP DISPLAY
The Heads-Up Display (HUD) shows information critical to a successful mission. Some elements only appear at certain points in the game. Most are self-explanatory.
Game Information |
|
|
|
|
|
|
|
|
Time or Frags Remaining |
|
|
|
|
|
|
|
|
|
Current Score |
|
|
|
|
|
|
|
|
|
Level Map |
|
|
|
|
|
|
|
|
|
Base Indicator |
|
|
|
|
|
|
|
|
|
|
|
|
|
|
|
|
|
|
|
Airstrike Indicator |
|
|
|
|
|
|
|
|
|
|
|
|
|
|
|
|
|
|
|
Mission Mode Info |
Team Messages |
|
|
|
|
Download Progress |
||||
|
|
|
|
|
|
|
|
|
Ammo Packs |
Vehicle Weapon |
|
|
|
|
|
|
Health Packs |
||
|
|
|
|
||||||
Current Vehicle |
|
|
|
|
Current Weapon |
||||
|
|
|
|||||||
Vehicle Health |
|
|
|
|
Clips Remaining |
||||
|
|
|
|
|
|||||
|
|
Weapon |
Weapon |
Current Health |
|
Current Clip Ammo |
|||
|
|
Heat Meter |
Select |
Stance |
|
|
|||
Game Information
Information appears in this box when players die, respawn or send a message.
Team Messages
Your options for sending messages to your teammates appear here along with the
function key for each message option. |
9 |
 Loading...