


ª
P.O. Box 18979 ¢ Irvine, CA 92623
Copyright © 1998 by Blizzard Entertainment
The use of this software product is subject to the terms of the enclosed End User License Agreement. You must accept the End User License Agreement before you can use this product. The Campaign Editor contained in this product is provided strictly for your personal use. The use of the Campaign Editor is subject to additional license restrictions contained inside the product and may not be commercially exploited.
Starcraft, Diablo and Battle.net are trademarks and Blizzard Entertainment and Warcraft are registered trademarks of Davidson and Associates, Inc. All other trademarks and trade names are the properties of their respective owners.
Uses Smacker Video Technology, Copyright © 1994-1998 by Invisible Inc. d.b.a. RAD Software
Blizzard Entertainment
P.O. Box 18979
Irvine, CA 92623
Customer Service / Technical Support and ÔFax-backÕ service
Tel: (0118) 920 9111
Fax: (0118) 987 5603
If you would prefer to write to us, please send your mail to the following address: CUC Software International Ltd
Customer Services / Mail Order / Tech Support Department
2 Beacontree Plaza ¥ Gillette Way
Reading ¥ Berkshire
RG2 0BS ¥ United Kingdom
http://www.blizzard.com |
World Wide Web |
support@blizzard.com |
Online Technical Support |
2 |
Blizzard Entertainment |
|

Table of Contents |
|
Getting Started (PC)......................................... |
4 |
Troubleshooting (PC)......................................... |
5 |
Getting Started (MAC)...................................... |
6 |
Troubleshooting (MAC)..................................... |
6 |
Technical Support............................................. |
7 |
MultiPlayer Games............................................ |
8 |
Game Tutorial................................................. |
12 |
HotKeys .......................................................... |
22 |
Resources...................................................... |
23 |
Terran |
|
History.................................................... |
26 |
Overview................................................. |
34 |
Units....................................................... |
35 |
Buildings.................................................. |
42 |
Factions.................................................. |
47 |
Zerg |
|
History.................................................... |
51 |
Overview.................................................. |
55 |
Units........................................................ |
56 |
Structures.............................................. |
62 |
Broods.................................................... |
68 |
Protoss |
|
History..................................................... |
71 |
Overview.................................................. |
79 |
Units........................................................ |
80 |
Buildings................................................. |
85 |
Tribes...................................................... |
89 |
Roster of Heroes............................................ |
91 |
Credits........................................................... |
94 |
Blizzard Entertainment |
3 |
|

g GETTING STARTED (PC) D
System Requirements
Computer:Starcraft requires an IBM PC or 100% compatible computer, with a Pentium® 90MHz or better processor. Your computer must have at least 16 megabytes of RAM.
Operating System:You must be utilising Windows® 95 later or Windows® NT 4.0 or later to play Starcraft on your system.
Controls:Akeyboardanda100%Microsoft®-compatiblemousearerequired.
Drives:A hard drive with 80 MB of disk space available and a double speed CD-ROM drive are necessary for installation and play. A quad-speed CD-ROM drive is necessary to view cinematic sequences.
Video: Starcraft requires a Local-bus SVGA video card that supports DirectDraw®. You must have DirectX® 2.0 or better installed on your system to play the game (DirectX 5.0 is included on the Starcraft CD.)
Sound: Starcraft will work with any DirectX 2.0 or better compatible sound card. To play the music during the game, your sound card must be configured for playing digital audio.
Installation of Starcraft
Place the Starcraft CD into your CD-ROM drive. If your computer is AutoPlay capable, a Starcraft menu will automatically appear on the screen. Select “Install Starcraft” from the list of choices to start the installation program. Follow the onscreeninstructionstoinstallStarcraftonyoursystem.Afterthegameissuccessfully installed, a Starcraft shortcut will be added to your Start menu.
If your system is not AutoPlay capable, open the “My Computer” icon on your Desktop, then select the drive letter that represents your CD-ROM drive. Doubleclick on the “Install” icon and continue as above.
Installation of DirectX
Make sure that the Starcraft CD is in your CD-ROM drive. When you begin the installation process, Starcraft will automatically detect whether you have DirectX 2.0 or better. Should you need to update your version of DirectX or install it for the first time, you will be prompted to do so. As Starcraft cannot be played without DirectX, we highly recommend installing it immediately should you be so directed.
If you experience any problems with Starcraft, please see our Troubleshooting section before attempting to contact technical support.
4 |
Blizzard Entertainment |
|

t TroubleShooting (pc) ]
Starcraft requires that you have Microsoft’s DirectX 2.0 or higher installed and that your video and sound cards are DirectX 2.0 compatible. DirectX 5.0 is included on the Starcraft CD and can be installed by running “Install DirectX” from the list of options. The most common problem with DirectX games is the drivers that are in use for your sound card and your video card. If you have problems with Starcraft, you should always contact your video and sound card manufacturer (either through their web sites or over the telephone) for information on obtaining the latest drivers. Most problems will stem from systems that are using older drivers.
I do not have any video when I start Starcraft!
This problem is usually attributed to older, or incompatible, DirectX drivers. Starcraft runs in 640x480 mode and some video cards have a problem with DirectX automatically switching to that resolution. You can manually change the screen resolution to 640x480 with 256 colours as the colour depth by opening the Start menu and then opening the Control Panel in the Settings folder. Open the Display Control Panel, click on the Settings tab, and change your Display Area and Colour Palette settings.
Starcraft loads, but after playing for awhile, I receive a DirectSound Error, DirectDraw Error or Page
Fault!
These issues are directly attributed to both the DirectSound and DirectDraw drivers that are in use on your system. To correct these problems, you will want to obtain the latest DirectX compatible sound drivers from your sound card manufacturer, and the latest DirectX compatible video drivers from your video card manufacturer. If this problem persists, please contact our Technical Support department or check the Technical Support FAQ at http://www.blizzard.com.
I am not hearing any music or sound effects in Starcraft.
Make sure that your sound card is compatible with DirectX 2.0 or higher. Sound cards that are not supported under Microsoft’s DirectX will not work with Starcraft. Install DirectX 5.0 from the Starcraft CD. You should also contact your sound card manufacturer to obtain the latest drivers for your system and information on installing them.
I keep hearing static or feedback during the game.
This usually occurs with older sound card drivers. Contact your sound card manufacturer to obtain the latest drivers. You also may want to check your mixer settings by opening the Start menu and then opening the Programs, Accessories and Multimedia folders in that order. Select the “Volume Control”option. You may now adjust your mixer settings by moving the sliders up or down.
Why am I only getting a black screen when I start Starcraft?
Either your video card is not DirectX compatible, or you are using an older version of DirectX. You will need to install DirectX 5.0 from the Starcraft CD and/or obtain DirectX compatible drivers from your video card manufacturer.
Will Starcraft work on my Cyrix 6x86, MediaGX, or AMD K6 computer?
Yes.
Can I run Starcraft on my 486 or other non-Pentium processor?
Starcraft has been optimised to run best on a Pentium 90 or faster processor. While CPUs slower than a Pentium 90 may run the game, it may not run properly or at playable speeds.
Is there any way to play the full version of Starcraft without the CD?
No, you must have the Starcraft CD in your CD-ROM drive in order to play a full-version single player game. See the Multiplayer section of this manual for information on “spawning” Starcraft on other systems.
Can I install Starcraft to a compressed drive?
This should cause no problems. However, due to performance issues, we do not recommend it.
Blizzard Entertainment |
5 |
|
n GeTTing STarTed (Mac¨) o
System Requirements
Computer:StarcraftrequiresaMacOS® computerwithaPowerPC® processor and 16 megabytes of physical RAM plus Virtual Memory (32 megabytes of RAM recommended). For multiplayer games of Starcraft, 32 megabytes of physical RAM is required.
Operating System:StarcraftrequiresSystem7.5orhigher.
Controls: A keyboard and mouse are required. If you have a two button mouse, please consult your mouse manual for instructions on configuring the second button to simulate a command (ζ) click.
Drives:A hard drive and a double-speed or faster CD-ROM drive are required for installation and play. A quad-speed CD-ROM drive is necessary to view cinematic sequences.
Video:Starcraft requires that your computer support at least a 640 x 480 display in 256 colours.
Sound: Starcraft will work with any Mac OS compatible system’s built in sound.
Installation of Starcraft
Place the Starcraft CD into your CD-ROM drive. Double-click on the Starcraft CD Icon, and then double-click on the “Starcraft Installer” to copy the required game and system files to your hard drive. The installer will present an abbreviated “Read Me”. Please read this, as it will contain the most up to date information aboutStarcraft.
TroubleshooTing
Most problems running Starcraft on the Macintosh® are resolved by making sure that the proper extensions are loaded and that there are no extension conflicts. Below is the Minimal Extension list for Starcraft Macintosh:
Apple CD-ROM
DrawSprocket®
Sound Manager (for Systems earlier than 7.5.3 only) Open Transport (Optional)
TheeasiestwaytoavoidextensionconflictsistosetupanExtensionSetspecifically for Starcraft using theExtensions Manager Control panel (or third party equivalent). Selectonlytheextensionsyouneedloaded,savethesetandrestartyourMacintosh.
6 |
Blizzard Entertainment |
|

j Technical SupporT x
online Support Services
Blizzard Entertainment provides upcoming news, software updates, product demos, reviews, technical support and more on the following online services.
Internet: support@blizzard.com (for IBM-PC) macsupport@blizzard.com (for Macintosh)
World Wide Web: http://www.blizzard.com/support.htm
http://www.battle.net
Additional Support Services
Technical Support, with faxing capability for most problems, is currently available twenty-four hours per day, seven days a week.
You may contact CUC Software International Ltd via fax and mail. Fax: (0118)9875603
We receive faxes 24 hours a day, and will respond 9 A.M. to 5 P.M., Monday through Friday, holidays excluded.
Mail: CUC Software International Ltd
Customer Services / Mail Order / Tech Support Department 2 Beacontree Plaza, Gillette Way
Reading, Berkshire
RG2 0BS, United Kingdom
Before You Call for Technical Support
If you are having problems, please consult the “Troubleshooting” section before calling technical support. We receive many calls every day and can deal with your inquiry more efficiently if you know the following information:
•The manufacturer of your computer and the CPU type/speed
•How much RAM your system has
•The version and type of operating system that you are using
•The manufacturer and model of your video card, sound card and modem
Our technical support number is (0118) 920 9111. Our hours are 9 A.M. to 5 P.M., Monday through Friday, holidays excluded. Have a pen and paper handy when you call, and be near your computer if at all possible. NO GAME PLAYING HINTS WILL BE GIVEN THROUGH THIS NUMBER.
Blizzard Entertainment |
7 |
|

n Multiplayer Games F
Multiplayer Gaming
Starcraft allows you to play with up to eight players in either stand-alone scenarios or in multiplayer campaigns. Each side can be controlled by either a human or computer opponent. The first time you start a multiplayer game over a modem, direct connection or local area network, you will be asked to create a multiplayer ID. This multiplayer ID will be used whenever you enter into a game using any of these three connection methods. Battle.netrequiresthecreation of a separate Battle.net ID.
Connection Methods
It is important to note that any multiplayer game is limited by the quality of the connection of all of the systems involved. Heavy network traffic, poor cabling, line noise, latency, and other environmental effects can adversely affect the reliability and performance of a multiplayer game.
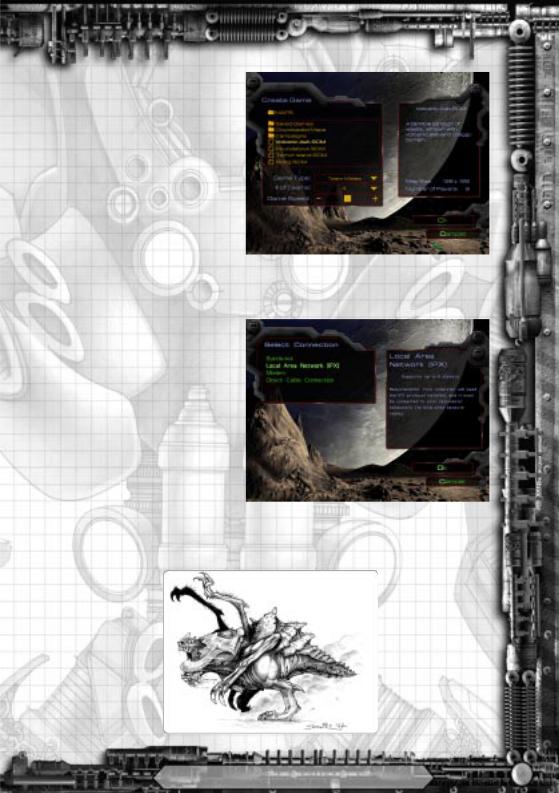
Battle.net Connection
Supports:2-8players
Requires:A32-bitTCP/IPconnectiontotheInternet.Thiscaneitherbeadial-upconnection
or a direct connection.
Battle.net is Blizzard Entertainment’s Internet gaming service. It allows players from around the world to battle against each other. Battle.net also supports a world-wide ranking system, enabling you to test your Starcraft skills against comparable opponents. Select the “Battle.net” connection method to connect to Battle.net. If your computer is configured to automatically dial out, Starcraft will dial your Internet Service Provider. Otherwise, you must establish a connection to your Internet Service Provider before running Starcraft. Once
connected to Battle.net, you can chat with other players to arrange, create, and join games. SpecificinformationisavailablefromwithinBattle.netbypressingtheF1keyonthekeyboard.
8 |
Blizzard Entertainment |
|
Troubleshooting: Check with your Internet Service Provider to find out the latency level of your connection and whether your connection supports 32-bit TCP/IP applications. A high latency connection with any of the players can result in an unstable multiplayer game. If you are having problems connecting with Battle.net call your Internet Service Provider and ask for their most up to date 32-bitprogramtoconnecttotheInternet.
IPX Network Connection
Supports:2-8players
Requires: 2 or more computers, connected to an active IPXcompatible network
To create a game, click “Create.” The name of that game will be based on your multiplayer ID. If you wish to join a specific game, you will need to know the name of the game prior to joining. To join a game, select the desired game from the list and click OK.
Troubleshooting:Checkthesettingsfor the IPX/SPX protocol in the “Network” control panel; contact your network
administrator for assistance in setting up your network connection. You will need to be sure that all computers are configured to see the same IPX frame type. Check all the physical network connections. Note that Starcraft will only work across one network segment.
Blizzard Entertainment |
9 |
|

Modem Connection
Supports:2players
Requires:2 computers, each with its own modem and telephone line
If your system has one modem installed, that modem will automatically be chosen when you select Modem as your connection type. If you have more than one modem installed, you will need to choose the specific modem that you wish to use.
The player that is answering the call should select “Create Game” from the menu. The other player should select “New Number” and enter the game creator’s phone number. If the game creator’s number has been previously entered, it can be selected from the menu list. If their modem is set up correctly, their game will automatically answer the incoming call and establish the connection.
Troubleshooting:YourmodemneedstobesetupcorrectlyintheWindows95orWindows NT “Modems” Control Panel before Starcraft will recognise it. Check your modem’s settings by opening the “Modems” Control Panel. Click on the “Diagnostics” tab, and double-click on the modem that you wish to check. Windows 95 and Windows NT will run a test on your modem. If any errors are reported, consult your modem manufacturer. Make sure that the modem’s COM port is not being used by another application.
Direct Connection
Supports:2-4players
Requires:2 or more computers connected via their serial ports with a null-modem cable.
One player needs to select the “Create Game” option to start a game. If the secondplayerdoesnotautomaticallyjoin, select “Retry Connection” to attempt to join the game again. Should you wish to link three or four computers for direct connection play, please refer to the SERIAL.DOC technical help file in the Starcraftdirectory.
Troubleshooting: Check the cable to ensure that it is a null-modem cable and double check the connections. If a nullmodem adapter is being used, make sure that only one adapter is being used. The
cable needs to connect to the serial port or COM ports on each computer, not the parallel (printer) ports. Make sure that there are no conflicts between the COM ports that are being used for the null-modem connection and any other devices on either system.
1 0 |
Blizzard Entertainment |
|
AppleTalk Network
Connection [MAC]
Supports:2-8players
Requires: 2 or more Macintosh computers, connected to an active AppleTalk network.
To create a game, click “Create”. The name of that game will be based on your multiplayer ID. A player who wishes to join your game will need to know the game’sname.
If your network has more than one AppleTalk zone, then you can click the “Choose Zone” button to select the zone that Starcraft will listen to in search of a game. Note that Starcraft will only display games on one AppleTalk Zone at a time.
Troubleshooting: Check the settings for your network in the “AppleTalk” or “Network” control panel; consult your owner's manual for assistance in setting up your network connection. Check all of the physical network connections.
Spawned Games
Starcraft allows for up to eight players to compete in multiplayer games with only one CD using a feature known as “Spawning”. To create a spawned copy, simply install Starcraft onto any computer using your Starcraft CD. When prompted to enter your CD Key, enter the CD Key associated with the Starcraft CD from which you are installing the spawned copy. WhenyourunStarcraftwithoutaCD(indicatingthatyouareusingaspawnedversion), you can only play multiplayer games created by the person who spawned your copy of Starcraft and has the Starcraft CD in his computer.
Certain features of Starcraft are only available when you have the Starcraft CD in the drive. These include playing the single player campaigns, creating multiplayer games, playing against players with different CD keys and using the Campaign Editor.
Blizzard Entertainment |
1 1 |
|

Game tutorial
NoTES oN USING THE MoUSE IN STARCRAFT
The majority of your control during a game of Starcraft is through using your mouse. The mouse performs the following actions:
SELECTION (LEFT-CLICK)
The left mouse buttonis used to select units, buildings, command buttons and points of action (locations where orders are carried out).
AUTO COMMANDS (RIGHT-CLICK)
When you have a unit or group selected, the right mouse button can be used to issue intelligent commands that will automatically be carried out. Macintosh users with a one button mouse can hold down the command (ζ) key and click to use Auto Commands.
1.Select an SCV.
2.While the SCV is selected, move the targeting cursor over a mineral field. Rightclick (Macintosh:ζ-click) on the minerals to be Gathered.
3.The SCV will automatically move to the mineral field and begin gathering resources.
4.Select a Marine.
5.While the Marine is selected, move the targeting cursor to an open area. Right-click (Macintosh: ζ-click) on that area to order the Marine to move.
6.The Marine will automatically move to the selected area.
7.By using the Auto Command feature, units can be ordered to perform logical tasks (move, gather resources, repair, attack) without multiple keystrokes or button
commands.
STARCRAFT Tutorial
The game begins with a graphic introduction to the world of Starcraft. If you would like to bypass this introduction, press the space bar or click the left mouse button. After the introduction you will be taken to the Starcraft Main Menu.
Click on the Single Player option or type “S” to begin a single player game. Note that the letter Sin “Single Player” is a different colour than the rest of the title. This different coloured letterisa“hotkey”(orkeyboardshortcut)which,whenentered,allowsyoutobypassclicking with the mouse. This convention is used throughout the game.
The next step is to create your player ID. The first time you run Starcraft, you are automatically prompted to enter a new ID name. Enter any name that you wish, and then click on the OK button. To start playing with the ID you have just created, select OK again.
The next screen allows you to start the Terran, Zerg or Protoss Campaign, Load a Saved GameorLoadaCustomMission.ToaccesstheStarcraftTutorial,selecttheTerranCampaign.
1 2 |
Blizzard Entertainment |
|
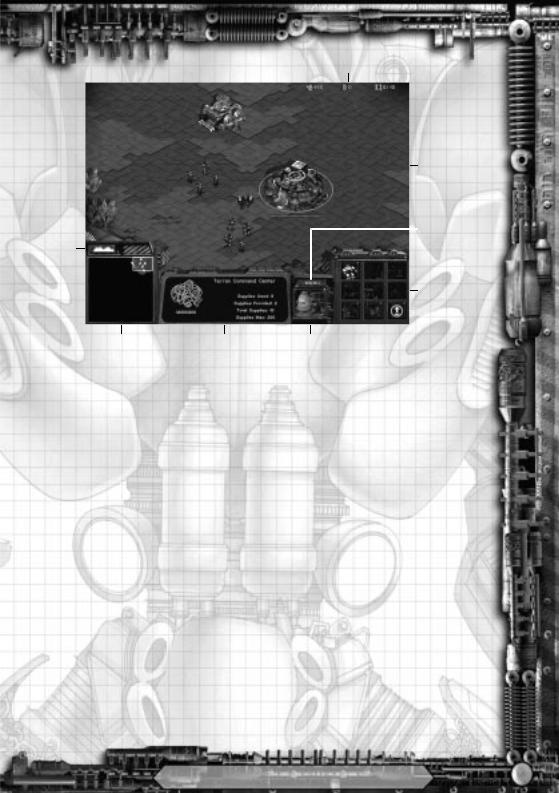
Resources
Main
Screen
Menu
Hide
Terrain
Command
Buttons
Mini Map Status Display Portrait
RESOURCES
This indicates the amount of harvested Minerals and refined Vespene Gas you currently have accumulated, as well as the current level of Supplies you have.
PORTRAIT
This is a close up of the unit currently selected.
STATUS DISPLAY
This is detailed information, including numeric statistics on any building or single unit selected in the Main Screen.
COMMAND BUTTONS
These are the different commands available to the unit, such as Build, Attack, etc.
MINI MAP
This is a bird’s eye view of your Main Screen that allows you to see the entire battlefield at once. Your buildings and units appear as green squares. Other player’s units, buildings and resource nodes appear as different colours. This map will increase in detail as you explore the lands surrounding your outpost.
MAIN SCREEN
This is the main field of play. Here you will be able to see, in great detail, the events that transpire in the area around you. You may select units or buildings in this window using the mouse. When one of your units is selected, a green circle will surround the unit, indicating that it is now prepared to receive your orders.
Blizzard Entertainment |
1 3 |
|

HIDE TERRAIN
This button toggles whether or not terrain is displayed in the Mini Map. Hiding terrain may make it easier to spot enemy units.
M E N U
This button calls up the Starcraft Options menu.
Save Game:This allows you to save the game you are currently engaged in.
Load Game:This allows you to load and continue a game that you have previously saved.
Pause Game:This allows you to pause the game you are currently engaged in.
Options:This brings up the Speed and Sound menus.
Help:This allows you to access a list of keyboard commands as well as Starcraft Tips.
Mission Objectives:This displays the victory conditions for the current mission.
End Mission:This allows you to terminate the current mission. You will be asked to
confirm your decision.
Return to Game:This closes the Starcraft Options menu and allows you to resume the game you are currently engaged in.
During a single player game clicking the Menu Button also pauses the game.
ESTABLISHING YoUR oUTPoST
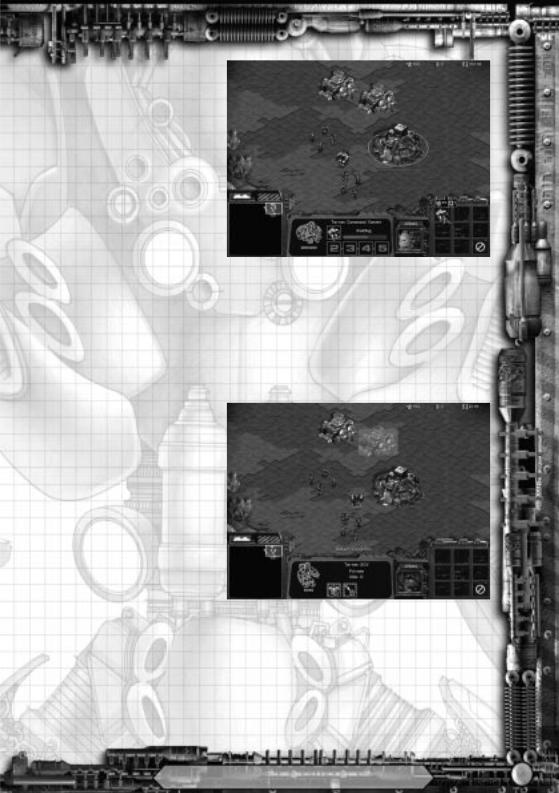
Your mission is to create a small outpost on an abandoned space platform. In the centre of your Main Screen you will see a Command Centre, a Supply Depot, a group of Terran Marines and an SCV.
1.Move the arrow over the Command Centre. When you are over a unit or building on the Command Map that you are able to select, the arrow will change into a selection cursor.
2.Select the Command Centre. When you select a unit or building, a coloured circle highlights your choice. Also, a description of the selection will appear at the bottom
of the Main Screen in the Status Display area.
BUILDING AN SCV
1. Move the arrow over the SCV Command Button. The words Build SCV will appear in anautomatedheads-updisplay.Note that the cost of building this unit and how many supplies it requires appears in a heads-up display that is directly connected to the Command Button. All costs for buildings and upgrades will appear in the same way.
2. Click on the Build SCV button. This begins the process of building your SCV. Note thatthestateofcompletionandtheunitsinthequeuetobebuiltareshowninthe StatusDisplayarea.
1 4 |
Blizzard Entertainment |
|
3.After the SCV is built, it will appear on the Main Screen.
4.Should you attempt to build another SCV, the message
Not Enough Supplies… Build More Supply Depots will display directly on the Main Screen.
5. To view your current available supplies, select your Command Centre or anySupplyDepot. Youcan alsoreferencethedisplayin
the upper right corner of the Main Screen. You must have supplies available in order to build or train more units. To increase the supplies available for use by your outpost, another Supply Depot must be built.
CoNSTRUCTIoN oF BUILDINGS
1.Select an SCV.
2.Move the arrow over the Build Structure button in the Command Button area and select this option. This will open the Basic Structure selection panel.
3.Move the mouse over the buttons and select the one that says Build Supply Depot. A green tinted image of a Supply Depot will appear on the Command Map. The green arearepresentstheamount of space required to constructthisstructure.
Buildings must have ample space available in explored territory in order to be placed.
SpecificRestrictions
Command Centres must be constructed a minimum distance from any Mineral Fields or Vespene Geysers.
Buildings may only be constructed on terrain that is defined as suitable for construction.
Buildings may only be constructed in areas that have been explored.
Blizzard Entertainment |
1 5 |
|
If you attempt to place a building in a location that is restricted, the portion of the building image that lies within the restricted location will be denoted by a red tint. Also, a message will inform you why you cannot build there, and you will be unable to place the building.
4. To place a building, select an area that falls within the restrictions for construction.
When you have chosen an appropriate site, left-click to place the building. The SCV willmovetotheselectedsiteandbeginconstruction. Note thatconstruction does not begin until the SCV reaches the selected site. Any obstacles present when the SCV reaches the site will prevent the construction from commencing.
If you select the new Supply Depot while it is being constructed, you will notice a completion bar in the Status Display area. A status bar located below the selected building indicateshowmuchdamagethestructurecantakebeforeitisdestroyed.Note thata building under construction begins in a weakened state and only reaches full strength when construction has been completed.
5. Once the SCV has completed this construction, select the new Supply Depot. Notice
that the total available supplies have been increased. Remember that you can also
select your Command Centre or refer to the display in the upper right corner of the
Main Screen.
The construction of certain buildings provides opportunities for various unit upgrades. When such an upgrade is available, moving the arrow over the associated Command Button will activate a heads-up display listing the requirements to obtain that upgrade.
EXPLoRATIoN AND THE FoG oF WAR
You will now want to begin gathering resources such as Minerals and Vespene Gas. To increaseyourreserves,youmustfindMineralfieldstoharvestandsearchforVespenegeysers that may be found about the area. Initially, the area around your Command Centre and Supply Depot is unexplored and will appear as great black regions on both your Main Screen and Mini Map.
1.Select an SCV. Then select the Move button from the Command Console.
2.A targeting cursor will appear on the Main Screen. Use this to indicate the destination of the selected unit.
3.Send your SCV into the unmappedregiontotheleftofthe Command Centre. Your SCV will immediately head off in that direction, surveying any territory itencounters.
4.As your unit enters unknown regions, they will become visible on both your Main Screen and
the Mini Map. Continue to
1 6 |
Blizzard Entertainment |
|
explore the area immediately around your Command Centre and then return the SCV to its starting location.
5.The area that is no longer in the vision of any of your units or buildings becomes shrouded. While the terrain that is in the shrouded area is still known, any units that you do not control that enter into this “Fog of War” will not be visible on the Main Screen or the Mini Map.
6.If buildings occupy an area that is later shrouded by the Fog of War, they will continue to be shown in their last known state.
7.When your units re-enter these shrouded areas, your knowledge of the terrain and any units or buildings in that area will be updated.
GATHERING Resources
1.To the left of your Command Centre should be a group of Mineral fields. Instruct your SCV to Gather these Minerals by selecting the correspondingbuttonfrom the Command Console.
2.A targeting cursor will appear as you move the mouse back to the Main Screen. Left-click the Mineral field you wish to mine.
3.You can also order the SCV to gather resources by simply right-clicking on the
Mineral field you wish to mine.
4. Your SCV will begin working the Mineral field and will return gathered resources to
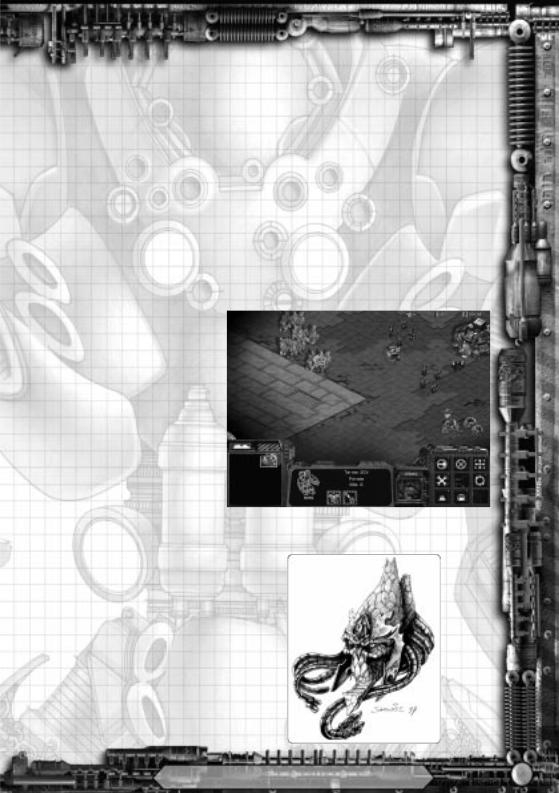
Protoss High Templar, wearing the much prized Khadarin Amulet
Blizzard Entertainment |
1 7 |
|
the Command Centre on its own. The SCV will repeat this gathering cycle until the Minerals run out or the unit is given another command.
Now that you have found a source of Minerals, gathering Vespene Gas is next.
1. South of your Command CentreisalargeVespeneGeyser. Select an SCV and move it next totheGeyser.
2. Select the Build Structure button in the Command Console area.
3. Move the arrow over the buttons and select the one that says Build Refinery. Once you have collected the required amountofresourcesasindicated intheheads-updisplay,selectthe Build Refinery button.
4.MovetheimageoftheRefinery over the Vespene Geyser. When the placement mask displays all
green, click the left mouse button and place the building.
Note: If you stop an SCV while it is returning to the Command Centre with a load of resources, the Gather button will be replaced by a Return Cargo button that you can select to resume delivery and continue gathering resources.
Viewing the Maps
To move around in each scenario, you can use either the Mini Map or the Main Screen
1.To move using the Mini Map, select the white box and move it around by holding down the left mouse button and dragging it where desired.
2.You can also select any area on the Mini Map and immediately jump to that location.
3.To move on the Main Screen, move the arrow cursor to any edge of the screen and the map will automatically scroll in the direction the arrow is pointing.
4.To use the keyboard to scroll on the Main Screen, use the arrow keys or the numeric keypad arrows.
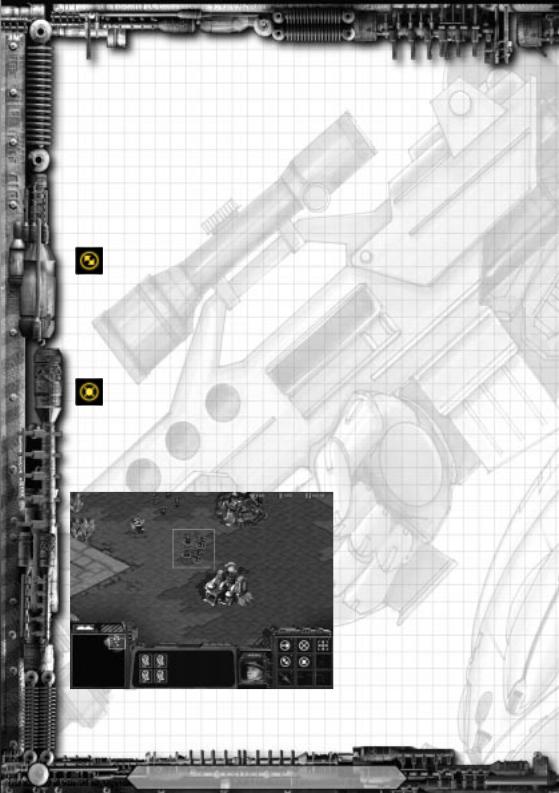
Unit commands & CoMBAT
You can give commands to your units at any time. All of your units share common commands, but some have specific abilities.
1 8 |
Blizzard Entertainment |
|
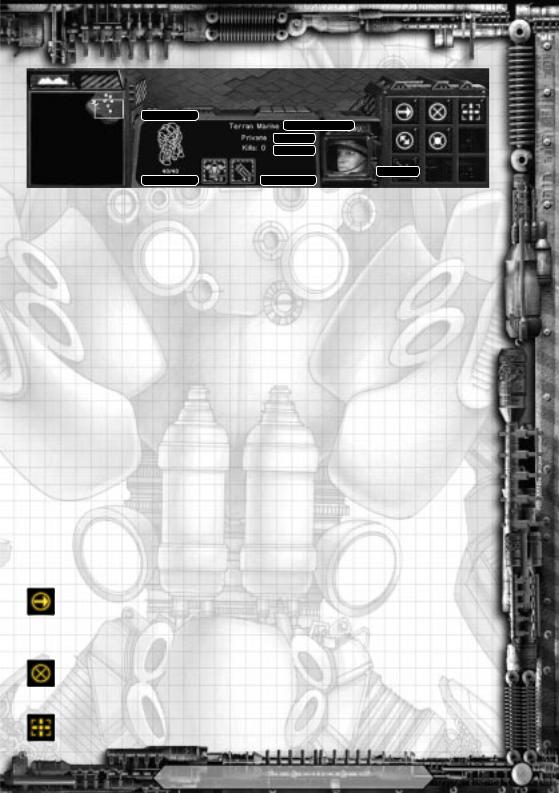
Wireframe
Unit Designation
Rank
Kills
Portrait
Hit Points |
Equipment |
1. Select a Marine. This will activate the Status Display, Command Button and Portrait areas in the Command Console.
WIREFRAME
A graphic representation of the health of your unit
HIT POINTS
A numeric representation of the health of your unit
UNIT DESIGNATION
The name of your unit
RANK
The military rank of your unit
KILLS
Number of enemy units personally eliminated in battle
EQUIPMENT
Armour, Weapons or Special Equipment and their levels of upgrade
PORTRAIT
A close-up view of your unit
oPTIoNS
Move
2.While having the Marine selected, click the Move button.
3.A targeting cursor will appear on the Main Screen. Use this to indicate the destination where you wish to send the selected unit.
Stop
4.While the Marine is moving, click the Stop button. The unit will halt all actions and await new orders.
Attack
5. While the Marine is selected, click the Attack icon.
Blizzard Entertainment |
1 9 |
|
6.A targeting cursor will appear on the Main Screen. Use this to indicate the target the selected unit will be sent to engage.
7.Select the Command Centre as the target you wish to engage. Normally you would never attack your own buildings, but until you feel ready to assault the enemy, they make for an easy fight.
8.While the Marine is attacking it, select the Command Centre.
9.Note that the hit point bar, numerical ratio and unit wireframe reflect the state ofthestructureasitsustainsdamage.
10.Select the attacking Marine and click the Stop button to halt your attack.
Patrol
11.While the Marine is selected, click the Patrol button.
12.A targeting cursor will appear on the Main Screen. Use this to indicate the second point of a patrol route (the first point being the current location of the unit). The unit will now move between these two points repeatedly. While in patrol mode your units will attack any enemy units they encounter.
13.To cease patrolling, select the Marine and click the Stop button.
Hold Position
14.While the Marine is selected, click the Hold Position button.
15.The Marine will now hold his position and defend that specific point, not moving to engage an enemy unit.
16.To cease Holding Position, select the Marine and click the Stop button.
ADDITIoNAL oRDERS
Grouping Units
1.Thereareseveraldifferentwaysof grouping units and issuing commands to them as a group. Up to twelve units may be placed in any one group.
2. Clicking and dragging across the Main Screen allows you to draw a rectangle around the units you wish toselect.
3. You may also select groups by holding down the shift key while selecting units. Holding shift while selecting a unit will add him to the current group.
4. Holding shift while clicking on an already selected unit will remove just that unit from a group.
2 0 |
Blizzard Entertainment |
|
5.Holding shift while clicking on a wireframe in the Status Display area will remove just that unit from a group.
6.Clicking on a wireframe in the Status Display area will select ONLY that unit and remove all other units from the group.
7.If you have only one unit selected and click on his portrait, it will centre the Main Screen on his location.
Groups are automatically saved into memory and can be recalled by selecting any member of that group while holding down the Alt key (Option key on the Macintosh.)
8. Groupscanbesetandsavedintomemorybyholdingdownthe Ctrlkeyandselecting a number from 0 to 9. This group can then be reselected by pressing the corresponding number key. Pressing the number key a second time will centre the Main Screen on that group.
Follow Command
9.Units can be made to follow a specific unit.
10.Select a unit or group that will be following a lead unit.
11.To choose the lead unit, immediately select it with the right mouse button (or ζ- click on the Macintosh.) The lead unit will then be outlined by a blinking green circle.
12.Moving the lead unit will cause the attached units to “follow the leader.”
Special Unit Commands
Transports
1.Transports are used to ferry your units across vast distances and impassible terrain. You can automatically load units onto a Transport by group selecting the units you would like to place onto the ship and then right-clicking the Transport. The number of units that can enter the transport is determined by the relative sizes of the units.
2.The Transport will be highlighted by a blinking green circle and will automatically movetowardstheunitsrequestingpick-up.Theselectedunitswillalsomovetowards the Transport and automatically enter it when it arrives.
3.Units can disembark from a Transport, after the ship has moved to its destination, by selecting the Unload All button in the Command Console.
A targeting cursor will appear on the Main Screen. Use this to indicate where you wish the units to be unloaded.
4.A single unit can be made to disembark from a Transport by clicking on it’s wireframe in the Status Display area while the Transport is selected. This will cause only the
unit whose wireframe is chosen to disembark from the ship.
Blizzard Entertainment |
2 1 |
|

List of Hotkeys |
|
F10 |
Game Menu |
Alt-M |
Game Menu |
Alt-S |
Save Game |
Alt-L |
Load Game |
Alt-H |
Help Menu |
F1 |
Help Menu |
Alt-O |
Options Menu |
+ |
Increase Game Speed |
- |
Decrease Game Speed |
Ctrl-X |
ExitStarcraft |
Alt-X |
ExitStarcraft |
Ctrl-Q |
Quit Mission |
Alt-Q |
Quit Mission |
Ctrl-M |
Toggle Music On/Off |
Ctrl-S |
Toggle SFX On/Off |
Space Bar |
CentreonLastTransmission |
Ctrl+# |
Assign Group # |
# |
Select Assigned Group |
# again |
Centre on Assigned Group |
Alt+Select Unit |
Recall Group |
Shift+Issue Command |
SetWaypoint |
Ctrl-C |
Centre on Selected Unit |
Alt-C |
Centre on Selected Unit |
Tab |
Hide/Reveal Terrain in Minimap |
Shift+Tab |
Toggle Diplomacy Colours in Minimap |
|
Green: Your troops |
|
Yellow: Allied Troops |
|
Red:EnemyTroops |
Enter |
SendMessage |
Shift+Enter |
Send Message to All |
Ctrl+Enter |
Send Message to Allies |
Shift+SelectUnit |
Add/Remove Unit from Current Selection |
Ctrl+SelectUnit |
Selects all units of that type on the Main Screen |
2 2 |
Blizzard Entertainment |
|
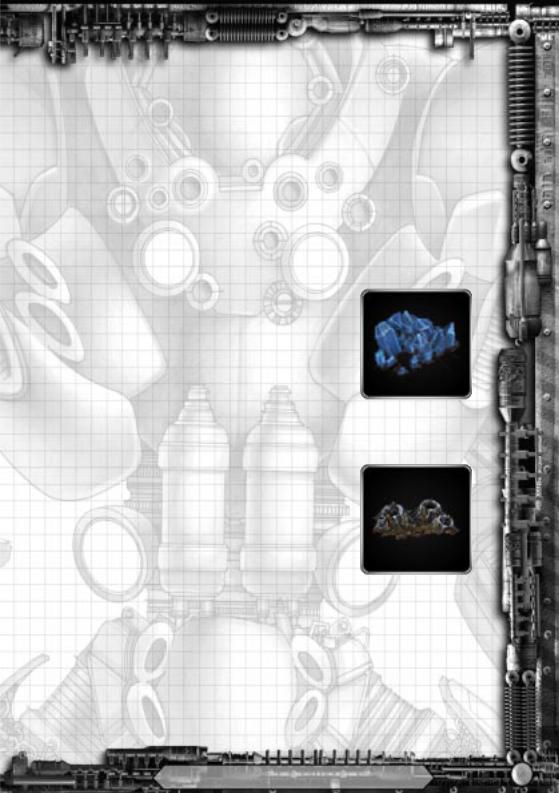
Resources
In order to build up your army, you will need to collect the raw materials necessary to develop and build your war machines. There are two types of resources. You will need to procure both in order to build your full complement of troops.
Mineral Deposits
The planets along the rim are often dotted with clusters of precious Mineral crystals. These Minerals are smelted down and used to create the armoured hulls of starships, vehicles and personal armour. Even the Zerg require Minerals to harden their carapaces and develop strong teeth and bones. The Mineral crystals take some time to gather, and only SCVs, Drones, and Probes have the necessary equipment to break off bits of the crystals and return them to the proper building.
Vespene Geysers
Vespene gas has an unusually high potential energy rating, and as such it is highly valued for use as a fuel in highperformance engines and energy reactors. The Zerg have adapted themselves to use raw Vespene as a source of nourishment to drive their greatly accelerated metabolisms. EventheProtossrequireVespenetoworkasacatalystfortheir psi-driven machines. Geysers of this powerful green gas can be found on many planets along the Rim, and several space stations have been built over Vespene-rich asteroid belts. A refinery of some sort must be built over an active geyser to process and package the gas for its collection by the different species.
While an individual geyser has an effectively unlimited amount of gas within it, after a certain point the geyser “collapses” and only trace amounts of Vespene can be refined from it. Most commanders would do well to seek fresh geysers to ensure that they have enough fuel to maintain their military.
Blizzard Entertainment |
2 3 |
|

the Campaign Editor
The Starcraft campaign editor allows for the creation of unlimited campaigns to play in Starcraft. These campaigns can be for either single player or multiplayer use and can consist of multiple maps, mission briefings, specific conditions for each map and special unit attributes. The campaign editor files are automatically transferred to other players in multiplayer games, ensuring the flexibility to easily design, create, and immediately play a scenario against any and all opponents.
The campaign editor offers the power of a detailed programming language presented in an accessible format that can be learned in a short time. These “triggers” take the place of complex programming statements and allow novices and veterans alike to create a richly detailed world in which to play.
For detailed descriptions on using the Starcraft campaign editor and tips on creating maps and missions, please refer to the comprehensive help file located on the Starcraft CD.
EditorFeatures
•Powerful trigger-language which allows you to create cause and effect statements that can be used throughout your campaign.
•Abilitytocreatemapsthatrangeinsizefrom64x64to256x256.Rectangular map sizes such as 256x64 or 96x128 are also available.
•Complete access to all of the units and buildings in the game, including heroes from each of the species.
•Ability to set up ‘Forces’ where multiple players are tasked with a common set of victory conditions or other conditional guidelines.
•Ability to modify each of the individual unit and building statistics.
•Regions can be defined and named, to specify actions that should happen in specific areas on the map.
2 4 |
Blizzard Entertainment |
|

STARCRAFT
Terran History
The Decline of Western CiviliSation
lthough technology and world A culture progressed rapidly throughout the twentieth century, their advancements paled in
comparison to the seemingly reckless leaps thatwouldfollow.Bytheendofthetwentyfirst century, mankind had seen bold and unprecedented changes within the world. Radical new technologies were surfacing at incredible rates, offering increased access to advanced computers and informational databasestoeventhemostdestitutenations of Earth. In the wake of the eradication of Communism from the Eastern Nations, nuclear weapons quickly became available in abundance. The international power structure, once defined primarily by the acquisition of capital and military superiority, was blasted apart as third-world nations rose to challenge the economic and military might of the world’s super-powers.
As the manipulative sciences of cybernetics, cloning and gene-splicing rose steadily into the public forum, militant humanist and hard-line religious groups challenged the rights of private interest corporations who profited from genetic experimentation. Multitudes of people were being augmented with cybernetic implants while others began to manifest slight physicalmutationsrangingfromheightened senses to advanced telepathy. These dramatic changes within the human gene pool caused widespread panic amongst manyofthefundamentalhumanistfactions.
Technology continued to evolve and spread, and population rates soared. Near
the end of the twentieth century, there were six billion people upon the earth. Within three hundred years, the population had grown to an estimated twenty-three billion. Pollution and a lack of natural resources and affordable fuelsaddedtothefireasworldleaderssought ways to stem the growth of their nation’s inhabitants. Popular sentiment held that the world was plummeting towards an inevitable catastrophe as overpopulation and genetic alteration swept across the globe.
Meanwhile, as tensions rose around the world regarding the use and capitalisation of cyberneticsandgeneticmutations,manycore international economic systems folded in uponthemselvesandshutdown.Horrificacts of terrorism and violence erupted between the corporate sector and the humanist factions, resulting in forced police actions across the globe. Irresponsible media coverage of these atrocious police actions spurred the already rampant civil chaos in many of the larger countries. Ultimately, the precarious balance of world power exploded into international pandemonium.
The New order
OnNovember22,2229,theUnitedPowers Leaguewasfounded.TheUPLwastobecome the ultimate incarnation of the vision of a unified humanity held by the now defunct United Nations. This new order encompassed and controlled close to ninety-three percent of the earth’s population, failing only to bring ordertoafewvolatileSouthAmericanstates. The UPL was founded upon the basis of
2 6 |
Blizzard Entertainment |
|

‘enlightened socialism’, but often resorted to harsh, fascist police actions to maintain the public order. With its control lasting for nearlyeightyyears,theUPLbegantodevise a rigid agenda that would unify the various cultures of humanity for all time. Great lengths were taken to eradicate the last vestiges of racial separatism, and the UnitariateCommissionsbannedmanyofthe world’s oldest religions. English was designated as the common tongue of the planet, replacing many ancient languages that were subsequently banned in their native countries.
Although religions were officially banned by the UPL, the organisation held an almost zealous belief in the supposed ‘divinity of mankind’. This quasi-religious dogma called for the immediate eradication of any nonvital prosthetics or mutations amongst the pure-strain human gene pool. Hard-line UPL proponentsandscholarsarguedthatgenetic alteration, cyber technology, and the use of psychoactive drugs all led to the eventual degenerationofthehumanspecies.TheUPL leaders formulated a bold plan that would assure that humanity would persevere, unscathed by the tempting corruption of radical technologies.
The Great Purification
Like the bloody Inquisitions that devastated Europe eight hundred years before, the UPL set in motion one of the harshest agendas ever conceived by humanity: Project Purification. This genocidal crusade was the Government’s final solution to the matter of cleansing humanityofitsmoredegeneratefacets.UPL troops scoured every nation on earth, rounding up dissidents, hackers, synthetics, the cybernetically enhanced, tech-pirates, and criminals of every kind. This planet-wide culling resulted in the eradication of nearly 400,000,000people.The world-media,now
under the strict control of the UPL, downplayed the horrific violence and kept thegeneralpopulaceofEarthunawareofthe scope of the atrocities being committed.
Despite their heinous acts, the UPL succeeded in advancing many core technologies. Fields of research that had lain dormant for decades were opened again under UPL control. The Space Exploration programs of the mid-twentieth century, abandoned by the American and Russian governments due to drastically reduced budgets and incessant political sabotage, becamethebasisforaneweraofexploration for humanity. The coupling of cryogenic hibernation with warp-drive technology resulted in the ability to travel amongst the stars. Within the span of forty years the UPL founded colonies upon the moon and many of the other planets within the Terran solar system.
During this period, a brilliant young scientist named Doran Routhe made plans to consolidate his power within the UPL. Uninvolved with the vulgarities of Project Purification, Routhe was obsessed with founding colonies upon the worlds found beyond the Terran Sector. Routhe was convincedthatthediscoveryofnewminerals and alternate fuel sources on the outlying worlds would make him one of the most influential men on Earth. Through his political connections and personal fortune, Routhe was able to secure thousands of UPL prisoners to use as guinea pigs for his secret plans.
The prisoners, slated for mass execution under the edict of Project Purification, were transportedtoRouthe’sprivatelaboratories. Routhe, planning on sending the prisoners off to colonise the outlying worlds, had his sciencecrewsprepnearly56,000peoplefor long-term cryogenic hibernation. Cataloguing the various mutations and cybernetic enhancements of the prisoners, Routhe input all of the data into a
Blizzard Entertainment |
2 7 |
|

revolutionarysupercomputer.ThisArtificial Tele-empathic Logistics Analysis System, known as ATLAS, then processed this geneticinformationandwasabletopredict which of the prisoners should be able to survive the trial to come. Only 40,000 of the prisoners were deemed viable to survive the rigorous conditions. Those 40,000 were then loaded onto four gargantuan, automated deep-space supercarriers. As the prisoners were prepped for cryogenic ‘cold sleep’, the ships were loaded with enough supplies, rationsandhardwaretoaidthemoncethey arrived at their scheduled destination. The navigation computer was then programmed with the coordinates of the outlying planet Gantris VI. All seemed in perfectpreparation,butevenRouthecould nothaveimaginedthattheprisonerswould be launched to their almost certain deaths in the galactic rim.
The Exiles and the Long
Sleep
The ATLAS was installed into the first of thesupercarriers,theNagglfar.Threeother carriers — the Argo, the Sarengo, and the Reagan — were programmed to follow the Nagglfar as it was launched into the void of space towards Gantris VI. Over the course of this journey, which later generations would call ‘The Long Sleep’, ATLAS continued to monitor the humans kept in cryogenic stasis. Evaluating the numerous mutations and enhancements found within the prisoner’s gene pool, ATLAS became aware of a powerful mutagenic strain that existed in some of their DNA. While this mutation was found to reside in less than one percent of the prisoners, it seemed to augment the latent psionic potential within the human brain. ATLAScalculatedthat,shouldtheprisoners survive in their new environment, many of them might benefit from this psionic
mutationwithinonlyafewgenerations.These findings were recorded and relayed back to Earth, straight into the logs of Doran Routhe.
Originally scheduled as a one-year trip, theirvoyagetookaturnfortheworse.Atsome point during the journey the navigational systems linked to ATLAS shut down, erasing not only the coordinates of Gantris VI, but those of the Earth as well. The four ships, carrying their hapless cargo in stasis, barrelled blindly through space at warp speeds for nearly thirty years.
Eventually, the warp-drive engines of the four supercarriers reached critical meltdown. After twenty-eight years of warp travel, the huge ships emerged into real space near the edgeofahabitablestarsystem.Some60,000 light years from the Earth, their engines destroyed and their life-support batteries nearly exhausted, the ships engaged their emergencyprotocolsandplummetedtowards the nearest habitable worlds in the system.
The Reagan and the Sarengo crash landed on the world that would be named Umoja. The Sarengo, which had suffered massive systems failures during its atmospheric descent, smashed into the planet killing all of its 8,000 passengers. The Reagan was more fortunate, making a controlled descent and landing safely. Once the ship had landed, the ‘cold sleep’ chambers were deactivated and thesurvivingpassengersslowlyawakened.The passengers,attemptingtodiscernwherethey were and how long they had ‘slept’, found that the ATLAS system had somehow erased all knowledge of their journey from their computer banks.
The Argo landed upon the red world of Moria. Its passengers met with the same fate as those aboard the Reagan, as all information regardingtheircurrentstatuswaserased.Only the passengers of the Nagglfar could access their ship’s computers to discern their plight. They accessed ATLAS directly and confirmed theirgrowingsuspicionsthattheywouldnever see the Earth again, for although they had
2 8 |
Blizzard Entertainment |
|

 Loading...