

™
www.summoner-thegame.com
www.thq.com
CONTENTS
Installation 2
The Controls 3
Main Menu 5
Options 5
Playing the Game 7
Game Screen and hud 7
Dialogue 9
Combat 10
Interface Screens 13
Switching Characters 18
Levels and Experience 18
Spells Menu 19
Skills Menu 21
Traveling to Other Cities and Locations 22
Summoning 22
Items 24
The World of Summoner 25
The Mark of the Summoner 27
The Characters 28
Saving and Loading 31
Multiplayer 32
Hints/Tips 34
Credits 36
Technical Customer Support 38
1

Installation
Insert CD 1 into your computer’s CD-ROM drive. After a few seconds the Install
Program will begin automatically. If you have autoplay disabled you will need to
double-click on the “My Computer” icon and then on your CD-ROM icon. Once the
CD-ROM window has opened, double-click on the setup icon to begin installation.
Follow the on-screen instructions that appear after the Install Program begins.
When the game has finished installing, the Main Menu will appear. Please consult
page 5 of the manual for instructions on beginning a new game.
If you experience problems installing Summoner
consult the README.TXT located on Disc 1 or check out the support page at
www.thq.com/support.
At the time of printing, all material and content contained herein was and is current.
However, some elements of instruction and gameplay may have since changed
slightly. We strongly recommend that you view the README.txt file located on Disc 1
to accommodate the possible changes.
Minimum Specs
Windows 95/98/ME compatible computer system with DirectX 8
Pentium II or K6-2 400 MHz Processor
3D Graphics Accelerator Card with 4MB of RAM (such as a Voodoo 2) or better
64 MB RAM
4x CD-ROM
800 MB of Free Hard Disc Space
DirectX certified sound card
100% Microsoft compatible mouse and keyboard
Recommended Specs
Pentium III or K6-2 500 MHz Processor
Voodoo3 or TNT2 Graphics Accelerator Card
128 MB RAM
EAX compatible sound card
™
on your PC, please
Supports
Internet or LAN multiplay via TCP/IP
2

THE CONTROLS
In Game Controls
Mouse: Move the cursor on screen
(both in-game and on menus)
to highlight available options
and move a character or party
to a desired location.
Note: To move your party or a single character using
the mouse, you may move the cursor to an available
spot on the ground and simply click or hold the
mouse button down. If you point and click, the character will travel to that spot and stop. If you hold the
mouse button down, the character will follow the cursor continually.
Note: Moving the cursor to the extreme left edge of
the screen will rotate the camera counter-clockwise.
Similarly, moving the cursor to the extreme right edge
of the screen will rotate the camera clockwise.
Left Mouse
Button: Activate highlighted
option/Confirm/Select
Right Mouse
Button: Initiate Chain Attack (see page
11 for more information)
Q: Toggle on/off Quest
Journal menu
R: Toggle on/off Character
Status menu
I: Toggle on/off Character
Inventory menu
S: Toggle on/off Skills menu
Enter: Enter/Leave combat mode
C: Toggle on/off Spells menu
M: Toggle on/off Map Screen
H: Toggle on/off Solo Mode
Space Bar: Pause/Unpause gameplay
Tab: Cycle through available
characters
3

Print Screen: Take a .jpeg screen shot of
the current gameplay frame
that is stored in the Summoner
root directory
ESC: Toggle In-Game Menu (see page
13 for more information)
Left Arrow Key: Rotate camera clockwise
Right Arrow Key: Rotate camera counter-clockwise
Up Arrow Key: Zoom in camera
Down Arrow Key: Zoom out camera
F12: Toggle High/Low/Auto Camera
Note: Selecting the “Inverse Camera” option in the
Options menu will cause the camera commands to work
inversely. Selecting this option will only affect the keyboard commands.
Menu Controls
Mouse: Move cursor to select
Left Mouse
Button: Scroll between/change available
Right Mouse
Button: View inventory item options
available options
options and/or menu screens
(not always available)
4
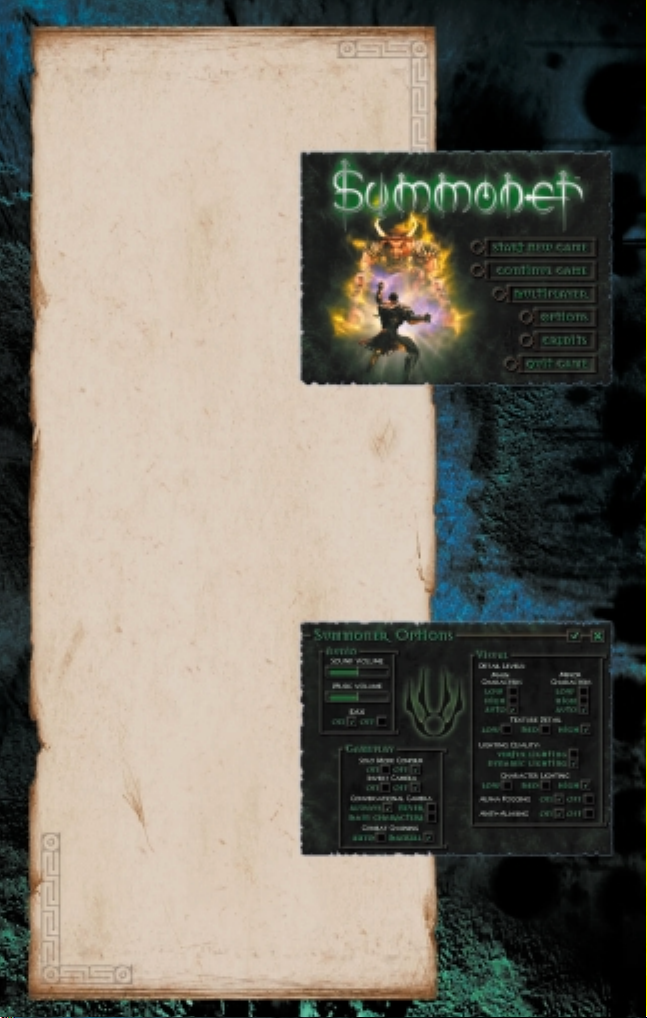
MAIN MENU
rom the Main Menu, you can choose to start a
new game, continue a saved
game, play a multiplayer
F
game, view the options menu, view
the list of credits, or quit. Use the
mouse to highlight an option and
click on it.
Start New Game—Begin a new
game of Summoner
Continue Game—Load a previously
saved game . You must have at least
one saved game to see this option.
See saving and loading on page 31
for more information.
Multiplayer—Begin a multiplayer game of Summoner
Options—Adjust the game settings.
Credits—Display the credits.
Quit Game—Quit the game.
™
.
OPTIONS MENU
ustomise your gameplay experience
with the Options Menu. Use the mouse
to highlight an available option and
C
click to toggle the settings.
AUDIO
Use the mouse to increase or
decrease the audio settings.
Sound Volume—Increase or
decrease the volume of the sound
effects.
Music Volume—Increase or
decrease the volume of the music.
EAX—Toggle EAX on or off.
™
.
VISUAL
Detail Levels—Choose the level of detail (low, high,
auto) you desire for characters.
5

Texture Detail—Choose the level of detail (low, high)
you desire for the in-game textures.
Lighting Quality—Choose between Vertex or
Dynamic lighting.
Fogging Plane—Choose the fogging distance (low,
medium, high).
Character Lighting—Choose the amount of ambient
lighting on your character (low, medium, high).
Anti-Aliasing—Toggle on or off (This option is available only when used with a video card that supports
an anti-aliasing feature.)
Note: Unless you are using a high-end computer, it is
recommended that you do not choose the highest settings for all available options as some slowing in
gameplay could occur.
GAMEPLAY
Solo Mode Confirm—Select ON to activate a pop-up
window each time you choose to enter solo mode. To
enter solo mode without a pop-up window, select OFF.
See page 18 for more information on solo mode.
Invert Camera—Toggle the camera controls as either
regular or inverted.
Conversational Camera—Choose to toggle different
options for the conversational camera. The available
options are: 1) Never zoom the camera in during conversation with npc
during conversation with npc
camera in during conversation with important npc
See controls on page 3 for more details on the game
camera and camera control.
Combat Chaining—Choose to select either manual
or auto for Chain Attacks. You control Chain Attacks
when the manual setting is selected. The computer will
control Chain Attacks when the auto setting is selected.
See page 11 for more detail on chain attacks.
s, 2) Always zoom the camera in
s, and 3) Only zoom the
s.
6
PLAYING THE GAME
oseph begins his adventure in the farming village of Masad. When beginning a new
game, a tutorial is available to help you become accustomed to the game controls and explain how to talk to other characters, how to find items, and how to
J
engage the enemy in battle.
It is highly recommended to use the tutorial to learn how to play Summoner
™
.
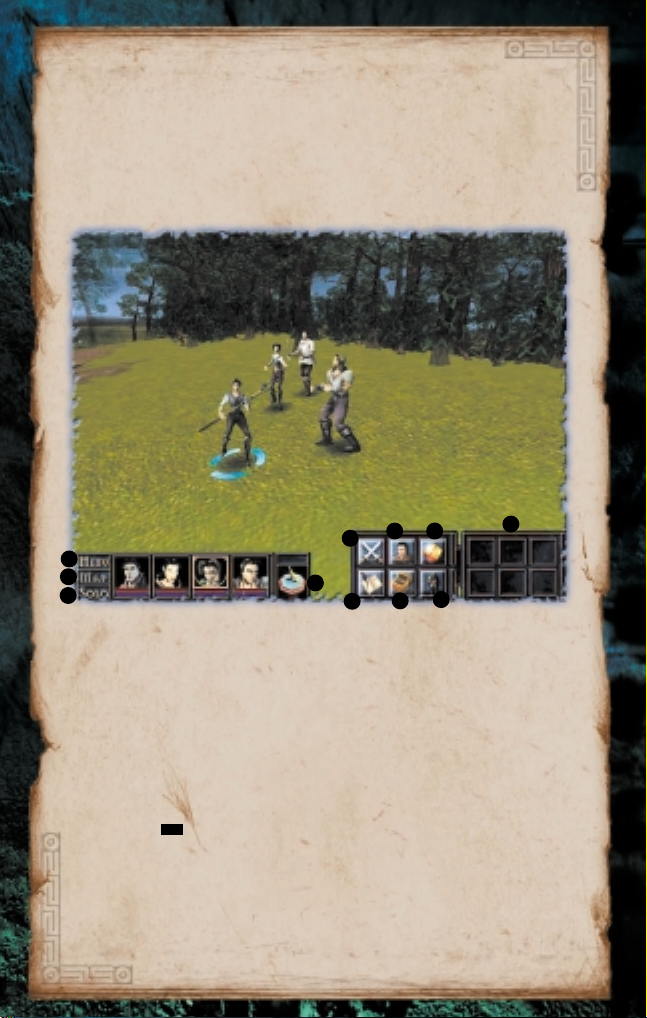
11
2
1
3
1. MAP Button
2. MENU Button
3. SOLO Button
4. Sun Dial
4
5. Swords Icon
6. Profile Icon
7. Spell Icon
8. Journal Icon
7
6
5
10
9
8
9. Chest Icon
10. Figure Icon
11. Programmable
Hot Keys
The Game Screen And HUD
he game screen provides important information for each character in your party.
You will also be able to view the surrounding environment containing NonPlayer Characters (npc
T
Player Characters
Along the bottom of the screen are pictures of each character in your
party. Press the tab key to scroll through party members. You control the
character that is highlighted.
Health Points Bar (hp)
Below each character’s portrait is a red Health Points Bar. This shows how much health
(hp) a character has left. Watch this meter closely when in combat and heal characters
that have low hp. When the red bar disappears, the character is incapacitated.
s) to talk with, enemies to battle, and items to find.
7

Action Points Bar (AP)
Beneath the character’s hp Bar is a blue Action
Points Bar. This displays how many Action Points (ap)
a character has remaining. Action Points are spent
to cast spells, attempt chain attacks, and use active
skills. When a character has spent all of his ap, he
is unable to cast spells, attempt chain attacks, or
use active skills available to him. ap will slowly
regenerate over time.
The Heads Up Display (hud) contains the
following elements:
1. MAP Button
Click here to bring up the Map menu. For more information on the map, see page 17
2. MENU Button
Click here to bring up the in-game menu
3. SOLO Button
Click to toggle Solo Mode. For more information on
Solo Mode, see page 18
4. Sun Dial
Click here to pause the game
5. Swords Icon
Click to toggle on/off combat-ready mode
6. Profile Icon
Click to bring up the Character Status Menu
7. Spell Icon
Click on the book to bring up the Spells Menu Screen
8. Journal Icon
Click to bring up the Quest Journal Menu Screen
9. Chest Icon
Click to bring up the Inventory Menu Screen
10. Figure Icon
Click to bring up the Skills Menu
11. Programmable Hot Keys
The empty boxes immediately next to the icons are
reserved for customisable hot keys. You may choose
to drag spells, skills, or a combination of both spells
and skills from the in-game menus into the boxes. The
boxes have been pre-assigned numbers 1 through 6
left to right, top to bottom. Pressing the corresponding
numerical key on the keyboard activates the spell or
skill assigned to that box. The spell or skill can also be
activated by simply clicking on the icon.
8
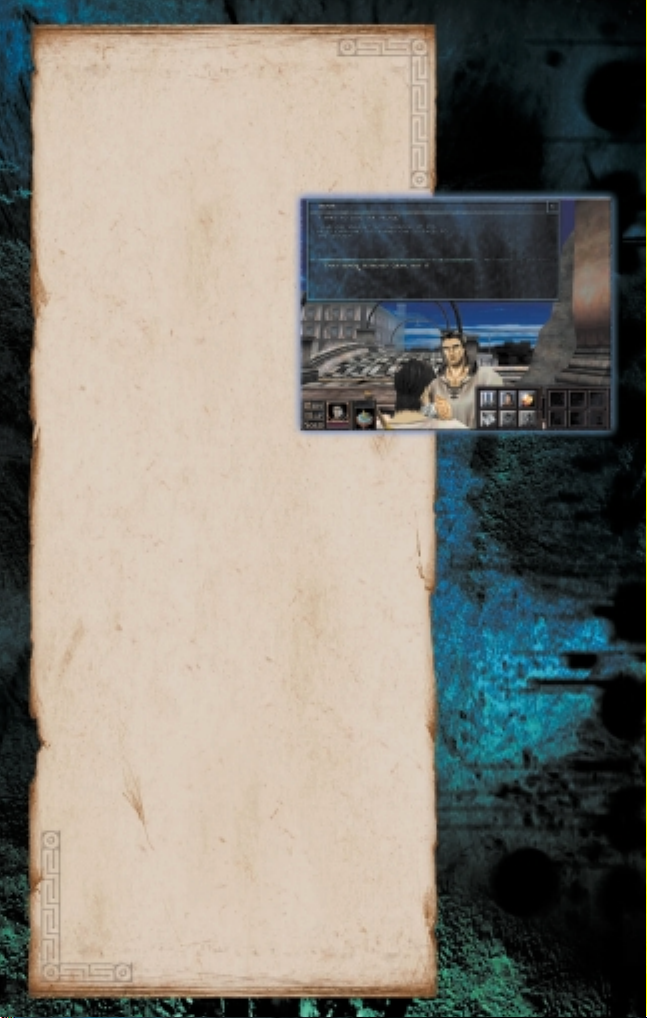
Dialogue
hile traveling through the villages, towns,
and castles of Medeva and Orenia, you can
W
Approach a character and select them by highlighting
them with the cursor. Click on the highlighted character
to begin the dialogue.
If a character has something important to say, the dialogue bubble
shows two exclamation marks (!!).
These characters often possess critical information regarding Joseph’s
quest, or they might offer optional
adventures to embark on. Some
characters may need to be visited
more than once before they give you
critical information.
The dialogue window contains two areas. The top half of
the window displays what the npc is saying. The bottom
half lists the available questions or responses. When the
npc’
word more will be displayed. Use the cursor and click to
scroll through the rest of the text.
Sometimes Joseph has many questions to ask a character or has multiple responses to their questions.
When more than one question or response is displayed, use the cursor to select an available phrase
and click on it to talk to the npc. When the discussion
for that topic has been completed, it is removed from
the Topic List. New topics will be added to the list as
more information is revealed.
To exit the dialogue at any time, click the X at the
top right corner of the dialogue box. Otherwise, select
fare well to end the discussion. Important conversations cannot be aborted.
talk to any of the characters you meet.
Note: Joseph will also come across
characters talking to each other.
When Joseph can hear the conversation, you will see a
smaller text box above the two npc
asterisk above his head (*) is the npc currently talking in
the conversation.
s speech is too long for the dialogue window, the
s. The character with an
9

Combat
oseph will encounter many hostile characters
and monsters while traveling through the lands of
Medeva and Orenia. Even as the adventure begins,
J
Orenian soldiers have destroyed Masad, Joseph’s
village, and they are searching the area for survivors.
Learn to use the combat techniques below to save
yourself and your party members from the enemies
and monsters that roam the world of Summoner
The Combat System
A hybrid system of real-time and turn-based combat is
used for all battles in Summoner
take turns attacking each other. Combat begins when
either character takes the first action.
The Chain Attack system enables you
to extend your turn. Every time a new
attack is added to the chain, you gain
one additional attack. When you finally fail to add an attack to the chain,
your turn is over. See page 11 for more
information on chain attacks.
This turn-based system occurs in real
time, which means you do not have to
wait for the enemy’s attack before
moving or targeting a new opponent.
You can move the party members
around the battlefield at any time,
gaining a height advantage on higher ground if available. You can also use the cursor to target a new enemy,
or you can run away from combat if your hp is too low.
Initiating Combat
Try to surprise an enemy by approaching it from behind
or out of view. This will give you an advantage on your
first attack. If more than one enemy is within range,
choose your target with the mouse and cursor. The red
cursor points to the currently selected enemy, with a red
bar above each enemy’s head. The red bar represents
their hp. Click on the selected enemy to attack.
Once a foe is selected, Joseph engages in combat,
continuing to fight until you give him another command or until he or his opponent runs out of hp. You
can reposition Joseph by using the mouse and cursor,
or you can run away from the battle if your hp is low.
Enemies always fight to the death. If you run away
from combat, your opponents will pursue.
10
™
. In battle, opponents
™
.
Note: You can exit/leave the combat-ready mode at
any time by clicking on the sword icon located on the
on-screen hud or by pressing the enter key.
Damage
During combat, numbers appear above each character’s head. The numbers represent how much health
has been subtracted from a character’s hp. White numbers indicate the damage done to enemies, while yellow numbers show how much damage Joseph and
his friends have sustained.
Combat Advantages
In addition to receiving a bonus for a surprise attack,
Joseph and his party can gain positive or negative combat modifiers. The numbers in blue show the percentage
modifiers (if any) for a character’s attack. Attacking from
higher ground adds a bonus, while attacking from lower
ground results in a penalty. These combat modifiers
affect the damage inflicted against opponents as well as
the damage sustained from enemy attacks. You may also
receive a bonus by attacking a creature from behind.
Note: Highlight an enemy with the cursor at any time
to view the creature’s health bar.
Chain Attacks
During combat, Joseph has the ability to perform
a chain of special attacks against the enemy. While
attacking the creature, a chain symbol appears
over Joseph’s head.
When the symbol appears over Joseph’s head, click
the right mouse button to begin the Chain Attack. For
each additional attack, click the right mouse button
until you are unable to continue. For each successful
Chain Attack, you get the chance to perform another
one. With each successive Chain Attack, your timing
needs to be more precise in order to continue the
chain. As long as you continue the Chain Attack, your
opponent cannot strike. When the chain is broken,
your opponent’s turn begins.
If you click the right mouse button too quickly or are
unable to press it in time, the Chain Attack fails and
the text too fast or too slow is displayed on the
screen. Try to adjust your timing to master the Chain
Attack.
Each party member has a different combination
of Chain Attacks.
11

Joseph’s Chain Attacks
• Added Blow—Standard secondary attack.
•Desperation—Does damage with the amount of
damage taken.
• Confusion—Removes APs from enemy.
• Revitalise—Party regains HP.
• Burn Hands—Does fire-based damage.
• Push—A successful push will increase the chance
for the next attack.
• Mind Drain—Target loses AP, while Joseph recovers AP.
• Life Leech—Does damage and recovers HP.
Flece’s Chain Attacks
• Added Blow—Standard secondary attack.
• Kick—Increases chance to hit with blunt melee attack.
• Mug—Steals gold and inflicts medium damage.
• Leg Swipe—Slows target and does medium damage.
• Arm Slice—Cripples target and inflicts
medium damage.
• Blind Stab—Blinds target and causes little damage.
• Desperation—Does damage with the amount of
damage taken.
• StaminaAtk—Does damage with the amount of AP left.
• Silence—Target cannot cast spells.
Rosalind’s Chain Attacks
• Added Blow—Standard secondary attack.
• Shock GRSP—Does energy-based damage.
• Bless—Party takes less physical damage.
• Confusion—Removes APs from enemy.
Jekhar’s Chain Attacks
• Added Blow—Standard secondary attack.
• Kick—Increases chance to hit with blunt melee attack.
• Axespin—Damages all nearby targets with axe only.
• Earthshaker—Knock down nearby targets with
blunt weapon only.
• Mend—Recovers small amount of HP.
• Desperation—Does damage with the amount
of damage taken.
• Sacrifice—Does double damage, but you lose
your own HP.
• Life Leech—Does damage and recovers HP.
By performing Chain Attacks frequently, your characters can gain new Chain Attacks to add to their arsenal. These can be assigned to specific keys by using
the Skills Menu. See page 15 for more information.
Note: Chain Attacks are only available during melee
combat and cost Ability Points to perform. Use faster
weapons to perform longer Chain Attacks.
12

After Combat
When the enemy has been killed, you can pick up any
gold and items that were dropped during battle. Use the
cursor to highlight available items and click the mouse
to pick them up and/or view the Contents Menu.
In the Contents Menu, you can choose to take everything
right away by selecting the option pick up selected. To
be more selective about the items, use the cursor to
select an item and click on it. You can leave an item
behind by selecting it and clicking. A red X should
appear next to it. If you decide you would like to take the
item after all, select it again by clicking. A green check mark will appear.
When finished, choose pick up
selected and click.
Interface Screens
ress the esc key to pause the
game and view a list of interface screens. Highlight an
P
option and click to confirm the selection. To learn more about Saving and
Loading a game, see page 31. Select
quit to return to the Main Menu without saving your game.
Inventory
The Inventory screen displays all of the items and gold
your party has collected and equipped. From this
screen, you can equip any of the characters with new
items, or you can unequip unwanted
items.
Note: You can switch characters by
clicking on the arrows next to the
character’s name.
Selected Character—The left side of
the screen shows the selected character. The weapons and armour he
or she has equipped are shown in
the boxes around the character.
Equipped Items—Use the cursor to
highlight an equipped item and click
the right mouse button to view the Inventory Options
for that item.
• Identify—Some magical items need to be identified
before they can be equipped. Only characters with the
Appraise skill can identify items.
13

• Info—View the relevant information for the selected
item. Skills and skill levels required to equip
weapons and armour are listed in Item Info.
• Unequip—Remove the item from the character’s body.
• Destroy—Permanently destroy the item.
• Cancel—Return to the Inventory screen.
Note: Not all of these options are available for
every inventory item.
Party Items—The right side of the screen displays a
list of Party Items. These are the items you have either
found on your adventures or have purchased from a
merchant. Click on the icons near the bottom of the
screen to sort items by Weapons, Armour, Rings,
Magic, and Miscellaneous.
• Weapons—All of the equipped and unequipped
weapons are listed here.
• Armour—Everything you own from footwear to head-
gear is shown on this list.
• Magic—Potions, draughts, and tonics are listed.
• Jewelry—Rings and necklaces the party
has accumulated.
• Misc—All other miscellaneous items owned by the
party appear on this list.
Available Gold—The amount of money you possess
is shown on the bottom of the screen, next to a pile of
gold. The number represents how many Gold Pieces
(gp) you currently have. You can use gp to purchase
weapons, armor, potions, rings, and other items.
Skills
The Skills screen shows the primary Skills
for each character.
• Selected Character—A portrait shows the face of
the Selected Character. All the information displayed
is for this character only. Click on the arrows near
the character’s name to switch characters.
• Character Information—Beneath the portrait is a list
of primary statistics.
• Level —As you gain Experience Points (Exp), your
level increases.
• Exp—This lists your current experience
points. You earn experience by defeating
opponents in combat as well as completing
quests and tasks.
• To Next—The number of experience points
needed to gain the next level is displayed.
14

• HP—The character’s Health Points are displayed
here. You earn more HP with each level gained.
• AP—This shows your current Ability Points.
Without AP, you cannot use Chain Attacks, spells,
or active skills.
• Speed—The higher the Speed percentage, the
better your chances of successfully completing a
Chain Attack.
• Damage—The higher the Damage modifier, the
more damage you will inflict on an enemy. As you
gain more experience and find
better weapons, this Damage
modifier increases.
• Protection—A higher Protection
modifier reduces the amount of
damage you sustain from enemy
attacks. Equip better armor and
gain levels to increase your
Protection modifier.
• Skills—To the right of the screen
is the Skills column. As you gain
experience, you can increase the
modifiers, awarding points to each
character at your discretion. Below
are Joseph’s beginning skills. This list will grow as
Joseph progresses through his adventure.
• Sword Weapons—Increase this number to
improve Joseph’s swordsmanship.
• Dodge—Raise the Dodge modifier to better avoid
attacks during combat.
• Summon—Increases the power assigned to the
summoning rings and enables Joseph to summon more creatures. Joseph does not start out
with the Summon skill.
• Heal—Increases the amount of hp that can be
restored by casting a Heal spell.
• Chain Attacks—Joseph gains new Chain Attacks as
you progress through Summoner
™
. You cannot
assign skill points in the Chain Attacks section, but
you can assign the Chain Attacks to the following
keys: alt , caps , shift , ctrl . Use the cursor to
highlight the desired Chain Attack, then click to
select it. Now highlight and select an available key
to bind the Chain Attack to that button.
Note: Only 4 Chain Attacks may be used at any given
time—even if your character has more than 4 Chain Attacks
in their Skills Menu inventory. If you choose to use the
right-mouse button to activate Chain Attacks, the computer
15

will go through your selected Chain Attacks in order each
time a Chain Attack is successfully executed. Chain Attacks
can only be executed when the chain symbol is visible.
Status
The Status screen displays a character’s Resistances
and Status Effects and shows his or her main combat
objective.
• Resistances—The percentages to the right indicate
how resistant a character is to each type of attack.
• Slashing—A higher percentage reduces the
amount of damage sustained from slashing
weapons, such as swords.
• Piercing—The higher this modifier, the less damage a character sustains from piercing weapons
like daggers.
• Blunt—This reduces the damage taken from
blunt weapons like war hammers.
• Fire—Decrease your hp loss from Fire-based spells.
• Ice—Decrease your hp loss from Ice-based spells.
• Energy—Reduce the damage sustained from
Energy-based spells.
• Magic—Increase your ability to avoid Magical
attacks altogether.
• Status Effects—Whenever a character is afflicted, the
affliction appears in the Status Effects list. Once the
effect has been cured or has worn off, it disappears
from the screen.
While viewing the Resistances and Status Effects screen,
click to alter the Artificial Intelligence (ai) script for each
party member. This changes their primary combat objective—the way they engage the enemy during battle
while you are controlling another character.
AI Scripts:
• Melee—Send the character in for
hand-to-hand, hack-and-slash
style combat. The character picks
the closest enemy and begins
attacking.
• Support—Support characters attack
creatures that are not being
attacked by anyone else. When any
ranged attacker (i.e., using ranged
weapons or spells) is directly
attacked, a support character will
• Range—Useful for characters who have a ranged
weapon, like a bow. The character shoots enemies
that are being attacked by others. This lessens the
16
attack that enemy.

chance that the enemy will divert its attention to the
ranged attacker.
• Healer—A character set to Healer will heal the
other party members when they’re low on hp. If
there is no one to heal, a healer acts as if given
the Melee command.
• Caster—A character set to Caster avoids any sort of
Melee combat and will stay behind the front lines,
casting offensive and defensive spells.
• Healer/Caster—A combination order set, this charac-
ter casts combat spells until a party member is low on
hp, at which point he or she casts healing spells. Be
careful to watch your ap! A Healer/Caster is bound to
use a lot of ap casting combat spells and could run out
when a party member needs to be healed. However, ap
won’t drop below a minimum level.
Quest Journal
Every time Joseph is asked to complete a task, it is added into his
Quest Journal. The journal is separated into a quest section and a
description section.
• Quest—As Joseph gains more
tasks, they are listed here.
• Description—When you highlight
a Quest, its description appears
in the Description section. Each
Quest’s description reminds you
of the tasks needed to accomplish
it. Descriptions are updated when
new information is gained.
Note: There are two types of Quests: Required and MiniQuests. It is not essential to complete the Mini-Quests to
finish the game. You can call up the Quest menu at any
time by pressing q on the keyboard or clicking on the
quest icon located on the hud.
Map
As Joseph and his party explore new
areas, the areas become visible in the
Map screen. When you look at the
Map, you see three important details.
• Your current position is represented
by a white cone. You are standing at
the point of the white cone, where
the cone indicates the direction
of the camera.
• Explored areas can be seen as
soon as you view the Map screen.
17

• Areas you still need to explore are blacked
out and mysterious.
If the current area has more than one level (layers),
click on the arrows on the bar labeled layer to explore
other layers. You cannot view a layer’s map until
you’ve actually explored that layer.
Switching Characters
As more people join your party, you
can control them individually during
the adventure or in combat. You can
also scroll between their Skills and
Status interface screens. Simply
press tab or click on the arrows near
the character bar to switch characters. The selected character’s portrait,
on the bottom of the screen,
becomes highlighted and the circular
icon is now beneath his or her feet.
Solo Mode
You can have any of the characters leave the party
at any time to continue adventuring on their own. To do
this, first make that character the active character, then
press the h key. Now you can control the active character individually without the others following. You can still
select the other characters by using the ta b key.
Pressing the h key again takes the character out of
Solo Mode and the entire group rejoins the active
character.
Note: You can also click on the solo icon on the
hud to activate Solo Mode.
Levels and Experience
xperience is gained by
defeating enemies and completing quests. When a char-
E
acter has accumulated enough experience points, he or she attains the
next experience level.
Each time a character “levels up”, his
or her maximum hp and ap stats
increase. Additional skill points are
also gained. A flashing “+” symbol
or she has skill points to distribute.
18
appears on a character’s portrait if he

To distribute skill points, press the r key for the
Character Menu. Now use the cursor to highlight the
skill you would like to increase. Finally, click on the plus
symbol (+)to increase that skill by one point. No skill
level can be raised higher than the character’s current
experience level.
Note: Skill points are permanent once you exit
the Skills screen.
Spells Menu
ress the c key or click on the
Spells icon to gain access to
the Spells Menu. Here, you
P
can select any spell a character has
learned and cast it against an enemy
or on a party member.
Along the top of the menu are the
six different categories of spells.
Use the cursor to scroll through the
six categories of spells. Press
the tab key to view a different
party member’s spells.
• Heal—These spells heal and cure your party members.
• Dark—Spells in the Dark circle, such as the Blind
spell, are typically used against the enemy.
• Energy—Energy spells draw their power from the
surrounding air to cast powerful magic. Lightning is
an example of an Energy spell.
• Holy—The spell caster calls upon the gods to help
cast Holy spells. These are mainly used to protect or
bless the party.
• Fire—Fire spells include such attacks as Fireball,
Meteor Storm, and Inferno.
• Ice—These spells damage your opponent with ice
projectiles (e.g., Icicle and Blizzard) or paralyse them
with freezing attacks (e.g., Icy Sleep and Ice Coffin).
To cast a spell, first highlight one with the cursor. Then
click on the highlighted spell to begin casting. A cursor appears on an enemy, party member, or the
ground (depending on the type of spell chosen). A
spell that helps Joseph and his allies can be used only
on them. An offensive spell can target only the enemy.
Casting a spell reduces a character’s ap, as shown
by the blue bar next to his or her portrait. Characters
recover ap slowly over time.
As a character’s skill in a spell circle increases (see lev-
els and experience on page 18), he or she gains access
19

to more powerful spells within that circle. Higher-level spells cost
more ap than lower-level spells.
NAME CLASS AP COST
Heal
Cure
Regenerate
Resurrect
Vitalise
Revive
Blind
Silence
Invisibility
Death
Life Drain*
Light
Lightning
Empower
Power Leech
Bless
Protect
Faith
Curse
Fire Arrow
Fireball
Meteor Storm
Wall of Fire
Inferno
Icicle
Ice Sleep
Freeze
Blizzard
Ice Coffin
*Available to Wraith only
Heal
Heal
Heal
Heal
Heal
Heal
Dark
Dark
Dark
Dark
Dark
Energy
Energy
Energy
Energy
Holy
Holy
Holy
Holy
Fire
Fire
Fire
Fire
Fire
Ice
Ice
Ice
Ice
Ice
4
2
4
10
5
20
2
3
20
20
1
1
3
8
15
4
8
10
20
3
6
6
10
20
3
4
6
15
20
SKILL POINTS
REQUIRED
1
2
4
6
8
10
1
2
8
10
1
1
2
7
10
1
3
7
10
1
2
4
7
10
1
3
5
7
10
HIT CHANCE
100%
100%
100%
100%
100%
100%
60%
60%
100%
30%
80%
100%
100%
100%
100%
100%
100%
100%
75%
100%
100%
100%
100%
100%
100%
65%
55%
100%
50%
20

Skills Menu
ust like the Spells Menu, you can access the Skills
Menu from the Game Screen. Press the s key or
click on the Skills icon to view the list of available
J
skills for each character.
Along the top of the menu are six different categories
of skills. Use the cursor to highlight and select a category or press the tab key to access other
party members’ Skills Menus.
• Combat—These skills include the ability to
Backstab, Dodge, or Parry when in battle.
• Stealth—Some of the characters can choose to
sneak or hide by using their Stealth skills.
• Creation—Joseph summons creatures using the
Creation skill.
• Examination—Depending on the
character, this skill enables you to
assess a potential enemy’s hp or
to look at a door to see if you can
pick the lock.
• Weapons—The Weapons category
shows the types of weapons each
character can use in combat.
• Spells—This displays the type of
Spells a character can cast.
There are two types of skills: Active
and Passive.
Active Skills
Active skills are employed like spells. Using an active
skill costs Ability Points, represented by the blue bar
next to a character’s portrait. Early on, characters do
not have many active skills. More skills become available to the party as they gain experience levels.
Passive Skills
Passive skills are automatically activated in the appropriate situation. You can see the status of passive
skills in the Skills menu, but they are never selectable.
The skills in the Weapons and Spells categories represent each character’s proficiency with those weapons
or spells. At level 1, Joseph has a low proficiency with
Sword weapons. This means he can wield swords but is
not particularly skilled in their use. Skills are rated
from 1 to 10, with 1 being the lowest.
For more information on assigning skill points to your
skills, see interface screens on page 13.
21

Traveling to other cities and Locations
hen Joseph needs to travel significant distances, he does so in the World Map view.
W
world of Summoner
villages. Prior to traveling, npc
mation on how to get to the next location. World Map
view is usually initiated when Joseph crosses an area
marked with a yellow line. While in the World Map
view, a compass will indicate which direction Joseph is
traveling. Use the mouse and cursor to move the party
to the next town, village, forest, or dungeon.
The World Map is an overhead view of the
™
, showing neighboring towns and
s will give Joseph infor-
SUMMONING
oseph was born with the ability to summon creatures. However, there is only one way a Summoner
can release creatures into the world—through the
J
use of summoning rings. Joseph will have to find
these summoning rings in order to use his unique
and powerful skill.
Each summoning ring you
obtain enables you to summon
a different creature.
1. To summon a creature, open the
Skills Menu by pressing the s
key or clicking on the Skills icon.
2. Click on the Creation icon.
3. You now see the summon skill,
with your assigned skill points next
to it. Click to view a list of creatures
to summon.
4. Highlight a creature and
5. Now a cursor appears on-screen. Use the cursor to
find a safe place for the summoned creature to
appear. If the cursor is red, there is not enough room
for the creature to appear. Move the cursor until it
turns blue.
6. Click to begin the summoning.
7. The summoned creature becomes a member of the
party and can be controlled as a normal party member. It can also complete Chain Attacks on the enemy.
The experience level of the summoned creature
depends on how much power the corresponding ring
has accumulated. Although you do not need to be
22
click to confirm.

wearing a summoning ring to summon the corresponding creature, the ring gains power only while you
have it equipped.
As Joseph gains experience, any summoning rings he
has equipped will increase in power. The amount of
experience acquired by these rings depends on
Joseph’s Summon skill. The higher his Summon skill,
the more power his summoning rings gain.
While trying to summon creatures into the world, be
aware of the following rules:
• Creatures cannot be summoned in town.
• Once you leave a level, any creature Joseph has
summoned is removed from the party.
• If Joseph loses all his hp and is rendered unconscious
while a summoned creature is alive, he loses control of
the summoning. If Joseph is revived, he cannot summon a new creature until the old one is killed.
• It costs life to give life. Joseph will lose points from his
Maximum hp whenever he summons a creature. The
Maximum hp he used to summon is returned to him
only when he banishes a summoning or exits an area.
If the summoning is killed in battle, Joseph will have
lost those Maximum hp points forever.
The following is the list of possible
creatures Joseph can summon:
• Golem
• Red Minotaur
• Blade of Urath
• Blue Imp
• Blackfire Elemental
• Blood Elemental
• Poison Elemental
• Mist Elemental
• Wraith
• Jade Golem
• Celestial Samurai
• Jade Dragon
• Water Dragon
• Four Winds Dragon
• Forest Dragon
23

ITEMS
s Joseph explores the continents of Medeva
and Orenia, he will come across various items
to either use, equip, or sell. Sometimes, npc
A
will ask Joseph to find a particular item of interest
and bring it back for a reward.
• Weapons—You can find Blunt, Piercing, Slashing,
or Ranged Weapons in stores or after combat.
Sometimes a faster weapon is better than a slower
weapon that causes more damage because Chain
Attacks are easier with a faster weapon. Be sure to
equip the most appropriate weapon according to
each character’s list of skills. Skills and skill levels
required to equip a weapon are listed in Item Info.
• Armour—Armour helps protect characters from
attacks. Some characters can wear only light armour,
while others can wear heavier, more encumbering
armour. Equip the best armour for each member of
the party. Skills and skill levels required to equip
armour are listed in Item Info.
• Rings and Necklaces—Aside from the summoning
rings, other rings and necklaces exist that can alter a
character’s protection rating, spell casting abilities,
or combat abilities. Be sure to view a ring’s information before giving it to a party member.
• Potions—Potions, scrolls and tomes can restore or
increase a character’s hp and ap. Scrolls and tomes
have spells, too.
• Miscellaneous—Joseph needs to find other items and
bring them back to npc
Aside from finding items after defeating an enemy, items
are also scattered throughout the world of Summoner
Barrels, boxes, and wells might contain anything from
gold coins to armour and weapons.
To search for items, use the mouse to hover the cursor
over the area you wish to search. If the area contains a
hidden item, the container will highlight. Click to collect the item. Gold is picked up automatically, and the
Contents Screen lists any other items found in the container. See after combat on page 13 for more information on the Contents Screen.
s to gain rewards for his trouble.
™
.
s
24

The WORLD
Of SUMMONER
n the mythology of Summoner™, Ghuval the Maker
of All Things created the world, Khosos. Urath,
god of the Sudani, struck the earth with his sword
I
and split Khosos into many continents and islands.
Summoner
Orenia and Medeva.
The Kingdom of Medeva
T
year war known as the Medevan Conquest. The calendar of Medeva is reckoned by the first year of the
Conquest (1 vm, or “Vorhno Medeva”). Summoner
begins in the year 596 vm.
Bellias VI now rules the Kingdom of Medeva. As a youth,
Bellias distinguished himself at the battle of Tormannen,
a victory that rallied the armies of the crown in the civil
war of 577. The following year he married Queen
Galienne, daughter of the late Duke of Tarhimun, a
marriage that secured the power of the monarchy and
brought peace to his troubled realm. Bellias’ brother,
Prince Sornehan, helps the king govern Medeva through
his network of spies and informants.
™
takes place on two of those continents:
hirteen kings once ruled over the realms of
Medeva. The princes of the Rhunari clan unified these kingdoms over the course of a 300-
™
25

Some places of interest in Medeva:
Masad
Masad is a farming village on the Darhu River, north
of Lenele. Joseph lives in Masad, and he begins the
game here.
Lenele
A city on the Darhu River, Lenele was built on the ruins
of the City of Gods. The Palace of King Bellias VI and
the High Temple of Urath are located here. Lenele has
four major quarters: the docks, the marketplace, the
Old City slums, and the wealthy Crown district.
Iona
Iona is an island monastery off the eastern coast of
Medeva. An esoteric order of mage-priests guards the
divine tomes of the Great Library. These tomes are
written in Aosi, the language of the gods, in which all
of Creation has been written.
Khosani Stronghold
Known to its denizens as “Saanavarh,” or “Mountain of
the Wise,” this is the last refuge of the Khosani, children of the earth god Vadagar. Twelve thousand years
ago, the sea god Amasido destroyed their cities
in a great flood.
Ikaemos
The ruins of an empire that flourished near the
end of the Chaos of Ten Thousand Years, the palace
of the Priest-Kings of Ikaemos now lies hidden
within a vast swamp.
The Empire of Orenia
urod the Usurper rules the empire of
Orenia, a realm far to the north across the
M
imperial priesthood, the Society of the Jade Temple,
Murod seized the throne of Orenia in the year 574 vm,
murdering the Emperor Gaodi II and his entire family.
Murod executed the priests of the Jade Temple after
they prophesied that one born with the Mark of the
Summoner would destroy him. Now the Society survives as a rebel army fighting against Murod’s tyranny.
Their leader is a mysterious woman named Aoqi.
In 596, the year that Summoner
invades the Kingdom of Medeva, searching for the
one born with the Mark of the Summoner.
Sea of Khadim. Formerly the leader of the
™
begins, Murod
26

Some places of interest in Orenia:
The Tower of Eleh
A siege tower built by the gods to storm the gates of
Heaven, the original tower was destroyed in the Chaos
of Ten Thousand Years. Murod has enslaved his people
to rebuild the tower and install himself as the Emperor
of Heaven and Lord of All Creation.
Wolong
A village on the Lake of Sorrows, Wolong is a stronghold of the Jade Temple’s rebellion and home of the
Gatherers, a sect of healers. In the legends of the village, a dragon’s tears formed the lake. The people
of Wolong offer sacrifices and festivals to keep
the dragon happy.
Liangshan
Lost within a forest of evil spirits, the Shrine
of Liangshan is a sanctuary devoted to Dai, the
Dragon of the Forest.
Jade Temple
For centuries the Jade Temple has served as the seat of
imperial power, built by the First Emperor following his
victory in the Battle of Nine Sparrows. The priests of the
temple, now in hiding, lead the rebellion against Murod.
The Mark of
the Summoner
he Summoners’ inheritance is a power greater
than magic. With ancient rings, they call forth
demons and golems, supernatural servants
T
and elemental creatures. Summoners have toppled
empires and challenged gods. They are venerated as
saviors and feared as destroyers. The chosen are born
with a mark on their hand, but the origins of this gift
were forgotten long ago.
Joseph now fears his power more than death itself.
As a child, Joseph tried to save his village from attackers, but the demon he summoned slaughtered the
villagers while Joseph watched in horror, his misguided heroics causing the deaths of those he loved.
Exiled and ostracised, Joseph vowed never to
summon again.
27

THE CHARACTERS
Joseph
Role: Farmer; Summoner
Born: 577 vm (19 years old)
After the massacre of Ciran,
Joseph exiled himself to
Masad, a village on the
Emperor of Orenia.
Darhu river. Though he
has tried to forget the
horror unleashed by
his power, Joseph
must learn to master
his gift and confront the
Rosalind
Role: Novice of the Order of Iona; Spellcaster
Born: 579 vm (17 years old)
Rosalind is the estranged daughter of Yago, a
former monk of the Order of Iona. Under mysterious circumstances, Rosalind came to Iona as a
child and is now a novice of the Order. She has
begun her study of Aosi, the divine language in
which all of Creation has been written.
28

Flece
Role: Thief
Born: 574 vm (22 years old)
Flece grew up in the quarter of Lenele known as the “Old City,”
the slums on the Darhu’s east bank. The daughter of a prostitute, Flece was orphaned when her mother was knifed to death
in the Alley of Dogs. Flece works for Tancred, the “King of Fleas”
who controls all illicit commerce in Lenele.
Jekhar
Role: Warrior
Born: 575 vm (21 years old)
Joseph’s childhood friend, Jekhar
lost his family when Joseph
destroyed Ciran nine years ago.
Jekhar swore on their graves that
if Joseph ever crossed his path
again, he would have his
vengeance. Jekhar now lives in
Lenele, capital of Medeva, where
he serves in the army of King
Bellias VI.
29

Murod
Role: Emperor of Orenia
Born: 532 vm (64 years old)
Formerly the leader of the Society of the Jade Temple,
Murod betrayed the emperor, murdered his family, and
seized the throne of Orenia. Murod has enslaved his
people to rebuild the Tower of Eleh and install himself
as the Emperor of Heaven. Because of the Jade
Temple’s prophecy, Murod has invaded Medeva to find
the Summoner.
Yag o
Role: Joseph’s Teacher; Counselor of Prince Sornehan
Born: 546 vm (50 years old)
A former monk of the Order of Iona, Yago left the
monastery to find the child born with the Mark, but his
efforts to teach Joseph failed when the boy destroyed
Ciran. After Joseph renounced his gift, Yago traveled to
Lenele, where he now serves as counselor to Prince
Sornehan, brother of the king.
The Four Riders
Role: Minions of Murod
Born: Unknown
No one but Murod knows the names and origins of
these sinister warriors. They are believed to be minions of Laharah who served her in the Second
Araenugeth, the “War of the Gods” fought eons ago.
Searching for the Summoner, the Riders lead the
Orenian invasion of Medeva. Each rider has unique
abilities and attacks.
King Bellias VI
Role: Ruler of Medeva
Born: 556 vm (40 years old)
Bellias has ruled the Kingdom of Medeva for sixteen
years. His marriage to Galienne secured the power of the
monarchy and brought peace to his troubled realm.
Bellias is heir of the Rhunari princes who unified the
thirteen kingdoms in the Medevan Conquest.
Aoqi
Role: Leader of the Society of the Jade Temple
Born: Unknown
The mysterious “woman in white,” Aoqi is the leader of
the Society of the Jade Temple. Once the priesthood of
the Orenian emperors, the Society prophesied that one
born with the Mark would destroy Murod. The Emperor
responded by having the priesthood executed. The sur-
30

vivors went into hiding, and now they lead the rebellion
against the Usurper.
Tancred
Role: Flece’s Guardian; Leader of Lenele’s Thieves
Born: 560 vm (36 years old)
The infamous “Prince of Beggars” and “King of Fleas,”
Tancred controls a network of smugglers, thieves,
spies, and assassins. Tancred became Flece’s guardian
after the death of her mother, and he taught her the
arts of stealth and deception.
SAVING AND
LOADING
ummoner™enables you to save data during a
game. The number of games you can save is limited by the available space on your hard drive.
S
Saving
Press the esc key to view the Pause
Game Menu. Now use the cursor to
highlight the save game option. You
can choose new game save to create
a new saved game file, or you can
highlight a previously saved game to
save the new file over it. Make your
selection and click.
Note: You cannot save your game
during combat. Saving is also prohibited in some areas.
Loading
To load a game from the Main Menu, select continue
game and click. Choose a game file to load with the
cursor and click. When prompted, select yes and click
to confirm the load.
To load a game from within the realm of Summoner
press the esc key to view the Pause Game Menu. Now
highlight load game and click. Select a game file
and click to load.
™
,
31

MULTIPLAYER
Summoner™Multiplayer allows up to four players to
play via Internet or LAN play. It is a means by which to
play cooperatively with others in your party against
randomly encountered enemies and build up your
character’s levels.
Note: In order to play Summoner™Multiplayer, you
will need at least a 56k Modem and valid Internet or LAN
connection via TCP/IP.
Registration on THQ’s dedicated
Multiplayer Server
THQ has a site that hosts multiplayer games for
Summoner
multiplayer games and chat with other Summoner
players. If you elect to use this service to host a
Summoner
server link on the multiplayer menu (or go to
www.Summoner.com) and follow these simple
steps in order to sign up and register:
1. Click on accounts
2. Click on “Create New Account”
3. Enter and submit your age
4. Read the Licensing Agreement and click
5. Complete the form at the bottom of the page
6. An e-mail will be sent to you confirming your
Once an account has been validated you will be
able to use this server for multiplayer games and
enter them directly from the Summoner
menu screen.
™
. At this site you will be able to start new
™
multiplayer game, click on the dedicated
to agree to its terms
and submit (you will need to include your name, a
login, a password, and a valid e-mail address)
registration. Click on the link in the e-mail to
validate your account.
™
multiplayer
™
Starting a New Multiplayer Game
From the main menu, select the Multiplayer option.
1. Select a Character
After selecting the multiplayer option, you will need to
first elect to play as a previously created character or
make a new character. This is done on the “Character
Selection/Creation” menu screen and will be the first
menu to appear after selecting the Multiplayer option.
Previously created characters are listed on the left
32

side of the menu. The right side of the screen is
reserved for making new characters.
A. Playing as a Previously Created Character
Simply click and highlight the desired character.
Created characters will be listed on the left side of
the Character Selection/Creation menu.
B. Making a New Character
If you wish to create a new character, select a
character from the available choices on the right side
of the menu. Next you must assign the desired character a class. You have four classes to choose from:
Summoner, Thief, Mage, or Fighter.
Note: As previously described, each of the classes has
varying strengths and weaknesses.
You must then assign your character a name. To do
this, simply choose the “Name Character” option
and type in your desired name.
Once created, you can save your multiplayer character. The number of characters that you can save
is dependent on your available hard drive space.
2. Joining/Hosting a Game
After choosing your character, you will be taken to a
screen which lists all players currently in available online games. At this screen, you can chat with other
players and decide what game you would like to join
on what level you wish to start.
Note: Not all levels will be available to all players. Available
levels are based on what levels you have already finished in
previous sessions. You will only be able to load a level that
has been unlocked by all players currently in the game.
Beginning players may not have as many levels available to
them as other players in the game.
You are only allowed to join games that are currently
forming. Joining games that are already in progress
will not be allowed.
A. Starting/Hosting a New Game
If you choose to host your own game, you will need
to click on “Start New Game” option as listed on
the Game List menu screen. After selecting this
option you will need to set certain parameters for
your game:
1. Name of the Game
Simply type in what you want to call your
game. A name must be given to the game.
33

2. Password
You can select a password for your game. If
you select this option, players wishing to join
the game will have to enter the password on
the Game Start screen. You DO NOT have to
include a password for your game.
3. Maximum Level Difference
Use this option to select the maximum level
difference joining players can be. You can
select between choosing a maximum level difference below the host level or a maximum
level difference above the host level.
4. Difficulty Level
There are three difficulty levels to choose from:
easy, hard, and nightmare. However, not all
three levels of difficulty are immediately available. In order to make “hard” an available
level, you must first beat multiplayer on the
easy level, and in order for “nightmare” to be
available, you must first beat multiplayer on
the “hard” level setting. The host of the game
will select the lowest difficulty level allowed by
the players currently in the game.
5. The Number of Players
You can choose to allow one, two or three
other players to join your game.
After all of the parameters have been assigned, click
on the “Start Game” button to begin.
HINTS/TIPS
1. Check all barrels and crates. You will occasionally
find valuable items.
2. Have your party attack the same enemy target if
possible. It is better to quickly defeat one enemy
than to attack multiple targets at the same time.
3. Before you equip a new item, make sure it is better
than the item you have currently equipped.
4. Always try to position your character above the
enemy if at all possible. Your character gains
attack bonuses when on higher ground so
take advantage of this.
5. Check the character portraits often during battle.
The portraits flash when that character is taking
damage or is almost dead.
34

6. Be sure to talk to the people with “!!” displayed
over their heads. These people have important
things to say to Joseph.
7. Chain attacks can increase in power the more
you use them.
8. When using a summoned creature make sure to
keep Joseph healthy. If he falls unconscious, the
summoning will turn on you.
9. Some creatures are more resistant to certain types
of attacks. Experiment to see which weapons work
best on which creatures.
10. Check the Quest Journal often to keep up with
any new updates.
11. Miniquests and random encounters offer many
opportunities to gain experience, gold, and items.
Though most of these quests and encounters are
optional, use them to build up the strength and
resources of your party. You will be better prepared
to confront the more difficult challenges you must
face later in the game.
35

CREDITS
For Volition, Inc.
www.volition-inc.com
Lead Designer
Sandeep Shekar
Additional Design
James Agay
Jason Scott
Anoop Shekar
Adam Pletcher
Mark Allender
Franchise Lead
Programmer
Mark Allender
Console Lead
Programmer
James Hague
Programmers
Dave Baranec
Dave Andsager
Brian Keron
Nicholas Lee
Additional
Programming
Jason Hoffoss
Lead Artist
Adam Pletcher
Artists
Mitri Vanichtheeranont
Peter Han
Jiovanie Velazquez
Kelly Snapka
Matt Flegel
Frank Marquart
Matt Kresge
John Enricco
Cory Hamilton
Concept Artists
Peter Han
with
Hoang Pham
Animators
Tim Borrelli
Jason Shum
with
Michael Comet
Writers
Jason Scott
with
Mike Breault
Level Scripting
James Agay
Sandeep Shekar
Composers/Sound
Designers
Walter Shaw
with
Dan Wentz
Scott Lee
Assistant Producer
Anoop Shekar
36
Executive Producer
Mike Kulas
Vice President of
Product Development
Philip Holt
QA Test Lead
James Tsai
QA Testers
Alvan Monje
Lorcan Murphy
Doug Nelson
Web Design and
Programming
Nathan Camarillo
Network Administration
Mark Muller
Office Management
Ginny Gee
Receptionist
Kris Moskwa
Voice
Recording in Chicago at
EKO Media Design
Recording Engineer
Graham Hicks
Walter Shaw
Voice Actors
Karin Anglin
Jenny Avery
John Bakos
Joel Cory
Charles Gerace
Jeffrey Gibson
Kevin Gudhal
Dale Inghram
B. J. Jones
Roger Mueller
Kurt Naebig
Jill Shellabarger
Special Thanks
Sharon Wottrich, Susan
Davies, and Linda
Bracilano at Voices
Unlimited
Ron, Vernyle, John, and
David Steele at EKO
Media Design
Daryle Albert at Creative
Associates, LLC
Flece
Rosalind
Abbot Laurent
Machival
King Bellias
Hierophant
Carados, Guard, Pijian,
Murod
Jekhar
Sornehan
Yago
Joseph
Aoqi, Queen Galienne
Mark Breugelmans of
Sony Computer
Entertainment Europe
Charles Gerace
Caleb Simpson
Soebeck Song
Chris Wu
Bay Sonthipanya
Chris Breault
Norah Kerr
Wil Foster
Nick Starr
The Red Faction Team
For THQ
www.thq.com
Vice President of
Product Development
Michael Rubinelli
Senior Producer
Jim Boone
Associate Producer
Rob Loftus
Greg Donovan
Assistant Producer
Gregg Nakawatase
Director of
Creative Services
Howard Liebeskind
Manual Writer
Kirk Somdal
Director of QA
Jeremy S. Barnes
UK Marketing
Ben Stevens
International
Brand Manager
Jennifer Wyatt
Head of Localisation
Susanne Dieck
Lead Testers
Greg Manley
Colin Totman
Erik van Rooy
Game Testers
Jenny Conn
Barry Coates
Dennis Czajkowski
Kris Debus
Carlos Estiandan
Chris Gonzales
Mark Hoffman
Glen Peters
Justice Sommer
Special Thanks
Raelea Apolito
Packaging and
Manual Design
Origin Studios
Sounds included in
the musical pieces of
this game are from
the Percussive
Adventures Sound
Library, produced
by Christopher
Page for East West
Communications, Inc.
For “Summoner Geeks”
Writer
Dan Harmon
Voices
Dan Harmon
Rob Schrab
Peter Alberts
Mondy Carter
Produced By
The Dead Alewives
www.deadalewives.com
Direction, Setup,
and Animation
Tim Borelli
Prop Modelling
Frank Capezzuto
Mike Comet
Character Modelling
Peter Han
Josh Nizzi
Credits and Titles
Adam Pletcher


Technical
customer
support:
If you have technical problems with this game
(installation, sound etc), please contact our
technical customer support team:
Mon - Fri from 10.00 am - 5.00 pm
Tel +44 (0) 1483 767656
383940


41

Coming Soon
www.redfaction.com
© 2000 Volition Inc. Published by THQ Inc. Developed by Volition Inc. Summoner - Game and Software © 2000, 2001 THQ Inc. Developed by
Volition, Inc. Summoner, Volition, THQ and their respective logos are trademarks and/or registered trademarks of THQ Inc. All rights reserved.
© 2001 THQ. All rights reserved. Published by THQ
 Loading...