


S P E C I A L O P E R A T I O N S M A N U A L
2000 Suite
S P E C I A L O P E R A T I O N S M A N U A L
www.redstorm.com
SPECIAL
OPERATIONS
MANUAL
© 1999 Red Storm Entertainment, Inc. All rights reserved. Red Storm Entertainment is a trademark of Jack Ryan Enterprises, Ltd. and Larry Bond. Rogue Spear is a trademark of Red Storm Entertainment. Rainbow Six is a trademark of Rubicon, Inc. All other brand names are trademarks or registered trademarks.
ROGUE SPEAR |
1-0 |
WWW.REDSTORM.COM |

CONTENTS
INTRODUCTIONS
OVERVIEW OF THE GAME |
1-4 |
GETTING STARTED
MINIMUM SPECIFICATIONS |
2-1 |
INSTALL/UNINSTALL |
2-2 |
WALKTHROUGH OF MISSION 1 |
2-4 |
PLANNING PHASE |
2-4 |
ACTION PHASE |
2-9 |
GAME MENUS
SINGLE PLAYER |
3-1 |
NEW |
3-2 |
DIFFICULTY LEVEL |
3-2 |
RESUME |
3-2 |
DELETE |
3-2 |
PRACTICE MISSION |
3-2 |
BRANCH CAMPAIGN |
3-2 |
LONE WOLF |
3-3 |
TERRORIST HUNT |
3-3 |
VIEW MISSION RESULTS |
3-3 |
MULTIPLAYER |
3-3 |
TRAINING |
3-3 |
FIRE AND MOVEMENT |
3-4 |
ROOM CLEARING |
3-5 |
HOSTAGE RESCUE |
3-5 |
OPEN TRAINING |
3-6 |
TERRORIST HUNT |
3-6 |
OPTIONS |
|
GAME |
3-7 |
SOUND |
3-8 |
GRAPHICS |
3-9 |
ADVANCED |
3-10 |
MULTIPLAYER GAME |
3-11 |
MULTIPLAYER SERVER |
3-11 |
JOYSTICK |
3-12 |
REMAP KEYS |
3-12 |
REPLAYS |
3-13 |
CREDITS |
3-13 |
QUIT |
3-13 |
PLANNING PHASE
BRIEFING |
|
|
4-2 |
OBJECTIVES |
|
4-2 |
|
LIST OF |
ADVISORS |
|
4-3 |
INTEL |
|
|
4-3 |
CATEGORY LIST |
|
4-4 |
|
SUBJECT |
LIST |
|
4-4 |
ROSTER |
|
|
4-5 |
|
|
|
|
RAINBOW SIX |
|
1-1 |
WWW.REDSTORM.COM |
|
|
CONTENTS |
PLANNING PHASE (CONTINUED) |
|
|
READINESS |
|
4-5 |
|
READY |
4-5 |
|
FATIGUED |
4-5 |
|
WOUNDED |
4-6 |
|
INCAPACITATED |
4-6 |
|
KIA |
4-6 |
BIO |
|
4-6 |
STATS |
|
4-6 |
SPECIALTY SKILLS |
4-7 |
|
|
ASSAULT |
4-7 |
|
DEMOLITIONS |
4-7 |
|
ELECTRONICS |
4-7 |
|
GRENADES |
4-7 |
|
SNIPER |
4-7 |
|
STEALTH |
4-7 |
PROFILE |
TRAITS |
4-8 |
|
AGGRESSION |
4-8 |
|
LEADERSHIP |
4-8 |
|
SELF-CONTROL |
4-8 |
|
STAMINA |
4-8 |
KIT SELECTION |
|
4-9 |
SAMPLE KITS |
|
4-13 |
RECON KIT |
4-13 |
|
ASSAULT |
KIT |
4-13 |
SNIPER KIT |
4-14 |
|
BREACHING KIT |
4-14 |
|
TEAM |
|
4-15 |
PLANNING |
|
4-16 |
MAP ORDERS |
|
4-16 |
RECON |
|
4-16 |
ROSTER |
|
4-17 |
ORDERS |
|
4-18 |
|
PLOTTING MOVEMENT |
4-18 |
|
WAYPOINT CONTROLS |
4-18 |
|
MAP CONTROLS |
4-19 |
|
GO CODES |
4-20 |
|
RULES OF ENGAGEMENT |
4-21 |
|
ASSAULT |
4-21 |
|
INFILTRATE |
4-21 |
|
RECON |
4-21 |
|
ESCORT |
4-21 |
|
BLITZ |
4-21 |
|
NORMAL |
4-21 |
|
CAUTIOUS |
4-21 |
|
SPECIAL ACTIONS |
4-22 |
|
FLASHBANG ROOM |
4-22 |
|
FRAG ROOM |
4-22 |
|
BREACH DOOR |
4-22 |
|
|
|
ROGUE SPEAR |
1-2 |
WWW.REDSTORM.COM |

CONTENTS
PLANNING PHASE (CONTINUED)
SNIPE |
4-22 |
COVER |
4-23 |
DEFEND |
4-23 |
ADDITIONAL |
4-23 |
SAVE/LOAD PLAN |
4-23 |
WATCH MODE |
4-24 |
EXECUTE |
4-24 |
ACTION PHASE
INTERFACE |
|
5-1 |
|
|
CINEMA WINDOW |
5-1 |
|
|
|
TARGETING RETICULE |
5-2 |
|
ACTION BAR |
5-4 |
|
SPECIAL |
ACTIONS |
5-7 |
|
CONTROL |
|
|
5-8 |
|
FIRE AND MOVEMENT |
5-8 |
|
|
VERTICAL MOVEMENT |
5-8 |
|
|
USING |
WEAPONS AND EQUIPMENT |
5-9 |
|
DOORS |
AND OTHER OBJECTS |
5-10 |
DYNAMIC |
TEAM CONTROL |
5-10 |
|
WATCH MODE |
|
5-11 |
|
ENDING THE MISSION |
5-11 |
||
MULTIPLAYER MODE
CREATING A |
GAME |
6-1 |
SETTING UP |
A GAME |
6-3 |
PLAYER OPTIONS |
6-4 |
|
SESSION OPTIONS |
6-5 |
|
ADVERSARIAL GAMES |
6-5 |
|
COOPERATIVE GAMES |
6-7 |
|
COMMUNICATING |
6-7 |
|
PLAY AFTER |
DEATH |
6-7 |
MSN GAMING |
ZONE |
6-8 |
MPLAYER |
|
6-10 |
WEAPONS AND EQUIPMENT
PRIMARY WEAPONS |
7-1 |
SECONDARY WEAPONS |
7-7 |
EQUIPMENT |
7-9 |
UNIFORMS |
7-11 |
DEFAULT KEYBOARD COMMANDS |
8-1 |
TECHNICAL SUPPORT |
9-1 |
CREDITS |
10-1 |
SPECIAL THANKS |
10-3 |
INTRODUCTION
With the end of the Cold War and the stabilizing effects of the Super Powers, terrorism has become one of the greatest threats to security in nations all around the world. While terrorism has existed in some form for centuries, it has become more effective with the development of the mass media and more powerful with the proliferation of weapons of mass destruction.
Terrorism involves illegal violent actions taken by a group of individuals in order to further their ideology or beliefs. The word illegal is important. Since many terrorist organizations consider themselves armies, they do not have the same legal status as a military of a recognized nation. In the past, terrorism has relied on high profile acts committed to attract attention to them and their cause. With 24-hour world-wide television news networks, a single terrorist can shock the entire world by blowing up a daycare center or gunning down innocent bystanders.
Fear is the main weapon of the terrorist. The fear that what was seen on television can happen anywhere. While bloody and violent, most terrorist actions were on a small scale, usually involving casualties of less than a few hundred. Now terrorists can threaten entire cities or nations with weapons of mass destruction. Casualties in these cases would number in the millions.
In the recent past, governments have declared war on terrorist organizations and their leaders. However, cruise missile attacks and other conventional military means have proved largely unsuccessful. Instead, a top secret organization by the name of RAINBOW was created to deal with unconventional threats with unconventional means.
OVERVIEW
In Rogue Spear, you must lead RAINBOW, a covert international counter-terror- ist team set up to combat terrorism around the world. As part of the operations assigned to you, you must select team members, outfit them with weapons and equipment, plan the actions your team will take and then execute the mission to achieve the objectives. The game consists of 18 missions which are linked together to form a campaign.
The Rogue Spear campaign takes place after the campaigns in RAINBOW SIX and the Eagle Watch Mission Pack. If you have played these previously, you will already be familiar with the game interface. However, review this manual as many changes and additions have been made. There are new weapons, new operatives, new actions and orders and much more.
Now don’t just sit there. Get going! You have the world to save.
RAINBOW SIX |
1-3 |
WWW.REDSTORM.COM |
RAINBOW SIX |
1-4 |
WWW.REDSTORM.COM |
GETTING STARTED
ROGUE SPEAR |
2-0 |
WWW.REDSTORM.COM |

GETTING STARTED: MINIMUM SPECS
TO PLAY ROGUE SPEAR, YOUR COMPUTER MUST MEET THE FOLLOWING CRITERIA:
COMPUTER: Pentium 233 Mhz with MMX and 3D Hardware acceleration OR Pentium II 266 Mhz (software rendering)
MEMORY: 32 MB RAM Required (64 MB RAM Recommended)
OPERATING SYSTEM: |
Windows 95 or Windows 98 |
VIDEO: Software Rendering only: 2D 16-Bit SVGA 4MB Video Card
3D HARDWARE SUPPORT: Direct 3D compatible video card required. Supported chipsets include 3Dfx Voodoo, Nvidia Riva, Matrox G200, for a full list of supported cards visit www.redstorm.com.
CD-ROM: |
4x or Better |
SOUND: |
DirectX compatible sound card required |
HARD DRIVE: |
200 MB uncompressed space |
DIRECTX: |
DirectX 6.1 (included on CD) must be installed |
INTERNET/NETWORK |
PLAY: Properly Configured TCP/IP connection at 28.8 Kbps |
|
or faster |
GETTING STARTED: INSTALLING GAME
INSTALLING THE GAME
1.Start the Windows 95/98 operating system.
2.Insert the Rogue Spear CD into your CD-ROM drive. The Autorun menu should appear.
Note: If the Autorun menu does not automatically appear, dou- ble-click the My Computer icon located on your Desktop. Then double-click the icon corresponding to your computer’s CDROM drive. The Autorun menu should now appear.
3. Click the Install Rogue Spear button.
The installation routine will now walk you through each step of the setup and installation process.
Once you have created a directory for Rogue Spear, the program will automatically be installed on your hard drive. In addition, the program will check to see whether or not a current version of DirectX has already been installed on your hard drive. If there is an older version of DirectX on your computer or DirectX does not exist,
the |
program |
will |
automatically ask |
you |
if you |
want |
to install version |
6.1, the latest version of DirectX. To play Rogue Spear you must have version 6.1 or higher.
4. After you have completed the installation process, you can select Rogue Spear from the Start menu or double-click on the Rogue Spear.exe file from the installed directory to run the game.
Note: You may also uninstall the game from the Start Menu.
CONFIGURE ROGUE SPEAR
During the installation process, Rogue Spear will automatically scan your system for any available sound and 3-D graphic accelerator cards. However, we recognize that many gamers may have multiple video and audio cards installed on their computers. The Configure Rogue Spear feature lets you manually select which cards you would like to use when playing Rogue Spear.
ROGUE SPEAR |
2-1 |
WWW.REDSTORM.COM |
ROGUE SPEAR |
2-2 |
WWW.REDSTORM.COM |

GETTING STARTED: UNINSTALLING GAME
UNINSTALLING ROGUE
SPEAR
TO UNINSTALL ROGUE SPEAR:
1.Start the Windows 95/98 operating system.
2.Insert the Rogue Spear CD into your CD-ROM drive.
3.Click the Uninstall Rogue Spear button.
You will be asked to confirm that you wish to uninstall Rogue Spear.
If you are sure you want to uninstall Rogue Spear, click Yes.
If you are not sure, click No.
Note: If you uninstall Rogue Spear, any previously saved scenarios will remain on your hard drive in the Rogue Spear Save game subdirectory. You may delete these saved games using Windows Explorer.
WALKTHROUGH OF THE FIRST MISSION
Rogue Spear is complex simulation of real-world hostage rescue operations. As such, we highly recommend that you read each section to acquaint yourself with some of the concepts, terminology and game functionality explained throughout the manual.
We also realize that some players would rather start playing the game right away and learn the basics first, then go ahead and find out more about the game interface mechanics of play and other details. If you are one of those who want to play immediately, read this brief walkthrough of the first mission, which will teach you the basics as you play.
On the other hand, if you want to learn all about the game before playing, skip this section for now and go to the section on Game Menus. After reading the Game Menus, Planning Phase and Action Phase sections, come back here to begin the tutorial.
BEGINNING A NEW CAMPAIGN
Rogue Spear contains eighteen different single player missions which together form a campaign. Let’s get one started. From the Main Menu screen, click on Single Player. This takes you to a new screen. Since there is no campaign in progress, the New Campaign window is open. Type in a name for your campaign. Change the difficulty level to Recruit and click on Enter. This will take you to the “Planning Phase” for the first mission. It consists of several different screens which let you plan your current mission prior to executing it.
PLANNING PHASE
The first part of the “Planning Phase” is the Briefing Screen. Here you can learn about the current mission. In the upper right are the stats for the first mission: codenamed Pandora Trigger. In the center at the top is the Objectives Box. It lists what must be accomplished in order for your mission to be a success. For this first mission, you must rescue all the
hostages. Along the left side of the screen is the Briefing Box. Control is the first briefing you receive. It basically brings you up to speed on the situation. Click on John Clark to go to the next briefing. Mr. Clark is the commander of RAINBOW and will offer some advice for the mission. At the bottom of the list are the Mission Orders. Once you have read all the briefings, go to the bottom of the screen and click on the right green arrow. This will take you to the next screen.
You are now on the Intel Screen. Here you can find additional information pertaining to the mission. Since this is your first mission, there is not much to view. In the top left is the Category Box. The intel subjects are divided into four categories. People provides information on the personalities involved in the missions. If you look down at the Subject List, there is only one name: John Clark. Read quickly about your commander and then in the Category Box, click on Organizations. Now the Subject List contains two names; Islamic Vanguard and RAINBOW. Read about each. The other two categories are empty to begin with.
RAINBOW SIX |
2-3 |
WWW.REDSTORM.COM |
ROGUE SPEAR |
2-4 |
WWW.REDSTORM.COM |

WALKTHROUGH OF THE FIRST MISSION
However, after some missions, a news story about it appears under Newswire and all other subjects fall under Miscellaneous. Now click on the right green arrow again to go to the next screen. A window will pop up asking if you want to use the HQ’s plan for the mission. For all missions, headquarters will provide the planning if you desire. However, since we are going to plan this mission ourselves, click on No.
team: Arnavisca, Bogart, Burke, Chavez, Filatov, Haider, Hanley, and Weber. To find the last operative, you must scroll down to the Sniper section of the list. When all eight slots are filled, click on the right green arrow to continue.
Pick your operatives for the mission.
The Roster Screen is where you choose which operatives to take on the mission. It is important to take the right operatives for each mission. Each operative has his or her own strengths and weaknesses. The right two thirds of the screen contains information on the currently selected operative. To look at the dossier for another operative, click on one of the names in the list on the left. To add an operative to your mission team, highlight their name, then click on the Add Bar above the list of names. The portrait of the operative will then appear in one of the boxes in the top left. For each mission, you are limited to a maximum of eight operatives. However, you can take as few as you want. For this mission we will take eight. Select the following operatives and add them to the mission
Equip your team.
It is now time to equip your team on the Kit Screen. The eight operatives are listed along the left side of the screen. The rest of the screen consists of equipment boxes. Each operative comes with a default set of equipment. However, we are going to customize things a bit. You should begin with Arnavisca who is already selected.
First you will assign uniforms to all the operatives. Click on the graphic of the operative in the middle of the screen to bring up the Uniform Menu. Click on Street Medium. Notice how the graphic changes to the new uniform. Click on the check mark to select the uniform. Now click on the blue button, containing three lines and the arrows, above the graphic. This assigns the uniform to all of the operatives.
WALKTHROUGH OF THE FIRST MISSION
Next, assign primary weapons to the operatives. Now, click on the picture of the submachine gun. This brings up the Primary Weapons Menu. Select the HK MP5/10SD. This is a submachine gun with a built in silencer. Assign this to all operatives by clicking on the assign to all the button above the graphic of the weapon.
The third step is to assign secondary weapons. Clicking on the picture of the Pistol brings up the Secondary Weapons Menu. Select the HK .45 Mark23. Assign this to all operatives.
Now you need to choose items to fill the bottom two boxes, Slots 1 and 2. Click on the Slot 1 Box to bring up a menu of items. While still on Arnavisca, select a Breaching Charge for Slot 1. Click on Slot 2 and select Flashbangs.
Switch to Chavez by clicking on his name in the list to the left. Assign him some Frag Grenades in Slot 1 and Flashbangs in Slot 2.
Give all the remaining operatives Flashbangs in both Slots 1 and 2.
Weber needs a sniper rifle. Assign him the PSG-1 sniper rifle. Change Weber’s uniform to Black Light.
Click right green arrow to go to tem screen.
The Team Screen is where you divide your operatives into fire teams. The operatives are listed on the left and four colored team boxes are located to the right. To add an operative to a team, highlight their name and then click on the Add button on the appropriate team. Assign Arnavisca, Bogart and Burke to the Blue Team. Assign Chavez, Filitov and Haider to Red. Assign Hanley and Weber to Green. To
choose a team leader, highlight an operative, then click on the Promote button to move their name towards the top of the team list. Team leaders should be Bogart, Chavez and Weber. Now click on the right green arrow to continue.
The Planning Screen is where you will spend most of your time during the “Planning Phase”. Here you give each member of your team orders so he or she knows exactly what to do, how to do it and when to do it during the mission. You begin with the Blue Team selected and the encircled blue triangle on the top left is lit up. Click on the “Recon” tab below it. The Recon Menu let’s you examine the known positions of Hostages, Terrorists and Landmarks on the map to the right. “Legend” lists what each symbol on the map represents. Cycle through the Hostages by clicking on the arrow to the right of the name. Do the same with the other categories, then click on the Orders tab.
Plot each team’s waypoints on the map and give orders where needed.
RAINBOW SIX |
2-5 |
WWW.REDSTORM.COM |
ROGUE SPEAR |
2-6 |
WWW.REDSTORM.COM |
WALKTHROUGH OF THE FIRST MISSION
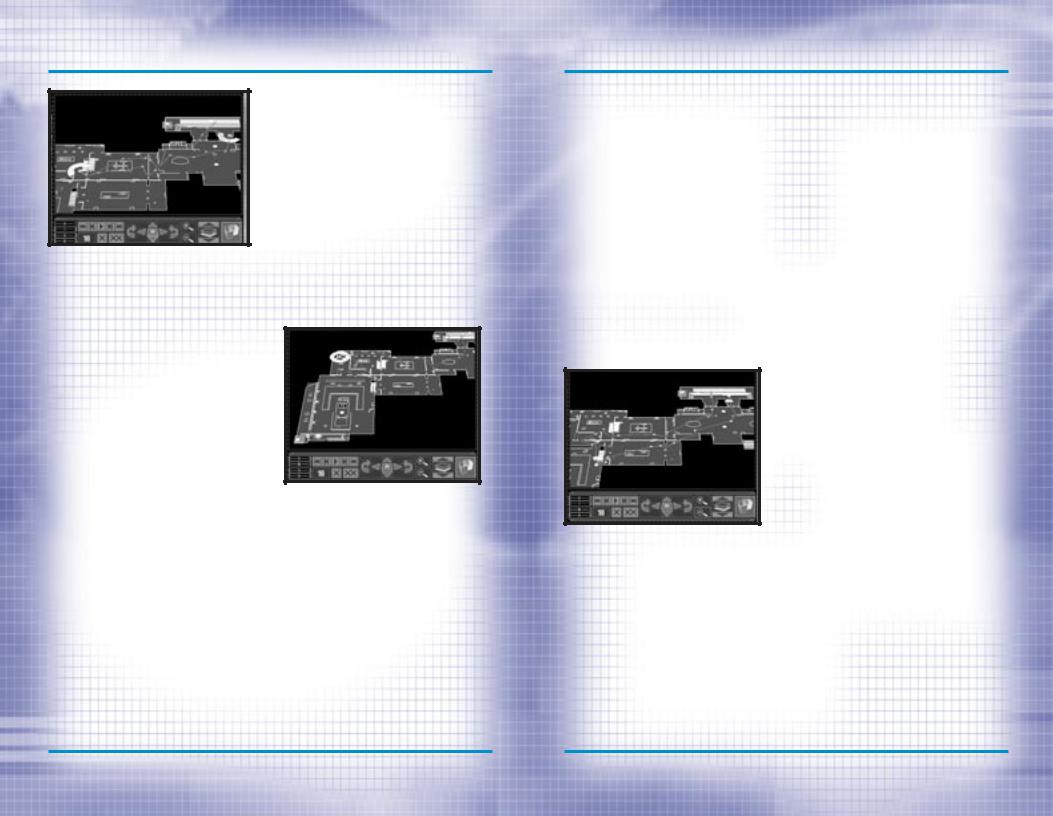
Blue Team’s Plan
All of your teams must start out at an Insertion Zone. These are represented on the map by a light blue rectangle. Move the map so you can see the one near the top. To move the map, click on the Map Control arrows below the map. You can also zoom in and out with the magnifying buttons. The next button to the right changes levels so you can see the second story. The far right button shows a 3-D view of the map. To place the first waypoint for Blue Team, click on the Insertion Zone. Place the next waypoint near the second door from the right. The green lines represent doors. While at this waypoint, go over to the Orders Menu and click on Breach Door under Actions. This orders the team to breach the door.
Note: You cannot give Special Action orders unless you’re in a position to perform the action.
In this case, if you do not place your waypoint close enough to the door, the option to breach it will not be available. Place the next waypoint up and to the right so they are just above the rightmost door. Click on Alpha under the Go Codes and then Cover under Actions. The Go Code order tells the team to wait at the waypoint until it receives the assigned Go Code. Without Go Codes, the team would trav-
el from waypoint to waypoint without stopping. Go Codes let you coordinate the actions of multiple teams. Cover tells them to defend their position in a 180 degree arc. To set the arc, right click on the map and a targeting icon will appear. Place it so the team is facing the opened door. Now, plot waypoints to lead the team into the museum, heading to the left until they are just to the left of the double staircase. Here, assign them Go code Bravo and order them to Cover facing the top left. Finally plot waypoints back through the main doors and to the Extraction Zone represented by the white rectangle.
Red Team’s Plan
With Blue Team ready, click on the red triangle to begin giving orders to Red Team. Start them off at the Insertion Zone in the bottom left. Place the next waypoint near the door and click on Frag Room under Actions. This orders the team to throw in a Frag Grenade as soon as they open the door. Continue up the stairs and down the corridor leading right and up. Just outside the second door you come to, near the small flight of stairs leading to the right, use the Frag Room order again, then head all the way to the right, then up and then back to the left, visiting all the rooms on the second floor.
WALKTHROUGH OF THE FIRST MISSION
Head down the single flight of stairs near the center of the map, then towards the room in the top left. Place a waypoint outside the door, and a little below it. Order the team to Flashbang Room, then enter it. Walk near the other door in the room, then click on the Charlie Go Code and Defend under Actions. Defend instructs the team to be prepared for terrorists in all directions or 360 degrees. Also click on Escort under Mode and Blitz under Speed. Escort orders the team to take any hostages with them while Blitz has them running instead of walking. Plot the next waypoints to lead them out the main doors, to the left side of the stairs outside and then on to the Extraction Zone.
the waypoint just to the left and below the staircase and click on Go Code Bravo. Also order them to Snipe at the doorway above and to the left of the stairway. The following waypoints should lead out the main doors and to the Extraction Zone. You are now finished with this screen, so click on the right green arrow to continue.
The Execute Screen is where you can choose which team you want to control at the start of Action Phase of the mission. You can also choose to just watch the mission by clicking on the button in the lower left of the screen. In this mode, you can view the mission from the perspectives of each of the three teams, but do not control any of them. Deselect Watch Mode. By default, you will be placed in control of the Blue team. When you are ready, click on the right green arrow again. A window will pop up asking if you wish to continue to the “Action Phase”. Click on Yes.
Green Team’s Plan
Green Team is your sniper team. Click on the green triangle and then place their first waypoint in the top Insertion Zone. Plot the next above the door the Blue team will breach. Here, click on the Alpha Go Code and Snipe under Actions. Snipe orders the team to set up the sniper to cover a very narrow arc. Right click somewhere inside the museum so the sniper has a line of sight to the point through the opened door. Next, send them inside and down near the staircase Red Team will come down. Place
RAINBOW SIX |
2-7 |
WWW.REDSTORM.COM |
ROGUE SPEAR |
2-8 |
WWW.REDSTORM.COM |
WALKTHROUGH OF THE FIRST MISSION
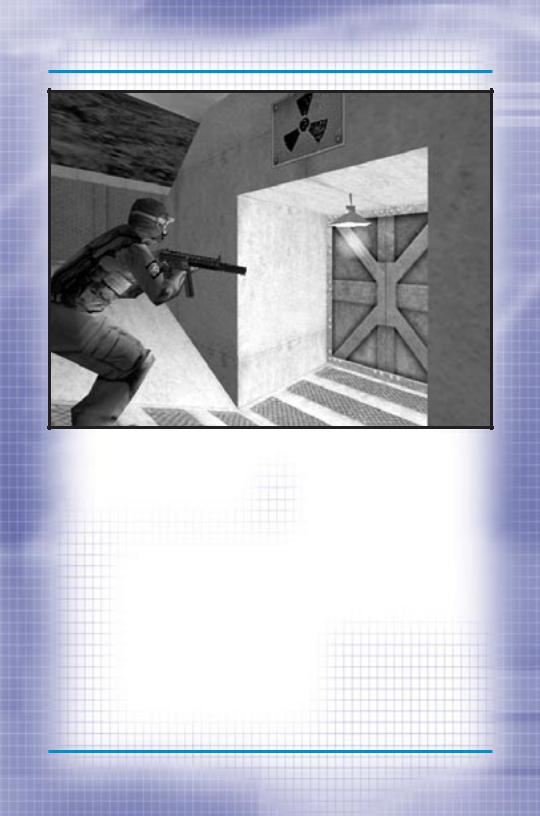
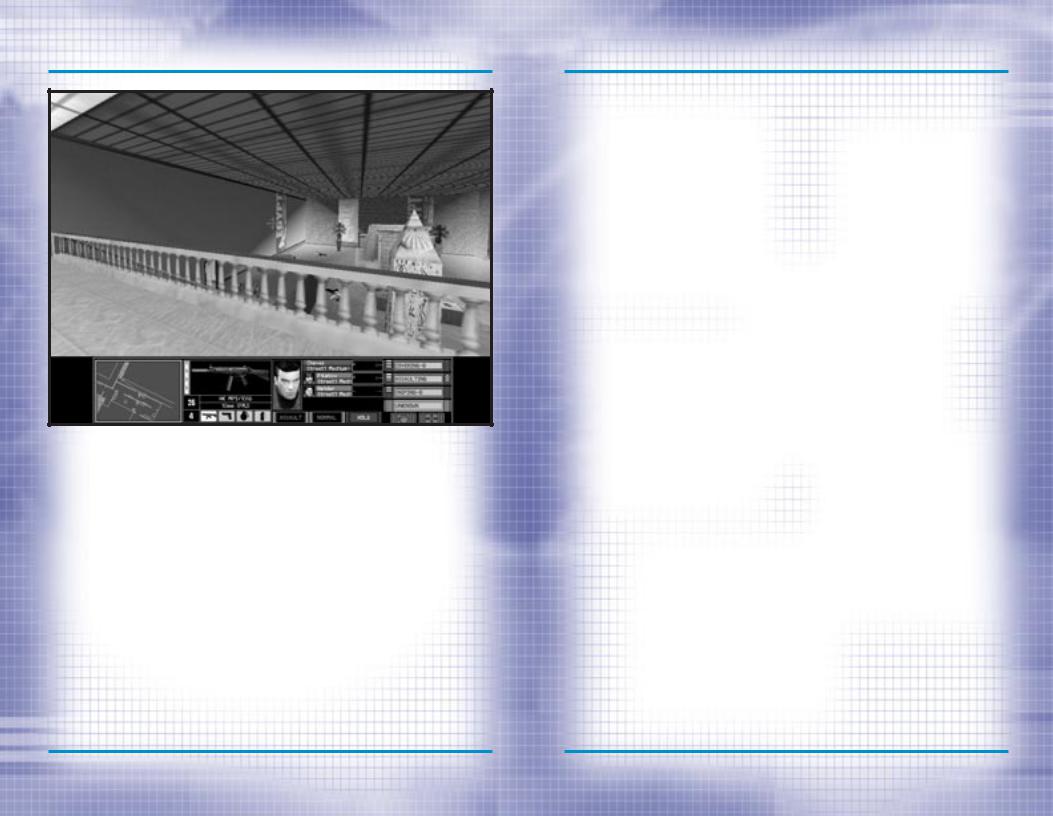
ACTION PHASE
The “Action Phase” is where you execute the plan you created in the Planning Phase. Unless you are in Watch Mode, you control the team leader of the currently selected team. After the Action Phase loads, a window will appear asking if you are ready to begin. Click on OK. The screen is divided into two main parts. The Cinema Window is the 3-D view of the mission area. Below it is the Action Bar. Centered in the Cinema Window is the targeting reticule. This is what you use to aim your weapon. As you move and rotate, the reticule will grow in size to show the decrease in accuracy while moving. On the left side of the Action Bar is the Map Window. This will be disabled in
resolutions lower than 640 |
X 480. |
It is centered on the current |
team. |
The top of the map is always the direction the team leader is facing. As you begin moving, follow the lines connecting your waypoints. Next to the Map is the Weapons Display. This shows the current weapon, the number of rounds remaining in the magazine, the number of extra magazines the operative is carrying and little icons of the other items carried. You can change items, magazines, or the rate of fire by selecting the appropriate keys. The next box is the Team Display. It lists the operatives in the current team and their Mode and Speed. The last box is the All Teams Display. It shows the status of all the teams in the mission. In addition, three yellow chevrons indicate the team you are currently in charge of.
WALKTHROUGH OF THE FIRST MISSION
When you come across a terrorist, place the targeting reticule over his chest and press the fire button or key. If the weapons rate of fire is set to single shot, each press will fire a single round.
However in three-round burst or full automatic, holding down the button or key will fire either three rounds or empty the magazine respectively. Be careful.
You can switch between teams during the mission and take control of each in turn. Keep an eye on the All Teams Display. When their status lists an action followed by a letter, it means the team is waiting for the listed Go Code. For this mission, give code Alpha as soon as Red Team is beginning to clear the area overlooking the main entrance. Code Bravo is to be given after Red Team has secured the hostages, immediately followed by code Charlie. Right from the beginning of the mission, you should press the Activate Sniper Control key to order the Sniper to fire at will.
Try playing this mission as each of the different teams as well as in Watch Mode. Each team has different responsibilities and going through each will give you a good feel for the game.
END OF THE MISSION
The mission will end when one of the following conditions occurs: the hostages have been safely rescued, a hostage is killed, or all of your operatives are out of action. At the end of the mission, you will go to the Results Screen where you can see the statistics for your mission. If you would like to see a replay of your mission, click on the third button from the right on the bottom of the screen. It will replay the mission and you can observe, similar to Watch Mode.
RAINBOW SIX |
2-9 |
WWW.REDSTORM.COM |
ROGUE SPEAR |
2-10 |
WWW.REDSTORM.COM |
GAME MENUS
ROGUE SPEAR |
3-0 |
WWW.REDSTORM.COM |
GAME MENUS: SINGLE PLAYER
Rogue Spear contains a number of different menus, which are organized to simplify the process of setting up and starting a game. This section covers all the choices available to you prior to selecting a mission.
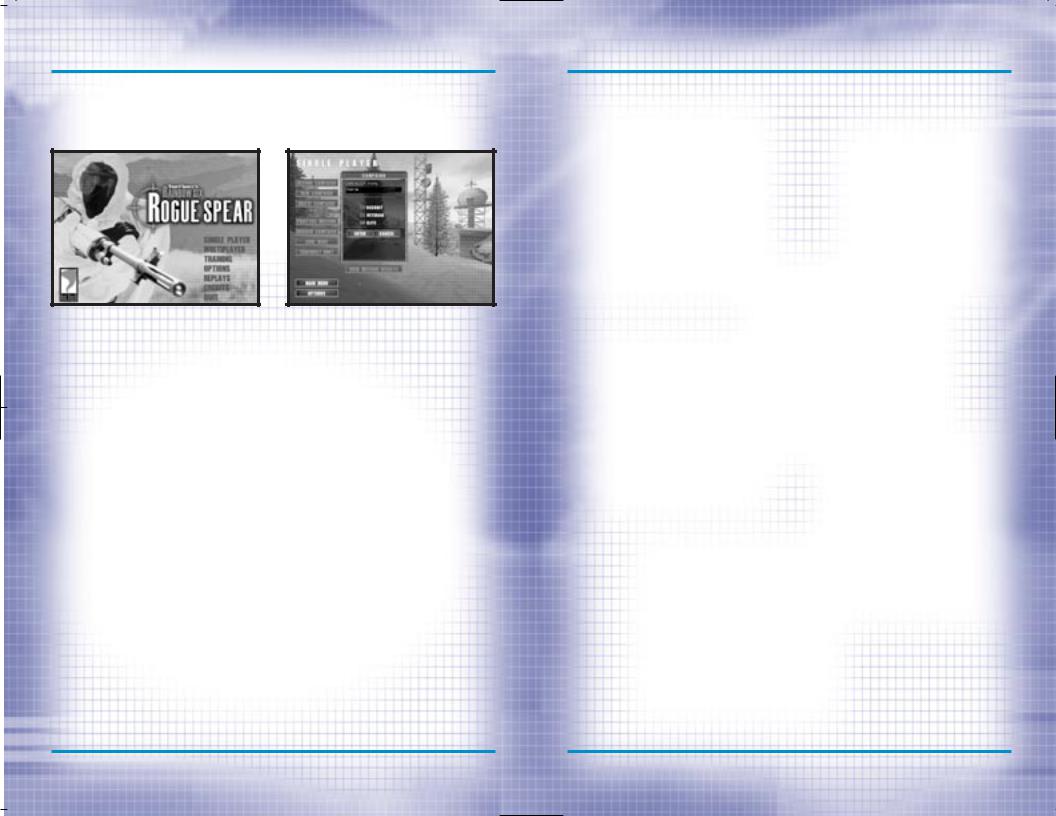
The Main Menu is fairly intuitive. Just left mouse click on a selection to go to the corresponding area.
When you first start Rogue Spear, the “Main Menu” offers seven different choices.
SINGLE PLAYER
Takes you to the Single Player Menu
MULTIPLAYER
Takes you to the Multiplayer Menu
TRAINING
Takes you to the Tutorial Menu
OPTIONS
Takes you to the Options Screen
REPLAYS
Takes you to the Mission Replay Menu
CREDITS
Takes you to the screen listing all the people who worked on this game.
QUIT
Exits the game.
The Single Player menu is where you begin a campaign and return to resume a campaign in progress. From here you can also replay missions in one of three different modes.
SINGLE PLAYER
The “Single Player” menu is where you begin all of the campaign missions and other types of games for individual play. There are eight selections from which to choose: New, Resume, Delete, Practice Mission, Branch Campaign, Lone Wolf, Terrorist Hunt, and View Missions Results. Each of these is described in the subheads below.
GAME MENUS: SINGLE PLAYER
NEW
When you play Rogue Spear for the first time, you will automatically be taken to New Campaign. A dialogue box will appear. Enter a name for the campaign. Next you must select a difficulty level.
DIFFICULTY LEVEL
You can choose from Recruit, Veteran or Elite. Each level of difficulty requires varying levels of skill for success.
Recruit: In order to move on to the next level, you must accomplish the objectives of the mission. There are fewer terrorists than in the other levels and they are slower to react. Veteran: As in Recruit, you must achieve the objectives to complete a mission successfully. However, there are usually more terrorists and they react quicker than in the Recruit level.
Elite: This is a very tough level. There are often more terrorists and they will shoot much more quickly. Auto Target is disabled and Heart Beat Sensors (explained in weapons and equipment section) cannot tell the difference between a hostage and a terrorist. This level is as real as they come and requires the most careful planning and execution in order to succeed.
Once you have made your selections, click OK to begin the first mission. You will be taken to the “Planning Phase”.
RESUME
After at least one campaign has been started, the Resume option will be available from the “Single Player” menu. Click on one of the campaigns listed in the Campaign Window and select Resume. You will be taken to the planning phase of the next uncompleted mission in the current campaign.
DELETE
This option deletes the selected campaign. A dialogue box will appear asking you to verify your decision before the campaign is actually deleted. You cannot delete individual missions in a campaign. If you are unhappy with the results of a mission and want to try it over to improve your performance for campaign purposes, use the Branch Campaign option instead. All deleted campaigns are gone for good. If the only campaign is deleted, you must start over from the beginning with mission 1.
PRACTICE MISSION
Once a mission has already been completed, you can return and try it again without affecting the campaign in progress. First select the campaign in the Campaign Window, then select the mission from the Mission Window. With the mission highlighted, select Practice Mission. You will be taken to the planning phase for that mission. None of the results of the practiced mission will affect the campaign. Even if some of your operatives are killed or wounded, these do not carry over to the campaign. If you want to improve the performance of a mission for campaign purposes, choose the Branch Campaign option instead.
BRANCH CAMPAIGN
If you are not happy with the results of a mission and would like to play it over for the purpose of improving your campaign, then use the Branch Campaign option. Once the correct campaign has been selected, choose the mission prior to the one you want to replay and then select Branch Campaign. A dialogue box will appear and ask you to provide a name for the new campaign. You cannot, however, change the difficulty level. It remains the same as that chosen for the original campaign.
RAINBOW SIX |
3-1 |
WWW.REDSTORM.COM |
ROGUE SPEAR |
3-2 |
WWW.REDSTORM.COM |
GAME MENUS: MULTIPLAYER/TRAINING
LONE WOLF
After a mission has been successfully completed, the Lone Wolf option for that mission will be available. Using the same map level, you enter it with a single operative. Thirty terrorists are randomly placed about the level. You must get from the insertion zone to the extraction zone without being killed. The objectives of the original mission are no longer in effect. It is just you and the bad guys. Once you select this option, you will be taken to the planning phase where you can choose and outfit your operative.
TERRORIST HUNT
Similar to Lone Wolf, this option is only available after a mission has been completed successfully. However, in this case, you can take an entire team with you. The objective for this option is to hunt down all thirty terrorists and clear the level. After selecting this option, you are taken to the planning phase.
VIEW MISSION RESULTS
This option allows you to review the End State of any completed mission within a campaign. This command is most useful when you have several campaigns and are looking for a good spot to Branch the Campaign. The information displayed is the same as that presented at the Results screen for the mission.
TRAINING
This is where you can create or join multiplayer games of Rogue Spear. These menus are covered later in this manual in the Multiplayer section.
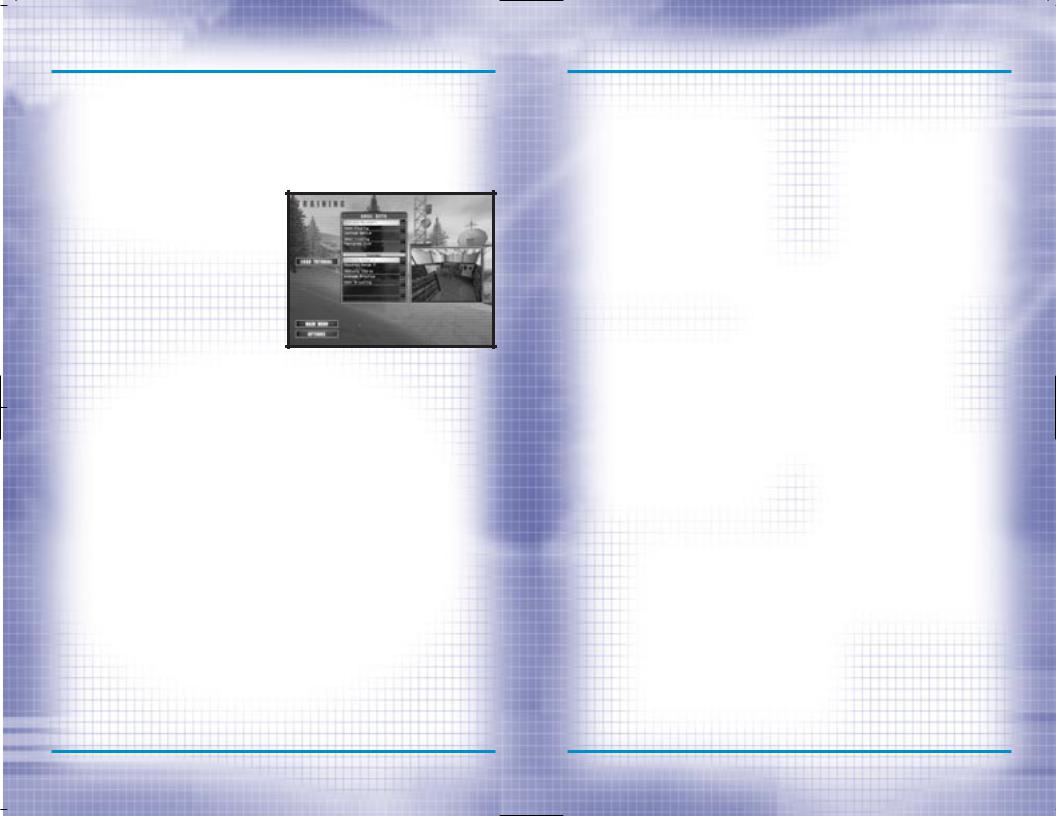
The Training Menu is divided into Skill Sets and Courses. The first three Skill Sets form a tutorial teaching you all the skills you need to go onto the operational missions.
Several training missions have been created to help you become familiar with the game and the types of actions you will be performing within the missions. It is a good idea to spend some time going through each of the training missions. They are organized according to Skill Sets. Each Skill Set concentrates on a group of skills necessary for the actual missions. To begin a training mission, select a Skill Set and then one of the courses listed in the window below. It is usually a good idea to go through each of the training missions in order since most build on the previous missions.
Even after you have started a campaign, continue to return to the training missions to keep your skills at a high level. Hostage rescue teams
GAME MENUS: TRAINING
in the real world spend thousands of hours training and practicing on firing ranges, obstacle courses and in simulated rescue situations. The training missions are organized to allow you to work on a specific type of action without having to do a lot of set-up and enter an actual mission. For example, if you are having trouble during a mission saving a hostage or entering a room containing terrorists, try one of the appropriate training courses until you feel comfortable with your ability to execute the action successfully.
While the training missions are a great way to hone your personal combat skills for missions, many are great for testing out team tactics. Each training mission begins with a planning phase where you can select different operatives and kits, then assign them to teams and lay out a plan. In some of the more advanced training missions, you can practice using Go Codes to coordinate the actions of all your teams. Also try assigning teams special actions such as Frag Room, Flashbang Room, or Breach Door. Then during the training mission, observe how they perform the action.
Often during an operational mission, there will be one or more difficult spots to get through. Instead of going through the entire mission again and again until you get it right, go back to the training missions and find one similar to the trouble spot. Practice getting through it either by yourself or with the help of other teams. Remember, the more you sweat in training, the less you bleed in combat. You can exit the Training Sessions at any time by pressing the Escape Key. Click on Abort Mission from the window which appears and you will be returned to
the Main Menu. There is not a Results Screen for Training Sessions since no statistics are collected during training.
There are five different Skill Sets from which to choose.
FIRE AND MOVEMENT
The five courses in this Skill Set let you practice moving your operatives as well as using their weapons and equipment. Two of the courses are shooting ranges were you can hone your firearms skills. Each course has five different sections. The first is a gravel walkway on the far left. Here you can practice firing while on the move. Walk along the gravel way and fire at the target as you go. To the right of this section are four more: short, medium, long and extra long ranges. The latter is great for sniper practice.
The obstacle course solely tests your ability to move an operative around the level. To complete this course, you must walk across narrow planks, side-step, climb, etc. While it may not seem too difficult, practice going through the course with your weapon always aimed downrange. In real missions, you always want to keep your weapon pointed towards the enemy. Also try using obstacles for cover by crouching behind them or peeking around them. Switch between first and third person views to find the best for different actions and situations.
The grenade practice range provides an area where you can work on your use of both flashbangs as well as frag grenades. Behind the tire barrier is a mock building. Start off with flashbangs and try throwing them over the barrier first. You throw grenades and
RAINBOW SIX |
3-3 |
WWW.REDSTORM.COM |
ROGUE SPEAR |
3-4 |
WWW.REDSTORM.COM |

GAME MENUS: TRAINING
flashbangs by holding, then releasing the fire button or key. The longer you hold it down, the farther you throw. By looking up or down, you change the angle at which you throw the grenade. Practice throwing grenades through the door, and then through the window. Remember to be careful with the frag grenades. Even in training, they are real and deadly. If they don’t clear the tire barrier, they will bounce back and land near you; killing or seriously wounding your operative.
In addition to the grenade range, there are also several mock buildings for practicing the use of flashbangs. Try opening a door while standing to one side. Then quickly peek in and throw a flashbang. As soon as you release the flashbang, switch to your primary weapon and enter the room once it has detonated. It is also a good idea to throw a flashbang and watch it detonate. Observe the effects it has on your operative. Your firing accuracy is reduced temporarily and your vision is somewhat obscured. You may also be temporarily paralyzed. It is important to practice throwing flashbangs, then looking away, so you are not effected as much as the terrorists.
The final course in this Skill Set is the Door Breaching Course. Take a demolitions specialist armed with shotguns and breaching charges for this training mission. It uses the same course as the grenade practice. Instead of using the grenade range, concentrate on breaching the doors of the mock buildings. There are two main ways to breach a door. Start off by using a breaching charge. Walk up to a door, select the breaching charge, then hold down the fire button or key while the operative places the charge. Next, back away from the door
and press the fire button or key again to detonate the charge. Not only is the door blown to pieces, terrorists in the room would be stunned with effects similar to a flashbang. Breaching charges can even kill if a person is too close to the other side of the door. Therefore, be careful when using them on rooms containing hostages.
ROOM CLEARING
This is the first Skill Set, which offers opposition. The three courses consist of the same pair of connecting rooms with different configurations of simulated terrorists inside. There are several ways to practice using the courses. Try using frag grenades to clear a room. Then try using flashbangs to stun the terrorists before rushing in. You can also test multiple team tactics by using two teams to breach and enter the two doors simultaneously. Use caution on each of these courses because the terrorists fire back at your operatives.
HOSTAGE RESCUE
The next Skill Set continues on with the training by adding hostages to the missions. Not only do you have to clear out the terrorists, you must also keep the hostages safe at the same time. It is a good idea to take a heartbeat sensor along to locate where the hostages are being held so you can use extra caution when entering those rooms.
The six courses take place in one of two kill houses. The first is a small office building with six small rooms connected by a single hallway. The second kill house is a two story building with several rooms on each floor. There are three configurations of terrorists and hostages for each of the kill houses. The hostage rescue
GAME MENUS: TRAINING
training missions are much tougher than previous ones. In most cases, there are doors across from each other in the hallways, which can make advancing on one difficult without exposing yourself to another. Practice using flashbangs as well as multiple team tactics. Once you can get through all six of these courses, you are first class certified in Hostage Rescue and Close Quarters Combat. You are ready to go operational.
OPEN TRAINING
After going through the training missions, the Open Training Skill Set lets you go back to practice at the shooting and demolitions ranges as well as three kill houses. It is always a good idea to continue training in-between operational missions to keep your skills honed to razor sharpness.
TERRORIST HUNT
The final Skill Set allows you to go through two new kill houses and eliminate all the terrorists you can find. The first kill house contains a pair of two story buildings while the second is a mock up of a city street. The latter is filled with hiding places and underground passages where terrorists can be waiting to ambush you. Each time you try these two training missions, the terrorists are randomly placed throughout the levels.
RAINBOW SIX |
3-5 |
WWW.REDSTORM.COM |
ROGUE SPEAR |
3-6 |
WWW.REDSTORM.COM |
GAME MENUS: OPTIONS
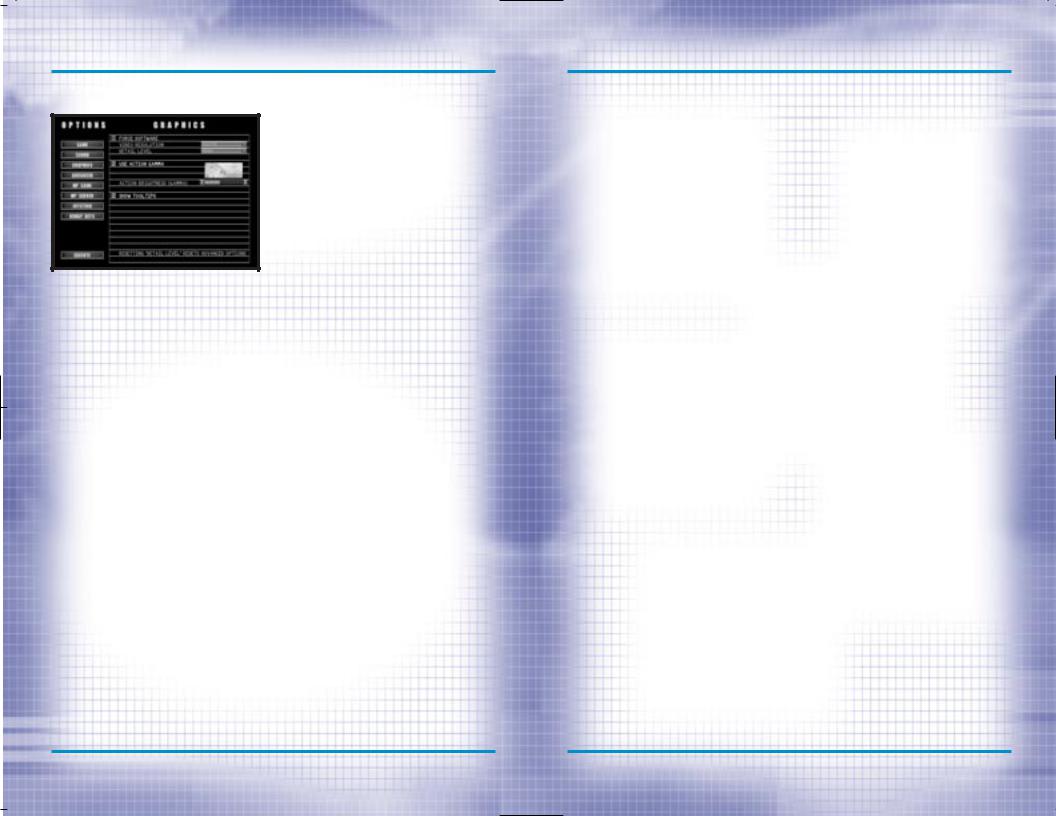
OPTIONS MENU
The Options Menu is where you can configure and customize the game for your computer and playing style.
The “Options Menu” allows you to configure and customize Rogue Spear to your personal taste. Within the submenus, you can adjust game functions, sound, graphics, multiplayer games, joystick setting and remap the keys.
GAME OPTIONS
These options affect the way the game plays. To toggle an option, click on the box next to the title and a checkmark will appear to show the option is activated. An empty box means the option is not activated.
Auto-Targeting On is activated by default. During the Action Phase, the targeting reticule will automatically center itself over the chest of the nearest enemy and then move to his head. This makes targeting a terrorist easier and eliminates the time necessary to line up a perfect shot. Once you become more proficient with the controls, deactivate this option for more of a challenge.
With Blood activated, terrorists and other characters will bleed when shot
and there can be blood spray. The effect is realistic and not overly gory like you might expect in other games. When Blood is deactivated, characters just fall down without any visible wounds; just like in the old Western movies.
With Mouse Look activated, your mouse moves the targeting reticule around in the Action Phase. Moving the mouse up and down makes your operative look up and down while left and right movement rotates your operative.
Note: Changing the Mouse Look settings will cause some of your key mappings to change.
If you turn this option off, number pad keys will be activated as your “Look” and “Turn” keys. Invert Mouse swaps the up and down motion of the mouse to make it similar to a flight simulator. Moving the mouse up makes your operative look down and vice versa. Mouse Sensitivity is set using a bar with arrows at each end. To increase the sensitivity, click on the right arrow and the little notches in the bar will begin to light up. The more sensitive the mouse, the less you have to move it during the Action Phase to control your character.
When Record Mission is activated, your missions will be automatically recorded for replay after the mission. For more information on this, see the Replay Mission section later in this manual. Turning this off may help increase speed on slower machines.
Unlimited Practice turns off Victory Conditions for Practice Mission. To use the Practice Missions option, you’ll need to have successfully completed the mission first. This allows you to run through a level while never
GAME MENUS: OPTIONS
winning or losing, regardless of what happens during the mission.
Always Run automatically makes your operative run whenever you give move commands. When you press the run button, your operative will slow down to a walk.
The MODs Path option allows you to use different MODs created by other players. Type in the path to where the MODs are located in your computer in the box provided. MODs are levels, missions or variations created by players. Red Storm Entertainment does not support MODs so use them at your own risk. Our Technical Support Representatives cannot help customers with problems arising from the use of MODs. Please uninstall any MODs before calling Technical Support. If you’re having game play problems after installing MODs, try uninstalling to see if problems are fixed.
SOUND OPTIONS
These options allow you to adjust the volume of different types of sounds in the game. By clicking on the box next to the titles, you can turn that sound on or off. Volume is adjusted by clicking on the arrows on either side of the bar. There are six types of sounds you can adjust:
Master: This adjusts the volumes of all the individual following types of sounds collectively.
Ambient: This adjusts the volume of background or environmental sounds such as crickets chirping or machinery running.
Gunshot: This adjusts the volume of all gunshots and explosions in the game.
Footstep: This adjusts the volume of sounds made by operatives and other characters walking.
Radio Chatter: This adjusts the volume of messages from your other operatives during a mission.
Action Music: This adjusts the volume of the music played during the missions. It does not affect the volume of CD music.
Maximal Sound: This bumps up the maximum number of 3D sounds that are played at any one time. Not all sound cards support a large number of 3D sounds being played at one time. If you are unsure whether or not your sound card can support many 3D sounds playing at once, then leave this option off.
RAINBOW SIX |
3-7 |
WWW.REDSTORM.COM |
ROGUE SPEAR |
3-8 |
WWW.REDSTORM.COM |
 Loading...