


Starter Guide
1
2
3
Read this guide first.
Preface
 P.2
P.2
Installing the Machine
 P.4
P.4
Connecting to a Computer and Installing the Drivers
 P.12
P.12
Please read this guide before operating this product. The remarks for important safety instructions are described in the Basic Operation Guide. After you finish reading the Starter Guide, store it in a safe place for future reference.
Checking the Supplied Accessories
Confirm that all the supplied accessories are contained in the box. If an item is missing or damaged, please contact the Canon Authorized Service Facilities or the Canon Customer Care Center.
Machine Unit |
Power Cord |
The toner cartridge is already installed. |
User Software CD-ROM |
Starter Guide
Limited Warranty Notice
Basic Operation Guide
About the USB Cable
The machine does not come with a USB cable. Have a USB cable ready as needed.
Supplied Toner Cartridge
•The included "Canon Cartridge 128 Starter" can print an average yield of 1,000 sheets*. The average yield of the replacement toner cartridge di ers from the supplied toner cartridge.
•To purchase replacement toner cartridges:
 "Replacement Toner Cartridges" in the e-Manual
*The average yield is based on "ISO/IEC 19752" when printing A4 size paper with the default printing density.
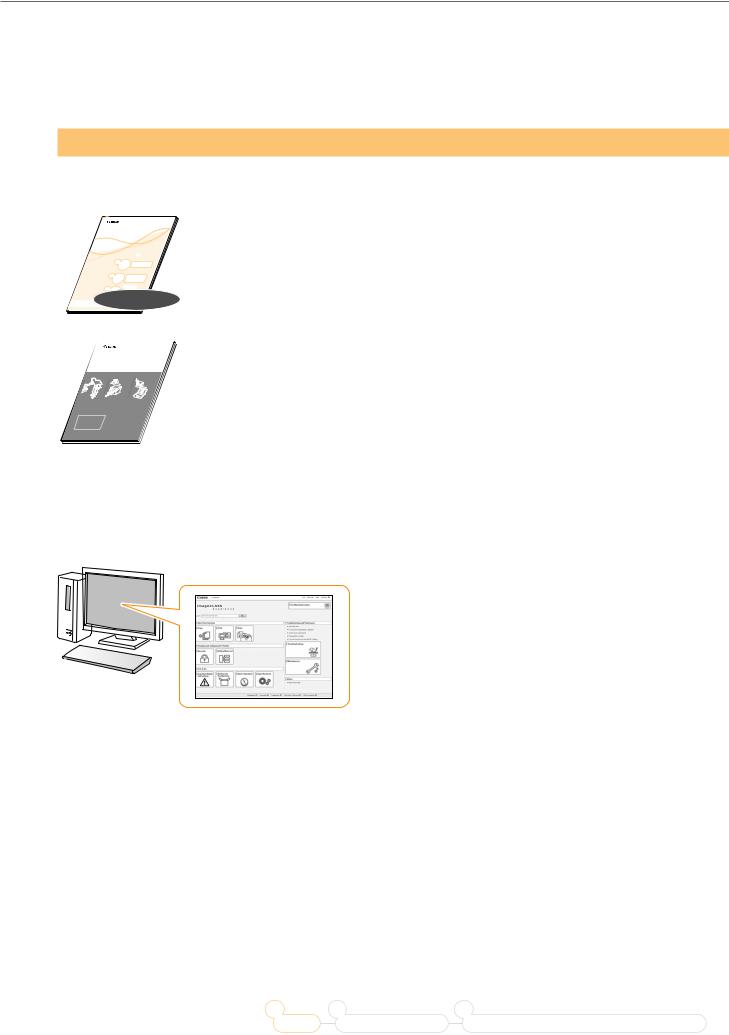
User Software CD-ROM
The User Software CD-ROM contains the MF Drivers, MF Toolbox, various software, and the e-Manual.*
MF Drivers
The MF Driver contains the printer and scanner drivers.
MF Toolbox
The MF Toolbox provides a group of commands for you, such as to open a scanned image in an application, send it as an e-mail attachment file, and store it on the hard disk.
Miscellaneous Software
The User Software CD-ROM contains Presto! PageManager. Install it from the [Custom Installation] option.
* See "Using the e-Manual" (P.18).
2
Checking the Supplied Accessories
Included Documents
Printed Manuals
Starter Guide
This manual describes the configuration and software installation.
This manual
Basic Operation Guide
This manual describes the basic use of the machine.
Manuals Included in the CD-ROM
e-Manual
This manual explains all the features of the machine, and is categorized by subject. For details about using the e-Manual, see “Using the e-Manual” (P.18).
1 |
2 |
3 |
|
3 |
Preface |
Installing the Machine |
|
Connecting to a Computer and Installing the Drivers |
|
|
|
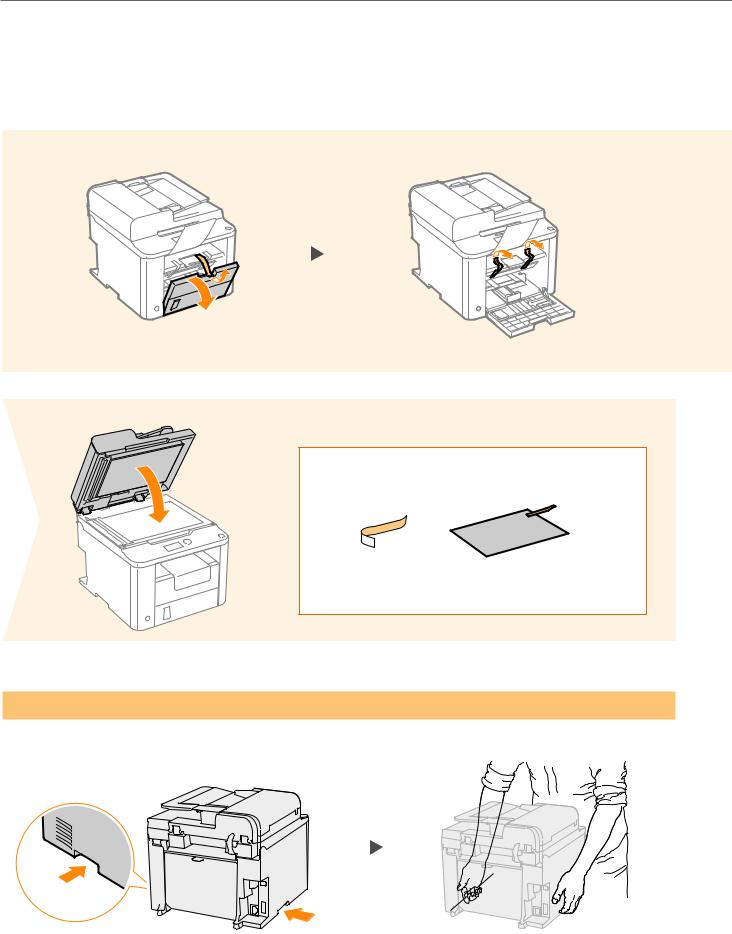
Removing the Packing Materials
Remove all the packing materials, such as orange tape. Packing materials may change in form or placement, or may be added or removed without prior notice.
1 |
2 |
5 |
Check! |
|
Are all the packing materials removed? |
||
|
Tape |
Packing Material |
|
|
with tape |
Proper Handling
Hold here.
Hold here.
4
Removing the Packing Materials
3 |
4 |
Do not remove this packing material yet.
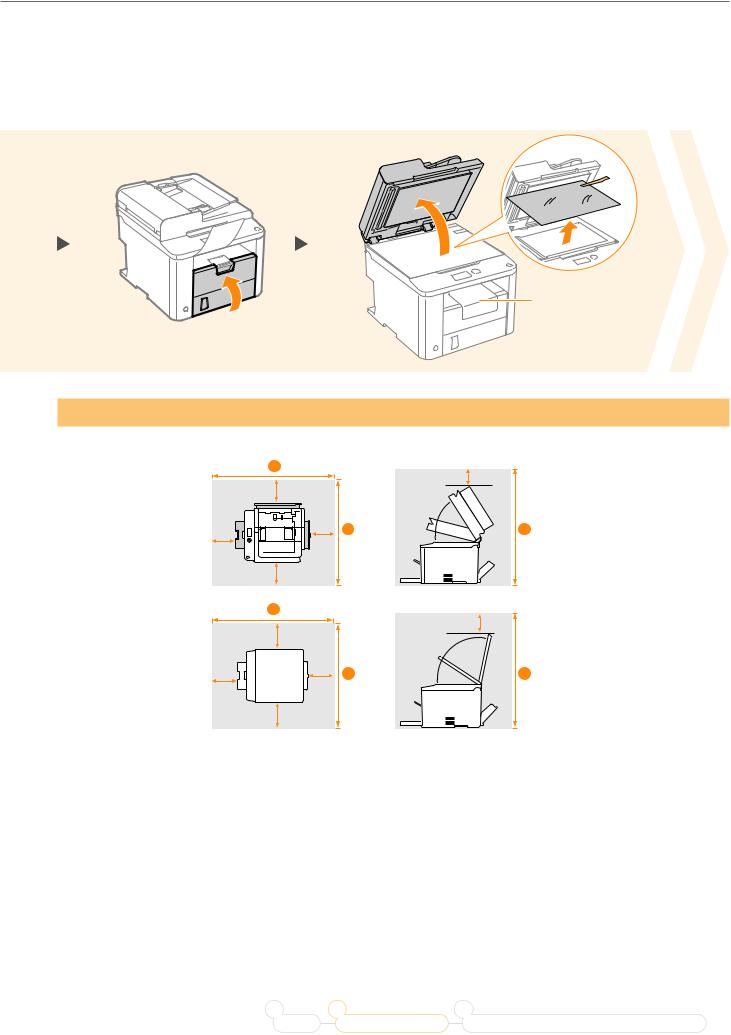
Establishing an Installation Site
D560
35 5/8" (904 mm)
24 5/8" (626 mm)
27 3/4" (706 mm)
D530
35 5/8" (904 mm)
23 1/4" (590 mm)
27 3/4" (703 mm)
|
1 |
|
|
|
|
|
|
2 |
|
|
|
|
|
|
|
1 |
|
|
|
|
|
|
2 |
|
||
|
|
|
 = 4" (100 mm)
3
3
Do not place the machine near the following:
•Alcohol, paint thinner, or other flammable substances If flammable substances come into contact with electrical parts inside the machine, this may result in a fire or electrical shock.
•Any medical equipment Radio wave emitted from this machine may interfere with medical equipment.
•Surfaces that are unstable, subject to excessive vibration, objects that could block the ventilation slot, dampness or dust, in direct sunlight or exposed to the elements, subject to high temperatures, open flames, and poor ventilation Installing the machine in locations with these characteristics may result in personal injury, fire, or electric shock.
Ozone from the Unit
Although ozone is generated from the machine during operation, it does not have any a ect on the human body. However, if you intend to use the machine for long periods of time, ensure that the installation location is well ventilated for a comfortable working environment.
1 |
2 |
3 |
|
5 |
Preface |
Installing the Machine |
|
Connecting to a Computer and Installing the Drivers |
|
|
|

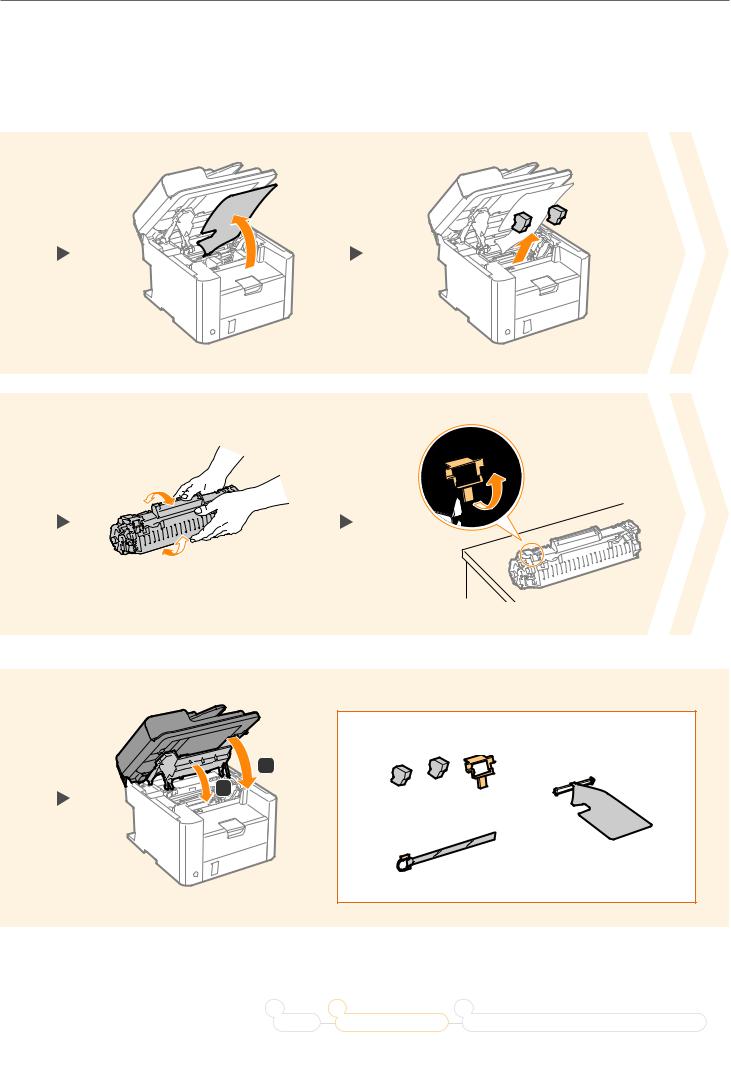
Preparing the Toner Cartridge
1 
5
2 


 1
1

 2
2


6
The plastic part is also a packing material. Be sure to remove it.
9 |
10 |
Left Side |
|
Protrusions |
Right Side |
Protrusions
2 |
|
|
The length of the tape is |
1 |
Fit the protrusions on each side of the toner cartridge, |
and then slide the toner cartridge into the machine. |
||
approximately 20" (50 cm). |
|
|
6
Preparing the Toner Cartridge
3 |
4 |
7 |
8 |
Shake 5 to 6 times.
Place on a flat surface.
11 |
Check! |
Are all the packing materials removed? |
|
|
2 |
|
1 |
|
Packing materials |
|
Packing material |
|
with a sheet |
|
Sealing Tape |
1 |
2 |
3 |
|
7 |
Preface |
Installing the Machine |
|
Connecting to a Computer and Installing the Drivers |
|
|
|
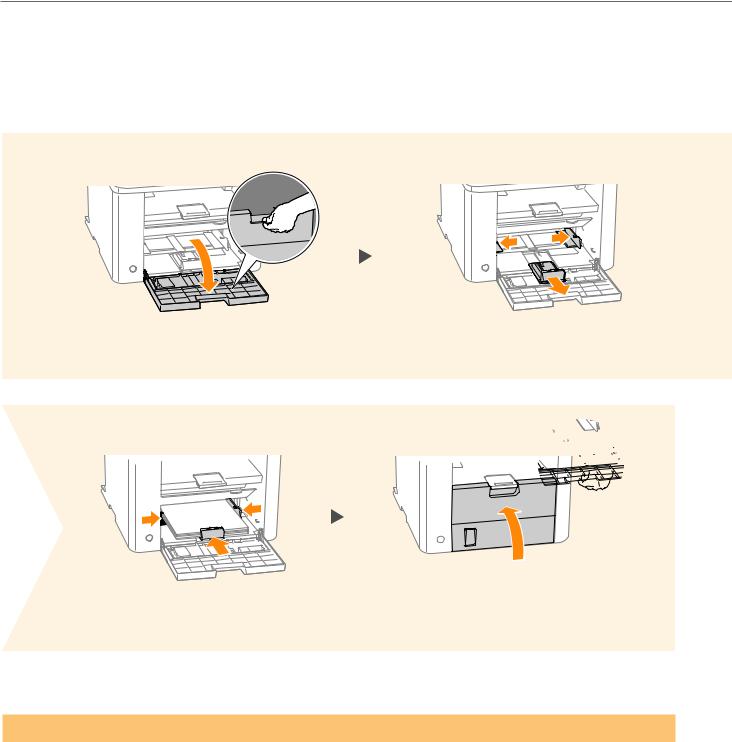
Loading Paper
1 |
2 |
Spread the paper guides a little wider than the width and length of the paper.
4 
 5
5 


Adjust the paper guides tightly to the width and length of the paper.
Loading Paper Other than Letter Size
The procedure here is for loading Letter size paper. To load paper other than Letter size, such as Legal or Statement, see “Loading Paper Other than Letter Size” (P.16) after finishing the initial settings.
8
 Loading...