

Page 1

HNS2200 Quick Start Guide
I. Preparation
1. Install HDD
2. Connect the HNS2200 to Power and to a router , power on and press “format” button at back of the device to format
the HDD with the exFAT format.
3. HNS2200 is ready to be used .
II. Registration
First, search and open the setting page of HNS2200
Method 1
1. Install JAVA running environment on the computer (Newest Java software is available from http://www.java.com/
).
2. After JAVA running environment installed, search HNS2200 with SDisk.jar and connect to HNS2200.(HNS2200 and
computer must be in the same network. SDisk.jar is available from http://www.xoro.de/downloads/home-nas
/downloads-fur-xoro-hns-2200/ )
Method 2
1. Open the configuration page of the router on local computer.(The default IP of the router is 192.168.1.1 and
generally visible at its back.)
1
Page 2
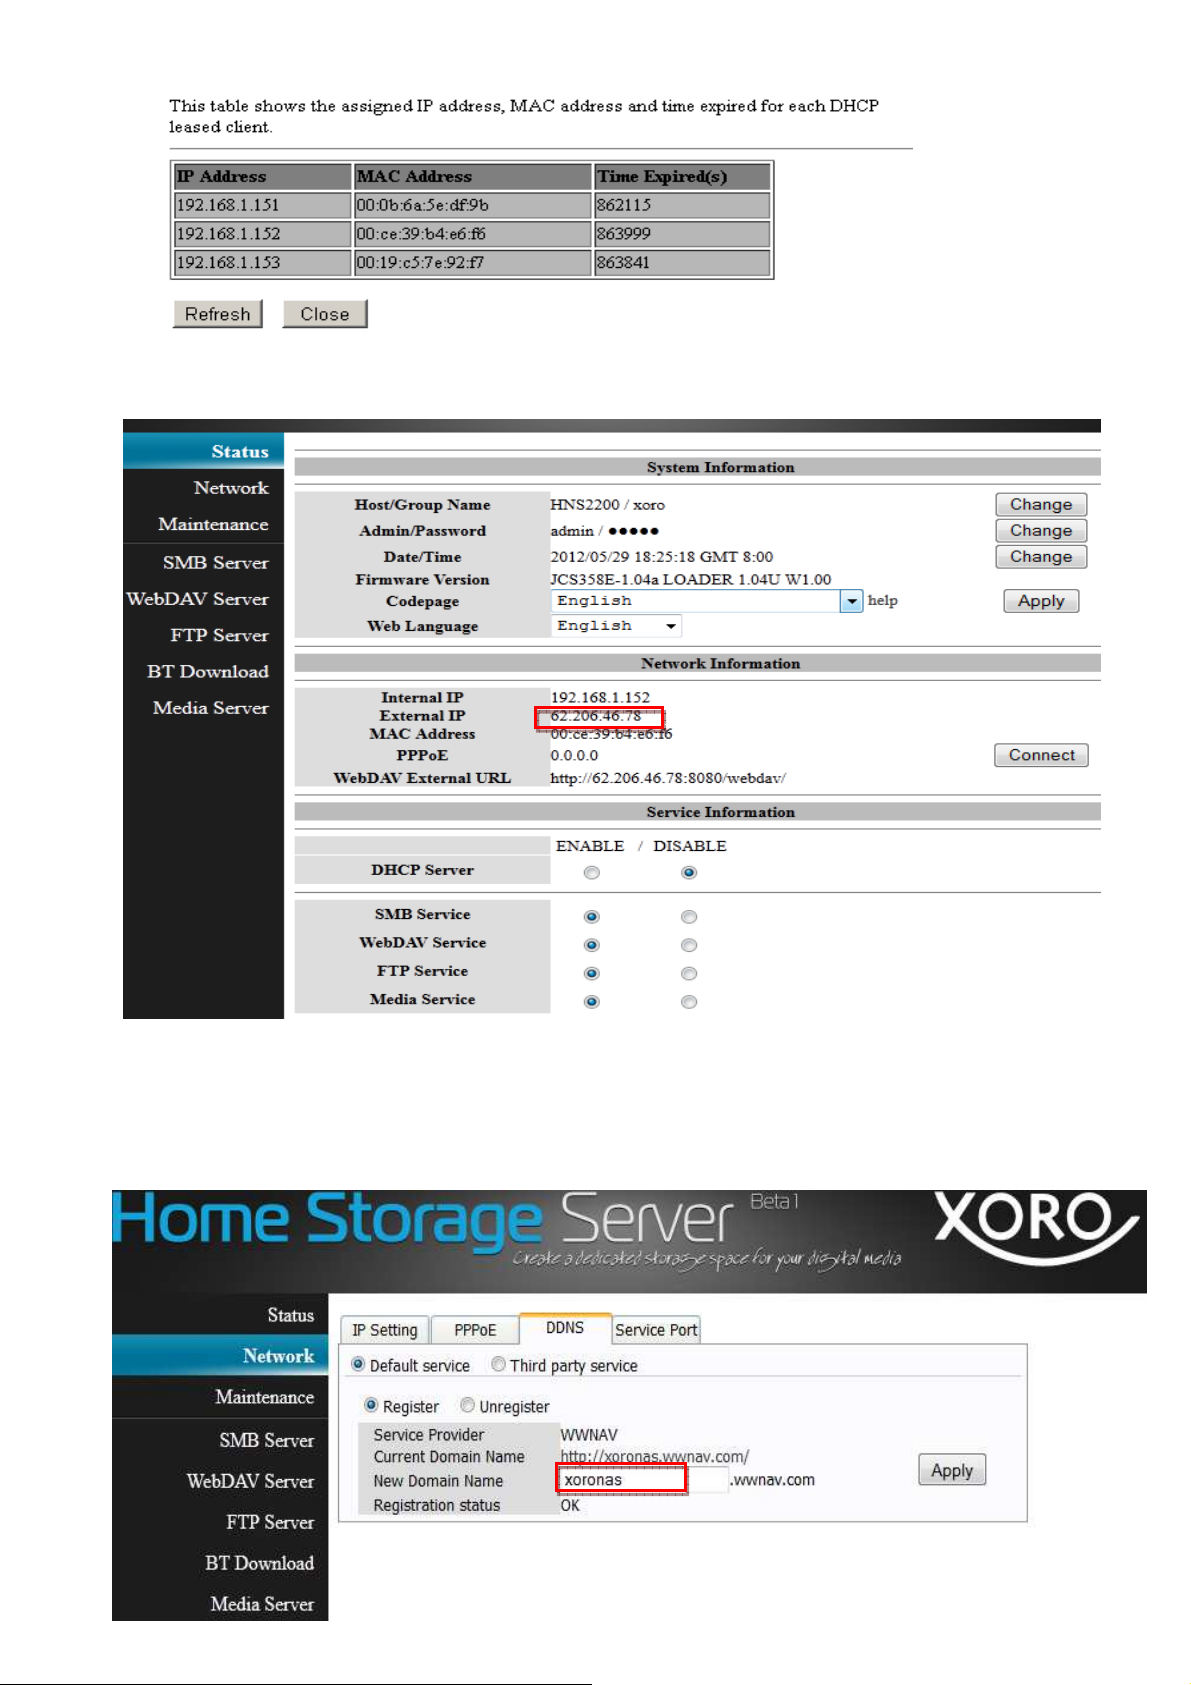
2. Then you can see all the connected devices and IP addresses on the configuration page.
3. Input the IP address of HNS2200 (192.168.1.152) in the address bar of web browser and input User Name: admin
and password : admin . The HNS2200 setting page will be opened as below. Only disable DHCP Server.
Second, User Registration
Go to the setting page—network—DDNS, Create a free account with the wwnav.com (service provider ) and register
your preferred name.
2
Page 3
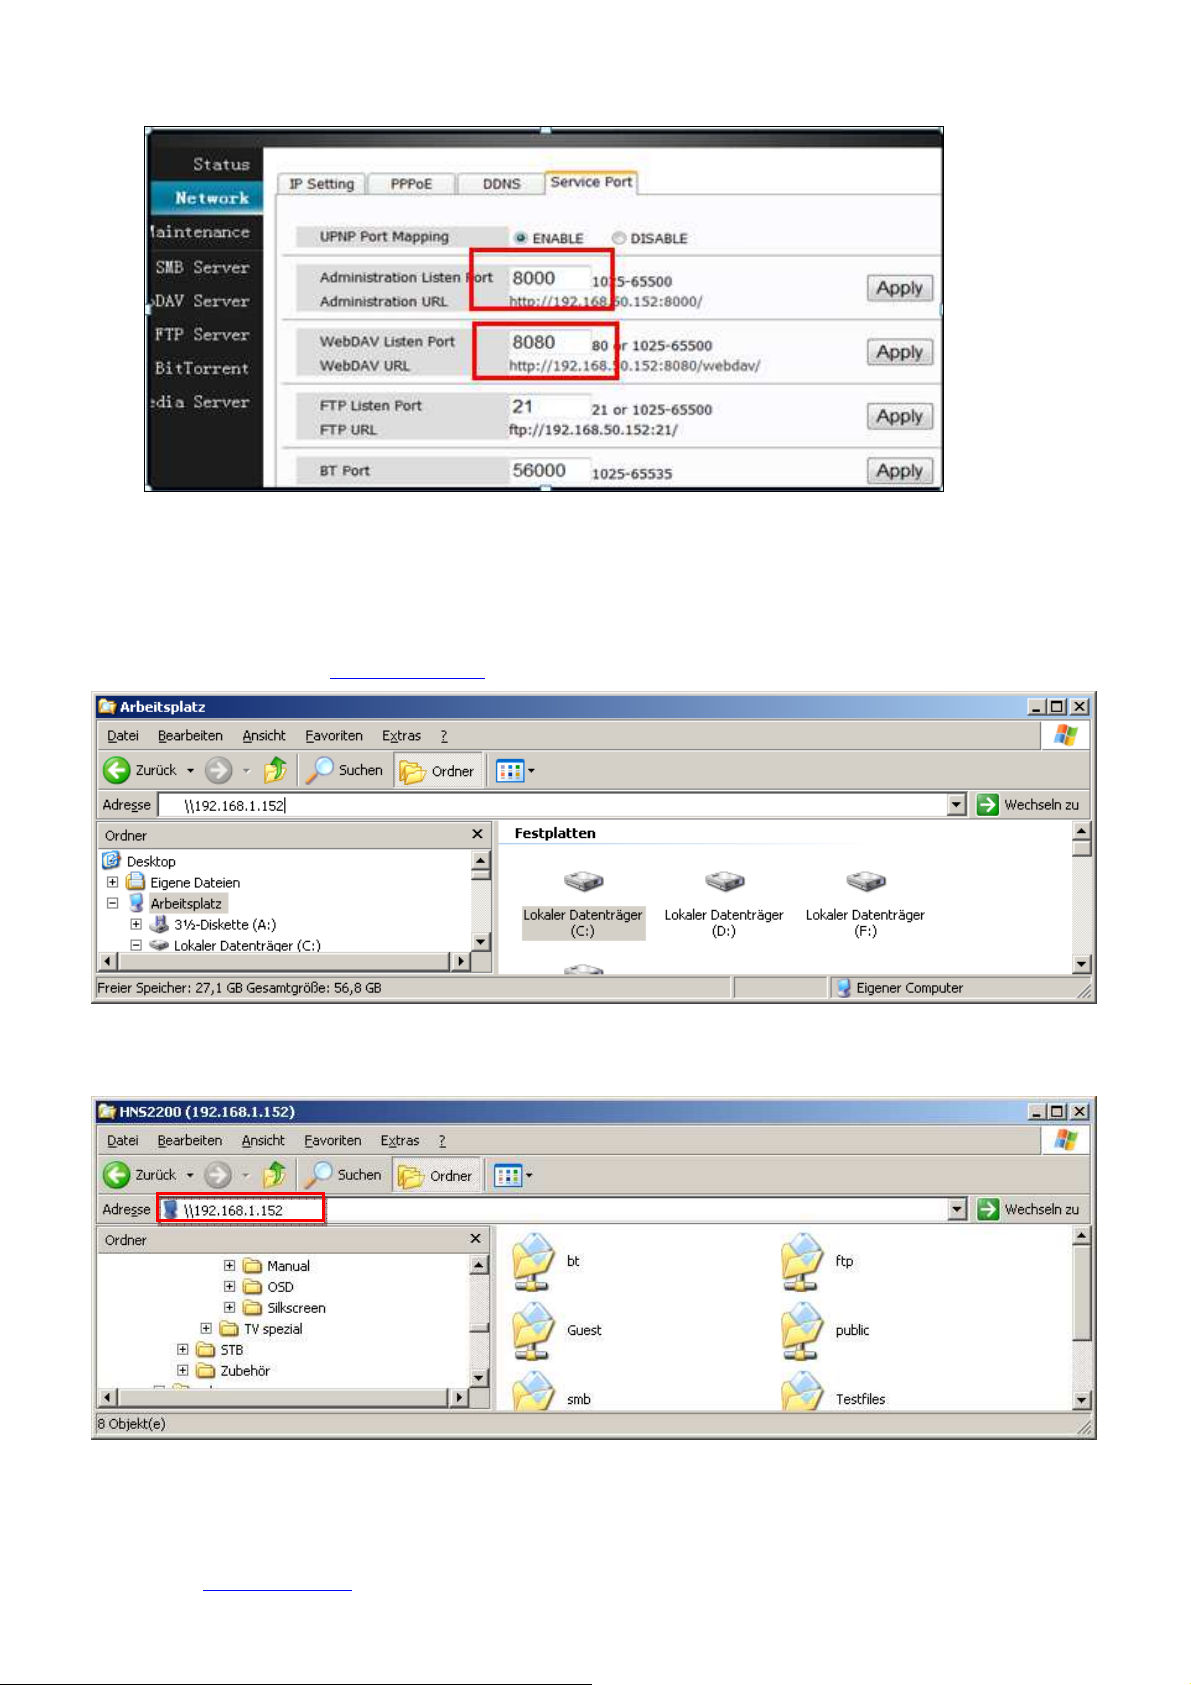
Remark: change the URL on network-Service Port.(The default URL may have conflict with the router)
III.
How to use HNS200 functions——
HNS2200 local network((((SMB Server))))
Input HNS2200 IP address (\\192.1.168.1.152 ) in local address bar
Available on both local network and WAN.
Connect the Computer to HNS2200 and then you can copy and delete files
How to visit HNS2200 throuth Internet((((WEBDAV Server))))On your PC
1. Open the setting page, go to Network-DDNS user registration page and find out the registered name.
2. Input
www.wwnav.com in the address bar of the explorer,go to webdav page, visit the device carrying your
username. (xoronas) .
3
Page 4

3. You can visit the server through internet or local network by making the selection button on the screen. In both
cases, you can unload and download files with WEBDAV application.
4. Upload and download files with WEBDAV application. (Internet)
How to visit HNS2200 throuth Internet((((WEBDAV Server))))On your Anroid Phone,iPod,iPad,iPhone
1.
Install a webdav clinet, for example, Webdav
2. Run the Webdav Nav, then press ‘+’ to add a new server connection. Make sure the Server URL, username
and password are correct.
Nav or Webdav nav+ on your iPad.
For Smart phone with Anroid system please install is “WebDAV Nav Lite” or “WevDAV File Manager” .
IV. More functions
HNS2200 has many functions like SAMBA Server, FTP Server , BT Download and Media Server, which bring your more
convenience and enjoyment.
1. FTP Server
Install “Filezilla” on your computer, run this tool, input HNS2200 IP address and quick connect the HNS2200.
4
Page 5

If it is connected successfully, following information will be displayed..
You can now upload and download files by FTP application freely.
2. Media Server
The UPnP-AV media server can be used to share your photos, music and videos that are stored on the network drive
with an Xbox 360, PlayStation 3 video game console, WMP12 or other DLNA compatible devices that are connected
to the same local network as well as stream music to iTunes media players.
1) Add permissions and users to the media share in the configuration page.
• From the drop-down list of the corresponding list, select the folder where your media files (e.g.
photos, music, videos) are stored.
• Repeat the previous step for each media type (photo, music, video).
• The file sharing can be disabled at any time by clicking DISABLE for the corresponding
directory.
2) for example Install and run “ I Tunes” on your computer, run this tool and search for HNS2200 in your home
network. And Media files can be shared.
5
Page 6

3) The function “ITunes Playlist Cache” is used for all the devices with “ I Tunes”. (Windows system or Mac system)
3. BitTorrent download
BT download is a Peer-to-Peer application. Here you can manage your torrents. Before you add the first torrent,
set the download path to your preferred folder. Also, you might want to click Settings and set the server port plus
a limit for the upload and download speed according to your network’s bandwidth. After changing the settings,
click Apply to save the new configuration.
HNS2200 supports maximum 4 torrents download at the same time and 40 torrents queuing.
The download speed may not be as fast as a BitTorrent™ client on the computer but once the torrent has been
added to the queue, it can download the files by itself and you can turn off the computer.
.
6
Page 7

V. Introduction of some functions and visit methods
Access the HNS2200 configuration page and webdav application by IP address in local network.
Input IP address in Web Browser address bar to access the HNS2200 configuration page.
Access the HNS2200 configuration page and webdav application by URL address in Internet.
When you are not at home, you can access the HNS2200 by WAN. Even without knowing the WAN IP adresse of the
router, you can find the WAN IP of the router, log in and operate the HNS2200 located in your home.
How to find the WAN IP of the router
1. Input http://www.wwnav.com in explorer address bar and click on “V isit NAS(Internet) “ with mouse and log in
with your username.
2. After logging in successfully, you will find WANIP-Adresse of the router.
7
Page 8

Control and operate the HNS2200 on configuration page in WAN network.
Input http://62.206.46.68:8000 in web browser address bar .
Configuration WebDAV server (exemplary)
WebDAV server allows you to upload/download files from local network or internet. You can enable
server by clicking on „
WebDAV
Service” under Menu Status. The Menu of WebDAV Server is illustrated as blow
WebDAV
This tab allows you to creat, modify, enable, disable and delete a WebDAV account. You can also give different
permissions to every account. Totally 16 accounts are supported. After a new WebDAV account is created, a
default folder will be created, name of the folder is the same as the account name.
VI. HDD format
For the network drive can HNSS2200 only access the first partition and it has to be formatted using the exFAT (Extended File
Allocation Table) file system.
Login as administrator, go to “System setting” and select “Maintain”. Select “Disk” and click Format. This will format your
hard drive and prepare it for the network drive and it will create a single partition using the exFAT file system. If you create
other partitions or choose a different file system when connected through USB, keep in mind that the network drive is only
able to recognize the first partition and it has to be exFAT!
VII. Online manual
Xoro HNS2200 is delivered with a quick installation guide. For more information please refer on
http://www.xoro.de/downloads/home-media-player/downloads-fur-xoro-hns-2200/. A manual of paper would quickly be
outdated and the information might no longer match the current product. However, the Online manual will always be kept
up to date and you can access it any time you need to. If you like to read some of the information offline, please select the
“export: odf” or “export: pdf” tab on top of the Online manual to create a PDF file with multiple pages.
8
 Loading...