


AR1230XA0
Whirlpool AR1230XA0, BHAC0830AS0, BHAC1230AS0, BHAC1230AS1, BHAC1830AS0 Use & Care Manual
...
I
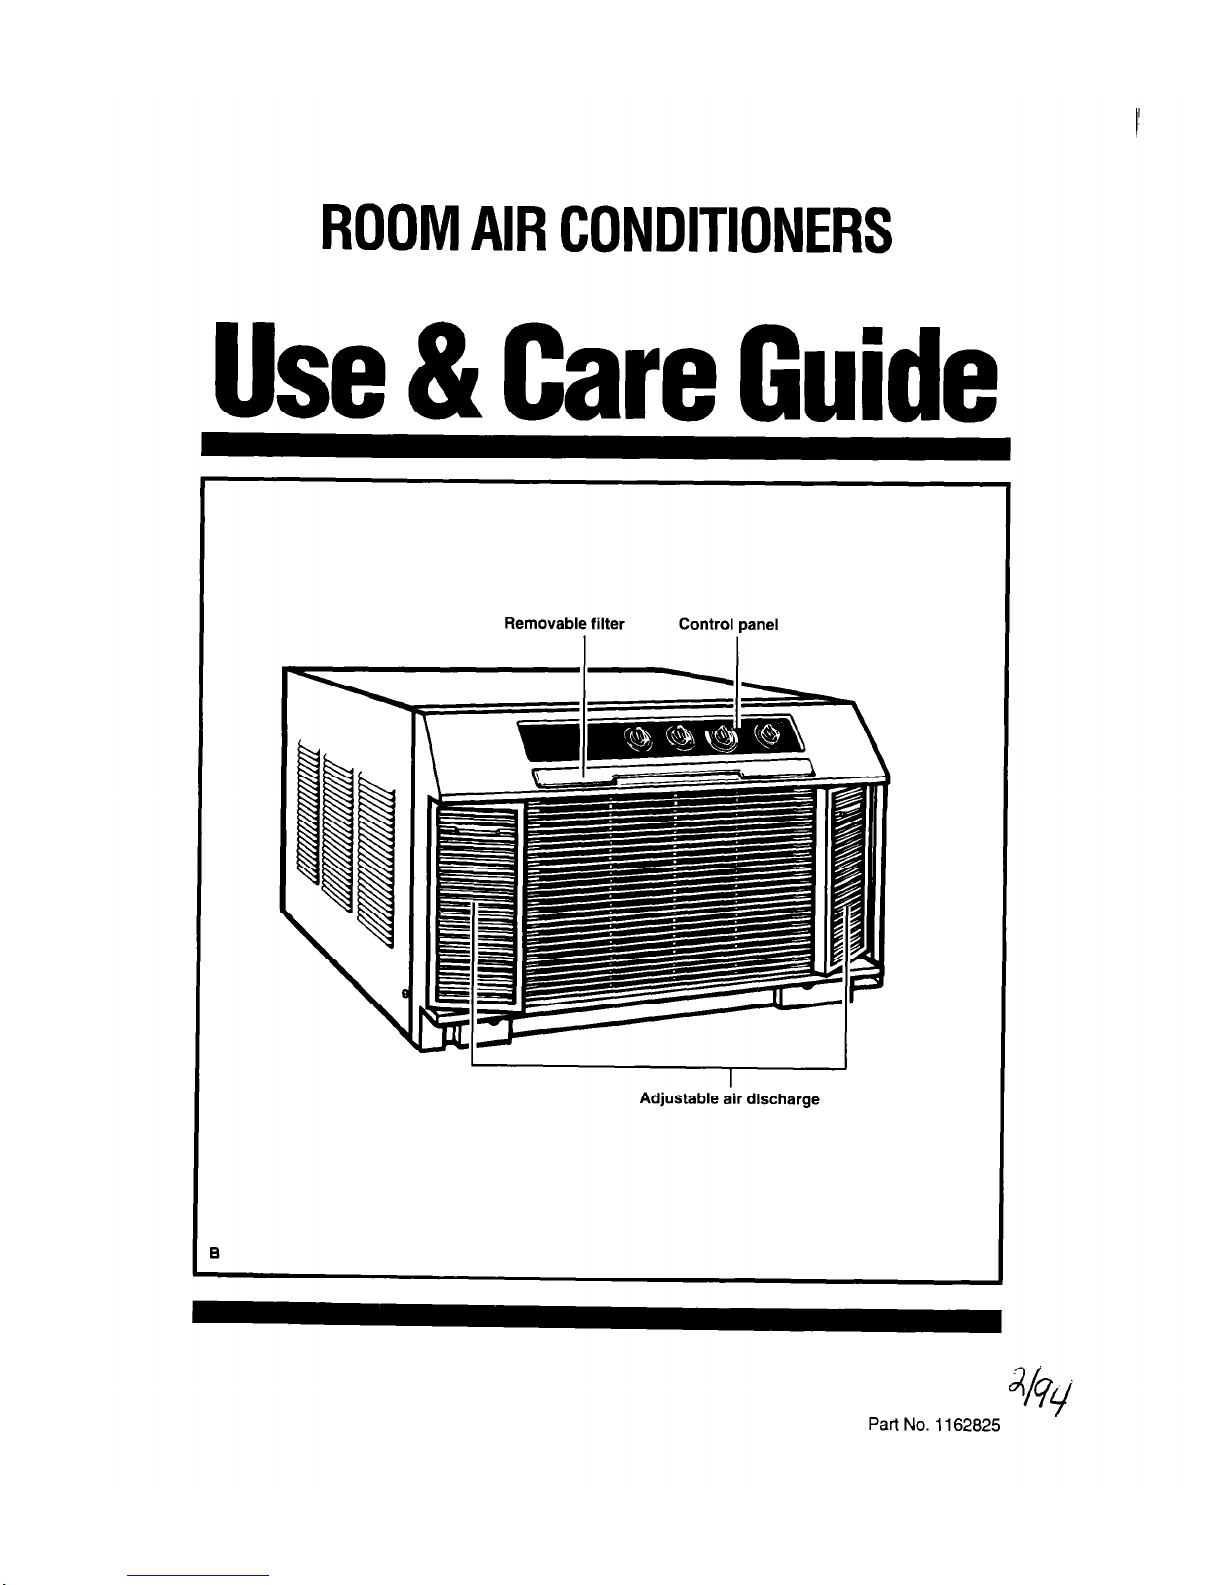
ROOM AIR CONDITIONERS
Use & Care Guide
Removable filter
Control panel
I
Adjustable air discharge
3
Part No. 1162625
Contents
Page
Important Safety Instructions
........................ .2
Operating Instructions
....................................
3
Starting your air conditioner
............................
3
The exhaust vent control
.................................
4
Changing air direction
.....................................
4
Cleaning Your Air Conditioner
.......................
4
Cleaning the front panel
..................................
5
Cleaning the filter
............................................
5
Caring For Your Air Conditioner
....................
5
Annual
maintenance .......................................
5
If You Need Service Or Assistance
............... .7
Warranty ...........................................................
8
Thank you for buying this appliance. Please
complete and mail the Owner Registration
Card provided with this product. Then complete the form below. Have this information ready
if you need service or call with a question.
l
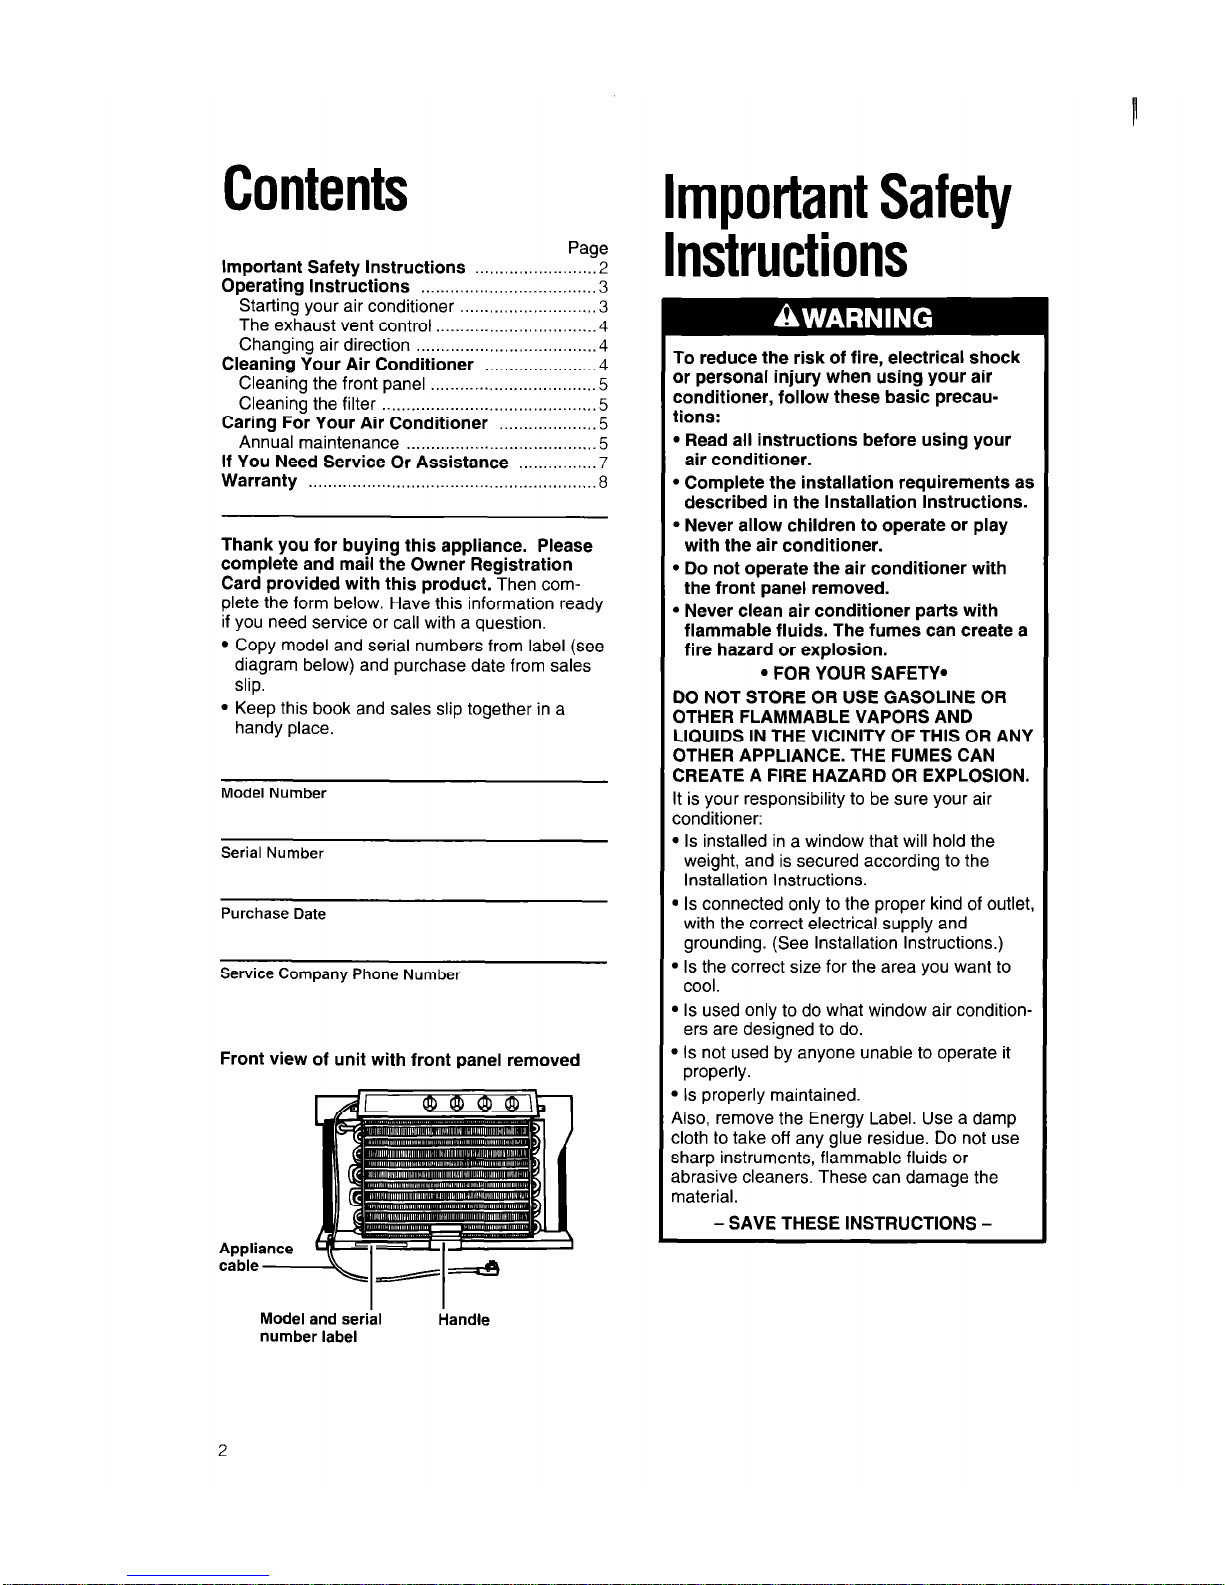
Copy model and serial numbers from label (see
diagram below) and purchase date from sales
slip.
. Keep this book and sales slip together in a
handy place.
Model Number
Serial Number
Purchase Date
Service Company Phone Number
Front view of unit with front panel removed
Appli
cable
mportant Safety
nstructions
To reduce the risk of fire, electrical shock
or personal injury when using your air
conditioner, follow these basic precautions:
l
Read all instructions before using your
air conditioner.
l
Complete the installation requirements as
described in the Installation Instructions.
l
Never allow children to operate or play
with the air conditioner.
l
Do not operate the air conditioner with
the front panel removed.
l
Never clean air conditioner parts with
flammable fluids. The fumes can create a
fire hazard or explosion.
l
FOR YOUR SAFETY.
DO NOT STORE OR USE GASOLINE OR
OTHER FLAMMABLE VAPORS AND
LIQUIDS IN THE VICINITY OF THIS OR ANY
OTHER APPLIANCE. THE FUMES CAN
CREATE A FIRE HAZARD OR EXPLOSION.
It is your responsibility to be sure your air
conditioner:
. Is installed in a window that will hold the
weight, and is secured according to the
Installation Instructions.
9 Is connected only to the proper kind of outlet,
with the correct electrical supply and
grounding. (See Installation Instructions.)
l
Is the correct size for the area you want to
cool.
l
Is used only to do what window air conditioners are designed to do.
l
Is not used by anyone unable to operate it
properly.
l
Is properly maintained.
Also, remove the Energy Label. Use a damp
cloth to take off any glue residue. Do not use
sharp instruments, flammable fluids or
abrasive cleaners. These can damage the
material.
- SAVE THESE INSTRUCTIONS -
Model and serial
number label
Handle
2
Operating Instructions
Starting your air conditioner
Electrical Shock Hazard
l
Plug unit only into grounded electrical
outlet.
l
Do not use an extension cord.
l
Do not operate unit with front removed.
Failure to follow the above precautions
could result in electrical shock or personal
injury.
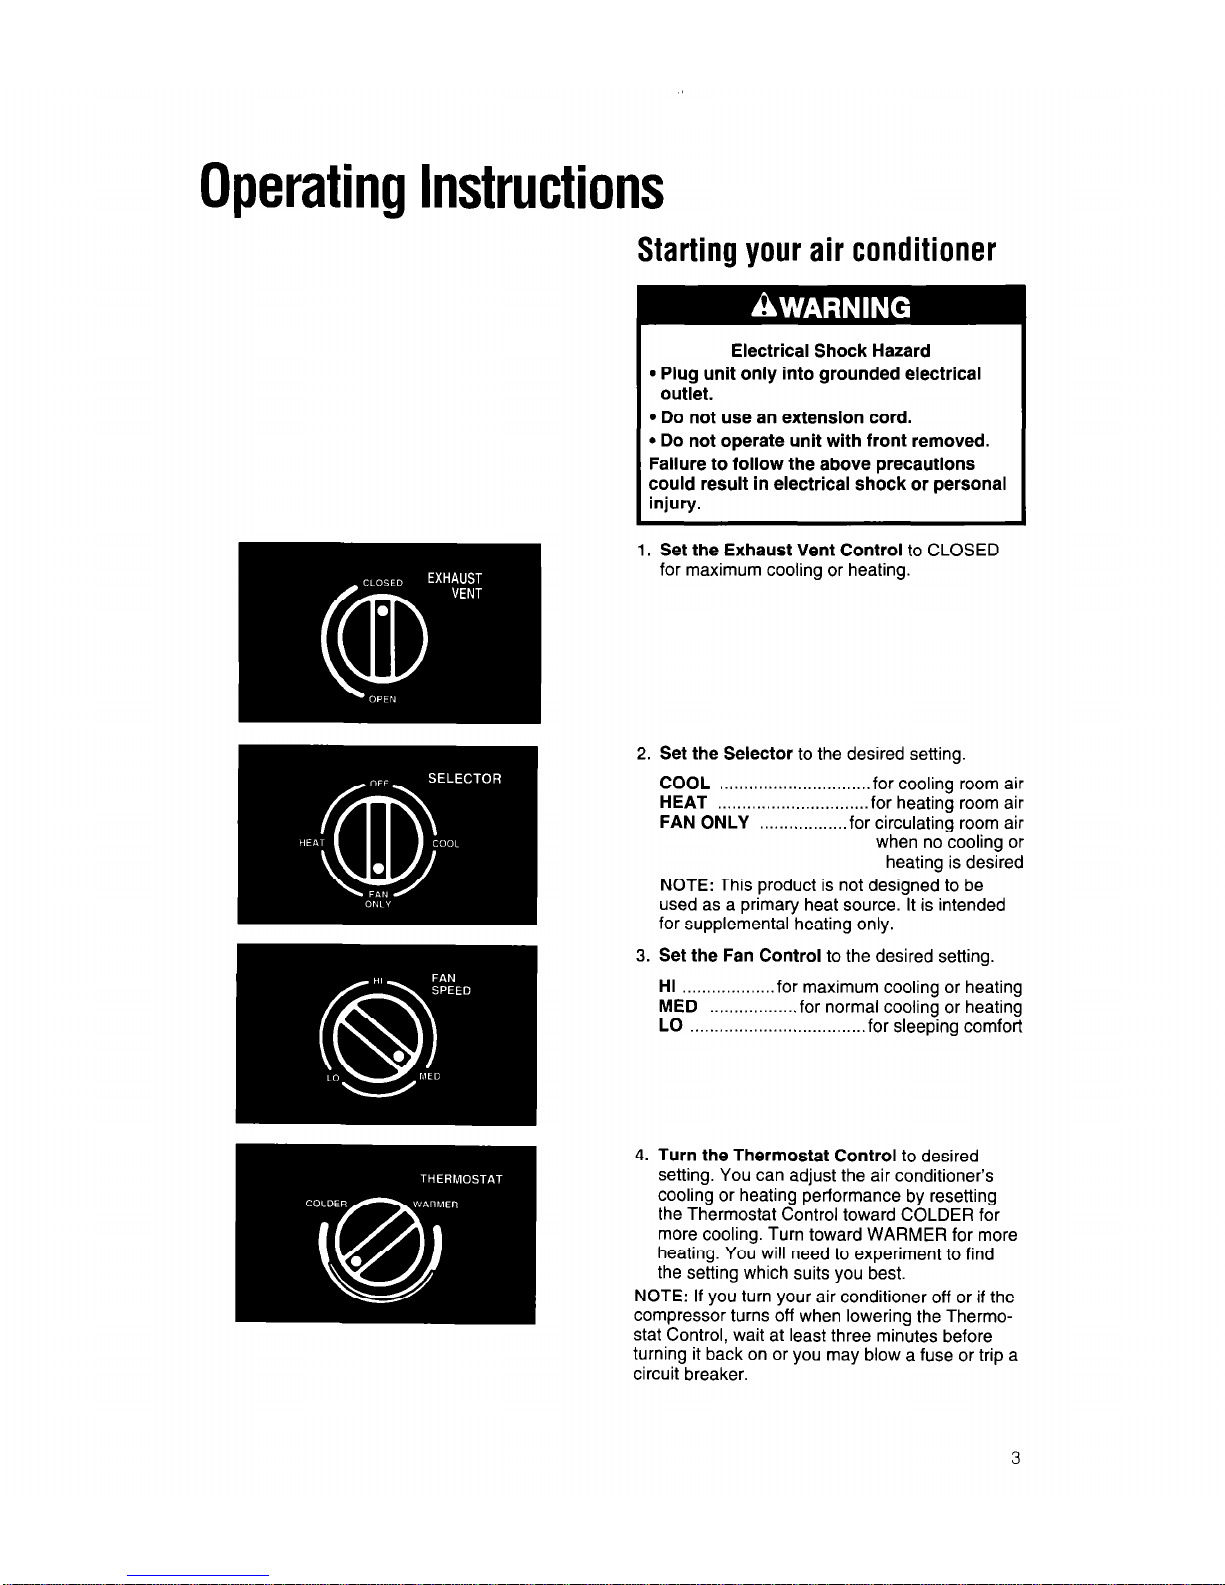
1. Set the Exhaust Vent Control to CLOSED
for maximum cooling or heating.
2. Set the Selector to the desired setting.
COOL . . . . . . . . . . . . . . . . . . . . . . . . for cooling room air
HEAT . . . . . . . . . . .._...._....... for heating room air
FAN ONLY . . . . . . . . . . . . . . . . for circulating room air
when no cooling or
heating is desired
NOTE: This product is not designed to be
used as a primary heat source. It is intended
for supplemental heating only.
3. Set the Fan Control to the desired setting.
HI for maximum cooling or heating
MED for normal cooling or heating
LO . . . . . . . . . . . . . . . . . . . . . . . . . . . . . . . . . . for sleeping comfort
4. Turn the Thermostat Control to desired
setting. You can adjust the air conditioner’s
cooling or heating performance by resetting
the Thermostat Control toward COLDER for
more cooling. Turn toward WARMER for more
heating. You will need to experiment to find
the setting which suits you best.
NOTE: If you turn your air conditioner off or if the
compressor turns off when lowering the Thermostat Control, wait at least three minutes before
turning it back on or you may blow a fuse or trip a
circuit breaker.
3

Operating Instructions
Continued
$
The exhaust vent control
The Exhaust Vent Control setting draws stale or
smoky air from the room.
1.
To exhaust room air:
Set Exhaust Vent Control to OPEN. Set Selector
to desired setting (COOL, HEAT or FAN ONLY).
Set Fan Control to desired fan speed. Set Thermostat Control to desired setting.
2. To circulate room air:
Set Exhaust Vent Control to CLOSED. Set
Selector to desired setting (COOL, HEAT or FAN
ONLY). Set Fan Control to desired fan speed. Set
Thermostat Control to desired setting.
NOTE: For maximum performance, the Exhaust
Vent Control must be in the CLOSED position
when cooling, heating or room air circulation is
desired.
Changing air direction
The air direction cartridges on both sides of the
unit control the direction of the cooled or heated
air. The air direction cartridge may be rotated to
direct the air straight ahead or to the side of the
unit.
The louvers in each air direction cartridge are
operated by a tab. The tab may be used to direct
the air up, down or straight ahead.
Cleaning Your Air Conditioner
Proper use and care of your air conditioner will
help ensure longer life of the unit and lower
operating costs. Follow these instructions
carefully. Call your Whirlpool servicing dealer for
an annual checkup.
Electrical Shock and Fire Hazard
l
Unplug power cord from receptacle
before cleaning unit. Failure to do so
could result in electrical shock or personal injury.
l
Do not use flammable fluids, solvents,
abrasive cleaners, or strong detergents.
Fire or product damage could result.
4

Screw
Filter
I
Cleaning the front panel
1.
2.
3.
4.
5.
6.
Unplug power cord.
Remove the front panel from unit when
cleaning. Remove two screws from bottom
edge of front panel.
Lift the front panel up and toward you.
Remove slide-out filter and clean separately.
(See “Cleaning the filter” below.)
NOTE:
Front does not have to be removed to
clean filter.
Clean front panel with warm water and mild
soap or detergent. Use a soft cloth. Rinse and
dry. Replace front panel.
Wipe control panel clean with a soft, dry cloth.
Cleaning the filter
The filter is cleanable. A clean filter helps remove
dust, lint and other particles from the air. Check
every two weeks to see if filter needs cleaning.
1. Remove filter by sliding the filter up and out
the top of front panel.
2. Clean filter, using a vacuum cleaner.
OR
3. If very dirty, wash filter with warm water and
mild detergent. Air dry thoroughly before
replacing.
4. Replace filter by sliding it back down into
opening at the top of front panel.
Caring For Your Air Conditioner
Annual Maintenance
Your air conditioner needs annual maintenance
to help ensure steady, top performance through-
out the year.
Call the service company recommended by
your dealer to:
l
Inspect and clean the coils and condensate
water passages.
l
Check fan and fan motor.
The compressor and fan motor are sealed and
need no oiling. Expense of annual inspection is
customer’s responsibility.
OR
If you are familiar with electrical appliances, you
can do the cleaning and maintenance yourself. If
you choose to do so, follow the steps on page 6.
5
 Loading...