


33933053GB.fm Page 130 Friday, January 21, 2005 2:39 PM
INSTRUCTIONS FOR USE
INVERTER SPLIT AIR CONDITIONER WITH ECO GAS 
PREPARATION BEFORE USE
SAFETY PRECAUTIONS
IDENTIFICATION OF PARTS
REMOTE CONTROL
OPERATION INSTRUCTIONS
MAINTENANCE
TROUBLESHOOTING
PROTECTION
INSTALLATION INSTRUCTIONS
ELECTRICAL CONNECTION
MODELS AVAILABLE 9K AND 12K BTU
This appliance is marked according to the European directive 2002/96/EC on Waste Electrical and Electronic Equipment (WEEE). This guideline is the frame of a European-wide validity of return and recycling on Waste Electrical and Electronic Equipment.
130
33933053GB.fm Page 131 Friday, January 21, 2005 2:39 PM
PREPARATION BEFORE USE
Before using the air conditioner, be sure to check and preset the following. |
|
||
• Remote Control presetting |
|
|
|
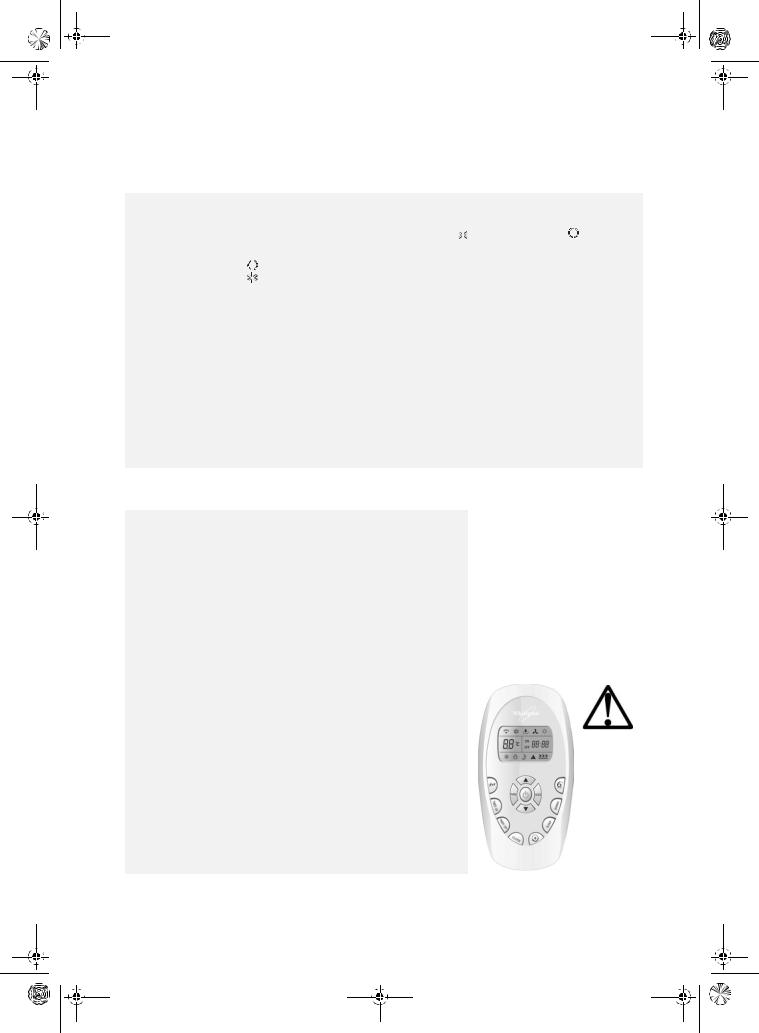
The remote control is NOT preset as Cooling Only Air Conditioner or Heat Pump by manufacturer. |
|
||
Each time the remote control batteries are replaced, the Cooling indicator |
and Heating indicator |
will flash |
|
alternately on the remote control LCD. |
|
|
|
The user can preset the remote control depending on the air conditioner type purchased as follows: |
|
||
Pressing any button when |
flashes, Heat Pump is set. |
|
|
Pressing any button when |
flashes, Cooling Only is set. |
|
|
If you don’t press any button within 12 seconds, the remote control is preset as Heat Pump automatically.
Note:
If the air conditioner you purchased is a Cooling Only one, but you preset the remote control as Heat Pump, it doesn’t matter. But if the air conditioner you purchased is a Heat Pump one, and you preset the remote control as Cooling Only, then you CANNOT preset the Heating operation with the remote control.
• Back-light function (optional)
Pressing any button of the remote control for about 2 seconds, the back-light turns on. Once the button is released, it automatically turns off after 10 seconds.
Note: Back-light is an optional function.
• Auto Restart Presetting
The Auto restart function is not preset by the manufacturer. To set the auto restart function, press the Emergency button (ON/OFF) on the indoor unit for at least 5 seconds. A buzz sound will signal that the auto restart function is set and the air conditioner is in standby.
To cancel the auto restart function, press the Emergency button (ON/OFF) on the indoor unit for at least 5 seconds. A buzz sound will signal that the auto restart function is cancelled and the air conditioner is in standby.
SAFETY PRECAUTIONS
Be sure not to do the following.
•It is harmful to your health if the cool air reaches you for a long time. It is advisable to let the air flow be deflected to all the room.
•Prevent the air flow from reaching the gas burners and stove.
•Do not touch the operation buttons when your hands are wet.
Pay attention to such a situation.
•Do not repair the appliance by yourself. If this is done incorrectly, it may cause an electric shock, etc.
Be sure to follow this instruction.
• Do not put any objects on the outdoor unit.
Earthing is essential.
•It is the user’s responsibility to have the appliance be earthed according to local laws by a qualified technician.
Warning: Incorrect handling could cause a serious hazard, such as death, serious injury, etc.
•Use correct power supply in accordance with the rating plate requirement. Don't use any extension cord for power supply. Otherwise, serious faults or hazard may occur or a fire may break out.
•Keep the power supply circuit breaker or plug from dirt. Connect the power supply cord to it firmly and correctly, lest an electric shock or a fire break out due to insufficient contact.
•Do not use the power supply circuit breaker or pull off the plug to turn it off during operation. This may cause a fire due to spark, etc.
•Do not twist, pull or press the power supply cord, lest the power supply cord be broken. An electric shock or fire is probably caused by a broken power supply cord.
•Never insert a stick or similar obstacle in the unit. Since the fan rotates at high speed, this may cause an injury.
•Turn off the appliance with remote control first before cutting off power supply if malfunction occurs.
131

33933053GB.fm Page 132 Friday, January 21, 2005 2:39 PM
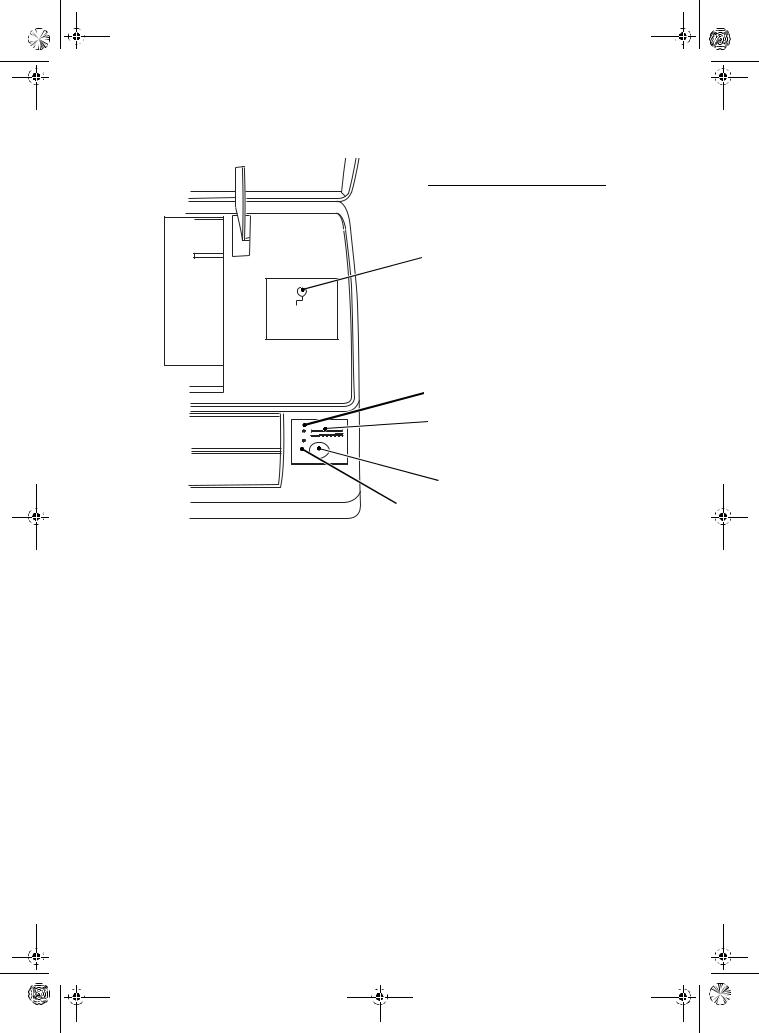
IDENTIFICATION OF PARTS
A |
|
B |
Indoor unit |
P
C
I
G
E
F
H
D
 L M
L M
Outdoor unit |
N |
O
Indoor unit
A- Air Intake
B- Front Panel
C- Operation Panel
D- Display
E- Air Outlet
F- Vertical Adjustment Louver
G- Horizontal Adjustment Louver
H- Remote Control
I- Air Filter
Outdoor unit
L- Air Intake
M- Pipes and Power Connection Cord
N- Drain Hose
Note: The condensate water drains at COOLING or DRY operation.
O- Air Outlet
P- Rating plate (product technical data)
NOTE:
The figure above is only a simple presentation of the unit, it may not match the external appearance of the unit you purchased.
132
33933053GB.fm Page 133 Friday, January 21, 2005 2:39 PM
ON/OFF
RUN
TIMER
1.Emergency button
Used to control the unit when the remote control is out of service.
2.Run Indicator (Green)
It is on during operation. When SLEEP mode is set, it will flash for ten seconds, then it will light up.
Operating and Display
 1
1
 2
2
 4
4
 5
5
 3
3
3.Timer Indicator (Yellow)
It lights up during the set time.
4.Power Indicator (Red)
It displays energy requirement during operation and protection status.
5.Signal Receptor
Receives signal from remote control.
133
33933053GB.fm Page 134 Friday, January 21, 2005 2:39 PM
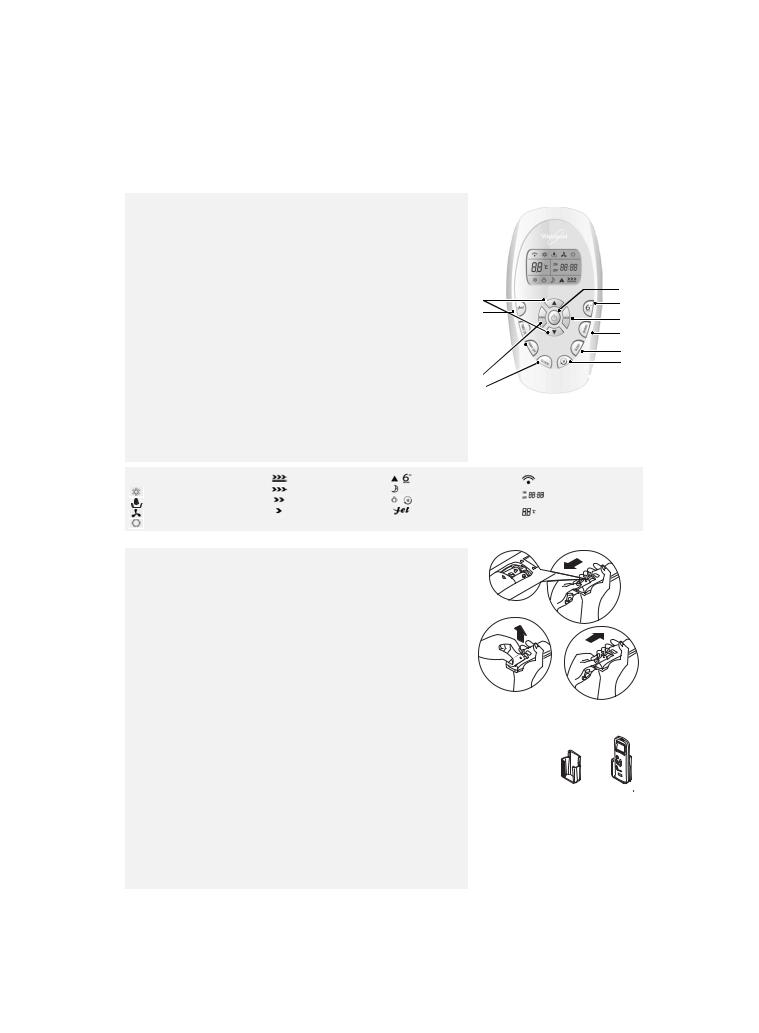
REMOTE CONTROL
The remote control transmits signals to the system.
A.ON/OFF button: The appliance will be started when it is energized or will be stopped when it is in operation, if you press this button.
B.MODE button: Used to select the operation mode.
C.FAN button: Used to select fan speed in sequence auto, high, medium or low.
D.ROOM TEMPERATURE SETTING buttons: Used to select the room temperature. Used to set time in TIMER mode and real time Clock.
E.SWING button: Used to stop or start vertical adjustment louver swinging and set the desired up/down airflow direction.
F.6th Sense button  : Used to enter fuzzy logic operation directly, regardless of the unit is on or off.
G.TIMER ON/OFF button: Used to set or cancel the timer operation.
H.SLEEP button  : Used to set or cancel Sleep Mode operation.
I. button: TURBO mode, used to start TURBO cooling funtion in cooling mode or turbo heating in heating mode
J. button: Remote controller automatically transmits room temperature signal to indoor unit every 10 minutes if you press this button.
K.Clock button: Used to enter the current time.
D
I
G
C
K
A F
B
E
H
J
Indication symbols on LCD:
Cooling indicator
Dry indicator
Fan only indicator *Heating indicator
|
|
|
Auto fan speed |
|
|
|
|
indicator |
|
|
|
Signal transmit |
|
|
|
|
High fan speed |
|
|
|
|
|
SLEEP indicator |
|
|
|
Display set timer |
|
|
|
|
|
|
|
|
|
|||||
|
|
|
|
|
|
|
|
|
|
|
|||
|
|
|
Medium fan speed |
|
|
|
|
|
indicator |
|
|
|
Display clock |
|
|
|
|
|
|
|
|
||||||
|
|
|
|
|
|
|
|
|
|
|
|||
|
|
|
Low fan speed |
|
|
|
|
JET TURBO indicator |
|
|
|
Display set |
|
|
|
|
|
|
|
|
|||||||
|
|
|
|
|
|
|
|
|
|
||||
|
|
|
|
|
|
|
|
|
|
|
|
|
temperature |
|
|
|
|
|
|
|
|
|
|
||||
|
|
|
|
|
|
|
|
|
|
|
|
|
|
NOTE: Each mode and relevant function will be further specified in following pages.
How to insert the batteries
• Remove the battery cover in the direction of the arrow.
• Insert new batteries making sure that the (+) and (-) of battery are matched correctly.
•Refit the cover by sliding it back into position.
Note:
•Use 2 LR03 AAA (1.5 V) batteries. Do not use rechargeable batteries. Replace batteries with new ones of the same type when the display becomes dim.
• If the replacement is done within 1 minute, the remote control will keep original presetting. However, if you want to change the presetting from Heat Pump to Cool Only or Cool Only to Heat Pump, you should reload batteries 3 minutes after removing the old ones.
(Please refer to page 131 for details.)
Storage and tips for using the remote control |
Remote control holder |
|
The remote control can be stored in a holder mounted on the wall. NOTE: The remote control holder is an optional part.
How to use the remote control
To operate the room air conditioner, point the remote control at the signal receiver. The remote control will operate the air conditioner at a distance of up to 7 m when pointing at the signal receiver of the indoor unit.
Choose cooling only remote control or heat pump.
Please refer to page 131 “Preparation before use“ for details.
Signal receiver
134
33933053GB.fm Page 135 Friday, January 21, 2005 2:39 PM
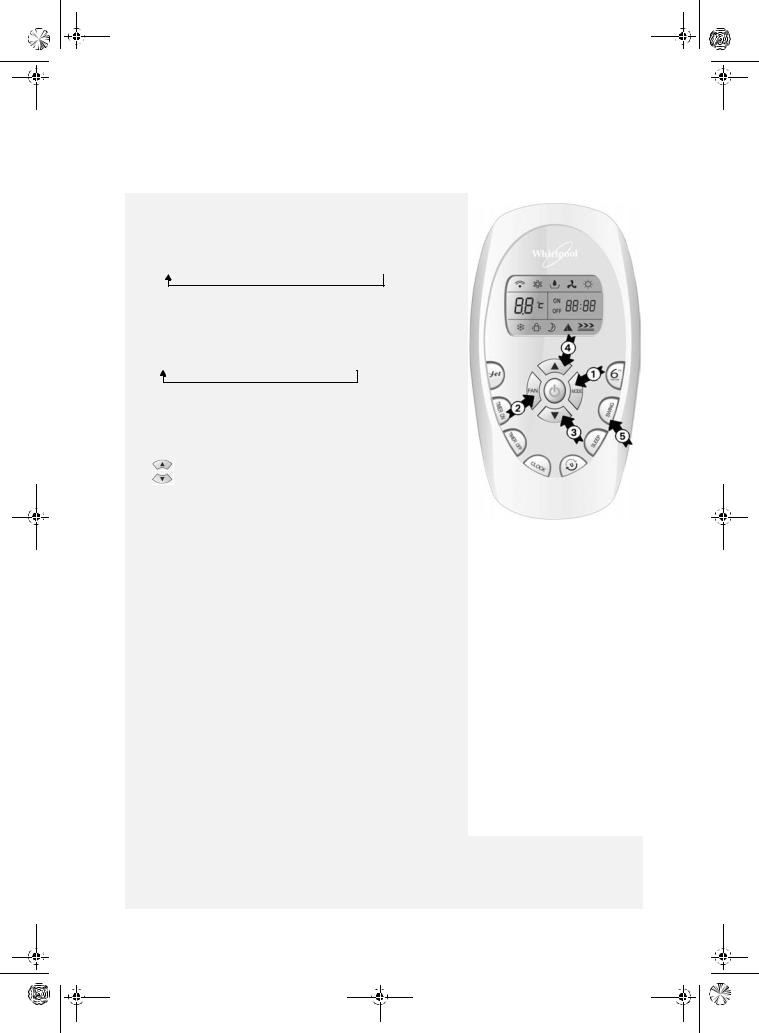
OPERATION INSTRUCTIONS
Operating modes
1.Selecting mode
Each time MODE button is pressed, the operation mode is changed in sequence:
COOLING 

 DRY
DRY 

 FAN ONLY

 HEATING
IMPORTANT:
Heating mode is NOT available for cooling only air conditioner.
2.“FAN” mode
Each time the “FAN” button is pressed, the fan speed is changed in sequence:
AUTO 

 HIGH
HIGH 

 MEDIUM

 LOW
LOW
IMPORTANT:
•In “FAN ONLY” mode, only “High”, ”Medium” and “Low” are available.
•In “DRY” mode, airflow is set at “Low” automatically, “FAN” button is ineffective in this case.
3.Setting temperature
Press once to raise temperature setting by 1°C
Press once to lower temperature setting by 1°C
Range of available set temperature:
*HEATING, COOLING |
18°C ~ 32°C |
DRY |
unable to set |
FAN ONLY |
unable to set |
*NOTE: Heating mode is NOT available for cooling only models.
4.Turning on
Press  button, when the appliance receives the signal, the RUN indicator of the indoor unit lights up.
SWING, 6th SENSE, TIMER ON, TIMER OFF, CLOCK, SLEEP, TURBO and ROUND U  operation modes will be specified in the following pages.
IMPORTANT:
•Changing modes during operation, sometimes the unit does not response at once. Wait 3 minutes.
•During heating operation, air flow is not discharged at the beginning. After 2-5 minutes, the air flow will be discharged until temperature of indoor heat exchanger rises.
•Wait 3 minutes before restarting the appliance.
5.Airflow direction control
Vertical airflow is automatically adjusted to a certain angle in accordance with the operation mode after turning on the unit.
The direction of airflow can also be adjusted to your own requirement by pressing the “SWING” button of the remote control.
operation mode |
direction of airflow |
|
|
COOLING, DRY |
horizontal |
|
|
*HEATING, FAN ONLY |
downward |
|
|
*Heating mode is only available for heat pump models.
Vertical airflow control (using the remote control)
Use the remote control to set the flow angles.
Swinging airflow.
Pressing the “SWING” button once, the vertical adjustment louver will swing up and down automatically.
Desired airflow direction.
Press the “SWING” button again when the louvers swing to a suitable angle as desired.
135
 Loading...