


Toshiba RAS-M14GAV-E, RAS-M18GAV-E, RAS-3M18SAV-E, RAS-3M26GAV-E1, RAS-4M23SAV-E Owner Manual
...OWNER’S MANUAL
AIR CONDITIONER (SPLIT TYPE)
For general public use
Indoor unit
RAS-(B) 10, 13, 18UFV Series
Outdoor unit
RAS-10, 13, 18SAV Series RAS-M14GAV-E RAS-M18GAV-E RAS-3M18SAV-E RAS-3M26GAV-E1 RAS-4M23SAV-E RAS-4M27GAV-E1 RAS-5M34UAV-E
ENGLISH
ESPAÑOL
FRANÇAIS
ITALIANO
DEUTSCH PORTUGUÊS POLSKI
ČESKY
PУCСКИЙ
HRVATSKI
MAGYAR
TÜRKÇE NEDERLANDS
ΕΛΛΗΝΙΚΑ
SVENSKA
SUOMI
NORSK
DANSK
ROMÂNĂ
БЪЛГАРСКИ
EESTI
LATVISKI
SLOVENČINA
SLOVENŠČINA
1112150101 (COVER_F)

1112150101 (COVER_F)
PRECAUTIONS FOR SAFETY
Store this owner’s manual in a location where it can be easily accessed when needed. Be sure to read this owner’s manual carefully before operating.
It is recommended that maintenance be performed by a specialist when the unit has been operated for a long time.
This appliance is not intended for use by person (including children) with reduced physical, sensory or mental capabilities, or lack of experience and knowledge, unless they have been given supervision or instruction concerning use of the appliance by a person responsible for their safety.
Children should be supervised to ensure that they do not play with the appliance.
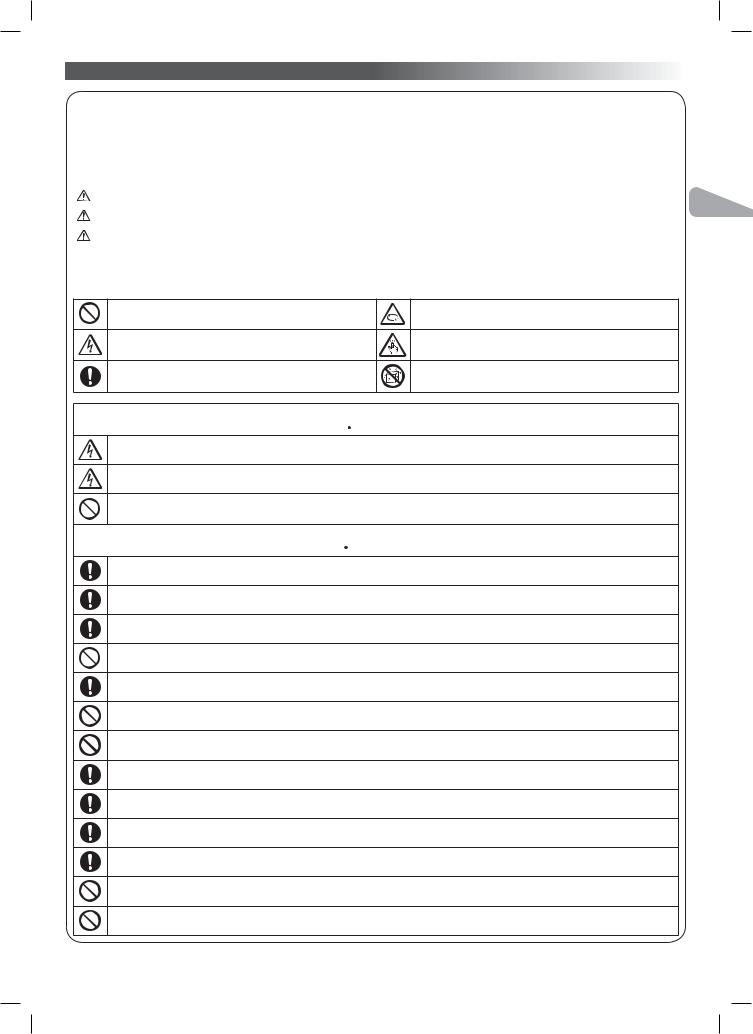
|
Be sure to follow the precautions provided here to avoid safety risks. |
|
|
|
The symbols and their meanings are shown below. |
DANGER |
|
It indicates that incorrect use of this unit can result in a high possibility of severe injury(*1) or death. |
|
|
|
WARNING |
|
It indicates that incorrect use of this unit may cause severe injury or death. |
|
|
|
CAUTION |
|
It indicates that incorrect use of this unit may cause personal injury(*2), or property damage(*3). |
|
|
|
*1: A severe injury refers to blindness, injury, burns (hot or cold), electrical shock, bone fracture, or poisoning that leaves aftereffects and requires hospitalization or extended out-patient treatment.
*2: Personal injury means a slight accident, burn, or electrical shock which does not require admission or repeated hospital treatment. *3: Property damage means greater damage which affects assets or resources.
Never do. |
Beware of rotating parts |
Electrical hazard. Contact with water will cause electric shock. Do NOT
Risk of finger injury
touch with wet hands. Always unplug when not in use.
Always follow the instructions |
Do not get the product wet |
 DANGER
Do not install, repair, open or remove the cover. It may expose you to dangerous voltages. Ask the dealership or the specialist to do this.
Turning off the power supply will not prevent potential electric shock.
Do not place a spray can near the air outlet grille less than 1 m.
The warm air from indoor and outdoor units may cause an explosion of the spray can.
 WARNING
The appliance shall be installed in accordance with national wiring regulation.
Means for disconnection from the supply having a contact separation of at least 3 mm in all poles must be incorporated in the fixed wiring.
Installation must be requested from the supplying retail dealership or professional installation vendors. Installation requires special knowledge and skill. If customers install on their own, it can be a cause of fire, electric shock, injury or water leakage.
Do not disassemble, modify or relocate the unit by yourself. It may become the cause of fire, electric shock, or water leakage. For repair or relocation, please request service from the supplying retail dealership or a dealership.
When relocating or repairing the unit, please contact the supplying retail dealership. When there is a kink in the wiring, it may be the cause of electric shock or fire.
Do not select a location for installation where flammable gas may leak. If there is any gas leakage or accumulation around the unit, it can be a cause of fire.
Do not select a location for installation where there may be excessive water or humidity, such as a bathroom. Deterioration of insulation may be a cause of electric shock or fire.
Earth work should be requested from the supplying retail dealership or professional vendors. Insufficient grounding work may be the cause of electric shock. Do not connect the earth wire to a gas pipe, water pipe, lightning conductor, or telephone earth wire.
You must use an independent power outlet for the power supply. If a power outlet other than the independent outlet is used, it may cause a fire.
Check that the circuit breaker is installed correctly. If the circuit breaker is not properly installed, it may cause an electric shock. To check the installation method, please contact the supplying retail dealership or the professional vendor who installed the unit.
During an error (such as a burning odor, not cooling, or not warming), stop operating the unit and turn off the circuit breaker. Continuous operation may be a cause of fire, or electric shock. Please request repair or service from the supplying retail dealership.
Do not turn ON/OFF the circuit breaker or operate buttons with a wet hand. It may be a cause of electric shock.
Do not insert any material (metal, paper, or water, etc) into the air outlet or air intake opening. Fan may be rotating at high speed inside or there are high voltage sections, which may cause an injury or electric shock.
EN ES FR IT DE PT PL CZ RU CR HU TR NL GR SV FI NO DK RO BG EE LV SK SI
Toshiba 1112150101 (EN)

When the air-conditioning unit does not cool or warm, there may be a leakage of refrigerant. Please consult the supplying retail dealership. The refrigerant used in the air-conditioning unit is safe. It will not leak under normal operating conditions but if it leaks into the room and contacts a heat source such as a heater, or stove, it may cause a harmful reaction.
When water or other foreign substances enter the internal parts, stop operating the unit immediately and turn off the circuit breaker. Operating the unit continuously may cause fire or electric shock. Please contact the supplying retail dealership for repair.
Do not clean the inside of the air-conditioning unit yourself. Please request internal cleaning of the air-conditioning unit from the supplying retail dealership. Incorrect cleaning may cause breakage of resin parts or insulation defects of electrical parts, causing water leakage, electric shock or fire.
Do not damage or modify the power cable. Do not connect the cable midway, or use a multiple outlet extension cord that is shared by other devices. Failure to do so may cause fire.
Do not place heavy objects on the power cable, expose it to heat, or pull it. To do so may cause electrical shock or fire.
Do not expose your body directly to cool air for a long time.
Do not insert your finger or any article into the air inlet/outlet.
 CAUTION
Ensure that drained water is discharged. When the discharging water process is not sufficient, water may leak, causing water damage to furniture. To check that the installation method used is correct, please contact the supplying retail dealership or the professional vendor who installed the unit.
If the indoor unit piping outlet is exposed due to relocation, close the opening, Touching internal electrical parts may cause injury or electric shock.
Do not wash the main air-conditioning unit with water. It may cause an electric shock.
Do not place any containers such as a vase containing fluid on the unit. It might cause water to enter the unit and deteriorate the electrical insulation, causing an electric shock.
When using the unit in a closed room, or operating with other combustion appliances, make sure to open a window occasionally for ventilation. Insufficient ventilation may cause suffocation due to a lack of oxygen.
Do not use combustion appliances in the direct flow of the air from the air-conditioning unit. Poor combustion of a combustion appliance may cause suffocation.
Avoid operating for long periods in a high humidity environment (over 80%) such as with the windows or doors open. There may be condensation on the indoor unit and droplets may fall onto the furniture.
When the unit won’t be used for a long time, turn off the main switch or the circuit breaker.
At least once a year check if the mounting table of the outdoor unit is damaged or not. If a damaged state is ignored, the unit may fall or over-turn, causing an injury.
Stand on a sturdy ladder when attaching/detaching the front panel/air filter/air cleaning filter. Failure to do so may cause a fall or injury.
Do not stand on the outdoor unit or place anything on the unit. It may be the cause of injury due to falling or over-turning. Any damage to the unit may cause an electric shock or fire.
Do not place anything around the outdoor unit or allow fallen leaves to accumulate around it. If there are fallen leaves, small animals could enter and contact internal electrical parts, causing a failure or fire.
Do not place animals and plants in places where wind from the air-conditioning unit flows directly. It may have a negative influence on the animal or plant.
Do not use for special applications such as storage of food or animals, or to display plants, precision devices, or art objects.
Do not use on ships or in other vehicles. It may cause a failure in the air-conditioning unit. In addition, it may damage these items.
Do not place other electrical appliances or furniture under the unit. Water droplets might fall, causing damage or failure.
When performing maintenance, you must stop operating the unit and turn off the circuit breaker. Since the fan inside may be rotating at high speed, it may cause an injury.
After the front panel/air filter is cleaned, wipe away any water and allow to dry. If water remains, it may cause an electric shock.
Once the front panel is removed, do not touch the metal parts (aluminum fins, etc.) of the unit. It may cause an injury.
When you hear thunder and there might be a lightning strike, stop operating the unit and disconnect the circuit breaker. If lightning strikes, it may cause a failure.
Do not hang laundry or other objects from the moving panel. The moving panel could fall and cause an injury.
Toshiba 1112150101 (EN)
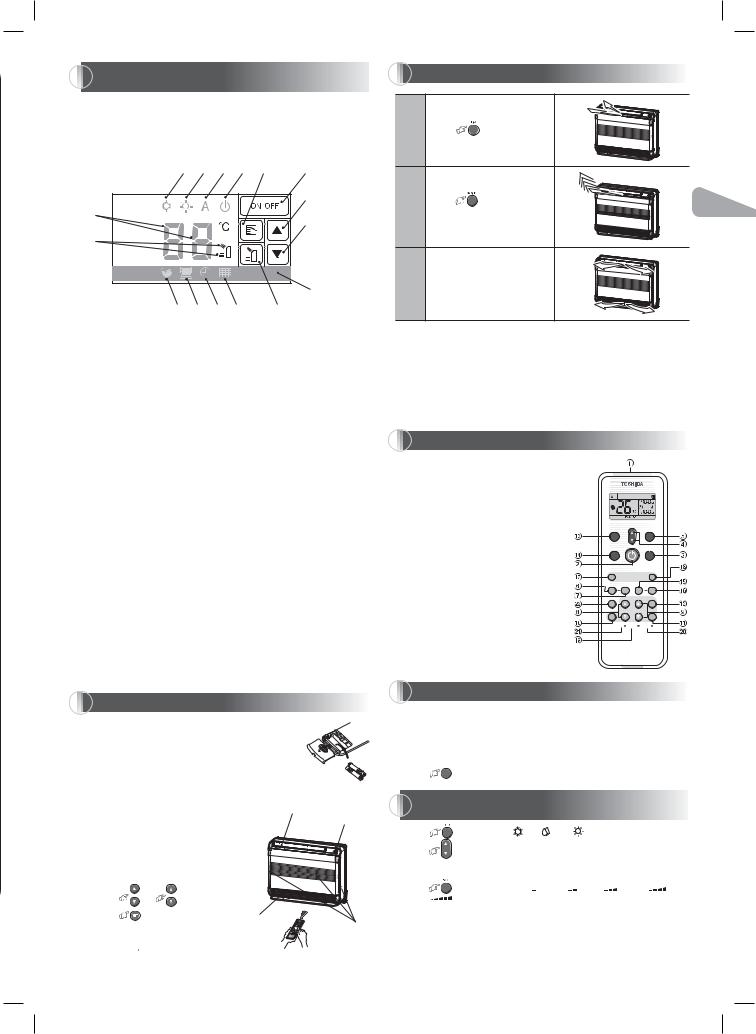
1INDOOR UNIT DISPLAY & UNIT OPERATION PANEL
This indoor unit can be operated with the unit operation panel or using remote control.
Operational contents will be followed the one which was operated later.
If change the set temperature with operation panel of unit, temperature indication will be changed, but the temperature display on the remote control will not change. If set the air flow only with the upper port, a little air flow may happen at the lower port.
6 |
7 |
8 |
9 |
2 |
1 |
|
|
|
|
|
|
|
|
|
|
|
4 |
% |
|
|
|
|
|
|
|
|
|
|
5 |
& |
|
|
|
|
|
|
|
|
|
|
Remote control |
! |
" |
# |
$ |
|
3 light receiver |
1OPERATION button : Unit operation ON/OFF button, turn off FILTER CHECK Indicator.
2MODE button : Operation mode (AutoΑCoolingΑHeatingΑAutoΑ • • • )CHILD LOCK function : Press MODE button for 3 seconds. (It is possible to
operate even when stopping.)
To cancel CHILD LOCK function, press MODE button for 3 seconds once again.
When CHILD LOCK function is activated, 3 beeps will sound.
When press MODE button to cancel the function, a beep will sound and then 3 seconds later 3 beep sound may occur.
The indicator button will be invalid while the child lock function is activated. (When press the button, 1 beep will sound).
Operation with remote control during the CHILD LOCK function works.
This function is cancelled when the power supply is off or failure.
3 AIR OUTLET SELECT button : Cooling, Auto (Upper & LowerΑUpperΑ Upper & LowerΑ • • •)
Dry (upper only)
Heating (Upper & LowerΑUpperΑLowerΑUpper & LowerΑ • • •)
On cooling operation, whichever air outlet is set, only Upper is used when the room temperature approaches the set temperature.
During stop operation : Open/close the lower air outlet grille.
When the TEMPERATURE indicator display “CL” the lower air outlet grille will be in closed status.
When the TEMPERATURE indicator display “OP” the lower air outlet grille
will be in open status.
4 TEMPERATURE button (Up) : Setting temperature increase by 1°C (17°CΑ 18°CΑ • • • 30°C)
5 TEMPERATION button (Down) : Setting temperature decrease by 1°C
(30°CΑ29°CΑ • • • 17°C)
6 COOL and DRY indicator (Blue)
7 HEAT indicator (Orange)
8 AUTO indicator (Green)
9 OPERATION indicator (Green) ! HI-POWER indicator (Green) " FLOOR indicator (Orange)
# TIMER indicator (Yellow)
$ FILTER CHECK indicator (Red) % TEMPERATURE indicator (Blue) & AIR OUTLET indicator (Green)
2PREPARATION BEFORE USE
Preparing Filters
1. Open the air inlet grille and remove the air filters. 2. Attach the attachment filters (see detail in the
accessory sheet).
Loading Batteries
1. Remove the battery cover.
2.Insert 2 new batteries (AAA type) following the
(+) and (–) positions.
Removing the batteries |
|
|
|
Upper air outlet grille |
||||
1. |
Remove the cover, and take out the batteries. |
|||||||
|
Main operation part |
|||||||
2. |
Reattach the cover. |
|
|
|
|
|||
|
|
|
|
|
||||
|
• Please dispose of the batteries according |
|
|
|||||
|
to the local regulation. |
|
|
|
||||
Clock Setup |
|
|
|
|
|
|
||
1. |
Push CLOCK • by tip of the pencil. |
|
|
|
||||
|
If timer indication is flashing, go to |
|
|
|
||||
|
the next step 2. |
|
|
|
|
|
||
2. |
Press |
ON or |
OFF |
: adjust the |
|
|
|
|
|
time. |
|
|
|
|
|
|
|
3. |
Press |
: Set the time. |
Lower air |
|
|
|||
Remote Control Reset |
|
|
|
|
||||
|
|
outlet grille |
Air inlet grille |
|||||
1. |
Remove the batteries. |
|
|
|
|
|||
2.Press 

3.Insert the batteries.
3AIR FLOW DIRECTION
1 |
Press |
: Move the louver |
|
||
|
in the desired vertical direction. |
|
|
2 |
Press |
: Swing the air |
|
|
|
|
|
|
EN |
|
|
automatically and press again |
|
|
|
|
|
|
||||
|
|
to stop. |
|
|
|
|
|
|
|
|
|
|
|
|
|
|
|
|
|
|
|
|
ES |
|
3 |
For horizontal direction, adjust |
|
|
|
|
|
|
FR |
||
|
|
|
|
|
|
|
|
||||
|
manually. |
|
|
|
|
|
|
|
IT |
||
|
|
|
|
|
|
|
|
|
|
|
|
Note: |
|
|
|
|
|
|
|
|
|
DE |
|
|
• Do not move the vertical louver manually by others. |
|
|
|
|
|
|||||
|
• The vertical louver may automation positioning by some operation mode. |
PT |
|||||||||
|
• On heating operation, in case of AIR OUTLET SELECT is set as Lower, |
||||||||||
|
upper louver is not operate even if swing is set by remote, though receiving |
||||||||||
|
history is recorded. |
|
|
|
|
|
|
|
|
||
|
• When changed the air flow to up/down or upward blowing, the swing |
|
PL |
||||||||
|
operation will be performed. |
|
|
|
|
|
|
|
|||
|
|
|
|
|
|
|
|
|
|||
|
• At the time of FLOOR WARMING OPERATION, the air will blow downward |
|
|||||||||
|
only and it cannot order to swing operation with remote control. |
|
CZ |
||||||||
4 |
REMOTE CONTROL |
|
|
|
|
|
|
||||
|
|
|
|
|
|
|
|||||
1 Infrared signal emitter |
|
|
|
|
|
|
|
RU |
|||
2 Start/Stop button |
|
|
|
|
|
|
|
|
|||
3 Mode select button (MODE) |
|
|
|
|
|
|
|
CR |
|||
4 Temperature button (TEMP) |
|
|
|
|
|
|
|
||||
5 Fan speed button (FAN) |
|
|
|
|
AUTO |
|
|
||||
6 Swing louver button (SWING) |
|
|
|
|
|
|
|
|
|||
7 Set louver button (FIX) |
|
|
|
|
|
AUTO |
|
HU |
|||
8 On timer button (ON) |
|
|
|
PRESET |
FAN |
|
|||||
9 Off timer button (OFF) |
|
|
|
|
|
TEMP |
|
|
|||
! Sleep timer button (SLEEP) |
|
|
|
ONE-TOUCH |
MODE |
|
TR |
||||
" Setup button (SET) |
|
|
|
|
|
|
|
||||
|
|
|
|
|
|
|
|
||||
# Clear button (CLR) |
|
|
|
QUIET |
|
COMFORT |
|
|
|||
$ Memory and Preset button (PRESET) |
|
|
|
SLEEP |
|
|
|||||
|
|
|
|
|
|
|
|||||
% One-Touch button (ONE-TOUCH) |
|
|
SWING |
FIX |
Hi-POWER ECO |
|
NL |
||||
& High power button (Hi-POWER) |
|
|
FLOOR |
|
|
|
|||||
( Economy button (ECO) |
|
|
|
TIMER |
|
|
|||||
|
|
|
|
|
CLR |
|
|
||||
) Quiet button (QUIET) |
|
|
|
|
ON |
OFF |
|
GR |
|||
~ Comfort sleep button (COMFORT SLEEP) |
|
SLEEP |
|
SET |
|
||||||
|
|
CHK FILTER CLOCK |
|
||||||||
+ Filter reset button (FILTER) |
|
|
|
|
|
||||||
|
|
|
|
|
|
|
|
||||
, Clock Reset button (CLOCK) |
|
|
|
|
|
|
|
SV |
|||
- Check button (CHK) |
|
|
|
|
|
|
|
||||
. Floor warming mode button (FLOOR) |
|
|
|
|
|
|
|||||
5 |
ONE-TOUCH |
|
|
|
|
|
|
|
FI |
||
|
|
|
|
|
|
|
|
||||
Press the “ONE-TOUCH” button for fully automated operation that is customized |
NO |
||||||||||
to the typical consumer preferences in your region of the world. The customized |
|||||||||||
settings control temperature air flow strength, air flow direction and other settings |
|
||||||||||
to provide you alternate contact with “ONE-TOUCH” of the button. If you prefer |
DK |
||||||||||
other settings you can select from the many other operating functions of your |
|||||||||||
Toshiba unit. |
|
|
|
|
|
|
|
|
|
||
|
|
ONE-TOUCH |
|
|
|
|
|
|
|
|
|
|
Press |
|
: Start the operation. |
|
|
|
|
|
|
RO |
|
|
|
|
|
|
|
|
|
|
|
|
|
6 |
AUTOMATIC / COOLING (DRY) / HEATING |
|
BG |
||||||||
OPERATION |
|
|
|
|
|
|
|
||||
|
|
|
|
|
|
|
|
||||
1. Press |
|
: Select A. Cool |
, Dry |
, Heat . |
|
|
|
|
EE |
||
2. Press |
TEMP |
: Set the desired temperature. |
|
|
|
|
|
||||
|
Min. 17°C, Max. 30°C. |
|
|
|
|
|
|
|
LV |
||
3. Press |
|
: Select AUTO, LOW , LOW+ |
, MED |
|
, MED+ |
, or |
|||||
|
|
|
|||||||||
|
HIGH |
. |
|
|
|
|
|
|
|
|
|
AUTOMATIC OPERATION : Choose cooling or heating operation automatically. SK
In DRY OPERATION mode, it can not select air volume.
SI
Toshiba 1112150101 (EN)

7Hi-POWER OPERATION
To automatically control room temperature and airflow for faster Auto, cooling or heating operation (except in DRY mode).
Press : Start and stop the operation.
8FLOOR WARMING OPERATION
Heating will operate with downward blowing only.
Temperature of air outlet will be higher than usual.
9ECO OPERATION
To automatically control room to save energy (except in DRY mode).
ECO
Press 
 : Start and stop the operation.
Note: Cooling operation; the internal set temperature will increase automatically 1 degree by 2 hours (maximum 2 degrees increase). For heating operation the internal set temperature will decrease.
10 TIMER OPERATION
Set the timer when the air conditioner is operating.
|
|
|
|
|
|
|
|
Setting the ON Timer |
|
Setting the OFF Timer |
|||
|
|
|
|
|
|
|
1 |
Press |
ON : Set the desired |
Press |
OFF : Set the desired |
||
|
ON timer. |
|
|
|
OFF timer. |
|
|
|
|
|
|
||
|
|
|
|
|
|
|
2 |
Press |
: Set the timer. |
Press |
|
: Set the timer. |
|
|
|
|
|
|
|
|
3 |
Press |
: Cancel the timer. |
Press |
|
: Cancel the timer. |
|
|
|
|
|
|
|
|
Daily timer allows the user to set both the ON & OFF timers and will be activated on a daily basis.
Setting Daily Timer
1 |
Press |
ON |
: Set the ON timer. |
3 |
Press |
|
. |
|
|
|
|
|
|
||
|
|
|
|
|
|
|
|
2 |
Press |
|
: Set the OFF timer. |
4 |
Press |
|
: button during the |
OFF |
( or |
) mark flashing. |
|||||
|
|
|
|
|
|
|
|
• During the daily timer is activating, both arrows ( ,
,  ) are indicated.
Note:
•Keep the remote control in accessible transmission to the indoor unit; otherwise, the time lag of up to 15 minutes will occur.
•The setting will be saved for the next same operation.
•Press 
 to cancel the daily timer operation.
11 PRESET OPERATION
Set your preferred operation for future use. The setting will be memorized by the unit for future operation (except airflow direction).
1. Select your preferred operation.
|
|
|
PRESET |
2. |
Press and hold |
until stop blinking and the P mark displays. |
|
|
|
PRESET |
|
3. |
Press |
: Operate the preset operation. |
|
12 QUIET OPERATION
To operate at super low fan speed for quiet operation (except in DRY mode). Press : Start and stop the operation.
Note: Under certain conditions, QUIET operation may not provide adequate cooling or heating due to low sound features.
13 COMFORT SLEEP OPERATION
For comfortable sleep, automatically control air flow and automatically turn OFF (Except in DRY mode).
1.Press : Select 1, 3, 5 or 9 hrs for OFF timer operation.
2.Press 
 to cancel the comfort sleep operation.
Note: The cooling operation, the set temperature will increase automatically 1 degree/hour for 2 hours (maximum 2 degrees increase). For heating operation, the set temperature will decrease.
14 SLEEP TIMER OPERATION
To start the sleep timer (OFF timer) operation.
1.Press
 : Select 1, 3, 5 or 9 hrs for OFF timer operation.
2.Press 
 to cancel the sleep timer operation.
15 AUTO RESTART OPERATION
To automatically restart the air conditioner after recovering from the power failure.
Setting
1.Press and hold OPERATION button on the indoor unit for 3 seconds to set the operation (3 beep sound and OPERATION lamp blink 5 time/sec for
5 seconds).
2.Press and hold OPERATION button on the indoor unit for 3 seconds to cancel the operation (3 beep sound but OPERATION lamp does not blink).
16 FILTER RESET
 Firstly, turn off the circuit breaker.
FILTER lamp lights on; the filter must be cleaned.
To turn off the lamp, push OPERATION button on the indoor unit or the FILTER button on the remote control.
Note: The filter indicator turns on after about 1000 hours.
Indoor Unit and Remote Control
•Clean the indoor unit and the remote control with a wet cloth when needed.
•No benzine, thinner, polishing powder or chemically-treated duster.
17SELF CLEANING OPERATION (COOL AND DRY OPERATION ONLY)
Cleaning operation
This function is used to dry the inside of the air conditioner to reduce the growth of mold, etc. inside the air conditioner.
•When the unit shuts down after having operated for 10 or more minutes in the cooling or dry mode, the cleaning operation is started automatically, and the TIMER indicator on the unit’s display panel turns on.
Cleaning operation duration
•The cleaning operation lasts for 30 minutes if the unit has been operating in the cooling or dry mode for 10 minutes or more.
Note:
•SELF CLEANING operation is default setting from factory.
•How to cancel SELF CLEANING operation.
Press and hold MODE button on operation panel for more than 10 seconds (less than 20 seconds). When canceling, 4 beeps sound.
•How to activate SELE CLEANING operation .
Press and hold MODE button on operation panel for more than 10 seconds (less than 20 seconds). Then, 4 beeps will sound and operation lamp will blink for 5 seconds.
18OPERATION AND PERFORMANCE
1.Three-minute protection feature: To prevent the unit from being activated for 3 minutes when suddenly restarted or switched to ON.
2.Preheating operation: Warm up the unit for 5 minutes before blowing warm air.
3.Warm air control: When the room temperature reaches the set temperature, the fan speed is automatically reduced and the outdoor unit will stop.
4.Automatic defrosting: Fans will stop during defrost operation.
5.Heating capacity: heat is absorbed from outdoor and released into the room. When the outdoor temperature is too low, use another recommended heating apparatus in combination with the air conditioner.
6.Consideration for accumulated snow: Select the position for outdoor unit where it will not be subjected to snow drifts, accumulation of leaves or other seasonal debris.
7.Some minor cracking sound may occur when unit operating. This is normal because the cracking sound may be caused by expansion/contraction of plastic.
Temp. |
Outdoor Temperature |
Room Temperature |
|
Operation |
|
||
RAS-10, 13, 18SAV Series |
|||
|
|||
|
|
||
Heating |
-15°C ~ 24°C |
Less than 28°C |
|
|
|
|
|
Cooling |
-10°C ~ 46°C |
21°C ~ 32°C |
|
|
|
|
|
Dry |
-10°C ~ 46°C |
21°C ~ 32°C |
|
|
|
|
Concerning multiple connections, please inquire to the dealership or refer to the catalog.
Toshiba 1112150101 (EN)
 Loading...