


 Loading...
Getting Started

Manual by Ludvig Carlson, Anders Nordmark, Roger Wiklander Quality Control: C. Bachmann, H. Bischoff, S. Pfeifer, C. Schomburg
The information in this document is subject to change without notice and does not represent a commitment on the part of Steinberg Media Technologies GmbH. The software described by this document is subject to a License Agreement and may not be copied to other media except as specifically allowed in the License Agreement. No part of this publication may be copied, reproduced or otherwise transmitted or recorded, for any purpose, without prior written permission by Steinberg Media Technologies GmbH.
All product and company names are ™ or ® trademarks of their respective owners. Windows 2000 and Windows XP are trademarks of Microsoft Corporation. The Mac logo is a trademark used under license. Macintosh and Power Macintosh are registered trademarks.
© Steinberg Media Technologies GmbH, 2003. All rights reserved.
Table of Contents

7 |
Introduction |
71 |
Tutorial 1: |
||
|
|
|
|
Recording and |
|
8 |
Welcome! |
|
|
||
10 |
About the manuals and the |
|
|
playing back audio |
|
|
Help |
|
|
|
|
|
72 |
About this tutorial |
|||
15 |
How you can reach us |
||||
73 |
Creating a new project |
||||
|
|
||||
17 |
Installation and |
75 |
Preparing to record |
||
83 |
Recording |
||||
|
Requirements for |
||||
|
83 |
Playing back what you just |
|||
|
Windows |
||||
|
|
|
recorded |
||
18 |
About this chapter |
84 |
Recording more events |
||
18 |
Requirements |
85 |
Playing back in a cycle |
||
22 |
Hardware installation |
87 |
Tutorial 2: Recording |
||
25 |
Installing Nuendo |
||||
|
|
and playing back MIDI |
|||
29 |
Installation and |
|
|
||
|
|
|
|||
88 |
About this tutorial |
||||
|
Requirements for |
||||
|
89 |
Setting up for recording |
|||
|
Mac OS X |
|
|
MIDI |
|
|
|
92 |
Recording MIDI |
||
30 |
About this chapter |
||||
92 |
Playing back what you just |
||||
30 |
Requirements |
||||
|
|
recorded |
|||
33 |
Hardware installation |
|
|
||
93 |
Playing back in a cycle |
||||
34 |
Installing Nuendo |
||||
94 |
Transposing the MIDI track |
||||
|
|
||||
37Setting up your system
38Setting up audio
49 Setting up MIDI
53Connecting a synchronizer
54Setting up video
55Optimizing audio performance
59Guided Tour
60The main windows in
Nuendo
97Tutorial 3: Mixing
98About this tutorial
98 Preparations
100Setting levels
101Setting pan
102Using Mute and Solo
103Adding EQ to an audio channel
107 Audio effects
112 Automation
NUENDO
4 Table of Contents

115 |
Tutorial 4: Creating a |
155 |
Tutorial 7: |
||
|
surround mix |
|
|
Editing audio |
|
|
|
|
|
|
|
116 |
About this tutorial |
156 |
About this tutorial |
||
116 |
Preparations |
156 |
The Sample Editor |
||
116 |
Creating a Project |
159 |
Processing audio |
||
120 |
Creating a surround bus |
160 |
Applying an effect plug-in |
||
122 |
Setting up a surround mix |
161 |
Using the Offline Process |
||
128 |
Exporting to a surround |
|
|
History dialog |
|
|
audio file |
163 |
Tutorial 8: |
||
131 Tutorial 5: Editing in |
|||||
|
|
Editing MIDI |
|||
|
the Project window |
|
|
|
|
|
164 |
About this tutorial |
|||
132 |
About this tutorial |
164 |
Opening the Key Editor |
||
132 |
Preparations |
165 |
Drawing events in the |
||
133 |
Overview |
|
|
Key Editor |
|
134 |
Moving and copying events |
166 |
Selecting and moving |
||
136 |
Muting and erasing events |
|
|
events |
|
137 |
Splitting and resizing events |
167 |
About quantize |
||
139 |
Adding a fade |
169 |
Editing velocity in the |
||
141 |
Tutorial 6: Using |
|
|
controller display |
|
171 |
Tutorial 9: |
||||
|
VST Instruments |
||||
|
|
|
|
Customizing |
|
142 |
About this tutorial |
|
|
||
142 |
Preparations |
172 |
About this tutorial |
||
143 |
Activating a VST Instrument |
173 |
Hiding menu items |
||
145 |
Routing |
175 |
Setting preferences |
||
146 |
Playing back |
178 |
Setting up Key Commands |
||
147 |
Adding another instrument |
182 |
Changing the look of the |
||
149 |
Playing a VST Instrument in |
|
|
Transport panel |
|
|
real time |
184 |
Creating a template |
||
151 |
Recording |
188 |
Setting up Zoom presets |
||
152 |
Making parameter settings |
190 |
Creating window layouts |
||
154 |
Automating the changes |
|
|
|
|
NUENDO
Table of Contents 5

193Basic Nuendo concepts
194About this chapter
194 The project
196 Audio terminology
198MIDI terminology
198Video terminology
199Basic Methods
200About this chapter
200Using menus
202Using tools
203Changing values
208Selecting objects
209Zoom and view techniques
212Window handling
215Undo
219Shortcuts & key commands
220About this chapter
220 The default key commands
229 Index
NUENDO
6 Table of Contents
1
Introduction

Welcome!
Thank you for choosing Steinberg´s Nuendo! Nuendo has been around a mere three years – and already it is being used in studios all over the world. Audio engineers and editors, producers and artists from the fields of film, television, radio, multimedia and music are choosing Nuendo today as their preferred tool for recording, editing and mixing.
With Nuendo 2.0, the Steinberg programming team has again managed to implement a large set of new features that offer even more possibilities than ever before. Support for even more new file formats, a completely redesigned mixer with all channels and busses with up to 12 channels, the time-saving Inspector in the Project Window giving instant access to all track parameters and a batch processing function
– to name just a few. Nuendo 2 also includes the possibility for network collaboration, allowing multiple users on various Nuendo stations to work on the same project in parallel, each committing their work to the group via TCP/IP and receiving updates from others if desired. MIDI functionality has been drastically extended in Nuendo 2. Not only have new editors found their way into the program but also new MIDI processing functionalities, MIDI plug-ins and the MIDI Device Manager are included. And as you will discover there is more – a lot more; all in all, no less than 200 new features have been implemented for this new version of the Nuendo Media Production System.
Despite the massive set of features that Nuendo now offers, we still managed to guarantee a quick workflow and intuitive handling. You can now fully customize Nuendo. You might have seen this on other computer workstations but nowhere ever to the extent that Nuendo offers now. First of all, the complete menu structure of Nuendo 2 can be configured to your liking. This means that if you know you are never going to use certain functionality, you can easily remove it from all menus. Or you can configure Nuendo differently depending on your project. If you do not require the extensive new MIDI sound and editing features for a certain project, you simply remove this entire section from all menus. And isn’t it good to know it is still there waiting for you in the background in case you need it later? Nuendo also displays only what you need on the Transport panel, the toolbar and the tracks in the project. Almost every
NUENDO
1 – 8 Introduction

button or display can be hidden or moved to a less central spot to create an interface which is just as complex as you want it to be. This way Nuendo 2 gives you everything you need for your work. No more and of course no less.
The Nuendo team is very grateful for the input we have received from Nuendo users in the past. In fact most of the new features implemented were user requests from the worldwide Nuendo community. Due to this direct communication and because of the encouraging feedback from the people actually using Nuendo in their professional working lives we at Steinberg have committed ourselves to continue with the current concept of the Nuendo Media Production System:
No matter whether you are working for film, television, radio broadcast or if you are involved in music, game sound, multimedia or innovative surround production, Nuendo will continue to deliver the right tool for any kind of audio production.
Please continue to visit www.nuendo.com and give us your feedback and suggestions.
See you there!
Your Steinberg Nuendo team.
NUENDO
Introduction 1 – 9

About the manuals and the Help
The Nuendo documentation is divided into several sections:
Printed books
Getting Started
This is the book you are reading now. The Getting Started book covers the following areas:
•Computer requirements.
•Installation issues.
•Setting up your system for audio, MIDI and/or video work.
•A guided tour of the main Nuendo windows.
•Tutorials describing the most common procedures for recording, playing back, mixing and editing in Nuendo.
•Basic concepts and terminology.
•A description of the general methods used when working in Nuendo.
In other words, this book does not go into detail on any Nuendo windows, functions or procedures.
The Operation Manual
The Operation Manual is the main Nuendo reference documentation, with detailed descriptions of Nuendo operations, parameters, functions and techniques. You should be familiar with the concepts and methods described in the Getting Started book before moving on to the Operation Manual.
Both the Getting Started book and the Operation Manual are available as Acrobat pdf documents as well – see below.
NUENDO
1 – 10 Introduction
Acrobat pdf documents
Parts of the documentation are included as documents in the Adobe Acrobat format (extension “.pdf”), accessed in the following ways:
•You can open the pdf documents from the Help menu in the program.
•Under Windows you can also open these documents from the Nuendo Documentation subfolder on the Windows Start menu.
•Under Mac OS X the pdf documents are located in the folder /Library/Documentation/Nuendo/.
•To read the pdf documents you need to have the Acrobat Reader application installed on your computer.
An Acrobat installer is provided on the program CD.
The following documents are included in pdf format:
Getting Started
This is the same document as the Getting Started book with cross references and index entries as clickable hyperlinks.
Operation Manual
This is the same document as the printed Operation Manual with cross references and index entries as clickable hyperlinks.
MIDI Devices and Features
Contains descriptions of the included MIDI effect plug-ins, how to manage MIDI devices, how to work with MIDI System Exclusive messages and how to use the Logical Editor.
Audio Effects and VST Instruments
Describes the features and parameters of the included VST plug-ins (real-time audio effects and VST instruments).
Networking
This pdf document describes how you can use Nuendo’s project sharing and networking features to collaborate with other users of Nuendo (version 2.0 or later) in a TCP/IP based peer-to-peer network.
NUENDO
Introduction 1 – 11

Remote Control Devices
This pdf document lists the supported MIDI remote control devices and describes how to set up and use them with Nuendo.
Score Layout and Printing
Describes the score editing features in Nuendo.
Using Nuendo with DSP Factory (Windows only)
Describes how to set up and use a Yamaha DSP Factory audio card with Nuendo.
NUENDO
1 – 12 Introduction

The Help System
Nuendo comes with a detailed help system, making it easy to look up procedures and descriptions from within the program. The contents of the help basically mirror the complete Operation Manual text. The help systems are slightly different depending on which operating system you use, Windows or Mac OS X:
HTML Help (Windows)
You use the HTML Help in the following way:
•To open the HTML Help for browsing, select “HTML Help” from the Help menu in the program.
This brings up the HTML Help browser in which you can browse the help table of contents, search the index or perform a free text search.
•To get information about the active window or a dialog, press [F1] on the computer keyboard or click the Help button in the actual dialog.
Within a topic, related topics are sometimes directly accessible via clickable links.
Apple Help (Mac OS X)
You use the Apple Help in the following way:
•To open the Apple Help for browsing, select “Nuendo Help” from the Help menu in the program.
This brings up the Apple Help Viewer window. There, you can either browse the help table of contents, use the index or type any words into the Search field at the top of the window.
•To get information about the active window or a dialog, press [F1] on the computer keyboard or click the Help button in the actual dialog.
Within a topic, related topics are sometimes directly accessible via clickable links.
Please note that you can open the Nuendo Help even when the program isn’t running:
1.Select “Mac Help” from the Help menu in the Finder.
2.In the Apple Help Viewer, bring up the “Help Center”.
3.Click the “Nuendo Help” link in the Help Center.
NUENDO
Introduction 1 – 13

About the program versions
The documentation covers two different operating systems or “platforms”; Windows and Mac OS X.
Some features and settings are specific to one of the platforms, Windows or Mac OS X. This is clearly stated in the applicable cases.
In other words:
•If nothing else is said, all descriptions and procedures in the documentation are valid both under Windows and Mac OS X.
The screenshots are taken from the Windows version.
Key command conventions
Many of the default key commands in Nuendo use modifier keys, some of which are different depending on the operating system. For example, the default key command for Undo is [Ctrl]-[Z] under Windows and [Command]-[Z] under Mac OS X.
When key commands with modifier keys are described in this manual, they are shown with the Windows modifier key first, in the following form:
[Win modifier key]/[Mac modifier key]-[key]
For example, [Ctrl]/[Command]-[Z] means “press [Ctrl] under Windows or [Command] under Mac OS X, then press [Z]”.
Similarly, [Alt]/[Option]-[X] means “press [Alt] under Windows or [Option] under Mac OS X, then press [X]”.
NUENDO
1 – 14 Introduction
How you can reach us
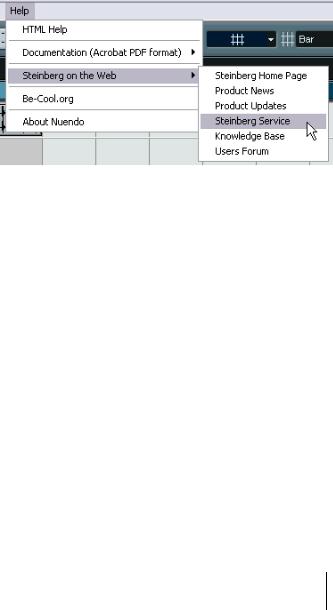
On the Help menu in Nuendo, you will find items for getting additional information and help:
•On the “Steinberg on the Web” submenu you can find links to various Steinberg websites. Selecting one will automatically launch your browser application and open the page.
You can find support and compatibility information, answers to frequently asked questions, links for downloading new drivers, etc. This requires that you have a web browser application installed on your computer, and a working Internet connection.
NUENDO
Introduction 1 – 15

NUENDO
1 – 16 Introduction
2
Installation and Requirements
for Windows

About this chapter
This chapter describes the system requirements and installation procedures for Nuendo for Windows. Installing Nuendo for Mac OS X is described on page 30.
Requirements
To use Nuendo, you need the following:
•A PC with either Windows XP or Windows 2000 installed.
A USB Port is also required.
For more details about the computer requirements, see below.
•Compatible audio hardware.
By audio hardware we mean a card capable of recording and playing back digital audio using your hard disk as a storage medium. It must also have an appropriate ASIO driver, see page 20, or be Windows Multimedia compatible. Also, to take full advantage of Nuendo’s multi-channel i/o bus architecture and surround features, you need audio hardware with multiple inputs and outputs.
For MIDI
•At least one MIDI interface.
•At least one MIDI instrument.
•Any audio equipment necessary to listen to the sound from your MIDI devices.
NUENDO
2 – 18 Installation and Requirements for Windows

Computer requirements
Hardware – PC
The absolute minimum requirements for running Nuendo on a PC are as follows:
•A 650 MHz Pentium processor or Athlon processor.
•256 MB of RAM.
•Monitor and video hardware supporting 1024 x 768 resolution.
For optimum performance we recommend the following:
•Pentium or Athlon processor at 1.4 GHz or faster
•512 MB of RAM.
•1152 x 864 screen resolution or higher.
RAM
Audio work requires a lot of RAM! In fact, there is a direct relation between the amount of available RAM and the number of audio channels that you can have running. As specified earlier, 256 MB is the minimum requirement, but as a general rule “the more the better” applies.
Hard disk size
•The size of the hard disk determines how many minutes of audio you will be able to record.
Recording one minute of stereo CD quality audio, requires 10 MB of hard disk space. That is, eight stereo tracks in Nuendo use up at least 80 MB of disk space per recording minute.
Hard disk speed
The speed of the hard drive also determines the number of audio tracks you can run. That is the quantity of information that the disk can read, usually expressed as “sustained transfer rate”. Again, “the more the better” applies.
Wheel mouse
Although a regular mouse will work fine with Nuendo, we recommend that you use a wheel mouse, as this will speed up value editing and scrolling considerably. See page 204 and page 209.
NUENDO
Installation and Requirements for Windows 2 – 19

Audio hardware
Nuendo will run with audio hardware that meets the following basic specifications:
•Stereo.
•16 bit.
•Support of at least the 44.1kHz sampling rate.
•Is supplied with a special ASIO driver, or a DirectX or Windows Multimedia compatible driver as described below.
About drivers
A driver is a piece of software that allows a program to communicate with a certain piece of hardware. In this case, the driver allows Nuendo to use the audio hardware. For audio hardware, there are three different cases, each requiring different driver configurations:
If the audio hardware has a specific ASIO driver
Professional audio cards often come with an ASIO driver written especially for the card. This allows for communication directly between Nuendo and the audio card. As a result, audio cards with specific ASIO drivers can provide lower latency (input-output delay), which is crucial when monitoring audio via Nuendo or using VST Instruments. The ASIO driver may also provide special support for multiple inputs and outputs, routing, synchronization, etc.
Audio card-specific ASIO drivers are provided by the card manufacturers. Make sure to check the manufacturer’s web site for the latest driver versions.
If your audio hardware comes with a specific ASIO driver we strongly recommend that you use this.
NUENDO
2 – 20 Installation and Requirements for Windows
If the audio card communicates via DirectX
DirectX is a Microsoft “package” for handling various types of Multimedia under Windows. Nuendo supports DirectX, or to be more precise, DirectSound, which is a part of DirectX used for playing back and recording audio. This requires two types of drivers:
•A DirectX driver for the audio card, allowing it to communicate with DirectX. If the audio card supports DirectX, this driver should be supplied by the audio card manufacturer. If it isn’t installed with the audio card, please check the manufacturer’s web site for more information.
•The ASIO DirectX Full Duplex driver, allowing Nuendo to communicate with DirectX. This driver is included with Nuendo, and does not require any special installation.
If the audio card communicates via Windows Multimedia system
If the card is Windows compatible, it can be used in Nuendo. The card then communicates with Windows Multimedia system, which in turn communicates with Nuendo. This requires two types of drivers:
•A Windows Multimedia driver for the audio card, allowing it to communicate with the Windows Multimedia system. This driver should be supplied by the audio card manufacturer, and is normally installed when you install the audio card.
•The ASIO Multimedia driver, allowing Nuendo to communicate with the Windows Multimedia system. This driver is included with Nuendo, and does not require any special installation.
NUENDO
Installation and Requirements for Windows 2 – 21

Hardware installation
Installing the copy protection key – please read!
Included with the Nuendo package, you will find a hardware key (sometimes referred to as a “dongle”) that is part of the Nuendo copy protection scheme. Nuendo will not run if this key isn’t installed properly.
•The copy protection key should be plugged into the computer’s USB port after installing Nuendo and restarting the computer!
When the copy protection key is plugged into the USB port, Windows will automatically register it as a new hardware device and will attempt to find drivers for it – these necessary drivers won’t be there until Nuendo has been installed and the computer restarted.
Installing the audio hardware and its driver
1.Install the audio card and related equipment in the computer, as described in the card’s documentation.
2.Install the driver for the card.
There are three types of drivers that could apply: card-specific ASIO drivers, DirectX drivers and Windows Multimedia drivers:
Specific ASIO driver
If your audio card has a specific ASIO driver it may be included with the audio card, but you should always make sure to check the audio card manufacturer’s web site for the most recent drivers. For details on how to install the driver, refer to the manufacturer’s instructions.
DirectX driver
If your audio card is DirectX compatible, its DirectX drivers will most likely be installed when you install the card (as with the Windows Multimedia driver). If you have downloaded special DirectX drivers for the audio card, you should follow the manufacturer’s installation instructions.
NUENDO
2 – 22 Installation and Requirements for Windows

Windows Multimedia driver
These drivers are normally included with all types of regular PC audio cards. Some are even included with Windows itself. Depending on whether the audio card is “Plug’n’Play compatible” or not, the installation of the card is done differently:
•If the card is “Plug’n’Play compatible”, Windows will detect the card once it is plugged in, and ask for the necessary driver disks.
•If not, you need to use the “Add New Hardware” feature in the Control Panel to install the card and its drivers.
Refer to the documentation that comes with the card.
Should you have an audio card but no driver, please check the manufacturer’s web site, or ask your music or computer dealer for help.
Testing the card
To make sure the audio card will work as expected, perform the following two tests:
•Use any software included with the audio card to make sure you can record and play back audio without problems.
•If the card is accessed via a standard Windows driver, use the Media Player application (included with Windows) to play back audio.
NUENDO
Installation and Requirements for Windows 2 – 23

Installing a MIDI interface/synthesizer card
Installation instructions for a MIDI interface should be included with the product. However, here’s an outline of the necessary steps:
1.Install the interface (or MIDI synthesizer card) inside your computer or connect it to a “port” (connector) on the computer.
Which is right for you depends on which type of interface you have.
2.If the interface has a power supply and/or a power switch, turn it on.
3.Install the driver for the interface, as described in the documentation that comes with the interface.
It is likely that you will need a CD ROM or floppy disk supplied by the manufacturer of the MIDI interface. You should also make sure to check the manufacturer’s web site for the latest driver updates.
NUENDO
2 – 24 Installation and Requirements for Windows

Installing Nuendo
Defragment the hard disk
If you plan to record audio on a hard disk where you have already stored other files, now is the time to defragment it. Defragmentation reorganizes the physical allocation of space on the hard disk in order to optimize its performance. It is done with a special defragmentation program. In Windows XP, for example, you might look for the “Disk Defragmenter” utility.
It is crucial to the audio recording performance that your hard disk is optimized (defragmented). You should make sure to defragment regularly.
Installing the files from the CD-ROM
The installation procedure puts all files in the right places, automatically.
1.Insert the Nuendo CD-ROM.
2.A pop-up dialog appears automatically, containing three items for installing, browsing the CD and exiting.
If this dialog doesn’t appear, open the CD-ROM on the desktop, and double click the “Autorun.EXE”.
3.To start the installation process, select “Install”.
Now the Nuendo installation procedure starts. A number of dialogs will appear, allowing you to select in which folder on your hard disk you want to install the program, etc. To advance to the next “page” in the installation procedure, click the “Next” button. The “Previous” button takes you back to the previous page.
•In one dialog you will need to fill in your name and the serial number of your Nuendo copy, and click OK.
You will find the serial number on the registration card that comes with the Nuendo package. Check the name and number in the confirmation dialog and click “Yes” if they are correct. Clicking “No” brings back the previous dialog.
•You will be asked to read and confirm the licence agreement (shown on screen).
This is required for the installation to proceed.
NUENDO
Installation and Requirements for Windows 2 – 25

•At one point you will be asked whether Nuendo should be available to all users of the computer or just to you.
Choose the option that suits you best.
•You will also be asked whether you want to install audio effect plugins from earlier Nuendo versions.
This is primarily intended to ensure compatibility with songs created with earlier versions, but will of course also give you a wider palette of plug-ins to choose from. You can either just select to install or to ignore all previous plug-ins and instruments (by activating/deactivating the checkbox), or click the Details button to select from a list where you can decide which plug-ins to install.
4.Finally, a dialog box informs you that the installation was successful and recommends that you restart your computer.
5.After restarting the computer, plug in the hardware protection key into the USB port.
If you are unsure over which port this is, consult the computer’s documentation.
6.The first time the copy protection device is plugged in, it will be registered as a new hardware device, and a dialog will appear asking you whether you would like to find drivers for the device manually or automatically. You should select to find drivers automatically.
The dialog closes.
7.You are now ready to launch Nuendo!
Remove the CD-ROM and store it in a safe place.
This completes the installation of your Nuendo program!
For information about product updates, you should check the Steinberg website regularly. Open the “Steinberg on the Web” submenu on the Help menu and select “Product Updates”. The website that opens contains a list with the recent updates.
NUENDO
2 – 26 Installation and Requirements for Windows

The items on the start menu
If you open the Windows Start menu, you will find a Nuendo group on the “Programs” submenu. This contains the following items:
•Documentation.
On this submenu you can access the various Nuendo documentation files in the Acrobat pdf format. These documents are also available on the Help menu from within the program.
•ASIO DirectX Full Duplex Setup.
This is where you make settings if your audio hardware uses DirectX for audio playback and recording.
•ASIO Multimedia Setup.
This opens a dialog with settings for the ASIO (Audio Stream Input Output) system, which handles audio recording and playback in Nuendo, if you are using the ASIO MME driver. This dialog can also be opened from within Nuendo. See the chapter “Setting up your system” in this book.
•Nuendo.
This launches the actual program.
On the “Programs” submenu you will also find an item called Syncrosoft (License Control Center). This item shows all Syncrosoft protection devices and valid licences currently installed.
There may also be additional items (such as Readme files) available on the Start menu. Please read all such files before launching Nuendo, since they may contain late information not included in the manuals.
NUENDO
Installation and Requirements for Windows 2 – 27

NUENDO
2 – 28 Installation and Requirements for Windows
3
Installation and Requirements
for Mac OS X

About this chapter
This chapter describes the system requirements and installation procedures for Nuendo for Mac OS X. Installing Nuendo for Windows is described on page 18.
Requirements
To use Nuendo, you need the following:
•A Macintosh computer running Mac OS X.
A USB Port is also required.
For more details about the computer requirements, see below.
•Mac OS X compatible audio hardware.
While the built-in audio hardware of the Macintosh may be adequate for basic audio playback, we strongly recommend audio hardware that is specifically designed for audio recording and music applications. Also, to take full advantage of Nuendo’s multi-channel i/o bus architecture and surround features, audio hardware with multiple inputs and outputs is required.
For MIDI
•At least one MIDI interface.
•At least one MIDI instrument.
•Any audio equipment necessary to listen to the sound from your MIDI devices.
NUENDO
3 – 30 Installation and Requirements for Mac OS X
Loading...