


2-634-880-12 (1)
LCD Monitor
Instructions for Use
LMD-1950MD
© 2005 Sony Corporation
English
Owner’s Record
The model and serial numbers are located at the rear. Record these numbers in the spaces provided below. Refer to these numbers whenever you call upon your Sony dealer regarding this product.
Model No. ____________________
Serial No. ____________________
WARNING
To reduce the risk of fire or electric shock, do not expose this apparatus to rain or moisture.
To avoid electrical shock, do not open the cabinet. Refer servicing to qualified personnel only.
THIS APPARATUS MUST BE EARTHED.
To disconnect the main power, unplug the AC plug.
WARNING
When installing the unit, incorporate a readily accessible disconnect device in the fixed wiring, or connect the power cord to socket-outlet which must be provided near the unit and easily accessible.
If a fault should occur during operation of the unit, operate the disconnect device to switch the power supply off, or disconnect the power cord.
In the event of a malfunction or when maintenance is necessary, consult an authorized Sony dealer.
This unit contains substances which can pollute the environment if disposed carelessly. Please contact our nearest representative office or your local environmental office in case of disposal of this unit.
For the customers in Canada
This unit has been certified according to Standard CSA C22.2 NO.601.1.
FOR THE CUSTOMERS IN THE USA
This equipment has been tested and found to comply with the limits for a Class A digital device, pursuant to Part 15 of the FCC Rules. These limits are designed to provide reasonable protection against harmful interference when the equipment is operated in a commercial environment. This equipment generates, uses, and can radiate radio frequency energy and, if not installed and used in accordance with the instruction manual, may cause harmful interference to radio communications. Operation of this equipment in a residential area is likely to cause harmful interference in
which case the user will be required to correct the interference at his own expense.
You are cautioned that any changes or modifications not expressly approved in this manual could void your authority to operate this equipment.
The shielded interface cable recommended in this manual must be used with this equipment in order to comply with the limits for a digital device pursuant to Subpart B of Part 15 of FCC Rules.
This product contains mercury. Disposal of this product may be regulated if sold in the United States. For disposal or recycling information, please contact your local authorities or the Electronics Industries Alliance ( http://www.eiae.org).
For the customers in the U.S.A. and Canada
Model LMD-1950MD is Non-Patient Equipment. This unit can not be used in the vicinity of patients.
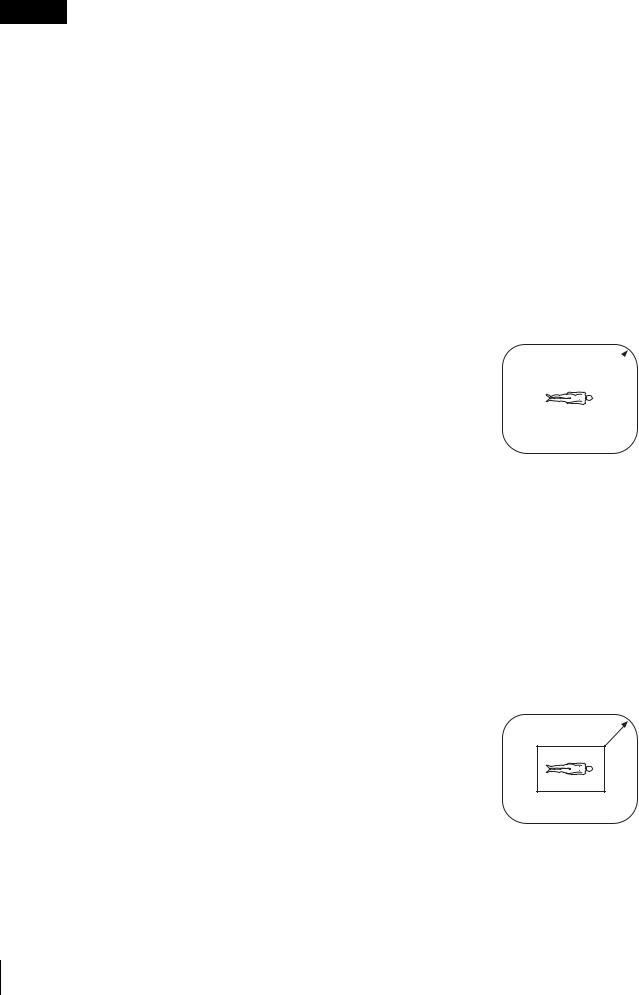
* Patient Vicinity |
|
|
||
|
|
.83m |
||
|
R1 |
6 |
feet |
|
|
|
|
|
|
|
|
|
|
|
Important safeguards/notices for use in the medical environments
1. All the equipment connected to this unit shall be certified according to Standard IEC60601-1, IEC60950-1, IEC60065 or other IEC/ISO Standards applicable to the equipment.
2. When this unit is used together with other equipment in the patient area*, the equipment shall be either powered by an isolation transformer or connected via an additional protective earth terminal to system ground unless it is certified according to Standard IEC60601-1 and IEC60601-1-1.
* Patient Area .5m R1
3.The leakage current could increase when connected to other equipment.
2

4.The operator should take precautions to avoid touching the rear panel input and output circuitry and the patient at the same time.
5.Model LMD-1950MD is a monitor intended for use in a medical environment to display pictures from cameras or other systems. These models are nonpatient care equipment with respect to the requirement of leakage current.
FOR CUSTOMERS IN EUROPE
This equipment has been found to comply with limits for a Class B device pursuant to EN60601-1-2. However, if this equipment does cause harmful interference to other devices, which can be determined by turning this equipment off and on, the user is encouraged to try to correct the interference by one or more of the following measures:
•Increase the separation between the equipment and other devices.
•Connect the equipment into an outlet on a circuit different from that to which other devices are connected.
•Consult the dealer or an experienced radio/TV technician for help.
Caution
When you dispose of the unit or accessories, you must obey the law in the relative area or country and the regulation in the relative hospital.
Symbols on the unit
Symbol |
Location |
This symbol indicates |
|
|
|
|
Bottom |
Power switch. |
|
|
Press to turn the monitor |
|
|
on. |
|
|
|
|
Bottom |
Power switch. |
|
|
Press to turn the monitor |
|
|
off. |
|
|
|
|
Bottom |
The equipotential |
|
|
terminal which brings the |
|
|
various parts of a system |
|
|
to the same potential. |
|
|
|
|
Bottom |
Functional earth terminal |
Front |
Brightness control |
8 |
|
|
|
Front |
Contrast control |
6 |
|
|
|
Front |
Key inhibit |
- |
The setting are locked so |
that they cannot be |
|
|
changed. |
Warning on power connection
Use a proper power cord for your local power supply.
|
The United States |
Canada |
Continental Europe |
|
|
|
|
Plug type |
HOSPITAL GRADE |
HOSPITAL GRADE |
LP-34A |
|
|
|
|
Female end |
E41395 |
LL33182 |
LS-60 |
|
|
|
|
Cord type |
E41395-A |
LL76662 |
H05VV-F |
|
|
|
|
Rated Voltage & Current |
10A/125V |
10A/125V |
10A/250V |
|
|
|
|
Safety approval |
UL |
CSA |
VDE |
|
|
|
|
3

Table of Contents |
|
Precaution .............................................................. |
5 |
On Safety ............................................................ |
5 |
On Installation .................................................... |
5 |
About the LCD Display Panel ............................ |
5 |
About the Fluorescent Tube ............................... |
5 |
Maintenance ....................................................... |
5 |
Disposal of the Unit ........................................... |
5 |
Recommendation to Use more than One Unit ... |
5 |
On Repacking ..................................................... |
6 |
On Fan Error ...................................................... |
6 |
Features .................................................................. |
6 |
Location and Function of Parts and Controls .... |
8 |
Front Panel ......................................................... |
8 |
Input Signals and Adjustable/Setting Items ..... |
10 |
Bottom .............................................................. |
11 |
Connecting the AC Power Cord ......................... |
12 |
Attaching the Input Adaptor .............................. |
13 |
Selecting the Default Settings ............................. |
14 |
Selecting the Menu Language ............................ |
15 |
Using the Menu .................................................... |
16 |
Loading USER MEMORY ................................. |
17 |
Adjustment Using the Menus ............................. |
18 |
Items ................................................................. |
18 |
Adjusting and Changing the Settings ............... |
19 |
STATUS menu............................................. |
19 |
COLOR TEMP menu .................................. |
19 |
USER CONTROL menu.............................. |
20 |
USER CONFIG menu.................................. |
21 |
REMOTE menu ........................................... |
22 |
USER MEMORY menu .............................. |
23 |
Saving the user memory............................... |
23 |
INPUT SELECT menu ................................ |
24 |
KEY INHIBIT menu.................................... |
24 |
USER SERVICE menu................................ |
25 |
Troubleshooting ................................................... |
25 |
Specifications ....................................................... |
26 |
Dimensions/Mass ................................................. |
30 |
4

Precaution
On Safety
•Operate the unit on 100-240 V AC only.
•The nameplate indicating operating voltage, etc. is located on the AC adaptor.
•Should any solid object or liquid fall into the cabinet, unplug the unit and have it checked by qualified personnel before operating it any further.
•Unplug the unit from the wall outlet if it is not to be used for several days or more.
•To disconnect the AC power cord, pull it out by grasping the plug. Never pull the cord itself.
•The socket-outlet shall be installed near the equipment and shall be easily accessible.
On Installation
•Prevent internal heat build-up allowing adequate air circulation.
Do not place the unit on surfaces (rugs, blankets, etc.) or near materials (curtains, draperies) that may block the ventilation holes.
•Do not install the unit near heat sources such as radiators or air ducts, or in a place subject to direct sunlight, excessive dust, mechanical vibration or shock.
•Do not place the monitor near equipment which generates magnetism, such as a transformer or high voltage power lines.
About the LCD Display Panel
•Although the LCD display panel is made with highprecision technology, black dots may appear or bright points of light (red, blue, or green) may appear constantly on the LCD screen. And a color shade or bight shade may appear according to a viewing angle. These are structural properties of the LCD panel and are not malfunctions.
•The LCD screen is made with high-precision technology and more than 99.99% of the picture element is intact. However, some of the picture element may not appear or some of the picture element may appear constantly.
•Do not leave the LCD screen facing the sun as it can damage the LCD screen. Take care when you place the unit by a window.
•Do not push or scratch the LCD monitor’s screen. Do not place a heavy object on the LCD monitor’s screen. This may cause the screen to lose uniformity.
•If the unit is used in a cold place, a residual image may appear on the screen. This is not a malfunction. When the monitor becomes warm, the screen returns to normal.
•If a still picture is displayed for a long time, a residual image may appear. The residual image will eventually disappear.
•The screen and the cabinet become warm during operation. This is not a malfunction.
About the Fluorescent Tube
•A specially designed fluorescent tube is installed as the lighting apparatus for this unit. If the LCD screen becomes dark, unstable or does not turn on, consult your Sony dealer.
Maintenance
•Clean the cabinet, panel and controls with a soft cloth lightly moistened with a mild detergent solution. Do not use any type of abrasive pad, scouring powder or solvent, such as benzine.
•Do not rub, touch, or tap the surface of the screen with sharp or abrasive items such as a ball-point pen or screwdriver. This type of contact may result in a scratched picture panel.
•Clean the screen with a soft cloth. If you use a glass cleaning liquid, do not use any type of cleaner containing an anti static solution or similar additive as this may scratch the screen’s coating.
Disposal of the Unit
•Do not dispose of the unit with general waste. Do not include the monitor with household waste.
•The fluorescent tube includes mercury. Dispose of the monitor in accordance with the regulations of your local sanitation authority.
Recommendation to Use more than One Unit
•As problems can occasionally occur for the monitor, when the monitor is used for safety control of personnel, assets or stable picture, or for emergencies, we strongly recommend you use more than one unit or prepare a spare unit.
Precaution 5

On Repacking
•Do not throw away the carton and packing materials. They make an ideal container which to transport the unit.
If you have any questions about this unit, contact your authorized Sony dealer.
On Fan Error
•The fan for cooling the unit is built in. When the “FAN ERROR” message is displayed, turn off the power and contact an authorized Sony dealer.
Features
Compliance with medical safety standards in America, Canada and Europe
UL60601-1 for America, CSA C22.2 No.601.1 for Canada and EN 60601-1 for Europe have been obtained for this monitor.
The monitor is designed for use in the medical treatment field, with the sheet switch, screen protect panel, etc.
Cabinet design with no heat vents
LMD-1950MD has been designed so that there are no air vents for expelling heat from the unit. This design prevents blood, chemical solutions, and dirt, which could cause a trouble, from entering the unit. No dirt accumulating in the main unit can come out.
Picture
Sophisticated I/P (Interlace to Progressive) Conversion
The LMD-1950MD provides sophisticated I/P conversion with Sony’s original X-Algorithm technology. This technology combines the pixels above, below and in the diagonal direction of the moving picture part, and then inserts a natural pixel.
The direct result is much smoother image reproduction for both moving and static picture areas.
Fully digital 10-bit signal processing circuit
As well as digital signals, all signals including analog signals are converted into digital signals. All signals are processed using a fully digital 10-bit processing circuit so that an image is produced in smooth gradation without any deterioration of quality.
Two color system available
The monitor can display NTSC and PAL signals by connecting this unit.
Auto chroma/phase function
The chroma and phase of the decoder are automatically adjusted with the auto chroma phase function.
6 Features

High image-quality/high-resolution SXGA LCD panel
An SXGA high-resolution (1280 × 1024 dots) panel and high brightness/ultra-wide field of view technology enable you to use the monitor under various lighting conditions and in numerous ways (installing on wall, using several monitors to view an image, and so on.). Because a color filter with wide-color reproduction and LCD materials with high response speed are used, the motion picture of the video signal is displayed clearer. This monitor also performs sampling of signals at high frequencies and provides a high resolution of 700 TV scanning lines or more during the RGB/COMPONENT signal (480/60I, 575/50I) input.
Input
Accepts analog RGB input signals *1
Adopting the scan converter allows this monitor to detect VGA, SVGA, XGA and SXGA analog RGB signals input to the HD15 input connector.
Accepts DVI-D (digital) input signals *1
Adopting the scan converter allows this monitor to detect VGA, SVGA, XGA and SXGA digital computer signals input to the DVI input connector.
To view SXGA signals when the DVI input is selected, use the cable within 3 m (118 1/8 inches) in length.
*1 For acceptable formats, refer to “About the preset signal” on pages 29 and 30.
Optional slot for the video signal
Two optional input adaptors can be attached. The composite, Y/C, component, analog RGB or SDI signal can be input depending on the input connectors of the board to be used.
Multi-format *2
NTSC or PAL color system or DTV format, such as 720P, 1080I, etc. can be selected automatically.
*2 For acceptable formats, refer to “Video signal formats” on page 28.
External sync input
The unit can be operated on the sync signal supplied from an external sync generator.
Functions
APA (Auto Pixel Alignment) function
You can display pictures from the HD 15 input connector in the appropriate picture by simply pressing the APA key.
Automatic termination (connector with  mark only)
The input connector is terminated internally at 75 ohms when nothing has been connected to the output connector. If a cable is connected to the output connector, the internal terminal is automatically released and the signals input to the input connector are output to the output connector (loop-through).
Select color temperature and gamma mode
You can select the color temperature from among four (HIGH, LOW, LOW2, LOW3) settings and gamma mode from among five settings. You can also adjust the color temperature to the appropriate setting in “USER”.
Aspect setting
You can set the monitor to 4:3 or 16:9 display mode according to the input signal.
Scan function
You can select the display from among “NORMAL”, “UNDER”, “OVER”, “FULL”, “ZOOM” and “NATIVE” (1080I and 720P only)” except the HD 15 and DVI input signals.
Select language display
You can select your language for the display from seven languages - English, German, French, Italian, Spanish, Japanese and Chinese.
Power saving function
The monitor enters into power saving mode to reduce the power consumption when no signal is input.
Key inhibit function
You can inhibit the key to prevent missing an operation.
User memory function
You can save the 20 picture settings with the name. The user memory data can be saved or loaded between the monitor and the equipment (PC, etc.) connected in serial remote mode.
Two kinds of ground terminals
Two kinds of ground terminals are built into the monitor to equal the electric potential.
External remote control function
You can directly select the input signal, aspect, etc. by operating the connected equipment.
Other
Optional stand
It is more convenient to install the monitor on a desk by using the optional stand (SU-560).
Features 7

Location and Function of Parts and Controls
Front Panel
2
APA |
+ |
+ |
MENU |
ENTER USER MEMORY |
INPUT |
|
|
|
POWER |
||
|
|
|
|
|
|
– |
– |
|
|
|
REMOTE |
|
|
|
- |
+ + |
|
3 4 5 6 7 8 9 0 qa qs qd |
– – |
|
|
|
1 |
|
a  /
/ (Power) switch
Press  to turn on the power and
  to turn off the power. When the power is turned on, the POWER indicator lights.
b Tally lamp
Turning this lamp on or off can be done with a Remote Control.
For details, refer to “Pin assignment” on page 27.
c APA (Auto Pixel Alignment) key
Adjust a picture clearest automatically while a signal is input from the HD15 input connector. To adjust the picture further for finer picture though the picture is adjusted automatically, see the “DOT PHASE” and “PITCH” on page 22.
Press the MENU key to stop the APA operation. The APA function does not work when the menu is displayed.
d 8 (Brightness) +/– keys
+: press for more brightness. –: press for less brightness.
The value is reset to the default setting by pressing the + and – keys simultaneously.
e 6 (Contrast) +/– keys
+: press to make the contrast stronger. –: press to make the contrast weaker.
The value is reset to the default setting by pressing the + and – keys simultaneously.
f MENU key
Press to display the on-screen menu. Press again to clear the menu.
The USER SERVICE menu (on page 25) appears by keeping the MENU key pressed.
For menu operations, refer to “Using the Menu” on page 16.
g Arrow keys (M/m/</,)
Select the menu or to make various adjustments.
h ENTER key
Press to decide a selected item in the menu.
i USER MEMORY key
Press to load the picture settings saved in the USER MEMORY menu (on page 23).
j INPUT M/m keys
Select the input signal. Each time you press the M key, the input signal switches as follows. When the m key is pressed, the input signal switches in reverse order.
C O M P O S I T E T |
H D 1 5 |
r |
R |
Y / C |
DV I |
r |
R |
R G B |
O P T I O N B - 2 |
r |
R |
C O M P O N E N T |
O P T I O N B - 1 |
r |
R |
O P T I O N A - 1 t |
O P T I O N A - 2 |
8 Location and Function of Parts and Controls

Notes
•The signal set to “OFF” in the INPUT SELECT menu is not selected with the INPUT key and skipped. To select the signal, select “ON”.
•When an input adaptor is not attached, “OPTION” is skipped automatically.
k -(Key inhibit) indicator
When the key inhibit function works, the green indicator lights.
For the key inhibit function, refer to “REMOTE menu” on page 22 and “KEY INHIBIT menu” on page 24.
l REMOTE indicator
When the serial remote (RS-232C) is operable, the green indicator lights.
For the remote function, refer to “REMOTE menu” on page 22.
m POWER indicator
When the power is turned on, the indicator lights in amber and then in green.
This indicator lights in amber in power saving mode.
Location and Function of Parts and Controls |
9 |
|
|

Input Signals and Adjustable/Setting Items
|
|
|
|
Input signal |
|
|
|
|
|
||
|
|
|
|
|
|
|
|
|
|
|
|
Item |
Video*1, |
B & W*1 |
Component*2 |
RGB*2 |
SDI |
DVI |
HD15 |
||||
|
Y/C*1 |
|
|
|
|
|
|
|
|
|
|
|
|
SD |
HD |
SD |
HD |
D1*3 |
HD*4 |
|
|
||
|
|
|
|
|
|||||||
CONTRAST |
a |
a |
a |
a |
a |
a |
a |
a |
a |
a |
|
|
|
|
|
|
|
|
|
|
|
|
|
BRIGHT |
a |
a |
a |
a |
a |
a |
a |
a |
a |
a |
|
|
|
|
|
|
|
|
|
|
|
|
|
CHROMA |
a |
× |
a |
a |
× |
× |
a |
a |
× |
× |
|
|
|
|
|
|
|
|
|
|
|
|
|
PHASE |
a (NTSC) |
× |
× |
× |
× |
× |
× |
× |
× |
× |
|
|
|
|
|
|
|
|
|
|
|
|
|
APERTURE |
a |
a |
a |
a |
× |
× |
a |
a |
× |
× |
|
|
|
|
|
|
|
|
|
|
|
|
|
COLOR TEMP |
a |
a |
a |
a |
a |
a |
a |
a |
a |
a |
|
|
|
|
|
|
|
|
|
|
|
|
|
AUTO CHROMA/ |
a |
× |
a |
a |
× |
× |
a |
a |
× |
× |
|
PHASE |
|||||||||||
|
|
|
|
|
|
|
|
|
|
||
|
|
|
|
|
|
|
|
|
|
|
|
COMP LEVEL |
× |
× |
a |
× |
× |
× |
× |
× |
× |
× |
|
|
|
|
(480/60I) |
|
|
|
|
|
|
|
|
|
|
|
|
|
|
|
|
|
|
|
|
NTSC SETUP |
a (NTSC) |
a |
× |
× |
× |
× |
× |
× |
× |
× |
|
|
|
(480/60I) |
|
|
|
|
|
|
|
|
|
|
|
|
|
|
|
|
|
|
|
|
|
GAMMA |
a |
a |
a |
a |
a |
a |
a |
a |
a |
a |
|
|
|
|
|
|
|
|
|
|
|
|
|
SCAN*5 |
a |
a |
a |
a |
a |
a |
a |
a |
× |
× |
|
|
|
|
|
|
|
|
|
|
|
|
|
ASPECT |
a |
a |
a |
a*6 |
a |
a*6 |
a |
× |
× |
× |
|
|
|
|
|
|
|
|
|
|
|
|
|
APA |
× |
× |
× |
× |
× |
× |
× |
× |
× |
a |
|
|
|
|
|
|
|
|
|
|
|
|
|
SIZE |
× |
× |
× |
× |
× |
× |
× |
× |
a |
a |
|
|
|
|
|
|
|
|
|
|
|
|
|
SHIFT |
a |
a |
a |
a |
a |
a |
a |
a |
a |
a |
|
|
|
|
|
|
|
|
|
|
|
|
|
DOT PHASE |
× |
× |
× |
× |
× |
× |
× |
× |
× |
a |
|
|
|
|
|
|
|
|
|
|
|
|
|
PITCH |
× |
× |
× |
× |
× |
× |
× |
× |
× |
a |
|
|
|
|
|
|
|
|
|
|
|
|
|
POWER SAVING |
a |
a |
a |
a |
a |
a |
a |
a |
a |
a |
|
|
|
|
|
|
|
|
|
|
|
|
|
PIC DELAY MIN*7 |
a |
a |
a |
a |
a |
a |
a |
a |
× |
× |
|
|
|
|
|
|
|
|
|
|
|
|
|
a : Adjustable/can be set |
*1 |
The signal can be input without an input adaptor. |
× : Not adjustable/cannot be set |
|
When a BKM-227W is attached, a number of the |
|
|
input is increased. |
|
*2 |
The signal can be input without an input adaptor. |
|
|
When a BKM-229X is attached, a number of the |
|
|
input is increased. |
|
*3 |
When a BKM-220D or BKM-243HS is attached, |
|
|
the signal can be input. |
|
*4 |
When a BKM-243HS is attached, the signal can be |
|
|
input. |
|
*5 |
You may not be able to set this item due to the input |
|
|
signal. For details, see “SCAN” on page 20. |
|
*6 |
The signal can be input with 480/60P or 576/50P |
|
|
format. |
|
*7 |
Available only interlace signal. |
10 Location and Function of Parts and Controls
 Loading...