


Mini HI-FI
Component System
4-273-674-81(1)
Operating Instructions US 
Manual de instrucciones ES 
LBT-SH2000
WARNING
To reduce the risk of fire or electric shock, do not expose this apparatus to rain or moisture. To reduce the risk of fire, do not cover the ventilation opening of the apparatus with newspapers, tablecloths, curtains, etc.
Do not place the naked flame sources such as lighted candles on the apparatus.
To reduce the risk of fire or electric shock, do not expose this apparatus to dripping or splashing, and do not place objects filled with liquids, such as vases, on the apparatus. As the main plug is used to disconnect the unit from the mains, connect the unit to an easily accessible AC outlet. Should you notice an abnormality in the unit, disconnect the main plug from the AC outlet immediately.
Do not install the appliance in a confined space, such as a bookcase or built-in cabinet. Do not expose batteries or apparatus with battery-installed to excessive heat such as sunshine, fire or the like.
The unit is not disconnected from the mains as long as it is connected to the AC outlet, even if the unit itself has been turned off.
CAUTION
The use of optical instruments with this product will increase eye hazard.
This appliance is classified as a CLASS 1 LASER product. This marking is located on the rear exterior.
When unpacking or handling a big and/or heavy speaker, be sure to handle the unit with two or more persons. Dropping the unit may cause personal injury and/or property damage.
Owner’s Record
The model and serial numbers are located on the rear of the unit. Record these numbers in the space provided below. Refer to them whenever you call upon your Sony dealer regarding this product.
Model No. __________________________
Serial No. __________________________
This symbol is intended to alert the user to the presence of uninsulated “dangerous voltage” within the product’s enclosure that may be of sufficient magnitude to constitute a risk of electric shock to persons.
This symbol is intended to alert the user to the presence of important operating and maintenance (servicing) instructions in the literature accompanying the appliance.
Important Safety
Instructions
1)Read these instructions.
2)Keep these instructions.
3)Heed all warnings.
4)Follow all instructions.
5)Do not use this apparatus near water.
6)Clean only with dry cloth.
7)Do not block any ventilation openings. Install in accordance with the manufacturer’s instructions.
8)Do not install near any heat sources such as radiators, heat registers, stoves, or other apparatus (including amplifiers) that produce heat.
2US

9)Do not defeat the safety purpose of the polarized or grounding-type plug. A polarized plug has two blades with one wider than the other. A grounding type plug has two blades and a third grounding prong. The wide blade or the third prong are provided for your safety. If the provided plug does not fit into your outlet, consult an electrician for replacement of the obsolete outlet.
10)Protect the power cord from being walked on or pinched particularly at plugs, convenience receptacles, and the point where they exit from the apparatus.
11)Only use attachments/accessories specified by the manufacturer.
12)Use only with the cart, stand, tripod, bracket, or table specified by the manufacturer, or sold with the apparatus. When a cart is used, use caution when moving the cart/apparatus combination to avoid injury from tip-over.
13)Unplug this apparatus during lightning storms or when unused for long periods of time.
14)Refer all servicing to qualified service personnel. Servicing is required when the apparatus has been damaged in any way, such as power-supply cord or plug is damaged, liquid has been spilled or objects have fallen into the apparatus, the apparatus has been exposed to rain or moisture, does not operate normally, or has been dropped.
The following FCC statement applies only to the version of this model manufactured for sale in the U.S.A. Other versions may not comply with FCC technical regulations.
NOTE: US
This equipment has been tested and found to comply with the limits for a Class B digital device, pursuant to Part 15 of the FCC Rules. These limits are designed to provide reasonable protection against harmful interference in a residential installation. This equipment generates, uses and can radiate radio frequency energy and, if not installed and used in accordance with the instructions, may cause harmful interference to radio communications. However, there is no guarantee that interference will not occur in a particular installation. If this equipment does cause harmful interference to radio or television reception, which can be determined by turning the equipment off and on, the user is encouraged to try to correct the interference by one or more of the following measures:
–Reorient or relocate the receiving antenna.
–Increase the separation between the equipment and receiver.
–Connect the equipment into an outlet on a circuit different from that to which the receiver is connected.
–Consult the dealer or an experienced radio/TV technician for help.
CAUTION
You are cautioned that any changes or modifications not expressly approved in this manual could void your authority to operate this equipment.
Continued l
3US
License and Trademark Notice
•“WALKMAN” and “WALKMAN” logo are registered trademarks of Sony Corporation.
•MPEG Layer-3 audio coding technology and patents licensed from Fraunhofer IIS and Thomson.
•Windows Media is either a registered trademark or trademark of Microsoft Corporation in the United States and/or other countries.
•This product contains technology subject to certain intellectual property rights of Microsoft.
Use or distribution of this technology outside of this product is prohibited without the appropriate license(s) from Microsoft.
•“PlayStation” is a registered trademark of Sony Computer Entertainment Inc.
4US

Table of Contents |
|
Guide to parts and controls .......... |
6 |
Getting Started |
|
Hooking up the system |
|
securely ...................................... |
10 |
Positioning the speakers............. |
12 |
Setting the clock......................... |
12 |
Disc |
|
Playing an AUDIO CD/MP3 |
|
disc ............................................. |
12 |
Using play mode ........................ |
13 |
Tuner |
|
Listening to the radio ................. |
14 |
Receiving RDS broadcasts......... |
15 |
USB Device |
|
Before using the USB device |
|
with this system.......................... |
16 |
Transferring music ..................... |
16 |
Playing a file .............................. |
19 |
Sound Adjustment |
|
Adjusting the sound ................... |
21 |
Creating your own sound |
|
effect .......................................... |
21 |
Creating a party atmosphere |
|
(DJ EFFECT) ............................. |
22 |
Other Operations |
|
Singing along ............................ |
22 |
Changing the lighting pattern |
|
on the speakers .......................... |
22 |
Using the timers ........................ |
23 |
Changing the display................. |
24 |
Using optional equipment ......... |
25 |
Deactivating the buttons on the |
|
unit (Child Lock)....................... |
25 |
Additional Information |
|
Playable discs............................ |
25 |
Troubleshooting ........................ |
26 |
Messages ................................... |
30 |
Precautions ................................ |
31 |
Specifications ............................ |
32 |
5US

Guide to parts and controls
This manual mainly explains operations using the unit, but the same operations can also be performed using the buttons on the remote control having the same or similar names.
Unit |
|
|
|
– Front view |
|
|
|
1 2 3 |
4 |
5 4 |
6 |
|
|
|
7 |
qj |
|
|
8 |
9 |
|
|
9 |
qh |
|
|
q; |
qg |
4 qf qd 4 qs qa |
– Top view
qk ql
6US

Remote control RM-SCU37B
wh |
|
1 |
wg |
|
|
|
w; |
|
wf |
|
|
|
wa |
|
wd |
|
|
|
q; |
|
|
BAND |
|
8 |
|
4 |
|
|
|
|
|
9 |
ws |
|
ql |
qj |
|
|
4 |
|
4 |
|
|
5 |
1
"/1 (on/standby)
Turn on the system, or set it to standby mode. The STANDBY indicator lights up in red when the system is turned off.
B
Remote control sensor
C
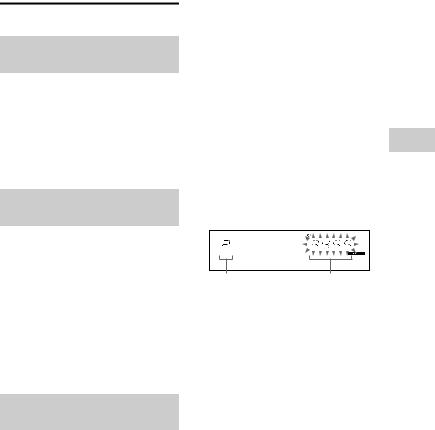
Display panel
D
Unit:  /
/ /
/
 /
/ 

Select the menu items.
 +/– (select folder)
Select a folder on an MP3 disc or a USB device.
m/M (rewind/fast forward)
Hold down to find a point in a track or file during playback.
Unit: l/L (go back/go forward)
Select a track or file.
Remote control: ./>
(go back/go forward)
Select a track or file.
Unit: TUNING +/–
Remote control: +/– (tuning)
Tune to the station you want.
E
Unit: VOLUME/DJ CONTROL
Adjust the volume.
Adjust the DJ EFFECT level (page 22). You cannot use this knob to adjust the volume when the DJ EFFECT is activated.
Remote control: VOLUME +/–*
Adjust the volume.
*The VOLUME + button has a tactile dot. Use the tactile dot as a reference when operating the system.
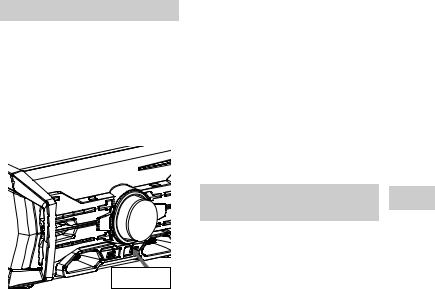
F
Disc slot
G
Z EJECT
Eject a disc.
H
OPTIONS
Enter the option menus.
TUNER/BAND
Select the TUNER function. Select the FM or AM band during TUNER function.
CD
Select the CD function.
Unit: USB/USB SELECT Remote control: USB
Select the USB function.
Select the USB device connected to the  A or
A or  B port during USB function.
Continued l
7US
I
Unit: NX (play/pause) Remote control: N (play), X (pause)
Start or pause playback.
To resume playback of the USB device, press NX or N.
x (stop)
Stop playback.
Press x twice to cancel resume play of the USB device.
J
Unit: PC
Select the PC function.
Unit: TV
Select the TV function.
Unit: DVD/SAT
Select the DVD/SAT function.
Unit: GAME
Select the GAME function.
Remote control: FUNCTION
Select a function.
K
TV L/R jacks
Use an audio cord (not supplied) to connect to the audio output jacks of a TV. The TV sound is output through this system.
L
PC L/R jacks
Use an audio cord (not supplied) to connect to the audio output jacks of an audio equipment. The audio is output through this system.
M
 B (PLAY/REC) port
Connect and transfer to an optional USB device.
 B indicator
Lights up in red when transferring to the connected optional USB device.
N
 A (PLAY) port
Connect an optional USB device.
 A indicator
O
MIC IN jack
Connect a microphone.
MIC LEVEL
Adjust the microphone volume.
P
Unit: FLANGER, ISOLATOR, SOUND FLASH, PHASER
Activate or select the DJ EFFECT type.
Q
Unit: SEARCH
Enter or exit search mode.
Unit: GROOVE
Reinforce the bass.
Unit: PRESET EQ Remote control: EQ
Select the sound effect (page 21).
REC TO USB B
Transfer onto the optional USB device which is connected to the  B port.
R
RETURN
Return to previous selection.
S
ENTER
Enter the settings.
T
CLOCK/TIMER SELECT (page 23) CLOCK/TIMER SET (page 12, 23)
Set the clock and the timers.
8US

U
REPEAT/FM MODE
Listen to a disc, a USB device, a single track or file repeatedly (page 14, 20). Select the FM reception mode (monaural or stereo) (page 14).
V
CLEAR
Delete the last step from the program list.
W
TUNER MEMORY (page 15)
Preset the radio station.
X
PLAY MODE/TUNING MODE
Select the play mode of an AUDIO CD, MP3 disc or a USB device (page 13, 20). Select the tuning mode (page 14).
Y
DISPLAY
Change the information on the display panel.
Z
SLEEP (page 23)
Set the Sleep Timer.
9US

Getting Started
Hooking up the system securely
|
|
ANTENNA |
A |
|
|
|
|
|
|
|
|
FM/AM |
|
|
|
|
|
|
|
|
|
|
C |
|
E |
SPEAKERS |
SPEAKERS |
||
|
|
GAME DVD/SAT |
|
HIGH CHANNEL |
LOW CHANNEL |
||||
B |
|
|
|
R |
L |
R |
L |
||
L |
L |
LED SPEAKER |
|
|
|
|
|
||
|
|
R |
L |
D |
|
|
|
E |
|
|
R |
R |
|
|
|
|
|
||
|
|
|
|
|
|
|
|
||
|
|
|
|
|
|
IMPEDANCE USE 4Ω |
IMPEDANCE USE 4Ω |
||
|
|
F |
|
|
|
|
|
|
|
AAntennas |
|
|
|
|
|
|
|
CDVD/SAT L/R jacks |
|
Find a location and an orientation that provide good reception, and then set up the antennas.
Keep the antennas away from the speaker cords, the power cord and the USB cable to avoid picking up noise.
Extend the FM lead antenna horizontally
AM loop antenna
BGAME L/R jacks
Use an audio cord (not supplied) to connect to the audio output jacks of a gaming device (such as PlayStation 3). The audio is output through this system.
Use an audio cord (not supplied) to connect to the audio output jacks of an audio/video equipment. The audio is output through this system.
DLED SPEAKER terminals
Connect the LED SPEAKER connector of the speaker to this terminal.
The lighting on the speakers will react according to the music source. You can select the lighting pattern according to your preference (page 22).
10US
ESpeakers
The speaker connectors are color-coded with their respective speaker terminals on the unit.
HIGH CHANNEL
White
Red
LOW CHANNEL
Blue
Grey
Notes
•Be sure to use only the supplied speakers.
•When connecting speaker cords, insert the connector straight into the terminals.
FPower
Plug the power cord into a wall socket. The demonstration appears in the display panel. Press "/1 to turn on the system and the demonstration automatically ends.
If the supplied adaptor on the plug does not fit your wall outlet, detach it from the plug (only for models equipped with an adaptor).
Inserting batteries
Insert the two supplied R6 (size AA) batteries, matching the polarities shown below.
Notes
•Do not mix an old battery with a new one or mix different types of batteries.
•If you do not use the remote for a long period of time, remove the batteries to avoid damage from battery leakage and corrosion.
Attaching the speaker foot
Attach the supplied speaker foot at each corner on the bottom of the speakers to stabilize the speakers and to prevent them from slipping.
Started Getting
11US

Positioning the speakers
To obtain optimum performance from the system, we recommend you to place the speakers as shown below.
AUnit
BSpeaker (left)
CSpeaker (right)
B |
C |
|
A |
0.3 m |
0.3 m |
(1 foot) |
(1 foot) |
Setting the clock
You cannot set the clock in Power Saving Mode.
Use the buttons on the remote control to perform this operation.
1 Press "/1 to turn on the system.
2 Press CLOCK/TIMER SET.
If “PLAY SET” appears in the display panel, press ./> repeatedly to select “CLOCK SET”, then press ENTER.
3 Press ./> repeatedly to set the hour, then press ENTER.
4 Press ./> repeatedly to set the minutes, then press ENTER.
Disc
Playing an AUDIO CD/ MP3 disc
1 Press CD.
2 Insert a disc with the label side facing up.
To search a track or MP3 file (TRACK SEARCH)
1Press SEARCH.
2(MP3 files only)
Press  /
/ to select the folder you want, then press ENTER or NX.
3Press  /
/ to select the track or file you want, then press ENTER or
NX.
The selected track or file starts playback.
Notes on playing discs
•The system can recognize up to
–999 folders (including root folder).
–999 MP3 files.
–250 MP3 files on a single folder.
–8 folder levels (tree structure of files).
•CD-TEXT information is not supported.
12US
Using play mode
Playing in original order (Normal Play)
Press PLAY MODE on the remote control repeatedly when playback is stopped.
•(blank): a disc
• *: all MP3 files in the folder on the disc
*When playing an AUDIO CD, “ ” performs the same operation as normal play mode.
Playing in random order (Shuffle Play)
Press PLAY MODE on the remote control repeatedly when playback is stopped.
•SHUF: shuffle a disc.
• SHUF*: shuffle all MP3 files in the folder on the disc
*When playing an AUDIO CD, “ SHUF” performs the same operation as “SHUF” play mode.
Note
When you turn off the system, the selected Shuffle Play is cleared and the play mode returns to Normal Play.
Creating your own program (Program Play)
You can make a program of up to 25 steps in the order you want them to be played back.
Use the buttons on the remote control to perform this operation.
1 For CD function:
Press CD.
For USB function:
Press USB.
2 When playback is stopped, press PLAY MODE repeatedly until “PGM” lights up in the display panel.
3 For USB function:
Press USB repeatedly to select the USB you want.
4 (Audio files only)
Press  +/– repeatedly to select a folder.
If you want to program all files in the folder, press ENTER.
5 Press ./> repeatedly to select the track or file you want, then press ENTER.
Selected track |
Total playing time of |
or file number |
program (including |
|
selected track) |
“--.--” appears when the total playing time exceeds 100 minutes for an AUDIO CD or when you program an audio file.
6 Repeat steps 3 to 5 to program additional tracks or files.
7 Press N to start Program Play.
To cancel Program Play
When playback is stopped, press PLAY MODE on the remote control repeatedly until “PGM” disappear from the display panel.
Continued l
Disc
13US

To delete the last step from the program list
Press CLEAR on the remote control when playback is stopped.
Notes
•(CD function only) The program list remains available until you eject the disc.
•(USB function only) The program list is cleared when you:
–remove the USB device.
–switch the USB memory select.
Playing repeatedly (Repeat Play)
Press REPEAT on the remote control repeatedly.
•REP: repeat all tracks or files
•REP 1: repeat a track or file
Tuner
Listening to the radio
Use the buttons on the remote control to perform this operation.
1 Press TUNER/BAND repeatedly to select FM or AM band.
2 For automatic scanning:
Press TUNING MODE repeatedly until “AUTO” lights up in the display panel. Then, press +/–.
Scanning stops automatically when a station is tuned in, and then “TUNED” and “STEREO” (for FM stereo programs only) light up in the display panel.
If “TUNED” does not light up and scanning does not stop, press x to stop scanning. Then, perform manual tuning (below).
For manual tuning:
Press TUNING MODE repeatedly until “AUTO” and “PRESET” disappear from the display panel. Then, press +/– repeatedly to tune to the station you want.
Tip
To reduce static noise on a weak FM stereo station, press FM MODE repeatedly until “MONO” lights up in the display panel.
To change the AM tuning interval
The default setting for AM tuning interval is 9 kHz (or 10 kHz for some areas). You cannot change the AM tuning interval in Power Saving Mode.
Use the buttons on the unit to perform this operation.
14US

1Press TUNER/BAND repeatedly to select AM band.
2Press "/1 to turn off the system.
3While holding down ENTER, press
"/1.
“AM 9K STEP” or “AM 10K STEP” appears in the display panel.
When you change the interval, all the AM preset stations are erased.
Presetting radio stations
You can store up to 20 FM and 10 AM stations as your favorite stations.
Use the buttons on the remote control to perform this operation.
1 Tune to the station you want.
2 Press TUNER MEMORY.
Preset number
3 Press +/– repeatedly to select the preset number you want, then press ENTER.
“COMPLETE” appears in the display panel. The station is stored.
To tune to a preset station
Press TUNING MODE repeatedly until “PRESET” lights up in the display panel. Then, press +/– repeatedly to select the preset number you want.
Receiving RDS broadcasts
This system allows you to use Radio Data System (RDS), which enables radio stations to send additional information along with the regular programming signal. This system offers convenient RDS features, such as Program Service name display. RDS is available only for FM stations.*
*Not all FM stations provide RDS service, nor do they provide the same type of services. If you are not familiar with the RDS services in your area, check with your local radio stations for details.
Simply select a station on the FM band.
When you tune to a station that provides RDS services, the Program Service name appears in the display panel.
You can check the RDS information by pressing DISPLAY on the remote control repeatedly.
Note
RDS may not work properly if the station you tuned to is not transmitting the RDS signal or if the signal strength is weak.
Tuner
15US

USB Device
Before using the USB device with this system
Check the websites below for the information about compatible USB devices. <http://www.sony.com/shelfsupport>
Note on the maximum number of audio files and folders on a USB device
This system cannot transfer or playback audio files and folders of the USB device in the following cases.
–When the number of audio files in a folder exceeds 250.
–When the number of audio files in a USB device exceeds 3000.
–When the number of folders in a USB device exceeds 1000.
Note
Do not remove the USB device during transferring or erase operations. Doing so may corrupt the data on the USB device or damage the USB device itself.
To select the playback source or transferring destination
If the USB device has more than one memory (for example, internal memory and a memory card), you can select which memory to use as a playback source or transferring destination.
Note
You cannot select a memory during playback or transferring. Make sure to select a memory before starting playback or transferring.
1Connect the USB device to the  A or
A or  B port on the unit.
2Press USB/USB SELECT repeatedly to select “USB A” or “USB B”.
3Press OPTIONS when playback is stopped.
4Press  /
/ to select “USB MEM SEL”, then press ENTER.
5Press  /
/ to select the memory you want, then press ENTER.
6Start playback the audio files of the selected memory or start transferring.
Transferring music
You can transfer music from a sound source to a USB device.
The audio format of files transferred by this system is MP3. However, you can also transfer WMA and AAC files from USB A to USB B.
Notes
•When transferring from an AUDIO CD, the tracks are transferred as 128 kbps MP3 files. When transferring from an MP3 disc, MP3 files are transferred with the same bit rate as the original MP3 files.
When transferring from a USB device, the audio files are transferred with the same bit rate as the original audio files.
•When transferring from TUNER, PC, TV, DVD/SAT, GAME function, the music are transferred as 128 kbps MP3 files.
Note on copyright-protected content
The transferred music is limited to private use only. Use of the music beyond this limit requires permission of the copyright holders.
16US
Transferring music from a disc
You can easily transfer all the music on a disc to a USB device (CD-USB Synchronized Transfer). You can also transfer a single track or MP3 file during playback (REC1 Transferring).
1 Connect a transferable USB device to the  B port as shown below.
USB device
2 Press CD.
3 Insert the disc you want to transfer.
4 For CD-USB Synchronized Transfer:
When playback is stopped, press PLAY MODE on the remote control repeatedly to select the play mode you want.
Note
If you start transferring in Shuffle Play or Repeat Play, the selected play mode is automatically changes to Normal Play.
For REC1 Transferring:
Select the track or MP3 file you want to transfer, then start playback.
5 Press REC TO USB B.
“PUSH ENTER” appears in the display panel.
6 Press ENTER.
Transferring starts when “DON’T REMOVE” appears in the display panel.
For CD-USB Synchronized
Transfer:
When the transferring is completed, the disc and the USB device stop automatically.
For REC1 Transferring:
When the transferring is completed, the disc continues to play.
Transferring analog audio (Analog Transferring)
You can transfer the sound from analog audio sources (other than CD and USB function) to a USB device.
1 Connect a transferable USB device to the  B port on the unit (page 17).
2 Press FUNCTION repeatedly to select the source you want to transfer.
3 Press REC TO USB B.
“PUSH ENTER” appears in the display panel.
4 Press ENTER.
Transferring starts when “DON’T REMOVE” appears in the display panel.
5 Start playback the source.
To stop transferring
Press x.
Continued l
Device USB
17US

To create a new MP3 file
Press REC TO USB B.
“NEW TRACK” appears in the display panel.
If you press REC TO USB B again after a few seconds, a new MP3 file cannot be created.
Note
When a new MP3 file is created, transferring is disabled for the time being.
Tip
A new MP3 file is created automatically after approximately 1 hour of transferring.
Transferring music from USB device
You can easily transfer the audio files from a USB device to another USB device (USB A-USB B Synchronized Transfer). You can also transfer a single audio file during playback (USB A-USB B REC1 Transferring).
1 Connect a transferable USB device to the  B port, then connect the USB device you want to transfer to
  A port.
2 Press USB/USB SELECT repeatedly to select “USB A”.
3 For USB A-USB B Synchronized Transfer:
When playback is stopped, press PLAY MODE on the remote control repeatedly to select the play mode you want.
Note
If you start transferring in “ALL USB”, “ALL USB SHUF”, “1 USB SHUF” and Repeat Play, the play mode automatically changes to “1 USB”.
If you start transferring in “ SHUF”, the play mode automatically changes to “
 ”.
”.
For USB A-USB B REC1
Transferring:
Select the audio file you want to transfer, then start playback.
4 Press REC TO USB B.
“PUSH ENTER” appears in the display panel.
5 Press ENTER.
Transferring starts when “DON’T REMOVE” appears in the display panel.
For USB A-USB B Synchronized
Transfer:
When the transferring is completed, both USB devices stop automatically.
For USB A-USB B REC1
Transferring:
When the transferring is completed, the audio file continues to play.
Folder and file generation rules
When transferring to a USB device, a “MUSIC” folder is created directly below the “ROOT”. Folders and files are generated within this “MUSIC” folder as follows.
CD-USB Synchronized Transfer
Transferring |
Folder name |
File name |
source |
|
|
MP3 |
Same as the transferring source |
|
AUDIO CD |
“CDDA0001”* |
“TRACK001”* |
CD-USB REC1 Transferring
Transferring |
Folder name |
File name |
source |
|
|
|
|
|
MP3 |
|
Same as the |
|
“REC1-MP3” |
transferring |
|
|
source |
AUDIO CD |
“REC1-CD” |
“TRACK001”* |
18US

Analog Transferring
Transferring |
Folder name |
File name |
source |
|
|
|
|
|
FM |
“TUFM0001”* |
“TRACK001”* |
|
|
|
AM |
“TUAM0001”* |
|
|
|
|
PC |
“EXPC0001”* |
|
|
|
|
TV |
“EXTV0001”* |
|
|
|
|
DVD/SAT |
“EXDS0001”* |
|
|
|
|
GAME |
“EXGA0001”* |
|
|
|
|
USB A-USB B Synchronized Transfer
Transferring |
Folder name |
File name |
source |
|
|
Audio files |
Same as the transferring source |
|
(MP3, |
|
|
WMA, |
|
|
AAC) |
|
|
USB A-USB B REC1 Transferring
Transferring |
Folder name |
File name |
|
source |
|
|
|
Audio files |
|
Same as the |
|
(MP3, |
“REC1-MP3” |
transferring |
|
WMA, |
source |
||
|
|||
AAC) |
|
|
*Folder and file numbers are assigned serially thereafter.
Notes on transferring
•While transferring from an MP3 disc, AUDIO CD or USB device, no sound is output.
•CD-TEXT information is not transferred in the created MP3 files.
•Transferring stops automatically if:
–the USB device runs out of space during transferring.
–the number of audio files and folders on the USB device reaches the limit for the number that the system can recognize.
–the function or tuner band is changed.
•If a folder or file that you are trying to transfer already exists on the USB device with the same name, a sequential number is added after the name without overwriting the original folder or file.
•You cannot eject the disc, select another track or file, pause playback or find a point in the track or file during CD-USB Synchronized Transfer or REC1 Transferring.
•When transferring music to a Walkman® using “Media Manager for WALKMAN”, be sure to transfer in MP3 format.
•When connecting a Walkman® to the system, be sure to connect after the display “Creating
Library” or “Creating Database” on the Walkman® has disappeared.
Playing a file
The audio formats that can be played back by this system are as follows:
–MP3: file extension “.mp3”
–WMA: file extension “.wma”
–AAC: file extension “.m4a”, “.mp4” or “.3gp”
If the audio files have the above file extension but are not the respective formats, the system may produce noise or may malfunction.
1 Press USB/USB SELECT repeatedly to select “USB A” or “USB B”.
2 Connect a USB device to the
 A or
A or  B port on the unit.
The display changes as follows: READING txxxx FOLDER*
* “xxxx” represent number of folders.
3 Press NX.
The audio files are played back in alphabetical order.
To search an audio file (TRACK SEARCH)
1Press SEARCH.
2Press  /
/ to select the folder you want, then press ENTER or NX.
Continued l
Device USB
19US

3Press  /
/ to select the audio file you want, then press ENTER or
NX.
The selected file starts playback.
To erase audio files or folders from the USB device
1Connect a USB device to the  A or
A or  B port on the unit.
2Press USB/USB SELECT repeatedly to select “USB A” or “USB B” when playback is stopped.
3Press l/L or  +/– repeatedly to select the audio file or folder.
4Press OPTIONS.
5Press  /
/ to select “USB ERASE”, then press ENTER.
“FOLDER ERASE” or “TRACK ERASE” appears in the display panel.
6Press ENTER.
“COMPLETE” appears in the display panel.
Using play mode
Use the buttons on the remote control to perform this operation.
Playing in original order (Normal Play)
Press PLAY MODE repeatedly when playback is stopped.
•ALL USB: all USB devices
•1 USB: a USB device
• : all audio files in the folder on the USB device
Playing in random order (Shuffle Play)
Press PLAY MODE repeatedly when playback is stopped.
•ALL USB SHUF: shuffle all USB devices
•1 USB SHUF: shuffle a USB device
• SHUF: shuffle all audio files in the folder on the USB device
Note
When you turn off the system, the selected Shuffle Play is cleared and the play mode returns to Normal Play.
Creating your own program (Program Play)
See page 13.
Playing repeatedly (Repeat Play)
Press REPEAT repeatedly.
•REP: repeat all audio files on a USB device
•REP 1: repeat an audio file
Notes on the USB device
•The playback order for the system may differ from the playback order of the connected digital music player.
•Be sure to turn off the system before removing the USB device. Removing the USB device while the system is turned on may corrupt the data on the USB device.
•You cannot erase audio files and folders in Shuffle Play or Program Play.
20US
Sound Adjustment
Adjusting the sound
To |
Do this |
|
|
|
Reinforce the |
Press GROOVE |
|||
bass and create |
repeatedly. |
|
||
a more powerful |
|
|
|
|
sound |
|
|
|
|
|
|
|||
(CD and USB |
1 Press OPTIONS. |
|||
function only) |
2 Press |
/ |
repeatedly |
|
Enhance the |
to select “MP3 |
|||
sound quality of |
BOOSTER+”, then |
|||
press ENTER. |
||||
the audio file |
||||
3 Press |
/ |
to select |
||
|
||||
“AUTO”, then press ENTER.
To exit the OPTIONS menu, press OPTIONS.
To select a preset sound effect
Press PRESET EQ (or EQ on the remote control) repeatedly.
The type of sound effects varies depending on the selected function as below:
•TV function: SPORTS, DRAMA/ NEWS, MOVIE, REGGAETON, FLAT, USER EQ
•DVD/SAT function: MOVIE, Music EQ*, FLAT, USER EQ
•Other functions: Music EQ*, FLAT, USER EQ
*REGGAETON, ROCK, POP, JAZZ, DANCE, TECHNO, SALSA, SAMBA
To cancel preset sound effect, select “FLAT”.
Creating your own sound effect
You can raise or lower the levels of specific frequency ranges and then store the setting in the memory as “USER EQ”.
1 Press OPTIONS.
2 Press  /
/ repeatedly to select “EQ EDIT”, then press ENTER.
3 Press  /
/ repeatedly to adjust the equalizer level, then press ENTER.
|
|
|
|
|
|
|
|
|
|
|
|
|
|
|
|
|
|
|
|
|
|
|
|
|
|
|
|
|
|
|
|
|
|
|
|
|
|
|
|
|
|
|
|
|
|
|
|
|
|
|
|
|
|
|
|
Frequency band |
Equalizer level |
Sound |
|||||||||||
4 Repeat step 3 to adjust the level |
|||||||||||||
|
|||||||||||||
|
of other frequency bands and |
Adjustment |
|||||||||||
|
surround effect. |
|
|
|
|
|
|
|
|||||
|
|
|
|
|
|
|
|
|
|||||
The user equalizer setting is stored when “USER EQ” appears in the display panel.
To call up the user equalizer setting
Press PRESET EQ (or EQ on the remote control) repeatedly to select “USER EQ”.
21US

Creating a party atmosphere
(DJ EFFECT)
1 Press the following button to select the effect type.
•FLANGER: Create a deep flanging effect that is similar to the roar of a jet plane.
•ISOLATOR: Isolate a specific frequency band by adjusting the other frequency bands. For example, when you want to focus on only vocal, etc.
•SOUND FLASH: Flash the sound output. The sound cuts off periodically.
•PHASER: Create a series of peaks and troughs in the frequency spectrum, like a sweeping effect.
2 Turn DJ CONTROL to adjust the effect level.
To turn off the effect
Press the selected effect button again.
Notes
•The DJ EFFECT is automatically turned off when you turn off the system, change the function or change the tuner band.
•If you activate the DJ EFFECT during transferring, the sound effect will not be transferred onto the USB device.
•You cannot use VOLUME/DJ CONTROL to adjust the volume when the DJ EFFECT is activated. Press VOLUME +/– on the remote control to adjust the volume.
Other Operations
Singing along
You can sing along with any audio source that played back on this system.
1 Turn MIC LEVEL to MIN to reduce the microphone volume level.
2 Connect a microphone to the MIC jack on the unit.
3 Start playing the music and adjust the volume.
4 Turn MIC LEVEL to adjust the microphone volume.
If acoustic feedback (howling) occurs, reduce the volume, move the microphone away from the speakers, or change the direction of the microphone.
After you have finished, disconnect the microphone.
Note
During transferring, the sound from microphone will not be transferred onto the USB device.
Changing the lighting pattern on the speakers
1 Press OPTIONS.
2 Press  /
/ repeatedly to select “LED SPEAKER”, then press ENTER.
3 Press  /
/ repeatedly to select the speaker lighting pattern you want, then press ENTER.
To turn off the lighting, select “PATTERN OFF”.
22US
 Loading...