

Page 1
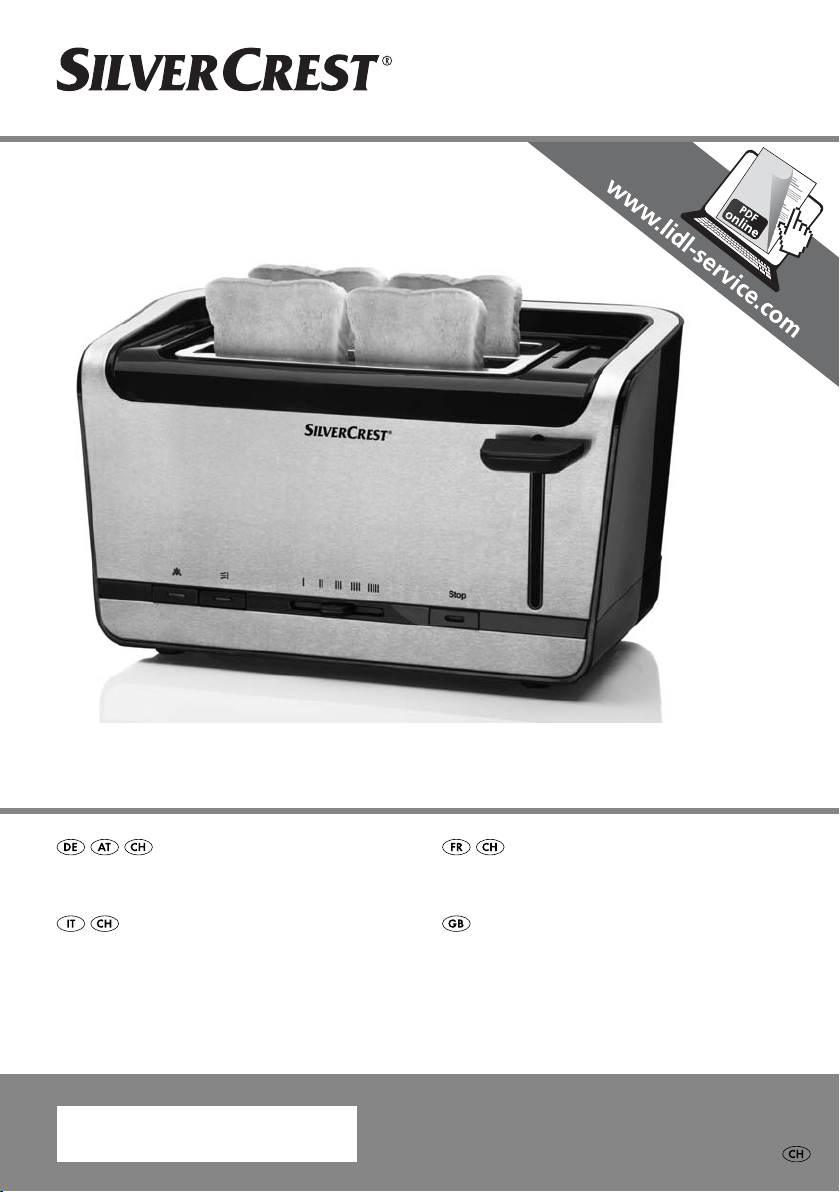
DOPPEL-LANGSCHLITZ-TOASTER SDLTD 1400 A1
DOPPEL-LANGSCHLITZ-TOASTER
Bedienungsanleitung
TOSTAPANE
Istruzioni per l’uso
IAN 72507
GRILLE-PAIN DOUBLE
Mode d’emploi
DOUBLE LONG SLOT TOASTER
Operating instructions
Page 2
Klappen Sie vor dem Lesen die Seite mit den Abbildungen aus und machen Sie sich anschließend mit allen
Funktionen des Gerätes vertraut.
Avant de lire le mode d‘emploi, ouvrez la page contenant les illustrations et familiarisez-vous ensuite avec
toutes les fonctions de l‘appareil.
Prima di leggere aprire la pagina con le immagini e prendere confi denza con le diverse funzioni
dell’apparecchio.
Before reading, unfold the page containing the illustrations and familiarise yourself with all functions of
the device.
DE / AT / CH Bedienungsanleitung Seite 1
FR / CH Mode d’emploi Page 13
IT / CH Istruzioni per l’uso Pagina 25
GB Operating instructions Page 37
Page 3
21
3
6
459 87
Page 4
Inhaltsverzeichnis
Einführung . . . . . . . . . . . . . . . . . . . . . . . . . . . . . . . . . . . . . . . . . . . . . . . . . . . . 2
Urheberrecht . . . . . . . . . . . . . . . . . . . . . . . . . . . . . . . . . . . . . . . . . . . . . . . . . . . . . . . . . . . . 2
Haftungsbeschränkung . . . . . . . . . . . . . . . . . . . . . . . . . . . . . . . . . . . . . . . . . . . . . . . . . . . . 2
Bestimmungsgemäße Verwendung . . . . . . . . . . . . . . . . . . . . . . . . . . . . . . . . . . . . . . . . . . . 2
Lieferumfang . . . . . . . . . . . . . . . . . . . . . . . . . . . . . . . . . . . . . . . . . . . . . . . . . . 3
Entsorgung der Verpackung . . . . . . . . . . . . . . . . . . . . . . . . . . . . . . . . . . . . . . . . . . . . . . . . 3
Gerätebeschreibung . . . . . . . . . . . . . . . . . . . . . . . . . . . . . . . . . . . . . . . . . . . . 3
Technische Daten . . . . . . . . . . . . . . . . . . . . . . . . . . . . . . . . . . . . . . . . . . . . . . . 4
Sicherheitshinweise . . . . . . . . . . . . . . . . . . . . . . . . . . . . . . . . . . . . . . . . . . . . 4
Tipps zum Gebrauch . . . . . . . . . . . . . . . . . . . . . . . . . . . . . . . . . . . . . . . . . . . . 6
Vor der ersten Inbetriebnahme . . . . . . . . . . . . . . . . . . . . . . . . . . . . . . . . . . . 7
Bedienen . . . . . . . . . . . . . . . . . . . . . . . . . . . . . . . . . . . . . . . . . . . . . . . . . . . . . 7
Bräunungsgrad einstellen . . . . . . . . . . . . . . . . . . . . . . . . . . . . . . . . . . . . . . . . . . . . . . . . . . . 7
Toasten. . . . . . . . . . . . . . . . . . . . . . . . . . . . . . . . . . . . . . . . . . . . . . . . . . . . . . . . . . . . . . . . . 7
Toastvorgang unterbrechen . . . . . . . . . . . . . . . . . . . . . . . . . . . . . . . . . . . . . . . . . . . . . . . . . 8
Aufwärm-Funktion . . . . . . . . . . . . . . . . . . . . . . . . . . . . . . . . . . . . . . . . . . . . . . . . . . . . . . . . 8
Auftau-Funktion . . . . . . . . . . . . . . . . . . . . . . . . . . . . . . . . . . . . . . . . . . . . . . . . . . . . . . . . . . 8
Brötchen knusprig aufwärmen . . . . . . . . . . . . . . . . . . . . . . . . . . . . . . . . . . . . . . . . . . . . . . 8
DE
AT
CH
Krümelschublade . . . . . . . . . . . . . . . . . . . . . . . . . . . . . . . . . . . . . . . . . . . . . . 9
Reinigen . . . . . . . . . . . . . . . . . . . . . . . . . . . . . . . . . . . . . . . . . . . . . . . . . . . . . . 9
Aufbewahren . . . . . . . . . . . . . . . . . . . . . . . . . . . . . . . . . . . . . . . . . . . . . . . .10
Fehlerbehebung . . . . . . . . . . . . . . . . . . . . . . . . . . . . . . . . . . . . . . . . . . . . . . 10
Entsorgung. . . . . . . . . . . . . . . . . . . . . . . . . . . . . . . . . . . . . . . . . . . . . . . . . . . 11
Garantie und Service . . . . . . . . . . . . . . . . . . . . . . . . . . . . . . . . . . . . . . . . . . 11
Importeur . . . . . . . . . . . . . . . . . . . . . . . . . . . . . . . . . . . . . . . . . . . . . . . . . . . 12
SDLTD 1400 A1
1
Page 5

DE
AT
CH
Einführung
Herzlichen Glückwunsch zum Kauf Ihres neuen Gerätes!
Sie haben sich damit für ein modernes und hochwertiges Produkt entschieden.
Die Bedienungsanleitung ist Bestandteil dieses Produktes. Sie enthält wichtige
Hinweise für Sicherheit, Gebrauch und Entsorgung. Machen Sie sich vor der
Benutzung des Produkts mit allen Bedien- und Sicherheitshinweisen vertraut.
Benutzen Sie dieses Produkt nur wie beschrieben und für die angegebenen
Einsatzbereiche. Händigen Sie alle Unterlagen bei Weitergabe des Produkts an
Dritte mit aus.
Urheberrecht
Diese Dokumentation ist urheberrechtlich geschützt.
Jede Vervielfältigung, bzw. jeder Nachdruck, auch auszugsweise, sowie die
Wiedergabe der Abbildungen, auch im veränderten Zustand, ist nur mit schriftlicher Zustimmung des Herstellers gestattet.
Haftungsbeschränkung
Alle in dieser Bedienungsanleitung enthaltenen technischen Informationen, Daten
und Hinweise für den Anschluss und die Bedienung entsprechen dem letzten
Stand bei Drucklegung und erfolgen unter Berücksichtigung unserer bisherigen
Erfahrungen und Erkenntnisse nach bestem Wissen.
Aus den Angaben, Abbildungen und Beschreibungen in dieser Anleitung können
keine Ansprüche hergeleitet werden.
Der Hersteller übernimmt keine Haftung für Schäden aufgrund von Nichtbeachtung der Anleitung, nicht bestimmungsgemäßer Verwendung, unsachgemäßen
Reparaturen, unerlaubt vorgenommenen Veränderungen oder Verwendung nicht
zugelassener Ersatzteile.
Bestimmungsgemäße Verwendung
Dieses Gerät ist ausschließlich vorgesehen für das Rösten von Brotscheiben,
Brötchen und Toast für den privaten Gebrauch. Es ist nicht vorgesehen für die
Verwendung mit anderen Lebensmitteln oder anderen Materialien.
Dieses Gerät ist ausschließlich für die Benutzung in privaten Haushalten bestimmt. Benutzen Sie das Gerät nicht gewerblich!
2
SDLTD 1400 A1
Page 6
Lieferumfang
Das Gerät wird standardmäßig mit folgenden Komponenten geliefert:
▯ Doppel-Langschlitz-Toaster
▯ Brötchenaufsatz
▯ Bedienungsanleitung
1)
Entnehmen Sie das Gerät, das Zubehör und die Bedienungsanleitung aus
dem Karton.
2) Entfernen Sie sämtliches Verpackungsmaterial.
HINWEIS
► Prüfen Sie die Lieferung auf Vollständigkeit und auf sichtbare Schäden.
► Bei einer unvollständigen Lieferung oder Schäden infolge mangelhafter
erpackung oder durch Transport wenden Sie sich an die Service-Hotline
V
(siehe Kapitel Garantie und Service).
Entsorgung der Verpackung
Die Verpackung schützt das Gerät vor Transportschäden. Die Verpackungsmaterialien sind nach umweltverträglichen und entsorgungstechnischen Gesichtspunkten ausgewählt und deshalb recyclebar.
Die Rückführung der Verpackung in den Materialkreislauf spart Rohstoff e und
verringert das Abfallaufkommen. Entsorgen Sie nicht mehr benötigte Verpackungsmaterialien gemäß den örtlich geltenden Vorschriften.
HINWEIS
► Heben Sie wenn möglich die Originalverpackung während der Garan-
eit des Gerätes auf, um das Gerät im Garantiefall ordnungsgemäß
tiez
verpacken zu können.
DE
AT
CH
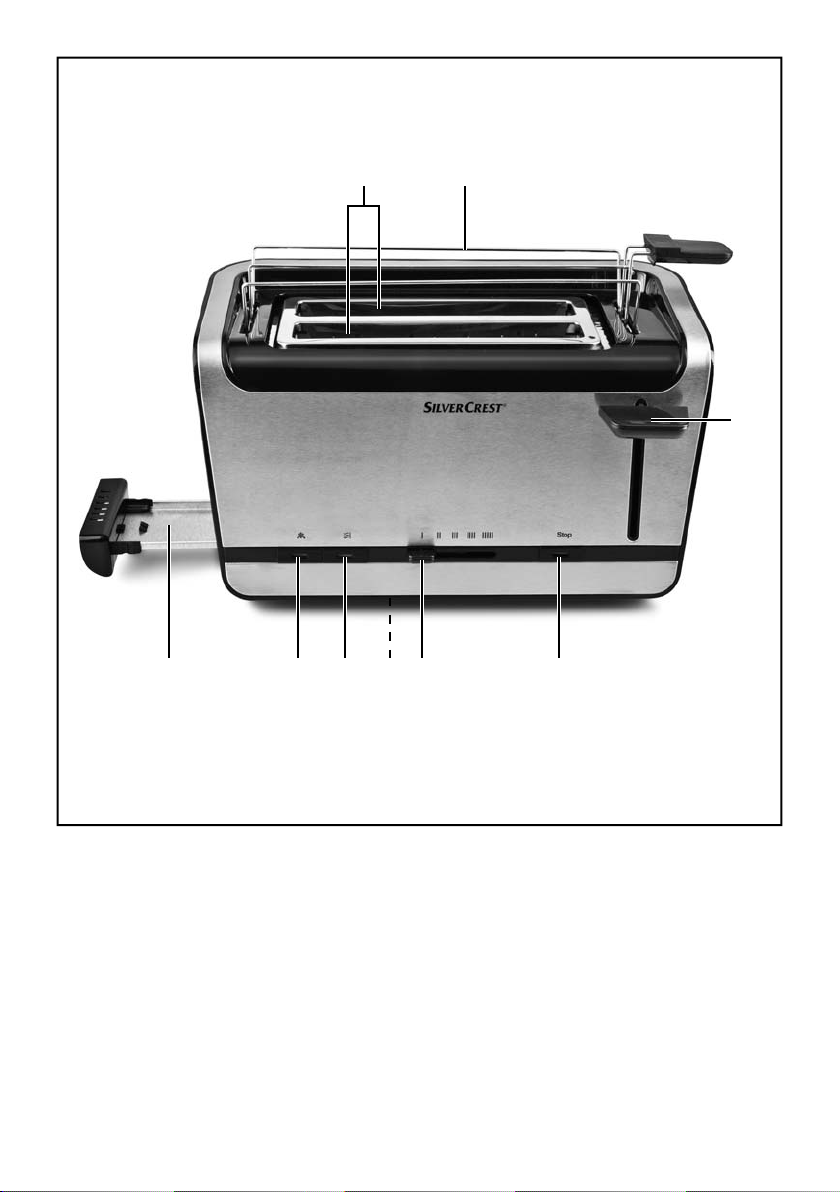
Gerätebeschreibung
1 Röstschächte
2 Brötchenaufsatz
3 Bedientaste
4 Taste „Stop“
5 Bräunungsregler
6 Kabelaufwicklung
7 Taste „Aufwärmen“
8 Taste „Auftauen“
9 Krümelschublade
SDLTD 1400 A1
3
Page 7

DE
AT
CH
Technische Daten
Spannung 220 - 240 V ∼, 50 Hz
Leistungsaufnahme 1200 - 1400 W
Sicherheitshinweise
STROMSCHLAGGEFAHR
► Lassen Sie beschädigte Netzkabel oder Netz-
stecker sofort von autorisiertem Fachpersonal
ersetzen, um Gefährdungen zu vermeiden.
► Verwenden Sie das Gerät nur in trockenen
Räumen, nicht im Freien.
Tauchen Sie das Gerät niemals in Wasser
oder andere Flüssigkeiten! Andernfalls besteht
Lebensgefahr durch elektrischen Schlag.
► Führen Sie nie Besteckteile oder andere metalli-
sche Gegenstände in die Röstschächte ein.
► Stellen Sie sicher, dass das Gerät niemals mit
Wasser in Berührung kommen kann. Betreiben
Sie das Gerät niemals in der Nähe von Wasser
oder neben Gefäßen, die Flüssigkeit enthalten.
► Achten Sie darauf, dass im Betrieb das Netzkabel
niemals nass oder feucht wird. Führen Sie es
so, dass es nicht eingeklemmt oder anderweitig
beschädigt werden kann.
► Ziehen Sie nach Gebrauch immer den Netzstecker
aus der Steckdose, um ein unbeabsichtigtes Einschalten zu vermeiden.
4
SDLTD 1400 A1
Page 8

WARNUNG! VERLETZUNGSGEFAHR!
► Dieses Gerät kann von Kindern ab 8 Jahren
sowie von Personen mit reduzierten physischen,
sensorischen oder mentalen Fähigkeiten oder
Mangel an Erfahrung und/oder Wissen benutzt
werden, wenn sie beaufsichtigt oder bezüglich
des sicheren Gebrauchs des Gerätes unterwiesen
wurden und die daraus resultierenden Gefahren
verstanden haben.
► Kinder dürfen nicht mit dem Gerät spielen.
► Reinigung und Benutzer-Wartung dürfen nicht
durch Kinder durchgeführt werden, es sei denn,
sie sind älter als 8 Jahre und beaufsichtigt.
Kinder jünger als 8 Jahre sind vom Gerät und
der Anschlussleitung fernzuhalten.
► Die Geräteteile können beim Betrieb heiß werden.
DE
AT
CH
Fassen Sie daher nur die Bedienelemente an.
► Betreiben Sie das Gerät nur auf einer stabilen,
rutschfesten und ebenen Stellfl äche.
► Benutzen Sie keine externe Zeitschaltuhr oder
ein separates Fernwirksystem, um das Gerät zu
betreiben.
► Wickeln Sie das Netzkabel vollständig von der Ka-
belaufwicklung ab, bevor Sie das Gerät benutzen.
SDLTD 1400 A1
5
Page 9

DE
AT
CH
ACHTUNG - BRANDGEFAHR!
► Röstgut kann sich entzünden! Stellen Sie das
Gerät deshalb niemals in der Nähe oder unter
brennbaren Gegenständen ab, insbesondere
nicht unter Gardinen oder Hängeschränke.
► Das Gerät darf nicht in der Nähe von brennbaren
Materialien verwendet werden.
► Decken Sie nie den Toaster ab, solange er in
Betrieb ist.
► Betreiben Sie das Gerät niemals unbeaufsichtigt.
Tipps zum Gebrauch
■ Jeder der 2 Röstschächte 1 ist für entweder je 2 Toastscheiben 90 x 90 mm
geeignet, oder für je eine Toastscheibe 120 x 120 mm.
■ Verwenden Sie keine zu großen oder zu dicken Scheiben, da sich diese leicht
v
erklemmen. Sollten sich Brotscheiben verklemmen, ziehen Sie zuerst den Netzstecker aus der Netzsteckdose. Lösen Sie verklemmte Brotscheiben mit einem
stumpfen Holzstab (z.B. einem Pinselstiel). Dabei die Heizdrähte nicht berühren.
■ Unterschiede in der Brotsorte, Feuchte und Dicke der einzelnen Scheiben
beeinfl
ussen die Bräunung des Toastbrotes. Daher sollte das Toastbrot möglichst in einer geschlossenen Verpackung aufbewahrt werden. Probieren Sie
immer zunächst einen niedrigeren Bräunungsgrad aus.
■ Verwenden Sie eine niedrigere Bräunungsstufe, wenn Sie trockenes Brot
br
äunen, da trockenes Brot schneller bräunt als frisches Brot.
■ Stellen Sie eine niedrigere Bräunungsstufe ein, wenn Sie weniger als 4
Scheiben Br
■ Wählen Sie für dunkles Brot eine höhere Bräunungsstufe als für helle Brote,
beispielsw
■ Um eine Überhitzung des Toasters zu vermeiden und eine gleichmäßige
Br
äunung des Brotes zu erhalten, warten Sie zwischen zwei Toastvorgängen
ca. 15 Sekunden.
■ Die höchste Stufe am Bräunungsregler 5 sollten Sie nur für gr
ben dunklen Brotes verwenden. Helles Brot wird mit dieser Bräunungsstufe
anbrennen und ungenießbar. Außerdem kann es zu Rauchentwicklung
kommen. Drücken Sie in diesem Fall sofort die Taste „Stop“ 4 und ziehen
Sie den Netzstecker aus der Netzsteckdose.
ot toasten.
eise Weißbrot.
oße Schei-
6
SDLTD 1400 A1
Page 10

Vor der ersten Inbetriebnahme
■ Betreiben Sie den Toaster 5 mal ohne Toast bei maximaler Bräunungsgrad-
Einstellung (IIIII).
■ Reinigen Sie den Toaster danach wie im Kapitel „Reinigen“ beschrieben.
HINWEIS
► Die Bedientaste 3 r
► Beim ersten Gebrauch kann ein leichter Geruch entstehen (auch geringe
auchentwicklung möglich). Dieser ist normal und verliert sich nach kurzer
R
Zeit. Sorgen Sie bitte für ausreichende Belüftung. Öff nen Sie zum Beispiel
ein Fenster.
astet nur bei angeschlossenem Netzkabel ein.
Bedienen
Bräunungsgrad einstellen
Der gewünschte Bräunungsgrad von „hell“ (I) bis „dunkel“ (IIIII) kann mit dem
Bräunungsregler 5 stufenlos eingestellt werden.
HINWEIS
► Beachten Sie, dass je nach Beladung des Toasters, der Bräunungsgrad bei
gleichbleibender Einstellung des Br
Toastscheiben Sie einlegen, umso höher ist ihr Bräunungsgrad. Stellen Sie
daher den Bräunungsregler 5 bei wenig Beladung immer etwas herunter.
äunungsreglers 5 variiert! Je weniger
DE
AT
CH
Toasten
ACHTUNG - BRANDGEFAHR!
1) Nach dem Einstellen des gewünschten Bräunungsgrades legen Sie das Brot
2) Drücken Sie die Bedientaste 3 nach unten. Die automatische Brotzentrie-
3) Ist der gewünschte Bräunungsgrad erreicht, schaltet sich der Toaster automa-
SDLTD 1400 A1
► Bei Betrieb des Toasters die Röstschächte 1 nicht abdeck
Gefahr eines Brandes! Das Gerät kann irreparabel beschädigt werden!
in den Röstschacht 1 ein.
rung zentriert das eingelegte Brot im Röstschacht 1. Während des Röstvorganges leuchtet die in der Taste „Stop“ 4 integrierte Kontrollleuchte.
tisch ab und die Brotscheiben kommen wieder nach oben, die Kontrollleuchte erlischt.
en. Es besteht die
7
Page 11
DE
AT
CH
Toastvorgang unterbrechen
Wenn Sie den Toastvorgang unterbrechen wollen, drücken Sie die Taste „Stop“ 4.
Der Toaster schaltet sich aus und die Brotscheiben kommen nach oben.
Aufwärm-Funktion
Die Aufwärm-Funktion ermöglicht Ihnen, das Brot zu erwärmen ohne es zu
bräunen. Zum Beispiel, wenn geröstetes Brot wieder erkaltet ist. Das Brot wird nur
kurz erwärmt.
1) Legen Sie das Brot ein und drücken Sie die Bedientaste 3 nach unten.
2) Drücken Sie die Taste „Aufwärmen“
ges leuchtet die in der Taste „Aufwärmen“ 7 integrierte Kontrollleuchte.
3) Wenn das Brot wieder aufgewärmt ist, schaltet sich das Gerät automatisch
ab und die Brotscheiben kommen wieder nach oben.
Auftau-Funktion
Durch Betätigung der Taste „Auftauen“ 8 kann auch eingefrorenes
Toastbrot aufgetaut und getoastet werden. Der Toaster erwärmt das Brot hierbei
langsam.
1) Nach dem Einstellen des gewünschten Bräunungsgrades legen Sie das Brot
in den Röstschacht 1 ein.
2) Drücken Sie die Bedientaste 3 nach unten.
3) Betätigen Sie die Taste „Auftauen“
leuchtet.
4) Wenn der Auftau- und Röstvorgang beendet ist, schaltet sich der Toaster
automatisch ab, die in der Taste „Auftauen“
te erlischt und die Brotscheiben kommen wieder nach oben.
7. Während des Aufwärmvorgan-
8. Die integrierte Kontrollleuchte
8 integrierte Kontrollleuch-
Brötchen knusprig aufwärmen
Legen Sie Brötchen niemals direkt auf den Toaster, sondern verwenden Sie immer
den Brötchenaufsatz 2.
1) Stellen Sie den Brötchenaufsatz 2 auf den Toaster, so dass er fest in den
dafür vorgesehenen Mulden sitzt.
2) Legen Sie die Brötchen darauf und starten Sie den Toastvorgang. Stellen Sie
den Bräunungsregler 5 für eine mittlere Bräune auf Stufe III. Die Bräunung
kann jedoch, je nach Beschaff enheit und Art des Brötchens, unterschiedlich
ausfallen.
8
SDLTD 1400 A1
Page 12
HINWEIS
► Legen Sie die Brötchen so auf den Brötchenaufsatz 2, dass sie nicht dur
den Brötchenaufsatz 2 hindurchfallen können.
► Die Brötchen sind nach dem Röstvorgang sehr heiß.
3)
Sobald sich der Toaster ausschaltet, das Brötchen zur Bräunung der anderen
Seite umdrehen und den Toaster wieder einschalten.
4) Wenn Sie den Brötchenaufsatz 2 nicht mehr benötigen, warten Sie, bis
dieser sich abgekühlt hat und nehmen Sie den Brötchenaufsatz 2 vom
Toaster herunter.
Krümelschublade
Beim Toasten sammeln sich die abfallenden Krümel in der Krümelschublade 9.
1) Zum Entfernen der Krümel ziehen Sie die Krümelschublade 9 zur Seite
heraus.
2) Entfernen Sie die Krümel.
3) Schieben Sie die Krümelschublade 9 wieder in den Toaster, so dass sie
fühlbar einrastet.
Reinigen
STROMSCHLAGGEFAHR
► Ziehen Sie erst den Netzstecker aus der Steckdose, bevor Sie das Gerät
einigen.
r
Tauchen Sie das Gerät niemals in Wasser oder andere Flüssigkeiten! Andernfalls besteht Lebensgefahr durch elektrischen Schlag.
ch
DE
AT
CH
ACHTUNG - SACHSCHADEN!
SDLTD 1400 A1
WARNUNG! VERLETZUNGSGEFAHR!
► Lassen Sie den Toaster vor der Reinigung abkühlen. Verbrennungsgefahr!
► Keine scharfen oder scheuernden Reinigungsmittel verwenden. Das greift
die Oberfl
■ Das Gehäuse reinigen Sie mit einem trockenen Tuch oder leicht angefeuch-
teten Lappen.
■ Entleeren Sie in regelmäßigen Abständen die Krümelschublade 9, um
Br
äche des Gerätes an.
andgefahr zu vermeiden.
9
Page 13
DE
AT
CH
Aufbewahren
■ Bewahren Sie den Toaster an einem trockenen Ort auf.
■ Reinigen Sie den Toaster wie im Kapitel „Reinigen“ beschrieben.
■ Wickeln Sie das Netzkabel um die Kabelaufwicklung 6 an der Unter
des Toasters und fi xieren Sie das Ende des Kabels mit der Klammer.
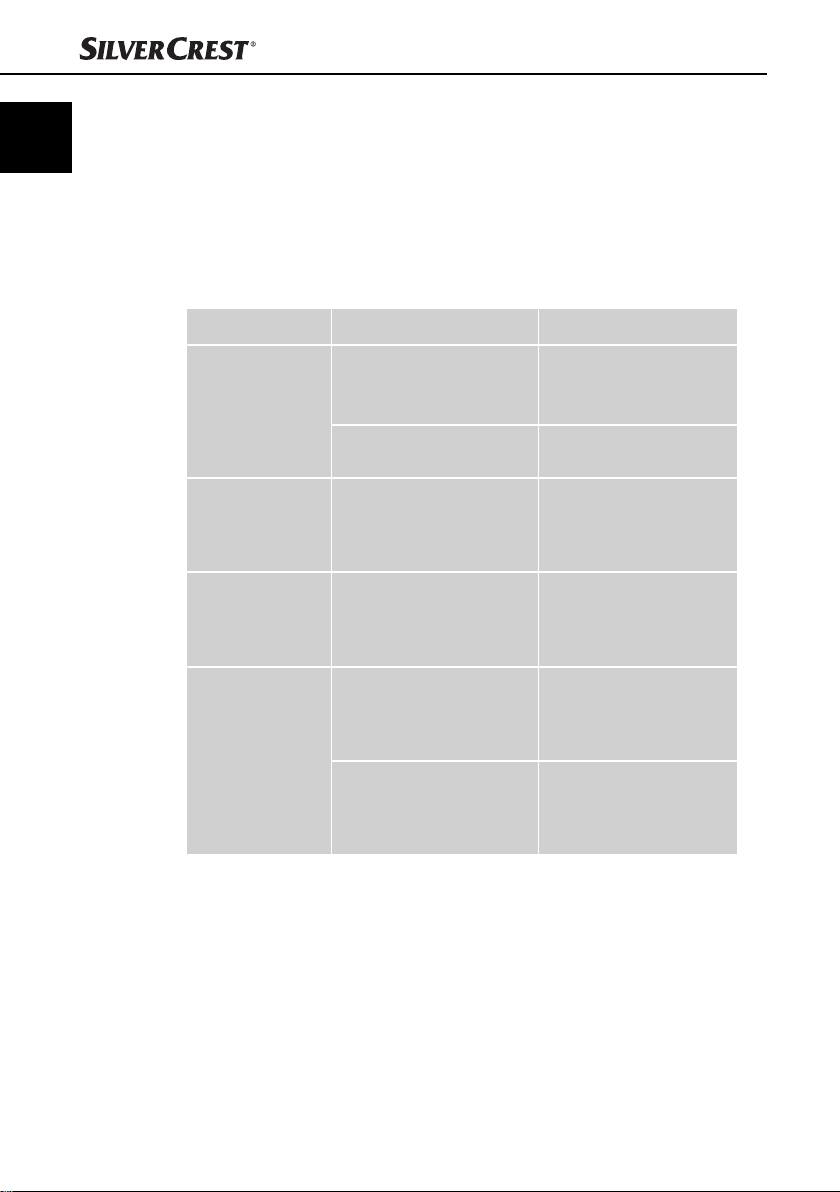
Fehlerbehebung
Störung Ursache Abhilfe
seite
Das Gerät funktioniert nicht.
Die Toastscheiben
werden zu dunkel.
Die Toastscheiben
werden nicht
geröstet.
Die Bedientaste 3
rastet nicht ein,
wenn sie nach
unten gedrückt
wird.
Der Netzstecker steckt nicht
in der Netzsteckdose.
Das Gerät ist defekt.
Es ist ein zu hoher Bräunungsgrad eingestellt.
Es ist ein zu niedriger Bräunungsgrad eingestellt.
Der Netzstecker steckt nicht
in der Netzsteckdose.
Das Gerät ist defekt.
Verbinden Sie den Netzstecker mit dem Stromnetz.
Wenden Sie sich an den
Kundendienst.
Stellen Sie den Bräunungsregler 5 etwas herunter.
Stellen Sie den Bräunungsregler 5 etwas höher.
Stecken Sie den Netzstecker in eine Netzsteckdose.
Wenden Sie sich an den
Kundendienst.
10
SDLTD 1400 A1
Page 14
Entsorgung
Werfen Sie das Gerät keinesfalls in den normalen Hausmüll.
Dieses Produkt unterliegt der europäischen Richtlinie 2002/96/EC
(Waste Electrical and Electronic Equipment).
Entsorgen Sie das Gerät über einen zugelassenen Entsorgungsbetrieb oder über
Ihre kommunale Entsorgungseinrichtung. Beachten Sie die aktuell geltenden
Vorschriften. Setzen Sie sich im Zweifelsfall mit Ihrer Entsorgungseinrichtung in
Verbindung.
Garantie und Service
Sie erhalten auf dieses Gerät 3 Jahre Garantie ab Kaufdatum. Das Gerät wurde
sorgfältig produziert und vor Anlieferung gewissenhaft geprüft.
Bitte bewahren Sie den Kassenbon als Nachweis für den Kauf auf. Bitte setzen
Sie sich im Garantiefall mit Ihrer Servicestelle telefonisch in Verbindung. Nur so
kann eine kostenlose Einsendung Ihrer Ware gewährleistet werden.
HINWEIS
► Die Garantieleistung gilt nur für Material- oder Fabrikationsfehler, nicht
aber für T
zerbrechlichen Teilen, z. B. Schalter oder Akkus.
Das Produkt ist lediglich für den privaten und nicht für den gewerblichen Gebrauch
bestimmt. Bei missbräuchlicher und unsachgemäßer Behandlung, Gewaltanwendung und bei Eingriff en, die nicht von unserer autorisierten Service-Niederlassung
vorgenommen wurden, erlischt die Garantie.
Ihre gesetzlichen Rechte werden durch diese Garantie nicht eingeschränkt. Die
Garantiezeit wird durch die Gewährleistung nicht verlängert. Dies gilt auch für
ersetzte und reparierte Teile.
Eventuell schon beim Kauf vorhandene Schäden und Mängel müssen sofort nach
dem Auspacken gemeldet werden, spätestens aber zwei Tage nach Kaufdatum.
Nach Ablauf der Garantiezeit anfallende Reparaturen sind kostenpfl ichtig.
ransportschäden, Verschleißteile oder für Beschädigungen an
DE
AT
CH
SDLTD 1400 A1
11
Page 15
Service Deutschland
Tel.: 0800 5435 111
E-Mail: kompernass@lidl.de
IAN 72507
Service Österreich
Tel.: 0820 201 222 (0,15 EUR/Min.)
E-Mail: kompernass@lidl.at
IAN 72507
Service Schweiz
Tel.: 0842 665566 (0,08 CHF/Min., Mobilfunk max. 0,40 CHF/Min.)
E-Mail: kompernass@lidl.ch
IAN 72507
Erreichbarkeit Hotline: Montag bis Freitag von 8:00 Uhr – 20:00 Uhr (MEZ)
Importeur
KOMPERNASS HANDELS GMBH
BURGSTRASSE 21
44867 BOCHUM
GERMANY
www.kompernass.com
12
SDLTD 1400 A1
Page 16
Sommaire
Introduction . . . . . . . . . . . . . . . . . . . . . . . . . . . . . . . . . . . . . . . . . . . . . . . . . . 14
Droits d’auteur . . . . . . . . . . . . . . . . . . . . . . . . . . . . . . . . . . . . . . . . . . . . . . . . . . . . . . . . . . 14
Limitation de responsabilité . . . . . . . . . . . . . . . . . . . . . . . . . . . . . . . . . . . . . . . . . . . . . . . . 14
Utilisation conforme . . . . . . . . . . . . . . . . . . . . . . . . . . . . . . . . . . . . . . . . . . . . . . . . . . . . . . 14
Accessoires fournis . . . . . . . . . . . . . . . . . . . . . . . . . . . . . . . . . . . . . . . . . . . . 15
Recyclage de l’emballage . . . . . . . . . . . . . . . . . . . . . . . . . . . . . . . . . . . . . . . . . . . . . . . . . 15
Présentation de l’appareil . . . . . . . . . . . . . . . . . . . . . . . . . . . . . . . . . . . . . . 15
Caractéristiques techniques . . . . . . . . . . . . . . . . . . . . . . . . . . . . . . . . . . . . . 16
Consignes de sécurité . . . . . . . . . . . . . . . . . . . . . . . . . . . . . . . . . . . . . . . . . . 16
Conseils d’usage . . . . . . . . . . . . . . . . . . . . . . . . . . . . . . . . . . . . . . . . . . . . . .18
Avant la première mise en service . . . . . . . . . . . . . . . . . . . . . . . . . . . . . . . 19
Opération . . . . . . . . . . . . . . . . . . . . . . . . . . . . . . . . . . . . . . . . . . . . . . . . . . .19
Régler le degré de dorage . . . . . . . . . . . . . . . . . . . . . . . . . . . . . . . . . . . . . . . . . . . . . . . . 19
Faire griller du pain . . . . . . . . . . . . . . . . . . . . . . . . . . . . . . . . . . . . . . . . . . . . . . . . . . . . . . 19
Interrompre le processus de dorage . . . . . . . . . . . . . . . . . . . . . . . . . . . . . . . . . . . . . . . . . 20
Fonction de réchauff ement . . . . . . . . . . . . . . . . . . . . . . . . . . . . . . . . . . . . . . . . . . . . . . . . 20
Fonction de décongélation . . . . . . . . . . . . . . . . . . . . . . . . . . . . . . . . . . . . . . . . . . . . . . . . 20
Réchauff er les petits pains pour qu’ils soient croustillants . . . . . . . . . . . . . . . . . . . . . . . . . 20
FR
CH
Tiroir ramasse-miettes . . . . . . . . . . . . . . . . . . . . . . . . . . . . . . . . . . . . . . . . . 21
Nettoyage . . . . . . . . . . . . . . . . . . . . . . . . . . . . . . . . . . . . . . . . . . . . . . . . . . . 21
Rangement . . . . . . . . . . . . . . . . . . . . . . . . . . . . . . . . . . . . . . . . . . . . . . . . . . 22
Dépannage . . . . . . . . . . . . . . . . . . . . . . . . . . . . . . . . . . . . . . . . . . . . . . . . . . 22
Mise au rebut . . . . . . . . . . . . . . . . . . . . . . . . . . . . . . . . . . . . . . . . . . . . . . . . 22
Garantie et service après-vente . . . . . . . . . . . . . . . . . . . . . . . . . . . . . . . . . 23
Importateur . . . . . . . . . . . . . . . . . . . . . . . . . . . . . . . . . . . . . . . . . . . . . . . . . . 23
SDLTD 1400 A1
13
Page 17

FR
CH
Introduction
Félicitations pour l’achat de votre nouvel appareil !
Vous avez opté pour un produit moderne, de grande qualité. Le présent mode
d’emploi fait partie intégrante de l’appareil. Il contient des remarques importantes
concernant la sécurité, l’utilisation et la mise au rebut. Veuillez vous familiariser
avec l’ensemble des consignes d’opération et de sécurité avant l’usage du produit.
N’utiliser l’appareil que comme indiqué et pour les domaines d’application spécifi és.
En cas de transfert du produit à un tiers, remettez-lui également tous les documents.
Droits d’auteur
Cette documentation est protégée par les droits d’auteur.
Toute reproduction ou réimpression, même partielle, y compris la reproduction des
illustrations, même modifi ées, n’est autorisée qu’avec l’accord écrit du fabricant.
Limitation de responsabilité
L’ensemble des informations, données et remarques techniques se rapportant
au raccordement et à l’opération contenues dans le présent mode d’emploi sont
conformes au dernier état lors du passage en presse en tenant compte de nos
expériences passées et de nos connaissances en toute bonne foi.
Aucune prétention ne peut être dérivée des indications, photos et descriptions
contenues dans le présent mode d’emploi.
Le fabricant n’assume aucune responsabilité pour les dommages résultant d’un
non-respect du mode d’emploi, d’un usage non conforme, de réparations non
conformes, de modifi cations eff ectuées sans autorisation ou de l’usage de pièces
de rechange non agréées.
Utilisation conforme
Cet appareil est exclusivement destiné à griller des tranches de pain, petits pains
et du pain de mie dans le cadre d’un usage privé. Il n’est pas prévu pour l’usage
avec d’autres aliments ou d’autres matériaux.
Cet appareil est exclusivement destiné à l’usage dans le cadre de ménages
privés. N’utilisez pas l’appareil à des fi ns professionnelles !
14
SDLTD 1400 A1
Page 18

Accessoires fournis
L’appareil est équipé par défaut des composants suivants :
▯ Grille-pain double
▯ Support à petits pains
▯ Mode d’emploi
1)
Retirez l’appareil et le mode d’emploi du carton.
2) Retirez tous les matériaux d’emballage.
REMARQUE
► Vérifi ez que la livraison est bien complète et qu'elle ne présente pas de
dommages appar
► En cas de livraison incomplète ou de dommages résultant d'un emballage
défectueux ou du tr
après-vente (voir le chapitre Garantie et service).
Recyclage de l’emballage
L’emballage protège l’appareil de tous dommages éventuels au cours du transport.
Les matériaux d’emballage ont été sélectionnés selon des critères de respect de
l’environnement et de recyclage, de sorte qu’ils peuvent être recyclés.
Le retour de l’emballage dans le cycle des matériaux permet d’économiser les
matières premières et réduit la formation de déchets. Recyclez les matériaux
d’emballage qui ne sont plus utilisés en conformité avec les règles locales en
vigueur.
ents.
ansport, veuillez vous adresser à la hotline du service
FR
CH
REMARQUE
► Dans la mesure du possible, conservez l'emballage d'origine pendant la
période sous gar
due forme pour l'expédition si vous étiez amené à faire valoir la garantie.
antie, afi n de pouvoir emballer l'appareil en bonne et
Présentation de l’appareil
1 Fente du grille-pain
2 Support à petits pains
3 Touche d’opération
4 Touche «Stop»
5 Régulateur de dorage
6 Enroulement du cordon
7 Touche «réchauff er»
8 Touche «Décongélation»
9 Tiroir ramasse-miettes
SDLTD 1400 A1
15
Page 19

FR
CH
Caractéristiques techniques
Tension 220 - 240 V ∼, 50 Hz
Puissance absorbée 1200 - 1400 W
Consignes de sécurité
RISQUE D'ÉLECTROCUTION
► Faites remplacer aussitôt un cordon d'alimenta-
tion ou une fi che secteur endommagée par des
techniciens spécialisés agréés, afi n d'éviter tous
dangers.
► Utiliser l'appareil exclusivement dans des locaux
secs, surtout pas en extérieur.
N'immergez jamais l'appareil dans de l'eau
ou dans d'autres liquides ! Sinon, il y a danger
de mort par électrocution.
► N'insérez pas de couverts ou d'autres objets
métalliques dans les fentes du grille-pain.
► Assurez-vous que l'appareil ne puisse jamais
entrer en contact avec de l'eau. N'opérez jamais
l'appareil à proximité d'eau ou à côté de récipients qui contiennent des liquides.
► Veillez à ce que le cordon d'alimentation ne soit
jamais mouillé ou humide en cours d'opération.
Disposez le cordon de manière à éviter qu'il ne
soit ni endommagé, ni coincé.
► Après utilisation, débranchez toujours la fi che
secteur de la prise secteur pour éviter tout déclenchement par inadvertance.
16
SDLTD 1400 A1
Page 20

AVERTISSEMENT ! RISQUE D'ACCIDENT !
► Cet appareil peut être opéré par des enfants
à partir de 8 ans ainsi que des personnes aux
capacités physiques, sensorielles ou mentales
réduites ou une absence d'expérience et/ou de
savoir, s'ils ont été supervisés ou initiés à l'usage
en toute sécurité de l'appareil et ont compris les
dangers qui en résultent.
► Les enfants ne doivent pas jouer avec l'appareil.
► Le nettoyage et la maintenance réalisée par
l'utilisateur ne doivent pas être eff ectués par des
enfants à moins qu'ils soient âgés de plus de 8
ans et supervisés. Les enfants âgés de moins de
8 ans doivent être tenus hors de portée du cordon d'alimentation.
► Les pièces de l'appareil peuvent chauff er en
FR
CH
cours d'utilisation. Pour cette raison, ne touchez
que les éléments de réglage.
► Opérez l’appareil uniquement sur une surface de
dépôt stable, antidérapante et plane.
► Ne pas utiliser de minuterie externe ou de disposi-
tif de commande à distance pour faire fonctionner
l’appareil.
► Dérouler le câble secteur intégralement du dis-
positif d’enroulement du câble, avant d’utiliser
l’appareil.
SDLTD 1400 A1
17
Page 21

FR
CH
ATTENTION - RISQUE D'INCENDIE !
► Les aliments qu'il est prévu de griller peuvent
s'enfl ammer ! Ne posez jamais l'appareil à
proximité ou sous des objets infl ammables,
tout particulièrement pas sous des rideaux
ou des armoires suspendues.
► Il est absolument interdit d'utiliser l'appareil à
proximité de matériaux infl ammables.
► Ne recouvrez jamais le grille-pain aussi
longtemps qu'il est en opération.
► N’opérez jamais l’appareil sans surveillance.
Conseils d’usage
■ Chacune des 2 fentes de grille-pain 1 est prévue soit pour 2 tranches de
90 x 90 mm ou une tranche de 120 x 120 mm.
■ N’utilisez pas de tranches trop grandes ou trop épaisses, dans la mesure où
elles peuv
retirez tout d’abord la fi che secteur de la prise secteur. Retirez les tranches
de pain coincées à l’aide d’une tige de bois non pointue (par ex. le bâton
d’un pinceau). Ce faisant, ne touchez pas les fi laments chauff ants.
■ Les diff érences au niveau des variétés de pain, de l’humidité et de l’épaisseur
des diff
pourquoi les tranches de pain à griller devraient dans la mesure du possible
être conservées dans un conteneur fermé. Essayez dans un premier temps
toujours un degré de dorage plus faible.
■ Utilisez un degré de dorage plus faible, lorsque vous grillez du pain sec,
dans la mesur
■ Réglez un degré de dorage plus faible si vous grillez moins de 4 tranches de pain.
■ Sélectionnez un degré de dorage plus élevé pour le pain foncé que pour
les pains clair
■ Pour éviter toute surchauff e du grille-pain et parvenir au dorage régulier du
pain, il faut attendr
Nous vous recommandons d’utiliser le degré le plus élevé au niveau du régula-
■
teur de dorage 5 uniquement pour les grandes tranches de pain foncé. Le pain
clair risque de brûler avec ce degré de dorage et sera impropre à la consommation. De la fumée peut par ailleurs se dégager. Dans ce cas, appuyez immédiatement sur la touche «Stop» 4 et retirez la fi che secteur de la prise secteur.
ent facilement se coincer. Si des tranches venaient à se coincer,
érentes tranches infl uent sur le degré de dorage du pain grillé. Voilà
e où le pain sec se dore plus rapidement que le pain frais.
s, par ex. le pain blanc.
e env. 15 secondes entre deux processus de dorage.
18
SDLTD 1400 A1
Page 22

Avant la première mise en service
■ Opérez le grille-pain 5 fois sans pain à degré de dorage/réglage maximal
(IIIII).
■ Nettoyez ensuite le grille-pain conformément à la description dans le
chapitre «Nettoyage».
REMARQUE
► La touche d'opération 3 ne s'enclenche qu'à partir du moment où le
cordon d'alimentation est raccordé.
► Lors de la première utilisation, une légère odeur peut se dégager (voire même
un peu de fumée). Ce phénomène est normal et s'estompe rapidement.
Veuillez à assurer une aération suffi sante. Ouvrez par exemple une fenêtre.
Opération
Régler le degré de dorage
Le degré de dorage de «clair» (I) à «foncé» (IIIII) recherché peut être réglé en
continu à l’aide du régulateur de dorage 5.
REMARQUE
► Veuillez noter qu'en fonction de la charge du grille-pain, le degré de dorage
varie même lorsque le réglage du régulateur de dorage 5 reste le même !
Moins vous insérez de tranches de pain, plus élevé sera le degré de dorage.
Voilà pourquoi nous vous recommandons de baisser quelque peu le régulateur de dorage 5 en cas de charge moindre.
FR
CH
Faire griller du pain
ATTENTION - RISQUE D'INCENDIE !
► Lors de l'opération du grille-pain, ne pas recouvrir la fente du grille-pain 1.
Il y a un risque d'incendie ! L'appareil risque alors d'être endommagé de
manière irréparable.
1) Après avoir procédé au réglage du degré de dorage souhaité, insérez le
pain dans la fente du grille-pain 1.
2) Pressez la touche d’opération 3 vers le bas. Le centrage automatique du pain
centre le pain inséré dans le fente du grille-pain 1. Au cours du processus de
dorage, le témoin de contrôle intégré dans la touche «Stop» 4 s’allume.
3) Si le degré de dorage souhaité est atteint, le grille-pain s’éteint automatiquement et les tranches de pain remontent, le témoin de contrôle s’éteint.
SDLTD 1400 A1
19
Page 23

FR
CH
Interrompre le processus de dorage
Si vous souhaitez interrompre le processus de dorage, appuyez sur la touche
«Stop» 4. Le grille-pain s’éteint et les tranches de pain remontent à la surface.
Fonction de réchauff ement
La fonction de réchauff ement vous permet de réchauff er le pain sans le dorer.
Par exemple lorsque du pain grillé est à nouveau refroidi. Le pain est uniquement
réchauff é sur une courte période.
1) Insérez le pain et appuyez la touche d’opération 3 vers le bas.
2) Appuyez sur la touche «réchauff er»
fement, le témoin de contrôle intégré dans la touche «réchauff er» 7
s’allume.
3) Dès que le pain est à nouveau réchauff é, l’appareil s’éteint automatiquement
et les tranches de pain remontent à la surface.
7. Au cours du processus de réchauf-
Fonction de décongélation
En actionnant la touche «Décongélation» 8, vous pouvez décongeler et
griller du pain. Avec cette fonction, le grille-pain réchauff e lentement le pain.
1) Après avoir procédé au réglage du degré de dorage souhaité, insérez le
pain dans la fente du grille-pain 1.
2) Pressez la touche d’opération 3 vers le bas.
3) Appuyez sur la touche «Décongélation»
intégrée s’allume.
4) Dès que le processus de décongélation et de dorage est terminé, le grillepain s’éteint automatiquement, la lampe témoin intégrée dans la touche
«Décongélation»
surface.
8 s’éteint et les tranches de pain remontent à la
8. L’indicateur de témoin
Réchauff er les petits pains pour qu’ils soient croustillants
Ne placez jamais directement les petits pains sur le grille-pain, mais utilisez
toujours le support à petits pains 2.
1) Disposez le support de petit pain 2 sur le grille-pain en vérifi ant qu’il repose
bien sur l’emplacement prévu.
2) Posez les petits pains et commencez à les faire griller. Mettez le régulateur 5
sur le niveau III (intensité moyenne de dorage). Le résultat en fi nal peut varier
selon le type de pain et ses caractéristiques.
20
SDLTD 1400 A1
Page 24

REMARQUE
► Placez les petits pains sur le support à petits pains 2, de telle manièr
qu'ils ne puissent pas tomber à travers le support à petits pains 2.
► Une fois qu'ils sont grillés, les petits pains sont très chauds.
Dès que le grille-pain s’éteint, tournez le petit pain sur l’autre côté pour le
3)
dorer et remettre le grille-pain en marche.
4) Lorsque vous n’avez plus besoin du support à petits pains 2, attendez qu’il
se refroidisse avant de retirer le support à petits pains 2 du grille-pain.
Tiroir ramasse-miettes
Lors du processus de dorage, les miettes tombent dans le tiroir ramasse-miettes 9.
1) Pour éliminer les miettes, retirez le tiroir ramasse-miettes 9 en le faisant
glisser sur le côté.
2) Retirez les miettes.
3) Faites à nouveau glisser le tiroir ramasse-miettes 9 dans le grille-pain, afi n
qu’il s’enclenche de manière sensible.
Nettoyage
RISQUE D'ÉLECTROCUTION
► Débranchez tout d'abord la fi che de la prise secteur avant de nettoyer
eil.
l'appar
N'immergez jamais l'appareil dans de l'eau ou dans d'autres
liquides ! Sinon, il y a danger de mort par électrocution.
e
FR
CH
ATTENTION - RISQUE DE DÉGÂTS MATÉRIELS !
SDLTD 1400 A1
AVERTISSEMENT ! RISQUE D'ACCIDENT !
► Laissez refroidir le grille-pain avant de procéder au nettoyage. Risque de
e !
brûlur
► N'utilisez pas de produit de nettoyage abrasif ou agressif. Il risque d'attaquer
a surface de l'appareil.
l
■ Nettoyez le boîtier avec un chiff on sec ou légèrement humidifi é.
■ Videz le tiroir ramasse-miettes 9, à inter
risque d’incendie.
valles réguliers, afi n d’éviter tout
21
Page 25

FR
CH
Rangement
■ Conservez le grille-pain dans un endroit sec.
■ Nettoyez le grille-pain conformément aux consignes du chapitre «Nettoyage
et entr
■ Enroulez le câble secteur autour du dispositif d’enroulement 6 en bas du
grille-pain et fi
Dépannage
Panne Cause Remède
etien».
xez l’extrémité du câble à l’aide d’une pince.
L'appareil ne
fonctionne pas.
Les tranches de
pain sont trop
foncées.
Les tranches de
pain ne sont pas
grillées.
Le touche
d'opération 3
ne s'enclenche
pas, lorsqu'on la
pousse vers le bas.
Mise au rebut
L’appareil ne doit jamais être jeté dans la poubelle domestique
normale.
Ce produit est assujetti à la directive européenne 2002/96/EC
(Waste Electrical and Electronic Equipment).
Remettez l’appareil destiné au recyclage à une entreprise spécialisée ou au
centre de recyclage de votre commune. Respectez la réglementation en vigueur.
En cas de doutes, contactez votre organisme de recyclage.
La fi che secteur n'a pas
été insérée dans la prise
secteur.
L'appareil est défectueux.
Le degré de dorage réglé
est trop élevé.
Le degré de dorage réglé
est trop faible.
La fi che secteur n'est pas
insérée dans la prise
secteur.
L'appareil est défectueux.
Raccordez la fi che secteur
au réseau électrique.
Adressez-vous au
service clientèle
Réduisez un peu le
degré de régulateur
de dorage 5.
Augmentez un peu le
degré de régulateur
de dorage 5.
Enfi chez la fi che secteur
dans une prise électrique.
Adressez-vous au service
clientèle.
22
SDLTD 1400 A1
Page 26

Garantie et service après-vente
Cet appareil bénéfi cie de 3 ans de garantie à compter de la date d’achat. L’appareil
a été fabriqué avec soin et consciencieusement contrôlé avant sa distribution.
Veuillez conserver le ticket de caisse en guise de preuve d’achat. Dans le cas où la
garantie s’applique, veuillez appeler le service après-vente compétent. Cette condition doit être respectée pour assurer l’expédition gratuite de votre marchandise.
REMARQUE
► Cette garantie concerne uniquement les vices de fabrication et ne couvre
pas les dommages de tr
par des éléments fragiles, par ex. le commutateur ou les accus.
Ce matériel est exclusivement destiné à un usage privé et non commercial. La
garantie est annulée en cas d’utilisation incorrecte et inappropriée, d’utilisation
brutale et en cas d’intervention qui n’aurait pas été réalisée par un centre de
service après-vente agréé.
Cette garantie ne constitue pas une restriction de vos droits légaux. La période sous
garantie n’est pas prolongée par la garantie du fabricant. Ceci vaut également pour
les pièces remplacées et réparées.
Tous dommages et défauts éventuellement déjà présents à l’achat doivent être notifi és
immédiatement après le déballage, au plus tard deux jours après la date d’achat.
Toutes réparations eff ectuées après la période sous garantie sont payantes.
Service France
Tel.: 0800 919270
E-Mail: kompernass@lidl.fr
IAN 72507
ansport, les pièces d'usure ou les dommages subis
FR
CH
Service Suisse
Tel.: 0842 665566 (0,08 CHF/Min., mobile max. 0,40 CHF/Min.)
E-Mail: kompernass@lidl.ch
IAN 72507
Heures de service de notre hotline : du lundi au vendredi de 8 h à 20 h (HEC)
Importateur
KOMPERNASS HANDELS GMBH
BURGSTRASSE 21
44867 BOCHUM
GERMANY
www.kompernass.com
SDLTD 1400 A1
23
Page 27

2424
SDLTD 1400 A1
Page 28

Indice
Introduzione . . . . . . . . . . . . . . . . . . . . . . . . . . . . . . . . . . . . . . . . . . . . . . . . . 26
Diritto d'autore . . . . . . . . . . . . . . . . . . . . . . . . . . . . . . . . . . . . . . . . . . . . . . . . . . . . . . . . . . 26
Limitazione di responsabilità . . . . . . . . . . . . . . . . . . . . . . . . . . . . . . . . . . . . . . . . . . . . . . . 26
Uso conforme . . . . . . . . . . . . . . . . . . . . . . . . . . . . . . . . . . . . . . . . . . . . . . . . . . . . . . . . . . 26
Volume della fornitura . . . . . . . . . . . . . . . . . . . . . . . . . . . . . . . . . . . . . . . . . 27
Smaltimento della confezione . . . . . . . . . . . . . . . . . . . . . . . . . . . . . . . . . . . . . . . . . . . . . . 27
Descrizione dell'apparecchio . . . . . . . . . . . . . . . . . . . . . . . . . . . . . . . . . . . .27
Dati tecnici . . . . . . . . . . . . . . . . . . . . . . . . . . . . . . . . . . . . . . . . . . . . . . . . . . . 28
Indicazioni di sicurezza . . . . . . . . . . . . . . . . . . . . . . . . . . . . . . . . . . . . . . . . 28
Consigli per l'uso . . . . . . . . . . . . . . . . . . . . . . . . . . . . . . . . . . . . . . . . . . . . . . 30
Prima di utilizzare l'apparecchio per la prima volta . . . . . . . . . . . . . . . . . 31
Uso . . . . . . . . . . . . . . . . . . . . . . . . . . . . . . . . . . . . . . . . . . . . . . . . . . . . . . . . 31
Regolazione del grado di doratura . . . . . . . . . . . . . . . . . . . . . . . . . . . . . . . . . . . . . . . . . . 31
Tostatura . . . . . . . . . . . . . . . . . . . . . . . . . . . . . . . . . . . . . . . . . . . . . . . . . . . . . . . . . . . . . . 31
Interruzione del procedimento di tostatura . . . . . . . . . . . . . . . . . . . . . . . . . . . . . . . . . . . . 32
Funzione di riscaldamento . . . . . . . . . . . . . . . . . . . . . . . . . . . . . . . . . . . . . . . . . . . . . . . . 32
Funzione di scongelamento . . . . . . . . . . . . . . . . . . . . . . . . . . . . . . . . . . . . . . . . . . . . . . . 32
Riscaldamento dei panini . . . . . . . . . . . . . . . . . . . . . . . . . . . . . . . . . . . . . . . . . . . . . . . . . 32
IT
CH
Cassetto di raccolta delle briciole . . . . . . . . . . . . . . . . . . . . . . . . . . . . . . . .33
Pulizia . . . . . . . . . . . . . . . . . . . . . . . . . . . . . . . . . . . . . . . . . . . . . . . . . . . . . . 33
Conservazione . . . . . . . . . . . . . . . . . . . . . . . . . . . . . . . . . . . . . . . . . . . . . . . 34
Guasti e possibili rimedi . . . . . . . . . . . . . . . . . . . . . . . . . . . . . . . . . . . . . . . . 34
Smaltimento . . . . . . . . . . . . . . . . . . . . . . . . . . . . . . . . . . . . . . . . . . . . . . . . . 34
Garanzia e assistenza . . . . . . . . . . . . . . . . . . . . . . . . . . . . . . . . . . . . . . . . . 35
Importatore . . . . . . . . . . . . . . . . . . . . . . . . . . . . . . . . . . . . . . . . . . . . . . . . . . 35
SDLTD 1400 A1
25
Page 29

IT
CH
Introduzione
Congratulazioni per l'acquisto del nuovo apparecchio!
Lei ha scelto un prodotto moderno e di alta qualità. Il manuale di istruzioni è
parte integrante del presente prodotto. Esso contiene importanti indicazioni per
la sicurezza, l'uso e lo smaltimento. Prima di utilizzare il prodotto, si familiarizzi
con tutte le indicazioni relative ai comandi e alla sicurezza. Utilizzi il prodotto
solo come descritto e per i campi di impiego indicati. In caso di cessione del
prodotto a terzi, consegni anche tutta la documentazione relativa.
Diritto d'autore
La presente documentazione è tutelata dal diritto d'autore.
Qualsiasi riproduzione o ristampa, anche parziale, ovvero la riproduzione delle
immagini, anche se modifi cate, è consentita solo previo permesso scritto del
produttore.
Limitazione di responsabilità
Tutte le informazioni tecniche contenute nel presente manuale di istruzioni, i dati
e le indicazioni relativi al collegamento e all'uso, corrispondono allo stato più
aggiornato al momento dell'invio in stampa e contengono le nostre esperienze
e conoscenze più attuali.
I dati, le illustrazioni e le descrizioni contenute nel presente manuale di istruzioni
non costituiscono una base valida per alcun tipo di rivendicazione.
Il produttore non si assume alcuna responsabilità per i danni derivanti da mancata osservanza del manuale di istruzioni, uso non conforme, riparazioni non
professionali, modifi che non consentite o uso di parti di ricambio non omologate.
Uso conforme
26
Il presente apparecchio è previsto esclusivamente per la tostatura di fette di pane,
panini e toast per uso domestico.Non è previsto per l'impiego con altri cibi o
altri materiali.
Questo apparecchio è destinato esclusivamente all'uso in ambienti domestici
privati. Non utilizzare l'apparecchio a fi ni commerciali!
SDLTD 1400 A1
Page 30

Volume della fornitura
La fornitura standard dell'apparecchio comprende i seguenti componenti:
▯ Tostapane
▯ Accessorio per panini
▯ Istruzioni per l'uso
1)
Rimuovere l'apparecchio e il manuale di istruzioni dal cartone.
2) Rimuovere completamente il materiale di imballaggio.
AVVERTENZA
► Controllare la completezza e integrità della fornitura in relazione ai danni
visibili.
► In caso di fornitura incompleta o in presenza di danni derivanti da imballag-
ciente o causati dal trasporto, rivolgersi alla Hotline di assistenza
gio insuffi
(v. capitolo Garanzia e assistenza).
Smaltimento della confezione
L'imballaggio protegge l'apparecchio dai danni da trasporto. I materiali di
imballaggio sono stati selezionati in relazione alla loro ecocompatibilità e
alle caratteristiche di smaltimento, e pertanto sono riciclabili.
Il riciclo dell'imballaggio consente di risparmiare materie prime e riduce la
generazione di rifi uti. Smaltire il materiale di imballaggio inutilizzato in conformità alle norme vigenti localmente.
AVVERTENZA
► Durante il periodo di validità della garanzia, se possibile, conservare
l'imballaggio originale, per poter imballar
in caso di intervento in garanzia.
IT
CH
e adeguatamente l'apparecchio
Descrizione dell'apparecchio
1 Vani di tostatura
2 Accessorio panini
3 Tasto di comando
4 Tasto “Stop”
5 Timer di regolazione della tostatura
6 Dispositivo di avvolgimento del cavo
7 Tasto “Riscaldamento”
8 Tasto “Scongelamento”
9 Cassetto di raccolta delle briciole
SDLTD 1400 A1
27
Page 31

IT
CH
Dati tecnici
Tensione 220 - 240 V ∼, 50 Hz
Assorbimento di potenza 1200 - 1400 W
Indicazioni di sicurezza
PERICOLO DI SCOSSA ELETTRICA
► Fare sostituire immediatamente il cavo o la spina
di rete danneggiato da personale specializzato
autorizzato, per evitare pericoli.
► Utilizzare l'apparecchio solo in ambienti asciutti,
non all'aperto.
Non immergere mai l'apparecchio in acqua
o altri liquidi! In caso contrario, sussiste il
pericolo di morte per folgorazione.
► Non inserire mai posate o altri oggetti metallici
nel vano di tostatura.
► Impedire che l'apparecchio venga a contatto con
l'acqua. Non azionare mai l'apparecchio nelle
vicinanze di acqua o di contenitori pieni d'acqua.
► Impedire che il cavo di rete si bagni o inumidisca
durante l'uso dell'apparecchio. Disporlo in modo
tale che non venga schiacciato o possa essere
danneggiato in altro modo.
► Dopo l'uso staccare sempre la spina dalla presa
di rete, per evitare un'accensione involontaria
dell'apparecchio.
28
SDLTD 1400 A1
Page 32

AVVISO! PERICOLO DI LESIONI!
► Questo apparecchio può essere utilizzato dai
bambini di almeno 8 anni di età e da persone
con capacità fi siche, sensoriali o mentali ridotte o
insuffi ciente esperienza o conoscenza solo se sorvegliati o istruiti sull'uso sicuro dell'apparecchio e
qualora ne abbiano compreso i risultanti pericoli.
► I bambini non devono giocare con l'apparecchio.
► La pulizia e la manutenzione a cura dell'utente
non devono essere eseguiti dai bambini, a meno
che non abbiano almeno 8 anni di età e non siano sorvegliati. Tenere lontano dall'apparecchio i
bambini di età inferiore agli 8 anni.
► I componenti dell'apparecchio possono surri-
scaldarsi durante l'uso. Toccare quindi solo gli
elementi di comando.
IT
CH
► Azionare l’apparecchio solo su una superfi cie
stabile, antisdrucciolevole e piana.
► Non utilizzare timer esterni o un sistema di tele-
comando separato per azionare l’apparecchio.
► Svolgere sempre completamente il cavo dal
dispositivo di avvolgimento del cavo prima di
utilizzare l’apparecchio.
SDLTD 1400 A1
29
Page 33

IT
CH
ATTENZIONE PERICOLO DI INCENDIO!
► Gli alimenti in cottura possono incendiarsi! Pertan-
to, non posizionare mai l'apparecchio in prossimità
o al di sotto di oggetti infi ammabili, in particolare
sotto tendine o pensili.
► L'apparecchio non deve essere utilizzato nelle
immediate vicinanze di materiali infi ammabili.
► Non coprire mai il tostapane mentre è in funzione.
► Non azionare mai l’apparecchio incustodito.
Consigli per l'uso
■ Ognuno dei 2 vani di tostatura 1 è previsto per 2 fette di toast da 90 x 90 mm
o per una fetta di toast da 120 x 120 mm.
■ Non utilizzare fette troppo grosse o troppo spesse, poiché potrebbero inca-
str
arsi facilmente. Se le fette di pane si incastrassero, staccare prima la spina
dalla presa di rete. Staccare le fette di pane incastrato con un bastoncino di
legno non appuntito (ad esempio il manico di un pennello). Nel farlo non
toccare le resistenze.
■ Le diff erenze nel tipo di pane, umidità e spessore delle singole fette infl uiscono
sul gr
ado di doratura del pane da tostare. Si consiglia pertanto di conservare
il pane da tostare in una confezione chiusa. Provare sempre prima con un
grado di doratura più basso.
■ Utilizzare un livello di doratura più basso se si desidera tostare il pane secco,
p
oiché esso si scurisce più rapidamente rispetto al pane fresco.
■ Impostare un livello di doratura più basso se si desidera tostare meno di
4 fette di pane.
■ Per il pane scuro selezionare un grado di tostatura più elevato che per il
pane bianco.
■ Per evitare il surriscaldamento del tostapane e ottenere una doratura uniforme
del pane, attender
■ Il livello più elevato del regolatore di doratura 5 de
solo per grosse fette di pane scuro. Il pane bianco si brucerebbe con questo
grado di doratura e non sarebbe commestibile.Inoltre si può sviluppare la
formazione di fumo. In tal caso premere subito il tasto "Stop" 4 ed estrarre
la spina dalla presa di rete.
e circa 15 secondi fra un processo di tostatura e l'altro.
ve essere utilizzato
30
SDLTD 1400 A1
Page 34

Prima di utilizzare l'apparecchio per la prima volta
■ Azionare il tostapane a vuoto 5 volte con l'impostazione di doratura
massima (IIIII).
■ Pulire quindi il tostapane come descritto al capitolo "Pulizia e manutenzione".
AVVERTENZA
► il tasto di comando 3 si inserisce solo con il cav
► Durante il primo impiego può svilupparsi un leggero odore (e anche una
a formazione di fumo). Si tratta di un evento normale che cessa
legger
dopo poco tempo. Provvedere a una suffi ciente aerazione. Aprire ad
esempio una fi nestra.
o di rete collegato.
Uso
Regolazione del grado di doratura
Il grado di doratura desiderato da "chiaro" (I) a "scuro" (IIIII) può essere regolato in continuo con il regolatore di doratura 5.
AVVERTENZA
► Tenere presente che, a seconda della quantità di pane inserita nell'appa-
ecchio, il grado di doratura può variare pur rimanendo invariata l'impo-
r
stazione del regolatore del grado di doratura 5! Minore è il quantitativo
di fette di pane da tostare, maggiore sarà il loro grado di doratura. Per
questo motivo si consiglia di abbassare un po' il regolatore del grado di
doratura 5 in caso di quantitativo ridotto di pane da tostare.
IT
CH
Tostatura
ATTENZIONE - PERICOLO DI INCENDIO!
1) Dopo aver impostato il grado di doratura desiderato, collocare il pane nel
2) Premere il tasto di comando 3 verso il basso. La centratura automatica
3) Al raggiungimento del grado di doratura desiderato, il tostapane si spegne
SDLTD 1400 A1
► Non coprire i vani di tostatura 1 mentr
il pericolo d'incendio! L'apparecchio potrebbe danneggiarsi irreparabilmente!
vano di tostatura 1.
consente di centrare il pane inserito nel vano di tostatura 1. Durante il
procedimento di tostatura, la spia di controllo integrata nel tasto "Stop" 4
si accende.
automaticamente, la spia di controllo si spegne e le fette di pane vengono
espulse verso l'alto.
e l'apparecchio è in funzione. Sussiste
31
Page 35

IT
CH
Interruzione del procedimento di tostatura
Se si desidera interrompere il procedimento di tostatura, premere il tasto Stop 4.
Il tostapane si spegne e le fette di pane vengono espulse verso l'alto.
Funzione di riscaldamento
La funzione di riscaldamento permette di riscaldare il pane senza dorarlo. Essa è
utile ad esempio per riscaldare il pane tostato che si è raff reddato. Il pane viene
riscaldato solo brevemente.
1) Inserire il pane e premere il tasto di comando 3 verso il basso.
2) Premere il tasto “Riscaldamento”
mento, la spia di controllo integrata nel tasto “Riscaldamento”
accende.
3) Quando il pane è nuovamente riscaldato, l’apparecchio si spegne automaticamente e le fette di pane vengono respinte verso l’alto.
7. Durante il procedimento di riscalda-
Funzione di scongelamento
Tramite l'azionamento del tasto "Scongelamento" 8 è possibile scongelare e
tostare anche il pane congelato. Il tostapane in tal caso riscalda il pane lentamente.
1) Dopo aver impostato il grado di doratura desiderato, collocare il pane nel
vano di tostatura 1.
2) Premere il tasto di comando 3 verso il basso.
3) Azionare il tasto "Scongelamento"
accende.
4) Se il procedimento di scongelamento e tostatura è terminato, il tostapane
si spegne automaticamente, la spia di controllo inserita nel tasto "Scongelamento"
verso l'alto.
8 si spegne e le fette di pane vengono respinte nuovamente
8. La spia di controllo integrata si
7 si
Riscaldamento dei panini
Non collocare mai i panini direttamente sul tostapane, bensì utilizzare sempre
l'apposito supporto 2.
1) Collocare l’accessorio panini 2 sul tostapane in modo che sia stabilmente
inserito nell’apposito incavo.
2) Collocare quindi i panini sull’accessorio e avviare il procedimento di doratura.
Per una doratura intermedia, spostare il regolatore di doratura 5 al livello
III. La doratura cambia a seconda del tipo e struttura di panino.
32
SDLTD 1400 A1
Page 36

AVVERTENZA
► Collocare i panini sull'accessorio panini 2 in modo tale che non cadano
attraverso di esso.
► Dopo il procedimento di tostatura i panini sono bollenti.
Non appena il tostapane si spegne, girare i panini per farli dorare sull’altro
3)
lato e riaccendere il tostapane.
4) Quando l’accessorio panini 2 non è più necessario, attendere fi no al suo
raff reddamento e rimuovere l’accessorio panini 2 dal tostapane.
Cassetto di raccolta delle briciole
Nel corso della tostatura, le briciole in caduta fi niscono nel cassetto di raccolta
delle briciole 9.
1) Per rimuovere le briciole, estrarre lateralmente il cassetto di raccolta delle
briciole 9.
2) Rimuovere le briciole.
3) Spingere il cassetto di raccolta delle briciole 9 nuovamente nel tostapane,
fi no all'inserimento percepibile.
Pulizia
PERICOLO DI SCOSSA ELETTRICA
► Prima di pulire l'apparecchio, disinserire la spina dalla presa.
Non immer
contrario, sussiste il pericolo di morte per folgorazione.
gere mai l'apparecchio in acqua o altri liquidi! In caso
IT
CH
ATTENZIONE - DANNI MATERIALI!
SDLTD 1400 A1
AVVISO! PERICOLO DI LESIONI!
► Fare raff reddare il tostapane prima della pulizia. Pericolo di ustioni!
► Non utilizzare detergenti abrasivi o corrosivi. Essi attaccano la superfi cie
dell'appar
■ Pulire l'apparecchio con un panno asciutto o con uno straccio leggermente
inumidito.
■ Svuotare regolarmente la cassetta di raccolta delle briciole 9, per e
incendi.
ecchio.
vitare
33
Page 37

Conservazione
■ Conservare il tostapane in un luogo asciutto.
■ Pulire il tostapane come descritto al capitolo "Pulizia e manutenzione".
■ Avvolgere il cavo di rete intorno all'avvolgimento cavo 6 sul lato inferior
del tostapane e fi ssare l'estremità del cavo con la graff etta.
e
IT
CH
Guasti e possibili rimedi
Guasto Causa Soluzione
La spina di rete non è
L'apparecchio non
funziona.
Le fette tostate
diventano troppo
scure.
Le fette di pane
non vengono
tostate.
Il tasto di comando 3 non si
inserisce se spinto
verso il basso.
inserita nella presa.
L'apparecchio è guasto. Rivolgersi al servizio clienti
È stato impostato un grado
di doratura troppo elevato.
È stato impostato un grado
di doratura troppo basso.
La spina di rete non è
inserita nella presa.
L'apparecchio è guasto.
Collegare la spina di
rete alla rete elettrica.
Impostare il grado di
doratura 5 a un livello
inferiore.
Impostare il grado di
doratura 5 a un livello
più alto.
Inserire la spina in una
presa di rete.
Rivolgersi al servizio
clienti.
Smaltimento
Non gettare per alcun motivo l'apparecchio insieme ai normali
rifi uti domestici.
Questo prodotto è soggetto alla Direttiva europea 2002/96/EC
(Rifi uti da apparecchiature elettriche ed elettroniche).
Smaltire l'apparecchio attraverso un'azienda di smaltimento autorizzata o attraverso
l'ente di smaltimento comunale. Rispettare le prescrizioni attualmente in vigore.
In caso di dubbi mettersi in contatto con l'ente di smaltimento competente.
34
SDLTD 1400 A1
Page 38

Garanzia e assistenza
Questo apparecchio è garantito per 3 anni a partire dalla data di acquisto.
L’apparecchio è stato prodotto con cura e debitamente collaudato prima della
consegna.
Conservare lo scontrino come prova d’acquisto. Nei casi contemplati dalla
garanzia, mettersi in comunicazione telefonica con il centro assistenza più vicino.
Solo in questo modo è possibile garantire una spedizione gratuita della merce.
AVVERTENZA
► La prestazione della garanzia vale solo per difetti del materiale o di fab-
bricazione, ma non per i danni da tr
parti fragili, come ad es. interruttori o accumulatori.
Il prodotto è destinato esclusivamente all’uso domestico e non a quello commerciale. La garanzia decade in caso di impiego improprio o manomissione, uso
della forza e interventi non eseguiti dalla nostra fi liale di assistenza autorizzata.
Questa garanzia non costituisce alcun limite ai diritti legali del consumatore. Il
periodo di garanzia non viene prolungato da interventi in garanzia. Ciò vale
anche per le parti sostituite e riparate.
I danni e difetti eventualmente presenti già all’atto dell’acquisto devono essere
segnalati immediatamente dopo il disimballaggio, e comunque entro due giorni
dalla data di acquisto.
Le riparazioni eseguite dopo la scadenza della garanzia sono a pagamento.
Assistenza Italia
Tel.: 02 36003201
E-Mail: kompernass@lidl.it
IAN 72507
IT
CH
asporto, a parti soggette a usura o a
Assistenza Svizzera
Tel.: 0842 665566 (0,08 CHF/Min., telefonia mobile max. 0,40 CHF/Min.)
E-Mail: kompernass@lidl.ch
IAN 72507
Raggiungibilità della hotline: dal lunedì al venerdì, dalle 8.00 alle 20.00 (CET)
Importatore
KOMPERNASS HANDELS GMBH
BURGSTRASSE 21
44867 BOCHUM
GERMANY
www.kompernass.com
SDLTD 1400 A1
35
Page 39

36
SDLTD 1400 A1
Page 40

Index
Introduction . . . . . . . . . . . . . . . . . . . . . . . . . . . . . . . . . . . . . . . . . . . . . . . . . . 38
Copyright . . . . . . . . . . . . . . . . . . . . . . . . . . . . . . . . . . . . . . . . . . . . . . . . . . . . . . . . . . . . . . 38
Limited liability . . . . . . . . . . . . . . . . . . . . . . . . . . . . . . . . . . . . . . . . . . . . . . . . . . . . . . . . . . 38
Intended use . . . . . . . . . . . . . . . . . . . . . . . . . . . . . . . . . . . . . . . . . . . . . . . . . . . . . . . . . . . 38
Items supplied . . . . . . . . . . . . . . . . . . . . . . . . . . . . . . . . . . . . . . . . . . . . . . . . 39
Disposal of the packaging . . . . . . . . . . . . . . . . . . . . . . . . . . . . . . . . . . . . . . . . . . . . . . . . . 39
Appliance description . . . . . . . . . . . . . . . . . . . . . . . . . . . . . . . . . . . . . . . . . . 39
Technical data . . . . . . . . . . . . . . . . . . . . . . . . . . . . . . . . . . . . . . . . . . . . . . . . 40
Safety instructions . . . . . . . . . . . . . . . . . . . . . . . . . . . . . . . . . . . . . . . . . . . . 40
Tips for use . . . . . . . . . . . . . . . . . . . . . . . . . . . . . . . . . . . . . . . . . . . . . . . . . . 42
Before taking into use . . . . . . . . . . . . . . . . . . . . . . . . . . . . . . . . . . . . . . . . . 43
Operation . . . . . . . . . . . . . . . . . . . . . . . . . . . . . . . . . . . . . . . . . . . . . . . . . . .43
Adjusting the browning level . . . . . . . . . . . . . . . . . . . . . . . . . . . . . . . . . . . . . . . . . . . . . . . 43
Toasting . . . . . . . . . . . . . . . . . . . . . . . . . . . . . . . . . . . . . . . . . . . . . . . . . . . . . . . . . . . . . . . 43
Interrupting the toasting process . . . . . . . . . . . . . . . . . . . . . . . . . . . . . . . . . . . . . . . . . . . . 44
Warming function . . . . . . . . . . . . . . . . . . . . . . . . . . . . . . . . . . . . . . . . . . . . . . . . . . . . . . . 44
Defrost function . . . . . . . . . . . . . . . . . . . . . . . . . . . . . . . . . . . . . . . . . . . . . . . . . . . . . . . . . 44
Warming up crusty bread rolls . . . . . . . . . . . . . . . . . . . . . . . . . . . . . . . . . . . . . . . . . . . . . 44
Crumb tray . . . . . . . . . . . . . . . . . . . . . . . . . . . . . . . . . . . . . . . . . . . . . . . . . . 45
Cleaning . . . . . . . . . . . . . . . . . . . . . . . . . . . . . . . . . . . . . . . . . . . . . . . . . . . . . 45
Storage . . . . . . . . . . . . . . . . . . . . . . . . . . . . . . . . . . . . . . . . . . . . . . . . . . . . .45
Troubleshooting . . . . . . . . . . . . . . . . . . . . . . . . . . . . . . . . . . . . . . . . . . . . . .46
Disposal . . . . . . . . . . . . . . . . . . . . . . . . . . . . . . . . . . . . . . . . . . . . . . . . . . . . .46
Warranty and Service . . . . . . . . . . . . . . . . . . . . . . . . . . . . . . . . . . . . . . . . . 47
GB
Importer . . . . . . . . . . . . . . . . . . . . . . . . . . . . . . . . . . . . . . . . . . . . . . . . . . . . . 47
SDLTD 1400 A1
37
Page 41

GB
Introduction
Congratulations on the purchase of your new appliance!
You have clearly decided in favour of a modern, high quality product. These
operating instructions are a component of this product. They contain important
information in regard to safety, use and disposal. Before using the product,
familiarise yourself with all of these operating and safety instructions. Use this
appliance only as described and only for the purposes indicated. In addition,
pass these documents on, together with the product, to any future owner.
Copyright
This documentation is copyright protected.
Any copying or reproduction of it, including as extracts, as well as the reproduction
of images, also in an altered state, is only permitted with the written authorisation
of the manufacturer.
Limited liability
All technical information, data and instructions for the installation, connection
and operation contained in these operating instructions correspond to the latest
available at the time of printing and, to the best of our knowledge, take into account
our previous experience and know-how.
No claims can be derived from the details, illustrations and descriptions in these
instructions.
The manufacturer assumes no responsibility for damage caused by failure to observe these instructions, improper use, incompetent repairs, making unauthorised
modifi cations or for using unapproved replacement parts.
Intended use
38
This appliance is intended exclusively for the toasting of slices of bread, rolls and
waffl es in domestic environments. It is not intended for use with other foods or
other materials.
This appliance is intended exclusively for use in domestic households. Do not use
the appliance for commercial applications!
SDLTD 1400 A1
Page 42

Items supplied
The appliance is delivered with the following components as standard:
▯ Double Long Slot Toaster
▯ Bread roll holder
▯ Operating instructions
1)
Remove the appliance and the operating instructions from the carton.
2) Remove all packing material.
NOTICE
► Check the contents to ensure everything is present and for visible damage.
► If the delivery is not complete or has been damaged due to defective
aging or transportation, contact the Service Hotline (see section
pack
Warranty and Service).
Disposal of the packaging
The packaging protects the appliance from transport damage. The packaging
materials are selected from the point of view of their environmental friendliness
and disposal technology and are therefore recyclable.
The recirculation of packaging into the material circuit saves on raw material and
reduces the amount of waste generated. Dispose of packaging material that is
no longer needed as per the regionally established regulations.
NOTICE
► If possible preserve the appliance's original packaging during the warranty
period so that, in the e
ideally for its return.
vent of a warranty claim, you can pack the appliance
Appliance description
1 Toaster slots
2 Bread-roll attachment
3 Operating slide
4 “Stop” button
5 Toasting dial
6 Cable winder
7 “Warm up” button
8 “Defrosting” button
9 Crumb tray
GB
SDLTD 1400 A1
39
Page 43

GB
Technical data
Voltage 220 - 240 V ∼, 50 Hz
Power consumption 1200 - 1400 W
Safety instructions
RISK OF ELECTRIC SHOCK
► Arrange for damaged power cables and/or
plugs to be replaced as soon as possible by a
qualifi ed specialist or by Customer Services.
► Use the appliance only in dry indoor areas, not
outdoors.
NEVER submerse the appliance in water
or other liquids! If you do, then you could
receive a potentially fatal electric shock.
► NEVER insert cutlery items or other metallic ob-
jects into the toaster slots.
► Ensure that the appliance can never come into
contact with water. NEVER use the appliance
adjacent to water or close to vessels containing
liquids.
► Ensure that the power cable never gets wet or
moist when the appliance is in use. Lay the cable
such that it cannot be clamped or otherwise damaged.
► After use, always remove the plug from the mains
power socket, this prevents the unintentional
switching on of the appliance.
40
SDLTD 1400 A1
Page 44

WARNING! RISK OF INJURY!
► This appliance may be used by children of at
least 8 years of age and
persons with reduced physical, sensory or mental
capabilities or lack of
experience and/or knowledge if they are supervised by a person responsible for their safety or
receive from this person instruction in how the
appliance is to be used, and they have understood the potential risks.
► Children should not play with the appliance.
► Cleaning and user maintenance should not be
performed by children, unless they are older
than 8 years of age and are supervised. Children
younger than 8 years of age are to be kept
away from the appliance and the power cable.
► The appliance can become hot when it is in use.
Therefore, only touch the operating elements.
► Use the appliance only on a stable, non-slippery
and level surface.
► Do not use an external timing switch or a separate
remote control system to operate the appliance.
GB
► Unwind the power cable completely from the cable
winder before using the appliance.
SDLTD 1400 A1
41
Page 45

GB
CAUTION - RISK OF FIRE!
► Bakery products can burn! You should therefore
NEVER locate the appliance close to or underneath
infl ammable objects, especially not under curtains
or suspended cupboards.
► This appliance may not be used in close vicinity
to fl ammable material.
► NEVER cover the toaster when it is in use.
► Operate the appliance only when it is under super-
vision.
Tips for use
■ Each of the two toasting slots 1 are suitable for either 2 bread slices 90 x 90 mm,
or one bread slice120 x 120 mm.
■ Avoid using slices that are too big or too thick, as these can easily become
jammed in the appliance. Should slices of br
disconnect the plug from the mains power socket. Release jammed slices
of bread with a blunt wooden object (e.g. a wooden spatula or spoon).
Thereby, do NOT touch the heater elements.
■ Diff erences in bread sorts, moisture content and the thickness of individual
slices infl
uence the browning of the toast. Therefore the bread for toasting
should be kept in sealed packaging until required. Always initially try out
a lower level of browning.
■ Use a lower level of browning if you are toasting dry bread, as dry bread
br
owns faster than fresh bread.
■ Set a lower level of browning if you are toasting less than 4 bread slices.
■ Select a higher level of browning for dark bread than for light bread, for
e
xample, wheat bread.
■ To avoid an overheating of the toaster and to obtain an even browning
of br
ead, wait for about 15 seconds between two toasting processes.
■ You should only use the highest level on the toasting dial 5 for lar
of dark bread. With this browning level light bread will scorch and become
inedible. In addition, it may cause the generation of smoke. If this occurs,
press the button “Stop” 4 immediately and disconnect the power cable
from the mains power socket.
ead become jammed, fi rst
ge slices
42
SDLTD 1400 A1
Page 46

Before taking into use
■ Operate the toaster without bread for 5 times at the maximum browning
level (IIIII).
■ Afterwards, clean the toaster as described in the chapter “Cleaning”.
NOTICE
► The operating slide 3 only engages when the cable is connected to a
mains po
► With the fi rst usage a slight smell can arise (minimal smoke development is
also possible). This is normal and dissipates af
suffi cient ventilation. For example, open a window.
wer socket.
Operation
Adjusting the browning level
The desired level of browning, from “light” (I) to “dark” (IIIII), can be adjusted
infi nitely with the toasting dial 5.
NOTICE
► Take note that, subject to the demand made on the toaster, the level of
owning can vary somewhat with an unvarying adjustment of the toasting
br
dial 5! The less the number of slices inserted, the higher is the browning
level. Thus, if you are not intending to toast many slices, always set the
toasting dial 5 a little lower.
ter a short time. Provide for
GB
Toasting
CAUTION - RISK OF FIRE!
1) After setting the desired browning level, insert the bread into the toaster
2) Press the operating slide 3 downwards. The automatic bread centring device
3) When the desired level of browning has been reached the toaster switches
SDLTD 1400 A1
► When the appliance is in operation, do NOT cover the toasting slots 1.
e will be a risk of fi re! The appliance could be irreparably damaged!
Ther
slots 1.
centres the inserted bread in the toaster slots 1. During the toasting process
the control lamp integrated in the “Stop” button 4 glows.
itself off automatically, the slices are ejected to the top and the control lamp
goes out.
43
Page 47

GB
Interrupting the toasting process
If you wish to interrupt the toasting procedure, press the button “Stop” 4.
The toaster switches itself off and the bread slices are ejected upwards.
Warming function
The warming function enables you to warm bread without browning it. As
an example, for toast that has gone cold. The bread is only briefl y warmed.
1) Insert the bread and press the operating button 3 down.
2) Press the „Warm up“ button
lamp integrated in the „Warm up“ button 7 glows.
3) When the bread has been reheated, the appliance switches itself off automatically and the slices are ejected upwards.
7. During the warm up process the control
Defrost function
By pressing the button “Defrosting”
and toasted. With this, the toaster slowly warms the bread.
1) After setting the desired browning level, insert the bread into the toaster
slots 1.
2) Press the operating slide 3 downwards.
3) Press the button “Defrosting”
4) When the defrosting and toasting process is fi nished, the toaster switches itself
off automatically, the control lamp integrated in the button “Defrosting”
goes out and the bread slices are ejected to the top.
8, also frozen bread can be thawed
8. The integrated control lamp glows.
8
Warming up crusty bread rolls
NEVER lay bread rolls directly onto the toaster, ALWAYS use the bread roll
holder 2.
1) Place the bread roll holder 2 on the toaster so that it is fi rmly seated in the
designated hollows.
2) Place the bread-rolls onto the holder and start the toasting procedure. For
a medium browning, set the toasting dial 5 to level III. The browning can
however vary, depending on the composition and type of bread roll.
NOTICE
► Place the rolls onto the bread-roll holder 2 in such a manner that the
cannot fall through the holder 2.
► After toasting, the rolls will be very hot.
44
y
SDLTD 1400 A1
Page 48

3) As soon as the toaster switches itself off , turn the rolls over to toast the other
side of them and then switch the toaster back on.
4) When you no longer need the bread roll holder 2, wait until it has cooled
down and then remove the bread roll holder 2 from the toaster.
Crumb tray
When toasting, crumbs that fall from the bread are collected in the crumb tray 9.
1) To empty crumbs from the crumb tray 9, simply pull it out to the side.
2) Tip out the crumbs.
3) Slide the crumb tray 9 back into the toaster so that it palpably engages.
Cleaning
RISK OF ELECTRIC SHOCK
► Disconnect the plug from the mains power socket before cleaning the
appliance.
WARNING! RISK OF INJURY!
► Allow the toaster to cool before cleaning it. Risk of Burns!
NEVER submer
do, then you could receive a potentially fatal electric shock .
se the appliance in water or other liquids! If you
GB
CAUTION - PROPERTY DAMAGE!
Storage
SDLTD 1400 A1
► Do not use aggressive or abrasive cleaning agents. These can damage
the upper sur
■ Clean the appliance housing only with a dry or lightly moistened cloth.
■ To avoid the risk of fi re, empty the crumb tray 9 at r
■ Store the toaster at a dry location.
■ Clean the toaster as described in the section “Cleaning and Maintenance”.
■ Wrap the power cable around the cable winder 6 on the under
toaster and secure the end of the cable to the bracket.
faces of the appliance.
egular intervals.
side of the
45
Page 49

Troubleshooting
Problem Cause Remedy
GB
The appliance
does not function.
The slices of toast
are too dark.
The slices of bread
are not toasted.
The operating
slide 3 does not
engage when it is
pressed down.
Disposal
Do not dispose of the appliance in your normal domestic waste.
This product is subject to the provisions of European Directive
2002/96/EC (Waste Electrical and Electronic Equipment).
Dispose of the appliance through an approved disposal centre or at your
community waste facility. Observe the currently applicable regulations.
In case of doubt, please contact your waste disposal centre.
The plug is not inserted into
a mains power socket.
The appliance is defective.
The level of browning is
set too high.
The level of browning is
set too low.
The plug is not inserted into
a mains power socket.
The appliance is defective.
Connect the power cable
into a mains power socket.
In this case, contact
Customer Services.
Set the toasting dial 5
somewhat lower.
Set the toasting dial 5
somewhat higher.
Insert the plug into a
mains power socket.
In this case, contact
Customer Services.
46
SDLTD 1400 A1
Page 50

Warranty and Service
The warranty for this appliance is for 3 years from the date of purchase. The
appliance has been manufactured with care and meticulously examined before
delivery.
Please retain your receipt as proof of purchase. In the case of a warranty claim,
please make contact by telephone with our Customer Service Department. Only
in this way can a post-free despatch for your goods be assured.
NOTICE
The warranty covers only claims for material and manufacturing defects,
►
but not for transport damage, wearing parts or for damage to fragile
components, e.g. buttons or batteries.
This product is for domestic use only and is not intended for commercial use. The
warranty is void in the case of abusive and improper handling, use of force and
internal tampering not carried out by our authorised service branch.
Your statutory rights are not restricted in any way by this warranty. The warranty
period is not extended by repairs made under the warranty. This applies also to
replaced and repaired parts.
Damages and defects extant at the time of purchase must be reported immediately after unpacking, resp. no later than two days after the date of purchase.
Repairs made after the lapse of the warranty period are subject to charge.
Service Great Britain
Tel.: 0871 5000 720 (£ 0.10/Min.)
E-Mail: kompernass@lidl.co.uk
IAN 72507
GB
Hotline availability: Monday to Friday 08:00 - 20:00 (CET)
Importer
KOMPERNASS HANDELS GMBH
BURGSTRASSE 21
44867 BOCHUM
GERMANY
www.kompernass.com
SDLTD 1400 A1
47
Page 51

KOMPERNASS HANDELS GMBH
BURGSTRASSE 21
44867 BOCHUM
DEUTSCHLAND / GERMANY
www.kompernass.com
Stand der Informationen · Version des informations
Versione delle informazioni · Last Information Update:
05 / 2013 · Ident.-No.: SDLTD1400A1-042012-3
IAN 72507
 Loading...