


 Loading...
User’s Guide
1.Before You Use Your Machine
2.Introduction to Your Machine
3.Paper Handling
4.Print
5.Network
6.Security
7.Mobile
8.iPrint&Scan for Mac
9.Troubleshooting
10.Routine Maintenance
11.Machine Settings
12.Information for This Machine
13.Appendix
For safe and correct use, be sure to read Safety Information before using the machine.

Home > Table of Contents |
|
Table of Contents |
|
Before You Use Your Machine ............................................................................................................. |
1 |
Definitions of Notes ........................................................................................................................................ |
2 |
Trademarks .................................................................................................................................................... |
3 |
Important Note ............................................................................................................................................... |
4 |
Introduction to Your Machine............................................................................................................... |
5 |
Control Panel Overview ................................................................................................................................. |
6 |
Access RICOH Utilities (Windows®) .............................................................................................................. |
8 |
Uninstall the Software and Drivers (Windows®) ................................................................................. |
10 |
Paper Handling..................................................................................................................................... |
11 |
Load Paper................................................................................................................................................... |
12 |
Load and Print Using the Paper Tray ................................................................................................. |
13 |
Load and Print Paper in the Manual Feed Slot .................................................................................. |
16 |
Paper Settings.............................................................................................................................................. |
22 |
Change the Paper Size and Paper Type............................................................................................ |
23 |
Change the Check Paper Size Setting............................................................................................... |
24 |
Unprintable Area .......................................................................................................................................... |
25 |
Supported Paper .......................................................................................................................................... |
26 |
Specifications of Paper Sizes ............................................................................................................. |
27 |
Specifications of Paper Types ............................................................................................................ |
28 |
Non-Recommended Paper Types ...................................................................................................... |
29 |
Paper Storage .................................................................................................................................... |
30 |
Using Special Paper..................................................................................................................................... |
31 |
Print ...................................................................................................................................................... |
32 |
Print from Your Computer (Windows®) ........................................................................................................ |
33 |
Print a Document (Windows®)............................................................................................................ |
34 |
Print Settings (Windows®) .................................................................................................................. |
36 |
Change the Default Print Settings (Windows®) .................................................................................. |
40 |
Monitor the Status of the Machine from Your Computer (Windows®) ................................................ |
41 |
Print from Your Computer (Mac) .................................................................................................................. |
42 |
Print a Document (Mac) ..................................................................................................................... |
43 |
Print Options (Mac) ............................................................................................................................ |
44 |
Monitor the Status of the Machine from Your Computer (Mac) .......................................................... |
49 |
Cancel a Print Job........................................................................................................................................ |
50 |
Test Print ...................................................................................................................................................... |
51 |
Network ................................................................................................................................................ |
52 |
Supported Basic Network Features ............................................................................................................. |
53 |
Network Management Software and Utilities ............................................................................................... |
54 |
Learn about Network Management Software and Utilities ................................................................. |
55 |
Additional Methods of Configuring Your Machine for a Wireless Network ................................................... |
56 |
Before Configuring Your Machine for a Wireless Network ................................................................. |
57 |
Configure Your Machine for a Wireless Network................................................................................ |
58 |
Configure Your Machine for a Wireless Network Using the One Push Method of Wi-Fi Protected |
|
Setup™ (WPS).................................................................................................................................... |
59 |
i

Home > Table of Contents |
|
Configure Your Machine for a Wireless Network Using the PIN Method of Wi-Fi Protected |
|
Setup™ (WPS).................................................................................................................................... |
60 |
Configure Your Machine for a Wireless Network Using the Machine's Control Panel Setup Wizard . 63 |
|
Configure Your Machine for a Wireless Network When the SSID Is Not Broadcast .......................... |
65 |
Use Wi-Fi Direct® ............................................................................................................................... |
67 |
Advanced Network Features........................................................................................................................ |
77 |
Print the Network Configuration Report.............................................................................................. |
78 |
Print the WLAN Report ....................................................................................................................... |
79 |
Technical Information for Advanced Users................................................................................................... |
82 |
Reset the Network Settings to the Factory Settings........................................................................... |
83 |
Security ................................................................................................................................................ |
84 |
Lock the Machine Settings ........................................................................................................................... |
85 |
Setting Lock Overview........................................................................................................................ |
86 |
Network Security Features........................................................................................................................... |
90 |
Before Using Network Security Features ........................................................................................... |
91 |
Manage Your Network Machine Securely Using SSL/TLS................................................................. |
92 |
Send an Email Securely ................................................................................................................... |
124 |
Mobile................................................................................................................................................. |
129 |
Google Cloud Print..................................................................................................................................... |
130 |
Google Cloud Print Overview ........................................................................................................... |
131 |
Before Using Google Cloud Print ..................................................................................................... |
132 |
Print from Google Chrome™ or Chrome OS™ ................................................................................. |
136 |
Print from Google Drive™ for Mobile ................................................................................................ |
137 |
Print from Gmail™ Webmail Service for Mobile................................................................................ |
138 |
AirPrint ....................................................................................................................................................... |
139 |
AirPrint Overview.............................................................................................................................. |
140 |
Before Using AirPrint ........................................................................................................................ |
141 |
Print Using AirPrint ........................................................................................................................... |
144 |
Mobile Printing for Windows® .................................................................................................................... |
148 |
Mopria® Print Service................................................................................................................................. |
149 |
iPrint&Scan for Mac .......................................................................................................................... |
150 |
iPrint&Scan Overview ................................................................................................................................ |
151 |
Troubleshooting ................................................................................................................................ |
152 |
Error and Maintenance Messages ............................................................................................................. |
153 |
Paper Jams ................................................................................................................................................ |
156 |
Paper is Jammed in the Paper Tray ................................................................................................. |
157 |
Paper is Jammed in the Back of the Machine .................................................................................. |
158 |
Paper is Jammed inside the Machine .............................................................................................. |
160 |
Paper is Jammed in the 2-sided Tray............................................................................................... |
161 |
Printing Problems....................................................................................................................................... |
163 |
Improve the Print Quality............................................................................................................................ |
166 |
Network Problems...................................................................................................................................... |
171 |
Error Messages ................................................................................................................................ |
172 |
Where Can I Find My Machine's Network Settings? ........................................................................ |
173 |
I Cannot Complete the Wireless Network Setup Configuration........................................................ |
174 |
My Machine Cannot Print over the Network ..................................................................................... |
176 |
|
ii |

Home > Table of Contents |
|
I Want to Check that My Network Devices are Working Correctly ................................................... |
178 |
Google Cloud Print Problems..................................................................................................................... |
179 |
AirPrint Problems ....................................................................................................................................... |
180 |
Other Problems .......................................................................................................................................... |
181 |
Machine Information................................................................................................................................... |
182 |
Check the Serial Number ................................................................................................................. |
183 |
Check the Firmware Version ............................................................................................................ |
184 |
Reset Functions Overview ............................................................................................................... |
185 |
Reset Your Machine ......................................................................................................................... |
186 |
Routine Maintenance ........................................................................................................................ |
187 |
Replace Supplies ....................................................................................................................................... |
188 |
Replace the Toner Cartridge ............................................................................................................ |
190 |
Replace the Drum Unit ..................................................................................................................... |
193 |
Clean the Machine ..................................................................................................................................... |
195 |
Clean the Corona Wire ..................................................................................................................... |
197 |
Clean the Drum Unit Using Drum Dot Print ...................................................................................... |
198 |
Clean the Paper Pick-up Rollers ...................................................................................................... |
201 |
Check the Remaining Part Life .................................................................................................................. |
202 |
Machine Settings............................................................................................................................... |
203 |
Change Machine Settings from the Control Panel ..................................................................................... |
204 |
General Settings............................................................................................................................... |
205 |
Menu Table ....................................................................................................................................... |
212 |
Change Machine Settings from Your Computer......................................................................................... |
217 |
Change Machine Settings Using Web Based Management ............................................................ |
218 |
Information for This Machine........................................................................................................... |
222 |
Information on Environmental Regulations ................................................................................................ |
223 |
ENERGY STAR Program ................................................................................................................. |
224 |
Energy Saving Functions ................................................................................................................. |
225 |
User Information on Electrical and Electronic Equipment (mainly Europe)...................................... |
226 |
Note for the Battery and/or Accumulator Symbol (For EU countries only) ....................................... |
227 |
Environmental Advice for Users (mainly Europe)............................................................................. |
228 |
Appendix............................................................................................................................................ |
229 |
Specifications ............................................................................................................................................. |
230 |
How to Enter Text on Your Machine ........................................................................................................... |
234 |
Supplies ..................................................................................................................................................... |
235 |
Information Regarding Recycled Paper ..................................................................................................... |
236 |
Contacting Us............................................................................................................................................. |
237 |
iii

 Home > Before You Use Your Machine
Before You Use Your Machine
•Definitions of Notes
•Trademarks
•Important Note
1

 Home > Before You Use Your Machine > Definitions of Notes
Definitions of Notes
We use the following symbols and conventions throughout this User's Guide:
WARNING |
WARNING indicates a potentially hazardous situation which, if not avoided, could |
||||
result in death or serious injuries. |
|||||
|
|
|
|
|
|
CAUTION |
CAUTION indicates a potentially hazardous situation which, if not avoided, may |
||||
result in minor or moderate injuries. |
|||||
|
|
||||
IMPORTANT |
IMPORTANT indicates a potentially hazardous situation which, if not avoided, may |
||||
|
|
|
|
|
|
|
|
|
|
|
result in damage to property or loss of product functionality. |
|
|
||||
NOTE |
NOTE specifies the operating environment, conditions for installation, or special |
||||
|
|
|
|
|
|
|
|
|
|
|
conditions of use. |
|
|
|
|
|
|
|
|
|
|
|
Tips icons indicate helpful hints and supplementary information. |
|
|
|
|
|
|
|
|
|
|
|
Electrical Hazard icons alert you to possible electrical shock. |
|
|
|
|
|
|
|
|
|
|
|
Fire Hazard icons alert you to the possibility of a fire. |
|
|
|
|
|
|
|
|
|
|
|
|
|
|
|
|
|
Hot Surface icons warn you not to touch hot machine parts. |
|
|
|
|
|
|
|
|
|
|
|
|
|
|
|
|
|
Keep out of reach of children. |
|
|
|
|
|
|
|
|
|
|
|
Do not use the cleaner. |
|
|
|
|
|
|
|
|
|
|
|
Do not throw into the fire. |
|
|
|
|
|
|
|
|
|
|
|
|
|
|
|
|
|
Do not touch. |
|
|
|
|
|
|
|
|
|
|
|
Do not use flammable substances or any type of spray. |
|
|
|
|
|
|
|
|
|
|
|
Do not use flammable liquids. |
|
|
|
|
||
|
|
||||
Bold |
Bold style identifies buttons on the machine's control panel or computer screen. |
||||
|
|
||||
Italics |
Italicised style emphasises an important point or refers you to a related topic. |
||||
|
|
||||
Courier New |
Courier New font identifies messages shown on the machine's LCD. |
||||
Related Information
• Before You Use Your Machine
2

 Home > Before You Use Your Machine > Trademarks
Trademarks
Microsoft, Windows, Windows Server and Internet Explorer are either registered trademarks or trademarks of Microsoft Corporation in the United States and/or other countries.
Apple, Mac, Safari, AirPrint, the AirPrint logo, iPad, iPhone and iPod touch are trademarks of Apple Inc., registered in the United States and other countries.
macOS is a trademark of Apple Inc.
App Store is a service mark of Apple Inc.
Wi-Fi, Wi-Fi Alliance and Wi-Fi Direct® are registered trademarks of Wi-Fi Alliance®.
WPA, WPA2, Wi-Fi CERTIFIED, Wi-Fi Protected Setup and Wi-Fi Protected Setup logo are trademarks of Wi-Fi Alliance®.
Android, Gmail, Google Cloud Print, Google Drive, Google Chrome, Chrome OS and Google Play are trademarks of Google Inc. Use of these trademarks is subject to Google Permissions.
Mopria® and the Mopria® Logo are registered trademarks and service marks of Mopria Alliance, Inc. in the United States and other countries. Unauthorised use is strictly prohibited.
Mozilla and Firefox are registered trademarks of the Mozilla Foundation. Intel is a trademark of Intel Corporation in the U.S. and/or other countries.
The Bluetooth® word mark is a registered trademark owned by the Bluetooth SIG, Inc. and any use of such marks by Ricoh Company, Ltd. is under license.
Each company whose software title is mentioned in this manual has a Software License Agreement specific to its proprietary programs.
Any trade names and product names of companies appearing on our products, related documents and any other materials are all trademarks or registered trademarks of those respective companies.
Related Information
• Before You Use Your Machine
3

 Home > Before You Use Your Machine > Important Note
Important Note
•Do not use this product outside the country of purchase as it may violate the wireless telecommunication and power regulations of that country.
•Windows® 10 in this document represents Windows® 10 Home, Windows® 10 Pro, Windows® 10 Education and Windows® 10 Enterprise.
•Windows Server® 2008 in this document represents Windows Server® 2008 and Windows Server® 2008 R2.
•The screens in this User's Guide are for illustration purposes only and may differ from the actual screens.
•Unless otherwise specified, the screens in this manual are from Windows® 7 and macOS v10.11.x. Screens on your computer may vary depending on your operating system.
•The contents of this guide and the specifications of this product are subject to change without notice.
•Not all features are available in countries subject to applicable export restrictions.
Related Information
• Before You Use Your Machine
4

 Home > Introduction to Your Machine
Introduction to Your Machine
•Control Panel Overview
•Access RICOH Utilities (Windows®)
5

 Home > Introduction to Your Machine > Control Panel Overview
Control Panel Overview
The control panel will vary depending on your model.
1
2
4
3
5
1.LCD (Liquid Crystal Display)
Displays messages to help you set up and use your machine.
A four-level indicator shows the wireless signal strength if you are using a wireless connection.
2. Power On/Off Button
•Turn on the machine by pressing  .
.
•Turn off the machine by pressing and holding  . The LCD displays [Shutting Down] for a few seconds before going off.
3. WiFi Button
•Press the WiFi button and launch the wireless installer on your computer. Follow the on-screen instructions to set up a wireless connection between your machine and your network.
When the WiFi light is on, your machine is connected to a wireless access point. When the WiFi light blinks, the wireless connection is down, or your machine is in the process of connecting to a wireless access point.
4.Menu Buttons
OK Button
Press to store your machine settings. After you change a setting, the machine returns to the previous menu level.
Back Button
•Press to go back one level in the menu.
•Press to select the previous digit when setting numbers.
a or b ( + or -)
•Press to scroll through menus and options.
6
•Press to enter a number or to increase or decrease the number. Press and hold down a or b to scroll faster. When you see the number you want, press OK.
5.Go Button
•Press to clear certain error messages. To clear all other errors, follow the control panel instructions.
•Press to print any data remaining in the machine's memory.
•Press to select the displayed option. After you change a setting, the machine returns to Ready mode.
•Press and hold Go for about two seconds to cancel a print job.
Related Information
• Introduction to Your Machine
7
 Home > Introduction to Your Machine > Access RICOH Utilities (Windows®)
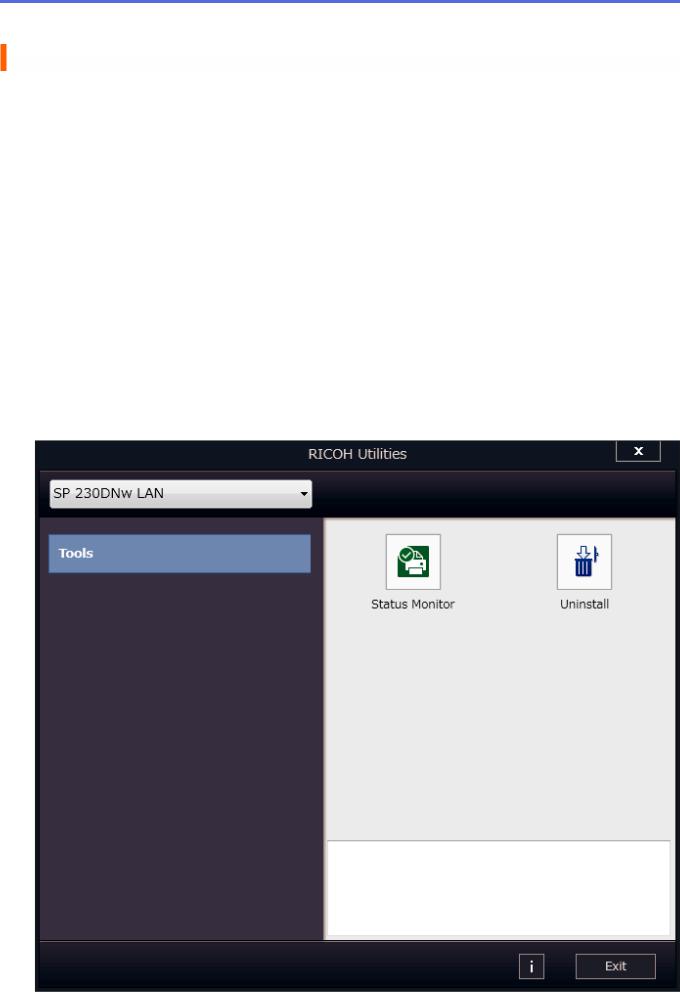
Access RICOH Utilities (Windows®)
RICOH Utilities is an application launcher that offers convenient access to all applications of this product installed on your computer.
1.Do one of the following:
•(Windows® 7, Windows Server® 2008 and Windows Server® 2008 R2) Click  (Start) > All Programs > RICOH > RICOH Utilities.
•(Windows Server® 2012)
Tap or click  (RICOH Utilities) either on the Start screen or the desktop.
•(Windows® 8.1 and Windows Server® 2012 R2)
Move your mouse to the lower left corner of the Start screen and click  (if you are using a touchbased device, swipe up from the bottom of the Start screen to bring up the Apps screen).
When the Apps screen appears, tap or click  (RICOH Utilities).
•(Windows® 10 and Windows Server® 2016) Click  > RICOH > RICOH Utilities.
2.Select your machine.
3. Choose the operation you want to use.
8

Related Information
•Introduction to Your Machine
•Uninstall the Software and Drivers (Windows®)
9

 Home > Introduction to Your Machine > Access RICOH Utilities (Windows®) > Uninstall the Software and Drivers (Windows®)
Uninstall the Software and Drivers (Windows®)
1.Do one of the following:
•(Windows® 7, Windows Server® 2008 and Windows Server® 2008 R2) Click  (Start) > All Programs > RICOH > RICOH Utilities.
•(Windows Server® 2012)
Tap or click  (RICOH Utilities) either on the Start screen or the desktop.
•(Windows® 8.1 and Windows Server® 2012 R2)
Move your mouse to the lower left corner of the Start screen and click  (if you are using a touchbased device, swipe up from the bottom of the Start screen to bring up the Apps screen).
When the Apps screen appears, tap or click  (RICOH Utilities).
•(Windows® 10 and Windows Server® 2016) Click  > RICOH > RICOH Utilities.
2.Click the drop-down list, and then select your model name (if not already selected). Click Tools in the left navigation bar, and then click Uninstall.
Follow the instructions in the dialog box to uninstall the software and drivers.
Related Information
• Access RICOH Utilities (Windows®)
10

 Home > Paper Handling
Paper Handling
•Load Paper
•Paper Settings
•Unprintable Area
•Supported Paper
•Using Special Paper
11

 Home > Paper Handling > Load Paper
Load Paper
•Load and Print Using the Paper Tray
•Load and Print Paper in the Manual Feed Slot
12

 Home > Paper Handling > Load Paper > Load and Print Using the Paper Tray
Load and Print Using the Paper Tray
• Load Paper in the Paper Tray
13

 Home > Paper Handling > Load Paper > Load and Print Using the Paper Tray > Load Paper in the Paper Tray
Load Paper in the Paper Tray
•If the Check Size setting is set to On and you pull the paper tray out of the machine, a message appears on the LCD asking if you want to change the paper size and paper type. Change the paper size and paper type settings if needed, following the LCD instructions.
•When you load a different size and type of paper in the tray, you must also change the Paper Size and Paper Type settings in the machine, or on your computer.
1.Pull the paper tray completely out of the machine.
2.Press and slide the paper guides to fit the paper. Press the release levers to slide the paper guides.
3.Fan the stack of paper well.
4.Load paper in the paper tray with the printing surface face down.
5.Make sure the paper is below the maximum paper mark (b b b). Overfilling the paper tray will cause paper jams.
6.Slowly push the paper tray completely into the machine.
7.Lift the support flap to prevent paper from sliding off the output tray.
14

Related Information
• Load and Print Using the Paper Tray
15

 Home > Paper Handling > Load Paper > Load and Print Paper in the Manual Feed Slot
Load and Print Paper in the Manual Feed Slot
•Load and Print Plain Paper, Thin Paper, Recycled Paper and Bond Paper in the Manual Feed Slot
•Load and Print on Thick Paper and Labels in the Manual Feed Slot
•Load and Print on Envelopes in the Manual Feed Slot
16
 Home > Paper Handling > Load Paper > Load and Print Paper in the Manual Feed Slot > Load and Print Plain Paper, Thin Paper, Recycled Paper and Bond Paper in the Manual Feed Slot
Load and Print Plain Paper, Thin Paper, Recycled Paper and Bond Paper in the Manual Feed Slot
When you load a different paper size in the tray, you must change the Paper Size setting in the machine or on your computer at the same time.
1.Lift the support flap to prevent paper from sliding off the face down output tray.
2.Open the manual feed slot cover.
3.Use both hands to slide the manual feed slot paper guides to fit the width of the paper you are using.
4.Using both hands, put one full sheet of paper in the manual feed slot until the front edge touches the paper feed roller. When you feel the machine pull it in, let go.
 • Load paper into the manual feed slot with the printing surface facing up.
•Make sure the paper is straight and in the correct position in the manual feed slot. If it is not, the paper may not be fed correctly, resulting in a skewed printout or a paper jam.
5.Send your print job to the machine.
 Change your print preferences in the Print screen before sending the print job from your computer.
6.After the printed page comes out from the machine, load the next sheet of paper in the manual feed slot. Repeat for each page that you want to print.
Related Information
• Load and Print Paper in the Manual Feed Slot
17

 Home > Paper Handling > Load Paper > Load and Print Paper in the Manual Feed Slot > Load and Print on Thick Paper and Labels in the Manual Feed Slot
Load and Print on Thick Paper and Labels in the Manual Feed Slot
When you load a different paper size in the tray, you must change the Paper Size setting in the machine or on your computer at the same time.
1. Open the machine's back cover (the face up output tray).
 The machine automatically turns on Manual Feed mode when you load paper in the manual feed slot.
2.On the front of the machine, open the manual feed slot cover.
3.Use both hands to slide the manual feed slot paper guides to fit the width of the paper that you are using.
4.Using both hands, put one full sheet of paper in the manual feed slot until the front edge touches the paper feed roller. When you feel the machine pull it in, let go.
 • Load paper into the manual feed slot with the printing surface facing up.
•Pull the paper out completely if you must reload the paper into the manual feed slot.
•Do not put more than one sheet of paper in the manual feed slot at one time, as it may cause a jam.
•Make sure the paper is straight and in the correct position in the manual feed slot. If it is not, the paper may not be fed correctly, resulting in a skewed printout or a paper jam.
5.Send your print job to the machine.
 Change your print preferences in the Print screen before sending the print job from your computer.
6.After the printed page comes out from the back of the machine, load the next sheet of paper in the manual feed slot. Repeat for each page that you want to print.
7.Close the back cover (the face up output tray) until it locks in the closed position.
18

Related Information
• Load and Print Paper in the Manual Feed Slot
19

 Home > Paper Handling > Load Paper > Load and Print Paper in the Manual Feed Slot > Load and Print on Envelopes in the Manual Feed Slot
Load and Print on Envelopes in the Manual Feed Slot
Before loading, press the corners and sides of the envelopes to make them as flat as possible.
When you load a different paper size in the tray, you must change the Paper Size setting in the machine or on your computer at the same time.
1. Open the machine's back cover (the face up output tray).
 The machine automatically turns on Manual Feed mode when you load paper in the manual feed slot.
2. Pull down the two levers, one on the left side and one on the right side, as shown in the illustration.
3.On the front of the machine, open the manual feed slot cover.
4.Use both hands to slide the manual feed slot paper guides to fit the width of the paper that you are using.
5.Using both hands, put one envelope in the manual feed slot until the front edge touches the paper feed roller. When you feel the machine pull it in, let go.
20

 • Load the envelope into the manual feed slot with the printing surface facing up.
•Pull the envelope out completely when you reload the envelope into the manual feed slot.
•Do not put more than one envelope in the manual feed slot at one time, as it may cause a jam.
•Make sure the envelope is straight and in the correct position on the manual feed slot. If it is not, the envelope may not be fed correctly, resulting in a skewed printout or a paper jam.
6.Send your print job to the machine.
 Change your print preferences in the Print dialog box before sending the print job from your computer.
Settings |
|
Options for Envelopes |
|
|
|
Paper Size Com-10
DL
C5
Monarch
Media Type Envelopes
Env. Thick
Env. Thin
7.After the printed envelope comes out of the machine, put in the next envelope. Repeat for each envelope that you want to print.
8.When you have finished printing, return the two levers you adjusted in the earlier step back to their original positions.
9.Close the back cover (the face up output tray) until it locks in the closed position.
Related Information
• Load and Print Paper in the Manual Feed Slot
21

 Home > Paper Handling > Paper Settings
Paper Settings
•Change the Paper Size and Paper Type
•Change the Check Paper Size Setting
22

 Home > Paper Handling > Paper Settings > Change the Paper Size and Paper Type
Change the Paper Size and Paper Type
When you change the size and type of the paper you load in the tray, you must change the Paper Size and Paper Type settings on the LCD at the same time.
1.Press a or b to display the [General Setup] option, and then press OK.
2.Press a or b to display the [Tray Setting] option, and then press OK.
3.Press a or b to display the [Paper Type] option, and then press OK.
4.Press a or b to select the paper type you want, and then press OK.
5.Press a or b to display the [Paper Size] option, and then press OK.
6.Press a or b to select the paper size you want, and then press Go.
Related Information
• Paper Settings
23

 Home > Paper Handling > Paper Settings > Change the Check Paper Size Setting
Change the Check Paper Size Setting
When you turn on your machine's Check Size setting, the machine displays a message when you remove a paper tray, asking if you changed the paper size and paper type.
The default setting is On.
1.Press a or b to display the [General Setup] option, and then press OK.
2.Press a or b to select the [Tray Setting] option, and then press OK.
3.Press a or b to select the [Check Size] option, and then press OK.
4.Press a or b to select the [On] or [Off] option, and then press Go.
Related Information
• Paper Settings
24
 Home > Paper Handling > Unprintable Area
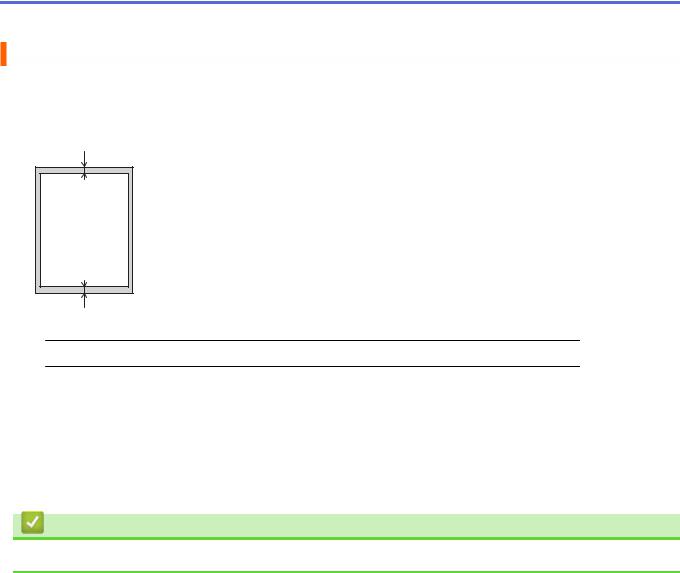
Unprintable Area
The measurements in the table below show maximum unprintable areas from the edges of the most commonlyused paper sizes. The measurements may vary depending on the paper size or settings in the application you are using.
1
2 

 4
4
3
 Do not attempt to print into these areas; your output will not reflect anything in these areas.
Usage |
Document Size |
Top (1) |
Left (2) |
|
|
Bottom (3) |
Right (4) |
Letter |
4.23 mm |
4.23 mm |
|
|
|
|
|
|
A4 |
4.23 mm |
4.23 mm |
|
|
|
|
|
Legal |
4.23 mm |
4.23 mm |
|
|
|
|
Related Information
• Paper Handling
25

 Home > Paper Handling > Supported Paper
Supported Paper
When loading custom size paper, specify the width and length using the control panel and the printer driver.
•Specifications of Paper Sizes
•Specifications of Paper Types
•Non-Recommended Paper Types
•Paper Storage
26
Loading...