


User Guide
What You Can Do with This Machine
Getting Started
Copy
Scan
Document Server
Web Image Monitor
Adding Paper and Toner
Troubleshooting
For information not in this manual, refer to the HTML/PDF files on the supplied
CD-ROM.
For safe and correct use, be sure to read the Safety Information in "Read This First" before using the machine.
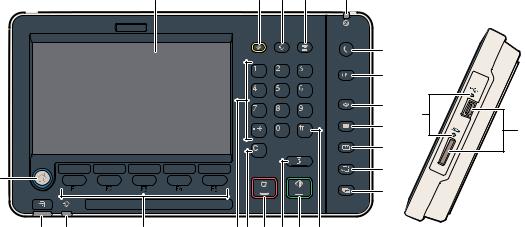
Guide to the Names and Functions of the Machine's Control Panel
1 |
2 |
3 |
4 |
5 |
|
|
|
|
6 |
|
|
|
|
7 |
|
|
|
|
8 |
|
|
|
|
9 |
|
|
|
|
10 |
22 |
|
|
|
11 |
|
|
|
|
|
|
|
|
|
12 |
21 |
20 |
19 |
1817 |
16 |
15 |
14 |
13 |
23 |
24 |
111Display panel
Displays keys for each function, operation status, or messages. See "How to Use the Screens on the Control Panel", Getting Started  .
.
222[Reset] key
Press to clear the current settings.
333[Program] key (copier, Document Server, and scanner mode)
••Press to register frequently used settings, or to recall registered settings. See "Registering Frequently Used Functions", Convenient Functions  .
.
••Press to program defaults for the initial display when modes are cleared or reset, or immediately after the main power switch is turned on.
See "Changing the Default Functions of the Initial Screen", Convenient Functions  .
.
444[Interrupt] key
Press to make interrupt copies. See "Interrupt Copy", Copy/ Document Server  .
.
555Main power indicator
The main power indicator goes on when you turn on the main power switch.
666[Energy Saver] key
Press to switch to and from Low Power mode or Sleep mode. See "Saving Energy", Getting Started  . When the machine is in Low Power mode, the [Energy Saver] key is lit. In Sleep mode, the
[Energy Saver] key flashes slowly.
The icon on the [Energy Saver] key in this manual may be different from the one on your machine, depending on when it was manufactured.
777[Login/Logout] key
Press to log in or log out.
888[User Tools] key
Press to change the default settings to meet your requirements. See "Accessing User Tools", Connecting the Machine/ System Settings  .
.
You can find out where to order expendable supplies and where to call when a malfunction occurs. You can also print these details. See "Checking Inquiry Using the User Tools",
Maintenance and Specifications  .
.
999[Paper Setting] key
Specify settings for the paper tray. See Paper Settings  .
.

1111[Counter] key
Press to check or print the counter value. See
"Counter", Maintenance and Specifications  .
.
1111[Language] key
Press to change the language of the display. See "Changing the Display Language", Getting Started  .
.
1111[Simple Screen] key
Press to switch to the simple screen. See "Switching Screen Patterns", Getting Started  .
.
1111[ # ] key (Enter key)
Press to confirm values entered or items specified.
1111[Start] key
Press to start copying, printing, scanning, or sending.
1111[Sample Copy] key
Press to make a single set of copies or prints to check print quality before making multiple sets. See "Sample Copy", Copy/ Document Server  .
.
1111[Stop] key
Press to stop a job in progress, such as copying, scanning or printing.
1111[Clear] key
Press to delete a number entered.
1111Number keys
Use to enter the numbers for copies and data for the selected function.
1111Function keys
No functions are registered to the function keys as a factory default. You can register often used functions, programs, and Web pages. For details, see "Configuring function keys", Getting Started
 .
.
2222Data In indicator (printer mode)
Flashes when the machine is receiving print jobs from a computer. See Print  .
.
2222[Check Status] key
Press to check the machine's system status, operational status of each function, and current jobs. You can also display the job history and the machine's maintenance information.
2222[Home] key
Press to display the [Home] screen. For details, see "How to Use the [Home] Screen".
2222Media access lamp
Lights up when a removable memory device is inserted in the media slot.
2222Media slots
Use to insert an SD card or a USB flash memory device.
Simple Screen
When you press the {Simple Screen } key, the screen changes to the simplified display. Letters and keys are displayed at a larger size, making operations easier.
Certain keys do not appear on the simplified display.

Quick Reference Copy Guide
Tips
Paper Size
Paper Size
You can check the paper
size using the scale on the exposure glass.
Auto Image Density
Dark texture originals will be copied so that background will not be reproduced.
Auto Paper Select
Selects a suitable size of paper automatically.
How to make Copies...
(Placing Originals, Paper Specifications and Adding Paper , Basic Copying)
APress the {Home } key on the bottom left of the control panel, and press the [Copier] icon on the [Home] screen.
BPress the {Reset } key.
CPlace the originals.
• Exposure Glass
(Face down)
|
• |
Auto Document |
|
|
Feeder (Face up) |
D |
Make desired settings. |
|
EEnter the number of copies.
FPress the {Start } key.
How to Reduce/Enlarge... (Basic Copying)
Auto Reduce/Enlarge
APress [Auto Reduce /
Enlarge].
BSelect the paper size.
C Place the originals, and then press the Start{ }key.
Preset Reduce/Enlarge
APress [Reduce / Enlarge].
BSelect a ratio, and then press [OK].
CPlace the originals, and then press the {Start } key. (Paper size is selected automatically.)
How to select a color mode... (Color Copying)
A Select a color mode.
How to save paper... (Basic Copying)
ASee if original is 1-sided or 2-sided (duplex).
BPress [Dup./Combine/Series].
CSelect the original and copy types and/or the orientation.
D Place the originals, and then press the |
{Start } key. |
Duplex
1-Sided →2-Sided
Copies two 1-sided pages on one 2-sided page.
2-Sided →2-Sided
Copies one 2-sided page on one 2-sided page.
Combine
1-sided Combine
Copies multiple 1-sided or 2-sided originals on one side of copy paper.
|
|
|
|
|
|
|
|
|
|
|
|
|
|
|
|
|
|
|
|
|
|
|
|
|
|
|
|
|
|
|
|
|
|
|
|
|
|
|
|
|
|
|
|
|
|
|
|
|
|
2-sided Combine |
|
||||||||
Copies multiple 1-sided originals |
Copies multiple 2-sided originals |
||||||||
on two sides of copy paper. |
on two sides of copy paper. |
||||||||
|
|
|
|
|
|
|
|
|
|
|
|
|
|
|
|
|
|
|
|
|
|
|
|
|
|
|
|
|
|
|
|
|
|
|
|
|
|
|
|
|
|
|
|
|
|
|
|
|
|
|
|
|
|
|
|
|
|
|
|
|
|
|
|
|
|
|
|
|
|
|
|
|
|
|
|
|
|
|
|
For more functions on Combine, see "Basic  Copying", Copy/ Document Server
  .
.
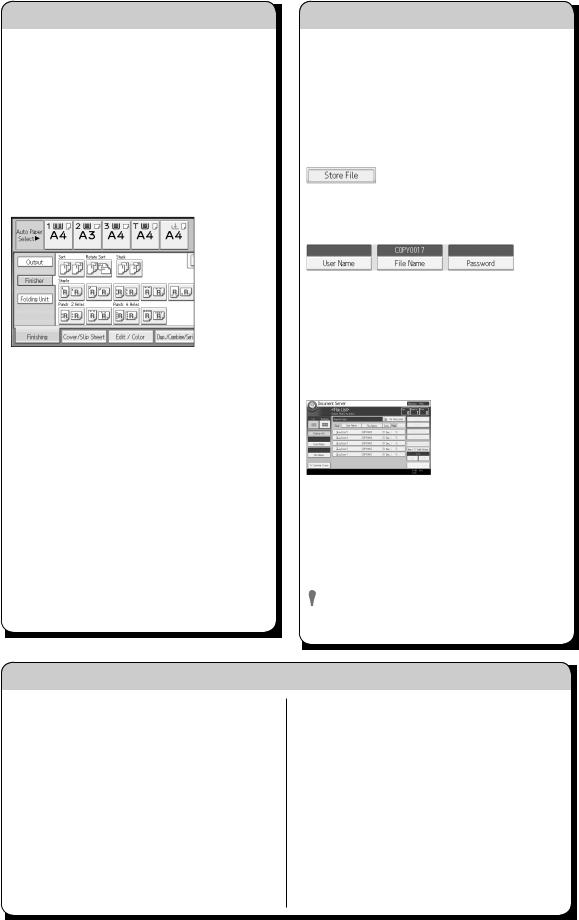
How to finish your document... (Basic Copying)
Staple
APress [Finishing].
BPress [Finisher].
CSelect one of the stapling positions (Copies will be sorted automatically).
DPress [OK].
EEnter the number of copies.
FPlace the originals, and then
press the {Start }key.
Punch
APress [Finishing].
BPress [Finisher].
CSelect one of the punch hole positions (Copies will be hole punched).
DPress [OK].
EEnter the number of copies.
FPlace the originals, and then press the {Start }key.
 Staple and Punch can be done at the
  same time.
 Availability of finishing depends on your
  configuration.
Document Server |
(Basic Copying) |
Why use it...
•To store often used documents centrally and print on demand.
•To reduce network load.
How to use in copy mode...
APress [Store File].
BEnter a file name, user name, or password if necessary.
CSpecify a folder in which to store the document if necessary.
DPress [OK].
EPlace the originals.
FMake the scanning settings for the original.
GPress the {Start } key.
The machine stores scanned originals in memory and makes one set of copies.
To find your document, press the {Home } key on the bottom left of the control panel, and press the [Document Server] icon on the [Home] screen.
For more functions on Document Server,  see "Document Server", Copy/ Document
Server  .
.
Advanced features
Reduce/Enlarge
•Zoom: You can specify the reproduction ratio in increments of 1%.
•Magnification: You can specify the horizontal and vertical reproduction ratios, individually.
Series Copies
•Separately copies the front and back of a 2-sided original onto two sheets.
Booklet/Magazine
• Copies two or more originals in page order.
(Basic Copying, Advanced Copying)
Edit/Stamp
•Image Repeat/Double Copies: The original image is copied repeatedly.
•Centering: Moves image to center.
•Erase: Erases the center and/or all four sides of the original image.
•Stamps: Copies with the date, page numbers, etc.
Cover/Slip Sheet
•Front Cover / Back Cover: Create cover sheets.
•Designate: Copies certain pages of the original onto designation sheets.
Chapter references in this guide refer to the bundled OI CD; Copy/ Document Server  .
.
Quick Reference Scanner Guide
To use the scanner functions, several settings must be made beforehand. For details about these settings,
see "Accessing UserTools", Connecting the Machine/ System Settings  and Scan
  on the supplied CD-ROM.
How to scan...
Available scan functions:
AScan to E-mail
BScan to Folder (SMB/FTP/NCP)
CScan Using WSD (Web Services on Devices)
DStore to Hard Disk
ESave to Memory Storage Device
FScan to Delivery Server
GScan via TWAIN Driver
For details about C, E, F, and G, see Scan 
 on the supplied CD-ROM.
How to use Scan to E-mail /Scan to Folder...
(Basic Procedure for Sending Scan Files by Email.
Basic Procedure When Using Scan to Folder)
APress the {Home } key on the lower left of the control panel, and press the [Scanner] icon on the [Home] screen.
BMake sure that no previous settings
remain. If a previous setting remains, press the {Reset } key.
CPress the [E-mail] or [Folder] tab.
DPlace originals.
EIf necessary, specify the scan settings according to the original to be scanned.
FIf necessary, press [Send File Type / Name] to specify settings such as file name and file format.
G Specify the destination(s). You can specify multiple destinations.
For scan to e-mail:
Before you select destination(s), make  sure you have selected [To]. If necessary, press [Cc] or [Bcc], and then select destination(s).
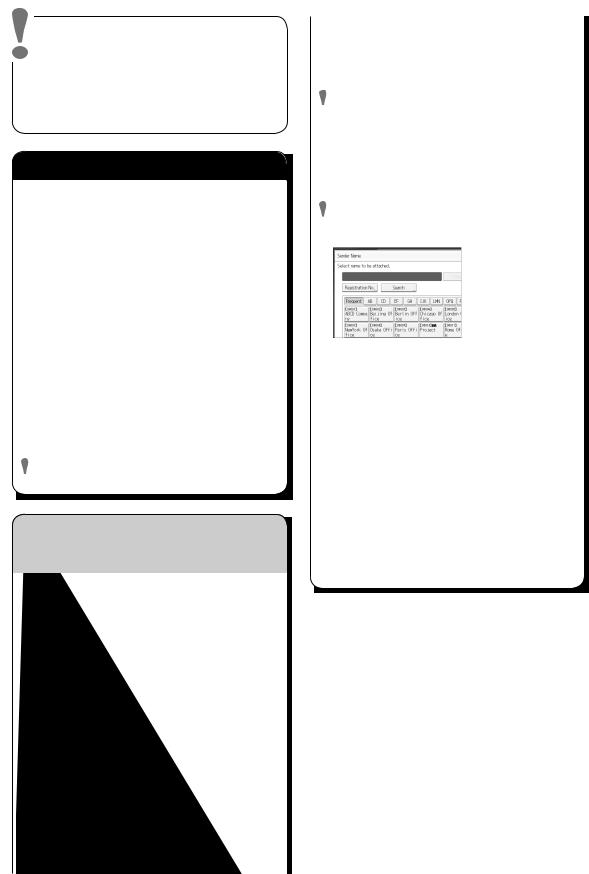
HFor scan to e-mail only
Specify the e-mail sender.
Depending on the security settings,  the logged-in user may be specified as [Sender Name]
•To specify the e-mail sender, press
[Sender Name].
•Select a sender.
•Press [OK].
•For reception confirmation e-mail, press [Recept. Notice].
IFor scan to e-mail only
Enter a subject line if necessary.
•Press [Subject].
•Enter the subject.
•Press [OK].
JPress the {Start } key.

How to save to the machine’s hard disk...
(Storing and Saving the Scanned Documents)
APress the {Home } key on the lower left of the control panel, and press the [Scanner] icon on the [Home] screen.
BMake sure that no previous settings
remain. If a previous setting remains, press the {Reset } key.
CPlace originals.
DPress [Store File].
EPress [Store to HDD].
FIf necessary, specify file information, such as [User Name], [File Name], and [Password].
GPress [OK].
HIf necessary, press [Scan Settings] to specify scanner settings such as resolution and scan size.
IPress the {Start } key.
For details about saving to memory storage device, see "Storing the Scanned Documents to a USB Flash Memory Device or SD Card", Scan  on the supplied CD-ROM.
Why use it?
To store scanned files in the hard disk of the machine for later (shared) use. (See Scan  .)
.)
Displaying a list of files stored on the machine’s hard disk
(Storing and Saving the Scanned Documents)
APress the {Home } key on the lower left of the control panel, and press the [Scanner] icon on the [Home] screen.
BPress [Select Stored File]. The list of stored files is displayed.
Registering an E-mail destination...
(Registering Addresses and Users , Connecting the Machine/ System Settings  )
)
APress the {User Tools } key.
BPress [Address Book Mangmnt].
CCheck that [Program / Change] is selected.
DSelect the name whose e-mail address you want to register. Press the name key, or enter the registered number using the number keys.
EPress [E-mail].
FPress [Change], under "E-mail Address".
GEnter the e-mail address.
HPress [OK].
For details about registering folders, see "Registering Addresses and Users ", Connecting the Machine/ System Settings  .
.
Chapter references in this guide refer to the bundled OI CD; Scan  and Connecting the Machine/ System Settings
  .
.

TABLE OF CONTENTS |
|
How to Read the Manuals................................................................................................................................. |
6 |
Symbols Used in the Manuals....................................................................................................................... |
6 |
Model-Specific Information............................................................................................................................... |
7 |
Names of Major Features.................................................................................................................................. |
8 |
1. What You Can Do with This Machine |
|
Reducing my Costs............................................................................................................................................. |
9 |
Converting Documents to Electronic Formats Easily...................................................................................... |
10 |
Registering Destinations................................................................................................................................... |
11 |
Operating the Machine More Effectively...................................................................................................... |
12 |
Customizing the [Home] Screen..................................................................................................................... |
13 |
Making Copies Using Various Functions........................................................................................................ |
14 |
Printing Data Using Various Functions............................................................................................................ |
16 |
Utilizing Stored Document............................................................................................................................... |
17 |
Connecting Two Machines for Copying........................................................................................................ |
18 |
Using the Scanner in a Network Environment............................................................................................... |
19 |
Embedding Text Information in Scanned Files............................................................................................... |
20 |
Preventing Information Leakage (Security Functions).................................................................................... |
21 |
Centrally Controlling Scan Conditions and Distribution............................................................................... |
22 |
Monitoring and Setting the Machine Using a Computer.............................................................................. |
23 |
Preventing Unauthorized Copying................................................................................................................. |
24 |
2. Getting Started |
|
Guide to Names and Functions of Components............................................................................................ |
25 |
Guide to Functions of the Attention Light.................................................................................................... |
28 |
Guide to Functions of the Machine's Options................................................................................................ |
31 |
Guide to Functions of the Machine's External Options............................................................................. |
31 |
Changing the Display Language.................................................................................................................... |
33 |
How to Use the [Home] Screen...................................................................................................................... |
34 |
Adding Icons to the [Home] Screen........................................................................................................... |
35 |
Registering Functions in a Program................................................................................................................. |
39 |
Example of Programs................................................................................................................................... |
41 |
Turning On/Off the Power.............................................................................................................................. |
45 |
Turning On the Main Power........................................................................................................................ |
45 |
Turning Off the Main Power........................................................................................................................ |
45 |
|
1 |

When the Authentication Screen Is Displayed............................................................................................... |
47 |
User Code Authentication Using the Control Panel.................................................................................. |
47 |
Logging In Using the Control Panel............................................................................................................ |
47 |
Logging Out Using the Control Panel......................................................................................................... |
48 |
Placing Originals.............................................................................................................................................. |
49 |
Placing Originals on the Exposure Glass................................................................................................... |
49 |
Placing Originals in the Auto Document Feeder....................................................................................... |
49 |
3. Copy |
|
Basic Procedure................................................................................................................................................ |
51 |
Auto Reduce / Enlarge.................................................................................................................................... |
53 |
Duplex Copying............................................................................................................................................... |
55 |
Specifying the Original and Copy Orientation......................................................................................... |
57 |
Combined Copying......................................................................................................................................... |
59 |
One-Sided Combine................................................................................................................................... |
60 |
Two-Sided Combine.................................................................................................................................... |
61 |
Copying onto Custom Size Paper from the Bypass Tray.............................................................................. |
64 |
Copying onto Envelopes................................................................................................................................. |
65 |
Copying onto Envelopes from the Bypass Tray......................................................................................... |
65 |
Copying onto Envelopes from the Paper Tray........................................................................................... |
66 |
Sort.................................................................................................................................................................... |
67 |
Changing the Number of Sets.................................................................................................................... |
68 |
Storing Data in the Document Server............................................................................................................. |
70 |
4. Print |
|
Quick Install...................................................................................................................................................... |
71 |
Displaying the Printer Driver Properties.......................................................................................................... |
72 |
Standard Printing.............................................................................................................................................. |
73 |
When Using the PCL 6 Printer Driver.......................................................................................................... |
73 |
Printing on Both Sides of Sheets...................................................................................................................... |
74 |
When Using the PCL 6 Printer Driver.......................................................................................................... |
74 |
Types of 2 Sided Printing............................................................................................................................. |
74 |
Combining Multiple Pages into Single Page.................................................................................................. |
75 |
When Using the PCL 6 Printer Driver.......................................................................................................... |
75 |
Types of Combine Printing.......................................................................................................................... |
75 |
2
Printing on Envelopes....................................................................................................................................... |
77 |
Configuring Envelope Settings Using the Control Panel........................................................................... |
77 |
Printing on Envelopes Using the Printer Driver........................................................................................... |
77 |
Saving and Printing Using the Document Server........................................................................................... |
79 |
Storing Documents in Document Server..................................................................................................... |
79 |
Managing Documents Stored in Document Server................................................................................... |
80 |
5. Scan |
|
Basic Procedure When Using Scan to Folder................................................................................................ |
81 |
Creating a Shared Folder on a Computer Running Windows/Confirming a Computer's Information..... |
|
....................................................................................................................................................................... |
82 |
Registering an SMB Folder......................................................................................................................... |
84 |
Deleting an SMB Registered Folder........................................................................................................... |
87 |
Entering the Path to the Destination Manually........................................................................................... |
88 |
Basic Procedure for Sending Scan Files by E-mail........................................................................................ |
89 |
Registering an E-mail Destination............................................................................................................... |
90 |
Deleting an E-mail Destination.................................................................................................................... |
91 |
Entering an E-mail Address Manually........................................................................................................ |
92 |
Basic Procedure for Storing Scan Files........................................................................................................... |
93 |
Checking a Stored File Selected from the List............................................................................................ |
94 |
Specifying the File Type................................................................................................................................... |
95 |
Specifying Scan Settings................................................................................................................................. |
96 |
6. Document Server |
|
Storing Data...................................................................................................................................................... |
97 |
Printing Stored Documents............................................................................................................................... |
99 |
7. Web Image Monitor |
|
Displaying Top Page..................................................................................................................................... |
101 |
8. Adding Paper and Toner |
|
Precautions for Loading Paper...................................................................................................................... |
103 |
Fanning the Paper..................................................................................................................................... |
103 |
Loading Paper into Tray 1............................................................................................................................. |
106 |
Loading Paper into the A3/11 × 17 Tray Unit........................................................................................... |
108 |
Loading Paper into Trays 2 and 3................................................................................................................ |
109 |
Loading Tab Stock into Trays 2 and 3..................................................................................................... |
110 |
|
3 |

Loading Paper into the Bypass Tray............................................................................................................. |
111 |
Loading Tab Stock into the Bypass Tray.................................................................................................. |
112 |
Loading Paper into the Large Capacity Tray............................................................................................... |
113 |
Loading Paper into the Wide Large Capacity Tray.................................................................................... |
115 |
Loading Paper into the Interposer................................................................................................................ |
117 |
Loading Paper into the Twin Interposer....................................................................................................... |
119 |
Loading Orientation-fixed Paper or Two-sided Paper............................................................................... |
121 |
Recommended Paper Sizes and Types........................................................................................................ |
124 |
Thick Paper................................................................................................................................................. |
137 |
Envelopes................................................................................................................................................... |
138 |
Registering a Custom Paper.......................................................................................................................... |
142 |
Selecting the Paper's Name from the Paper Library............................................................................... |
142 |
Registering a Paper Whose Paper Name is Not Displayed in the Paper Library................................ |
143 |
Registering a New Custom Paper by Modifying an Existing Paper...................................................... |
146 |
Adding Toner................................................................................................................................................. |
148 |
Sending Scanned Documents When Toner Has Run Out...................................................................... |
150 |
Disposing of Used Toner........................................................................................................................... |
150 |
Menu Items and Functions............................................................................................................................ |
151 |
9. Troubleshooting |
|
When a Status Icon Is Displayed.................................................................................................................. |
153 |
When the Indicator Lamp for the [Check Status] Key Is Lit or Flashing..................................................... |
155 |
When the Machine Makes a Beeping Sound............................................................................................. |
157 |
When You Have Problems Operating the Machine................................................................................... |
158 |
When Multiple Functions Cannot Be Executed Simultaneously............................................................ |
164 |
Messages Displayed When Using the Copy/Document Server Function................................................ |
166 |
When Using the Connect Copy Function................................................................................................ |
169 |
Messages Displayed When Using the Printer Function.............................................................................. |
171 |
Messages Displayed on the Control Panel When Using the Printer Function...................................... |
171 |
Messages Printed on the Error Logs or Reports When Using the Printer Function............................... |
174 |
Messages Displayed When Using the Scanner Function........................................................................... |
185 |
Messages Displayed on the Control Panel When Using the Scanner Function................................... |
185 |
Messages Displayed on the Client Computer......................................................................................... |
195 |
When Other Messages Appear................................................................................................................... |
201 |
4

When There Is a Problem Scanning or Storing Originals...................................................................... |
202 |
When the Home Screen Cannot Be Edited............................................................................................. |
203 |
When the Address Book Is Updated....................................................................................................... |
203 |
When Data Cannot Be Sent Due to a Problem with the Destination..................................................... |
204 |
When the Machine Cannot Be Operated Due to a Problem with the User Certificate....................... |
205 |
When Problems Occur While Logging In............................................................................................... |
206 |
When the User Lacks Privileges to Perform an Operation..................................................................... |
207 |
When the LDAP Server Cannot Be Used................................................................................................. |
207 |
INDEX ........................................................................................................................................................... |
209 |
5

How to Read the Manuals
Symbols Used in the Manuals
This manual uses the following symbols:
Indicates points to pay attention to when using the machine, and explanations of likely causes of paper misfeeds, damage to originals, or loss of data. Be sure to read these explanations.
Indicates supplementary explanations of the machine's functions, and instructions on resolving user errors.
This symbol is located at the end of sections. It indicates where you can find further relevant information.
[ ]
Indicates the names of keys on the machine's display or control panels.
Indicates instructions stored in a file on a provided CD-ROM.


 (mainly Europe and Asia)


 (mainly North America)
Differences in the functions of Region A and Region B models are indicated by two symbols. Read the information indicated by the symbol that corresponds to the region of the model you are using. For details about which symbol corresponds to the model you are using, see page 7 "Model-Specific
Information".
6
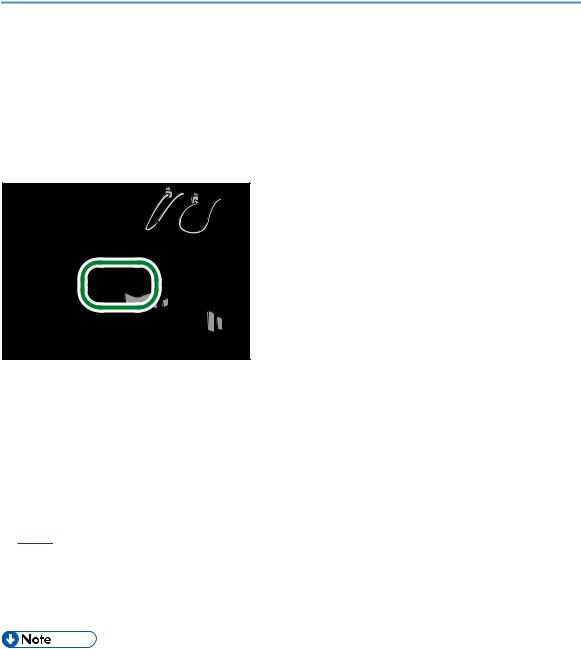
Model-Specific Information
This section explains how you can identify the region your machine belongs to.
There is a label on the rear of the machine, located in the position shown below. The label contains details that identify the region your machine belongs to. Read the label.
CUV122 |
The following information is region-specific. Read the information under the symbol that corresponds to the region of your machine.


 (mainly Europe and Asia)
If the label contains the following, your machine is a region A model:
•CODE XXXX -27, -29
•220–240 V


 (mainly North America)
If the label contains the following, your machine is a region B model:
•CODE XXXX -17
•208–240 V
•Dimensions in this manual are given in two units of measure: metric and inch. If your machine is a Region A model, refer to the metric units. If your machine is a Region B model, refer to the inch units.
7

Names of Major Features
In this manual, major features of the machine are referred to as follows:
•Auto Document Feeder  ADF
ADF
•LCIT RT4020  Large Capacity Tray (LCT)
•LCIT RT4030  Wide Large Capacity Tray (Wide LCT)
•Multi-Folding Unit FD4000  Multi-folding unit
•Decurler Unit DU5020  Decurler unit
8
1. What You Can Do with This Machine
You can search for a description by what you want to do.
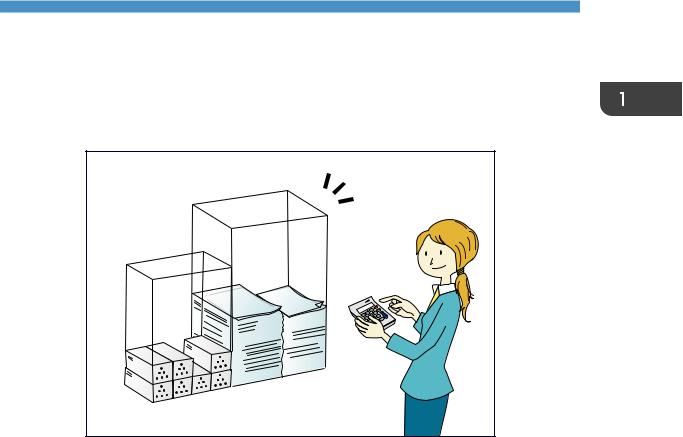
Reducing my Costs
BRL059S
Printing multi-page documents on both sides of sheets (Duplex Copy)
 See "Duplex Copying", Copy/ Document Server
 .
.
Printing multi-page documents on a single sheet (Combine)
 See "Combined Copying", Copy/ Document Server
 .
.
Checking how much paper is saved ([Information] screen)
 See "How to Use the [Information] Screen", Getting Started
 .
.
Reducing electricity consumption
 See "Saving Energy", Getting Started
 .
.
 See "Timer Settings", Connecting the Machine/ System Settings
 .
.
9
1. What You Can Do with This Machine
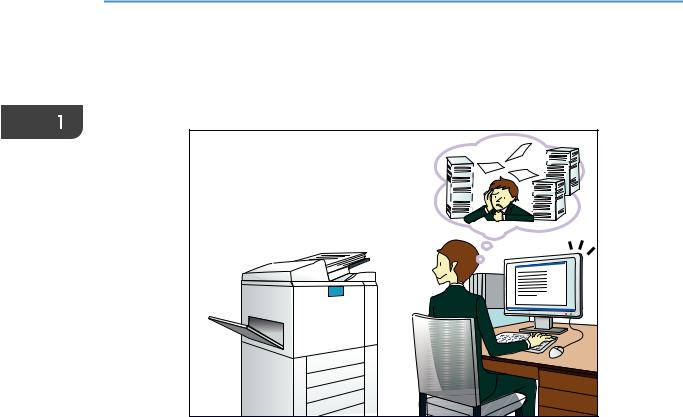
Converting Documents to Electronic Formats Easily
BQX138S |
Sending scan files
 See "Basic Procedure for Sending Scan Files by E-mail", Scan
 .
.
Sending the URL of the folder in which scan files are stored
 See "Sending the URL by E-mail", Scan
 .
.
Storing scan files in a shared folder
 See "Basic Procedure When Using Scan to Folder", Scan
 .
.
Storing scan files on media
 See "Basic Procedure for Saving Scan Files on a Memory Storage Device", Scan
Embedding text information in scanned files
 See "Embedding Text Information in Scanned Data", Scan
 .
.
Managing and using documents converted to electronic formats (Document Server)
 See "Relationship between Document Server and Other Functions", Copy/ Document Server
 .
.
10
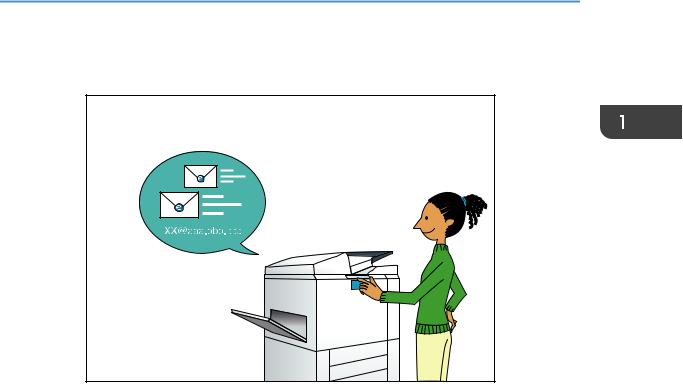
Registering Destinations
Registering Destinations
CAY062
Using the control panel to register destinations in the Address Book
 See "Registering a destination in the address book manually", Scan
 .
.
11
1. What You Can Do with This Machine
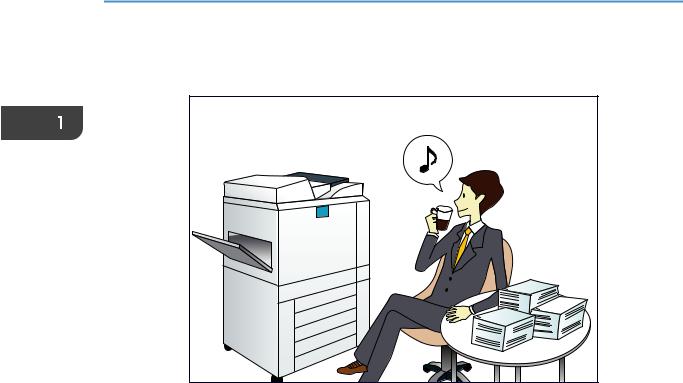
Operating the Machine More Effectively
BQX139S |
Registering and using frequently-used settings (Program)
 See "Registering Functions in a Program", Convenient Functions
 .
.
Registering frequently-used settings as initial settings (Program as Defaults (Copier/Document Server/Scanner))
 See "Changing the Default Functions of the Initial Screen", Convenient Functions
 .
.
Registering frequently-used printing settings to the printer driver
 See "Using One Click Presets", Print
 .
.
Changing the initial settings of the printer driver to frequently-used printing settings
 See "Displaying the Printing Preferences Dialog Box", Print
 .
.
Adding shortcuts to frequently used programs or Web pages
 See "Adding Icons to the [Home] Screen", Convenient Functions
 .
.
Changing the order of the function and shortcut icons
 See "Changing the Order of Icons on the [Home] Screen", Convenient Functions
 .
.
12
Customizing the [Home] Screen
Customizing the [Home] Screen
The icons of each function are displayed on the [Home] screen.
CUM002
•You can add shortcuts to often used programs or Web pages to the [Home] screen. The programs or Web pages can be recalled easily by pressing the shortcut icons.
•You can display only the icons of functions and shortcuts that you use.
•You can change the order of the function and shortcut icons.
•For details about the features on the [Home] screen, see "How to Use the [Home] Screen", Getting
Started .
.
•For details about how to customize the [Home] screen, see "Types of [Home] Screens and How to Customize Them", Convenient Functions .
.
13
1. What You Can Do with This Machine
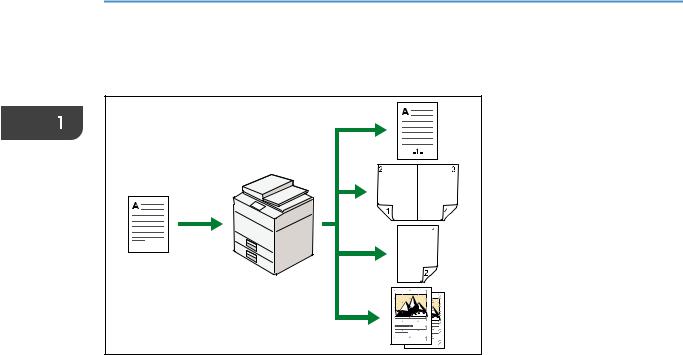
Making Copies Using Various Functions
CJQ601 |
•You can make copies in full color. You can switch the color copy mode depending on the type of originals used and the desired finish.
 See "Copying in Color", Copy/ Document Server
 .
.
•You can print stamps on copies. Stamps can include background numbers, scanned images, dates, and page numbers.
 See "Stamps", Copy/ Document Server
 .
.
•You can adjust the color tones and image quality of your copies.
 For details about a color adjustment, see "Adjusting Color", Copy/ Document Server
 .
.
 For details about an image adjustment, see "Image Adjustment", Copy/ Document Server
 .
.
•You can reduce or enlarge the copy image. Auto Reduce / Enlarge function enables the machine to detect the original size automatically. Also, it enables the machine to select an appropriate reproduction ratio based on the paper size you specify. If the orientation of the original is different from that of the paper you are copying onto, the machine rotates the original image by 90 degrees to match it with the copy paper.
 See "Reducing or Enlarging Originals", Copy/ Document Server
 .
.
•Copier functions such as Duplex, Combine, Booklet, and Magazine allow you to save on paper by copying multiple pages onto single sheets.
 For details about duplex copying, see "Duplex Copying", Copy/ Document Server
 .
.
 For details about combined copying, see "Combined Copying", Copy/ Document Server
 .
.
 For details about combined copying, see "Booklet/Magazine", Copy/ Document Server
 .
.
•You can copy onto various types of paper such as envelopes and OHP transparencies.  See "Copying onto Various Types of Paper", Copy/ Document Server
 .
.
14

Making Copies Using Various Functions
•The finisher allows you to sort, staple, and punch holes in your copies.  See "Finishing", Copy/ Document Server
 .
.
15
1. What You Can Do with This Machine
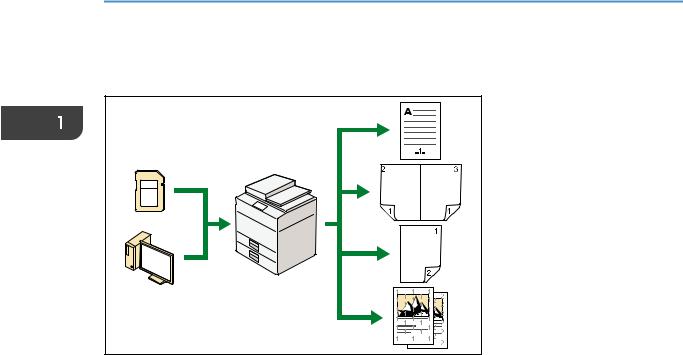
Printing Data Using Various Functions
CJQ614 |
•This machine supports network and local connections.
•You can send PDF files directly to the machine for printing, without having to open a PDF application.
 See "Printing a PDF File Directly", Print
 .
.
•You can print or delete print jobs stored on the machine's hard disk, which have been previously sent from computers using the printer driver. The following types of print jobs can be selected:
Sample Print, Locked Print, Hold Print, and Stored Print.
 See "Storing Documents in the Hard Disk Drive and Printing them", Print
 .
.
•The finisher allows you to collate, staple, and punch holes in your prints.
 For details about stapling, see "Staple", Print
 .
.
 For details about punching, see "Punch", Print
 .
.
•You can print files stored on a removable memory device and specify print conditions such as print quality and print size.
 See "Direct Printing from a Memory Storage Device", Print
 .
.
16

Utilizing Stored Document
Utilizing Stored Document
You can store files scanned in copier, printer, or scanner mode on the machine's hard disk. Web Image
Monitor allows you to use your computer to search for, view, print, delete, and send stored files via the network. You can also change print settings and print multiple documents (Document Server).
CUM004 |
•You can retrieve stored documents scanned in scanner mode to your computer.
•Using the file format converter, you can download documents stored in copier, Document Server, or printer mode to your computer.
•For details about how to use the Document Server, see "Storing Data in the Document Server",
Copy/ Document Server .
.
•For details about the Document Server in copier mode, see "Document Server", Copy/ Document
Server .
.
•For details about the Document Server in printer mode, see "Saving and Printing Using the Document Server", Print .
.
•For details about the Document Server in scanner mode, see "Storing and Saving the Scanned
Documents", Scan .
.
17

1. What You Can Do with This Machine
Connecting Two Machines for Copying
You can connect two machines together with copy connector. When you set up a copy job on one machine (the main machine), data is transferred to the other (the sub-machine) so that copies can be made on both machines simultaneously (Connect Copy).
CJQ101 |
•You can complete large volume copy runs in shorter time.
•Even if one machine runs out of paper, or stops because of a paper jam, the other machine can still continue to finish the job.
•See "Connect Copying", Copy/ Document Server .
.
18
Using the Scanner in a Network Environment
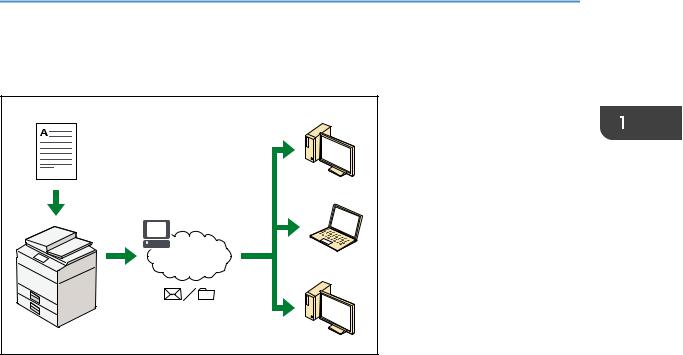
Using the Scanner in a Network Environment
CJQ607 |
•You can send scan files to a specified destination using e-mail (Sending scan files by e-mail).
 See "Basic Procedure for Sending Scan Files by E-mail", Scan
 .
.
•You can send scan files directly to folders (Sending scan files by Scan to Folder).  See "Basic Procedure When Using Scan to Folder", Scan
 .
.
•You can use this machine as a delivery scanner for the ScanRouter delivery software*1 (Network delivery scanner). You can save scan files in the delivery server or send them to a folder in a computer on the same network.
 See "Basic Procedure for Delivering Files", Scan
 .
.
•You can use Web Services on Devices (WSD) to send scan files to a client computer.
 See "Basic Operating Procedure of WSD Scanner (Push Type)", Scan
 .
.
*1 The ScanRouter delivery software is no longer available for sale.
19
1. What You Can Do with This Machine
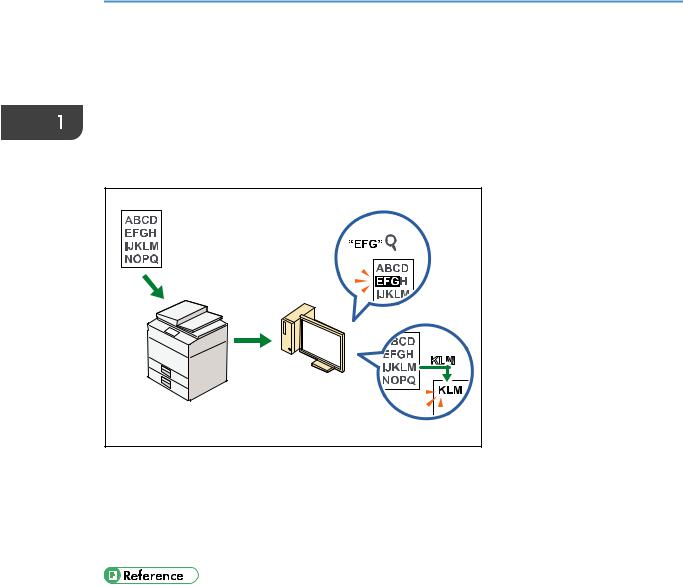
Embedding Text Information in Scanned Files
You can extract text information from a scanned document and embed it in the file without using a computer.
If you scan a document using this function, embedded text can be searched by using the text search function or copied to another document.
CUL003 |
•To use this function, the optional OCR unit is required.
•You can select a file type from [PDF], [High Compression PDF], or [PDF/A].
•This function can optically recognize characters in various languages and up to approximately
40,000 characters a page.
•See "Embedding Text Information in Scanned Data", Scan .
.
20
Preventing Information Leakage (Security Functions)
Preventing Information Leakage (Security
Functions)
CJQ608
•You can protect documents from unauthorized access and stop them from being copied without permission.
•You can control the use of the machine, as well as prevent machine settings from being changed without authorization.
•By setting passwords, you can prevent unauthorized access via the network.
•You can erase or encrypt the data on the hard disk to minimize the risk of information leakage.
•You can limit the usage of functions for each user.
•See Security Guide .
.
21
1. What You Can Do with This Machine
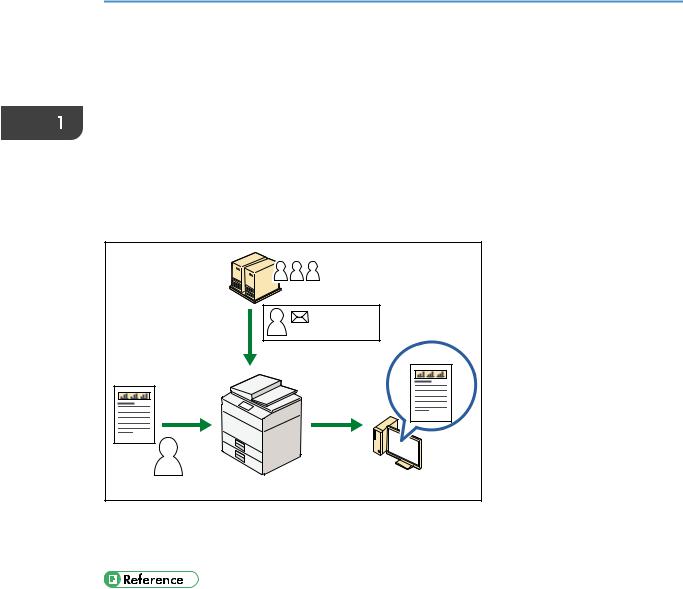
Centrally Controlling Scan Conditions and
Distribution
You can use the distributed scan management (DSM) system in Windows Server 2008 R2 to manage the destinations and scan settings for each individual user in a group and to use the information when distributing scanned data.
You can also use this system to centrally manage information about people using the network and the machine's scanner functions. Both delivered files and user information can be controlled.
A |
xxx@xxx.xxx |
600 dpi |
|
|
600 dpi |
A |
xxx@xxx.xxx |
|
|
|
CUL004 |
•You must set up and configure a Windows server to use the distributed scan management system.
This system is supported under Windows Server 2008 R2.
•For details about how to deliver files using the distributed scan management system, see
"Managing Scan Conditions and Other Settings in the Block using Distributed Scan Management", Scan .
.
22
 Loading...