

Pioneer AVIC-X1R User Manual

Hardware Manual
DVD AV NAVIGATION HEAD-UNIT
AVIC-X1R
ENGLISH


Introduction
Manual Overview
This manual mainly describes hardware-related
information such as the part names of the Navigation System or precautions for use. Please
read this manual and all other enclosed manuals
before using your Navigation System. The following issues are described in each chapter:
How to use this manual
Introduction
This chapter describes precautions for the use of
the Navigation System.
How to Use Navigation Unit and
Names of the Parts
This chapter describes matters that are important
to know before using the Navigation System,
such as the names of each part, inserting/ejecting discs.
Appendix
This section describes how to handle the Navigation System or discs and the specifications of the
Navigation System.
Terminology
Before moving on, take a few minutes to read the
following information about the conventions
used in this manual. Familiarity with these conventions will help you greatly as you learn how to
use your new equipment.
• Buttons on your Navigation System are
referred to as:
e.g.) POS button, NAVI MENU button.
• Items in various menus or touch keys displayed on the screen are referred to like this:
e.g.) “Destination”, “Settings”.
• Extra information, alternative use and other
notes are presented like this:
e.g.)
❒ When the source icon is not displayed, you
can display it by touching the screen.
• The references are indicated like this:
e.g.)
➲ For suitable discs ➞ Page 6
1

Table of Contents
Introduction 1
Manual Overview 1
How to use this manual 1
Terminology 1
Table of Contents 2
Important Safety Information 3
Notes Before Using the System and Additional
Safety Information 4
Precaution 4
Update DVD 5
Playable discs 6
DVD-Video disc region numbers 6
Features (Characteristics of this hardware) 6
To protect the LCD screen 7
For viewing LCD comfortably 7
Condition memory 7
What the marks on DVDs indicate 8
When an operation is prohibited 8
Resetting the microprocessor 8
Chapter 1
How to Use Navigation Unit and
Names of the Parts 9
Display unit 9
Turning the unit on and selecting a source 11
Loading a disc 11
Adjusting the volume 12
Turning the source off 12
Using the REAR button 12
Opening and closing the LCD panel 12
Adjusting the LCD panel angle 12
Turning the LCD panel horizontal 13
Changing the wide screen mode 13
Operating the picture adjustment 13
Adjusting the dimmer 14
Protecting your unit from theft 15
Removing the front panel 15
Attaching the front panel 15
Appendix 17
Troubleshooting 17
Error messages 18
Vehicles that Cannot Obtain Speed Pulse Data 18
Conditions Likely to Cause Noticeable Positioning
Errors 18
Handling and Care of the Disc 18
Navigation map discs 18
DVD drive and care 18
DVD discs and other DVD media types 19
CD-R/CD-RW discs 19
MP3 files 19
Ambient conditions for playing disc 21
Using the display correctly 21
Handling the display unit 21
Liquid crystal display (LCD) screen 21
Keeping the LCD screen in good condition 22
Small fluorescent tube 22
Glossary 22
Specifications 23
2

Important Safety Information
Before using your Navigation System, be sure to
read and fully understand the following safety
information:
❒ Read the entire manual before operating this
Navigation System.
❒ The navigation features of this unit (and rear
view camera option if purchased) is intended
solely as an aid to you in the operation of your
vehicle. It is not a substitute for your attentiveness, judgement, and care when driving.
❒ Do not operate this Navigation System (or the
rear view camera option if purchased) if doing
so in any way will divert your attention from
the safe operation of your vehicle. Always
observe safe driving rules and follow all existing traffic regulations. If you experience difficulty in operating the system or reading the
display, park your vehicle in a safe location
and apply the parking brake before making
necessary adjustments.
❒ Never allow others to use the system unless
they have read and understood the operating
instructions.
❒ Never use this Navigation System to route to
hospitals, police stations, or similar facilities
in an emergency. Please call the appropriate
emergency number.
❒ Route and guidance information displayed by
this equipment is for reference purposes only.
It may not accurately reflect the latest permissible routes, road conditions, one way streets,
road closures, or traffic restrictions.
❒ Traffic restrictions and advisories currently in
force should always take precedence over
guidance given by this product. Always obey
current traffic restrictions, even if this product
provides contrary advice.
❒ Failure to input correct information about the
local time may result in the product providing
improper routing and guidance instructions.
❒ Never set the volume of your Navigation Sys-
tem so high that you cannot hear outside traffic and emergency vehicles.
❒ To promote safety, certain functions are disa-
bled unless the handbrake is applied.
❒ The data encoded in the disc for this product
is the intellectual property of the provider, and
the provider is responsible for such content.
❒ Keep this manual handy as a reference for
operating procedures and safety information.
❒ Pay close attention to all warnings in this
manual and follow the instructions carefully.
❒ Do not install the display where it may (i)
obstruct the driver’s vision, (ii) impair the performance of any of the vehicle’s operating systems or safety features, including air bags,
hazard lamp buttons or (iii) impair the driver’s
ability to safely operate the vehicle.
❒ Please remember to wear your seat belt at all
times while operating your vehicle. If you are
ever in an accident, your injuries can be considerably more severe if your seat belt is not
properly buckled.
❒ Using the most current map DVDs will allow
for most accurate destination mapping.
Update DVDs are available through your local
Pioneer dealer.
❒ Never use headphones while driving.
❒ Do not attempt to install or service your navi-
gation system by yourself. Installation or servicing of the navigation system by persons
without training and experience in electronic
equipment and automotive accessories may
be dangerous and could expose you to the
risk of electric shock or other hazards.
3
Notes Before Using the System
and Additional Safety Information
Precaution
• The tuner frequencies on this unit are allocated for use in Western Europe, Asia, the Middle East, Africa and Oceania. Use in other
areas may result in improper reception. The
RDS function operates only in areas with FM
stations broadcasting RDS signals.
CLASS 1
LASER PRODUCT
• Do not allow this unit to come into contact
with liquids. Electrical shock could result.
Also, this unit damage, smoke, and overheat could result from contact with liquids.
Display Definition
• From here on after, the screen that is attached
to the body of the product will be referred to as
the “Front Display”. Any additional optional
screen that is purchased for use in conjunction with this product will be referred to as the
“Rear Display”.
• The Pioneer CarStereo-Pass is for use only in
Germany.
• Protect this product from moisture.
• If the battery is disconnected or discharged,
the memory will be erased and must be reprogrammed.
In case of trouble
• Should this product fail to operate properly,
contact your dealer or nearest authorised Pioneer Service Station.
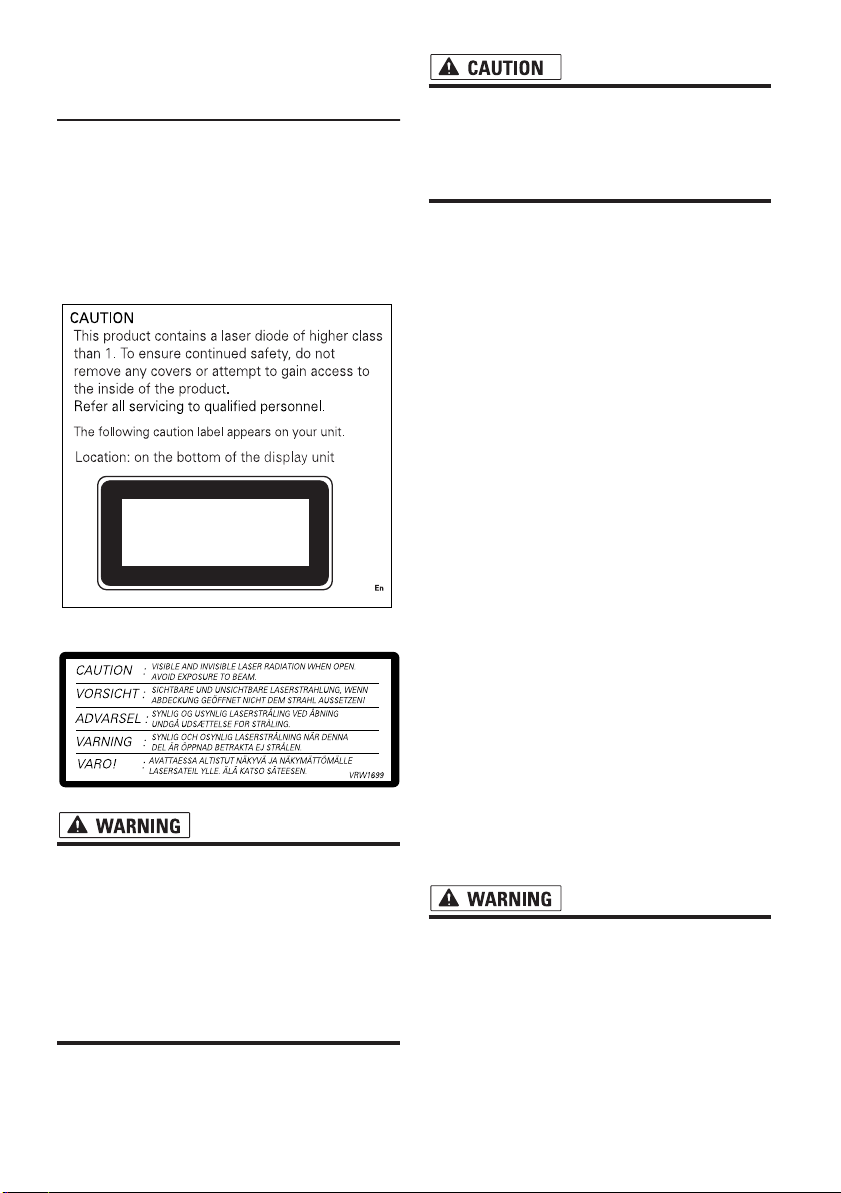
On the top of the display unit.
• LIGHT GREEN LEAD AT POWER CONNECTOR IS DESIGNED TO DETECT PARKED STATUS AND MUST BE
CONNECTED TO THE POWER SUPPLY
SIDE OF THE HANDBRAKE SWITCH.
IMPROPER CONNECTION OR USE OF
THIS LEAD MAY VIOLATE APPLICABLE
LAW AND MAY RESULT IN SERIOUS
INJURY OR DAMAGE.
4
Handbrake interlock
Certain functions offered by this Navigation System could be dangerous if used while driving. To
prevent them being used while in motion, there is
an interlock with your vehicle’s handbrake. If you
attempt to use these functions during driving,
they may be inoperable. If so, stop in a safe place,
apply the handbrake, then operate.
See “Handbrake interlock” on “Operation Manual” for more information.
To ensure safe driving
• To avoid the risk of accident and the
potential violation of applicable laws, this
unit should never be used while the vehicle is being driven except for Navigation
purposes. Also, Rear Displays should not
be in a location where it is a visible distraction to the driver.
• In some countries or states the viewing of
images on a display inside a vehicle even
by persons other than the driver may be
illegal. Where such regulations apply, they
must be obeyed and this unit’s DVD or TV
features should not be used.
This unit detects whether your vehicle’s handbrake is engaged or not, and prevents you from
watching a DVD or TV on the front display while
driving. When you attempt to watch a DVD or TV,
the warning VIDEO VIEWING IS NOT AVAIL-
ABLE WHILE DRIVING will appear on the front
display.
To watch a DVD or TV on the front display, park
your vehicle in a safe place and apply the handbrake.
See “Handbrake interlock” on “Operation Manual” for more information.
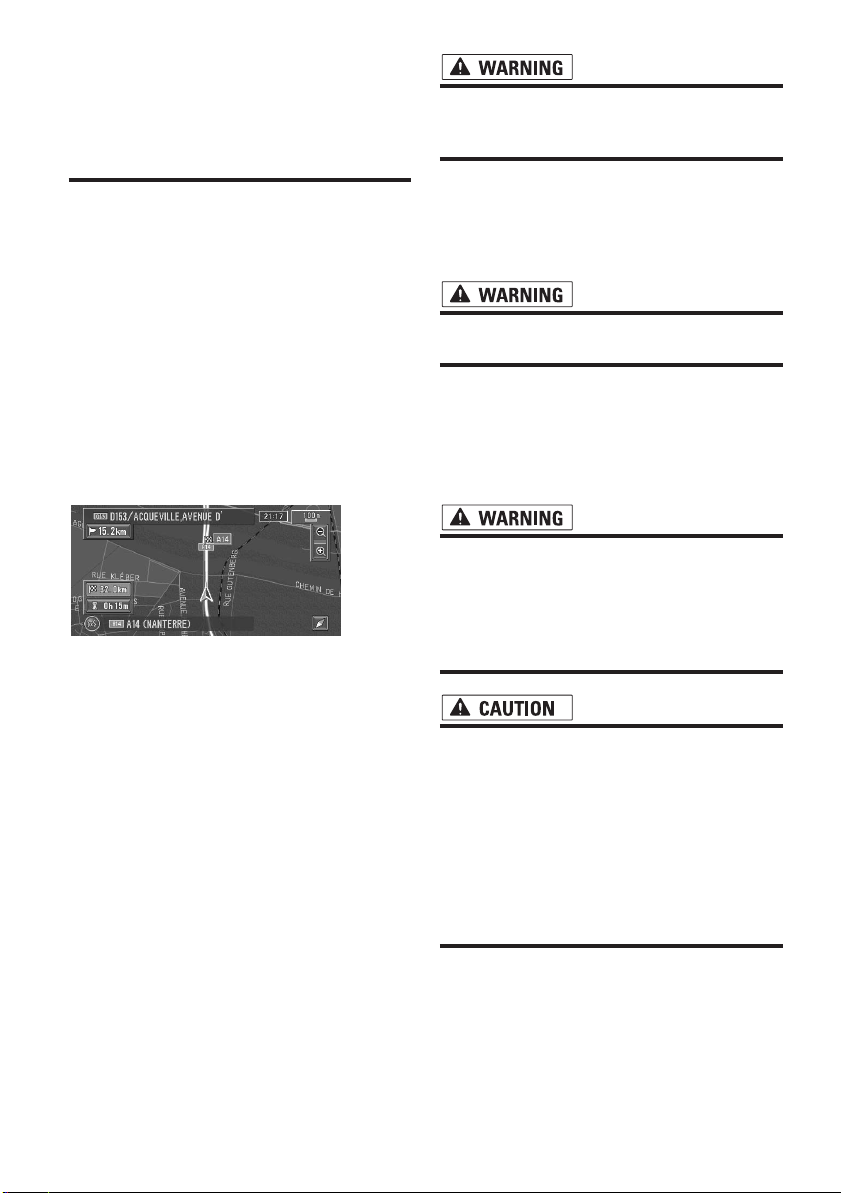
Colour difference of the map display
between day and night
Night display
The examples in this manual are illustrated using
the daytime display. When driving at night, the
colours you see may differ from those shown.
To use this function, the Orange/white lead to
this unit must be connected correctly.
➲ Day/Night Display ➞ Operation Manual
When using a display connected to
REAR OUT
This unit’s REAR OUT is for connection of a display to enable passengers in the rear seats to
watch the DVD or TV.
❒ The map screen navigation images output to
the rear display differ from standard NTSC format images. Therefore, their quality will be
inferior to the images that appear on the front
display.
• NEVER install the rear display in a location that enables the driver to watch the
DVD or TV while driving.
To avoid battery exhaustion
Be sure to run the vehicle engine while using this
unit. Using this unit without running the engine
can result in battery drainage.
• Do not use with vehicles that do not feature an ACC position.
About Rear View Camera
• With an optional rear view camera (sold separately) you are able to use this product as an
aid to keep an eye on trailers, or while backing
up.
• SCREEN IMAGE MAY APPEAR
REVERSED.
• USE INPUT ONLY FOR REVERSE OR
MIRROR IMAGE REAR VIEW CAMERA.
OTHER USE MAY RESULT IN INJURY
OR DAMAGE.
• The rear view camera function is to use
this product as an aid to keep an eye on
trailers, or while backing up. Do not use
this function for entertainment purposes.
• Please note that the edges of the rear view
camera images may differ slightly according to whether full screen images are displayed when backing up, and whether the
images are used for checking the rear
when the vehicle is moving forward.
Update DVD
• Updated Navigation DVDs are available for
purchase from your local Pioneer dealer that
includes the most current map and point of
interest information. Contact your local Pioneer dealer for details.
5
Playable discs
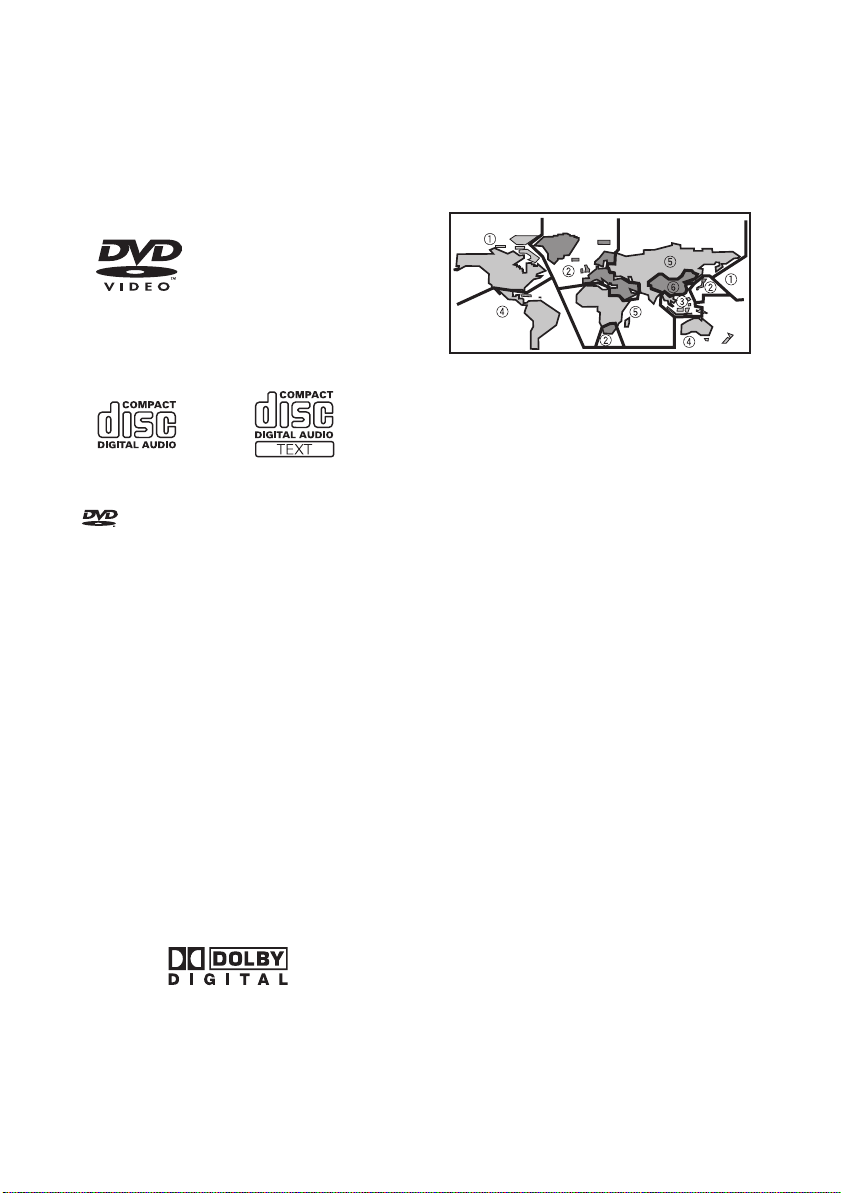
About DVD-Video and CD
DVD and CD discs that display the logos shown
below generally can be played back on this builtin DVD drive.
DVD-Video
CD
❒ is a trademark of DVD Format/Logo
Licensing Corporation.
❒ It is not possible to play back DVD audio
discs. This DVD drive may not be able to play
all discs bearing the marks shown above.
About DVD map disc
You can use discs intended for this product. Use
only discs approved by Pioneer.
➲ For details on other discs ➞ Page 18
About Dolby Digital/DTS sounds
The AVIC-X1R will down-mix Dolby Digital signals
internally and the sound will be output by the
stereo. (Equipped with optical output for future
extension.)
❒ Manufactured under licence from Dolby Labo-
ratories. “Dolby” and the double-D symbol are
trademarks of Dolby Laboratories.
❒ Only digital output of DTS audio is possible. If
navigation unit’s optical digital outputs are
not connected. DTS audio will not be output,
so select an audio setting other than DTS.
6
DVD-Video disc region numbers
DVD-Video discs that have incompatible region
numbers cannot be played on this DVD drive. The
region number of the player can be found on the
bottom of this unit.
The illustration below shows the regions and corresponding region numbers.
Features (Characteristics of this
hardware)
Touch panel key operation
It is possible to operate this unit by using touch
panel keys.
Built-in Navigation system
You can use DVD map discs that are compatible
with this system.
Memory navigation
This navigation system can memorise a certain
amount of information up to the set destination.
This navigation system continues to operate even
when you remove the map disc, allowing you to
play a CD or DVD while using the navigation. (If
the destination is particularly distant, you may
need to insert the map disc again.)
DVD-Video playback
It is possible to play back DVD-Video, DVD-R
(video mode) and DVD-RW (video mode).
Remember that use of this system for commercial or public viewing purposes may constitute an
infringement on the author’s rights protected by
the Copyright Law.
➲ “Handling and Care of the Disc” ➞ Page 18
➲ “Playable discs” ➞ Page 6
CD playback
Music CD/CD-R/CD-RW playback is possible.
➲ “Handling and Care of the Disc” ➞ Page 18
➲ “Playable discs” ➞ Page 6

MP3 file playback
It is possible to play back MP3 files recorded on
CD-ROM/CD-R/CD-RW (ISO9660 Level 1/Level 2
standard recordings).
• Supply of this product only conveys a licence
for private, non-commercial use and does not
convey a licence nor imply any right to use this
product in any commercial (i.e. revenue-generating) real time broadcasting (terrestrial, satellite, cable and/or any other media),
broadcasting/streaming via internet, intranets
and/or other networks or in other electronic
content distribution systems, such as payaudio or audio-on-demand applications. An
independent licence for such use is required.
For details, please visit
http://www.mp3licensing.com.
➲ “Handling and Care of the Disc” ➞ Page 18
➲ “Playable discs” ➞ Page 6
NTSC/PAL compatibility
This unit is NTSC/PAL system compatible. When
connecting other components to this unit, be
sure components are compatible with the same
video system or else images will not be correctly
reproduced.
sound only) from the DVD drive to the rear display even when the screen of this unit is displaying navigation.
➲ “Using the REAR button” ➞ Page 12
Rear view camera ready
You can display what is behind the vehicle if connected to a rear view camera (sold separately).
➲ “About Rear View Camera” ➞ Page 5
To protect the LCD screen
❒ Do not allow direct sunlight to fall on the dis-
play when this unit is not being used.
Extended exposure to direct sunlight can
result in LCD screen malfunction due to the
resulting high temperatures.
❒ When using a portable phone, keep the aerial
of the portable phone away from the display to
prevent disruption of the video by the appearance of spots, coloured stripes, etc.
❒ Never touch the screen with anything besides
your finger when operating the Touch Panel
functions. The screen can scratch easily.
Multi-aspect
Switching between wide screen, letter box and
panscan display is possible.
Multi-audio, Multi-subtitle, and Multiangle
You can switch between multiple audio systems,
subtitle languages, and multiple viewing angles
of a scene recorded on a DVD as desired.
❒ This product incorporates copyright protec-
tion technology that is protected by method
claims of certain U.S. patents and other intellectual property rights owned by Macrovision
Corporation and other rights owners. Use of
this copyright protection technology must be
authorised by Macrovision Corporation, and is
intended for home and other limited viewing
uses only unless otherwise authorised by
Macrovision Corporation. Reverse engineering or disassembly is prohibited.
Rear entertainment
By setting the DVD-Video, etc. in the built-in DVD
drive, you can output images and sounds (or
For viewing LCD comfortably
Due to its construction, the view angle of the LCD
screen is limited. The viewing angle (vertical and
horizontal) can be increased, however, by using
BRIGHT to adjust the black density of the video.
When using for the first time, adjust the black
density in accordance with the viewing angle
(vertical and horizontal) to adjust for clear viewing. DIMMER can also be used to adjust the
brightness of the LCD screen itself to suit your
personal preference.
Condition memory
This function memorizes audio language, subtitle
language, angle number and aspect ratio made
during disc playback for up to 30 discs. Without
any special operations, the final setting details
during playback of a disc are memorised. The
next time a disc is played, the previous settings
are automatically applied.
7
 Loading...