


 Loading...
AT941
AT940
AT899
AT897
AT896
AT894
AT891
AT890
AT811
AT790
AT756
AT753
AT751
AT750
User manual

1

AT941,AT940,AT899,AT897,AT896,AT894,AT892,AT891,AT890,AT811,AT790,AT756,AT753,AT751,AT750
ENGLISH 6
БЪЛГАРСКИ 20
ČEŠTINA 34
EESTI 48 HRVATSKI 61 MAGYAR 75
ҚАЗАҚША 89
LIETUVIŠKAI 103
LATVIEŠU 117
POLSKI 130
ROMÂNĂ 144
РУССКИЙ 158
SLOVENSKY 173
SLOVENŠČINA 187
SRPSKI 200
УКРАЇНСЬКА 214
6 ENGLISH
Introduction
Congratulations on your purchase and welcome to Philips!To fully benefit from the support that Philips offers, register your product at www.philips.com/welcome. Please read this user manual, as it contains information about the wonderful features of this shaver as well as some tips to make shaving easier and more enjoyable.
General description (Fig. 1)
1Protection cap
2Shaving unit
3Shaving unit release button
4Shaver on/off button (AT899/AT896/AT894/AT892/AT891/AT890/ AT811/AT790/AT756/AT753/AT751/AT750 only)
5Shaving head symbol
6Charging light (AT899/AT896/AT894/AT892/AT891/AT890/AT811/ AT790/AT756/AT753/AT751/AT750 only)
7Charging stand (AT941/AT940 only)
8Adapter
9Cleaning brush
10Storage pouch (AT941/AT940/AT897/AT894/AT892/AT891/AT890/ AT811 only)
11Battery symbol and shaving head symbol (AT941/AT940/AT897 only)
12Shaver on/off button (AT941/AT940/AT897 only)
13Trimmer release slide (AT941/AT940/AT897/AT896/AT894/AT892/ AT891/AT890/AT811/AT790/AT756 only)
14Trimmer (AT941/AT940/AT897/AT896/AT894/AT892/AT891/AT890/ AT811/AT790/AT756 only)
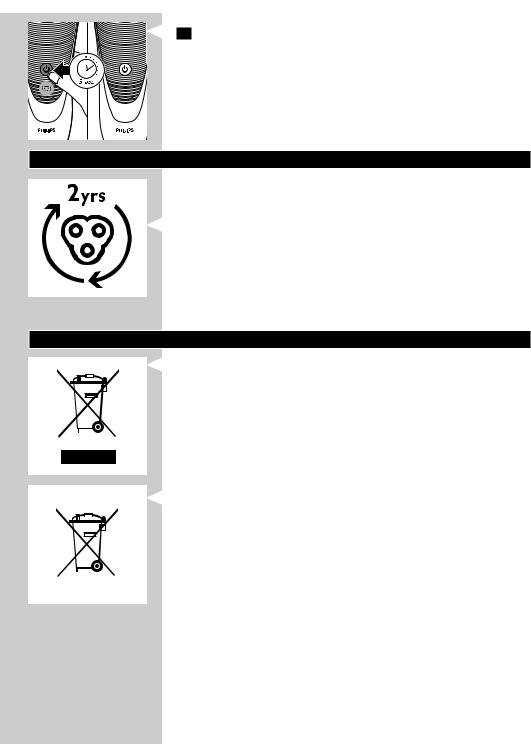
Note:You can find the type number on the back of the shaver.
Important
Read this user manual carefully before you use the appliance and the charging stand (AT941/AT940 only). Save it for future reference.
Danger
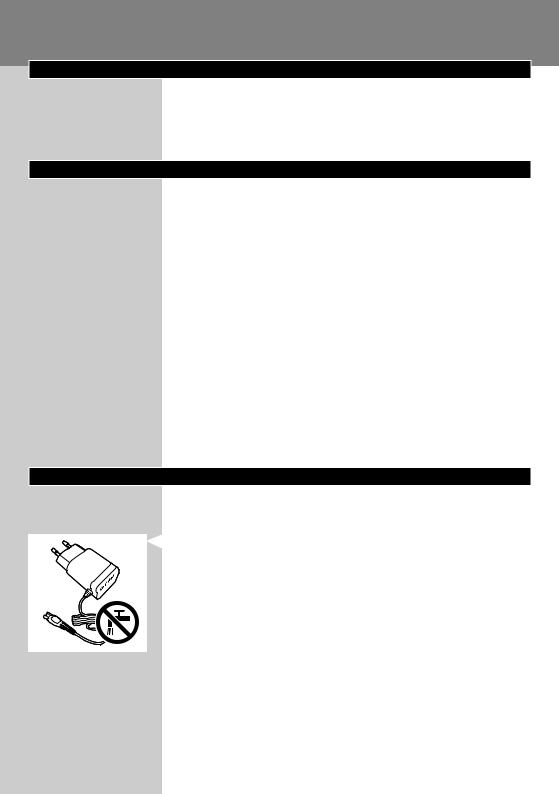
-- Make sure the adapter does not get wet.
Warning
-- The adapter contains a transformer. Do not cut off the adapter to replace it with another plug, as this causes a hazardous situation.
-- This appliance is not intended for use by persons (including children) with reduced physical, sensory or mental capabilities, or lack of experience and knowledge, unless they have been given supervision or instruction concerning use of the appliance by a person responsible for their safety.
-- Children should be supervised to ensure that they do not play with the appliance.
-- Always unplug the shaver before you clean it under the tap.

ENGLISH |
7 |
Caution |
|
-- Never use water hotter than 80°C to rinse the shaver. |
|
-- Be careful with hot water. Always check if the water is not too hot, |
|
to prevent your hands from getting burnt. |
|
-- The shaver and the other accessories are not dishwasher-proof. |
|
-- Water may leak from the socket at the bottom of the shaver when you |
|
rinse it.This is normal and not dangerous because all electronics are |
|
enclosed in a sealed power unit inside the shaver. |
|
-- Do not use the shaver, adapter, charging stand or any other part if |
|
it is damaged, as this may cause injury. Always replace a damaged |
|
adapter or charging stand with one of the original type. |
|
-- Use, charge and store the appliance at a temperature between |
|
10°C and 35°C. |
|
-- Always place and use the shaver on a surface that is fluid-resistant. |
|
-- Only use the adapter, charging stand and accessories supplied. |
|
-- Always put the protection cap on the shaver to protect the shaving |
|
heads when you are travelling.
-- If the shaver is subjected to a major change in temperature, pressure or humidity, let it acclimatise for 30 minutes before you use it.
-- Do not immerse the charging stand in water or any other liquid, nor rinse it under the tap.
Compliance with standards
-- This Philips appliance complies with all applicable standards and regulations regarding electromagnetic fields (EMF).
General
-- The appliance is equipped with an automatic voltage selector and is suitable for mains voltages ranging from 100 to 240 volts.
-- The adapter transforms 100-240 volts to a safe low voltage of less than 24 volts.
Charging
Note:The shaver cannot be used directly from the mains.
When you charge the shaver for the first time or after a long period of disuse, let it charge until the charging light lights up continuously.
See the table below for the charging time of your shaver.
Charging time |
1 hour |
8 hours |
|
|
|
|
AT941, AT940, AT897 |
AT899, AT896, AT790 |
|
AT894, AT892, AT891 |
AT756, AT753, AT751 |
|
AT890, AT811 |
AT750 |
The shaving time may be less than stated below in the table as a result of your shaving behaviour, your cleanings habits or your beard type.
8 |
ENGLISH |
|
|
|
|
|
|
|
Shaving |
60 min. |
50 min. |
45 min. |
40 min. |
|
|
minutes |
|
|
|
|
|
|
|
|
|
|
|
|
|
|
AT941 |
AT897, AT894, AT892 |
AT899 |
AT790, AT756, |
|
|
|
|
|
|
AT753 |
|
|
|
AT940 |
AT891, AT890, AT811 |
AT896 |
AT751, AT750 |
Charge indications
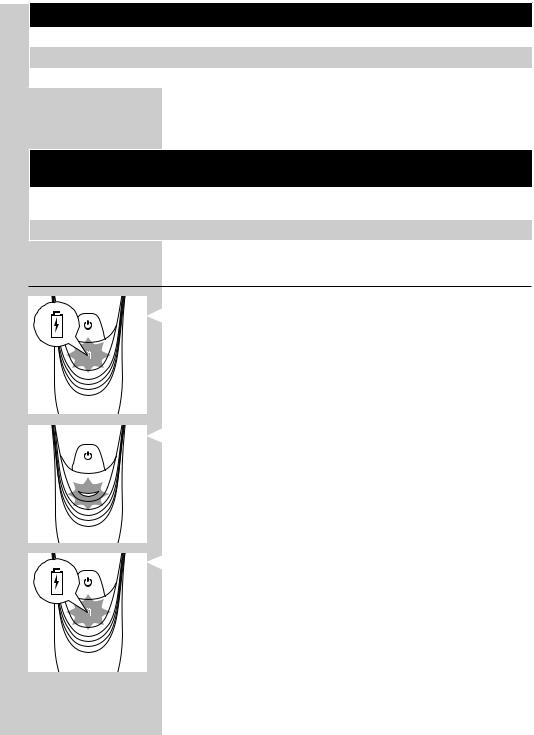
Battery low
-- AT941/AT940/AT897:When the battery is almost empty (when there are only 5 or fewer shaving minutes left), the orange battery symbol starts to flash.When you switch off the shaver, the orange battery symbol continues to flash for a few seconds.
-- AT899/AT896/AT894/AT892/AT891/AT890/AT811/AT790/ AT756/AT753/AT751/AT750:When the battery is almost empty (when there are only 5 or fewer shaving minutes left), the charging light starts to flash orange. When you switch off the shaver, the charging light continues to flash orange for a few seconds.
Quick charging (AT941/AT940/AT897/AT896/AT894/AT892/ AT891/AT890/AT811 only)
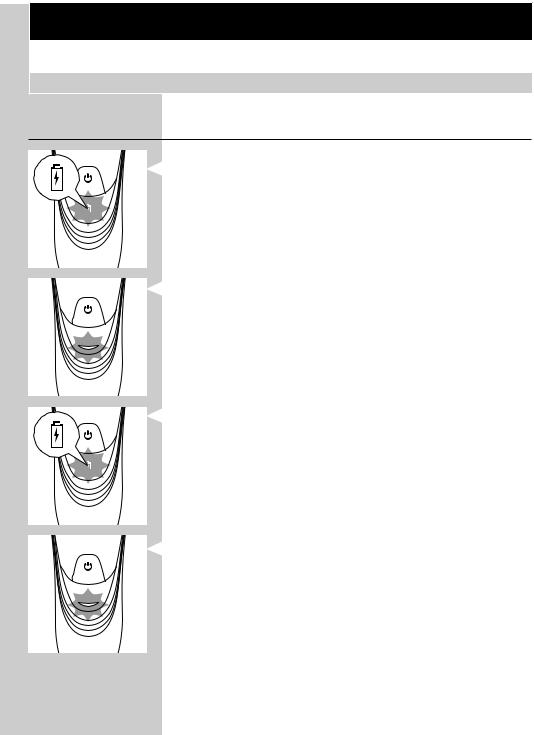
-- AT941/AT940/AT897:When you start charging the empty battery, the battery symbol flashes orange and white.
Note:When the battery symbol flashes white and orange towards only white, you can have a quick shave of three minutes.
-- AT896/AT894/AT892/AT891/AT890/AT811:When you start charging the empty battery, the charging light alternately flashes orange and green.
Note:When the charging light flashes orange and green towards only green, you can have a quick shave of three minutes.

ENGLISH 9
Charging
-- AT941/AT940/AT897:When the shaver is charging, the white battery symbol flashes.
-- AT899/AT896/AT894/AT892/AT891/AT890/AT811/AT790/ AT756/AT753/AT751/AT750:When the shaver is charging, the charging light flashes green.
Battery fully charged
-- AT941/AT940/AT897:When the battery is fully charged, the white battery symbol lights up continuously.
Note:After approx.30 minutes,the battery symbol goes out to save energy.
-- AT899/AT896/AT894/AT892/AT891/AT890/AT811/AT790/ AT756/AT753/AT751/AT750:When the battery is fully charged, the charging light lights up green continuously.
Note:After approx.30 minutes,the charging light goes out to save energy.
Charging
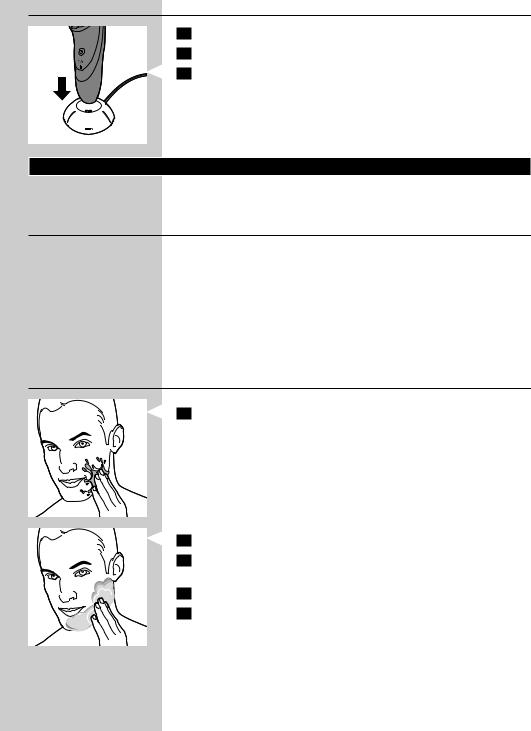
1Put the small plug in the shaver.
2Put the adapter in the wall socket.
,, The charging light shows the charging status of the shaver (see section ‘Charge indications’ in this chapter).
10 ENGLISH
Charging in the charging stand (AT941/AT940 only)
1 Put the small plug in the charging stand.
2 Put the adapter in the wall socket.
3 Place the shaver in the charging stand.
,, The charging light shows the charging status of the shaver (see section ‘Charge indications’ in this chapter).
Using the shaver
Note:This shaver can be used in the bath or shower.It can therefore not be used directly from the mains for safety reasons.
Shaving tips and tricks
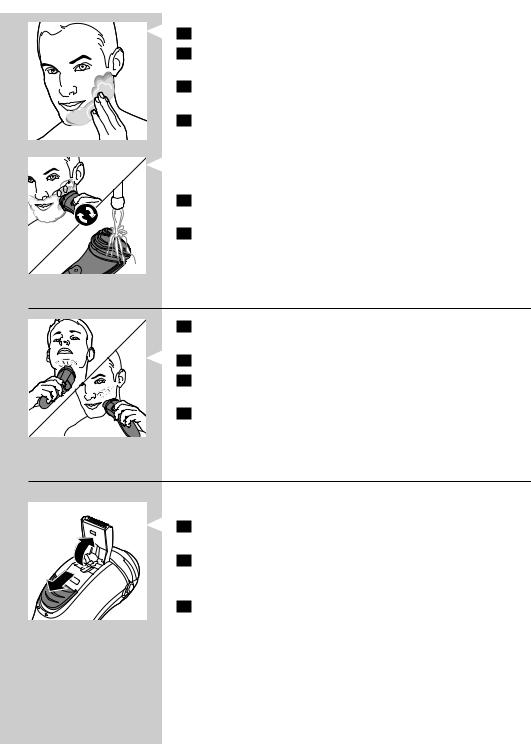
-- This shaver is suitable for both wet and dry use. Use the shaver with shaving gel or foam for extra skin comfort, or use the shaver dry for extra convenience.
Note:We advise you to use the shaver with shaving gel or foam when you use it for a wet shave.Do not use thick shaving cream or shaving oil with this shaver.
-- For optimal shaving results, make circular movements during use.
-- The shaver is waterproof and can be used in the bath or shower. -- Your skin may need 2 or 3 weeks to get accustomed to the Philips
shaving system.
Wet shaving
1Apply some water to your skin.
2Apply shaving foam or shaving gel to your skin.
3Rinse the shaving unit under the tap to ensure that the shaving unit
glides smoothly over your skin.
4 Press the on/off button once to switch on the shaver.
5 Move the shaving heads in circular movements over your skin.
ENGLISH 11
Note:Rinse the shaver under the tap regularly to ensure that it continues to glide smoothly over your skin.
6After shaving, press the on/off button once to switch off the shaver and dry your face.
7Clean the shaver (see chapter ‘Cleaning and maintenance’).
Note:Make sure you rinse all foam or shaving gel off the shaver.
Dry shaving
1Press the on/off button once to switch on the shaver.
2Move the shaving heads in circular movements over your skin.
3After shaving, press the on/off button once to switch off the shaver.
4Clean the shaver (see chapter ‘Cleaning and maintenance’).
Trimming (AT941/AT940/AT897/AT896/AT894/AT892/AT891/ AT890/AT811/AT790/AT756 only)
You can use the trimmer to groom your sideburns and moustache.
1Push the trimmer slide downwards to open the trimmer.
2Press the on/off button once to switch on the shaver.
,, You can now start trimming.
3After trimming, press the on/off button once to switch off the shaver.
4Clean the trimmer (see chapter ‘Cleaning and maintenance’).
5Close the trimmer (‘click’).
12 ENGLISH
Cleaning and maintenance
Never use compressed air, scouring pads, abrasive cleaning agents or aggressive liquids such as petrol or acetone to clean the shaver and the charging stand (AT941/AT940 only).
Always unplug the shaver before you clean it under the tap.
-- Clean the shaver after every shave for optimal shaving performance. -- Regular cleaning guarantees better shaving performance.
-- For the best cleaning results, we advise you to use the Philips Cleaning spray (HQ110).
-- Be careful with hot water. Always check if the water is not too hot, to prevent your hands from getting burnt.
Note:Water may leak from the socket at the bottom of the shaver when you rinse it.This is normal and not dangerous because all electronics are enclosed in a sealed power unit inside the shaver.
Cleaning the shaving unit under the tap
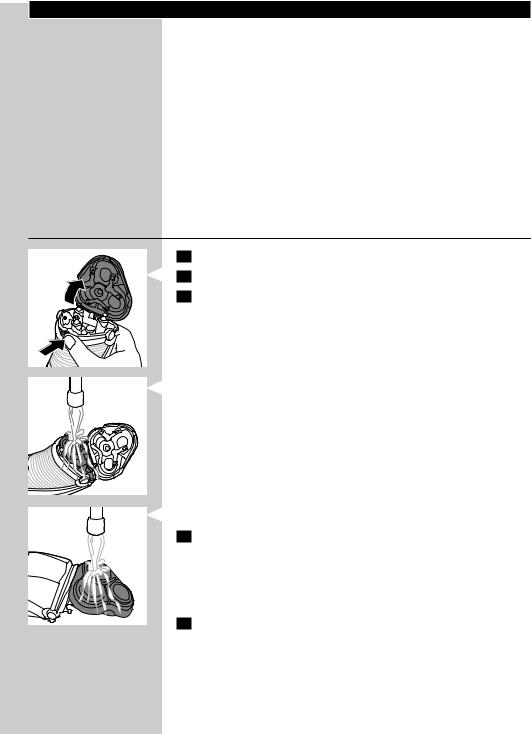
1 Switch off the shaver.
2 Press the release button to open the shaving unit.
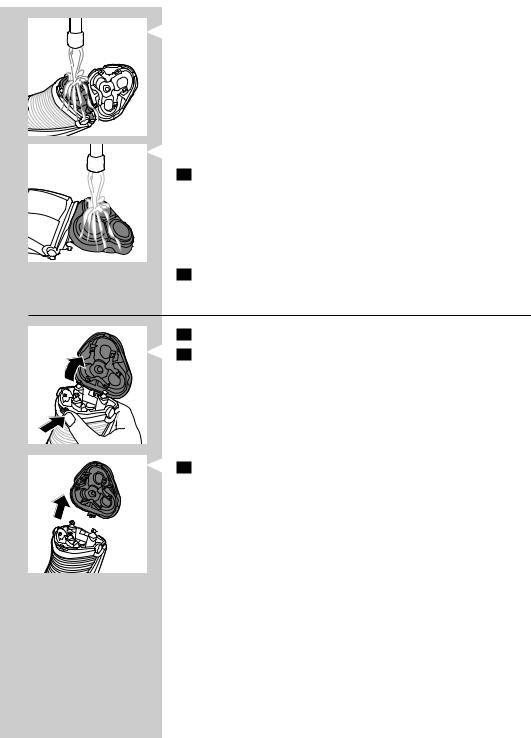
3 Rinse the shaving unit and hair chamber under a hot tap for 30 seconds.
Be careful with hot water.Always check if the water is not too hot, to prevent your hands from getting burnt.
-- Rinse the hair chamber and the inside of the shaving unit.
-- Rinse the outside of the shaving unit.
4 Close the shaving unit and shake off excess water.
Be careful not to hit the shaving unit against anything while shaking off excess water.
Never dry the shaving unit and the hair chamber with a towel or tissue, as this may damage the shaving unit.
5Open the shaving unit again and leave it open to let the shaver dry completely.
ENGLISH 13
Cleaning the shaving unit with the cleaning brush
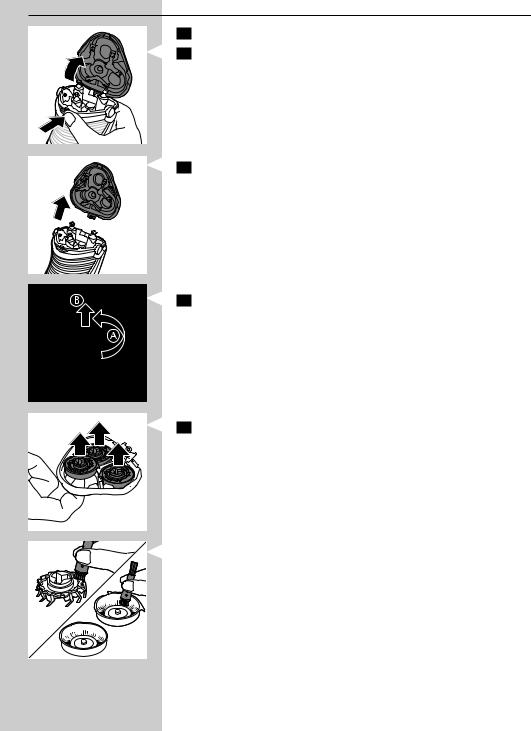
1Switch off the shaver.
2Press the release button to open the shaving unit.
3Pull the shaving unit off the shaver.
4Turn the lock anticlockwise (A) and remove the retaining frame (B).
5Remove and clean one shaving head at a time. Each shaving head consists of a cutter and a guard.
Note:Do not clean more than one cutter and guard at a time,since they are all matching sets.If you accidentally mix up the cutters and guards,it may take several weeks before optimal shaving performance is restored.
-- Remove the cutter from the shaving guard and clean it with the brush.
-- Clean the inside and outside of the shaving guard with the brush.
14 ENGLISH
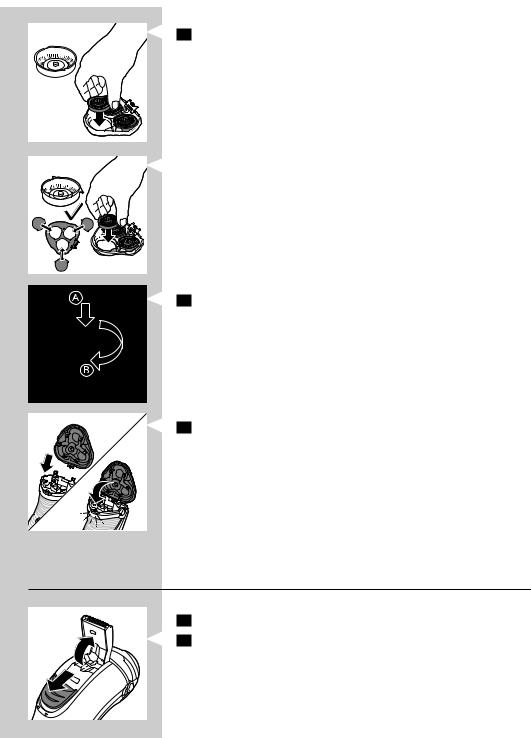
6 Put the shaving heads back into the shaving unit.
Make sure that the projections of the shaving heads fit exactly into the recesses.
7 Put the retaining frame back into the shaving unit (A) and turn the lock clockwise (B).
8 Insert the lug of the shaving unit into the slot in the top of the shaver. Then close the shaving unit.
Note:If the shaving unit does not close smoothly,check if you have inserted the shaving heads properly and if the retaining frame is locked.
Cleaning the trimmer with the cleaning brush (AT941/AT940/ AT897/AT896/AT894/AT892/AT891/AT890/AT811/AT790/AT756 only)
Clean the trimmer every time you have used it.
1 Switch off the shaver.
2 Push the trimmer slide downwards to open the trimmer.

ENGLISH 15
3Clean the trimmer with the short-bristled side of the cleaning brush. Brush up and down along the trimmer teeth.
4Close the trimmer (‘click’).
Tip:For optimal trimming performance,lubricate the trimmer teeth with a drop of sewing machine oil every six months.
Storage
-- Put the protection cap on the shaver to prevent damage.
-- AT941/AT940/AT897/AT894/AT892/AT891/AT890 only: Store the shaver in the pouch supplied.
Replacement
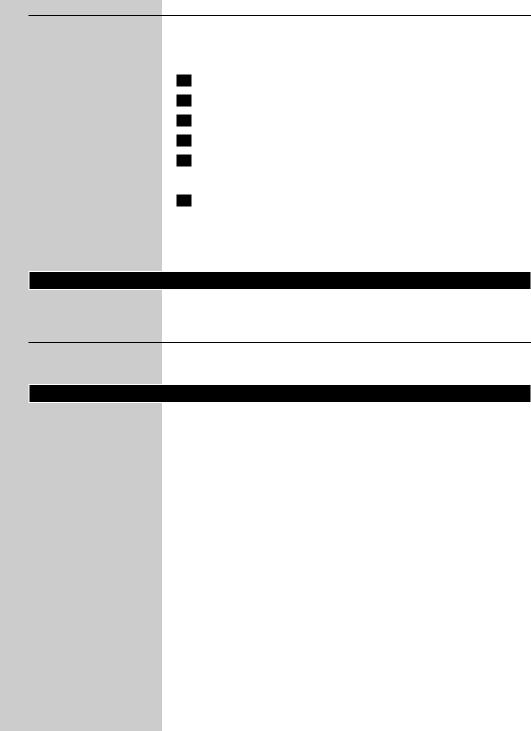
For maximum shaving performance, we advise you to replace the shaving heads every year.
Replacement reminder
The shaving head symbol will light up to indicate that the shaving heads need to be replaced. Replace damaged shaving heads right away.
Only replace the shaving heads with original HQ9 (AT941/AT940) or HQ8 (AT899/AT897/AT896/AT894/AT892/AT891/AT890/AT790/AT756/AT753/ AT751/AT750) Philips Shaving Heads.
1The shaving head symbol lights up orange continuously.
2Switch off the shaver. Disconnect the shaver from the mains or remove it from the charging stand (AT940/AT921 only).
16 ENGLISH
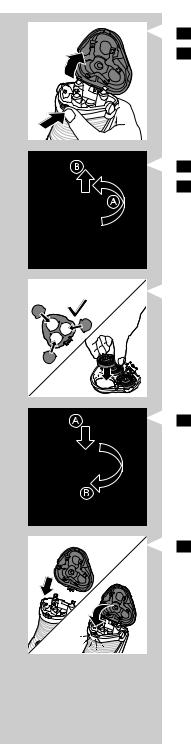
3 Press the release button to open the shaving unit. 4 Pull the shaving unit off the shaver.
5 Turn the lock anticlockwise (A) and remove the retaining frame (B). 6 Remove the shaving heads and place new ones in the shaving unit.
Make sure that the projections of the shaving heads fit exactly into the recesses.
7 Put the retaining frame back into the shaving unit (A)and turn the lock clockwise (B).
8 Insert the lug of the shaving unit into the slot in the top of the shaver. Then close the shaving unit.
Note:If the shaving unit does not close smoothly,check if you have inserted the shaving heads properly and if the retaining frame is locked.
ENGLISH 17
9Press and hold the on/off button for 5 seconds to reset the replacement reminder on the shaver.The orange light will go out.
Ordering accessories
To retain the top performance of your shaver, make sure you clean it regularly and replace its shaving heads at the recommended time.
Shaving heads
-- We advise you to replace your shaving heads every two years. Always replace with HQ9 (AT941/AT940) or HQ8(AT899/AT897/ AT896/AT894/AT892/AT891/AT890/AT790/
AT756/AT753/AT751/AT750) Philips Shaving Heads.
Cleaning
-- Use Cleaning spray (HQ110) to clean the shaving heads thoroughly.
Environment
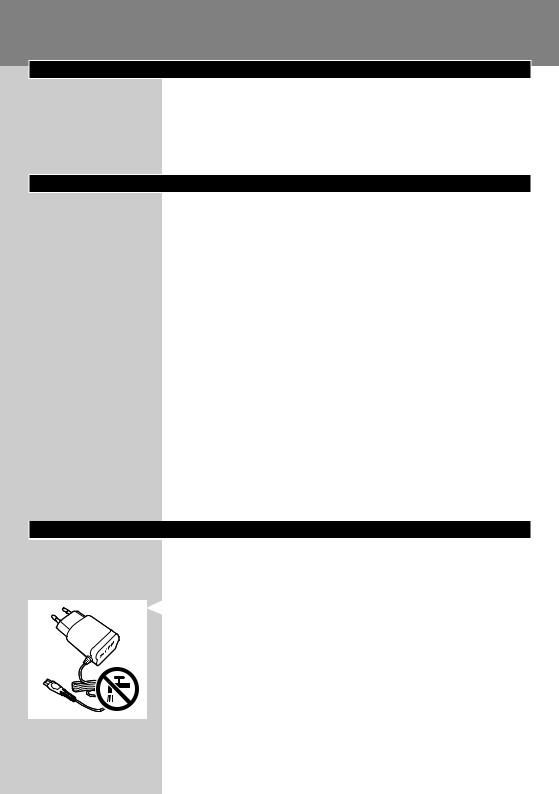
-- Do not throw away the appliance with the normal household waste at the end of their life, but hand them in at an official collection point for recycling. By doing this, you help to preserve the environment.
-- The built-in rechargeable shaver battery contains substances that may pollute the environment. Always remove the battery before you discard or hand in the shaver at an official collection point.
Dispose of the battery at an official collection point for batteries. If you have trouble removing the battery, you can also take the appliance to a Philips service centre.The staff of this centre will remove the battery for you and will dispose of it in an environmentally safe way.
18 ENGLISH
Removing the rechargeable shaver battery
Only remove the rechargeable battery when you discard the shaver. Make sure the rechargeable battery is completely empty when you remove it.
1Disconnect the shaver from the mains.
2Let the shaver operate until it stops.
3Undo the screws in the back of the shaver and in the hair chamber.
4Remove the front panel and the back panel.
5Bend the 6 hooks aside and take out the power unit.
Be careful, the hooks are sharp. 6 Remove the battery.
Be careful, the battery strips are sharp.
Do not connect the shaver to the mains again after you have removed the rechargeable battery.
Guarantee and support
If you need information or support, please visit www.philips.com/ support or read the separate worldwide guarantee leaflet.
Guarantee restrictions
The shaving heads (cutters and guards) are not covered by the terms of the international guarantee because they are subject to wear.
Troubleshooting
This chapter summarises the most common problems you could encounter with the appliance. If you are unable to solve the problem with the information below, visit www.philips.com/support for a list of frequently asked questions or contact the Consumer Care Centre in your country.

|
|
ENGLISH 19 |
Problem |
Possible cause |
Solution |
|
|
|
The shaver does not |
The shaving heads are damaged |
Replace the shaving heads (see chapter |
shave as well as it used |
or worn. |
‘Replacement’). |
to. |
|
|
Foam or gel residues clog up the shaving heads.
Long hairs obstruct the shaving heads.
You have not inserted the shaving heads properly.
Rinse the shaving unit under a hot tap (see chapter ‘Cleaning and maintenance’).
Clean the shaving heads one by one (see chapter ‘Cleaning and maintenance’).
Make sure that the projections of the shaving heads fit exactly into the recesses
(see chapter ‘Cleaning and maintenance’).
The shaver does not |
The rechargeable battery is |
Recharge the battery (see chapter |
work when I press the |
empty. |
‘Charging’). |
on/off button. |
|
|
|
The temperature of the shaver |
|
is too high. In this case, the |
|
shaver does not work. |
The shaver does not |
The shaver is not designed to |
work, although it is |
be used directly from the mains. |
connected to the |
|
mains. |
|
As soon as the temperature of the shaver has dropped sufficiently, you can switch on the shaver again.
Recharge the battery (see chapter ‘Charging’) and disconnect it from the mains.
20 БЪЛГАРСКИ
Въведение
Поздравления за вашата покупка и добре дошли във Philips! За да се възползвате изцяло от предлаганата от Philips поддръжка,регистрирайте продукта си на адрес www.philips.com/welcome.Прочетете внимателно това ръководство за експлоатация,тъй като то съдържа информация за прекрасните функции на тази самобръсначка,а също и някои съвети, които ще направят бръсненето ви по-бързо и по-приятно.
Общо описание (фиг. 1)
1 Предпазна капачка
2Бръснещ блок
3Бутон за освобождаване на бръснещия блок
4Бутон за вкл./изкл. на самобръсначката (само за AT899/AT896/AT894/
AT892/AT891/AT890/AT811/AT790/AT756/AT753/AT751/AT750)
5Символ на бръснеща глава
6Индикатор за зареждане (само за AT899/AT896/AT894/AT892/
AT891/AT890/AT811/AT790/AT756/AT753/AT751/AT750)
7Зарядна поставка (само за AT941/AT940)
8Адаптер
9Четка за почистване
10Калъф за съхранение (само за AT941/AT940/AT897/AT894/AT892/
AT891/AT890/AT811)
11Символ на батерия и символ на бръснеща глава (само за AT941/
AT940/AT897)
12Бутон за вкл./изкл. на самобръсначката (само за AT941/AT940/AT897)
13Плъзгач за освобождаване на приставката за подстригване (само за AT941/AT940/AT897/AT896/AT894/AT892/AT891/AT890/AT811/
AT790/AT756)
14Приставка за подстригване (само за AT941/AT940/AT897/AT896/
AT894/AT892/AT891/AT890/AT811/AT790/AT756)
Забележка:Можете да откриете номера на модела на гърба на самобръсначката.
Важно
Прочетете внимателно това ръководство на потребителя, преди да използвате уреда и зарядната поставка (само за АТ941/ AT940). Запазете го за справки в бъдеще.
Опасност
-- Внимавайте адаптерът да не се мокри.
Предупреждение
-- В адаптера има трансформатор. Не отрязвайте адаптера, за да го замените с друг щепсел, тъй като това крие опасности.
-- Този уред не е предназначен за ползване от хора (включително деца) с намалени физически възприятия или умствени недъзи или без опит и познания, ако са оставени без наблюдение и не са инструктирани от страна на отговарящо за тяхната безопасност лице относно начина на използване на уреда.
-- Наглеждайте децата, за да не си играят с уреда.
-- Винаги изключвайте щепсела от контакта, преди да измиете самобръсначката с течаща вода.
БЪЛГАРСКИ 21
Внимание
-- Никога не изплаквайте самобръсначката с вода, по-гореща от 80°C. -- Внимавайте с горещата вода. Винаги проверявайте дали водата не е прекалено гореща, за да предпазите ръцете си от изгаряне.
-- Самобръсначката и другите принадлежности не могат да се почистват в съдомиялна машина.
-- От гнездото отдолу на самобръсначката може да тече вода, когато я изплаквате. Това е нормално и не е опасно, тъй като цялата електроника е затворена в капсулован захранващ блок вътре в самобръсначката.
-- Не използвайте самобръсначката, адаптера, зарядната поставка или която и да било друга част, ако е повредена, тъй като това може да причини наранявания. Заменяйте повредения адаптер или зарядна поставка само с такива от оригиналния вид.
-- Използвайте, зареждайте и съхранявайте уреда при температура между 10°C и 35°C.
-- Винаги поставяйте и използвайте самобръсначката върху устойчива на течности повърхност.
-- Използвайте само приложените адаптер, зарядна поставка и аксесоари.
-- За да предпазите бръснещите глави при пътуване, винаги поставяйте предпазната капачка на самобръсначката.
-- Ако самобръсначката е била подложена на значителни промени в температурата, налягането или влажността, оставете я да се аклиматизира за 30 минути, преди да я използвате.
-- Не потапяйте зарядната поставка във вода или друга течност и не я мийте с течаща вода.
Съответствие със стандартите
-- Този уред на Philips е в съответствие с нормативната уредба и всички действащи стандарти, свързани с излагането на електромагнитни полета (ЕМП).
Общи положения
-- Уредът е съоръжен с автоматичен селектор на напрежение и е подходящ за напрежения на мрежата от 100 до 240 волта.
-- Адаптерът преобразува 100-240 волта в безопасно ниско напрежение под 24 волта.
Зареждане
Забележка:Самобръсначката не може да се използва със захранване директно от мрежата.
Когато зареждате самобръсначката за първи път или след като не е използвана дълго време, оставете я да се зарежда, докато индикаторът за зареждане започне да свети непрекъснато.
Вижте таблицата по-долу за времето за зареждане на самобръсначката.
22 БЪЛГАРСКИ
Време за зареждане |
1 час |
8 часа |
|
|
|
|
AT941, AT940, AT897 |
AT899, AT896, AT790 |
|
AT894, AT892, AT891 |
AT756, AT753, AT751 |
|
AT890, AT811 |
AT750 |
Времето за бръснене може да е по-малко от посоченото по-долу в таблицата в зависимост от начина ви на бръснене, навиците ви за почистване или вида на брадата ви.
Минути за |
60 мин. |
50 мин. |
45 мин. |
40 мин. |
бръснене |
|
|
|
|
|
|
|
|
|
|
AT941 |
AT897, AT894, AT892 |
AT899 |
AT790, AT756, |
|
|
|
|
AT753 |
|
AT940 |
AT891, AT890, AT811 |
AT896 |
AT751, AT750 |
Индикации за зареждане
Изтощена батерия
-- AT941/AT940/AT897: Когато батерията е почти изтощена (когато остават само 5 или по-малко минути за бръснене), оранжевият символ на батерията започва да мига. Когато изключите самобръсначката, оранжевият символ на батерията продължава да мига още няколко секунди.
-- AT899/AT896/AT894/AT892/AT891/AT890/AT811/AT790/
AT756/AT753/AT751/AT750: Когато батерията е почти изтощена (когато остават само 5 или по-малко минути за бръснене), индикаторът за зареждане започва да мига в оранжево. Когато изключите самобръсначката, индикаторът за зареждане продължава да мига в оранжево още няколко секунди.
Бързо зареждане (само заAT941/AT940/AT897/AT896/
AT894/AT892/AT891/AT890/AT811)
-- AT941/AT940/AT897: Когато започнете зареждане на изтощена батерия, символът за батерия започва да мига в оранжево и бяло.
Забележка:Когато символът за батерия мига в бяло и оранжево и след това само в бяло,можете да направите бързо бръснене за три минути.

БЪЛГАРСКИ 23
-- AT896/AT894/AT892/AT891/AT890/AT811: Когато започнете зареждане на изтощена батерия, светлинният индикатор за зареждане започва да мига последователно в оранжево и зелено.
Забележка:Когато индикаторът за зареждане мига в оранжево и зелено и след това само в зелено,можете да направите бързо бръснене за три минути.
Зареждане
-- AT941/AT940/AT897: Когато самобръсначката се зарежда, белият символ за батерия мига.
-- AT899/AT896/AT894/AT892/AT891/AT890/AT811/AT790/
AT756/AT753/AT751/AT750: Когато самобръсначката се зарежда, индикаторът за зареждане мига в зелено.
Напълно заредена батерия
-- AT941/AT940/AT897: Когато батерията е напълно заредена, белият символ за батерия свети непрекъснато.
Забележка:След около 30 минути символът на батерия угасва,за да се пести енергия.
-- AT899/AT896/AT894/AT892/AT891/AT890/AT811/AT790/
AT756/AT753/AT751/AT750: Когато батерията е напълно заредена, индикаторът за зареждане свети непрекъснато в зелено.
Забележка:След около 30 минути индикаторът за зареждане угасва, за да се пести енергия.

24 БЪЛГАРСКИ
Зареждане
1Включете малкия щепсел в самобръсначката.
2Включете адаптера в контакта.
,, Индикаторът за зареждане показва състоянието на зареждане на самобръсначката (вижте раздел“Индикации за зареждане” в тази глава).
Зареждане в зарядната поставка (само за АТ941/AT940)
1
2
3
,,
Включете малкия щепсел в зарядната поставка. Включете адаптера в контакта.
Сложете самобръсначката в зарядната поставка.
Индикаторът за зареждане показва състоянието на зареждане на самобръсначката (вижте раздел“Индикации за зареждане” в тази глава).
Използване на самобръсначката
Забележка:Тази самобръсначка може да се използва в банята или под душа.Следователно,от съображения за сигурност,тя не може да се използва със захранване директно от електрическата мрежа.
Съвети и препоръки за бръсненето
-- Тази самобръсначка е подходяща за използване на мокро и сухо. Използвайте я с гел или пяна за бръснене - за повече комфорт на кожата или на сухо - за повече удобство.
Забележка:Съветваме ви да използвате самобръсначката с гел или пяна за бръснене,когато искате мокро бръснене.Не използвайте тази самобръсначка с плътни кремове или масло за бръснене.
-- За оптимални резултати при бръсненето, правете кръгови движения.
-- Самобръсначката е водоустойчива и може да се използва в банята или под душа.
-- Може да са необходими 2 или 3 седмици, докато кожата ви свикне със системата за бръснене Philips.
Мокро бръснене
1 Намокрете кожата с малко вода.
БЪЛГАРСКИ 25
2Нанесете пяна или гел за бръснене.
3Изплакнете бръснещия блок с течаща вода,за да сте сигурни, че ще се плъзга гладко по кожата ви.
4Натиснете веднъж бутона вкл./изкл.,за да включите самобръсначката.
5Движете бръснещите глави по кожата си с кръгови движения.
Забележка:Редовно изплаквайте бръснещия блок с течаща вода,за да сте сигурни,че ще продължи да се плъзга гладко по кожата ви.
6След бръсненето,натиснете веднъж бутона вкл./изкл.,за да изключите самобръсначката,и подсушете лицето си.
7Почистете самобръсначката (вж.раздел“Почистване и поддръжка”).
Забележка:Уверете се,че сте изплакнали от самобръсначката всичката пяна или гел за бръснене.
Сухо бръснене
1Натиснете веднъж бутона вкл./изкл.,за да включите самобръсначката.
2Движете бръснещите глави по кожата си с кръгови движения.
3След бръсненето,натиснете веднъж бутона вкл./изкл.,за да изключите самобръсначката.
4Почистете самобръсначката (вж.раздел“Почистване и поддръжка”).
Подстригване (само заAT941/AT940/AT897/AT896/AT894/
AT892/AT891/AT890/AT811/AT790/AT756)
Можете да ползвате машинката за подстригване, за да оформите бакенбардите и мустаците.
1Избутайте плъзгача на машинката за подстригване надолу,за да отворите машинката.
2Натиснете веднъж бутона вкл./изкл.,за да включите самобръсначката.
,, Сега можете да започнете подстригването.
3След подстригването,натиснете веднъж бутона вкл./изкл.,за да изключите самобръсначката.

26 БЪЛГАРСКИ
4Почистете машинката за подстригване (вижте глава“Почистване и поддръжка”).
5 Затворете машинката за подстригване (с щракване).
Почистване и поддръжка
Никога не почиствайте самобръсначката и зарядната поставка (само заAT941/AT940) с въздух под налягане,абразивни гъби, абразивни почистващи препарати или агресивни течности,като бензин или ацетон.
Винаги изключвайте щепсела от контакта,преди да измиете самобръсначката с течаща вода.
-- За най-добри резултати при бръснене почиствайте самобръсначката след всяка употреба.
-- Редовното почистване гарантира по-ефикасно бръснене. -- За най-добри резултати при почистване ви съветваме да
използвате спрей за почистване Philips (HQ110).
-- Внимавайте с горещата вода. Винаги проверявайте дали водата не е прекалено гореща, за да предпазите ръцете си от изгаряне.
Забележка:От гнездото отдолу на самобръсначката може да тече вода,когато я изплаквате.Това е нормално и не е опасно,тъй като цялата електроника е затворена в капсулован захранващ блок вътре в самобръсначката.
Почистване на бръснещия блок с течаща вода
1 Изключете самобръсначката.
2 Натиснете бутона за освобождаване,за да отворите бръснещия блок.
3Изплакнете бръснещия блок и отделението за косми с гореща течаща вода за 30 секунди.
Внимавайте с горещата вода.Винаги проверявайте дали водата не е прекалено гореща,за да предпазите ръцете си от изгаряне.
БЪЛГАРСКИ 27
-- Изплакнете отделението за косми и вътрешността на бръснещия блок.
-- Изплакнете бръснещия блок отвън.
4 Затворете бръснещия блок и изтръскайте излишната вода.
Докато изтръсквате водата,внимавайте да не ударите някъде бръснещия блок.
Никога не подсушавайте бръснещия блок и отделението за косми с кърпа за баня или хартиени салфетки,защото това може да повреди бръснещия блок.
5Отворете отново бръснещия блок и го оставете отворен,за да може самобръсначката да изсъхне напълно.
Почистване на бръснещия блок с четката за почистване
1Изключете самобръсначката.
2Натиснете бутона за освобождаване,за да отворите бръснещия блок.
3Извадете бръснещия блок от самобръсначката.

28 БЪЛГАРСКИ
4 Завъртете ограничителя обратно на часовниковата стрелка (А) и свалете задържащата рамка (В).
5 Сваляйте и почиствайте бръснещите глави една по една.Всяка бръснеща глава се състои от ножче и предпазител.
Забележка:Ножчетата и предпазителите са в комплекти по двойки. Почиствайте двойките една по една,защото ако случайно размените ножчетата и предпазителите,може да минат няколко седмици, докато се възстанови оптималната работа при бръснене.
-- Извадете ножчето от предпазителя и го почистете с четката.
-- Почистете предпазителя отвътре и отвън с четката.
6 Поставете бръснещите глави обратно в бръснещия блок.
Уверете се,че издатините на бръснещите глави пасват точно в жлебовете.

БЪЛГАРСКИ 29
7Върнете задържащата рамка в бръснещия блок (А) и завъртете ключалката по часовниковата стрелка (В).
8Вмъкнете издадената част на бръснещия блок в жлеба отгоре на самобръсначката.След това затворете бръснещия блок.
Забележка:Ако бръснещият блок не се затвори гладко,проверете дали сте поставили добре бръснещите глави и дали задържащата рамка е заключена.
Почистване на приставката за подстригване с четката за почистване (само заAT941/AT940/AT897/AT896/AT894/
AT892/AT891/AT890/AT811/AT790/AT756)
Почиствайте машинката за подстригване след всяка употреба.
1Изключете самобръсначката.
2Избутайте плъзгача на машинката за подстригване надолу, за да отворите машинката.
3Почистете машинката за подстригване,като използвате края с къси косми на четката за почистване.Четкайте нагоре и надолу успоредно на зъбите на машинката.
4Затворете машинката за подстригване (с щракване).

30 БЪЛГАРСКИ
Съвет:За най-добри резултати при подстригване,на всеки шест месеца смазвайте зъбците на машинката за подстригване с капка масло за шевни машини.
Съхранение
-- За да избегнете повреди, поставяйте предпазната капачка на самобръсначката.
-- Само за AT941/AT940/AT897/AT894/AT892/AT891/AT890:
Съхранявайте самобръсначката във включения в комплекта калъф.
Подмяна
За да постигнете оптимална работа на уреда при бръснене, препоръчваме ви да подменяте бръснещите глави всяка година.
Напомняне за смяна
Символът за бръснеща глава ще светне, за да укаже, че бръснещите глави трябва да се сменят. Сменяйте повредените бръснещи глави веднага.
Заменяйте бръснещите глави само с оригинални глави HQ9 (AT941/ AT940) или HQ8 (AT899/AT897/AT896/AT894/AT892/AT891/AT890/ AT790/AT756/AT753/AT751/AT750) на Philips.
1
2
3
4
Символът за бръснеща глава свети непрекъснато в оранжево.
Изключете самобръсначката.Извадете щепсела на самобръсначката от контакта или я извадете от зарядната поставка (само заAT940/AT921).
Натиснете бутона за освобождаване,за да отворите бръснещия блок. Извадете бръснещия блок от самобръсначката.
Loading...