


2013 ROGUE Quick Reference Guide

|
01 |
|
03 |
04 |
05 |
02 |
|
06 |
|
|
|
08 |
|
15 |
|
09 |
07
10 
 11
11 
 12
12
16
13
14 |
17 |
18 |
01 VEHICLE INFORMATION DISPLAY*
02 HEADLIGHT AND TURN SIGNAL CONTROL
03 LOW TIRE PRESSURE WARNING LIGHT
04 INSTRUMENTSWITCH* BRIGHTNESS CONTROL
05 TRIP CHANGE BUTTON*
06 |
WINDSHIELD WIPER / WASHER SWITCH |
07 |
OUTSIDE MIRROR CONTROL SWITCH |
08 |
STEERING WHEEL SWITCHES FOR |
AUDIO CONTROL* / BLUETOOTH® |
|
09 |
CRUISE CONTROL |
10 |
HEADLIGHT AIMING CONTROL* |
11 |
AWD LOCk SWITCH* |
12 |
VEHICLE DYNAMIC CONTROL (VDC) |
|
OFF SWITCH* |
13 |
STEERING WHEEL TILT ADJUSTMENT* |
14 |
HOOD RELEASE* |
15 |
AUDIO AND NAVIGATION SYSTEM |
16 |
AUTOMATIC CLIMATE CONTROLS* |
17 |
POWER OUTLET* |
18 |
FRONT PASSENGER AIR BAG |
|
STATUS LIGHT* |
*See your Owner’s Manual for information.

TABLE OF CONTENTS
New SYSTEM Features |
|
|
Around View™ Monitor (if so equipped) . . . . . . . . . . . . . |
. |
2 |
Sport Mode . . . . . . . . . . . . . . . . . |
3 |
|
USB/iPod® Interface (if so equipped) . . . . . . . . . . . . . |
. |
. 3 |
Navigation System (if so equipped) . . . . . . . . . . . . . . |
. |
. 4 |
ESSential Information |
|
|
Loose Fuel Cap . . . . . . . . . . . . . . . . . 5 |
||
Tire Pressure Monitoring System (TPMS) . . . . . . . . . . . . |
. |
5 |
Towing Your Vehicle . . . . . . . . . . . . . . . . . |
6 |
|
Outside Temperature Display . . . . . . . . . . . . . . . . . |
|
6 |
First Drive Features |
|
|
NISSAN Intelligent Key® System (if so equipped) . . . . . . . . |
. |
. 7 |
Liftgate Release (NiSSAN Intelligent Key® models only - if so equipped) . |
. |
7 |
Front Seat Adjustments . . . . . . . . . . . . . . . . . |
8 |
|
Folding the Front Passenger’s Seat Down (if so equipped) . . . . . |
. |
8 |
Folding the Rear Seatbacks Down . . . . . . . . . . . . . . . |
. |
9 |
Outside Mirror Control Switch . . . . . . . . . . . . . . . . |
. |
9 |
Starting/Stopping the Engine |
|
|
(NISSAN Intelligent Key® models only - if so equipped) . . . . . . |
. |
9 |
Headlight Control . . . . . . . . . . . . . . . . . |
10 |
|
Windshield Wiper/Washer Switch . . . . . . . . . . . . . . . |
. 11 |
|
Manual Climate Controls (if so equipped) . . . . . . . . . . . . |
. 12 |
|
FM/AM/SiriusXM™ Satellite Radio with CD Player (if so equipped) . |
. |
13 |
cruise Control . . . . . . . . . . . . . . . . . . . . . . . . . . . . . . . . . . |
. . . . . . . . . . . . . . 14 |
|
Fuel-Filler Door . . . . . . . . . . . . . . . . . |
|
14 |
SySTem Guide |
|
|
Trip Computer . . . . . . . . . . . . . . . . . |
|
15 |
Bluetooth® Hands-free Phone System (if so equipped) |
. |
. . . . . . 15 |
•A cellular telephone should not be used for any purpose while driving so full attention may be given to vehicle operation.
•Always wear your seat belt.
• Supplemental air bags do not replace proper seat belt usage.
•Children12 and under should always ride in the rear seat properly secured in child restraints or seat belts according to their age and weight.
•Do not drink and drive.
For more information, refer to the “Safety –– Seats, seat belts and supplemental restraint system (section 1)”, “Center display, heater, air conditioner, audio, phone and voice recognition systems (section 4)” and “Starting and driving (section 5)” of your Owner’s Manual.
Additional information about your vehicle is also available in your Owner’s Manual, Navigation System Owner’s Manual
and at www.nissanusa.com.
To view detailed instructional videos, go to
www.nissanownersinfo.mobi/2013/rogue or snap this barcode with an appropriate barcode reader.
new system features
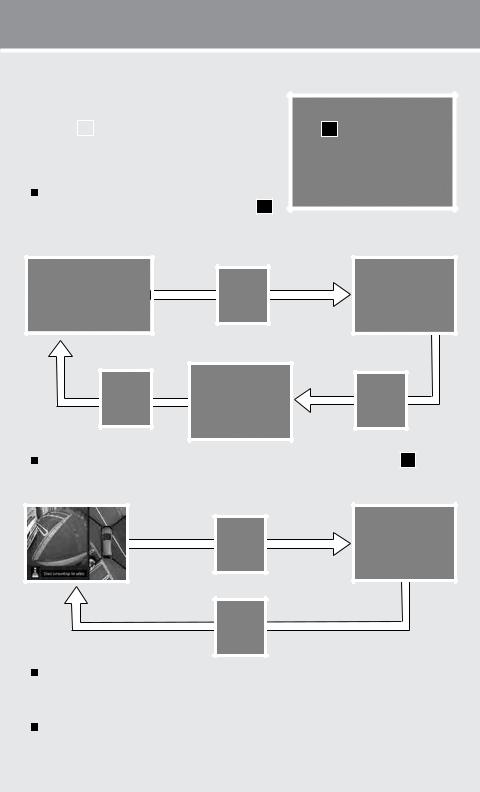
AROUND VIEW™ MONITOR (if so equipped)
|
|
With the ignition switch in the ON position, the Around |
|||
|
|
||||
|
|
View™ Monitor is activated by pressing the CAMEra |
|||
|
|
button |
01 |
, located on the center console, or by |
01 |
|
|
moving the shift lever to the R (REVERSE) position. |
|||
|
|
The monitor displays various views of the position of |
|||
|
|
the vehicle. |
|
||
|
|
When the shift lever is in the P (PARK), N (NEuTRAL) |
|||
|
|
or D (DRive) position and the CAMEra button 01 |
is |
||
|
|
pressed, the following views will display in order: |
|
||
Start from any Control Panel screen |
Front view & bird’s-eye view |
||||
|
|
|
|
Press |
|
Press |
Front view & front-side view |
Press |
When the shift lever is in the R (REVERSE) position and the CAMEra button 01 is pressed, the following views will display in order:
Rear view & bird’s-eye view |
Rear view & front-side view |
|
Press |
Press
The colored guide lines on the display screen indicate vehicle width and approximate distances to objects with reference to the vehicle body line.
• Red 1.5 ft (0.5 m); Yellow 3 ft (1 m); Green 7 ft (2 m) and 10 ft (3 m).
For information regarding how to access additional viewing cycles, please see your Owner’s Manual.
2 |
To view detailed instructional videos regarding these and other features, please go to www.nissanownersinfo.mobi |
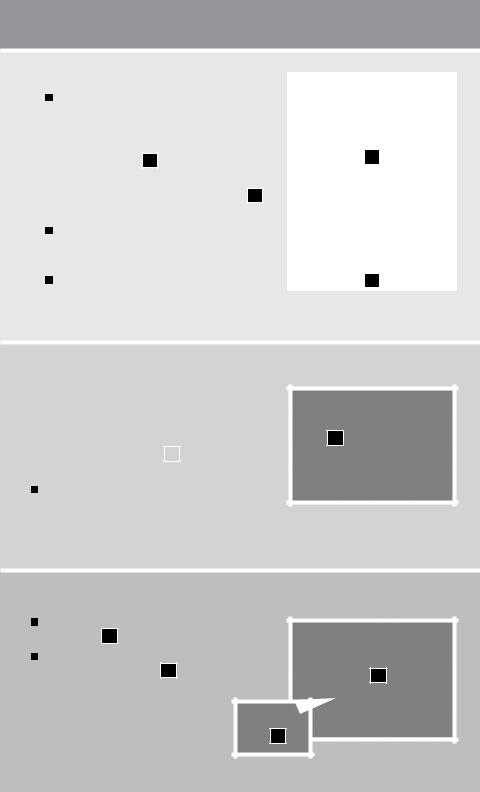
NOTE:
There are some areas where the system will not detect objects.
•When in the front or the rear view display, an object below the bumper or on the ground may
not be detected 02 .
•When in the bird’s-eye view, a tall object near the seam of the camera detecting areas 03 will not appear in the monitor.
The distance between objects viewed on the Around View Monitor differs from the actual distance.
Objects in the bird’s-eye view will appear further than the actual distance.
02
03
For more information, refer to the “Center display, heater, air conditioner, audio, phone and voice recognition systems (section 4)” of your Owner’s Manual.
SPORT Mode
|
In the SPORT mode, the engine and transmission are |
||
|
|||
|
controlled to set the engine speed higher than in the |
||
|
D (DRive) position. This enhances throttle response |
||
|
for a “sporty” driving feeling. |
01 |
|
|
|
|
|
|
The SPORT mode switch |
01 |
is located on the |
|
|||
|
center console. |
|
|
To turn the SPORT mode on, push the SPORT mode switch. The SPORT mode indicator light in
the instrument panel illuminates. To turn the SPORT mode off, push the SPORT mode switch again. The SPORT mode indicator light on the instrument panel will turn off.
For more information, refer to the “Starting and driving (section 5)” of your Owner’s Manual.
USB/iPod® Interface (if so equipped)
The USB jack is located in the center console under |
|
|
the arm rest 01 . |
|
|
When a compatible USB memory device or iPod® is |
|
|
plugged into the USB jack 02 , compatible audio files |
01 |
|
stored on the device can be played through the |
|
|
|
|
|
vehicle’s audio system. |
|
|
For more information, refer to the “Center display, heater, |
|
|
air conditioner, audio, phone and voice recognition |
02 |
|
systems (section 4)” of your Owner’s Manual. |
|
|
To view detailed instructional videos regarding these and other features, please go to www.nissanownersinfo.mobi |
3 |

new system features
01 |
|
|
|
02 |
03 |
04 |
05 |
06 |
07 |
08 |
09 |
10 |
|
|
11 |
|
12 |
13 |
|
|
|
|
14 |
NAVIGATION SYSTEM (if so equipped)
Your Navigation System can calculate a route from the current location to a preferred destination. The real-time map display and turn-by-turn voice guidance will lead you along the route.
The Navigation System will continually update your vehicle’s position. If you have deviated from the original route, it will recalculate the route from your current location.
01 |
button – Press to change the display brightness between day and night modes. |
While the mode is being displayed, the brightness can be adjusted using the SCROLL knob. Press and hold to turn the display off. Press again to turn the display on.
02 NAV button – Press to access the functions of the Navigation System.
03 TRAF button – Press to view traffic information on the route (if so equipped).
04Voice key – Select to repeat the voice guidance while a route is active. Select and hold to switch the voice guidance on and off.
05 MAP button – Press to display the current location map screen. 06 SETUP button – Press to access the system settings.
07 
 key – Select to zoom the map in. 08 Touch screen display.
09 
 BACK button – Press to return to the previous screen. 10
 key– Select to zoom the map out.
11VOL knob – Turn right to increase the volume or left to decrease the volume.
12SCROLL knob – Turn to scroll through the items in a list. Press to select a menu item.
13Menu key – Select to access system menu options; “Store Current Position”, “Show
Position/GPS Information”, “Show Destination Information” and “Map Setup”.
14SD-card location - An SD-card with map data must be inserted here for map functions to operate.
For more information, refer to your Navigation System Owner’s Manual.
4 |
To view detailed instructional videos regarding these and other features, please go to www.nissanownersinfo.mobi |
 Loading...