


FM2
Table of contents
 Loading...
Nikon
INSTRUCTION MANUAL
C€
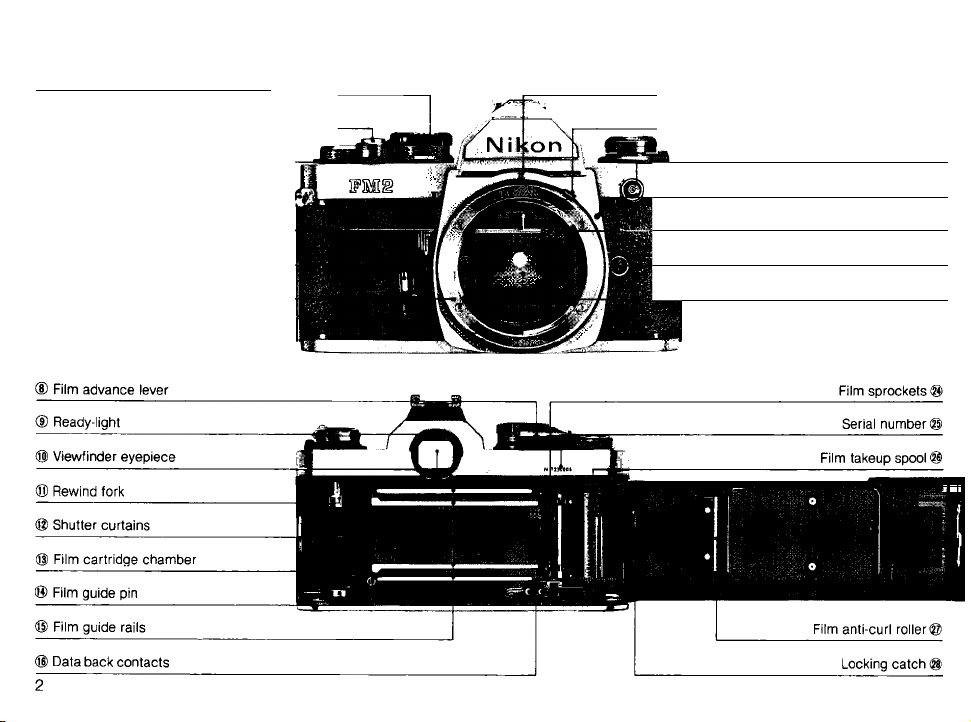
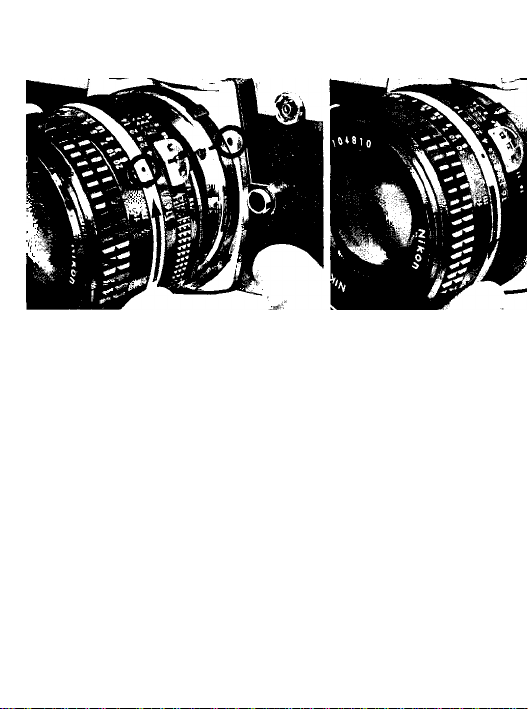
NOMENCLATURE
0 Shutter speed/ASA/ISO film speed ring
@ Shutter release button
® Shutter release fingerguard
® Neckstrap eyelet
® Depth-of-field preview lever
® Self-timer lever
® Lens mounting flange
_________
ADR window ®
Meter coupling lever d
Sync cord terminal d
Lens mounting index ®
Focusing screen release latch ®
Lens release button @
yH Reflex mirror ®
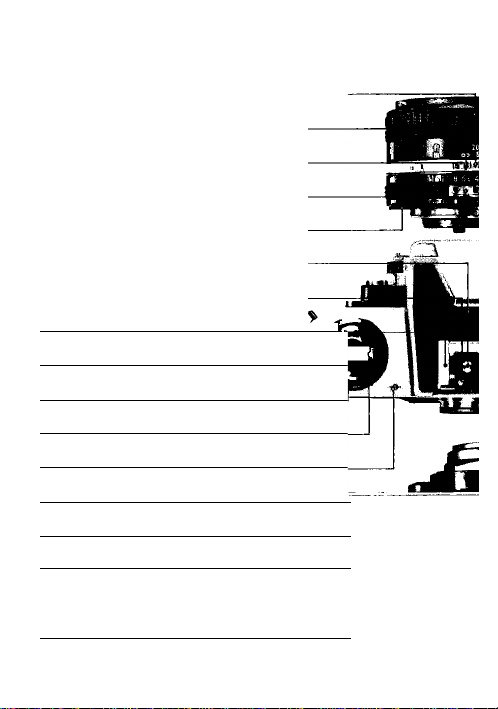
1 Depth-of-field indicators/Lens mounting ring
1
Aperture/Focusing index
) infrared compensation index
I Meter coupiing shoe
I Meter coupiing ridge
) Hot-shoe contact
> Ready-iight contact
) Accessory shoe
® Camera baok iock iever
® Film rewind knob
® Film rewind crank
® Film plane indicator
® Motor drive shutter coupling
@ Motor drive coupling
@ Film rewind button
@ Memo holder
i(C

Distance scale i
Focusing ring
Aperture scale (
Aperture ring (
ADR scale i
Shutter speed Index (
Shutter speed dial i
Multiple exposure lever (
Frame counter >
ASA/ISO film speed Indicator ®
ASA/ISO film speed dial '
Tripod socket (
Motor drive electrical contacts
Battery chamber lid i
Film pressure plate i
Camera back

CONTENTS
NOMENCLATURE..................................................................2—3
FOREWORD.................................................................................5
BASIC OPERATION.............................................................6—15
CONTROLS IN DETAIL
Film advance lever
Frame counter.....................................................................16
Shutter release button
ASA/ISO film speed dial.....................................................18
Shutter speed dial/exposure determination
Setting the shutter speed
Setting the aperture
Exposure determination
Exposure display.........................................................21
Metering range of exposure meter.............................22
Stop-down exposure measurement
Exposure measurement in special cases
Duplication work and photomicrography
Viewfinder/viewing & focusing
Depth-of-field preview lever
Self-timer lever....................................................................30
Multiple exposure lever.....................................................31
Memo holder
Infrared compensation index
Flash photography
Ready-light............................................................34—35
........................................................
.............................................................
.......................................................
............
....................................
.....................................................
.............................................
...........................
..................................
......................................
.......................................................................
............................................
.................................................
16-35
18—25
18—19
.................
.................
26—27
28—30
33—35
16
17
20
21
23
24
25
32
32

ACCESSORIES..................................................................36—44
Interchangeable focusing screens
Close-up equipment...........................................................38
Motor Drive MD-12
Nikon Speedlights..............................................................40
Data Back MF-16................................................................41
Anti-Cold Battery Pack DB-2.............................................42
Right-Angle Viewing Attachment DR-3
Eyepiece Magnifier DG-2...................................................42
Rubber eyecup...................................................................42
Eyepiece correction lenses
Cable Release AR-3
Filters...................................................................................43
Lens hoods.........................................................................43
Camera cases
Neckstraps..........................................................................44
Compartment cases...........................................................44
TIPS ON BATTERY USE...........................................................45
TIPS ON CAMERA CARE
SPECIFICATIONS..............................................................48—49
IMPORTANT!.............................................................................50
.............................................................
...........................................................
.....................................................................
.................................................
...........................
...........................
..............................................
36—37
46—47
39
42
42
42
44


FOREWORD
Thank you for your purchase of the Nikon FM2 and welcome
to Nikon’s world of photography. The Nikon FM2 offers many
special features including top shutter speed of 1/4000 sec.,
and flash synchronization speeds as fast as 1/250 sec. The
FM2 also incorporates a TTL full-aperture metering system
and high-precision mechanically-controlled shutter curtains.
These features enable full manual operation and mechanical
control—the FM2 works without batteries at all speeds, for
a wide range of purposes. Whenever you are, at home or far
afield, you’ll always be ready for great shooting. To obtain the
best results with your FM2, be sure to keep this instruction
manual handy until you’ve fully mastered its operation—just
a few minutes to ensure many years of rewarding photography.
BASIC OPERATION
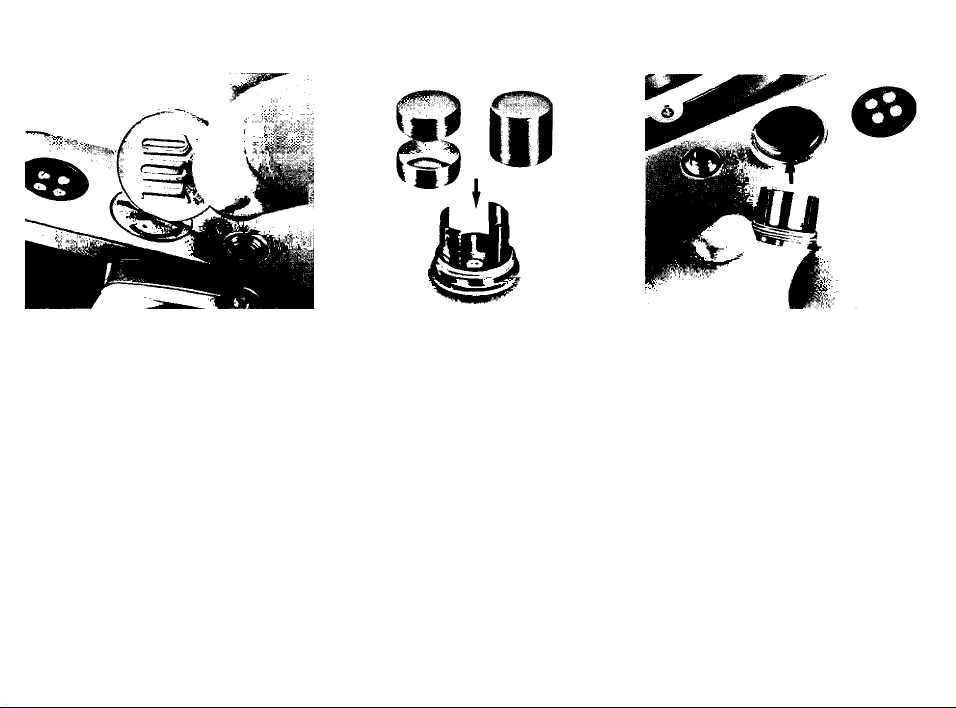
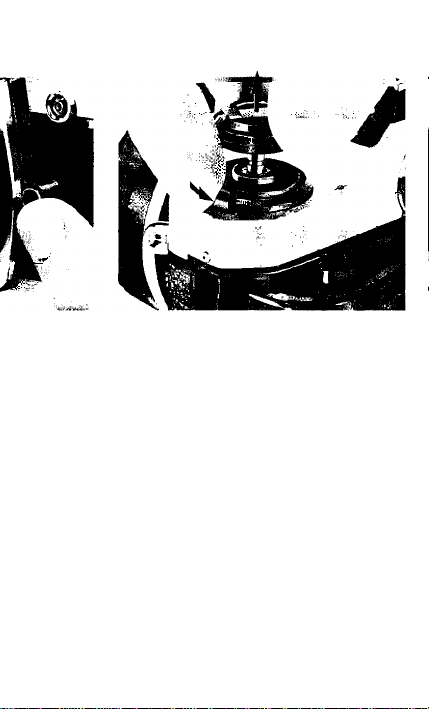
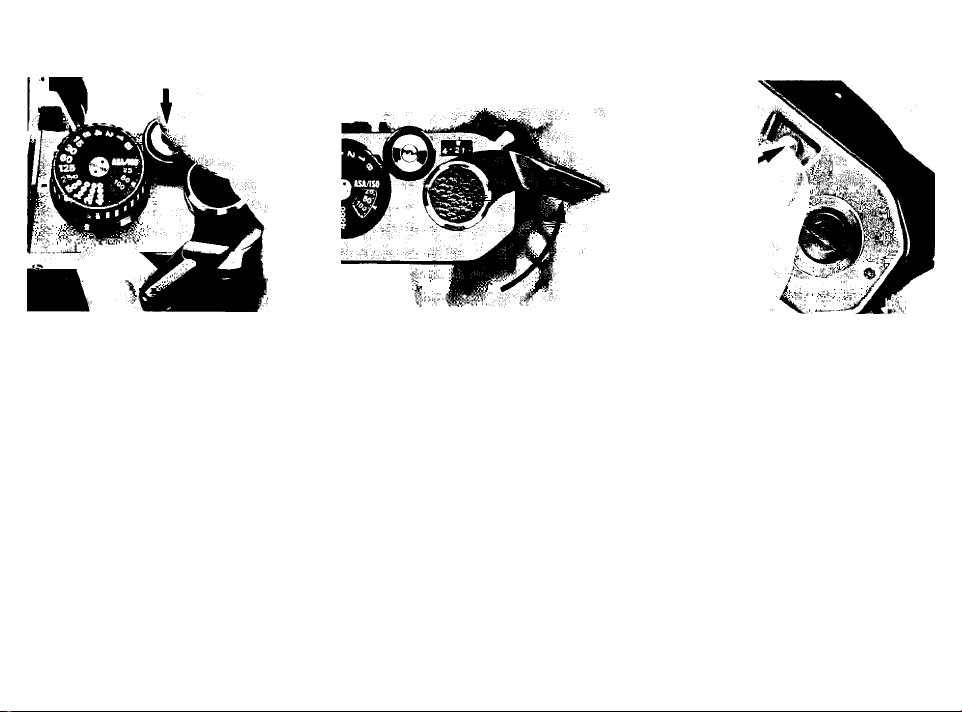
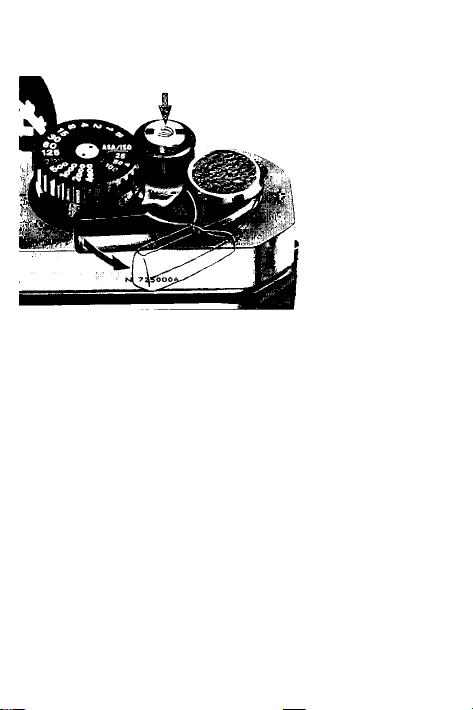
4 Remove the battery
chamber lid ® .
Use a coin to unscrew the lid in a counter
clockwise direction.
A Install the battery.
Wipe the battery terminals clean
and insert the batteries, making sure that
the + signs are up. Usable batteries are:
• 3V lithium battery (1 unit)
• 1.55V silver-oxide batteries, 3.1V,
(2 units)
• 1.5V alkaline-manganese batteries, 3V,
(2 units)
Caution: Keep batteries away from infants and
small children. In case a battery is accidentally
swallowed, call a doctor immediately as the
material inside the batteries can cause serious
problems.
O Put the battery chamber
lid back In its place.
Slip the battery clip back into the camera
body baseplate and screw it clockwise
tightly into place.
Note: For more information on batteries, refer
to page 45.
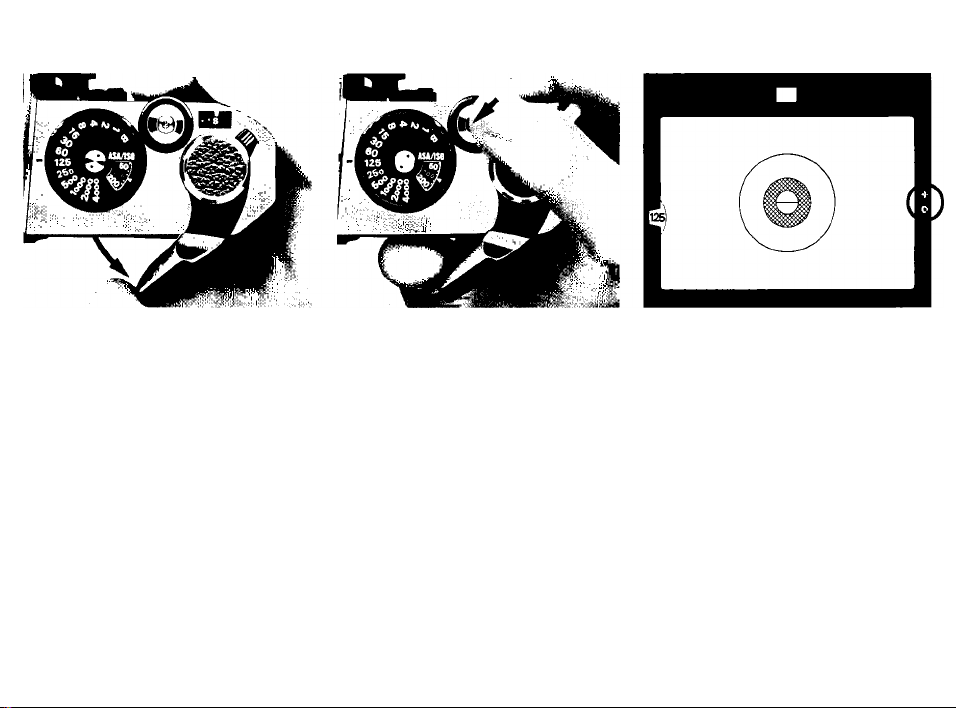
^ Pull out the film advance
lever (D to unlock the
shutter release button (D.
The film advance lever doubles as a
shutter release button lock. You can un
lock the shutter release button by simply
pulling out the film advance lever slightly
from the flush to the standoff position.
e Press the shutter
release button lightly to
switch the exposure meter
on.
The shutter release button activates the
exposure meter when lightly pressed. The
meter Itself stays on for approx. 30 sec.
after you have taken your hnger off the
button.
A Check battery power.
"■ Switch the exposure meter on while
looking through the viewfinder. If one or
two of the red LED exposure indicator
lamps inside lights up, this would mean
normal condition. ’’
Note: When the shutter speed dial ® is on B
(bulb), none of the exposure indicator lamps will
light up. Be sure to set the dial at another posi
tion. If none of the exposure Indicator lamps
light up, either the battery is improperly In
stalled—In which case you should install It
properly—or battery power Is not sufficient,
in which case you should change the battery.
BASIC OPERATION —continued
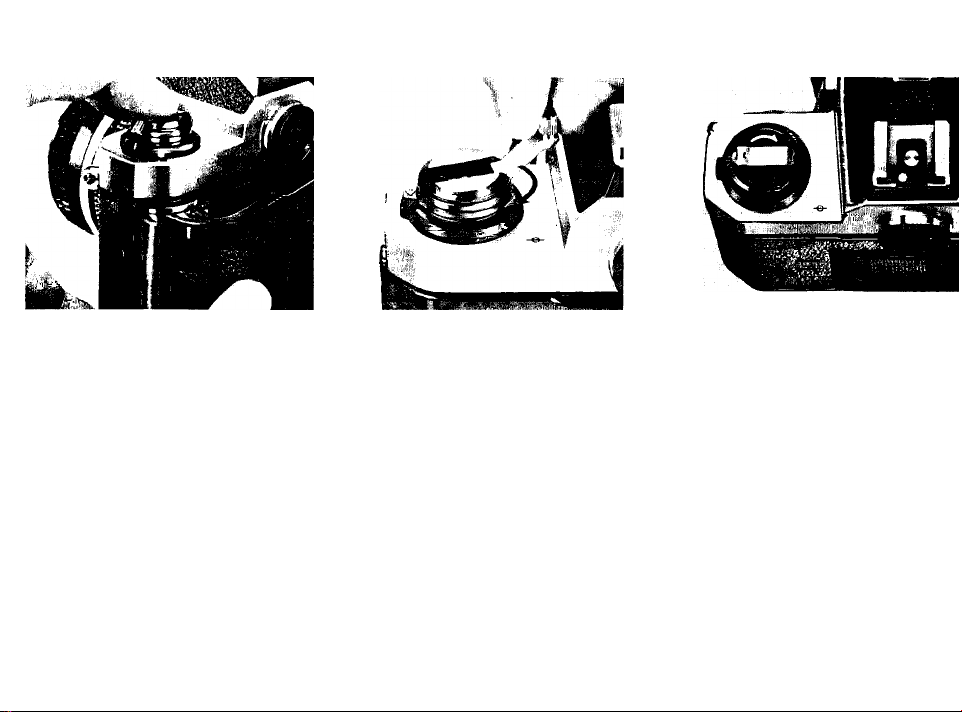
^ Mount the lens onto the camera.
■■ Place the lens onto the camera, lining up the aperture/
focusing Index ® on the lens with the lens mounting index ®
on the camera body. Then twist the lens mounting ring ®
counterclockwise until It clicks Into place. Confirm that the
aperture/focusing index is right on top.
To remove: Push the lens release tDutton @ and turn the lens
mounting ring clockwise until the lens comes off.
Note: When changing lenses with film loaded in the camera, be careful
not to expose the mirror box to direct sunlight.
Q Open the camera back #.
Push the camera back lock lever ®
counterclockwise with your index finger
while lifting the film rewind knob® . The
camera back will pop open.
Caution: Never touch the shutter curtaihs.

/
Q Install the film cartridge.
Position the film cartridge in the
film cartridge chamber @ with the film
leader pointing towards the takeup spool
@, and push the rewind knob back down
to secure it in place.
Note: You can use any of the 35mm film car
tridges available on the market. It is advisable
to handle film in the shade to avoid direct ex
posure to sunlight.
4 A Insert the film leader
In the takeup spool.
Pull the leader across gently and insert it
into one of the slots in. the film takeup
spool. Slowly rotate the takeup spool
inwards with your thumb, making sure the
latch in the slot engages the first or sec
ond perforation along the side of the film
leader.
Wind the film advance
* lever to advance film
onto the takeup spool.
Wind the film advance lever and depress
the shutter release button until the film
sprockets ® engage the perforations on
the edges of the film. Make sure you wind
the lever fully until it comes to a stop.
BASIC OPERATION »continued
4 A Close the camera
back.
Close the camera back until it snaps shut,
making sure that the perforations are
perfectly meshed with the sprockets and
that the film is set between the film guide
rails ®.
10
4 o Take up film slack.
Fold out the film rewind crank
®) and rotate it in the direction of the
arrow on the film rewind knob until it
stops. Then fold the crank back in.
4^ Make blank exposures
until the frame
counter ® reaches frame 1.
Press the shutter release button and wind
the film advance lever until the frame
counter reaches frame 1. As you wind the
lever, confirm that the film rewind knob
rotates counterclockwise. This indicates
the film has been loaded and is being
advanced correctly. If the knob fails to
rotate, reload the film cartridge.
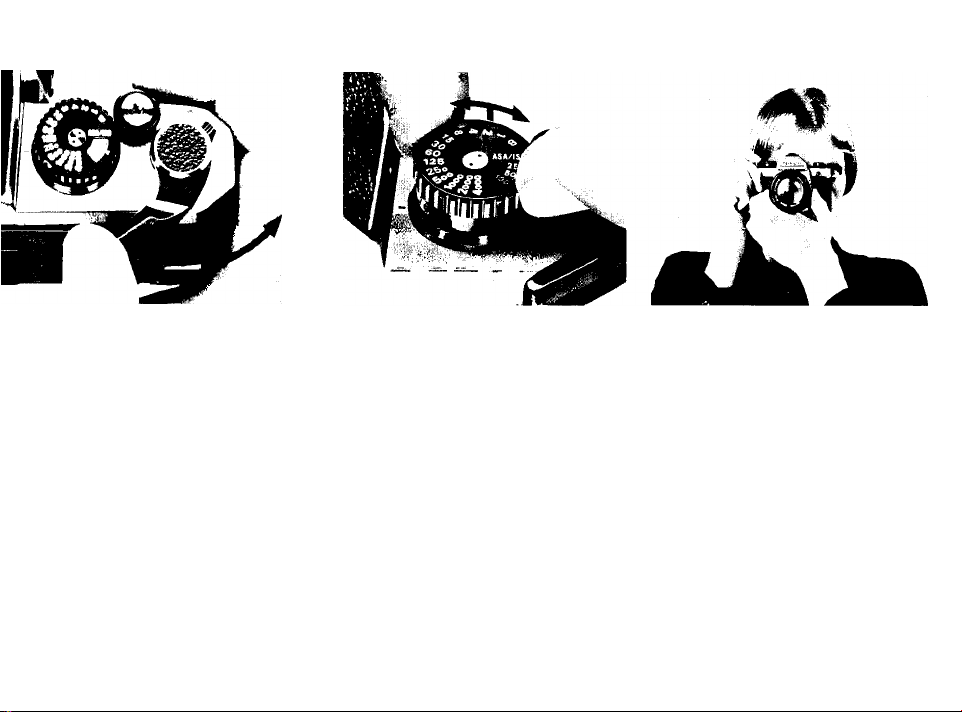
Set the ASA/ISO film speed.
Lift the ASA/ISO film speed ring ® and
rotate it in either direction until the red
ASA/ISO film speed indicator ® is oppo
site the ASA/ISO film speed indication in
use. Unless the film speed is set correctly,
you cannot obtain correct exposure. For
film speeds not indicated in the ASA/ISO
film speed dial®, refer to page 18.
Hold the camera and
point It at the subject.
Basic holding posture: Use your left hand
to cradle the camera, with your fingers
wrapped around the lens and the elbow
propped against your body for support, as
you look through the viewfinder. Use your
right hand’s index finger to depress the
shutter release button and your thumb to
wind the film advance lever. Wrap the
other fingers of your right hand around
the camera body. You can adapt this
basic posture to both horizontal and ver
tical format shooting. To hold the camera
steady, it is advisable to lean on or against
something strong and stable (e.g.,a wall).
Also, you can look through the viewfinder
with the right or left eye, with the other
eye closed or open.
11

BASIC OPERATION —• continued-
I
A
y Set the correct exposure.
* ■■ First, position your main subject at the center (i.e., the
12mm-diameter circie) of the field of view inside the viewfinder.
Then turn the shutter speed dial @ and/or lens aperture ring @
until the LED lamp for the symbol for correct exposure o
lights up.
Important! Intermediate settings of lens aperture but not of shutter
speed are usable.
Note: The meter reads the light over the entire focusing screen but has
a distinct bias on the central 12mm-diameter area.
12
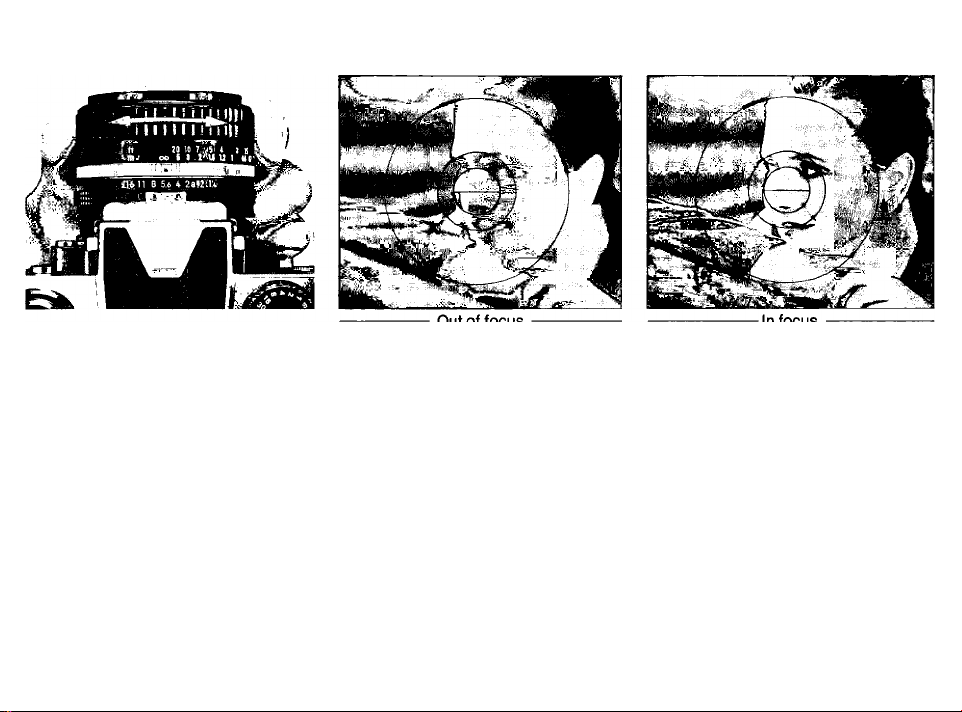
40 Focus on the subject
by rotating the lens
focusing ring (§).
The FM2 is provided with the Type K2 fo
cusing screen as standard. Look through
the viewfinder whiie turning the focusing
ring until the two halves of the split image
rangefinder coincide perfectly to form a
single unbroken image and the image in
the microprism grid appears sharp. Cor
rect focus will then be secured.
-Outof focus- lnfocus-
13
BASIC OPERATION —continued-
4 Q Depress the shutter
' ^ * release button.
Look through the viewfinder, and depress
the shutter reiease button, in depressing
the shutter release button, apply light but
steady pressure with the ball of your
index finger to avoid camera shake that
might result in image blur.
14
AQ Advance the film.
Wind the film advance lever as
far as it will go to transport the film to the
next frame and ready the camera for the
next shot. Do not apply excessive pres
sure in winding the lever. You cannot wind
the lever when the film is at an end—you
should then rewind the film.
A4 Press the film rewind
^ ■■ button
After the last exposure has been made,
turn the camera upside down and press
the film rewind button, so that the ex
posed film can be rewound back into its
cartridge. You don't have to depress the
button all the way.
®.

A A Rewind the film.
Lift the film rewind crank and
turn it in the direction of the arrow. At the
end of film rewind, you will feel a slight
resistance. Continue winding one or two
more turns until the crank feels lighter;
this will indicate that the film leader is
now fully rewound into the cartridge.
A A Remove the film
cartridge.
Push the camera back lock lever in the
direction of the arrow as you lift the film
rewind crank to open the camera back.
Take out the film cartridge. Avoid unload
ing film in direct sunlight.
A^ Put the film advance
lever back into place.
Close the camera back and push the film
advance lever into place. When you're
not using the camera, you should set the
film advance lever to this position which
locks the shutter release button and
keeps the exposure indicator lamps in
side the viewfinder switched off even if
the shutter release button is accidentally
pressed.
Note: Even if the exposure indicator lamp is lit,
it will automatically be switched off in approx.
30 sec., and the exposure measuring circuit
will simultaneously be cut off.
15
CONTROLS IN DETAIL
Film advance lever (D
The film advance lever also functions as a lock for the shutter
release button. The shutter release button is unlocked \A/hen the
lever is pulled out to the standoff position. To advance the film,
wind the lever to the right all the way until it stops. It auto
matically returns to the standoff position the moment you take
your thumb off it, A single, completed stroke of the lever ad
vances the film by a single frame and simultaneously cocks
the shutter.
16
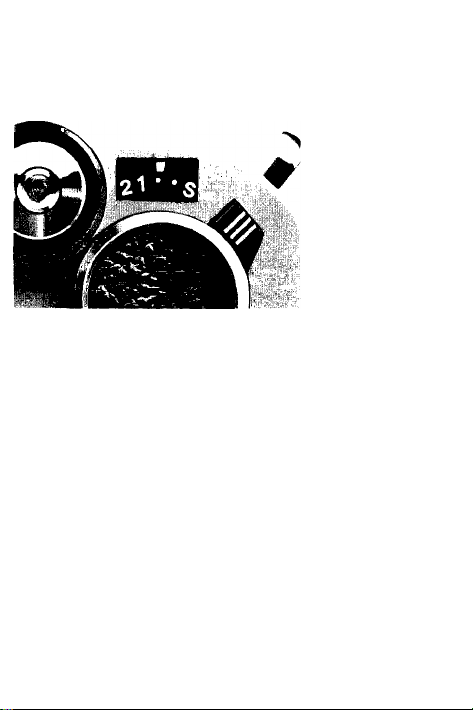
Frame counter
The additive type frame counter is graduated from S- -1 2 4—
up to 36 in even numbers with odd numbers indicated by white
dots in between the even numbers. Even if there's no fiim in the
camera, the frame counter is operative, advancing by a single
frame every time the film advance lever is fully wound. After
frame 36 of a 36-exposure roll of film, the counter will not oper
ate even if you repeatedly press the shutter release button and
wind the film advance lever; film will be advanced, however,
until the actual end of the film roll. The counter is automatically
reset to S when the camera back is opened.
®
Shutter release button (D
The shutter release button also serves to activate the FM2's
bullt-ln exposure meter. When the film advance lever Is In the
flush position, the shutter release button is locked and will not
operate. To release the button from its locked position, pull out
the film advance lever to the standoff position. Slight pressure
on the shutter release button will then switch on both the ex
posure meter and the LED exposure information display inside
the viewfinder. The meter and the display remain on for approx.
30 sec. after the finger is removed from the button, after whicti
they are automatically switched off to conserve battery power.
Pressing the shutter release button all the way down releases
the shutter. When you depress the button, touch the fingerguard ® with the tip of your index finger and depress it lightly
with smooth, even pressure. This makes shutter release oper
ation smooth and stable. With a shutter speed of 1/30 sec. or

slower, it is advisabie to attach the camera to a tripod and use
a cable release to release the shutter; this will prevent camera
shake which results in blurred photographs. The cable con
nector can be screwed into the hole at the center of the shutter
release button. If the tripod has a large head, contact between
the lens barrel and the head may make it impossible to turn the
lens aperture ring. In this case, use the special tripod adapter
supplied with the camera between the tripod head and the
camera body.
17

CONTROLS IN DETAIL —continued
ASA/ISO film speed dial ®
The ASA/ISO scale on the dial has numbered settings for
speeds from ASA/iS012 to 6400. The dots between each pair of
ASA/ISO numbers stand for intermediate settings, such as 64,
80, etc. The iliustration above gives the speeds for ali infermediate settings. ASA/iSO 100 and 400 are indicated in red as
they are used quite often.
ASA/ISO is a numerical rating of the film's sensitivity to a given
amount of light. The higher the number, the greater the sensi
tivity, and vice versa. The ASA/ISO of your film is indicated on
the cartridge itself. It is also printed on the film carton and on
the data sheet packed inside.
18
Shutter speed dial ® I exposure
determination
Setting the shutter speed
To set the shutter speed, turn the shutter speed dial to the right
or left until the desired shutter speed number click-stops and is
aligned with the shutter speed index ®. The dial has indications
for B (bulb) and for shutter speeds from 1 to 1/4000 sec. The 250
engraved in red indicates the fastest sync speed for an electronic
flash unit. On B. the shutter curtains ® remain open for as long
as the shutter release button is kept depressed. 1 is for indicat
ing one second, 2 for 1/2 sec., 60 for 1/60 sec. and so on. One of
the two adjoining numbers, excluding B is two times or 1/2 as
much as the exposure amount of the other number. Note that
shutter speeds between printed numbers (i.e., intermediate
speeds) cannot be used. Since you can always confirm the
shutter speed number inside the viewfinder, you don't have to
see the shutter speed dial as you turn it.
Loading...