


Laser Rangefinder / Laser-Entfernungsmesser / Télémètre laser / Telémetro láser / Telemetro laser / Лазерный дальномер / Laseravstandsmåler / Laseravståndsmätare / Laser-etäisyysmittari /Laserafstandsmeter / Laserafstandsmåler / Telemetru cu laser / Dalmierz laserowy / Lézeres távmérő / Laserový dálkoměr
Forestry Pro
|
|
|
|
|
|
|
|
Instruction manual / Bedienungsanleitung/ Manuel d’utilisation / |
En |
De |
|
Fr |
|
Es |
|
Manual de instrucciones / Manuale di istruzioni / Руководство по |
|
|
|
|
|
|
|
It |
Ru |
|
No |
|
Se |
|
|
продукции / Instruksjonsmanual / Bruksanvisning / Käyttöohje / |
|
|
|
|
|
|
|
Fi |
Nl |
|
Dk |
|
Ro |
|
|
Gebruiksaanwijzing / Brugsvejledning / Manual de instrucţiuni / |
|
|
|
||||
|
|
|
|
|
|
|
|
Instrukcją obsługi / Kezelési útmutató / Návod k použití |
Pl |
Hu |
|
Cz |
|
|
|
|
|
|
|
|
|
|
|
English.......................... |
p. 4-33 |
Deutsch...................... |
s. 34-63 |
Français...................... |
p. 64-93 |
Español..................... |
p. 94-123 |
Italiano................... |
p. 124-153 |
Русский.............. |
cтр. 154-183 |
Norsk...................... |
s. 184-213 |
Svenska.................. |
s. 214-243 |
Suomi..................... |
s. 244-273 |
Nederlands............ |
p. 274-303 |
Dansk...................... |
s. 304-333 |
Română.................. |
p. 334-363 |
Polski...................... |
s. 364-393 |
Magyar.................. |
394-423. o. |
Česky...................... |
s. 424-453 |
2
3

De
Fr
Es
It
Ru
No
Se
Fi
Nl
Dk
Ro
Pl
Hu
Cz
English |
|
CONTENTS |
|
Cautions before use ....................................................... |
5-7 |
Key features ........................................................................ |
8-9 |
Nomenclature/Composition .......................................... |
10 |
Changing batteries ............................................................ |
11 |
Internal display............................................................. |
12-13 |
Operational Summary................................................ |
14-16 |
Specifications................................................................ |
17-18 |
External display............................................................ |
19-21 |
Operation and internal display............................... |
22-28 |
Others...................................................................................... |
29 |
Troubleshooting/Repair............................................ |
30-31 |
How to use the Rangefinder case................................. |
32 |
4

Cautions before use
Thank you for purchasing the Nikon Laser Forestry Pro.
This high-spec laser rangefinder features a new angle measurement function in addition to the existing linear distance measurement function for enhanced enjoyment of sports and other outdoor applications. (The Nikon Laser Forestry Pro is also able to measure the horizontal distance to a target and its height.)
Please observe the following guidelines strictly so you can use the equipment properly and avoid potentially hazardous problems. Before using this product, read thoroughly the “SAFETY PRECAUTIONS” and instructions on correct usage accompanying the product.
Use of controls or adjustments or performance of procedures other than those specified herein may result in hazardous radiation exposure.
Keep this manual within reach for easy reference.
• Specifications and design are subject to change without notice.
•No reproduction in any form of this manual, in whole or in part (except for brief quotation in critical articles or reviews), may be made without written authorization from NIKON VISION CO., LTD.
De
Fr
Es
It
Ru
No
Se
Fi
Nl
Dk
Ro
Pl
Hu
Cz
5

De
Fr
Es
It
Ru
No
Se
Fi
Nl
Dk
Ro
Pl
Hu
Cz
Cautions before use
Please observe the following guidelines strictly so you can use the equipment properly and avoid potentially hazardous problems. Before using this product, read thoroughly the “SAFETY AND OPERATION PRECAUTIONS” and instructions on correct usage accompanying the product. Keep this manual within reach for easy reference.
 WARNING
This indication alerts you to the fact that any improper use ignoring the contents described herein can result in potential death or serious injury.
 CAUTION
This indication alerts you to the fact that any improper use ignoring the contents described herein can result in potential injury or material loss.
SAFETY AND OPERATION PRECAUTIONS
 Warning
•Never look directly at the laser beam or directly at the sun when using the Nikon Laser Forestry Pro.
•Do not depress the POWER button while looking into the optics from the
objective side.
•Do not aim at the eye.
•Do not operate the unit with other additional optical elements, such as lenses or binoculars. Using an optical instrument together with the Nikon Laser Forestry Pro increases the danger of damaging the eyes.
•Do not disassemble the Nikon Laser Forestry Pro. The emitting laser may be harmful to your health. A product that has been disassembled is not guaranteed by the manufacturer.
•When the Nikon Laser Forestry Pro’s body cover is damaged, or if it emits a strange sound due to dropping or for some other cause, immediately remove the battery and stop using.
 Cautions
•When not using the Nikon Laser Forestry Pro, do not push the POWER button.
•Do not leave the Nikon Laser Forestry Pro within the reach of small children.
•Rain, water, sand and mud should be removed from the rangefinder body surface as soon as possible, using a soft, clean, dry cloth.
•Although the Nikon Laser Forestry Pro is waterproof, it is not designed for use underwater.
•Do not swing the Nikon Laser Forestry Pro by its strap. It may hit someone and cause injury.
•Do not leave the Nikon Laser Forestry Pro in an unstable place, as it may fall and cause injury, or damage the equipment.
•Do not look through the Nikon Laser Forestry Pro while walking. You may walk into something and get hurt.
•Do not leave the Nikon Laser Forestry Pro in a car on a hot or sunny day, or near heat-generating equipment. This may damage or negatively affect it.
•Do not leave the Nikon Laser Forestry Pro in direct sunlight. Ultraviolet rays and excessive heat may negatively affect or even damage the unit.
•When the Nikon Laser Forestry Pro is exposed to sudden changes in
temperature, water condensation may occur on lens surfaces. Do not use the product until the condensation has evaporated.
•Do not use alcohol for cleaning the main body.
•Do not leave the polyethylene bag used for packaging within the reach of small children.
•Be careful that small children do not inadvertently swallow the eyecup. If it does happen, consult a doctor
6

immediately.
•If you use the rubber eyecup for a long period of time, you may suffer skin inflammation. If you develop any symptoms, consult a doctor immediately.
•When carrying the Nikon Laser Forestry Pro, store it in the soft case.
•If your Nikon Laser Forestry Pro should fail to operate correctly, discontinue use immediately and consult the Troubleshooting Table. If you are unable to fix the problem, contact your local dealer for instructions on where to send it for repair.
CARE AND MAINTENANCE
Lenses
•When removing dust on the lens surface, use a soft oil-free brush.
•When removing stains or smudges like fingerprints from the lens surface, wipe the lenses very gently with a soft clean cotton cloth or quality oil-free lens tissue.
Use a small quantity of pure alcohol (not denatured) to wipe stubborn smudges. Do not use velvet cloth or ordinary tissue, as it may scratch the lens surface. Once the cloth has been used for cleaning the body, it
should not be used again for the lens surface.
Main body
•Clean the body surface with a soft, clean cloth and a dry cloth. Do not use benzene, thinner, or other organic agents because they may cause discolouration or rubber degeneration.
Storage
•Water condensation or mold may occur on the lens surface because of high humidity. Therefore, store the Nikon Laser Forestry Pro in a cool, dry place.
After use on a rainy day or at night, thoroughly dry it at room temperature, then store in a cool, dry place.
NOTES ON LITHIUM BATTERY
If handled incorrectly, batteries may rupture and leak, corroding equipment and staining clothing. Be sure to observe the following:
•Install batteries with the + and – poles positioned correctly.
•Batteries should be removed when exhausted or during extended periods of non-use.
•Always use the same type of battery.
•If battery fluid contacts eyes or skin, rinse well with water. If swallowed, consult a doctor immediately.
•Do not short-circuit battery chamber terminals.
•Do not carry batteries together with keys or coins in a pocket or bag. This may overheat and short-circuit batteries.
•Do not put batteries in fire or water. Never disassemble batteries.
•Do not charge batteries.
•Do not subject stored batteries to extremes in temperature.
•Do not subject batteries to strong vibrations or shock.
De
Fr
Es
It
Ru
No
Se
Fi
Nl
Dk
Ro
Pl
Hu
Cz
7

Key Features
De
Fr
Es
It
Ru
No
Se
Fi
Nl
Dk
Ro
Pl
Hu
Cz
•Linear distance measurement range: 10-500 meters/11-550 yards/33-999 feet.
•Angle measurement range: ±89°
•Distance measurement display step: [Internal Display]:
(Linear Distance)
0.5 meter/yard, 1 foot
(measurement distance is less than 100 meters/yards /feet)
1.0 meter/yard, 1 foot
(measurement distance is 100 meters/yards/feet or further)
(Horizontal Distance/Height) 0.2 meter/yard, 0.5 foot
(measurement distance is less than 100 meters/yards /feet)
1.0 meter/yard, 1 foot
(measurement distance is 100 meters/yards/feet or further)
(Angle)
0.1° (-10° — 10°) 1.0° ( -10°, 10° )
[External Display]: (Linear distance)
(Horizontal Distance/Height) (Angle)
•Easy-to-aim 6x optical observation system
•Quantifies the horizontal distance to the target and its height in relation to the rangefinder's level by measuring linear distance and angle.
•Measure the vertical separation (height between two points) - vertical separation mode and 3-point measurement mode are available
•The results are displayed on both an internal and an external LCD panel. The external LCD panel shows all results simultaneously.
•Target Priority Switch System allows you to easily match the measuring situation.
•Waterproof design (NOT designed for underwater usage)
•Invisible/Eyesafe EN/IEC Class 1M Laser
•30-second results display
•Compact, lightweight, ergonomic design
•Automatic shut-off (after approx. 30 sec. unattended)
•Default to “Last Use” settings
•Approx. 20-second continuous measuring function
The Nikon Laser Forestry Pro emits invisible, eyesafe, infrared energy pulses that reflect off the selected target back to its optical receiver. Sophisticated precision charge circuitry is used to instantaneously calculate distances, by measuring the time it takes for each pulse to travel from the rangefinder to the target and back. Laser reflectivity and measurement results may vary according to climatic and environmental conditions, the colour, surface finish, size, shape and other characteristics of the target.
8

The following factors ensure better range and accuracy:
•Night time use
•Cloudy weather
•Bright-coloured targets
•Targets with highly reflective surfaces
•Targets with shiny exteriors
•Large-size targets
•Shooting targets facing at 90 degrees
Measurement may result in inaccuracy or failure in the following cases:
•Slender or small target
•Target has diffusing reflective surface
•Target does not reflect the laser beam to the rangefinder (glass, a mirror, etc.)
•Black target
•Target has varing depths
•In snow, rain or fog
•Target measured through glass
•Reflective surface measured from diagonal direction
•Moving target
•Obstacle moving in front of the target
•When targeting the surface of water
De
Fr
Es
It
Ru
No
Se
Fi
Nl
Dk
Ro
Pl
Hu
Cz
9
De
Fr
Es
It
Ru
No
Se
Fi
Nl
Dk
Ro
Pl
Hu
Cz
Nomenclature/Composition
 5
5
4
1
6
27
 8
8
!e 3
9
!p
!q
!w
Composition
Body ............................................... |
x1 |
Neckstrap ..................................... |
x1 |
Soft case (CCN)............................ |
x1 |
Lithium battery (CR2) .............. |
x1 |
|
|
|
|
1Monocular objective lens/ Laser emission aperture
2 Laser detector aperture
3 External LCD
4 MODE button
5 POWER button
6 6x monocular eyepiece
7 Eyecup/dioptre adjustment ring
8 Dioptre index
9 Strap eyelet
!p Battery chamber cover
!q Battery chamber cover “Open/Close” indication
!w Product number/explanatory label
!e Laser warning label
10
Changing Batteries
•Type of battery: 3V CR2 lithium battery
•Battery condition indicators
 : Battery has enough power for use.
: |
Battery is getting low. |
flashing: |
Battery is low and battery should be replaced. |
disappears: |
Battery is exhausted and should be replaced. |
 flashing in the LCD indicates that the battery should be replaced.
1Open the battery chamber cover
Using the ball of the thumb or a coin in the recessed part of the battery chamber cover, rotate the cover following the Open/ Close arrow indicator. It may not open easily due to its rubber packing for water resistance.
2Replace the old battery with a new one
Install new battery with the [+] and [-] correctly positioned following the “Battery installation” indication seal in the battery chamber. (Insert battery positioning the [+] pole towards the inside of the chamber.) [The Laser Forestry Pro will not operate if the battery is installed incorrectly.]
3Close the battery chamber cover
Align the Open/Close indicator with the white dot and insert the battery chamber cover. Using the ball of the thumb or a coin, turn the cover in the opposite direction to the arrow indicator. It may not close easily due to the rubber packing for water resistance, but continue to turn it all the way until it stops. Confirm that the cover is securely closed.
• Battery life
Continuous operation: Approx. 13,000 times (at 20°C)
Target focusing, measurement, and automatic power off are included in a single cycle. This figure may differ according to temperature, and other factors such as target shape, colour, etc.
*The Nikon Laser Forestry Pro come with a 3V CR2 lithium battery. However, due to natural electric discharge, the life of the battery will likely be shorter than that noted above.
*Replace battery if the Nikon Laser Forestry Pro is ever submerged in water or if water enters in the battery chamber.
De
Fr
Es
It
Ru
No
Se
Fi
Nl
Dk
Ro
Pl
Hu
Cz
11
Internal display
De
Fr
Es
It
Ru
No
Se
Fi
Nl
Dk
Ro
Pl
Hu
Cz
1.
 - Target aiming/Laser irradiate system

 - Aim at the target. Position the target at the center of the reticle.

 - Appears while the laser is being used for a measurement. (Remains present during single measurement. Blinks during continuous measurements.)
Warning: Do not look into the objective lenses when this mark is shown.
2 - Distance/measurement status display
Digitally indicates measured distance in meters/yards/feet and angles in degrees. Also indicates measuring status such as “Measurement in progress”, “Measurement unsuccessful” or “Unable to measure.”
<Examples of measurement results> |
|
|
|
(Distance) |
|
|
|
Display of results: ( 100m/yards/feet) e.g. 234 meters = |
|||
Display of results: ( 100m/yards/feet) e.g. 76.5 yards = |
|
||
Display of results: ( 100m/yards/feet) |
e.g. 82 feet = |
|
|
(Angle) |
|
|
|
Display of results: ( -10˚and 10˚) |
e.g. 36˚ = |
|
|
|
e.g. -29˚ = |
|
|
Display of results: (-10˚ and 10˚) |
e.g. 3.5˚ = |
|
|
|
e.g. -7.0˚ = |
|
|
 - Now measuring

 - Failure to measure or unable to measure distance
3. Display Units
 Indicates distance being measured in meters.
 Indicates distance being measured in yards.
[No unit displayed] Indicates distance is measured in feet.
4.  - Indicates battery condition. (See "Changing Batteries")
12

5. 


 Display Modes
(See “External display, and Operation and Internal display”for operations and display examples.) Linear distance mode

 Calculates linear distance to your target and displays the results. Horizontal distance mode

 Calculates horizontal distance to your target by measuring the linear distance and angle, and displays the results. Height mode

 Measures your target's height from the horizontal level, and displays the results. Vertical separation (height between two points) mode


 Uses the linear distance and angle data of two points to calculate and display the vertical separation (height between the two points.)
Three-point measurement (height between two points) mode


Angle mode

 Measures the angle of your target from the horizontal level and displays the results.
6.

 Target Priority mode First Target Priority mode
|
Indicates when First Target Priority mode is set. |
Distant Target Priority mode |
|
|
Indicates when Distant Target Priority mode is set. |
Note: When Angle measuring mode is set (during [Ang] symbol display), Target Priority mode is not displayed and illuminated [1st] or [Dst] symbols turn off.
Although the LCD was produced using the most advanced technology, it is impossible to eliminate dust completely. When using this product, the LCD is magnified by high magnification of the eyepiece lens and dust may appear as a defect. It will not, however, affect measurement accuracy.
De
Fr
Es
It
Ru
No
Se
Fi
Nl
Dk
Ro
Pl
Hu
Cz
13
De
Fr
Es
It
Ru
No
Se
Fi
Nl
Dk
Ro
Pl
Hu
Cz
Operational Summary
Caution—use of controls or adjustments or performance of procedures other than those specified herein may result in hazardous radiation exposure
1.Install a battery in the battery chamber. (See "Changing Batteries")
2.Rubber eyepiece cup
Eyeglass wearer: Collapse the eyepiece cups. Non-eyeglass wearer: Do not collapse the eyepiece cups.
3.Diopter adjustment
Adjust diopter to obtain a clear image in the LCD.
First, rotate the diopter adjustment ring counterclockwise until it comes to a complete stop. Next, turn on the power to activate the LCD when you look through the Nikon Laser Forestry Pro. Rotate the diopter adjustment ring clockwise until the display comes into focus.
If the diopter is not adjusted to correspond to your eyesight, you may not be able to clearly focus your subject.
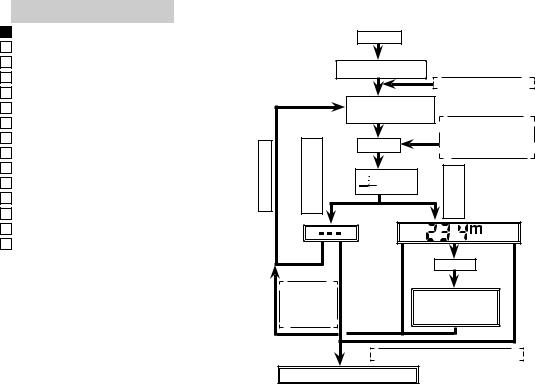
4.Measuring
Note: See the chapter "External and Internal display" for external
LCD panel.
Note: Depressing and holding down the POWER button causes all symbols to be displayed in the internal LCD panel. After you remove your finger from the POWER button, the lastused setting is displayed. (If you briefly press the POWER button then remove your finger, the LCD panel may display the last-used setting without displaying all of the symbols. This is not a malfunction or other problem.)
Before measuring, be sure to confirm settings, such as unit, measurement/display mode and priority mode.
: See the relevant mode section in this manual for setting.
POWER
LCD is illuminated |
|
Set your desired modes
|
Align the reticle |
|
|
|
with the target |
For continuous distance |
|
|
|
||
|
|
and angle measurement |
|
|
POWER |
(up to 20 seconds), keep |
|
|
button depressed. |
||
| <![if ! IE]> <![endif]>againMeasure |
<![if ! IE]> <![endif]>measureto Fail measureCannot |
||
| <![if ! IE]> <![endif]>Successfully measured |
|||
|
appears |
|
|
|
or |
|
|
|
|
MODE |
|
|
|
|
|
|
Indication |
Results are converted |
|
|
remains |
||
|
illuminated for |
to the mode set and |
|
|
30 sec. |
displayed. |
|
|
30 seconds pass without operation |
||
|
Power off: LCD indications disappear |
||
14
See the the chapter "External and Internal display" for details regarding the operations and results display of the various
modes.“
Power turns off 30 seconds after the last operation.
Continuous measurement mode


 Keeping the POWER button depressed allows you to perform continuous measurement for 20 seconds.
Blinks while performing measurements.
When measuring a pin at a golf course, for example, use First Target Priority and Continuous measurement mode for easy measurement. With no objects between you and the pin, the smallest number is the distance to your targeted pin.
5. Selecting display unit (Factory default setting is feet.)
|
|
Meter [ |
] |
|
|
Yard [ |
] |
|
|
Feet [ ] |
|
|
|
|
|
||||||||
|
|
|
|
|
|
|
|
|
|
|
|
1.Confirm the LCD panel is on.
2.Press and hold the 

 button for approx. two seconds.
3.When display unit has switched, release the  button.
4.Repeat steps 2 and 3 until your desired mode is displayed.
5.When you have completed setting, results will be converted and displayed in the your selected measurement unit.
6.Switching measurement/display modes (Factory default setting is linear distance measurement mode)

 Linear Distance [
 ]
] 
 Horizontal Distance [
 ]
] 

 Height [
 ]
] 
 Angle [
 ]
] 
Vertical Separation |
|
|
|
Three-point measurement |
|
|
(height between 2 |
|
|
|
|
||
] |
|
|
[ |
] |
|
|
|
|
|
||||
points )[ |
|
|
|
|
|
|
|
|
|
|
|
|
|
By pressing the MODE button, modes will change in the order indicated above.
1.Confirm the LCD panel is on.
2.Press 


 button within 0.5 seconds.
3.Release 


 button to switch the mode.
4.Repeat steps 2 and 3 until your desire mode is displayed.
5.Switching the mode after measurement converts the results to the new mode.
6.After the mode is set, measurements are performed in the new mode.
De
Fr
Es
It
Ru
No
Se
Fi
Nl
Dk
Ro
Pl
Hu
Cz
15

Operational Summary
7. Switching Target priority modes (Factory default setting is
De |
|
Distant Target Priority mode.) |
|
|
|
|
|||||||||
Fr |
|
|
|
|
|
|
|
|
|
||||||
|
First Target Priority |
|
|
|
|
|
Distant Target Priority |
|
|||||||
|
|
|
|
|
|
|
|
||||||||
Es |
|
[ |
] |
|
|
|
|
|
|
|
[ |
] |
|
|
|
|
|
|
|
|
|
|
|
|
|
|
|||||
It |
|
1. LCD panel should be on. |
|
|
|
|
|||||||||
|
2. Press and hold |
|
|
|
button, then depress and hold |
|
|
|
|||||||
Ru |
|
|
|
|
|
|
|
||||||||
|
button within 0.5 second. |
|
|
|
|
||||||||||
|
|
|
|
|
|
||||||||||
No |
|
Note If the |
|
|
|
button is not pressed within 0.5 |
|||||||||
|
|
|
|
||||||||||||
Se |
|
|
second, the display unit (m/yd/ft) will be switched. |
||||||||||||
Fi |
|
3. Continue to press and hold both buttons (more than 2 |
|||||||||||||
|
seconds) until First Target Priority mode and Distant Target |
||||||||||||||
Nl |
|
Priority mode are switched. |
|
|
|
|
|||||||||
|
Note: If buttons are not pressed in the correct order, |
||||||||||||||
|
|
||||||||||||||
Dk |
|
|
switching will not take place. |
|
|
|
|
||||||||
Ro |
|
Note: If switching fails to take place, repeat 2. |
|||||||||||||
|
4. Release buttons. |
|
|
|
|
|
|
|
|
||||||
|
|
|
|
|
|
|
|
|
|
||||||
Pl |
|
Note: Because Target Priority mode is not displayed |
|||||||||||||
Hu |
|
|
while Angle mode is set, switching is made but |
||||||||||||
|
|
visual confirmation is impossible. Switch to another |
|||||||||||||
Cz |
|
|
measuring mode for confirmation. |
|
|
|
|
||||||||
[Deciding which Target Priority to use] |
|
|
|
|
|||||||||||
|
|
|
|
|
|||||||||||
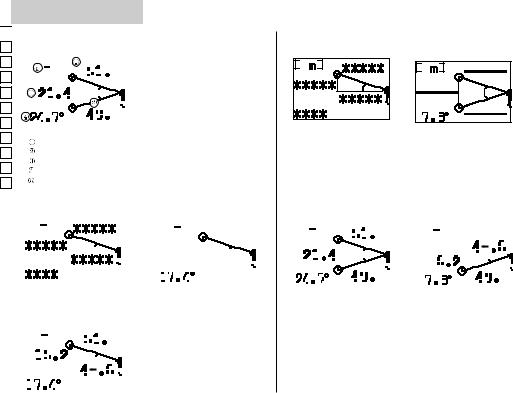
When obtaining different results from a single measuring operation, the Nikon Laser Forestry Pro will display the distance to the farthest target on the LCD panel when using Distant Target Priority mode, while First Target Priority mode will show the range to the nearest target.
ex.) When measuring a tree standing in front of a house;
Distance to Target |
Tree |
Fence |
House |
|
115m |
123m |
128m |
||
|
"115m" (distance to the tree) will be displayed in First Target Priority mode, and "128m" (distance to the house) in Distant Target Priority mode. First Target Priority mode, for example, has applications for golf, while Distant Target Priority is useful when
hunting in heavily wooded areas.
8. Low battery indication
Flashing  indicates that the battery power is low and battery should be replaced. (See "Changing Battery")
16

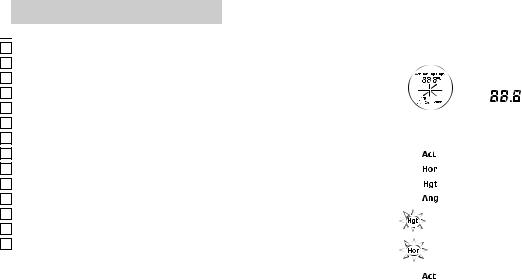
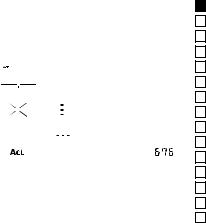
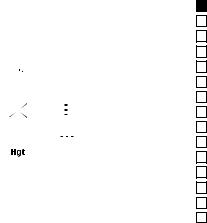
Specifications
Measuring system
Measuring mode display |
|
Linear distance |
: Act |
|||
|
|
|
|
Horizontal distance |
: Hor |
|
|
|
|
|
Height |
: Hgt |
|
|
|
|
|
Angle |
: Ang |
|
|
|
|
|
Vertical separation (height between two points ): Hgt + Hgt2 |
||
|
|
|
|
Three-point measurement : Hor + Hgt + Hgt2 |
||
|
|
|
|
Distance: 10-500 meters/11-550 yards/33-999 feet |
||
Measuring distance/ angle range |
|
|
(999 feet: 304.5 meters/333 yards) |
|||
|
|
|
|
Angle: ± 89° |
|
|
|
|
Act |
|
0.5m/yd., 1.0 ft. ( 100m/yd./ft.) |
||
Distance- |
|
(Linear distance) |
|
1.0m/yd., 1.0 ft. ( 100m/yd./ft.) |
||
angle |
|
|
|
|
||
| <![if ! IE]> <![endif]>Internal |
Hor |
|
0.2m/yd., 0.5 ft. ( 100m/yd./ft.) |
|||
Display |
(Horizontal distance) |
|
1.0m/yd., 1.0 ft. ( 100m/yd./ft.) |
|||
steps |
|
|
|
|
|
|
Hgt |
|
0.2m/yd., 0.5 ft. ( 100m/yd./ft.) |
||||
|
|
(Height) |
|
1.0m/yd., 1.0 ft. ( 100m/yd./ft.) |
||
|
|
Ang (Angle) |
|
0.1° ( 10°), 1.0°( 10°) |
||
|
<![if ! IE]> <![endif]>External |
Linear distance |
|
0.5m/yd., 1.0 ft. |
|
|
|
Horizontal dist. |
|
0.2m/yd., 0.5 ft. |
|
||
|
Height |
|
0.2m/yd., 0.5 ft. |
|
||
|
Angle |
|
0.1° |
|
||
|
|
|
|
|||
System |
|
First Target Priority/Distant Target Priority switching system |
||||
Optical system |
|
|
|
|
|
|
Type |
|
|
|
Roof-prism monocular |
|
|
Magnification (x) |
|
|
6 |
|
|
|
Effective diameter of objective lens |
|
ø21 |
|
|
||
(mm) |
|
|
|
|
|
|
|
|
|
|
|
|
|
Angular field of view (real) (˚) |
|
6.0 |
|
|
||
Eye relief (mm) |
|
|
18.2 |
|
|
|
Exit pupil (mm) |
|
|
ø3.5 |
|
|
|
Dioptre adjustment |
|
±4m-1 |
|
|||
De
Fr
Es
It
Ru
No
Se
Fi
Nl
Dk
Ro
Pl
Hu
Cz
17

De
Fr
Es
It
Ru
No
Se
Fi
Nl
Dk
Ro
Pl
Hu
Cz
Specifications
Others
Operating temperature (˚C) |
|
-10 — +50 |
Power source |
|
CR2 lithium battery x 1 (DC 3V) |
|
|
Auto power shutoff function equipped (after approx. 30 seconds) |
Dimensions (L x H x W) (mm) |
|
130x69x45 |
Weight (g) |
|
Approx. 210 (without battery) |
Structure |
|
Body: Waterproof |
|
|
(maximum depth of 1 meter for up to 10 minutes)* |
|
Battery chamber: Water resistant** |
|
Laser classification |
|
IEC60825-1: Class 1M/Laser Product |
|
|
FDA/21 CFR Part 1040.10:Class I Laser Product |
EMC |
|
FCC Part15 SubPartB class B, EU:EMC directive, AS/NZS, VCCI classB, CU TR 020 |
Environment |
|
RoHS, WEEE |
|
|
|
Laser |
|
|
Wavelength (nm) |
|
870 |
Pulse duration (ns) |
|
14 |
Output (W) |
|
15 |
Beam divergence (mrad) |
|
Vertical: 2.5, Horizontal: 0.025 |
Operating humidity (%RH) |
|
80 (without dew condensation) |
|
|
|
* Waterproof models
The Nikon Laser Forestry Pro is waterproof, and will suffer no damage to the optical system if submerged or dropped in water to a maximum depth of 1 meter for up to 10 minutes.
The Nikon Laser Forestry Pro offers the following advantages:
• Can be used in conditions of high humidity, dust and rain without risk of damage.
•Nitrogen-filled design makes it resistant to condensation and mold.
Observe the following when using the Nikon Laser Forestry Pro.
•The unit should not be operated nor held in running water.
•Any moisture should be wiped off before adjusting movable parts (eyepiece, etc.) of the Nikon Laser Forestry Pro to prevent damage and for safety reasons.
To keep your Nikon Laser Forestry Pro in excellent condition, Nikon Vision recommends regular servicing by an authorized dealer.
** The battery chamber is water resistant, not waterproof. Water may enter the device if the Nikon Laser Forestry Pro is submerged in 18 water. If water enters the battery chamber, wipe out any moisture and allow time for the chamber to dry.

External display
|
|
|
|
|
|
|
|
|
|
|
|
|
|
|
|
|
|
|
|
|
|
|
|
|
|
|
|
|
|
|
|
|
|
|
|
|
|
|
|
|
|
|
|
|
|
|
|
|
|
|
|
|
|
|
|
|
|
|
|
|
|
|
|
|
|
|
|
|
|
|
|
|
|
[Power On] |
[While measuring] |
De |
|||||||||||||||||||||||||||||||||||||||||||||||||||||||||||||||||||||||
|
|||||||||||||||||||||||||||||||||||||||||||||||||||||||||||||||||||||||||
|
|
|
|
|
|
|
|
|
|
|
|
|
|
|
|
|
|
|
|
|
|
|
|
|
|
|
|
|
|
|
|
|
|
|
|
|
|
|
|
|
|
|
|
|
|
|
|
|
|
|
|
|
|
|
|
|
|
|
|
|
|
|
|
|
|
|
|
|
|
Fr |
|||
|
|
|
|
|
|
|
|
|
|
|
|
|
|
|
|
|
|
|
|
|
|
|
|
|
|
|
|
|
|
|
|
|
|
|
|
|
|
|
|
|
|
|
|
|
|
|
|
|
|
|
|
|
|
|
|
|
|
|
|
|
|
|
|
|
|
|
|
|
|
|
|
|
|
|
|
After the power is turned on, the |
|
|
|
|
|
|
|
|
|
|
|
|
|
|
|
|
|
|
|
|
|
|
|
|
|
|
|
|
|
|
|
|
|
|
|
|
|
|
|
|
|
|
|
|
|
|
|
|
|
|
|
|
|
|
|
|
|
|
|
|
|
|
|
|
|
|
|
|
|
|
Es |
|
|
internal and external LCDs are |
|
|
|
|
|
|
|
|
|
|
|
|
|
|
|
|
|
|
|
|
|
|
|
|
|
|
|
|
|
|
|
|
|
|
|
|
|
|
|
|
|
|
|
|
|
|
|
|
|
|
|
|
|
|
|
|
|
|
|
|
|
|
|
|
|
|
|
|
|
|
It |
|
|
illuminated until either the POWER or |
|
|
|
|
|
|
|
|
|
|
|
|
|
|
|
|
|
|
|
|
|
|
|
|
|
|
|
|
|
|
|
|
|
|
|
|
|
|
|
|
|
|
|
|
|
|
|
|
|
|
|
|
|
|
|
|
|
|
|
|
|
|
|
|
|
|
|
|
|
|
Ru |
|
|
MODE button is pressed. |
|
|
|
|
|
|
|
|
|
|
|
|
|
|
|
|
|
|
|
|
|
|
|
|
|
|
|
|
|
|
|
|
|
|
|
|
|
|
|
|
|
|
|
|
|
|
|
|
|
|
|
|
|
|
|
|
|
|
|
|
|
|
|
|
|
|
|
|
|
|
|
No |
|
|
|
|
|
|
|
|
|
|
|
|
|
|
|
When the target is upward |
When the target is downward |
Se |
|||||||||||||||||
[Power off notice] |
|
|
|
|
|
|
|
|
|
|
|
|
|
|
|
|
|
|
|
|
|
|
|
|
|
Fi |
||||||||
|
|
|
|
|
|
[Measurement unsuccessful or unable to measure] |
Nl |
|||||||||||||||||||||||||||
|
|
|
|
|
|
|
|
|
|
|
|
|
|
|
||||||||||||||||||||
|
|
|
|
|
|
|
|
|
|
|
|
|
|
If 30 seconds pass without |
|
|
|
|
|
|
|
|
|
|
|
Dk |
||||||||
|
|
|
|
|
|
|
|
|
|
|
|
|
|
operation, the power turns off. |
|
|
|
|
|
|
|
|
|
|
|
|
|
|
|
|
|
|
|
Ro |
|
|
|
|
|
|
|
|
|
|
|
|
|
|
|
|
|
|
|
|
|
|
|
|
|
|
|
|
|
|
|
|
|
||
|
|
|
|
|
|
|
|
|
|
|
|
|
|
Approx. one second before power |
|
|
|
|
|
|
|
|
|
|
|
|
|
|
|
|
|
|
|
|
|
|
|
|
|
|
|
|
|
|
|
|
|
|
|
|
|
|
|
|
|
|
|
|
|
|
|
|
Pl |
||||||
|
|
|
|
|
|
|
|
|
|
|
|
|
|
turns off, this screen is displayed. |
|
|
|
|
|
|
|
|
|
|
|
|
|
|
|
|
|
|||
Hu |
Cz
1 Point Measurement |
|
|
When the target is upward |
When the target is downward |
|
|
With negative values, |
||
[Results] |
|
|
|
|
After measurement, all data “linear |
|
the “– (minus)” symbol is not shown. |
||
|
|
|
||
|
distance, horizontal distance, height |
[Measurement complete] |
|
|
|
and angle” are displayed. Units can be |
|
||
|
|
|
||
|
shown in meters, yards or feet. Angles |
|
|
|
|
are indicated by °(degree). |
|
|
|
|
[ m ] : meter |
|
|
|
|
[ YD ] : yards |
|
|
|
|
[ ft ] |
: feet |
|
|
Linear distance |
Horizontal distance |
|
|
|
|
|
|
|
|
|
|
|
|
|
|
|
|
|
|
|
|
|
|
|
|
|
|
|
|
|
|
|
|
||
Height |
Angle |
Unit |
|
|
|
|
|
|
|
|
|
|
|
|
|
|
|
|
|
|
|
|
|
|
|
|
|
|
|
|
|
|
|
|
|
|
|
When the target is upward |
When the target is downward |
||||||||||||||||||||||||||||||||
19
External display

 Vertical separation (height between two points) mode
De [Results]
Fr |
|
|
|
|
|
|
|
|
|
|
|
|
|
|
|
|
|
|
|
|
|
|
|
|
After measuring two points, "Linear |
Es |
|
|
|
|
|
|
|
|
|
|
|
|
|
|
|
|
|
|
|
|
|
|
|
|
distance to two points"and "Vertical |
It |
|
|
|
|
|
|
|
|
|
|
|
|
|
|
|
|
|
|
|
|
|
|
|
|
separation (height) and angle |
|
|
|
|
|
|
|
|
|
|
|
|
|
|
|
|
|
|
|
|
|
|
|
|
between two points"are displayed. |
|
Ru |
|
|
|
|
|
|
|
|
|
|
|
|
|
|
|
|
|
|
|
|
|
|
|
|
|
|
|
|
|
|
|
|
|
|
|
|
|
|
|
|
|
|
|
|
|
|
|
|
|
Units can be shown in meters, yards |
|
|
|
|
|
|
|
|
|
|
|
|
|
|
|
|
|
|
|
|
|
|
|
|
|
||
No |
|
|
|
|
|
|
|
|
|
|
|
|
|
|
|
|
|
|
|
|
|
|
|
|
or feet. Angles are indicated by |
|
|
|
|
|
|
|
|
|
|
|
|
|
|
|
|
|
|
|
|
|
|
|
|
°(degree). |
|
Se |
|
|
|
|
|
|
|
|
|
|
|
|
|
|
|
|
|
|
|
|
|
|
|
|
|
|
|
Linear distance (1st point) |
|||||||||||||||||||||||
|
|
|
|||||||||||||||||||||||
Fi |
|
|
Linear distance (2nd point) |
||||||||||||||||||||||
Nl |
|
|
Vertical separation (height between two points) |
||||||||||||||||||||||
|
|
Angle of two points |
|||||||||||||||||||||||
|
|
|
|||||||||||||||||||||||
Dk |
|
|
Unit |
||||||||||||||||||||||
Ro |
[Measuring 1st point] |
|
|
|
|
|
|
|
|
|
[Failed to measure 1st point] |
||||||||||||||||||||||||||||||||||||
|
|||||||||||||||||||||||||||||||||||||||||||||||
Pl |
|
|
|
|
|
|
|
|
|
|
|
|
|
|
|
|
|
|
|
|
|
|
|
|
|
|
|
|
|
|
|
|
|
|
|
|
|
|
|
|
|
|
|
|
|
|
|
Hu |
|
|
|
|
|
|
|
|
|
|
|
|
|
|
|
|
|
|
|
|
|
|
|
|
|
|
|
|
|
|
|
|
|
|
|
|
|
|
|
|
|
|
|
|
|
|
|
|
|
|
|
|
|
|
|
|
|
|
|
|
|
|
|
|
|
|
|
|
|
|
|
|
|
|
|
|
|
|
|
|
|
|
|
|
|
|
|
|
|
|
|
|
|
|
|
|
|
|
|
|
|
|
|
|
|
|
|
|
|
|
|
|
|
|
|
|
|
|
|
|
|
|
|
|
|
|
|
|
|
|
|
|
|
|
|
|
|
|
|
|
|
|
|
Cz |
|
|
|
|
|
|
|
|
|
|
|
|
|
|
|
|
|
|
|
|
|
|
|
|
|
|
|
|
|
|
|
|
|
|
|
|
|
|
|
|
|
|
|
|
|
|
|
|
|
|
|
|
|
|
|
|
|
|
|
|
|
|
|
|
|
|
|
|
|
|
|
|
|
|
|
|
|
|
|
|
|
|
|
|
|
|
|
|
|
|
|
|
|
|
|
|
|
|
|
|
|
|
|
|
|
|
|
|
|
|
|
|
|
|
|
|
|
|
|
|
|
|
|
|
|
|
|
|
|
|
|
|
|
|
|
|
|
|
|
|
|
|
|
|
|
|
|
|
|
|
|
|
|
|
|
|
|
|
|
|
|
|
|
|
|
|
|
|
|
|
|
|
|
Angle measurements never fail. |
|||||||||||||||||
|
[Results of 1st point] |
|
|
|
|
|
|
|
|
|
|
|
|
|
|
|
|
|
|
|
|
|
|
|
|
|
|
|
|||||||||||||||||||
|
|
|
|
|
|
|
|
|
|
|
|
|
|
|
|
|
|
|
|
|
|
|
|
|
|
|
|
|
|
|
|
|
|
|
|
|
|
|
|
|
|
|
|
|
|
|
|
|
|
|
|
|
|
|
|
|
|
|
|
|
|
|
|
|
|
|
|
|
|
|
|
|
|
|
|
|
|
|
|
|
|
|
|
|
|
|
|
|
|
|
|
|
|
|
|
|
|
|
|
|
|
|
|
|
|
|
|
|
|
|
|
|
|
|
|
|
|
|
|
|
|
|
|
|
|
|
|
|
|
|
|
|
|
|
|
|
|
|
|
|
|
|
|
|
|
|
|
|
|
|
|
|
|
|
|
|
|
|
|
|
|
|
|
|
|
|
|
|
|
|
|
|
|
|
|
|
|
|
|
|
|
|
|
|
|
|
|
|
|
|
|
20
[Measuring 2nd point]
Although the point is located downward, display shows the upward position.
[Failure to measure 2nd point]
Angle measurements never fail.
[Display of results for vertical separation (height between two points) and 2nd point]
|
|
|
|
|
|
|
|
|
|
|
|
|
|
|
|
|
|
|
|
|
|
|
|
|
|
|
|
|
|
|
|
|
|
|
|
|
|
|
|
|
|
|
|
|
|
|
|
|
|
|
|
|
|
|
|
|
|
|
|
|
|
|
|
|
|
|
|
|
|
|
|
|
|
|
|
|
|
|
|
|
|
|
|
|
|
|
|
|
|
|
|
|
|
|
|
|
|
|
|
|
|
|
|
|
|
|
|
|
|
|
|
|
|
|
|
|
|
|
|
|
|
|
|
|
|
|
|
|
|
|
|
|
|
|
|
|
|
|
|
|
|
|
|
|
|
|
|
|
|
|
|
|
|
|
|
|
|
|
|
|
|
|
|
|
|
|
|
|
|
|
|
|
|
|
|
|
|
|
|
|
|
|
|
|
|
|
|
|
|
|
|
|
|
|
|
|
|
|
|
|
|
|
|
|
|
|
|
|
|
|
|
|
|
|
|
|
|
|
|
|
|
|
|
|
|
|
|
|
|
|
|
Vertical separation |
After displaying vertical |
||||||||||||||||||||||||||||||||||||||||||||||||||||||||
(height between two points) |
separation (height between |
||||||||||||||||||||||||||||||||||||||||||||||||||||||||
|
|
|
|
|
|
|
|
|
|
|
|
|
|
|
|
|
|
|
|
|
|
|
|
|
|
|
|
two points), pressing MODE |
|||||||||||||||||||||||||||||
|
|
|
|
|
|
|
|
|
|
|
|
|
|
|
|
|
|
|
|
|
|
|
|
|
|
|
|
button displays the result of |
|||||||||||||||||||||||||||||
|
|
|
|
|
|
|
|
|
|
|
|
|
|
|
|
|
|
|
|
|
|
|
|
|
|
|
|
the 2nd point. |
|||||||||||||||||||||||||||||
Three-point measurement (height between two points) mode
[Results]
After measuring horizontal distance and two angles and its height, "vertical separation (height) and angle between two points" are displayed. Units can be shown in meters, yards or feet. Angles are indicated by °(degree).
 Vertical separation (height between two points)
 Angle of two points
 Unit
Unit
[Measuring 1st point] |
[Failed to measure 1st point] |
|||||||||||||
|
|
|
|
|
|
|
|
|
|
|
|
|
|
|
|
|
|
|
|
|
|
|
|
|
|
|
|
|
|
|
|
|
|
|
|
|
|
|
|
|
|
|
|
|
|
|
|
|
|
|
|
|
|
|
|
|
|
|
|
|
|
|
|
|
|
|
|
|
|
|
|
|
|
|
[Results of 1st point]
[Measuring 2nd point] |
[Results of 2nd point] |
|||||||||||||
|
|
|
|
|
|
|
|
|
|
|
|
|
|
|
|
|
|
|
|
|
|
|
|
|
|
|
|
|
|
|
|
|
|
|
|
|
|
|
|
|
|
|
|
|
|
|
|
|
|
|
|
|
|
|
|
|
|
|
|
|
|
|
|
|
|
|
|
|
|
|
|
|
|
|
|
|
|
|
|
|
|
|
|
|
|
|
|
|
|
|
|
|
|
|
|
|
|
|
|
|
|
|
|
|
|
|
|
|
|
|
|
|
|
|
|
|
|
|
|
|
|
|
|
|
|
|
|
|
|
|
|
|
|
|
When measuring 2nd and 3rd points, please note that angles should be between –75˚ and +75˚ from the horizontal level. If measurement fails, the angle is beyond ±75˚.
[Measuring 3rd point] |
[Results of 3rd point] |
||||||||||||
|
|
|
|
|
|
|
|
|
|
|
|
|
|
|
|
|
|
|
|
|
|
|
|
|
|
|
|
|
|
|
|
|
|
|
|
|
|
|
|
|
|
|
|
|
|
|
|
|
|
|
|
|
|
|
|
|
|
|
|
|
|
|
|
|
|
|
|
|
|
|
|
|
|
|
|
|
|
|
|
|
|
|
|
|
|
|
|
|
|
|
|
|
|
|
|
|
|
|
|
|
|
|
|
|
|
|
|
|
|
|
|
|
|
|
|
|
|
|
|
|
|
|
|
|
|
|
|
|
|
|
|
|
|
|
|
|
|
|
|
When measuring 2nd and 3rd points, please note that angles should be between –75˚ and +75˚ from the horizontal level. If measurement fails, the angle is beyond ±75˚.
Displays the horizontal distance.
De
Fr
Es
It
Ru
No
Se
Fi
Nl
Dk
Ro
Pl
Hu
Cz
21
Operation and internal display

 1 • 2 Power On/Off and mode settings
De
Fr
Es
It
Ru
No
Se
Fi
Nl
Dk
Ro
Pl
Hu
Cz
|
Operation/Results |
|
Work |
Button |
Display |
Display |
|
|
examples |
||||
|
|
|
|
|
|
|
1 |
|
|
|
|
|
|
|
Power On |
|
|
|
|
|
|
Measurement standby |
|
Initial screen |
POWER |
|
|
|
|
|
|
|
||
|
|
|
|
|
All symbols |
|
|
|
|
|
|
(while pressing) |
|
|
|
|
|
|
|
|
|
|
|
Measurement standby |
|
Last Use mode symbol |
|
2 |
Selecting and setting modes |
(1) |
Linear distance 3 |
|
|
n/a |
|
|
|
|
|
||
(2) |
Horizontal distance 4 |
MODE |
|
n/a |
||
|
|
|
||||
|
|
|
|
|
|
|
|
|
(3) |
Height (from horizontal) 5 |
MODE |
|
n/a |
|
|
|
|
|
|
|
|
|
(4) |
Angle (from horizontal) 6 |
MODE |
|
n/a |
|
|
|
|
|
|
|
|
|
(5) |
Vertical separation |
MODE |
|
n/a |
|
|
(height between two points) 7 |
blinks |
|||
|
|
|
|
|
|
|
|
|
(6) |
Three-point measurement 8 |
MODE |
blinks |
n/a |
|
|
(height between two points) |
||||
|
|
|
|
|
||
|
|
|
|
|
|
|
|
|
|
Return to 2-(1) Linear distance, then repeat. |
|
|
n/a |
|
|
|
|
|
|
|
See the relevant section in this manual for each mode setting and display.
|
|
|
Regardless of process, after 30 seconds since your |
30 seconds |
|
|
9 |
Power off |
|
without |
|
|
|
|
last operation, power turns off. |
|
|
|||
|
|
|
operation |
|
|
|
|
|
|
|
|
|
22
3 Linear distance mode
|
|
|
|
|
|
Display examples |
|
||
|
Operation/Results |
|
Work |
Button |
Display |
meter |
yards |
|
feet |
|
|
|
|
|
|
Elevation (˚) |
Depression (˚) |
|
|
3 |
Measurement with Linear distance mode |
|
|
|
|
|
|
||
|
|
|
|
|
|
|
|
|
|
3-1 |
Seeking your target |
|
Linear distance |
|
|
|
|
|
|
(Align the reticle with target) |
|
|
|
|
|
|
|
||
|
|
|
|
|
|
|
|
|
|
|
|
|
|
|
|
|
|
|
|
|
Measurement |
|
With the POWER button depressed, |
|
|
|
|
|
|
|
|
continuous measurement is possible for |
|
|
|
|
|
|
|
3-2 |
(Laser irradiate symbol is |
|
POWER |
|
|
|
|
|
|
|
up to 20 seconds. |
|
|
|
|
|
|||
|
displayed.) |
|
|
|
|
|
|
|
|
|
|
(When done, 3-3 display appears.) |
|
|
|
|
|
|
|
|
|
|
|
|
|
|
|
|
|
3-3 |
Failure to measure |
|
Repeat step 3-1. |
|
|
|
|
|
|
3-4 |
Measurement OK |
|
Linear distance |
|
|
206 |
225 |
|
|
|
Follow by 3-1. |
|
|
|
|
||||
|
|
|
|
|
|
|
|
|
|
|
|
|
|
|
|
|
|
|
|
|
|
|
Regardless of process, after 30 seconds |
30 seconds |
|
|
|
|
|
9 |
Power off |
|
without |
|
|
|
|
|
|
|
since your last operation, power turns off. |
|
|
|
|
|
|||
|
|
|
operation |
|
|
|
|
|
|
|
|
|
|
|
|
|
|
|
|
De
Fr
Es
It
Ru
No
Se
Fi
Nl
Dk
Ro
Pl
Hu
Cz
23

Operation and internal display

 4 Horizontal distance mode
De |
|
|
|
|
|
|
|
Display examples |
|
||
|
|
|
|
|
|
|
|
|
|
|
|
|
|
|
Operation/Results |
|
Work |
Button |
Display |
meter |
yards |
|
feet |
Fr |
|
|
|||||||||
|
|
|
|
|
|
|
|
Elevation (˚) |
Depression (˚) |
|
|
Es |
|
|
|
|
|
|
|
|
|||
|
4 |
Measurement with Horizontal distance mode |
|
|
|
|
|
|
|||
|
|
|
|
|
|
|
|
||||
It |
|
|
|
|
|
|
|
|
|
|
|
|
4-1 |
Seeking your target |
|
Horizontal distance |
|
|
|
|
|
|
|
|
|
|
|
|
|
|
|
|
|||
Ru |
|
(Align the reticle with target) |
|
|
|
|
|
|
|
||
|
|
|
|
|
|
|
|
|
|
|
|
No |
|
|
Measurement |
|
With the POWER button depressed, |
|
|
|
|
|
|
|
|
|
|
|
|
|
|
|
|
||
|
|
|
|
|
|
|
|
|
|||
Se |
|
4-2 |
(Laser irradiate symbol is |
|
continuous measurement is possible for |
POWER |
|
|
|
|
|
|
|
|
up to 20 seconds. |
|
|
|
|
|
|||
|
|
|
displayed.) |
|
|
|
|
|
|
|
|
Fi |
|
|
|
(When done, 4-3 display appears.) |
|
|
|
|
|
|
|
|
|
|
|
|
|
|
|
|
|
||
|
|
|
|
|
|
|
|
|
|
|
|
|
|
4-3 |
Failure to measure |
|
Repeat step 4-1. |
|
|
|
|
|
|
Nl |
|
|
|
|
|
|
|||||
Dk |
|
4-4 |
Measurement OK |
|
Horizontal distance |
|
|
201 |
220 |
|
660 |
|
|
Follow by 4-1. |
|
|
|
||||||
|
|
|
|
|
|
|
|
|
|
|
|
Ro |
|
|
|
|
|
|
|
|
|
|
|
Pl |
|
|
|
|
Regardless of process, after 30 seconds |
30 seconds |
|
|
|
|
|
|
|
9 |
Power off |
|
since your last operation, power turns off. |
without |
|
|
|
|
|
|
|
|
|
|
|
|
|||||
|
|
|
|
|
operation |
|
|
|
|
|
|
Hu |
|
|
|
|
|
|
|
|
|
|
|
|
|
|
|
|
|
|
|
|
|
|
|
Cz
24
5 Height mode
|
|
|
|
|
|
Display examples |
|
||
|
Operation/Results |
|
Work |
Button |
Display |
meter |
yards |
|
feet |
|
|
|
|
|
|
Elevation (˚) |
Depression (˚) |
|
|
5 |
Measurement with Height mode |
|
|
|
|
|
|
||
|
|
|
|
|
|
|
|
|
|
5-1 |
Seeking your target |
|
Height (from horizontal) |
|
|
|
|
|
|
(Align the reticle with target) |
|
|
|
|
|
|
|
||
|
|
|
|
|
|
|
|
|
|
|
|
|
|
|
|
|
|
|
|
|
Measurement |
|
With the POWER button depressed, |
|
|
|
|
|
|
|
|
continuous measurement is possible for |
|
|
|
|
|
|
|
5-2 |
(Laser irradiate symbol is |
|
POWER |
|
|
|
|
|
|
|
up to 20 seconds. |
|
|
|
|
|
|||
|
displayed.) |
|
|
|
|
|
|
|
|
|
|
(When done, 5-3 display appears.) |
|
|
|
|
|
|
|
|
|
|
|
|
|
|
|
|
|
5-3 |
Failure to measure |
|
Repeat step 5-1. |
|
|
|
|
|
|
5-4 |
Measurement OK |
|
Height (from horizontal) |
|
|
45.2 |
49.4 |
|
148 |
|
Follow by 5-1. |
|
|
|
|||||
|
|
|
|
|
|
|
|
|
|
|
|
|
|
|
|
|
|
|
|
|
|
|
Regardless of process, after 30 seconds |
30 seconds |
|
|
|
|
|
9 |
Power off |
|
without |
|
|
|
|
|
|
|
since your last operation, power turns off. |
|
|
|
|
|
|||
|
|
|
operation |
|
|
|
|
|
|
|
|
|
|
|
|
|
|
|
|
De
Fr
Es
It
Ru
No
Se
Fi
Nl
Dk
Ro
Pl
Hu
Cz
25

Operation and internal display
 6 Angle mode
De |
|
|
|
|
|
|
|
|
Display examples |
|
|
|
|
|
|
|
|
|
|
|
|
|
|
|
|
|
Operation/Results |
|
|
Work |
Button |
Display |
meter |
yards |
feet |
Fr |
|
|
|||||||||
|
|
|
|
|
|
|
|
|
Elevation (˚) |
Depression (˚) |
|
Es |
|
|
|
|
|
|
|
|
|
||
|
6 |
Measurement with Angle mode |
|
|
|
|
|
|
|||
|
|
|
|
|
|
|
|
||||
It |
|
|
|
|
|
|
|
|
|
|
|
|
6-1 |
Seeking your target |
|
|
Angle (from horizontal) |
|
|
|
|
|
|
|
|
|
|
|
|
|
|
|
|||
Ru |
|
(Align the reticle with target) |
|
|
|
|
|
|
|
||
|
|
|
|
|
|
|
|
|
|
|
|
No |
|
|
Measurement |
|
|
With the POWER button depressed, |
|
|
|
|
|
|
|
|
|
|
continuous measurement is possible for |
|
|
|
|
|
|
Se |
|
6-2 |
(Laser irradiate symbol is |
|
|
POWER |
|
|
|
|
|
|
|
|
up to 20 seconds. |
|
|
|
|
||||
|
|
|
displayed.) |
|
|
|
|
|
|
|
|
Fi |
|
|
|
|
|
(When done, 6-3 display appears.) |
|
|
|
|
|
|
|
6-3 |
Failure to measure |
|
|
Repeat step 6-1. |
|
|
|
|
|
Nl |
|
|
|
|
|
||||||
|
6-4 |
Measurement OK |
|
|
Angle (from horizontal) |
|
|
|
13 |
|
|
|
|
|
|
|
|
|
|
||||
Dk |
|
|
|
Follow by or 6-1. |
|
|
|
|
|||
|
|
|
|
|
|
|
|
|
|
|
|
|
|
|
|
|
|
|
|
|
|
|
|
Ro |
|
|
|
|
|
|
|
|
|
|
|
Pl |
|
|
|
|
|
Regardless of process, after 30 seconds |
30 seconds |
|
|
|
|
|
9 |
Power off |
|
|
without |
|
|
|
|
||
|
|
|
|
since your last operation, power turns off. |
|
|
|
|
|||
|
|
|
|
|
|||||||
|
|
|
|
|
|
operation |
|
|
|
|
|
Hu |
|
|
|
|
|
|
|
|
|
|
|
|
|
|
|
|
|
|
|
|
|
|
|
Cz
26
7 Vertical separation (height between two points) mode
|
|
|
|
|
|
Display examples |
|
||
|
Operation/Results |
|
Work |
Button |
Display |
meter |
yards |
|
feet |
|
|
|
|
|
|
Elevation (˚) |
Depression (˚) |
|
|
7 |
Measurement with Vertical separation (height between two points) mode |
|
|
|
|
|
|
||
|
|
|
|
|
|
|
|
|
|
7-1 |
Seeking your target |
|
Vertical separation |
|
blinks |
|
|
|
|
(Align the reticle with target) |
|
(height between two points) (1st target) |
|
|
|
|
|
||
|
|
|
|
|
|
|
|
||
|
|
|
|
|
|
|
|
|
|
|
Measurement |
|
|
|
|
|
|
|
|
7-2 |
(Laser irradiate symbol is |
|
|
POWER |
|
|
|
|
|
|
displayed.) |
|
|
|
|
|
|
|
|
|
|
|
Follow by 7-1 |
|
|
|
|
|
|
7-3 |
Failure to measure |
|
Repeat 7-1, 7-2, 7-3 until measurement is |
|
blinks |
|
|
|
|
|
|
|
complete. |
|
|
|
|
|
|
7-4 |
Measurement OK |
|
Height of 1st target (from Horizontal) |
|
blinks |
15.2 |
16.6 |
|
50.0 |
|
|
|
|
|
|
|
|
|
|
|
Aiming (2nd target) |
|
Vertical separation (height between two |
|
|
|
|
|
|
7-5 |
(Align the reticle with |
|
points) (2nd target) |
|
blinks |
15.2 |
16.6 |
|
50.0 |
|
target) |
|
(Result shown is the height of the 1st target) |
|
|
|
|
|
|
|
|
|
|
|
|
|
|
||
|
Measurement |
|
|
|
|
|
|
|
|
7-6 |
(Laser irradiate symbol is |
|
|
POWER |
|
|
|
|
|
|
displayed) |
|
|
|
|
|
|
|
|
|
|
|
Follow by 7-5 |
|
|
|
|
|
|
7-7 |
Failure to measure |
|
Repeat 7-5,7-6 and 7-7 until measurement |
|
blinks |
|
|
|
|
|
|
|
is complete |
|
|
|
|
|
|
|
|
|
Vertical separation |
|
|
|
|
|
|
7-8 |
Measurement OK |
|
(height between two points) |
|
|
21.4 |
23.4 |
|
|
|
|
|
After 2 seconds, move to7-1 |
|
|
|
|
|
|
|
|
|
|
|
|
|
|
|
|
|
|
|
Regardless of process, after 30 seconds |
30 seconds |
|
|
|
|
|
9 |
Power off |
|
without |
|
|
|
|
|
|
|
since your last operation, power turns off. |
|
|
|
|
|
|||
|
|
|
operation |
|
|
|
|
|
|
|
|
|
|
|
|
|
|
|
|
De
Fr
Es
It
Ru
No
Se
Fi
Nl
Dk
Ro
Pl
Hu
Cz
27
Operation and internal display
 8 Three-point measurement (height between two points) mode
De
Fr
Es
It
Ru
No
Se
Fi
Nl
Dk
Ro
Pl
Hu
Cz
|
|
|
|
|
|
Display examples |
|
|
|
Operation/Results |
|
Work |
Button |
Display |
meter |
yards |
feet |
|
|
|
|
|
|
|
|
|
|
|
|
|
|
|
Elevation (˚) |
Depression (˚) |
|
8 |
Measurement with Three-point measurement (height between two points) mode |
|
|
|
|
|||
|
|
|
|
|
|
|
|
|
8-1 |
Seeking your target |
|
Horizontal distance (1st target) |
|
blinks |
|
|
|
(Align the reticle with target) |
|
|
|
|
|
|||
|
|
|
|
|
|
|
|
|
|
|
|
|
|
|
|
|
|
|
Measurement |
|
|
|
|
|
|
|
8-2 |
(Laser irradiate symbol is |
|
|
POWER |
|
|
|
|
|
displayed.) |
|
|
|
|
|
|
|
|
|
|
Follow by 8-1 |
|
|
|
|
|
8-3 |
Failure to measure |
|
Repeat 8-1, 8-2, 8-3 until measurement is |
|
blinks |
|
|
|
|
|
|
complete. |
|
|
|
|
|
8-4 |
Measurement OK |
|
Horizontal distance |
|
|
24.4 |
26.8 |
80.5 |
|
Followed by 8-5. |
|
|
|||||
|
|
|
|
|
|
|
|
|
|
Aiming (2nd target) |
|
Vertical separation |
|
|
|
|
|
8-5 |
(Align the reticle with |
|
|
blinks |
24.4 |
26.8 |
80.5 |
|
|
(height from horizontal level to 2nd point). |
|
||||||
|
target) |
|
|
|
|
|
|
|
|
Measurement |
|
|
|
|
|
|
|
8-6 |
(Laser irradiate symbol is |
|
|
POWER |
|
|
|
|
|
displayed) |
|
|
|
|
|
|
|
8-7 |
Measurement OK |
|
Vertical separation |
|
|
3.4 |
3.8 |
11.0 |
|
(height from horizontal level to 2nd point). |
|
|
|||||
|
|
|
|
|
|
|
|
|
|
Aiming (3rd target) |
|
Vertical separation |
|
|
|
|
|
8-8 |
(Align the reticle with |
|
|
blinks |
3.4 |
3.8 |
11.0 |
|
|
(height between 2nd target and 3rd target) |
|
||||||
|
target) |
|
|
|
|
|
|
|
|
|
|
|
|
|
|
|
|
|
|
|
|
|
|
|
|
|
|
Measurement |
|
|
|
|
|
|
|
8-9 |
(Laser irradiate symbol is |
|
|
POWER |
|
|
|
|
|
displayed) |
|
|
|
|
|
|
|
|
|
|
Vertical separation |
|
|
|
19.0 |
|
8-10 |
Measurement OK |
|
(height between 2nd target and 3rd target) |
|
|
|
|
|
|
|
|
After 2 seconds, follow by 8-1 |
|
|
|
|
|
|
|
|
|
|
|
|
|
|
9 |
Power off |
|
Regardless of process, after 30 seconds since |
30 seconds |
|
|
|
|
|
without |
|
|
|
|
|||
|
your last operation, power turns off. |
|
|
|
|
|||
|
|
|
operation |
|
|
|
|
|
|
|
|
|
|
|
|
|
|
28

Others
This device complies with Part 15 of the FCC Rules. Operation is subject to the following two conditions:
(1)This device may not cause harmful interference, and
(2)this device must accept any interference received, including interference that may cause undesired operation.
This equipment has been tested and found to comply with the limits for a Class B digital device, pursuant to Part 15 of the FCC Rules and to EU EMC directive. These limits are designed to provide reasonable protection against harmful interference in a residential installation. This equipment generates, uses and can radiate radio frequency energy and, if not installed and used in accordance with the instructions, may cause harmful interference to radio communications. However, there is no guarantee that interference will not occur in a particular installation. If this equipment does cause harmful interference to radio or television reception, which can be determined by turning the equipment off and on, the user is encouraged to try to correct the interference by one or more of the following measures:
•Reorient or relocate the receiving antenna.
•Increase the separation between the equipment and receiver.•Consult the dealer or an experienced radio/TV technician for help.
This Class B digital apparatus meets all requirements of the Canadian Interference-Causing Equipment Regulations.
The Forestry Pro is a simplified laser rangefinder. Results obtained should not be used for official records.
De
Fr
Es
It
Ru
No
Se
Fi
Nl
Dk
Ro
Pl
Hu
Cz
29

De
Fr
Es
It
Ru
No
Se
Fi
Nl
Dk
Ro
Pl
Hu
Cz
Troubleshooting/Repair
If your Nikon Laser Forestry Pro should require repair, please contact your local dealer for details regarding where to send it. Before doing so, you are advised to consult the Troubleshooting Table below.
Symptom |
Check Points |
|
Unit does not turn |
• Depress POWER button. |
|
on — LCD fails to |
||
• Check and replace batteries if necessary. |
||
illuminate |
||
|
||
|
|
|
Target range cannot |
• Be sure that nothing, such as your hand or finger, is |
|
blocking the laser emission aperture and laser detector. |
||
be obtained |
||
• Be sure that the laser emission aperture and laser detector |
||
|
||
|
are clean. Clean them if necessary. |
|
|
• Be sure that the target shape and condition is appropriate |
|
|
to reflect the laser beam. |
|
|
• Replace battery. |
|
[- - -] (“Cannot |
• Be sure to hold the unit steady while depressing the |
|
POWER button. |
||
measure”) appears |
||
• Be sure the target is within measuring range (10-500m/11- |
||
|
||
|
550 yards/33-999 feet) |
|
Closer target cannot |
• Be sure that nothing, such as leaves or grass, is between |
|
be measured |
the Nikon Laser Forestry Pro and the target. |
|
Target beyond a |
• Be sure that nothing, such as leaves or grass, is between |
|
certain distance |
the Nikon Laser Forestry Pro and the target. |
|
cannot be measured |
|
30
 Loading...