


Notes on these Operating Instructions
The operating instructions and installation guidelines have been organized so that subjectrelated information can be easily found using the contents list.
Note
You will find comprehensive Operating Instructions for navigation on relevant CDs/DVDs and at the online help of the device.
The section "Frequently Asked Questions" contains answers to questions that are frequently addressed to our customer service department.
Document Your Navigation Unit
It is important to record the details of your Navigation Unit and the purchase thereof. In the event you require warranty support you may be asked for this information. The serial number can be found on the back of the device:
Serial Number ....................................................................................
Password ....................................................................................
Information note ....................................................................................
SuperPIN ....................................................................................
UUID ....................................................................................
Date of Purchase ....................................................................................
Place of Purchase ....................................................................................
Please record the serial number into any appropriate guarantee documents.
You will enter your own password and information note using the Security Function.
The SuperPIN and the UUID will be provided following the activation of the Security Function. See Page 17.

Quality
The components used have been selected to provide a product that has a high level of functionality and is user friendly, safe and reliable. A well-balanced hardware and software design allows us to offer you a technologically advanced navigation system, which is both practical and enjoyable to use.
Service
Our customer care is there to provide support and assistance whenever you have questions or are experiencing problems.
This manual contains a section specific to Customer Service starting on page 41.
Copyright © 2009, version 25/03/2009. All rights reserved. Microsoft®, MS-DOS®, and Windows are registered trademarks of Microsoft Corporation in the U.S. and other countries. Pentium® is a registered trademark of Intel Corporation. The names of actual companies and products mentioned herein may be the trademarks of their respective owners. Information in this document is subject to change without notice.
ii

Contents |
|
Safety and Maintenance .................................................................................. |
1 |
Safety Instructions ......................................................................................................... |
1 |
Data Security ................................................................................................................. |
1 |
Operating Environment................................................................................................. |
2 |
Repair............................................................................................................................ |
2 |
Ambient temperature .................................................................................................... |
2 |
Electromagnetic Compatibility ...................................................................................... |
3 |
Connection ................................................................................................................... |
4 |
Power supply through Car Adapter............................................................................ |
4 |
Power Supply through AC adapter (optional) ............................................................ |
4 |
Cabling ......................................................................................................................... |
4 |
Information about the Regulatory Compliance according to R&TTE .............................. |
5 |
Battery Operation.......................................................................................................... |
5 |
Cleaning and Maintenance............................................................................................ |
5 |
Care of the Display ........................................................................................................ |
6 |
Recycling and Disposal.................................................................................................. |
6 |
Transport ...................................................................................................................... |
7 |
Supplied Items .............................................................................................................. |
8 |
Views ............................................................................................................... |
9 |
Front Components ........................................................................................................ |
9 |
Back Components ....................................................................................................... |
10 |
Bottom Components................................................................................................... |
11 |
Top Components ........................................................................................................ |
11 |
Right Components ...................................................................................................... |
12 |
Left Components......................................................................................................... |
13 |
Holder with extension socket (optional) ...................................................................... |
14 |
Front components ................................................................................................... |
14 |
Back components..................................................................................................... |
15 |
Initial Set up .................................................................................................. |
16 |
I. Charging the Battery ................................................................................................ |
16 |
II. Power Supply .......................................................................................................... |
17 |
Car Adapter.............................................................................................................. |
17 |
Alternative possibility of charging the battery........................................................... |
17 |
AC Adapter (optional) .............................................................................................. |
18 |
III. Switching on the Device ......................................................................................... |
19 |
IV. Installing the Navigation Software .......................................................................... |
20 |
|
iii |

General Operating Instructions ..................................................................... |
21 |
Switching on/off the device......................................................................................... |
21 |
Security ......................................................................................................... |
23 |
Storing the password and the information note .......................................................... |
23 |
Making settings ........................................................................................................... |
24 |
SuperPIN and UUID ..................................................................................................... |
25 |
Fingerprint Sensor ....................................................................................................... |
26 |
Benefits of this technology ....................................................................................... |
26 |
Storing a fingerprint .................................................................................................... |
26 |
Making subsequent settings........................................................................................ |
28 |
Password Request ....................................................................................................... |
29 |
Resetting the Navigation System ................................................................................. |
30 |
Soft Reset .................................................................................................................... |
30 |
1. Possibility ............................................................................................................. |
30 |
2. Possibility ............................................................................................................. |
30 |
Switching the Device off Completely / Hard Reset ....................................................... |
31 |
Navigation ..................................................................................................... |
32 |
Safety Instructions for Navigation ................................................................................ |
32 |
General Instructions ................................................................................................. |
32 |
Notes for Use in a Vehicle ......................................................................................... |
33 |
Aerial Orientation ........................................................................................................ |
33 |
I. Mounting the Car Holder ......................................................................................... |
34 |
II. Attaching the Navigation System ............................................................................. |
35 |
Fixing the navigation system via cradle with extension socket .................................. |
36 |
III. Connecting the Car Adapter ................................................................................... |
37 |
IV. Starting the Navigation Software ............................................................................ |
38 |
Warning function for traffic monitoring points ............................................................ |
39 |
Integrated FM Transmitter (optional) ........................................................... |
41 |
Starting the FM Transmitter......................................................................................... |
41 |
Overview of the main screen ....................................................................................... |
41 |
Description of the Interfaces ........................................................................................ |
42 |
Selecting the frequency............................................................................................ |
42 |
Speech commands (optional) ........................................................................ |
44 |
Handsfree Facility by means of Bluetooth (optional)........................................ |
49 |
Starting the Bluetooth Application............................................................................... |
49 |
Overview of the Main Screen ................................................................................... |
50 |
Pairing the Navigation Device and the Mobile Phone ............................................... |
51 |
Accepting incoming calls ......................................................................................... |
52 |
Making Calls ............................................................................................................ |
52 |
iv |
|

During a Call............................................................................................................ |
53 |
MP3 Player (optional) ................................................................................... |
54 |
Main Screen Overview................................................................................................. |
54 |
Select a Title and Move it into the List of Favourites.................................................. |
56 |
List of Favourites ...................................................................................................... |
57 |
List of the established bookmarks ................................................................................ |
57 |
Picture Viewer (optional).............................................................................. |
58 |
Operating the Picture Viewer....................................................................................... |
58 |
Main Screen ................................................................................................................ |
58 |
Full Image View........................................................................................................ |
59 |
Video Player (optional) ................................................................................. |
61 |
Main Screen Overview................................................................................................. |
61 |
Selecting and playing video ..................................................................................... |
61 |
Travelguide (optional) .................................................................................. |
63 |
AlarmClock (Wake up function) (optional)................................................... |
64 |
Overview of the main screen ....................................................................................... |
64 |
Description of the Interfaces ........................................................................................ |
65 |
Setting the System Time........................................................................................... |
66 |
Selecting an Alarm Signal......................................................................................... |
67 |
Setting the Volume .................................................................................................. |
67 |
Snooze Function ...................................................................................................... |
68 |
Ending the Alarm Clock Application ......................................................................... |
68 |
Contact Viewer (optional) ............................................................................. |
69 |
Create the contacts database....................................................................................... |
69 |
Operating the Contact Viewers.................................................................................... |
70 |
Contacts list view ........................................................................................................ |
70 |
Visiting card view ........................................................................................................ |
71 |
Selection of addresses and phone numbers................................................................. |
72 |
Sudoku (optional) ......................................................................................... |
73 |
Main Screen ................................................................................................................ |
73 |
Description of the switch fields.................................................................................... |
73 |
FAQ ................................................................................................................ |
75 |
Customer Service ........................................................................................... |
76 |
Faults and Possible Causes .......................................................................................... |
76 |
Additional Support ...................................................................................................... |
76 |
v

Appendix ....................................................................................................... |
77 |
Special CleanUp Function............................................................................................ |
77 |
Synchronisation with the PC........................................................................................ |
80 |
I. Installing Microsoft® ActiveSync® ............................................................................ |
80 |
II. Connecting with the PC ....................................................................................... |
81 |
Alternative possibility of charging the battery........................................................... |
81 |
III. Working with Microsoft® ActiveSync® .................................................................... |
82 |
GPS (Global Positioning System) ................................................................................. |
83 |
Dead Reckoning (gyroscope) (only in the case of Model X5535).............................. |
83 |
TMC (Traffic Message Channel)................................................................................... |
84 |
Pay TMC (optional) ..................................................................................................... |
84 |
Connecting an additional TMC Dipole Aerial (optional) ........................................... |
85 |
The Remote Control (optional).................................................................................... |
86 |
Safety Instructions ....................................................................................................... |
86 |
Batteries and Proper Treatment ................................................................................... |
86 |
Button Layout ............................................................................................................. |
87 |
Installation .................................................................................................................. |
88 |
Working with Memory Cards....................................................................................... |
90 |
Inserting Memory Cards........................................................................................... |
90 |
Removing Memory Cards......................................................................................... |
90 |
Accessing Memory Cards ......................................................................................... |
90 |
Data Exchange via Card Reader ................................................................................ |
91 |
Additional Card Material.............................................................................................. |
91 |
Transfer of card material to a memory card .............................................................. |
91 |
Alternate method of installing Navigation Software (using a Memory Card) ........... |
92 |
Transferring Installation Files and Map Material to the Internal Memory .................. |
92 |
Specifications ................................................................................................ |
93 |
Model Overview ............................................................................................. |
94 |
Conditions of Warranty for the United Kingdom ........................................... |
95 |
Index ........................................................................................................... |
101 |
vi

Safety and Maintenance
Safety Instructions
Please read this section carefully and follow all the instructions provided. This will help ensure reliable operation and prolong the life for your appliance.
Keep the packaging and the user instructions for future reference or inquiries at a later date. If you pass the article on to another person, you should pass on these instructions.
•Never allow children to play with electrical equipment unsupervised.
•Keep the packing materials, such as plastic bags away from children as there is a danger of suffocation.
•Never open up the housing of the appliance or the power adapter. These contain no user-serviceable parts. If the housing is opened there is a danger of electric shock.
•Do not place any objects on the appliance and do not exert any pressure on the display. Otherwise there is a danger that the screen will break.
•To avoid damage, do not touch the screen with sharp objects. We recommend using only the stylus provided or finger when using the touch-screen functionality of the product.
•There is a risk of injury if the display breaks. If this should occur, use protective gloves to pack the broken parts and contact customer support to arrange for disposal. Then wash your hands with soap, since there is a possibility that chemicals may have escaped.
Remove the power adapter from the outlet, switch the appliance off immediately, or do not switch it on, and contact Customer Service.
•If the housing of the appliance or the power pack becomes damaged or liquid may have leaked into it the components must be checked by Customer Service in order to avoid damage!
Data Security
•Every time your data is updated or modified backup copies should be made on an external storage medium. The supplier assumes NO liability for data loss or damage to data storage units, and no claims can be accepted for damages resulting from the loss of data or for consequential damages.
Safety and Maintenance |
1 |

Operating Environment
Failure to follow these instructions may lead to your appliance being damaged. In cases where products are damaged as a result of misuse of neglect the associated guarantee will be considered void.
•Keep your navigation System and all connected devices away from moisture and avoid exposure to dust, heat and direct sunlight, especially in the car.
•Make sure you prevent your appliance from getting wet, e.g. from rain and hail, at all times. Please note that moisture can even build up inside a protective pouch as a result of condensation.
•Avoid heavy vibrations and shaking.
•Please note the device should be installed vertically, this will ensure that the device remains secured within its holder.
Repair
•Please contact our Service Center if you encounter technical problems with your appliance.
•In the event repair becomes necessary, please use only our authorized Service Partners. You will find the address on the back of your guarantee card.
Ambient temperature
•The appliance will operate effectively at an ambient temperature of between +32°F and +95°F (0° C and 35° C) and at a relative humidity of between 10% and 90% (non-condensing).
•In the powered down state the appliance can be stored at between -4°F and +140°F (-20°C and +60°C).
•Store the appliance in a safe location, away from high temperatures (e.g. when parking or from direct sunlight).
2 |
Safety and Maintenance |

Electromagnetic Compatibility
•When connecting additional or other components the “Electromagnetic Compatibility Directive” (EMC) must be adhered to. Please note that only screened cable (maximum 10ft) should be used with this appliance.
•For optimal performance, maintain a distance of at least 10 ft. from sources of highfrequency and magnetic interference (televisions, loudspeaker systems, mobile telephones etc. This will help to avoid malfunctions and loss of data.
•Electronic devices emit electromagnetic waves during operation.
These emissions are harmless, but can interfere with other devices operated in close proximity.
While our devices are tested and optimized for electromagnetic compliance in our laboratories, interference during operation may still occur in the device itself and with other devices in its proximity.
Should such interference occur, try to eliminate it by adjusting the positions of and the distances between the devices.
Before driving, please ensure that the electronic systems of the car are working properly.
Safety and Maintenance |
3 |

Connection
When connecting your appliance it is important to observe the following instructions:
Power supply through Car Adapter
•The car adapter should only be connected to the lighter socket of a car
(car battery = DC 12V , truck battery = DC 24V
  ). If you are in any doubt about the power source in your car, please contact your car manufacturer.
Power Supply through AC adapter (optional)
•The outlet must be in the vicinity of the appliance and must be easily accessible.
•To disconnect your appliance from the power source, remove the mains adapter from the power socket.
•Only use the mains adapter on sockets at AC 100–240 V~ AC, 50/60 Hz. If you are unsure about the power supply to the place of use, ask the relevant energy supplier.
•Use only the power adapter provided with your appliance.
•Do not cover the power supply unit, in order to avoid damage through unacceptable warming.
•Stop using the power supply unit if the housing or the feed line to the device is damaged. Replace it with a power supply unit of the same type.
•For additional safety, we recommend the use of a surge protector in order to protect your appliance from damage from spikes or lighting strikes on the power network.
Cabling
•Arrange cables so that they do not cause unnecessary obstruction or risk entanglement or snaring. E.g. ensure that the cables cannot be trod on, or tripped over.
•Do not place any items on the cable.
4 |
Safety and Maintenance |
Information about the Regulatory Compliance according to R&TTE
The following radio equipment has been supplied with this device (optional):
•Bluetooth (only in the case of model P5435 and X5535)
•FM-Transmitter (optional)
The company declares that this device is in compliance with the essential requirements and other relevant provisions of Directive 1999/5/EC. Complete declarations of conformity are available under www.medion.com/conformity.
Battery Operation
Your appliance is powered by an integrated battery, Li-Ion. In order to prolong the life and efficiency of your battery and ensure safe operation, follow the instructions below:
•Batteries cannot withstand excessive heat. Take care to avoid overheating of appliance and the integrated battery. Failure to comply with this instruction may lead to damage to or, even explosion of the battery.
•Only use the car adapter to charge the battery from the navigation kit.
• The batteries are special category waste. When disposing of the appliance ensure that this is done correctly. Contact Customer Service for more details.
Cleaning and Maintenance
Warning
There are no user-serviceable or parts which require cleaning inside the housing of the appliance.
You can prolong the life of the appliance by taking the following simple steps:
•Always remove the power plug and all connecting cables before cleaning.
•Clean the appliance only with a damp, lint-free cloth.
•Do not use solvents, caustic or gaseous cleaners.
Safety and Maintenance |
5 |

Care of the Display
•Avoid scratching the display surface as this may be easily damaged. We recommended using a display protection film (mylar) to prevent scratching to the screen. Please contact your nearest dealer for this accessory.
The foil on the display at delivery is purely for protection during transportation!
•Ensure that no traces of water remain on the screen. Water can cause irreversible discoloration.
•Use only a soft, lint-free cloth to clean the screen.
•Do not expose the screen to strong sunlight or ultraviolet radiation.
Recycling and Disposal
The device and its packaging are recyclable.
Device 
At the end of its life, the appliance must not be disposed of in household rubbish. Consult your local waste disposal company to enquire about environmentally-friendly options for disposal.
Packaging
To avoid damage during transport, the appliance is supplied in protective packaging. The majority of packaging is manufactured from materials which can be disposed of in an environmentally friendly manner and be recycled professionally.
6 |
Safety and Maintenance |

Transport
When transporting the appliance please follow the instructions below:
•In the event of large fluctuations in temperature or humidity, condensation or moisture may form inside the appliance. This can cause an electrical short-circuit.
•After transporting the appliance wait until the unit has acclimatised and adjusted to surrounding conditions (e.g. room temperature and humidity) prior to use.
•In order to protect the appliance from dirt, knocks and scratching, please use an appropriate protective case.
•Before travelling ensure that you are aware of the power and communications provisions at your destination. Before travelling obtain any power or communications adapters that may be required for the operation of your device.
•When shipping your appliance we recommend using the original packaging. If the original packaging isn’t available please contact customer service for advice.
•When passing through baggage control at airports, it is recommended that you pass the appliance and all magnetic storage media (external hard drives) through the X-ray system (the machine on which your bags are placed). Avoid the magnetic detector (the structure through which you yourself pass) or the magnetic wand (the hand device that the security staff use), since this may corrupt your data.
Safety and Maintenance |
7 |

Supplied Items
Please check the condition of items supplied and check for missing items using the list below. If you find your package to be incomplete, please forward us all claims for missing items within 14 days from the date of purchase.
The package should include the following:
•Navigation system
•Power cable for cigarette lighter
•USB cable
•TMC dipole antenna
•Car holder
•CDs/DVDs with navigation software, digital maps, ActiveSync®, data for rapidly resetting the contents of the memory card/internal memory
•Instruction manual and warranty card
Optional
•AC adapter
•Memory card SD
•Earphones
•Holder with extension socket
•Protective case
8 |
Safety and Maintenance |

Views
Front Components
op
n
q
Ref Component |
Description |
|
|
n Touch Screen |
Displays the output of your appliance. Tap on the |
|
screen with the stylus (found in the holder, see page |
|
35) to select menu commands or enter data. |
|
|
o Battery charge |
The LED will flash orange during the charging process. |
indicator |
It will shine constant green when the accumulator is |
|
fully charged. |
|
|
p Bluetooth indicator |
This LED will blink at different speeds, according to the |
|
connection status, if Bluetooth has been activated |
|
(only in the case of model P5435 and X5535). |
|
|
q Microphone |
only in the case of model P5435 and X5535 |
|
|
Views |
9 |

Back Components |
o |
|
n
GPS aerial
Ref Component |
Description |
|
|
n Stylus |
Take the stylus out of it's compartment in order to |
|
use it, and replace it after use. The stylus is required |
|
for operating the touch screen. |
|
|
o Loudspeaker |
Provides audible language statements and warn- |
|
ings. |
|
|
10 |
Views |

Bottom Components n |
o p q |
Ref Component |
Description |
n Extension |
For the expansion for future components. |
socket |
|
|
|
o Mini-USB- |
Connection for connecting to a PC by means of a USB |
Connector |
cable (for data transfer) as well as connection to exter- |
|
nal power supply. |
|
|
p TMC connection |
You also have the possibility to connect a TMC dipole |
|
antenna here. |
qHeadphone connection
Connection for a pair of stereo headphones (3.5 mm).
Using this appliance at full or high volumes for extended periods of time may cause damage to the hearing of the listener.
Top Components
no
Ref Component |
Description |
|
|
n On/Off button |
Turn the device on or off by pressing and holding the |
|
On/Off button. You will switch to the stand-by mode |
|
or reactivate the device by quickly pressing the button |
|
(> ½ sec.). |
|
|
o Fingerprint sensor |
See page 26 |
|
|
Views |
11 |

Right Components
n
Ref Component |
Description |
n SD Slot |
Accepts an optional SD (Secure Digital) card for |
|
removable storage. |
|
|
12 |
Views |

Left Components
n
o
p
Ref Component |
Description |
n Volume control / |
You can control the volume of your device as follows: |
Activation of the |
You can increase the volume by turning the wheel |
voice entry |
upwards (+). You can reduce the volume by turning |
(optional) |
the wheel downwards (-). |
|
Press the wheel briefly to activate speech input |
|
(optional). |
oMain switch / Switches the device completely off (Hard Reset). Battery switch
p Reset opening |
Restarts your appliance (Reset, see page 30). |
|
|
Views |
13 |

Holder with extension socket (optional)
This holding casing offers extended possible connections and, in addition, it has a receiver for the optional steering wheel remote.
Proceed as described on Page 36 in order to connect your navigation system by means of this optional holding casing with expansion plugs.
Attention !
Please pay attention to the fact that the steering wheel remote will only be available in the case that an electricity supply has been connected.
Front components
n
o
Ref |
Component |
Description |
n |
Holding clip |
|
|
|
|
o |
Extension socket |
Connection plug to the main device |
|
|
|
14 |
Views |
Back components
|
|
|
|
|
|
|
n o p q |
||||
|
|
|
|
|
|
Ref Component |
Description |
||||
|
|
|
|
|
|
n TMC Connector |
Connector for a TMC dipole antenna |
||||
|
(serves to improve the reception, if no reception or |
||||
|
only long-lasting inadequate reception is possible |
||||
|
through the TMC aerial installed in the holder) |
||||
|
|
|
|
|
|
o Microphone |
For connection of an external microphone (only for the |
||||
|
models P5435 and X5535) |
||||
|
|
|
|
|
|
p Earphone |
Connects to a pair of stereo headphones (3.5 mm). |
||||
connector |
|
|
|
|
Using this appliance at full volume |
|
|
|
|
|
|
|
|
|
|
|
for extended periods of time may |
|
|
|
|
|
cause damage to the hearing ca- |
|
|
|
|
|
pacity of the listener. |
|
|
|
|
|
|
q Mini-USB- |
Connection to an external electricity supply by means |
||||
Connector |
of a mini-USB plug (not to the data adjustment!) |
||||
|
|
|
|
|
|
Attention!
Pay attention that the contacts are not touched, contaminated or shortcircuited.
Views |
15 |

Initial Set up
The following is a step by step guide to assist in the initial Set-up of the navigation system.
Start by removing the protective plastic sheet from the display.
I. Charging the Battery
The battery of your navigation system can be charged in the following ways:
•Using the supplied car adapter,
•using a suitable USB cable or
•by using a mains adapter (purchased as an optional extra).
Attention!
It may be necessary to initially charge the battery for a considerable period of time prior to commencing and running through the initial installation, this is dependent on the level of charge held at the time by the internal battery.
Please observe the following notes:
•The charging status display LED will flash orange until the navigation system is charged. If possible, do not interrupt the charging process until the
battery is fully charged. This may take a few hours. The charging status LED will shine constant green if the battery has a high level of charge. Leave the device charging for 20 further minutes, to ensure the battery is charged-up fully.
•The navigation system can be used during the charging process, but the power supply must not be interrupted during initial set-up.
•Leave the external power supply connected to the navigation system for around 24 hours, so that the backup battery also charges-up fully.
•The external power supply can remain connected; this is recommended for continuous operation.
•Even after a power source has been connected to the device it may take several minutes until the device is once again ready to operate again, this occurs if the charging state of the battery is exceptionally low. The battery will continue to be charged if the power supply is connected and the device is switched off.
16 |
Initial Set up |

II. Power Supply
Car Adapter
o
n
(similar picture)
1.Plug the jack (n) of the connection cable into the corresponding receptor at the bottom of your navigation system.
2.Insert the power adapter (o) into the cigar lighter socket ensuring, that it will not lose contact while driving. This could cause a malfunction.
Alternative possibility of charging the battery
The battery will charge as soon as you connect your navigation device to a switched-on PC or notebook by means of a USB cable.
Please pay attention to the fact that both USB plugs of the USB cable supplied with the device must be connected to your PC or laptop to guarantee a sufficient supply of electricity.
No additional software or updates are required for your PC to perform this function. Do not interrupt the charging process if possible during the initial charge.
Note
The brightness will be adjusted downwards, if necessary, if a USB connection is being set up when the device is switched on.
It is recommended to set the device to the stand-by mode, in order to shorten the charging time by USB.
Initial Set up |
17 |

AC Adapter (optional)
Adapter plug
o
n
(similar picture)
1.Push the adapter connector into the guide on the back of the AC adapter. Press the push button at the same time, so that the adapter plug can engage.
2.Plug the cable of the mains adapter (n) into the mini-USB connection on of the navigation system.
3.Push the AC adapter (o) into a power point that is easily accessible.
18 |
Initial Set up |

III. Switching on the Device
Switch the main switch ( see page 13) to ON.
The Navigation System will start the initial installation automatically. The brand logo will appear. Your device will display the application screen after a few seconds.
Button Description |
Main Screen |
Navigation, page 32
Travel Guide, page 64
MP3Player, page 54
Bluetooth Dialer, page 49
Contact Viewer, page 69
Alarm Clock, page Fehler!
Textmarke nicht definiert.
Picture Viewer, page 58
Video Player page 61
Sudoku, page 73
Settings
Next page of the main screen
Previous page of the main screen
Initial Set up |
19 |

Note
Brief pressure on the On/Off button will be enough to switch the device on or off, provided that your navigation system is connected to an external source of electricity or is running in battery operation (standby mode). The device will be reactivated by pressing the On/Off button once (> ½ sec.).
You can adjust the period of operation to suit your needs using the Settings button on the main screen of your device. Your device is delivered in a status in which it will not switch off independently.
To switch your navigation system completely off, push the main switch to the OFF position.
No data will be lost as data is stored in the internal memory. The starting process will only take slightly longer.
Your navigation system will use a low amount of electricity and the batteries will be discharged, even when in standby mode.
IV. Installing the Navigation Software
The final installation of the navigation software will take place automatically from the internal memory, during the initial setting up, if your device has already been equipped with the basic data of the navigation software at the factory. Follow the instructions on the screen.
An optional memory card must always be inserted in the device while the navigation system is being used.
It will be necessary to carry out a Reset to restart the navigation system if the memory card has been removed (see page 30).
Please also read the chapter Navigation starting on page 32.
20 |
Initial Set up |

General Operating Instructions
Switching on/off the device
Your device will be in its normal operating state after the initial setting up. You can activate and deactivate your device with the On/Off button.
1.To start your navigation system press briefly the On/Off button  . The battery charge indicator will blink briefly and the application screen will appear.
Note
Your device is delivered in a status in which it will not switch off independently. You can adjust the period of operation to suit your needs using the Settings button on the main screen of your device.
Your navigation system will use a low amount of electricity and the batteries will be discharged, even when it is in the standby mode.
2.To switch off your navigation system briefly press the Power button  . The following screen will appear:
You have three possible choices:
Button Description
Cancel/Back
Return to previous view with this key, if you have accidently called up this screen.
Standby Mode
The device will go into Standby Mode if this key is clicked.
Reset
You can carry out a reset by clicking this key.
General Operating Instructions |
21 |

The device will go into the Standby mode automatically after a few seconds if you do not want to select any of these three possibilities.
For further settings within the Standby mode also see the chapter on “Special CleanUp Function”, page 77, point 8.
This display will also appear after the delay period of a few seconds has expired, if you have activated the DC AutoSuspend Comfort Function.
22 |
General Operating Instructions |
Security
You have the possibility of protecting your device against external access by means of this function. Some one-off settings will have to be made before you will be able to use this function. Proceed as follows to do this:
Storing the password and the information note
1. Go to the |
settings by means of the main display. |
2.Click on Security, in order to start the respective function. The following display will appear:
3.Click on  , in order to enter a password.
4.A keyboard will appear. Enter a password with it.
Note
The password must consist of at least 4 symbols. Use a combination of letters (A - Z) and numbers (0 - 9). Keep the password in a safe place.
5.Confirm the password with the  symbol after you have entered it.
6.Enter the password in the second field to reconfirm it and in order to avoid potential careless mistakes.
Note
The password will be displayed in the form of small stars (****).
7.An additional text field will appear after you have entered the password. Enter an information note here that will serve as a support for remembering your password. You will be able to call up this information if you have forgotten or mislaid the password.
Security |
23 |

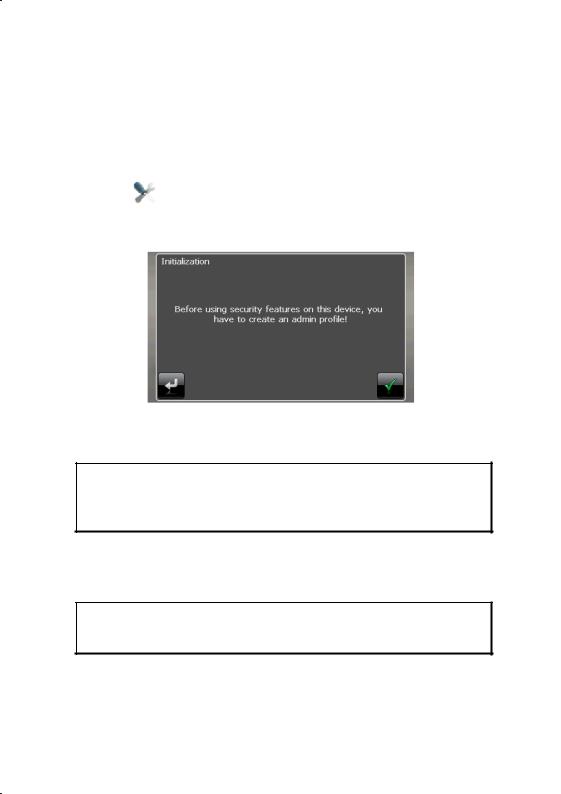
Making settings
The following selection window, through which you will make the settings for the Security Function, will appear after you have entered the password and the information note successfully.
Button Description
Set here whether the device should request the password after a hard reset.
Set here whether the device should request the password after a restart.
Set here whether the device should request the password after the device has been switched on from the Standby mode.
Confirm you settings with  during the set-up. The following screen will appear:
24 |
Security |
 Loading...