


HI 96713

Instruction Manual
HI 96713C
Phosphate Low Range ISM
www.hannainst.com
1

Dear Customer,
Thank you for choosing a Hanna product. This manual will provide you with the necessary
information for the correct use of the instrument. Please read it carefully before using the meter. If
you need additional technical information, do not hesitate to e-mail us at tech@hannainst.com.
TABLE OF CONTENTS
PRELIMINARY EXAMINATION ................................................................................................ 3
GENERAL DESCRIPTION ....................................................................................................... 4
ABBREVIATIONS .................................................................................................................. 4
SPECIFICATIONS ................................................................................................................... 5
PRECISION AND ACCURACY .................................................................................................. 5
PRINCIPLE OF OPERATION ................................................................................................... 6
FUNCTIONAL DESCRIPTION .................................................................................................. 7
ERRORS AND WARNINGS .................................................................................................... 9
GENERAL TIPS FOR AN ACCURATE MEASUREMENT ............................................................. 11
STARTUP ........................................................................................................................... 12
MEASUREMENT PROCEDURE ............................................................................................. 12
VALIDATION PROCEDURE ................................................................................................... 15
CALIBRATION PROCEDURE ................................................................................................. 17
GLP ................................................................................................................................... 20
BATTERY MANAGEMENT .................................................................................................... 21
BATTERY REPLACEMENT .................................................................................................... 22
ACCESSORIES ..................................................................................................................... 22
WARRANTY........................................................................................................................ 23
All rights are reserved. Reproduction in whole or in part is prohibited without the written consent of the copyright owner,
Hanna Instruments Inc., Woonsocket, Rhode Island, 02895 , USA.
2

PRELIMINARY EXAMINATION
Please examine this product carefully. Make sure that the instrument is not damaged. If any
damage occurred during shipment, please notify your Dealer.
Each HI 96713 Ion Selective Meter is supplied complete with:
• Two Sample Cuvettes and Caps
• CAL CHECK standard cuvettes
• 9V Battery
• Cloth for wiping cuvettes
• Instrument quality certificate
• Instruction Manual
• Rigid carrying case
Note: Save all packing material until you are sure that the instrument works correctly. Any
defective item must be returned in its original packing.
3

GENERAL DESCRIPTION
The HI 96713 is an auto diagnostic portable microprocessor meter that benefits from Hanna’s
years of experience as a manufacturer of analytical instruments. It has the advanced optical
system based on a special Tungsten Lamp and a narrow band interference filter that allows most
accurate and repeatable readings. All instruments are factory calibrated and the electronic and
optical design minimizes the need of frequent calibration.
With the powerful CAL CHECKTM validation function, you are able to validate good performance
of your instrument at any time. The validation procedure is extremely user friendly. Just use the
exclusive HANNA ready-made, NIST traceable standards to verify the performance of the
instrument and recalibrate if necessary.
All instruments are splash waterproof and the lamp and filter units are protected from dust or dirt
by a transparent cup. This makes the instruments fulfill field applications. Display messages aid
the user in routine operation. The meter has an auto-shut off feature that will turn off the
instrument after 10 minutes of non use in
calibration mode
The meter uses an exclusive positive-locking system to ensure that the cuvette is in the same
position every time it is placed into the measurement cell. It is designed to fit a cuvette with a
larger neck making it easier to add both sample and reagents. The cuvette is made from special
optical glass to obtain best results.
The HI 96713 meter measures the phosphate content in water samples in the 0.00 to 2.50 mg/L
(ppm) range. The method is an adaptation of the ascorbic acid method.
The reagent is in powder form and is supplied in packets. The amount of reagent is precisely
dosed to ensure the maximum repeatability.
.
measurement mode
or after 1 hour if left in
ABBREVIATIONS
degree Celsius
°C:
degree Fahrenheit
°F:
micrograms per liter. mg/L is equivalent to ppm (parts per million)
mg/L:
milliliter
mL:
millivolts
mV:
4

SPECIFICATIONS
Range 0.00 to 2.50 mg/L
Resolution 0.01 mg/L
Accuracy ±0.04 mg/L ± 4% of reading @ 25°C
Typical EMC Deviation ±0.01 mg/L
Light Source Tungsten lamp
Light Detector Silicon Photocell with narrow band interference filter @ 610 nm
Method Adaptation of the ascorbic acid method. The reaction between
phosphate and the reagent causes a blue tint in the sample.
Environment 0 to 50°C (32 to 122°F); max 95% RH non-condensing
Battery Type 1 x 9 volt
Auto-Shut off After 10' of non-use in
after 1 hour of non-use in
with last reading reminder.
Dimensions 192 x 104 x 69 mm (7.6 x 4.1 x 2.7")
Weight 360 g (12.7 oz.).
REQUIRED REAGENTS
Code Description Quantity/test
HI 93713-0 Powder Reagent 1 packet
measurement mode
calibration mode
;
;
PRECISION AND ACCURACY
Precision is how closely repeated measurements
agree with each other. Precision is usually
expressed as standard deviation (SD).
Accuracy is defined as the nearness of a test
result to the true value.
Although good precision suggests good accuracy,
precise results can be inaccurate. The figure
explains these definitions.
In a laboratory using a standard solution of
1.00 mg/L phosphate and a representative lot of
reagent, an operator obtained with a single
instrument a standard deviation of 0.03 mg/L.
5

PRINCIPLE OF OPERATION
Absorption of Light is a typical phenomenon of interaction between electromagnetic radiation and
matter. When a light beam crosses a substance, some of the radiation may be absorbed by
atoms, molecules or crystal lattices.
If pure absorption occurs, the fraction of light absorbed depends both on the optical path length
through the matter and on the physical-chemical characteristics of the substance according to the
Lambert-Beer Law:
-log I/Io = ελ c d
or
A = ελ c d
Where:
-log I/I
Therefore, the concentration "c" can be calculated from the absorbance of the substance as the
other factors are known.
Photometric chemical analysis is based on the possibility to develop an absorbing compound
from a specific chemical reaction between sample and reagents. Given that the absorption of a
compound strictly depends on the wavelength of the incident light beam, a narrow spectral
bandwidth should be selected as well as a proper central wavelength to optimize measurements.
The optical system of Hanna's HI 96 colorimeter is based on special tungsten lamp and narrow-band
interference filters to guarantee both high performance and reliable results.
= Absorbance (A)
o
Io= intensity of incident light beam
I = intensity of light beam after absorption
ελ= molar extinction coefficient at wavelength λ
c = molar concentration of the substance
d = optical path through the substance
HI 96 block diagram (optical layout)
6

A microprocessor controlled special tungsten lamp emits radiation which is first optically
conditioned and beamed to the sample contained in the cuvette. The optical path is fixed by the
diameter of the cuvette. Then the light is spectrally filtered to a narrow spectral bandwidth, to
obtain a light beam of intensity Io or I.
The photoelectric cell collects the radiation I that is not absorbed by the sample and converts
it into an electric current, producing a potential in the mV range.
The microprocessor uses this potential to convert the incoming value into the desired measuring
unit and to display it on the LCD.
The measurement process is carried out in two phases: first the meter is zeroed and then the
actual measurement is performed.
The cuvette has a very important role because it is an optical element and thus requires
particular attention. It is important that both, the measurement and the calibration (zeroing)
cuvettes, are optically identical to provide the same measurement conditions. Whenever possible
use the same cuvette for both. It is necessary that the surface of the cuvette is clean and not
scratched. This to avoid measurement interference due to unwanted reflection and absorption of
light. It is recommended not to touch the cuvette walls with hands.
Furthermore, in order to maintain the same conditions during the zeroing and the measuring
phases, it is necessary to close the cuvette to prevent any contamination.
FUNCTIONAL DESCRIPTION
INSTRUMENT DESCRIPTION
1) GLP/ key
2) CAL CHECK key
3) ZERO/CFM key
4) READ/ /TIMER key
5) ON/OFF key
6) Liquid Crystal Display (LCD)
7) Cuvette alignment indicator
8) Cuvette holder
7
10
8
5
2
9
7
3
4
6
1
KEYPAD DESCRIPTION
• ON/OFF: to turn the meter on and off.
• ZERO/CFM: this is a bi-functional key. Just press to zero the meter prior to measurement,
or confirm edited values. In
• READ/ /TIMER: this is a multi-functional key. In
calibration mode
press to confirm factory calibration restore.
measurement mode
, press to make a
measurement, or press and hold for three seconds to start a pre-programmed countdown prior
to measurement. In
GLP mode
press to view the next screen.
• CAL CHECK: this is a bi-functional key. Just press to perform the validation of the meter, or
press and hold for three seconds to enter
• GLP/ : this is a bi-functional key. Just press to enter
calibration mode
GLP mode
.
. In
calibration mode
press
to edit the date and time.
OPERATING MODES
•
Measurement mode:
•
Calibration mode:
default operation mode, enables both validation and measurement.
may be entered by keeping CAL CHECK pressed for three seconds (the
“CAL” tag appears), it enables calibration of the instrument.
•
GLP mode
may be entered by pressing GLP/ (“GLP” appears), it enables consulting of
user calibration date or restore factory calibration.
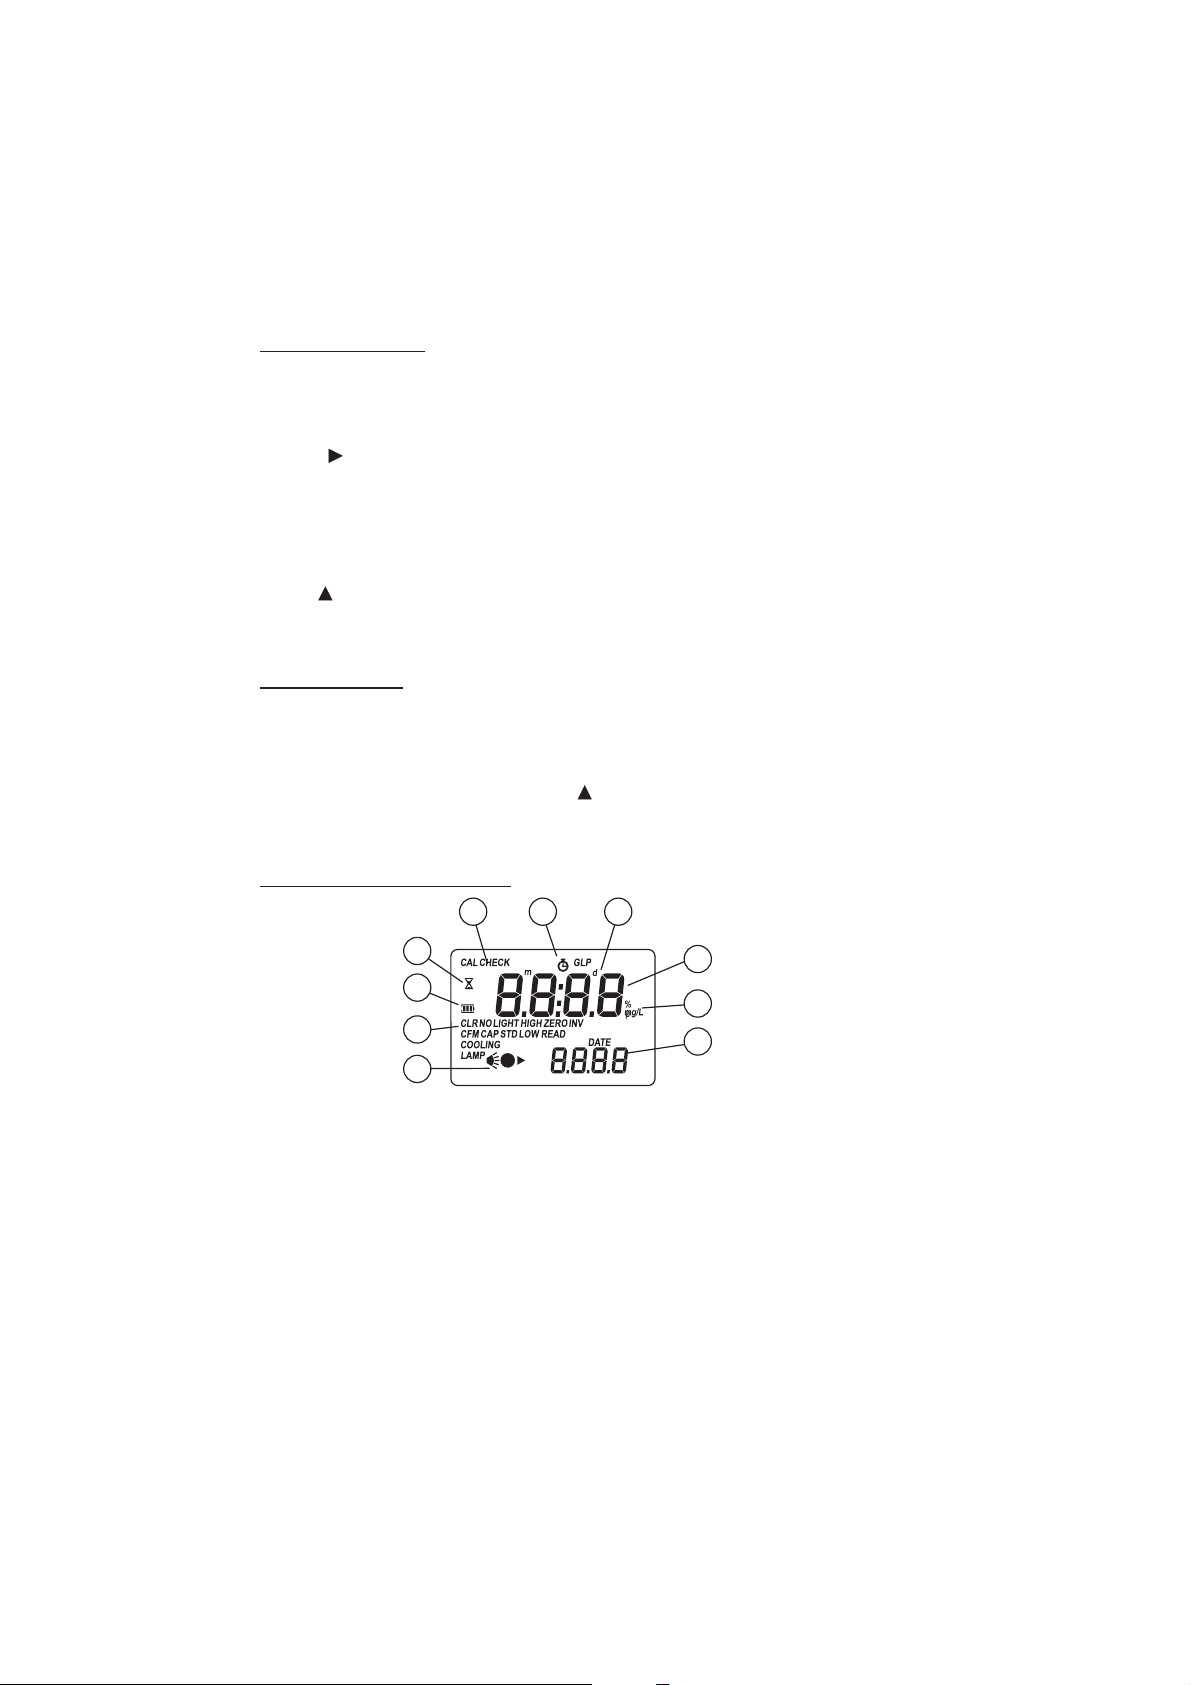
DISPLAY ELEMENTS DESCRIPTION
1) The measuring scheme (lamp, cuvette, detector), appears during different phases of zero or
reading measurement
2) Error messages and warnings
3) The battery icon indicates the charge state of the battery
4) The hourglass appears when an internal check is in progress
5) Status messages
6) The chronometer appears when the reaction timer is running
7) The month, day and date icons appear when a date is displayed
8) Four digit main display
9) Measuring units
10) Four digit secondary display
8
 Loading...