


GUD24ESSM1WW

WASHER/DRYER
SAFETY INFORMATION .........3
GETTING STARTED
Washer ............................. 6
Dryer .............................. 14
CARE AND CLEANING
Washer ..............................13
Dryer ................................17
TROUBLESHOOTING TIPS
Washer ..............................18
Dryer ................................21
CONSUMER SUPPORT
Limited Warranty .................... 23
Consumer Support ................... 24
Write the model and serial
numbers here:
Model # _________________
Serial # _________________
Open dryer door for model and
serial number tag.
49-90581-5 04-19 GEA
OWNER’S MANUAL
234D2664P001
GE is a trademark of the General Electric Company. Manufactured under trademark license.
ENGLISH/FRANÇAIS/
ESPAÑOL
GUV27ES
GUV27EE
GUD27ES
GUD27EE
GUD24ES

2 49-90581-5
THANK YOU FOR MAKING GE APPLIANCES A PART OF YOUR HOME.
Whether you grew up with GE Appliances, or this is your first, we’re happy to have you in the family.
We take pride in the craftsmanship, innovation and design that goes into every GE Appliances
product, and we think you will too. Among other things, registration of your appliance ensures that we
can deliver important product information and warranty details when you need them.
Register your GE appliance now online. Helpful websites and phone numbers are available in the
Consumer Support section of this Owner’s Manual. You may also mail in the pre-printed registration
card included in the packing material.

49-90581-5 3
IMPORTANT SAFETY INFORMATION
READ ALL INSTRUCTIONS BEFORE USING THE APPLIANCE
SAFETY INFORMATION
READ AND SAVE THESE INSTRUCTIONS
To reduce the risk of death, fire, explosion, electric shock, or injury to persons when using
your appliance, follow basic precautions, including the following:
Ŷ
DO NOT wash or dry articles that have been previously cleaned in, washed in, soaked in or spotted with
gasoline, dry-cleaning solvents, or other flammable or explosive substances, as they give off vapors that could
ignite or explode.
Ŷ
DO NOT place items exposed to cooking oils in your dryer. Items contaminated with cooking oils may
contribute to a chemical reaction that could cause a load to catch fire. To reduce the risk of fire due to
contaminated loads, the final part of the tumble dryer cycle occurs without heat (cool down period). Avoid
stopping a tumble dryer before the end of the drying cycle unless all items are quickly removed and spread
out so that the heat is dissipated.
Ŷ
DO NOT add gasoline, dry-cleaning solvents, or other flammable or explosive substances to the wash water.
These substances give off vapors that could ignite or explode.
Ŷ
Under certain conditions, hydrogen gas may be produced in a hot-water system that has not been used for
2 weeks or more. HYDROGEN GAS IS EXPLOSIVE. If the hot water system has not been used for such a
period, before using a washing machine, turn on all hot-water faucets and let the water flow from each for
several minutes. This will release any accumulated hydrogen gas. As the gas is flammable, DO NOT smoke
or use an open flame during this time.
Ŷ
DO NOT allow children to play on or in this appliance. Close supervision of children is necessary when this
appliance is used near children. Before the appliance is removed from service or discarded, remove the door
and lid to the drying and washing compartments. Failure to follow these instructions may result in death or
injury to persons.
Ŷ
DO NOT reach into the appliance if the drum, tub or agitator is moving to prevent accidental entanglement.
Ŷ
DO NOT dry articles containing foam rubber or similarly textured rubber-like materials.
Ŷ
Clean lint screen before or after each load.
Ŷ
DO NOT operate the dryer without the lint filter in place.
Ŷ
Follow all fabric care instructions and warnings to prevent melting of garments or damage to the appliance.
Ŷ
DO NOT use fabric softeners or products to eliminate static unless recommended by the manufacturer of the
fabric softener or product.
Ŷ
D O N O T store combustible materials, gasoline or other flammable liquids near the dryer. Keep area around
the exhaust opening and adjacent surrounding areas free from the accumulation of lint, dust and dirt.
Ŷ
The interior of the appliance and exhaust duct should be cleaned periodically by qualified service personnel.
Ŷ
DO NOT install or store this appliance where it will be exposed to the weather.
Ŷ
DO NOT tamper with controls.
Ŷ
DO NOT repair or replace any part of this appliance or attempt any servicing unless specifically recommended
in the user maintenance instructions or in published user repair instructions that you understand and have the
skills to carry out.
Ŷ
DO NOT operate this appliance if it is damaged, malfunctioning, partially disassembled, or has missing or
broken parts including a damaged cord or plug.
Ŷ
Unplug the appliance or turn off the circuit breaker before servicing. Pressing the Power or Start/Pause
button DOES NOT disconnect power.
Ŷ
DO NOT spray any type of aerosol into, on or near appliance, at any time. DO NOT use any type of spray
cleaner when cleaning dryer interior. Hazardous fumes or electrical shock could occur.
Ŷ
DO NOT store items that may burn or melt (such as clothing, paper material, plastics or plastic containers,
etc.) on top of the appliance nor hang them from the door.
Ŷ
DO NOT climb on or stand on this unit.
Ŷ
See “ELECTRICAL CONNECTION INFORMATION” located in the Installation Instructions for grounding instructions.
WARNING

4 49-90581-5
SAFETY INFORMATION
READ AND SAVE THESE INSTRUCTIONS
IMPORTANT SAFETY INFORMATION
READ ALL INSTRUCTIONS BEFORE USING THE APPLIANCE
ADDITIONAL WASHER SAFETY
START-UP SEQUENCE
Ŷ
Any time the washer is being started or restarts after the washer lid has been opened and closed, the washer
will turn on the cold water valve for two short periods followed by a 10 second pause before continuing. If the
lid is opened during this period, the washer will pause. You will have to push the Start button again to restart
the cycle.
WHEN NOT IN USE
Ŷ
Turn off water faucets to minimize leakage if a break or rupture should occur. Check the condition of the fill
hoses; GE Appliances recommends changing the hoses every 5 years.
AUTOMATIC DRAIN SEQUENCE
Ŷ
Machine will automatically drain any time the lid is left open for more than 15 minutes and water is present.
Ŷ
Machine will automatically drain if left in a paused state with the lid closed for more than 24 hours and water is
present.

49-90581-5 5
IMPORTANT SAFETY INFORMATION
READ ALL INSTRUCTIONS BEFORE USING THE APPLIANCE
SAFETY INFORMATION
READ AND SAVE THESE INSTRUCTIONS
Failure to follow safety warnings exactly could result in serious injury, death, or property
damage.
- DO NOT store or use gasoline or other flammable vapors and liquids in the vicinity of
this or any other appliance.
- WHAT TO DO IF YOU SMELL GAS:
Ŷ
DO NOT try to light any appliance.
Ŷ
DO NOT touch any electrical switch; DO NOT use any phone in your building.
Ŷ
Clear the room, building, or area of any occupants.
Ŷ
Immediately call your gas supplier from a neighbor’s phone. Follow the gas supplier’s
instructions.
Ŷ
If you cannot reach your gas supplier, call the fire department.
- Installation and service must be performed by a qualified installer, service agency, or
the gas supplier.
ADDITIONAL GAS DRYER WARNINGS
- Fire or Explosion Hazard
WARNING
6 49-90581-5
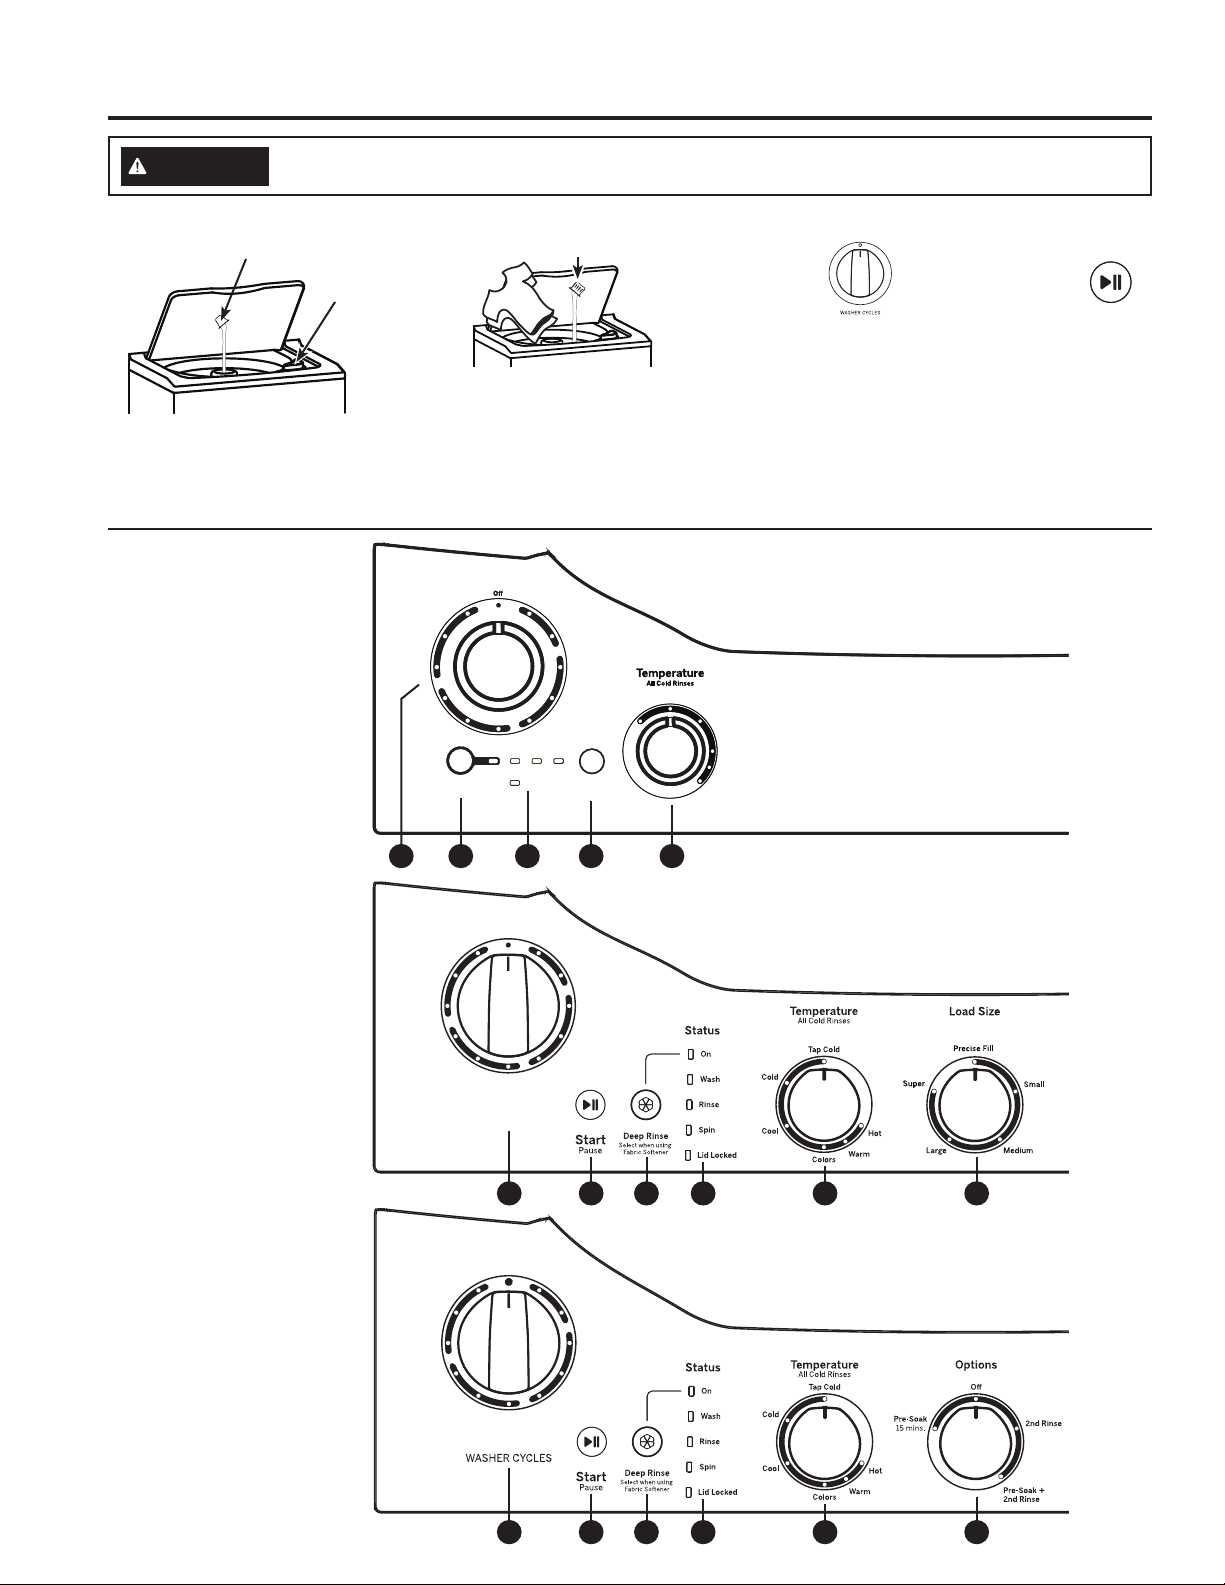
USING THE WASHER
Throughout this manual, features and appearance may vary from your model.
• Loosely add items.
Overloading may negatively
impact wash performance.
See page 11 for suggested
loading.
• Add detergent
Step 2 Step 3
Step 4
Step 1
• Turn the WASHER CYCLES
knob to “wake up” the washer
before each use. The LED lights
will turn on when the washer is
awake and ready to use.
• Select desired wash cycle.
• Select additional settings.
• Close lid.
• Press
the Start
button.
• Add fabric softener (optional)
• Add bleach (optional).
To reduce the risk of fire, electric shock, or injury to persons, read the IMPORTANT SAFETY
INFORMATION before operating this appliance.
WARNING
NOTE: This appliance
is designed so that the
washer and dryer can be
operated at the same time.
Getting started - Washer
Liquid
Bleach
Fabric Softener
Detergent
Colors
Heavy
Medium Bulky Items
Casuals
Heavy
Delicates
Light Drain & Spin
Medium
Normal
Speed Wash
Light
O
WASHER CYCLES
Whites
Washer models:
GUV27ES - With an Agitator
GUD27ES - With an Agitator
EDCBGA
Colors
Heavy
Medium
Heavy
Casuals
Light
Speed
Drain
& Spin
Wash
Bulky
Items
Medium
Delicates
Light
Off
Whites
Normal
Washer model:
GUD24ES - With an Agitator
FDCBGA
Colors
Heavy
Medium Bulky Items
Casuals
Heavy
Delicates
Light
Drain & Spin
Medium
Speed Wash
Light
Whites
Start
Pause
Normal
Wash Rinse Spin
Lid Locked
Deep Rinse
Select when using Fabric Softener
Tap Cold
Cold
Cool
Colors
Warm
Hot
Washer model:
GUV27EE - With an Infusor
GUD27EE - With an Infusor
DCB GA
Colors
Heavy
Medium Bulky Items
Casuals
Heavy
Delicates
Light
Drain & Spin
Medium
Speed Wash
Light
Whites
Start
Pause
Normal
Wash Rinse Spin
Lid Locked
Deep Rinse
Select when using Fabric Softener
Tap Cold
Cold
Cool
Colors
Warm
Hot
49-90581-5 7
Getting started - Washer
USING THE WASHER
A
Washer Cycles
The washer cycle controls the type of washing process. The cycle selector knob can be turned in either direction.
Turning the knob after starting a cycle will stop the washer and change the cycle to the new selection. Press Start
to begin the new cycle selection.
The chart below will help you match the items to be washed with the best washer cycle settings. For optimal
performance, select the cycle that most closely matches the items being washed. Selections shown in bold are
the recommended settings for that cycle.
Off - Washer is turned off and the Start button does not function. NOTE: When the control is turned to Off, the
Status lights are off.
NOTE: The cycle selector does not rotate during the operation of the washer.
Items to Wash Cycle Wash Temp Cycle Details
Cycle for normal, regular,
or typical use for washing
up to a full load of normally
soiled cotton clothing.
Colors
Medium/
Normal
Hot
Warm
Colors
Cool
Cold
Tap Cold
Use Colors Medium/
Normal cycle for normal, regular, or typical use for
washing up to a full load of normally soiled cotton clothing. Choose the
Warm or Hot water temperature selection as appropriate for your clothes
load for a higher degree of cleaning. Incorporates multi-stage fills and
wash periods to provide optimal fabric care.
Whites and household linens Whites Hot
Warm
Colors
Cool
Cold
Tap Cold
Cycle tailored to clean and brighten your whites.
Large coats, bed spreads,
mattress covers, sleeping
bags, and similar large
bulky items.
Bulky
Items
Hot
Warm
Colors
Cool
Cold
Tap Cold
Provides a max fill wash water level to wash bulky items. Also incorporates a
deep fill rinse to effectively rinse bulky items.
Casual clothes, lightly
soiled office wear.
Casuals Hot
Warm
Colors
Cool
Cold
Tap Cold
Wash cycle tailored to care for casual clothes and office wear items.
Incorporates multi-stage fills and wash periods to provide optimal fabric care.
Lingerie and special care
fabrics with light soil.
Delicates Hot
Warm
Colors
Cool
Cold
Tap Cold
Utilizes a gentle agitate profile and a low spin speed to provide special care
to delicate fabrics. It is recommended to place small or ultra delicate items in
mesh bags before washing.
Small loads of lightly soiled
items that are needed in a
hurry.
Speed
Wash
Hot
Warm
Colors
Cool
Cold
Tap Cold
Utilizes an expedited wash cycle and time-saving continuous spray rinse to
clean small lightly soiled loads in the fastest time possible.
Wet load of items. For items
that need only to be rinsed,
use this cycle with 2nd Rinse
option (on some models).
Drain &
Spin
Utilizes a high speed spin to extract water from wet items. For items that
need to be rinsed, select the 2nd Rinse option (on some models) when
using this cycle.
Your washer has a security system that prevents opening
the lid during the spin cycle. The lid lock prevents anyone
(especially children) from reaching into the washer while
the basket is spinning. The lid lock will release within 5
seconds after the basket stops spinning.
Trying to open the lid while locked could result in injuries.
If the lid does not unlock after spinning, please contact
service.
NOTE: If there is a power outage the lid lock can take 3
minutes to release.
8 49-90581-5
Start
Press Start to begin the cycle. With the lid closed pressing Start again will pause the cycle and Status lights will blink.
To continue the cycle, close the lid and press Start again. The water fill will continue with the lid opened, except when
Precise Fill (on some models) is selected as the load size. The lid must be closed to continue filling when Precise Fill
(on some models) is selected.
If the lid is opened during the cycle, the cycle will pause and the Status lights will blink. To resume the cycle, close the
lid and press Start.
If the machine is paused for more than 24 hours, the cycle will be cancelled. To stop the cycle, turn the Cycle Selector
to the Off position. NOTE: Machine will automatically cancel and drain when water is present and the lid is left open
for 15 minutes or the unit is left in a paused state for 24 hours with the lid closed. Select cycle and press Start to begin
new cycle.
Status light Illuminates
On When the fabric softener option has been selected.
Wash When the washer is in the wash portion of the cycle.
Rinse When the washer is in the rinse portion of the cycle.
Spin When the washer is draining and/or spinning.
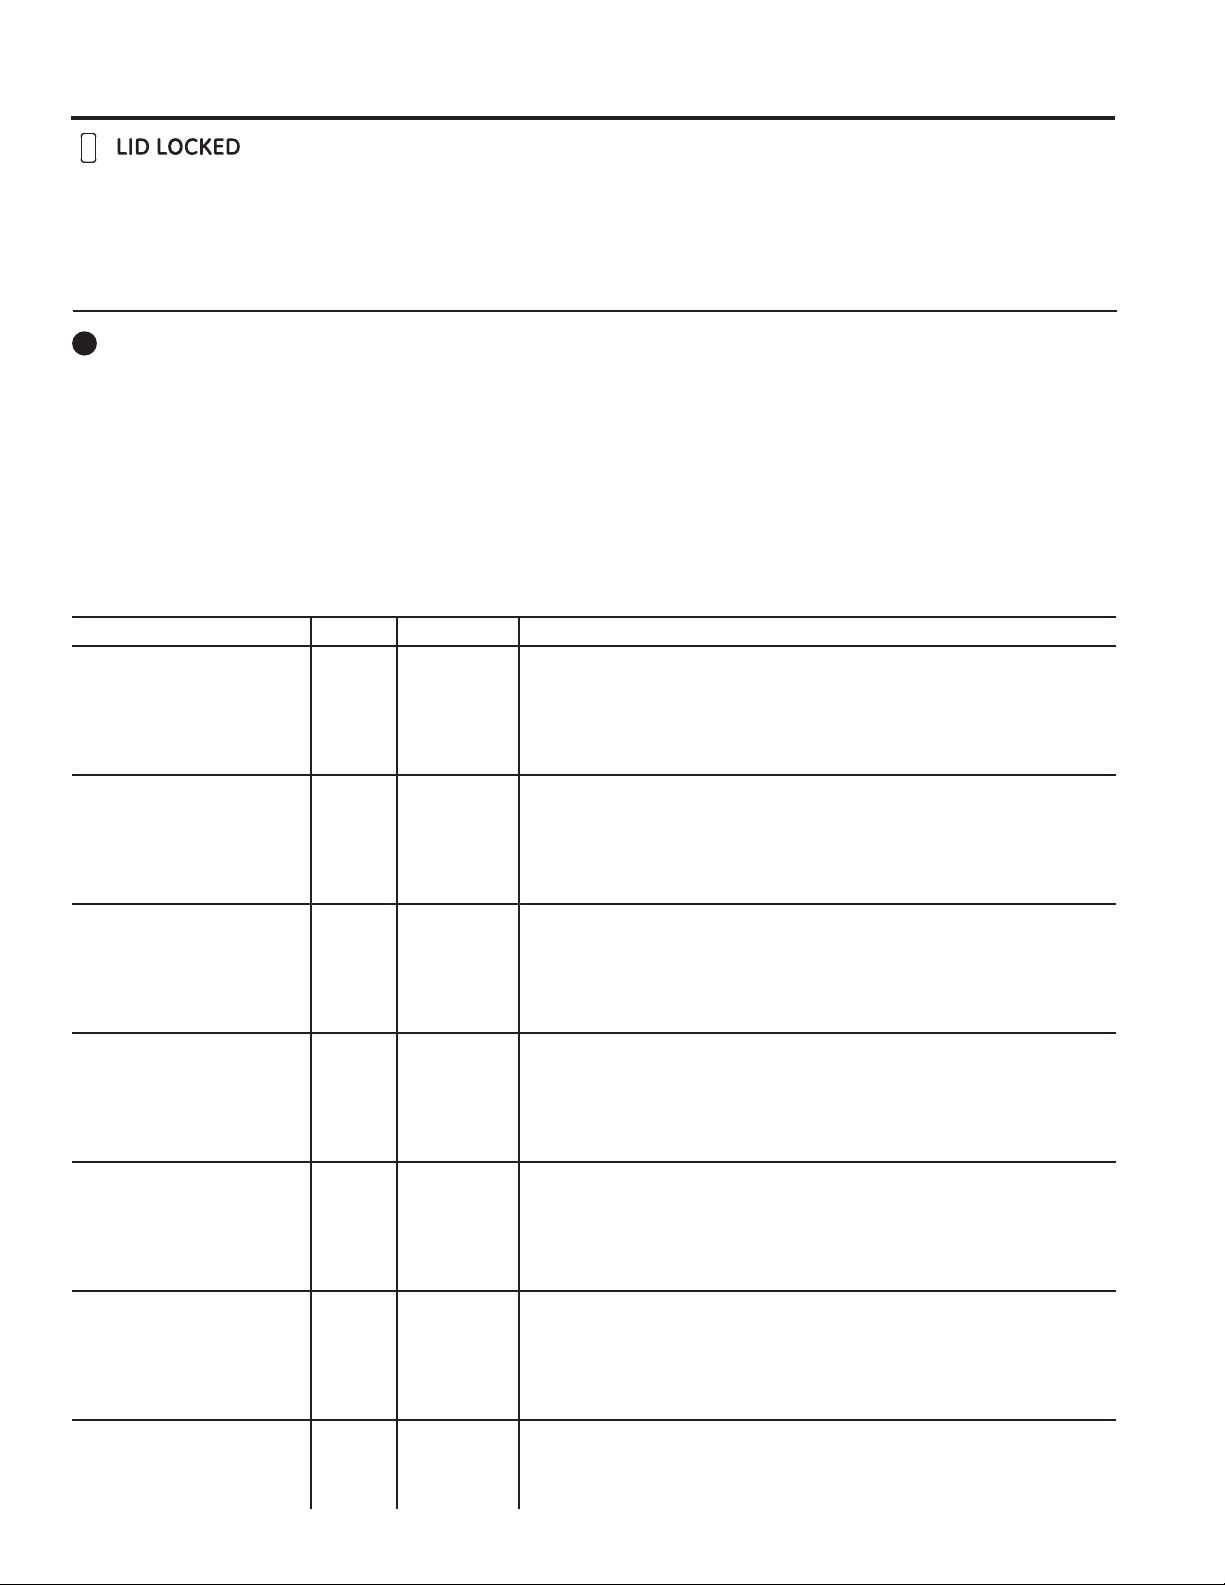
Lid Locked
When the washer lid is locked. This feature prevents the lid from being opened while the washer
is in the spin cycle or coasting to a stop.
NOTE: If the Status lights are blinking, the operation of the washer has been paused. To resume operation press the
Start button (the lid must be closed).
Deep Rinse
Set this option when adding fabric softener to the washer.
Status lights
The Status lights show the stage the washer is in. When the selector knob is set to a new cycle, the Status
lights will flash momentarily, showing the stages the cycle will go through.
Temperature
Select the water temperature for the washer cycle (all rinses use cold water). Always follow fabric manufacturer’s
care label or instructions when laundering.
Tap Cold* uses incoming tap water, which can provide energy savings. For all other temperature selections, a
mixture of hot and cold water is used to achieve the ideal temperature for each temperature setting.
* Please note that some detergents do not fully dissolve in very cold water. If you experience this, it is
recommended you choose a setting other than Tap Cold.
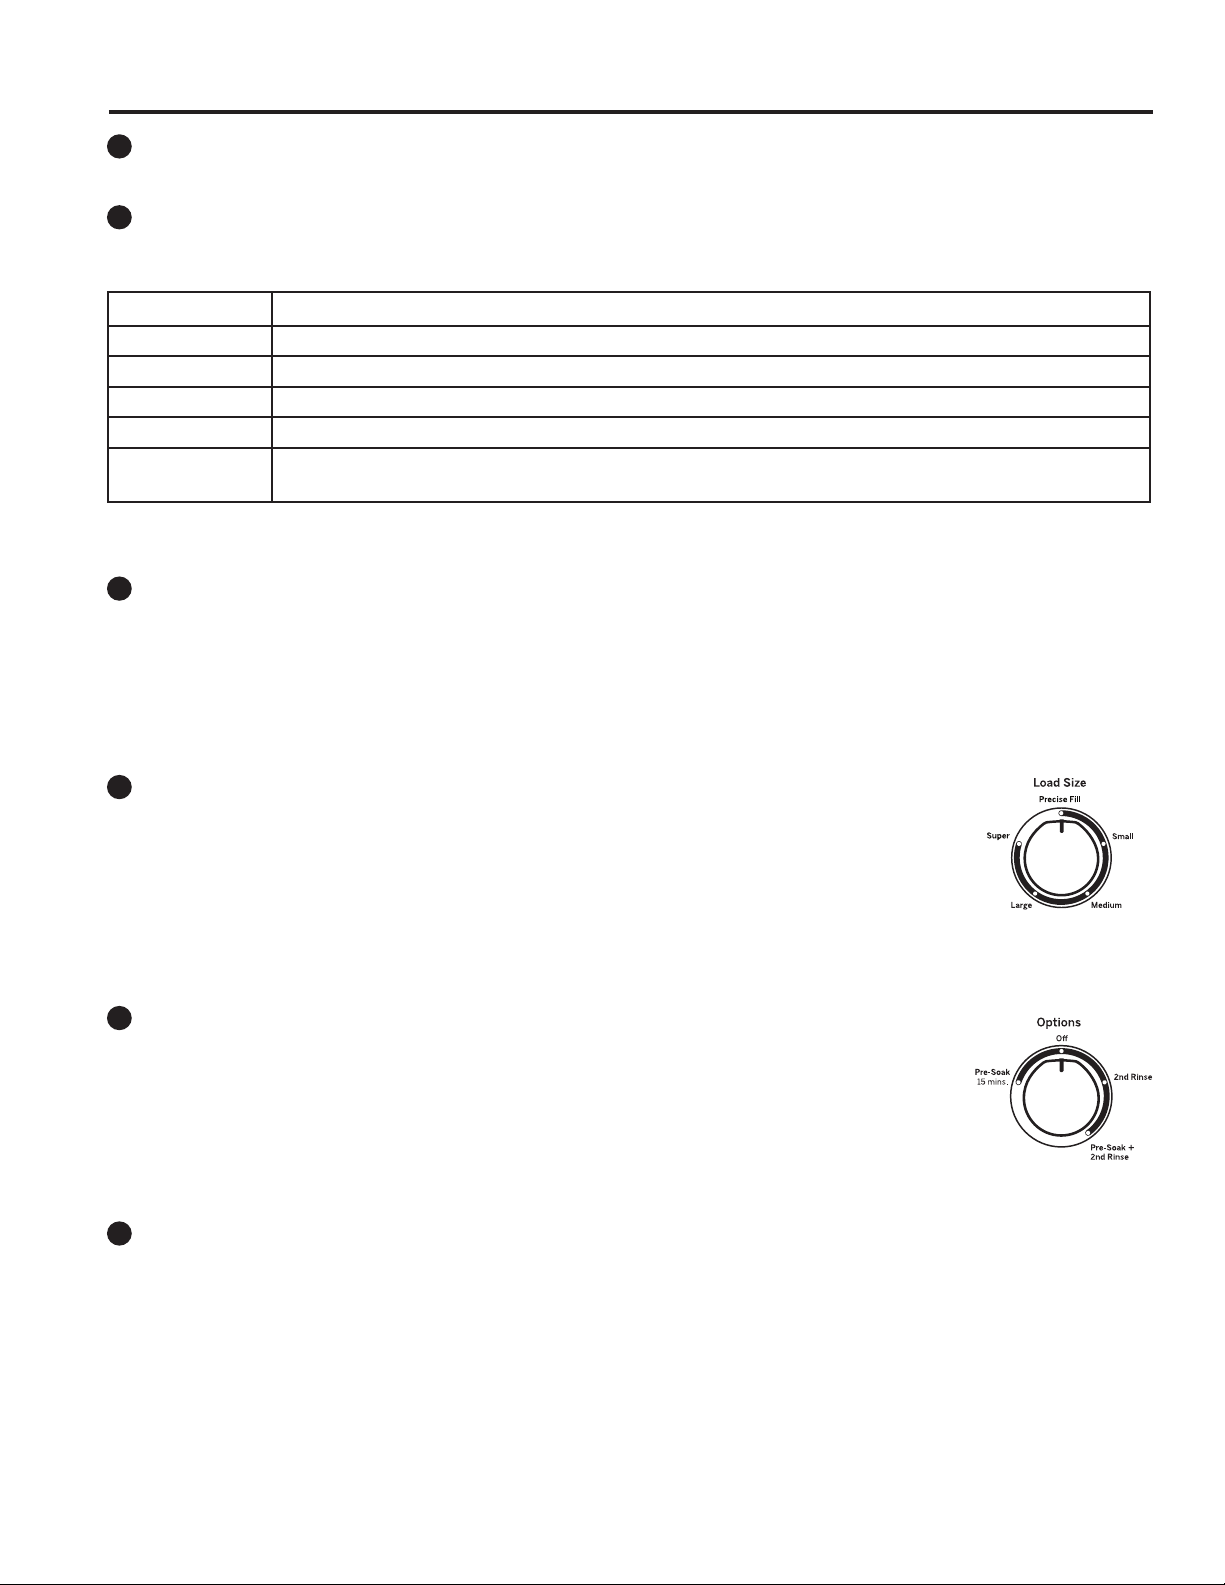
Load Size
(on some models)
Loosely load clothes no higher than the top row of holes in the washer basket.
Precise Fill - This selection automatically provides the correct amount of water suited to the
size and type of load placed in the unit.
If you prefer to manually select the water level, select Small through Super. While Precise
Fill is best for most loads and general washing, you may want to manually select the load size for specialty items
such as bulky, lightweight comforters or pillows, where you want to ensure a larger water level is applied. Manual
load size selections should be made for wet items placed in the washer, such as soaked towels or garments.
B
C
D
E
G
Getting started - Washer
USING THE WASHER
Options (on some models)
Pre-Soak 15 mins. - This option begins with a brief agitation, soaks for this specified period
of time, then moves through the rest of the cycle automatically.
2nd Rinse - When you use extra detergent or bleach to clean heavily soiled clothes, use the
2nd Rinse option to better remove additional residues.
Pre-Soak + 2nd Rinse - Turns both options on.
Off - Turns these options off.
F
 Loading...