


REFRIGERATORS
Side by Side
SAFETY INFORMATION . . . . . 3
USING THE REFRIGERATOR
Controls . . . . . . . . . . . . . . . . . . . . . . . . . . 5
ClimateKeeper2TM . . . . . . . . . . . . . . . . . . 6
TurboCoolTM. . . . . . . . . . . . . . . . . . . . . . . 6
ExpressChillTM . . . . . . . . . . . . . . . . . . . . . 7
Water Filter - MWF . . . . . . . . . . . . . . . . 8
Water Filter - XWF . . . . . . . . . . . . . . . . 9
Shelves and Bins. . . . . . . . . . . . . . . . . . 10
Crispers and Pans. . . . . . . . . . . . . . . . . 13
Automatic Icemaker. . . . . . . . . . . . . . . 14
Ice and Water Dispenser. . . . . . . . . . . 15
CARE AND CLEANING . . . . . . 17
The Outside. . . . . . . . . . . . . . . . . . . . . . 17 The Inside . . . . . . . . . . . . . . . . . . . . . . . 17 Behind the Refrigerator . . . . . . . . . . . 17 Preparing for Vacation . . . . . . . . . . . . 18 Preparing to Move . . . . . . . . . . . . . . . . 18 Replacing the Light Bulbs. . . . . . . . . . 19
INSTALLATION INSTRUCTIONS
Preparing to Install the
Refrigerator. . . . . . . . . . . . . . . . . . . . . 20 Moving the Refrigerator . . . . . . . . . . . 21 Installing the Refrigerator. . . . . . . . . . 25 Installing the Water Line. . . . . . . . . . . 29
TROUBLESHOOTING TIPS
Normal Operating Conditions . . . . . . 32
Troubleshooting . . . . . . . . . . . . . . . . . . 33
LIMITED WARRANTY . . . . . . . 35
CONSUMER SUPPORT
Water Filter Limited Warranty . . . . . 36
Performance Data Sheet . . . . . . . . . . . 37
Consumer Support . . . . . . . . . . . . . . . .40
Write the model and serial numbers here:
Model #_________________
Serial # _________________
Find these numbers on a label inside the refrigerator
compartment at the top on the right side behind the controls..
OWNER’S MANUAL &
INSTALLATION
INSTRUCTIONS
Models
Models 22, 23, 25,26,27 and 29
ENGLISH/FRANÇAIS/
ESPAÑOL
GE is a trademark of the General Electric Company. Manufactured under trademark license.
Pub No. 49-60646-6 06-18 GEA

THANK YOU FOR MAKING GE APPLIANCES A PART OF YOUR HOME.
Whether you grew up with GE Appliances, or this is your first, we’re happy to have you in the family.
We take pride in the craftsmanship, innovation and design that goes into every GE Appliances product, and we think you will too. Among other things, registration of your appliance ensures that we can deliver important product information and warranty details when you need them.
Register your GE appliance now online. Helpful websites and phone numbers are available in the Consumer Support section of this Owner’s Manual. You may also mail in the pre-printed registration card included in the packing material.
2 |
|
49-60646-6 |

IMPORTANT SAFETY INFORMATION
READ ALL INSTRUCTIONS BEFORE USING THE APPLIANCE
|
|
To reduce the risk of fire, explosion, electric shock, or injury when using your refrigerator, follow |
||
|
WARNING |
|||
|
|
these basic safety precautions: |
|
|
|
|
|
||
Ŷ 7KLV UHIULJHUDWRU PXVW EH SURSHUO\ LQVWDOOHG |
Ŷ 7R DYRLG VHULRXV LQMXU\ RU GHDWK FKLOGUHQ VKRXOG QRW |
|||
|
DQG ORFDWHG LQ DFFRUGDQFH ZLWK WKH ,QVWDOODWLRQ |
stand on, or play in or with the appliance. |
||
|
,QVWUXFWLRQV EHIRUH LW LV XVHG |
Ŷ &KLOGUHQ DQG SHUVRQV ZLWK UHGXFHG SK\VLFDO VHQVRU\ |
||
Ŷ 8QSOXJ WKH UHIULJHUDWRU EHIRUH PDNLQJ UHSDLUV RU |
or mental capabilities or lack of experience and |
|||
|
cleaning. |
knowledge can use this appliance only if they are |
||
|
NOTE: Power to the refrigerator cannot be |
supervised or have been given instructions on safe |
||
|
disconnected by any setting on the control panel. |
XVH DQG XQGHUVWDQG WKH KD]DUGV LQYROYHG |
||
|
NOTE: Repairs must be performed by a qualified |
Ŷ 7KLV DSSOLDQFH LV LQWHQGHG WR EH XVHG LQ KRXVHKROG |
||
|
Service Professional. |
and similar applications such as: staff kitchen areas |
||
Ŷ 5HSODFH DOO SDUWV DQG SDQHOV EHIRUH RSHUDWLQJ |
LQ VKRSV RIILFHV DQG RWKHU ZRUNLQJ HQYLURQPHQWV |
|||
Ŷ 'R QRW XVH DQ H[WHQVLRQ FRUG |
IDUP KRXVHV E\ FOLHQWV LQ KRWHOV PRWHOV EHG |
|||
Ŷ 'R QRW VWRUH RU XVH JDVROLQH RU RWKHU IODPPDEOH |
EUHDNIDVW DQG RWKHU UHVLGHQWLDO HQYLURQPHQWV |
|||
catering and similar non-retail applications. |
||||
|
vapors and liquids in the vicinity of this or any other |
|||
|
Ŷ &RQQHFW WR SRWDEOH ZDWHU VXSSO\ RQO\ $ FROG ZDWHU |
|||
|
appliance. |
|||
Ŷ 'R QRW VWRUH H[SORVLYH VXEVWDQFHV VXFK DV DHURVRO |
supply is required for automatic icemaker operation. |
|||
The water pressure must be between 40 and 120 psi |
||||
|
cans with a flammable propellant in this appliance. |
|||
|
(275-827 kilopascals). |
|||
Ŷ 7R SUHYHQW VXIIRFDWLRQ DQG HQWUDSPHQW KD]DUGV |
||||
|
||||
|
WR FKLOGUHQ UHPRYH WKH IUHVK IRRG DQG IUHH]HU |
|
||
|
doors from any refrigerator before disposing of it or |
|
||
|
discontinuing its use. |
|
||
|
|
|
|
|

 CAUTION To reduce the risk of injury when using your refrigerator, follow these basic safety precautions.
Ŷ 'R QRW FOHDQ JODVV VKHOYHV RU FRYHUV ZLWK ZDUP water when they are cold. Glass shelves and covers may break if exposed to sudden temperature changes or impact, such as bumping or dropping. Tempered glass is designed to shatter into many small pieces if it breaks.
Ŷ .HHS ILQJHUV RXW RI WKH ³SLQFK SRLQW´ DUHDV clearances between the doors and between the doors and cabinet are necessarily small. Be careful closing doors when children are in the area.
Ŷ 'R QRW WRXFK WKH FROG VXUIDFHV LQ WKH IUHH]HU compartment when hands are damp or wet, skin may stick to these extremely cold surfaces.
Ŷ 'R QRW UHIUHH]H IUR]HQ IRRGV ZKLFK KDYH WKDZHG completely.
Ŷ ,Q UHIULJHUDWRUV ZLWK DXWRPDWLF LFHPDNHUV DYRLG contact with the moving parts of the ejector mechanism, or with the heating element that
UHOHDVHV WKH FXEHV 'R QRW SODFH ILQJHUV RU KDQGV on the automatic ice making mechanism while the refrigerator is plugged in.
Ŷ Use a sturdy glass when dispensing ice (on models with ice dispenser
STATE OF CALIFORNIA PROPOSITION 65 WARNINGS
WARNING This product contains one or more chemicals known to the State of California to cause cancer and birth defects or other reproductive harm.
INSTALLATION

 WARNING
 EXPLOSION HAZARD
.HHS IODPPDEOH PDWHULDOV DQG YDSRUV VXFK DV JDVROLQH DZD\ IURP UHIULJHUDWRU )DLOXUH WR GR VR FDQ UHVXOW LQ ILUH explosion, or death.
READ AND SAVE THESE INSTRUCTIONS
INFORMATION SAFETY
49-60646-6 |
3 |

SAFETY INFORMATION
IMPORTANT SAFETY INFORMATION
READ ALL INSTRUCTIONS BEFORE USING THE APPLIANCE
CONNECTING ELECTRICITY

 WARNING
 ELECTRICAL SHOCK HAZARD
Plug into a grounded 3-prong outlet
'R QRW UHPRYH WKH JURXQG SURQJ 'R QRW XVH DQ DGDSWHU 'R QRW XVH DQ H[WHQVLRQ FRUG
)DLOXUH WR IROORZ WKHVH LQVWUXFWLRQV FDQ UHVXOW LQ GHDWK ILUH RU HOHFWULFDO VKRFN
Do not, under any circumstances, cut or remove the third (ground) prong from the power cord. For personal safety, this appliance must be properly grounded.
The power cord of this appliance is equipped with a 3-prong (grounding) plug which mates with a standard
SURQJ JURXQGLQJ ZDOO RXWOHW WR PLQLPL]H WKH SRVVLELOLW\ RI HOHFWULF VKRFN KD]DUG IURP WKLV DSSOLDQFH
Have the wall outlet and circuit checked by a qualified electrician to make sure the outlet is properly grounded.
Where a standard 2-prong wall outlet is encountered, it is your personal responsibility and obligation to have it replaced with a properly grounded 3-prong wall outlet.
'R QRW XVH DQ DGDSWHU
The refrigerator should always be plugged into its own individual electrical outlet which has a voltage rating that matches the rating plate.
$ 9ROW $& +] RU DPS IXVHG JURXQGHG electrical supply is required. This provides the best performance and also prevents overloading house
ZLULQJ FLUFXLWV ZKLFK FRXOG FDXVH D ILUH KD]DUG IURP overheated wires.
Never unplug your refrigerator by pulling on the power cord. Always grip plug firmly and pull straight out from the outlet.
,PPHGLDWHO\ GLVFRQWLQXH XVH RI D GDPDJHG VXSSO\
FRUG ,I WKH VXSSO\ FRUG LV GDPDJHG LW PXVW EH replaced by a qualified service professional with an
DXWKRUL]HG VHUYLFH SDUW IURP WKH PDQXIDFWXUHU
When moving the refrigerator away from the wall, be careful not to roll over or damage the power cord.
PROPER DISPOSAL OF YOUR OLD REFRIGERATOR

 WARNING SUFFOCATION AND ENTRAPMENT HAZARD
)DLOXUH WR IROORZ WKHVH GLVSRVDO LQVWUXFWLRQV FDQ UHVXOW LQ GHDWK RU VHULRXV LQMXU\
IMPORTANT: Child entrapment and suffocation |
Before You Throw Away Your Old Appliance |
|
are not problems of the past. Junked or abandoned |
Ŷ 7DNH RII WKH IUHVK IRRG DQG IUHH]HU GRRUV |
|
refrigerators are still dangerous even if they will sit |
Ŷ Leave the shelves in place so that children may not |
|
IRU ³MXVW D IHZ GD\V ´ ,I \RX DUH JHWWLQJ ULG RI \RXU ROG |
||
easily climb inside. |
||
refrigerator, please follow the instructions below to help |
||
|
||
prevent accidents. |
|
Refrigerant and Foam Disposal:
'LVSRVH RI DSSOLDQFH LQ DFFRUGDQFH ZLWK )HGHUDO DQG /RFDO 5HJXODWLRQV )ODPPDEOH LQVXODWLRQ PDWHULDO XVHG requires special disposal of your appliance. Contact your local authorities for the environmentally safe disposal of your appliance.
4 |
49-60646-6 |
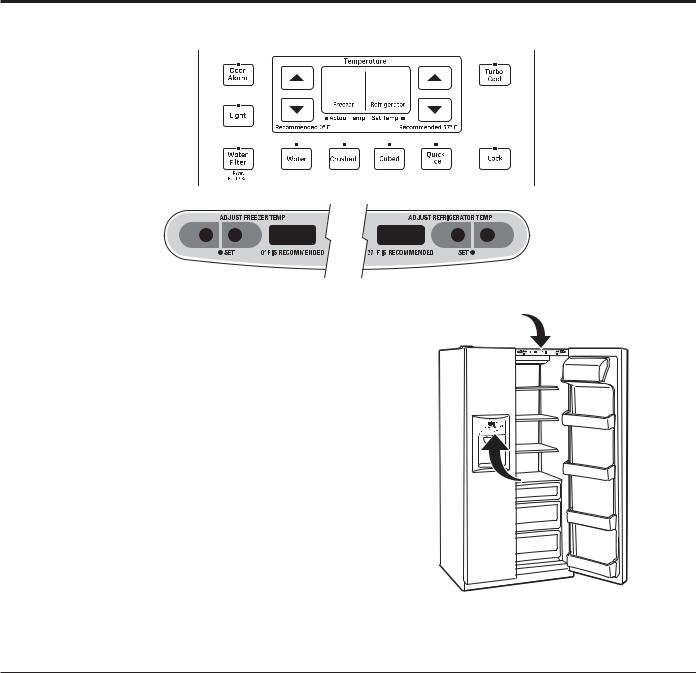
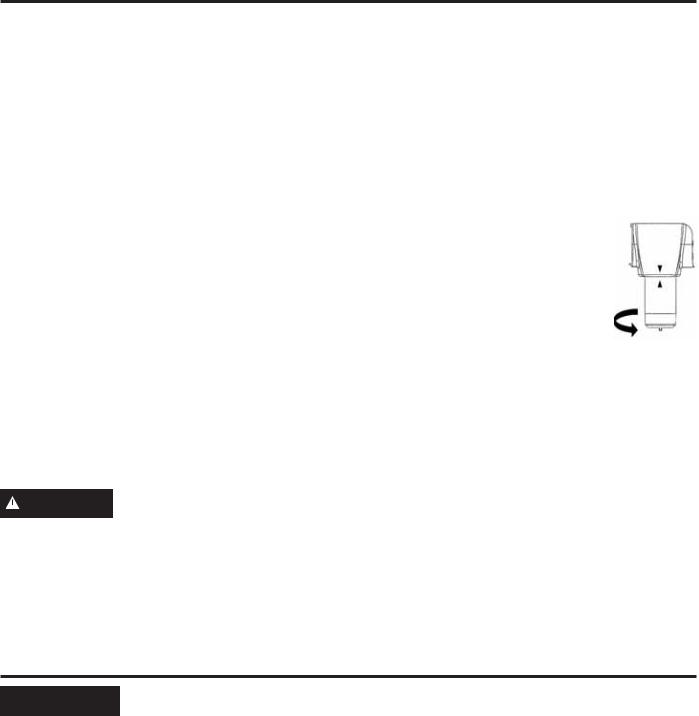
Controls
Not all features are on all models. Your controls may be similar to the following:
OR
The temperature controls are preset in the factory
DW ) & IRU WKH UHIULJHUDWRU FRPSDUWPHQW DQG) & IRU WKH IUHH]HU FRPSDUWPHQW $OORZ
KRXUV IRU WKH WHPSHUDWXUH WR VWDELOL]H WR WKH SUHVHW recommended settings.
The temperature controls can display both the SET temperature as well as the actual temperature in the
UHIULJHUDWRU DQG IUHH]HU 7KH DFWXDO WHPSHUDWXUH PD\ vary slightly from the SET temperature based on usage and operating environment.
Ŷ 2Q VRPH PRGHOV VHWWLQJ ERWK FRQWUROV WR WKH ZDUPHVW setting until the display flashes (off) will stop cooling
LQ ERWK WKH IUHH]HU DQG UHIULJHUDWRU FRPSDUWPHQWV
Ŷ 2Q RWKHU PRGHOV VHWWLQJ HLWKHU FRQWURO WR WKH ZDUPHVW setting until the display flashes (off) will stop the
FRROLQJ WR WKH IUHH]HU DQG UHIULJHUDWRU
Ŷ NOTE: Turning the refrigerator off via the controls on the touch panel does not shut off electrical power to the refrigerator.
NOTE: The refrigerator is shipped with protective film-
FRYHULQJ WKH WHPSHUDWXUH FRQWUROV ,I WKLV ILOP ZDV QRW removed during installation, remove it now.
Performance Air Flow System
7KH 3HUIRUPDQFH $LU )ORZ 6\VWHP LV GHVLJQHG WR PD[LPL]H WHPSHUDWXUH FRQWURO LQ WKH UHIULJHUDWRU DQG
IUHH]HU FRPSDUWPHQWV 7KLV XQLTXH VSHFLDO IHDWXUH consists of the Air Tower along the back wall of the refrigerator and the Air Tunnel on the bottom portion of
WKH IUHH]HU UHDU ZDOO
Placing food in front of the louvers on these components will not affect performance. Although the Air Tower and the Air Tunnel can be removed, doing so will affect
WHPSHUDWXUH SHUIRUPDQFH )RU UHPRYDO LQVWUXFWLRQV on-line, 24 hours a day, contact us at
GEAppliances.com RU FDOO *( &$5(6 ,Q &DQDGD contact us at geappliances.ca or call 1.800.561.3344.)
Controls REFRIGERATOR: THE USING
49-60646-6 |
5 |
USING THE REFRIGERATOR: &OLPDWH.HHSHU™/ TurboCool™
ClimateKeeper2™ (on some models.)
How it Works
The ClimateKeeper2™ is the industry’s most advanced |
Moisture sensitive foods such as fresh fruit, salads, |
|
refrigeration system, delivering optimum temperature and |
rice, etc., can now be stored on open shelves without |
|
humidity performance to keep food garden fresh longer |
excessive moisture loss. |
|
DQG UHGXFH IUHH]HU EXUQ |
'XH WR WKH KLJKHU KXPLGLW\ LQ WKH UHIULJHUDWRU \RX PD\ |
|
The ClimateKeeper2™ |
on occasion experience fog or small amounts of moisture |
|
system features two |
in the refrigerator compartment. This is normal and may |
|
evaporators—one for the |
come and go as different food loads and environmental |
|
refrigerator and one for the |
conditions change. Wipe dry with a paper towel if |
|
IUHH]HU |
desired. |
|
This provides two separate |
7KH VHSDUDWH DLUIORZ V\VWHP PLQLPL]HV WKH PL[LQJ RI DLU |
|
cooling systems, and |
between the two compartments, which reduces fresh |
|
separates the airflow between |
food odor transfer to improve the taste of ice. |
|
WKH IUHVK IRRG DQG IUHH]HU |
7KH &OLPDWH.HHSHU V\VWHP DOVR UHGXFHV WKH QXPEHU |
|
compartments during normal |
RI GHIURVWLQJ F\FOHV LQ WKH IUHH]HU HYDSRUDWRU WKHUHE\ |
|
cooling operations.* |
UHGXFLQJ IUHH]HU EXUQ |
|
This ensures that the |
)UHH]HU DLU LV XVHG LQ WKH CustomCool™ feature. |
|
humidity levels in the fresh food compartment are |
7HVWLQJ VKRZV D KLJKHU OHYHO RI KXPLGLW\ LQ WKH )UHVK |
|
significantly higher than in a conventional system,** |
||
)RRG VHFWLRQ LQ ClimateKeeper2™ refrigerators versus |
||
allowing fresh produce and other unsealed foods to |
||
conventional units. |
||
retain their moisture content and freshness longer. |
||
|
||
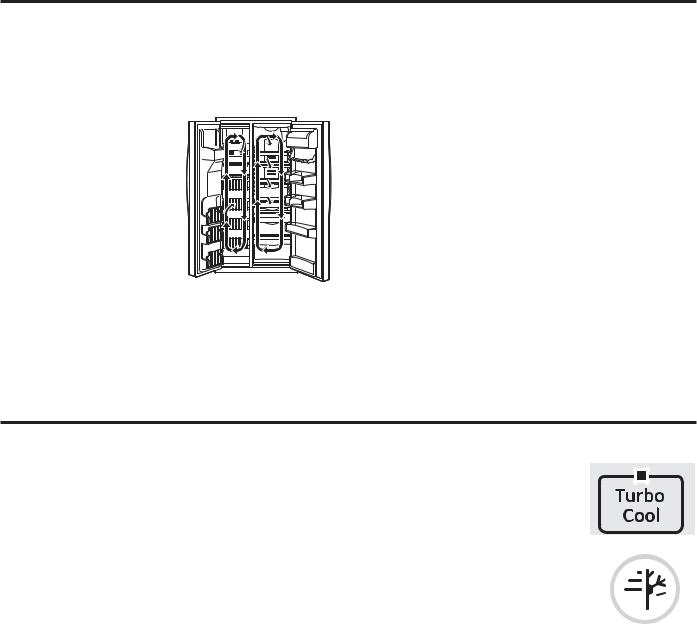
TurboCool™ (on some models.) |
|
|
How it Works |
How to Use |
TurboCool™ rapidly cools the refrigerator compartment in order to more quickly cool foods. Use TurboCool™ when adding a large amount of food to the refrigerator compartment, putting away foods after they have been sitting out at room temperature or when putting away
ZDUP OHIWRYHUV ,W FDQ DOVR EH XVHG LI WKH UHIULJHUDWRU KDV been without power for an extended period.
Once activated, the compressor will turn on immediately and the fans will cycle on and off at high speed as needed for eight hours. The compressor will continue to run until the refrigerator compartment cools to
DSSUR[LPDWHO\ ) & WKHQ LW ZLOO F\FOH RQ DQG RII WR maintain this setting. After 8 hours, or if TurboCool™ is pressed again, the refrigerator compartment will return to the original setting.
Press TurboCool™. The
TurboCool™ temperature display will show Tc DQG WKH /(' ZLOO EH DFWLYDWHG
After TurboCool™ is complete, the TurboCool™ indicator light will go out.
NOTES: The refrigerator temperature |
OR |
|
|
cannot be changed during |
|
TurboCool™. |
|
7KH IUHH]HU WHPSHUDWXUH LV QRW 
 affected during TurboCool™.
When opening the refrigerator door during TurboCool™, the fans will continue to run if they have cycled on.
6 |
49-60646-6 |
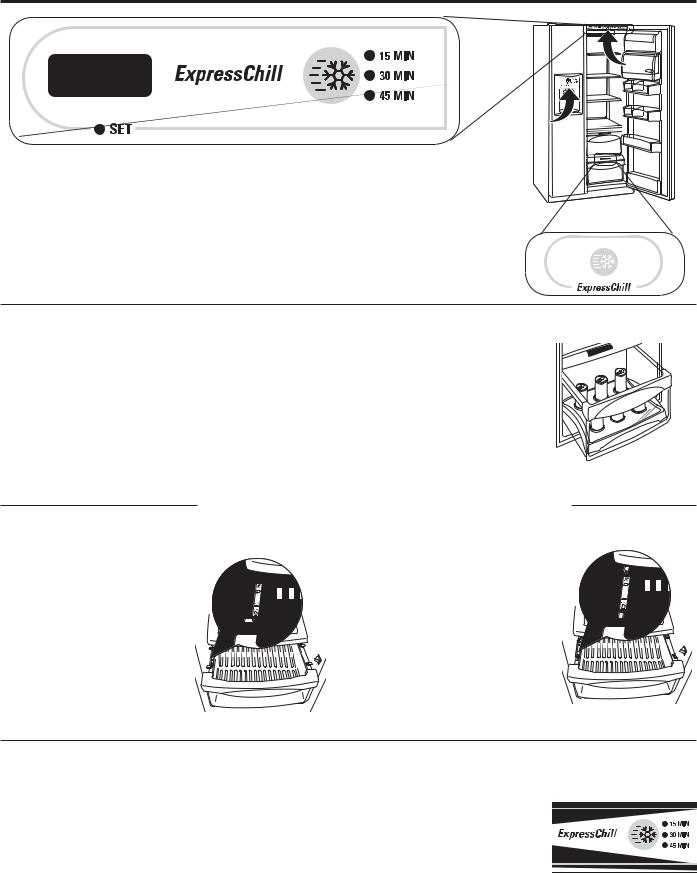
ExpressChill™ (on some models.)
How it Works
The ExpressChill™ feature is a system of dampers, a fan and a temperature thermistor.
The pan is tightly sealed to prevent the pan’s temperature from causing temperature fluctuations in the rest of the refrigerator.
The controls for this pan are located in the top of the refrigerator or on the dispenser with the temperature controls.
How to Use
1.Empty the pan. Place the Chill Tray in the pan. Place the items on the tray and close the pan completely.
2.Select the ExpressChill™ pad. On some models, you can then select the chill time (use chart to determine best setting). Other models will only have one option (45 minutes). On models with multiple settings, tap the pad until the light appears next to the desired setting.
How to Remove and Replace the Drawer
To remove:
1. Pull the drawer out to the stop position.
2. Rotate all four swing locks to the unlock position.
3. Lift the front of the drawer up and out.
Ŷ 7R VWRS D IHDWXUH before it is finished, tap that feature’s pad until no options are selected and the display is off.
Ŷ 'XULQJ ([SUHVV&KLOO |
|
|
the display on the |
|
|
controls will count down |
([SUHVV&KLOO |
|
the time in the cycle. |
||
|
To replace:
1. Make sure all four swing locks are in the unlock position.
2. Place the sides of the drawer into the drawer supports, making sure the swing locks fit on the drawer slots.
3. Lock all four swing locks by rotating them to the lock position.
ExpressChill™ Chart (on some models)
NOTE: Results may vary depending on packaging, starting temperature and other food traits.
15 Minutes |
30 Minutes |
%HYHUDJH &DQ R] |
2 to 6 Beverage Cans |
2 Small Juice Boxes |
R] HDFK |
± R] HDFK |
3ODVWLF R] %RWWOHV |
|
of Beverage |
|
4 to 6 Small Juice Boxes |
|
± R] HDFK |
|
)RLO -XLFH 3DFNHWV |
|
Wine (750 ml bottle) |
45Minutes
2 Liters of Beverage
1/2 Gallon of Juice
Gelatin—1 package
([SUHVV&KLOO REFRIGERATOR: THE USING
49-60646-6 |
7 |
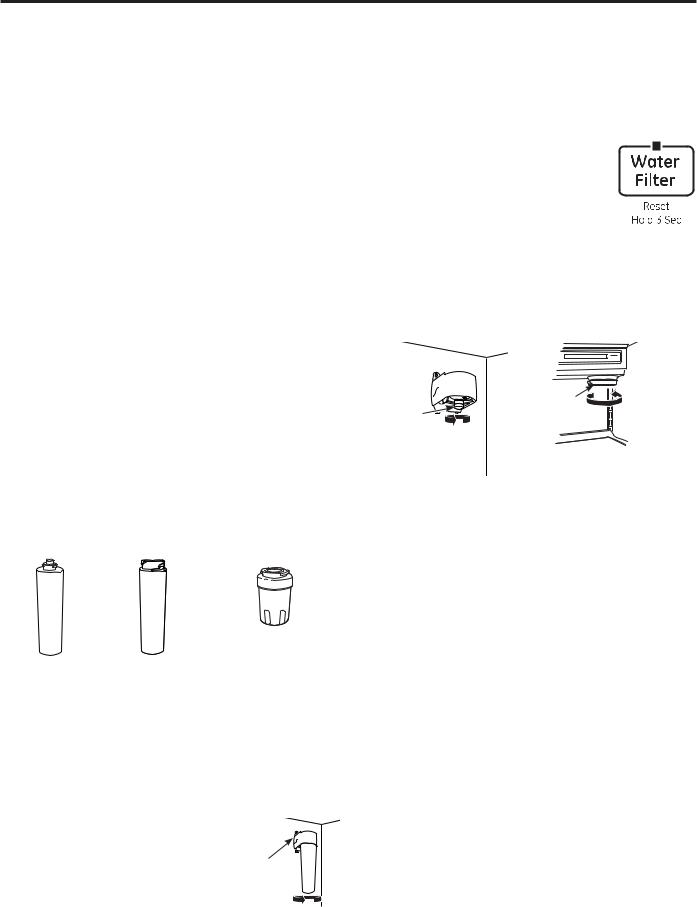
USING THE REFRIGERATOR: :DWHU)LOWHU&DUWULGJH0:)
Water Filter Cartridge - MWF(On some models.)
Water filter cartridge
The water filter cartridge is located in the back upper right corner of the refrigerator compartment.
When to replace the filter on models with a replacement indicator light
There is a replacement indicator light for the water filter cartridge on the dispenser. This light will turn orange to tell you that you need to replace the filter soon.
The filter cartridge should be replaced when the replacement indicator light turns red or if the flow of water to the dispenser or icemaker decreases.
When to replace the filter on models without a replacement indicator light
The filter cartridge should be replaced every six months or earlier if the flow of water to the dispenser or icemaker decreases.
Removing the filter cartridge
,I \RX DUH UHSODFLQJ WKH FDUWULGJH ILUVW UHPRYH WKH ROG RQH by slowly turning it to the left. Do not pull down on the cartridge. A small amount of water may drip down.
Installing the filter cartridge
1. ,I \RX DUH UHSODFLQJ D 6PDUW:DWHU FDUWULGJH ZLWK DQ adapter, it must be removed before installing the cartridge. To remove the adapter, turn it to the left about 1/4 turn.
,I \RX DUH UHSODFLQJ D :DWHU E\ &XOOLJDQ FDUWULGJH leave the adapter in place. This adapter will stay in the refrigerator when you replace future cartridges.
|
|
Some models use |
With adapter |
Without adapter |
this type of water |
filter. |
||
(appearance may vary) |
|
|
2.On models ithout a replacement indicator light, apply the month and year sticker to the new cartridge to remind you to replace the filter in six months.
3. )LOO WKH UHSODFHPHQW FDUWULGJH ZLWK ZDWHU IURP WKH WDS to allow for better flow from the dispenser immediately after installation.
4. Line up the arrow on the cartridge and the cartridge holder. Place
the top of the new cartridge up
LQVLGH WKH KROGHU 'R QRW SXVK LW Cartridge up into the holder. Holder
5.Slowly turn it to the right until the filter cartridge stops.
'2 127 29(57,*+7(1 $V \RX WXUQ WKH FDUWULGJH it will automatically raise itself into position. The cartridge will move about 1/2 turn.
6.Run water from the dispenser 1-1/2 gallons (about three minutes) to clear the system and prevent sputtering.
7. 3UHVV DQG KROG WKH :$7(5 ),/7(5 SDG
(on some models) on the dispenser for 3 seconds.
NOTE: A newly-installed water filter cartridge may cause water to spurt from the dispenser upon first use.
Filter bypass plug
You must use the filter bypass plug when a replacement filter cartridge is not available. The dispenser and the icemaker will not operate without the filter or filter bypass plug.
|
)LOWHU |
|
)LOWHU |
Bypass |
|
Plug |
||
Bypass |
||
|
||
Plug |
|
|
SmartWater |
Water by Culligan |
7R XVH WKH ILOWHU E\SDVV SOXJ RQ :DWHU E\ &XOOLJDQ models, you must first remove the filter adapter from the cartridge holder by turning it to the left.
)RU WKH PD[LPXP EHQHILW RI \RXU ILOWUDWLRQ V\VWHP *(
Appliances recommends the use of GE Appliances
EUDQGHG 6PDUW:DWHU ILOWHUV RQO\ 8VLQJ *( $SSOLDQFHV branded filters in GE Appliances and Hotpoint refrigerators provides optimal performance and reliability.
*( $SSOLDQFHV EUDQGHG 6PDUW:DWHU ILOWHUV DUH DOZD\V the right choice because they are patented and designed
VSHFLILFDOO\ IRU *( $SSOLDQFHV SURGXFWV 6PDUW:DWHU
ILOWHUV PHHW ULJRURXV LQGXVWU\ 16) VWDQGDUGV IRU VDIHW\ and quality that are important for products that are filtering your water. GE Appliances has not qualified non-GE Appliances branded filters for use in GE Appliances and Hotpoint refrigerators and there is no assurance that non-GE Appliances branded filters meet GE Appliances standards for quality, performance and reliability.
,I \RX KDYH TXHVWLRQV YLVLW RXU :HEVLWH DW
GEAppliances.com, or call 1.800.GE.CARES (1.800.432.2737).
Replacement filters:
,I \RX KDYH TXHVWLRQV RU WR RUGHU DGGLWLRQDO ILOWHU cartridges, visit our website at gewaterfilters.com or call GE Appliances Parts and Accessories,
,Q &DQDGD FDOO
8 |
49-60646-6 |
Water Filter Cartridge - XWF (On some models.)
Water Filter Cartridge
The water filter cartridge holder is located in the back upper-right corner of the fresh food refrigerator compartment.
When to Replace the Filter
,I WKHUH LV D UHSODFHPHQW LQGLFDWRU OLJKW IRU WKH ZDWHU ILOWHU cartridge on the dispenser, the red filter light will start blinking to tell you that you need to replace the filter soon.
)RU H[WHUQDO FRQWURO PRGHOV WKH ILOWHU OLJKW ZLOO EOLQN while you are dispensing until the filter is replaced.
)RU WRS FRQWURO PRGHOV WKH ILOWHU OLJKW ZLOO EOLQN ZKLOH the door is open until the filter is replaced.
)RU PRGHOV WKDW GRQ¶W KDYH WKH LQGLFDWRU OLJKW WKH ILOWHU cartridge should be replaced every six months, or earlier if the flow of water to the dispenser or icemaker decreases.
Removing the Filter
,I \RX DUH UHSODFLQJ WKH ILOWHU ILUVW UHPRYH WKH SUHYLRXV one:
2SHQ WKH ILOWHU FDUWULGJH KRXVLQJ E\ VTXHH]LQJ WKH front tabs and gently pulling down.
2.Rotate the filter down.
3.Gently grasp the filter and slowly turn it counterclockwise about a ¼ turn. The filter should automatically release itself when you have rotated it far enough to the left. A small amount of water may drip down.
 CAUTION ,I DLU KDV EHHQ WUDSSHG LQ WKH V\VWHP the filter cartridge may be ejected as it is removed. Use caution when removing.
Filter Bypass Plug
To reduce the risk of property damage due to water leakage, you MUST use the filter bypass plug when a replacement filter cartridge is not available. Some models do not come equipped with the filter bypass plug. To
REWDLQ D IUHH E\SDVV SOXJ FDOO *(&$5(6 ,Q
Canada, call 800.561.3344. The dispenser and icemaker will not operate without either the filter or bypass plug installed. The bypass plug is installed in the same way as a filter cartridge.
Installing the Filter Cartridge in a Side by Side Refrigerator
1.Line up the arrow on the filter with the arrow on the filter cartridge holder. Gently push the top of the new filter up inside the holder.
2.Slowly turn the filter to the right until it
VWRSV '2 127 29(57,*+7(1 $V \RX turn the filter, it will automatically raise itself into position. The filter will move about a ¼ turn or 90 degrees.
3.Run water from the dispenser for 2 gallons (7.6 liters) or approximately 5 minutes to clear the system. Water may spurt out and air bubbles may be visible during this process.
3UHVV DQG KROG WKH :$7(5 ),/7(5 SDG RQO\ RQ select models) on the dispenser for three seconds.
Application Guidelines/Water Supply
6HUYLFH )ORZ |
0.5 gpm (1.89 lpm) |
Water Supply |
Potable Water |
Water Pressure |
25-120 psi (172-827 kPa) |
Water Temperature |
) ) & & |
Capacity |
170 gallons (643.5 liters) |
Sign-up for TEXT REMINDERS by texting REPLACE to 70543.

 WARNING To reduce the risk associated with choking, do not allow children under 3 years of age to have access to small parts during the installation of this product. The disposable filter cartridge should be replaced every 6 months at the rated capacity, or sooner if a noticeable reduction in flow rate occurs.
)RU WKH PD[LPXP EHQHILW RI \RXU ILOWUDWLRQ V\VWHP *( $SSOLDQFHV UHFRPPHQGV WKH XVH RI *( $SSOLDQFHV EUDQGHG filters only. Using GE Appliances-branded filters in GE Appliances and Hotpoint® refrigerators provides optimal performance and reliability. GE Appliances filters meet rigorous industry standards for safety and quality that are important for products that are filtering your water. GE Appliances has not qualified non-GE Appliances-branded filters for use in GE Appliances and Hotpoint refrigerators and there is no assurance that non-GE Appliancesbranded filters meet GE Appliances standards for quality, performance and reliability.
If you have questions, or to order additional filter cartridges, visit our website at gewaterfilters.com or call GE Appliances Parts and Accessories, 877.959.8688. (Canada 1.800.661.1616 or GEAppliances.ca/en/products/ parts-filters-accessories)
;:)&DUWULGJH)LOWHU:DWHUREFRIGERATOR: THE USING
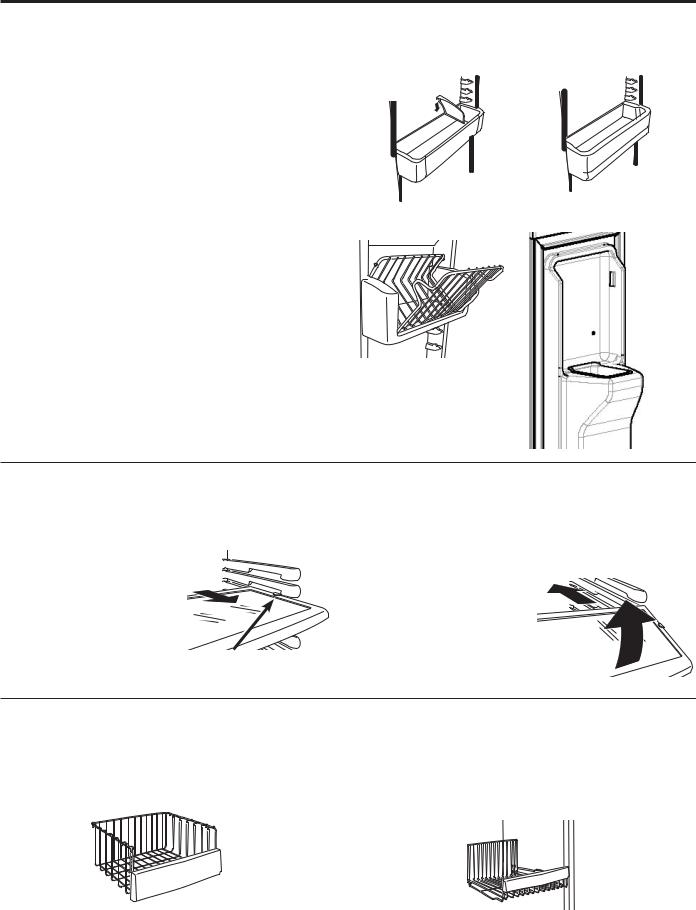
USING THE REFRIGERATOR: Shelves and Bins
Shelves and Bins
Not all features are on all models.
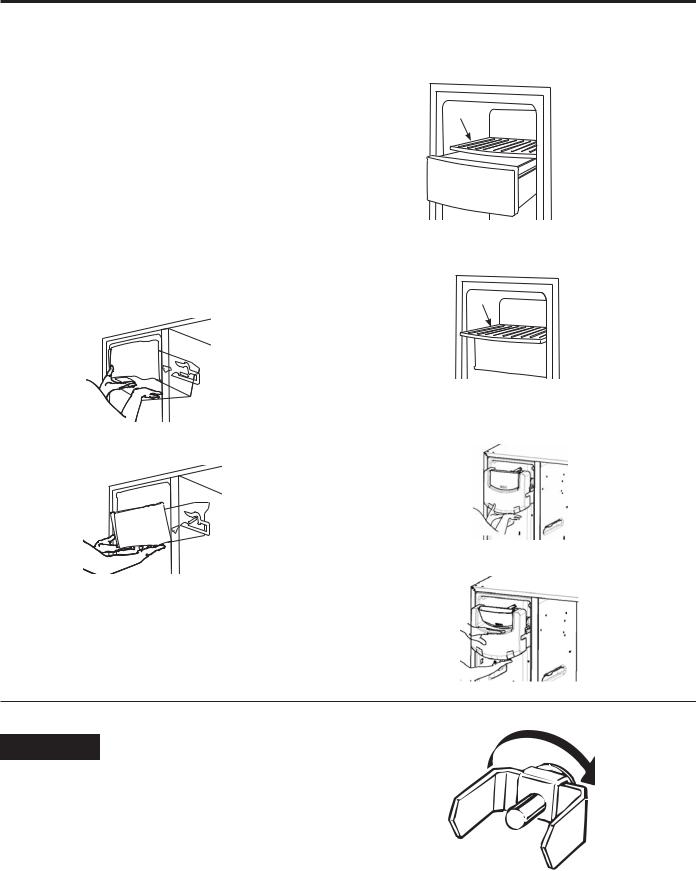
Refrigerator Door Bins and Freezer Door Tilt-Out Bins
Large Bins
7KH ODUJHU UHIULJHUDWRU GRRU ELQV DQG IUHH]HU WLOW RXW GRRU bins are adjustable.
To remove: Lift the front of the bin straight up, then lift up and out.
To replace or relocate: Engage the back side of the bin in the molded supports of the door. Then push down on the front of the bin. Bin will lock in place.
Small Bins
To remove: Lift the front of the bin straight up then out.
To replace: Position the bin above the rectangular molded supports on the door. Then slide the bin down onto the support to lock it in place.
The snugger helps prevent tipping, spilling or sliding of small items stored on the door shelf. Place a finger on either side of the snugger near the rear and move it back and forth to fit your needs.
NOTE: Be careful when placing items in the top bin. Make sure that items do not block or fall into the ice chute.
Snugger
Refrigerator bin |
)UHH]HU ELQ |
,FH &KXWH
)UHH]HU WLOW RXW ELQ
Slide-Out Spillproof Shelf
The slide-out spillproof shelf allows you to reach items stored behind others. The special edges are designed to help prevent spills from dripping to lower shelves.
To remove: Slide the shelf out
until it reaches the stop, then press down on the tab and slide the shelf straight out.
Press tab and pull shelf forward to remove
To replace or relocate: Line the shelf up with the supports and slide it into place. The shelf can be repositioned when the door is at 90° or more. To reposition the shelf, slide the shelf past the stops and angle downward. Slide shelf down to the desired position, line up with the 
supports and slide into place.
Make sure you push the shelves all the way back in before you close the door.
Freezer Baskets (on some models)
To remove, slide out to the stop position, lift the front past the stop position, and slide out.
Make sure you push the baskets all the way back in before you close the door.
Freezer Baskets (on some models)
To remove, push the basket all the way to the back of
WKH IUHH]HU /LIW XS XQWLO WKH EDFN SLQV DUH GLVHQJDJHG
Lift the entire basket up and pull out.
Make sure you push the baskets all the way back in before you close the door.
10 |
49-60646-6 |
Shelves and Bins
Not all features are on all models.
QuickSpace™ Shelf (on some models)
This shelf splits in half and slides under itself for storage of tall items on the shelf below.
This shelf can be removed and replaced or relocated just like Slide-Out Spillproof Shelves.
On some models, this shelf can not be used in the lowest position.
Slide-Out Freezer Shelves
To remove, slide out to the stop position, lift the front past the stop position, and slide out from rib.
Make sure you push the shelves all the way back in before you close the door.
ShelfSaver™ Rack (on some models)
Use this rack to store beverage cans for easy
access.
,W FDQ DOVR KROG D ´ [ ´ baking dish.
Door Can Rack (on some models)
This door rack holds up to 9
cans.
NOTE: This rack can only be mounted in the top position under the dairy bin.
Fixed Freezer Shelves
To remove, lift the shelf up at the left side and then bring
the shelf out.
NOTE FOR DISPENSER MODELS: ,Q RUGHU WR WDNH IXOO advantage of the tilt-out ice bin (on some models), only
store items on the shelf below the ice bin that are no taller than the lowest point on the bin.
Door Wine/Beverage Rack (on some models)
This rack holds up to 5 cans, one bottle of wine or one 2-liter bottle of soda.
The rack hangs from the sides of the dairy bin.
To remove:
1. Empty the wine/beverage
rack.
2. Holding the bottom of the dairy bin, lift the front straight
up, then lift up and out.
3. To detach the rack from the dairy bin, pull the rack’s side wires out of the holes on each side of the dairy bin.
To replace:
1. Reattach the rack to the sides
of the bin.
2. Engage the back side of the bin in the molded supports on the door. Then push down on the front of the bin. The bin will lock into place.
Removable Beverage Rack
(on some models)
The beverage rack is designed to hold a bottle on its side.
,W FDQ EH DWWDFKHG WR DQ\ slide-out shelf.
To install: |
|
1. Line up the large part of |
1 |
the slots on the top of the |
|
rack with the tabs under the |
2 |
shelf. |
|
2.Then slide the rack back to lock it in place.
Bins and Shelves REFRIGERATOR: THE USING
49-60646-6 |
11 |
USING THE REFRIGERATOR: Shelves and Bins
Shelves and Bins
Refrigerator Doors (on some models)
The refrigerator doors may feel different than the ones you are used to. The special door opening/closing feature makes sure the doors close all the way and are securely sealed.
When opening and closing the door you will notice a stop
SRVLWLRQ ,I WKH GRRU LV RSHQHG SDVW WKLV VWRS SRLQW WKH door will remain open to allow you to load and unload food more easily. When the door is only partially open, it will automatically close.
The resistance you feel at the stop position will be reduced as the door is loaded with food.
When the door is only partially open, it will automatically close.
Beyond this stop the door will stay open.
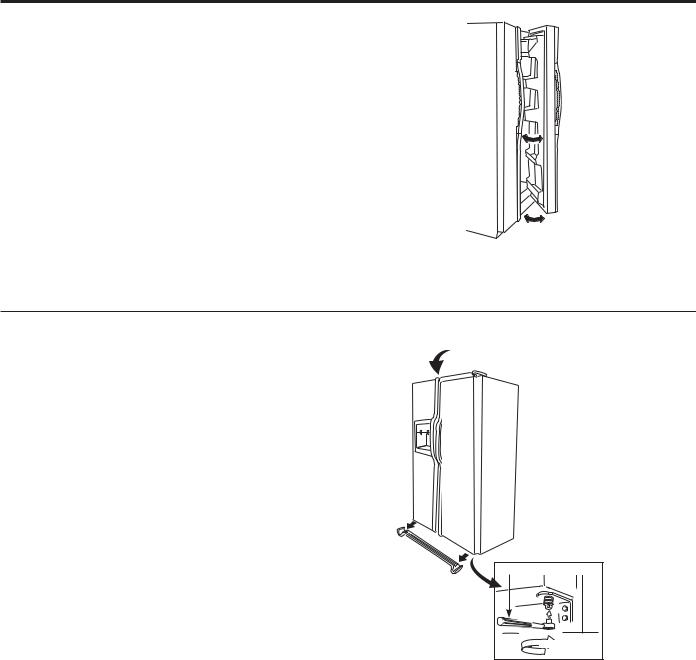
Door Alignment
,I GRRUV DUH XQHYHQ DGMXVW WKH UHIULJHUDWRU GRRU
To remove the base grille, open the doors, remove the screw at each end of the base grille and then pull the grille straight out.
8VLQJ D ´ VRFNHW ZUHQFK WXUQ WKH GRRU DGMXVWLQJ
VFUHZ WR WKH ULJKW WR UDLVH WKH GRRU WR WKH OHIW WR lower it. (A nylon plug, imbedded in the threads of the pin, prevents the pin from turning unless a wrench is used.)
2.After one or two turns of the wrench, open and close the refrigerator door and check the alignment at the top of the doors.
´ 6RFNHW :UHQFK |
Raise |
12 |
49-60646-6 |
Crispers and Pans
Not all features are on all models.
Fruit and Vegetable Crispers
Excess water that may accumulate in
the bottom of the drawers should be wiped dry.
On some models, the bottom drawer has full extension slides that allow full access to the drawer.
Convertible Deli Pan (on some models)
The convertible deli pan has its own cold air duct to
DOORZ D VWUHDP RI FROG DLU IURP WKH IUHH]HU FRPSDUWPHQW or refrigerator compartment to flow to the pan.
The variable temperature control regulates the air flow
IURP WKH &OLPDWH .HHSHU
Set the control to the coldest setting to store fresh meats.
Set the control to cold to convert the panto normal refrigerator temperature and provide extra vegetable storage space. The cold air duct is turned off. Variable settings between these extremes can be selected.
Adjustable Humidity Crispers |
C |
|
|
|
C |
|
|
|
T |
||
|
|
|
|
D |
O |
|
|
|
|
D |
|
|
|
O |
L |
|
L |
|
|
|
E |
||
|
|
|
|
S |
6OLGH WKH FRQWURO DOO WKH ZD\ WR WKH +, VHWWLQJ WR SURYLGH high humidity recommended for most vegetables.
Slide the control all the way to the LO setting to provide lower humidity levels recommended for most fruits.
HI  LO
LO
Crisper Removal
Crispers can easily be removed by pulling the drawer straight out and lifting the drawer up and over the stop location.
,I WKH GRRU SUHYHQWV \RX IURP WDNLQJ RXW WKH GUDZHUV ILUVW
WU\ WR UHPRYH WKH GRRU ELQV ,I WKLV GRHV QRW RIIHU HQRXJK clearance, the refrigerator will need to be rolled forward
XQWLO WKH GRRU RSHQV HQRXJK WR VOLGH WKH GUDZHUV RXW ,Q some cases, when you roll the refrigerator out, you will need to move the refrigerator to the left or right as you roll it out.
Pans and Crispers REFRIGERATOR: THE USING
49-60646-6 |
13 |
USING THE REFRIGERATOR: $XWRPDWLF,FHPDNHU
Automatic Icemaker
Not all features are on all models.
Automatic Icemaker
The icemaker will produce seven cubes per cycle— approximately 100–130 cubes in a 24-hour period,
GHSHQGLQJ RQ IUHH]HU FRPSDUWPHQW WHPSHUDWXUH URRP temperature, number of door openings and other use conditions.
,I WKH UHIULJHUDWRU LV RSHUDWHG EHIRUH WKH ZDWHU FRQQHFWLRQ is made to the icemaker, set the power switch in the
2)) SRVLWLRQ
When the refrigerator has been connected to the water supply, set the power switch to the ON position.
7KH LFHPDNHU ZLOO ILOO ZLWK ZDWHU ZKHQ LW FRROV WR )
(–10°C). A newly installed refrigerator may take 12 to 24 hours to begin making ice cubes.
<RX ZLOO KHDU D EX]]LQJ VRXQG HDFK WLPH WKH LFHPDNHU fills with water.
Throw away the first few batches of ice to allow the water line to clear.
Be sure nothing interferes with the sweep of the feeler arm.
When the bin fills to the level of the feeler arm, the
LFHPDNHU ZLOO VWRS SURGXFLQJ LFH ,W LV QRUPDO IRU VHYHUDO cubes to be joined together.
,I LFH LV QRW XVHG IUHTXHQWO\ ROG LFH FXEHV ZLOO EHFRPH cloudy, taste stale and shrink.

 CAUTION Avoid contact with the moving parts of the ejector mechanism, or with the heating element (located on the bottom of the ice maker) that releases
WKH FXEHV 'R QRW SODFH ILQJHUV RU KDQGV RQ WKH automatic ice making mechanism while the refrigerator is plugged in.
,FHPDNHU |
Power Switch |
,FHPDNHU |
Power |
)HHOHU $UP |
Green |
|
Switch |
Power Light |
)HHOHU $UP |
|
|
(on some models) |
||
|
(on some models) |
||
|
|
||
Special note about dispenser models:
Ŷ 6RPH PRGHOV KDYH D WLOW RXW LFH ELQ 7KH ELQ FDQ EH tilted out as shown in the illustrations, and it will hold itself up while you take ice out or turn the icemaker power switch on and off. Be sure to put the bin back in place before closing the door.
Ŷ To restore your ice level from an empty bucket stage, the following steps are recommended:
1.12 hours after the first batch of ice has fallen into the bin, dispense 3 to 4 cubes.
2.After an additional 6 hours, dispense 3 to 4 cubes again.
These steps will restore your ice level in the shortest amount of time.
NOTE:
,Q KRPHV ZLWK ORZHU WKDQ DYHUDJH ZDWHU SUHVVXUH \RX may hear the icemaker cycle multiple times when making one batch of ice.
14 |
49-60646-6 |
Automatic Icemaker
Accessing Ice and Reaching the Power Switch on Dispenser Models
There are two types of ice storage bins on dispenser models. One has a shelf above the bin, the other does not.
Special note for models with tilt-out ice bin:
Ŷ 7KHVH PRGHOV KDYH D WLOW RXW LFH ELQ 7KH ELQ FDQ EH tilted out as shown in the illustrations, and it will hold itself up while you take ice out or turn the icemaker power switch on and off. Be sure to put the bin back in place before closing the door.
NOTE: ,Q RUGHU WR WDNH IXOO DGYDQWDJH RI WKH WLOW RXW LFH bin, only store items on the shelf below the ice bin that are no taller than the lowest point on the bin.
Models with tilt out ice bin
To access ice and reach the icemaker power switch:
Models with a shelf above the ice bin
To access ice, pull the bin forward.
Shelf
,FH %LQ
To reach the power switch, pull the shelf straight out. Always be sure to replace the shelf.
1. Lift the bin, then pull it forward until the bin stops.
2. Lower the bin to access ice or reach the power switch.
Shelf
On some models, to access ice or reach the power switch:
1. Pull the bin forward until the bin stops.
2. Lower the bin to access ice or reach the power switch.
Removing Ice Bin (dispenser models)

 CAUTION The ice bin is heavy when full.
Set the power switch to the OFF position before removing the bin.
When replacing the bin, be sure to press it firmly into
SODFH ,I LW GRHV QRW JR DOO WKH ZD\ EDFN UHPRYH LW DQG rotate the drive mechanism 1/4 turn. Then push the bin back again.
Rotate
'ULYH
Mechanism
'LVSHQVHU 0RGHOV RQO\
,FHPDNHU$XWRPDWLF REFRIGERATOR: THE USING
49-60646-6 |
15 |
USING THE REFRIGERATOR: ,FHDQG:DWHU'LVSHQVHU
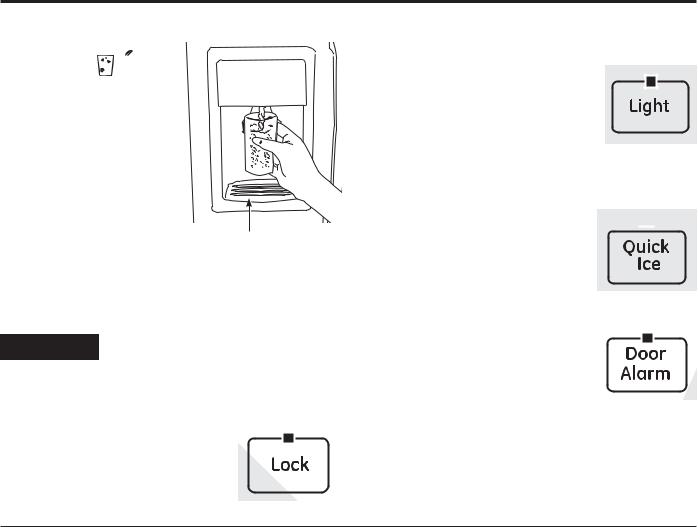
Ice and Water Dispenser (on some models.)
Using the Dispenser
6HOHFW &8%(' ,&(  ,
,
&586+(' ,&( 
 or WATER
  .
.
Press the glass gently against the top of the dispenser cradle.
The spill shelf is not selfdraining. To reduce water spotting, the shelf and its grille should be cleaned regularly.
,I QR ZDWHU LV GLVSHQVHG when the refrigerator is first
installed, there may be air in the water line system. Press the dispenser arm for at least two minutes to remove trapped air from the water line and to fill the water system. To flush out impurities in the water line, throw away the first six glassfuls of water.

 CAUTION Laceration Hazard
Ŷ 1HYHU SXW ILQJHUV RU DQ\ RWKHU REMHFW LQWR LFH FUXVKHU
GLVFKDUJH RSHQLQJ 'RLQJ VR FDQ UHVXOW LQ FRQWDFWLQJ the ice crushing blades and lead to serious injury or amputation
Ŷ 8VH D VWXUG\ JODVV ZKHQ GLVSHQVLQJ ice. A delicate glass may break and result in personal injury.
Locking the Dispenser
3UHVV WKH /2&. SDG IRU VHFRQGV WR lock the dispenser and control panel. To unlock, press and hold the pad again for 3 seconds.
Dispenser Light
This pad turns the light in the dispenser on and off. The light also comes on when the dispenser cradle is
SUHVVHG )RU PRGHOV ZLWK D EXOE LI WKH OLJKW EXUQV RXW it should be replaced with a 6 watt 

9 PD[LPXP EXOE )RU /(' PRGHOV FRQWDFW )DFWRU\ 6HUYLFH
Quick Ice (on some models)
When you need ice in a hurry, press
this pad to speed up ice production. This will increase ice production for the following 48
hours or until you press the pad again.
Door Alarm (on some models)
To set the alarm, press this pad until the indicator light comes on. This
alarm will sound if either door is open for more than 3 minutes. The light goes out and the beeping stops when you close the door.
Important Facts About Your Dispenser
Ŷ 'R QRW DGG LFH IURP WUD\V RU EDJV WR WKH VWRUDJH |
Ŷ |
||
GUDZHU ,W PD\ QRW FUXVK RU GLVSHQVH ZHOO |
|
||
Ŷ Avoid |
overfilling glass with ice and use of narrow |
|
|
glasses. Backed-up ice can jam the chute or cause |
|
||
WKH GRRU LQ WKH FKXWH WR IUHH]H VKXW ,I LFH LV EORFNLQJ |
Ŷ |
||
the chute, poke it through with a wooden spoon. |
|
||
Ŷ Beverages |
and foods should not be quick-chilled |
Ŷ |
|
in the ice storage drawer. Cans, bottles or food packages in the storage drawer may cause the icemaker or auger to jam.
Ŷ To keep dispensed ice from missing the glass, put the glass close to, but not touching, the dispenser opening.
Some crushed ice may be dispensed even though
\RX VHOHFWHG &8%(' ,&( 7KLV KDSSHQV RFFDVLRQDOO\ when a few cubes accidentally get directed to the crusher.
After crushed ice is dispensed, some water may drip from the chute.
Sometimes a small mound of snow will form on the door in the ice chute. This condition is normal and usually occurs when you have dispensed crushed ice repeatedly. The snow will eventually evaporate.
16 |
49-60646-6 |

Care and Cleaning
Cleaning the Outside
The dispenser drip area, (on
some models) beneath the grille, should be wiped dry. Water left in this area may leave deposits. Remove the
deposits by adding undiluted vinegar to the well. Soak until the deposits disappear or become loose enough to rinse away.
The dispenser cradle (on some models). Before cleaning, lock the dispenser by pressing and holding the LOCK pad for 3 seconds. Clean with warm water and baking soda solution—about a tablespoon (15 ml) of baking soda to a quart (1 l) of water. Rinse thoroughly and wipe dry.
The door handles and trim. Clean with a cloth
GDPSHQHG ZLWK VRDS\ ZDWHU 'U\ ZLWK D VRIW FORWK
The stainless steel doors and door handles (on some models) can be cleaned with a commercially available stainless steel cleaner. Cleaners with oxalic acid such
DV %DU .HHSHUV )ULHQG 6RIW &OHDQVHU ZLOO UHPRYH UXVW tarnish and small blemishes. Use only a liquid cleanser free of grit and rub in the direction of the brush lines with a damp soft sponge.
'R QRW XVH DSSOLDQFH ZD[ RU SROLVK RQ WKH VWDLQOHVV steel.
Keep the outside clean. Wipe with a clean cloth lightly dampened with kitchen appliance wax or mild liquid dish
GHWHUJHQW 'U\ DQG SROLVK ZLWK D FOHDQ VRIW FORWK
'R QRW ZLSH WKH UHIULJHUDWRU ZLWK D VRLOHG GLVK FORWK RU wet towel. These may leave a residue that can erode
WKH SDLQW 'R QRW XVH VFRXULQJ SDGV SRZGHUHG FOHDQHUV bleach or cleaners containing bleach because these products can scratch and weaken the paint finish.
Cleaning the Inside
To help prevent odors, leave an open box of baking
VRGD LQ WKH IUHVK IRRG DQG IUHH]HU FRPSDUWPHQWV
Unplug the refrigerator before cleaning. ,I WKLV LV QRW practical, wring excess moisture out of sponge or cloth when cleaning around switches, lights or controls.
Use warm water and baking soda solution— about a tablespoon (15 ml) of baking soda to a quart (1 liter) of
ZDWHU 7KLV ERWK FOHDQV DQG QHXWUDOL]HV RGRUV 5LQVH DQG wipe dry.
Use of any cleaning solution other than that which is recommended, especially those that contain petroleum distillates, can crack or damage the interior of the refrigerator.
 CAUTION 'R QRW FOHDQ JODVV VKHOYHV RU FRYHUV with warm water when they are cold. Glass shelves and covers may break if exposed to sudden temperature changes or impact such as bumping or dropping. Tempered glass is designed to shatter into many small pieces if it breaks.
'R QRW ZDVK DQ\ SODVWLF UHIULJHUDWRU SDUWV LQ WKH dishwasher.
The chill/thaw tray is dishwasher safe.
Behind the Refrigerator
Be careful when moving the refrigerator away from the wall. All types of floor coverings can be damaged, particularly cushioned coverings and those with embossed surfaces.
Pull the refrigerator straight out and return it to position by pushing it straight in. Moving the refrigerator in a side direction may result in damage to the floor covering or refrigerator.
When pushing the refrigerator back, make sure you don’t roll over the power cord or icemaker supply line (on some models).
CLEANING AND CARE
49-60646-6 |
17 |
CARE AND CLEANING
Care and Cleaning
Preparing for Vacation
)RU ORQJ YDFDWLRQV RU DEVHQFHV UHPRYH IRRG DQG unplug the refrigerator. Clean the interior with a baking soda solution of one tablespoon (15 ml) of baking soda to one quart (1 liter) of water. Leave the doors open.
6HW WKH LFHPDNHU SRZHU VZLWFK WR WKH 2)) SRVLWLRQ DQG shut off the water supply to the refrigerator.
,I WKH WHPSHUDWXUH FDQ GURS EHORZ IUHH]LQJ KDYH D qualified servicer drain the water supply system (on some models) to prevent serious property damage due to flooding.
Preparing to Move
Secure all loose items such as shelves and drawers by |
Be sure the refrigerator stays in an upright position |
taping them securely in place to prevent damage. |
during moving. |
When using a hand truck to move the refrigerator, do not |
|
rest the front or back of the refrigerator against the hand |
|
truck. This could damage the refrigerator. Handle only |
|
from the sides of the refrigerator. |
|
Replacing the Light Bulbs

 WARNING Before replacing a burned-out light bulb, the refrigerator should be unplugged in order to avoid contact with a live wire filament. (A burned-out light bulb may break when being replaced.)
7XUQLQJ WKH FRQWURO WR WKH 2)) SRVLWLRQ GRHV QRW UHPRYH SRZHU WR WKH OLJKW FLUFXLW
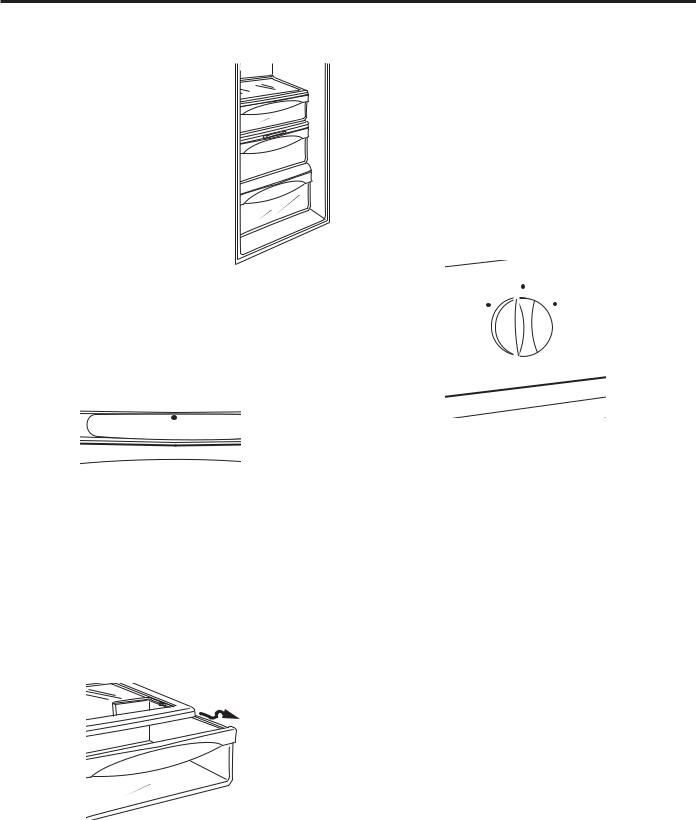
Refrigerator Compartment—Upper Light
1.Unplug the refrigerator.
2.The bulbs are located at the top of the compartment, inside the light shield. On some models, a screw at the front of the light shield will have to be removed. On other models, the screw is located in the pocket located at the back of the shield.
3.To remove the light shield, on some models, press in on the tabs on the sides of the shield and slide forward and out. On other models, just slide the shield forward and out.
Your light shield will look like one of the following:
4.After replacing the bulb with an appliance bulb of the same or lower wattage, replace the light shield and screw. When replacing the light shield, make sure that the tabs at the back of the shield fit into the slots at the back of the light shield housing.
5.Plug the refrigerator back in.
OR
Tabs
18 |
49-60646-6 |
Care and Cleaning
Replacing the Light Bulbs (Cont.)

 WARNING Before replacing a burned-out light bulb, the refrigerator should be unplugged in order to avoid contact with a live wire filament. (A burned-out light bulb may break when being replaced.)
7XUQLQJ WKH FRQWURO WR WKH 2)) SRVLWLRQ GRHV QRW UHPRYH SRZHU WR WKH OLJKW FLUFXLW
Refrigerator Compartment—Lower Light
This light is located above the top drawer. 1. Unplug the refrigerator. 2. Lift the light shield up and pull it out.
3. After replacing the bulb with an appliance bulb of the same or lower wattage, replace the shield.
4. Plug the refrigerator back in.
Freezer Compartment
1.Unplug the refrigerator.
2.Remove the shelf just above the light shield. (The
shelf will be easier to remove if it is emptied first.) Remove the screw at the top of the light shield.
3.To remove the light shield, press in on the sides, and lift up and out.
4. Replace the bulb with an appliance bulb of the same or lower wattage, and reinstall the light shield. When reinstalling the light shield, make sure the top tabs snap securely into place. Replace the screw.
5. Reinstall the shelf and plug the refrigerator back in.
Dispenser (on some models)
1. |
Unplug the refrigerator. |
5HSODFH WKH EXOE ZLWK D EXOE RI WKH VDPH VL]H DQG |
2. |
The bulb is located on the dispenser under the |
wattage. |
|
control panel. Remove the light bulb by turning it |
4. Plug the refrigerator back in. |
|
counterclockwise. |
|
Replacing the lights on models with LED lighting (on some models)
Setting the controls to OFF does not remove power to the light circuit. Not all features are on all models.
Refrigerator Compartment
7KHUH LV DQ /(' OLJKWLQJ GLVSOD\ LQ WKH WRS DQG VLGHV RI |
|
|
|
|
|
|
|
the fresh food compartment and in the rear and side of |
|
|
|
|
/(' |
||
WKH IUHH]HU FRPSDUWPHQW RQ VRPH PRGHOV |
|
|
Lighting |
,I WKLV DVVHPEO\ QHHGV WR EH UHSODFHG FDOO *( |
|
|
'LVSOD\ |
|
|
|
|
Appliances Service at 1.800.432.2737 in the United |
|
|
|
States or 1.800.561.3344 in Canada. |
|
|
|
CLEANING AND CARE
49-60646-6 |
19 |
INSTALLATION INSTRUCTIONS
Installation Instructions Refrigerator Models 22, 23,
25, 26, 27 & 29
Questions? Call 800.GE.CARES (800.432.2737) or visit our Website at: GEAppliances.com In Canada, call 1.800.561.3344 or visit our Website at: GEAppliances.ca
BEFORE YOU BEGIN
Read these instructions completely and carefully.
• IMPORTANT — Save these instructions
for local inspector’s use
• IMPORTANT — Observe all governing codes and ordinances.
•Note to Installer – Be sure to leave these instructions with the Consumer.
•Note to Consumer – .HHS WKHVH LQVWUXFWLRQV IRU future reference.
•Skill level – ,QVWDOODWLRQ RI WKLV DSSOLDQFH UHTXLUHV basic mechanical skills.
•Completion time – 5HIULJHUDWRU ,QVWDOODWLRQ
30 minutes
|
:DWHU /LQH ,QVWDOODWLRQ |
30minutes
•Proper installation is the responsibility of the installer.
•Product failure due to improper installation is not covered under the Warranty.
,I WKH UHIULJHUDWRU KDV DOUHDG\ EHHQ LQVWDOOHG UHPRYH the base grille (see Step 2 in Moving the Refrigerator),
WKHQ VNLS WR 6WHS LQ ,QVWDOOLQJ WKH 5HIULJHUDWRU
PREPARATION
WATER SUPPLY TO THE ICEMAKER
(on some models)
,I WKH UHIULJHUDWRU KDV DQ LFHPDNHU LW ZLOO KDYH WR EH connected to a cold water line. A GE Appliances water supply kit is available at extra cost from your dealer, by visiting our Website at GEAppliances.com (in Canada, at geappliances.ca), or from Parts and Accessories, 877.959.8688. (in Canada 1.800.661.1616).
TOOLS YOU WILL NEED
´ DQG ´ 6RFNHW ´ DQG ´ :UHQFK
3ODVWLF 3XWW\ .QLIH
Phillips Head Screwdriver
20 |
49-60646-6 |

Installation Instructions
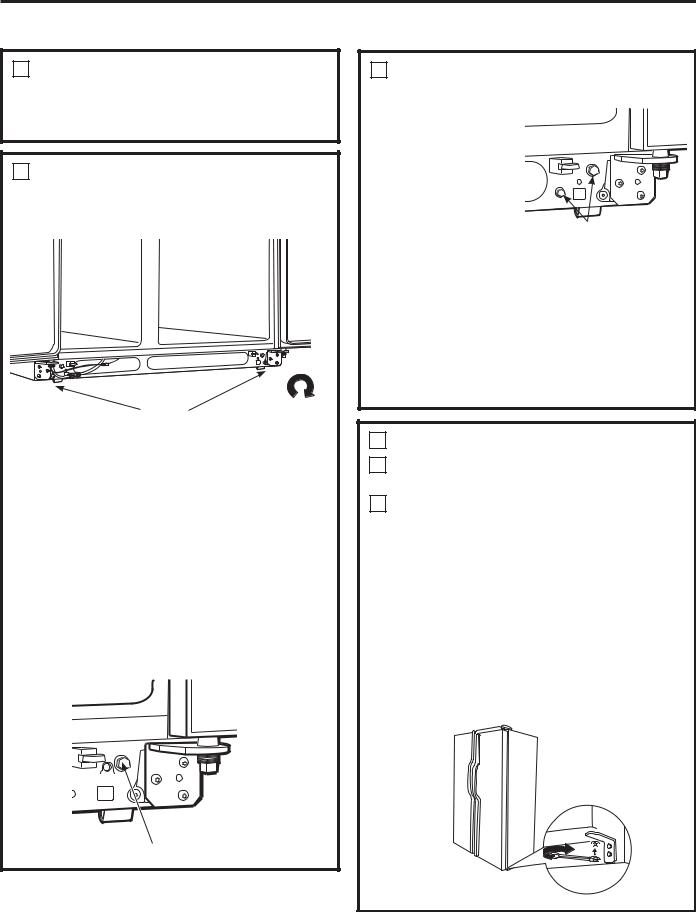
MOVING THE REFRIGERATOR
1LOADING THE REFRIGERATOR ONTO A HAND TRUCK
Leave all tape and door pads on doors until the refrigerator is in its final location.
To move the refrigerator, use a padded hand truck. Center the refrigerator on the hand truck and secure the strap around the refrigerator.
DO NOT OVERTIGHTEN THE STRAP.
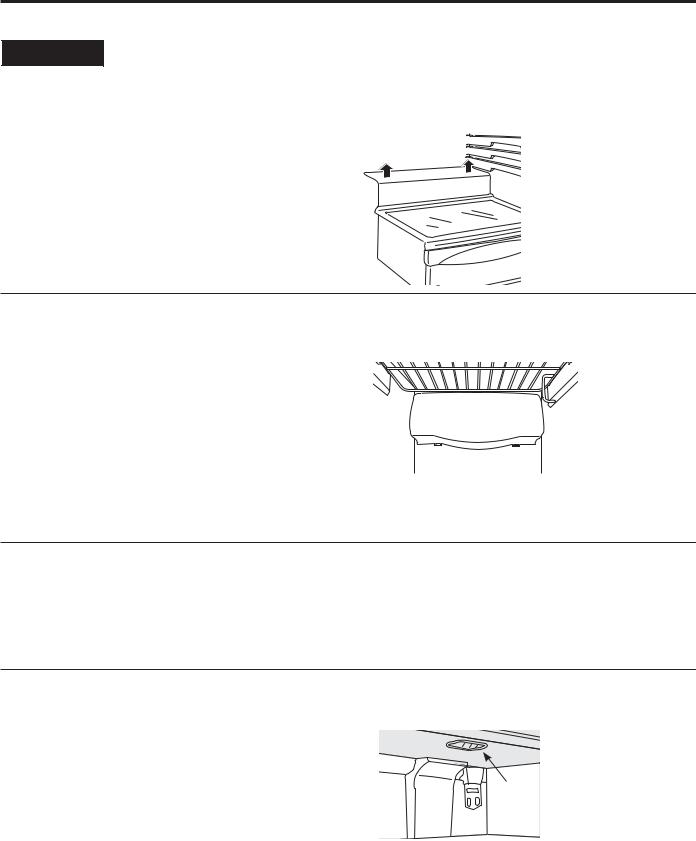
2 REMOVE THE BASE GRILLE
Remove the grille by removing the two Phillips head screws.
,I WKH UHIULJHUDWRU PXVW JR WKURXJK DQ\
HQWUDQFH WKDW LV OHVV WKDQ ´ ZLGH WKH doors must be removed. Proceed to Step 3.
DO NOT remove the handles.
,I DOO HQWUDQFHV DUH PRUH WKDQ ´ ZLGH VNLS WR ,QVWDOOLQJ WKH 5HIULJHUDWRU.
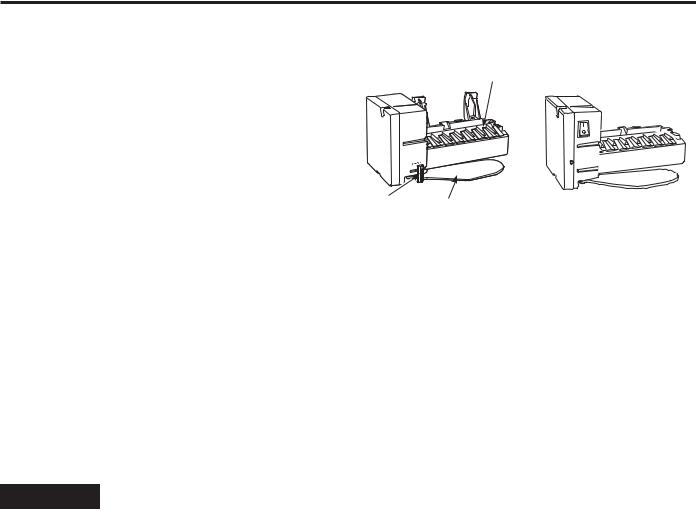
3DISCONNECT THE WATER COUPLING (on some models)
,I WKH UHIULJHUDWRU KDV D ZDWHU GLVSHQVHU there is a water line from the cabinet into the
ERWWRP KLQJH RQ WKH IUHH]HU GRRU WKDW PXVW EH disconnected.
To disconnect, push in on the white collar of the coupling and pull out the tubing.
White collar
Bottom
IUHH]HU hinge
INSTRUCTIONS INSTALLATION
49-60646-6 |
21 |

INSTALLATION INSTRUCTIONS
Installation Instructions
MOVING THE REFRIGERATOR (Cont.)
 CAUTION Lifting Hazard.
Single person lift can cause injury. Use assistance when handling, moving or lifting the refrigerator doors.
NOTE: When moving door, to prevent damage to door and electronics carefully place the door in a proper location.
 WARNING To reduce the risk of electric shock or injury during installation, you must first unplug the
UHIULJHUDWRU EHIRUH SURFHHGLQJ )DLOXUH WR IROORZ WKHVH instructions can result in electrical shock.
4DISCONNECT THE POWER COUPLING (on some models)
If the refrigerator has a water dispenser, there is a power line (harness) from the cabinet
LQWR WKH ERWWRP KLQJH RQ WKH IUHH]HU GRRU WKDW must be disconnected.
To disconnect, pull apart at the coupling.
5DISCONNECT THE ELECTRICAL CONNECTORS (on some models)
If the refrigerator has a refreshment center, there are electrical connectors (harnesses) from the cabinet into the bottom hinge on the refrigerator door that must be disconnected.
To disconnect, pull apart each connector.
Bottom refrigerator hinge
6CLOSE THE FREEZER AND REFRIGERATOR DOORS
Bottom
IUHH]HU hinge
22 |
49-60646-6 |
Installation Instructions
MOVING THE REFRIGERATOR (Cont.)
7 REMOVE THE FREEZER DOOR

 WARNING )ROORZ DOO VWHSV IRU UHPRYLQJ
DQG UHLQVWDOOLQJ WKH GRRU )DLOXUH WR IROORZ WKHVH instructions, leaving off parts, or overtightening screws, can lead to the door falling off and result in injury and property damage.
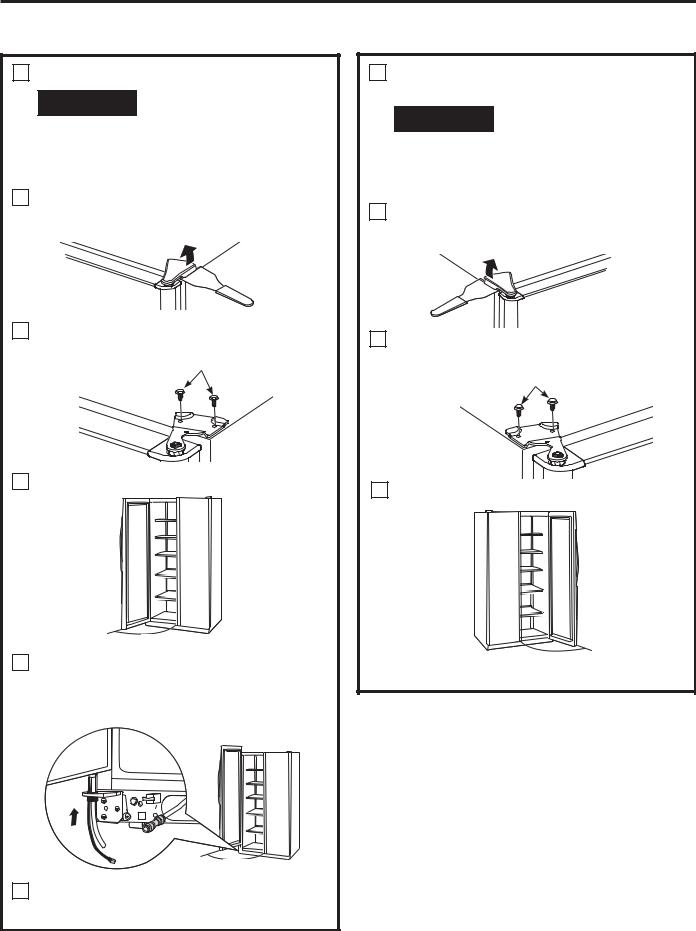
A5HPRYH WKH IUHH]HU GRRU WRS KLQJH FRYHU LI HTXLSSHG E\ HLWKHU VTXHH]LQJ LW DQG SXOOLQJ LW up or by prying it off with a plastic putty knife.
|
|
|
|
|
|
5HPRYH WKH WZR ´ KH[ KHDG VFUHZV WKHQ |
|
B |
|||
|
|
lift the hinge straight up to free the hinge pin. |
|
|
|
´ +H[ +HDG |
|
|
|
|
|
C2SHQ WKH IUHH]HU GRRU WR .°
90°
'$V RQH SHUVRQ VORZO\ OLIWV WKH IUHH]HU GRRU XS and off the bottom hinge, the second person should carefully guide the water line and power
line (harness) through the bottom hinge.
8REMOVE THE REFRIGERATOR DOOR

 WARNING )ROORZ DOO VWHSV IRU UHPRYLQJ
DQG UHLQVWDOOLQJ WKH GRRU )DLOXUH WR IROORZ WKHVH instructions, leaving off parts, or overtightening screws, can lead to the door falling off and result in injury and property damage.
ARemove the refrigerator door top hinge cover (if
HTXLSSHG E\ HLWKHU VTXHH]LQJ LW DQG SXOOLQJ LW up or by prying it off with a plastic putty knife.
B5HPRYH WKH WZR ´ KH[ KHDG VFUHZV WKHQ lift the hinge straight up to free the hinge pin.
´ +H[ +HDG
C Open the refrigerator door to 90.°
90°
90°
ESet the door on a non-scratching surface with the inside up.
INSTRUCTIONS INSTALLATION
49-60646-6 |
23 |
INSTALLATION INSTRUCTIONS
Installation Instructions
MOVING THE REFRIGERATOR (Cont.)
8REMOVE THE REFRIGERATOR DOOR (Cont.)
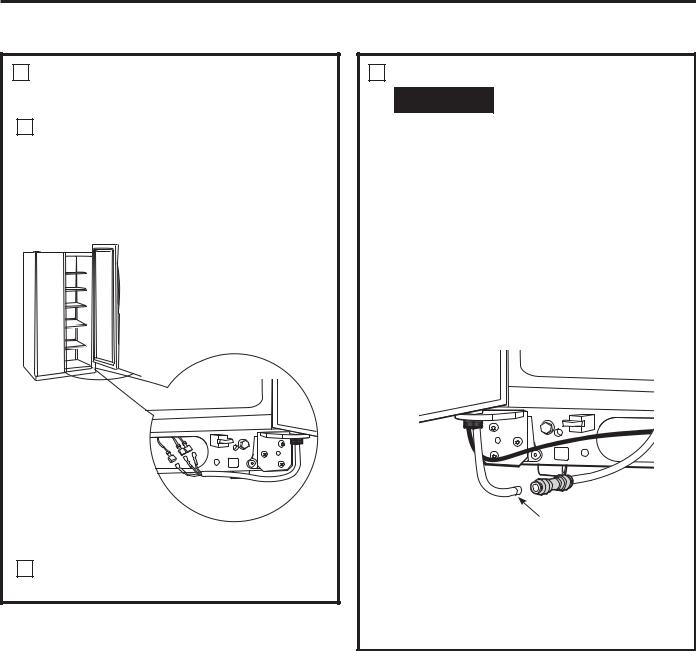
'Lift the refrigerator door up and off the bottom hinge.
,I WKH UHIULJHUDWRU KDV D UHIUHVKPHQW FHQWHU RQH person should slowly lift the door up and off the bottom hinge and the second person should carefully guide the electrical lines (harnesses) through the bottom hinge.
90°
Refreshment Center Models only
ESet the door on a non-scratching surface with the inside up.
9 REPLACING THE DOORS

 WARNING )ROORZ DOO VWHSV IRU UHPRYLQJ
DQG UHLQVWDOOLQJ WKH GRRU )DLOXUH WR IROORZ WKHVH instructions, leaving off parts, or overtightening screws, can lead to the door falling off and result
in injury and property damage.
To replace the doors, simply reverse steps 3 through 8.
However, please note the following:
•When lowering the doors onto the bottom hinges, make sure the second person carefully guides the tube and harnesses through the holes in the hinges.
•When connecting the water line, make sure you insert the tubing all the way to the mark.
Mark
'R QRW SLQFK WKH WXELQJ DQG KDUQHVVHV ZKHQ placing the doors on the bottom hinges.
•When connecting the power line and the electrical lines (refreshment center models only), be sure that the connectors are seated together fully.
24 |
49-60646-6 |

Installation Instructions
INSTALLING THE REFRIGERATOR
REFRIGERATOR LOCATION
•'R QRW LQVWDOO WKH UHIULJHUDWRU ZKHUH WKH
WHPSHUDWXUH ZLOO JR EHORZ ) & EHFDXVH it will not run often enough to maintain proper temperatures.
•'R QRW LQVWDOO WKH UHIULJHUDWRU ZKHUH WKH
WHPSHUDWXUH ZLOO JR DERYH ) & EHFDXVH it will not perform properly.
•'R QRW LQVWDOO WKH UHIULJHUDWRU LQ D ORFDWLRQ H[SRVHG WR water (rain, etc.) or direct sunlight.
•,QVWDOO LW RQ D IORRU VWURQJ HQRXJK WR VXSSRUW LW IXOO\ loaded.
CLEARANCES
Allow the following clearances for ease of installation, proper air circulation and plumbing and electrical connections:
|
23‘/25‘ |
23‘ (33” wide), |
|
CustomStyle™ |
25‘, 26‘, 27‘, 29‘ |
Sides |
´ PP |
´ PP |
Top |
´ PP |
´ PP |
Back |
´ PP |
´ PP |
DIMENSIONS AND
SPECIFICATIONS
 Water Electrical
|
´ PP |
|
|
|
Airspace |
|
|
´ FP |
´ > PP@ *DS |
´ FP |
|
´ > PP@ :DOO |
|||
Cabinet |
Countertop |
||
Plates) |
|||
|
|
DIMENSIONS AND SPECIFICATIONS
(for 23' CustomStyle™ models)
701»4´ FP |
´ |
(91.4 cm) |
´ FP |
DIMENSIONS AND SPECIFICATIONS
(for 25' CustomStyle™ models)
721»4´ FP |
´ |
(91.4 cm) |
´ FP |
*72- ´ FP UHTXLUHG IRU IXOO DGMXVWPHQW
RI PRELOLW\ ZKHHOV ,I FDELQHWV LQVWDOOHG DERYH refrigerator have doors that are flush to the top of the opening for the refrigerator, then an additional
´ PD\ EH UHTXLUHG WR SURYLGH FOHDUDQFH IRU cabinet doors to open freely.
INSTRUCTIONS INSTALLATION
49-60646-6 |
25 |

INSTALLATION INSTRUCTIONS
Installation Instructions
INSTALLING THE REFRIGERATOR (Cont.)
1
A
B
CONNECTING THE REFRIGERATOR TO THE HOUSE WATER LINE
(icemaker and dispenser models)
A cold water supply is required for automatic
LFHPDNHU DQG GLVSHQVHU RSHUDWLRQ ,I WKHUH LV not a cold water supply, you will need to provide
RQH 6HH ³,QVWDOOLQJ WKH :DWHU /LQH´ VHFWLRQ
NOTES:
•Before making the connection to the refrigerator, be sure the refrigerator power cord is not plugged into the wall outlet.
,I \RXU UHIULJHUDWRU GRHV QRW KDYH D ZDWHU ILOWHU we recommend installing one if your water supply has sand or particles that could clog the screen of the refrigerator’s water valve.
,QVWDOO LW LQ WKH ZDWHU OLQH QHDU WKH UHIULJHUDWRU ,I XVLQJ 6PDUW&RQQHFW Refrigerator
7XELQJ .LW \RX ZLOO QHHG DQ DGGLWLRQDO WXEH
:; ; WR FRQQHFW WKH ILOWHU 'R QRW FXW plastic tube to install filter.
,I \RX DUH XVLQJ FRSSHU WXELQJ SODFH D compression nut and ferrule (sleeve) onto the end of the tubing coming from the house cold water supply.
,I \RX DUH XVLQJ WKH 6PDUW&RQQHFW tubing, the nuts are already assembled to the tubing.
,I \RX DUH XVLQJ FRSSHU WXELQJ LQVHUW WKH HQG of the tubing into the refrigerator connection, at the back of the refrigerator, as far as possible. While holding the tubing, tighten the fitting.
,I \RX DUH XVLQJ 6PDUW&RQQHFW tubing, insert the molded end of the tubing into the refrigerator connection, at the back of the refrigerator, and tighten the compression nut
until it is hand tight. Then tighten one additional turn with a wrench. Overtightening may cause leaks.
 WARNING
Connect to potable water supply only.
A cold water supply is required for automatic icemaker operation. The water pressure must be between 40 and 120 psi (275-827 kilopascals).
WARNING |
ELECTRIC SHOCK |
|
HAZARD |
||
|
Attach tubing clamp using existing hole only. DO NOT drill into the refrigerator.
C)DVWHQ WKH WXELQJ LQWR WKH FODPS SURYLGHG WR hold it in position. You may need to pry open the clamp.
Tubing Clamp |
|
´ 7XELQJ |
|
´ |
|
|
|
Compression Nut |
|
|
|
)HUUXOH |
|
|
|
(sleeve) |
|
|
|
Refrigerator |
SmartConnect |
Tubing |
|
Connection |
|||
|
|
Option 2
6PDUW&RQQHFW
Tubing 


Refrigerator
Connection
Option 3
2 |
TURN ON THE WATER SUPPLY |
Turn the water on at the shutoff valve (house water supply) and check for any leaks.
3 PLUG IN THE REFRIGERATOR
Before plugging in the refrigerator, make sure the icemaker power switch is set to
WKH 2)) SRVLWLRQ
See the grounding information attached to the power cord.
26 |
49-60646-6 |
Installation Instructions
INSTALLING THE REFRIGERATOR (Cont.)
4PUT THE REFRIGERATOR IN PLACE
Move the refrigerator to its final location.
5 LEVEL THE REFRIGERATOR
The refrigerator can be leveled by adjusting the rollers located near the bottom hinges.
|
|
|
|
|
|
|
|
|
|
|
|
|
|
|
|
|
|
|
|
|
|
|
|
|
|
Rollers |
|
||
|
|
Raise |
|||
|
|
|
|
|
|
Rollers have three purposes:
•Rollers adjust so the door closes easily when opened about halfway. (Raise the front about
´ > PP@ IURP WKH IORRU
•Rollers adjust so the refrigerator is firmly positioned on the floor and does not wobble.
•Rollers allow you to move the refrigerator away from the wall for cleaning.
To adjust the rollers on 23’ (33” wide), 25’, 26’, 27’ and 29’ models:
•Turn the roller adjusting screws clockwise to raise the refrigerator, counterclockwise to
ORZHU LW 8VH D ´ KH[ VRFNHW RU ZUHQFK RU an adjustable wrench.
Roller adjusting screw
5LEVEL THE REFRIGERATOR (cont.)
To adjust the
rollers on 23’/25’  CustomStyle™
models:
Turn the front roller adjusting screws clockwise to raise
the refrigerator, |
Roller adjusting screws |
counterclockwise to |
|
lower LW 8VH D ´ KH[ ZUHQFK ZLWK H[WHQVLRQ or an adjustable wrench.
These models also have rear adjustable rollers so you can align the refrigerator with
\RXU NLWFKHQ FDELQHWV 8VH D ´ KH[ ZUHQFK with extension to turn the screws for the rear rollers—clockwise to raise the refrigerator, counterclockwise to lower it.
6 LEVEL THE DOORS
AAdjust the refrigerator door to make the doors even at the top.
BTo align:
8VLQJ D ´ ZUHQFK WXUQ WKH GRRU DGMXVWLQJ screw to the right to raise the door, to the left to lower it.
NOTE:
A nylon plug, imbedded in the threads of the pin, prevents the pin from turning unless a wrench is used.
After one or two turns of the wrench, open and close the refrigerator door and check the alignment at the top of the doors.
 'RRUV VKRXOG EH HYHQ DW WRS
Raise 


´ ZUHQFK
INSTRUCTIONS INSTALLATION
49-60646-6 |
27 |

INSTALLATION INSTRUCTIONS
Installation Instructions
INSTALLING THE REFRIGERATOR (Cont.)
7 REPLACE THE BASE GRILLE
Replace the grille by installing the two Phillips head screws.
8 SET THE CONTROLS
Set the controls to the recommended setting.
9 START THE ICEMAKER
Set the icemaker power switch to the I (on) position. The icemaker will not begin to operate
XQWLO LW UHDFKHV LWV RSHUDWLQJ WHPSHUDWXUH RI )± & RU EHORZ ,W ZLOO WKHQ EHJLQ RSHUDWLRQ
DXWRPDWLFDOO\ ,W ZLOO WDNH ± GD\V WR ILOO WKH LFH bin.
Power switch
Power switch
NOTE:
,Q ORZHU ZDWHU SUHVVXUH FRQGLWLRQV WKH ZDWHU valve may turn on up to 3 times to deliver enough water to the icemaker.
28 |
|
|
|
|
|
|
|
|
|
|
|
|
|
|
|
|
|
|
|
|
|
|
|
|
|
|
|
|
|
49-60646-6 |
|||||
Installation Instructions
INSTALLING THE WATER LINE (icemaker & dispenser models)
BEFORE YOU BEGIN
5HFRPPHQGHG FRSSHU ZDWHU VXSSO\ NLWV DUH :; ;
:; ; RU :; ; GHSHQGLQJ RQ WKH DPRXQW RI tubing you need. Approved plastic water supply
OLQHV DUH 6PDUW&RQQHFW 5HIULJHUDWRU 7XELQJ:; ; :; ; DQG :; ;
When connecting your refrigerator to a Reverse Osmosis Water System, the only approved
LQVWDOODWLRQ LV ZLWK D *( $SSOLDQFHV 59.LW )RU other reverse osmosis water systems, follow the manufacturer’s recommendations.
,I WKH ZDWHU VXSSO\ WR WKH UHIULJHUDWRU LV IURP D 5HYHUVH 2VPRVLV :DWHU )LOWUDWLRQ 6\VWHP
$1' WKH UHIULJHUDWRU DOVR KDV D ZDWHU ILOWHU XVH the refrigerator’s filter bypass plug. Using the refrigerator’s water filtration cartridge in conjunction with the RO filter can result in hollow ice cubes and slower water flow from the water dispenser.
This water line installation is not warranted by
WKH UHIULJHUDWRU RU LFHPDNHU PDQXIDFWXUHU )ROORZ
WKHVH LQVWUXFWLRQV FDUHIXOO\ WR PLQLPL]H WKH ULVN RI expensive water damage.
Water hammer (water banging in the pipes) in house plumbing can cause damage to refrigerator parts and lead to water leakage or flooding. Call a qualified plumber to correct water hammer before installing the water supply line to the refrigerator.
To prevent burns and product damage, do not hook up the water line to the hot water line.
,I \RX XVH \RXU UHIULJHUDWRU EHIRUH FRQQHFWLQJ WKH water line, make sure the icemaker power switch is
LQ WKH 2)) SRVLWLRQ
'R QRW LQVWDOO WKH LFHPDNHU WXELQJ LQ DUHDV ZKHUH WHPSHUDWXUHV IDOO EHORZ IUHH]LQJ
When using any electrical device (such as a power drill) during installation, be sure the device is double insulated or grounded in a manner to prevent the
KD]DUG RI HOHFWULF VKRFN RU LV EDWWHU\ SRZHUHG
All installations must be in accordance with local plumbing code requirements.
WHAT YOU WILL NEED
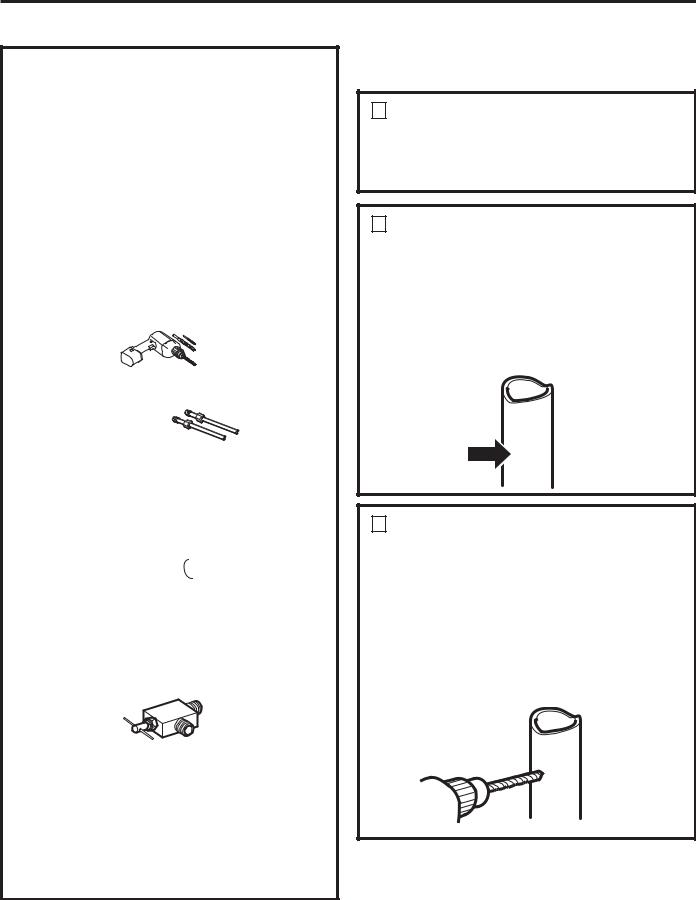
&RSSHU RU 6PDUW&RQQHFW 5HIULJHUDWRU 7XELQJ NLW ´ RXWHU GLDPHWHU WR FRQQHFW WKH UHIULJHUDWRU
WR WKH ZDWHU VXSSO\ ,I XVLQJ FRSSHU EH VXUH ERWK ends of the tubing are cut square.
To determine how much tubing you need: measure the distance from the water valve on the back of the refrigerator to the water supply pipe. Be sure there is sufficient extra tubing to allow the refrigerator to move out from the wall after installation.
6PDUW&RQQHFW 5HIULJHUDWRU 7XELQJ .LWV DUH available in the following lengths:
¶ P ± :; ;
¶ P ± :; ;
¶ P ± :; ;
 WARNING
Connect to potable water supply only.
A cold water supply is required for automatic icemaker operation. The water pressure must be between 40 and 120 psi (275-827 kilopascals).
INSTRUCTIONS INSTALLATION
49-60646-6 |
29 |
INSTALLATION INSTRUCTIONS
Installation Instructions
INSTALLING THE WATER LINE (Cont.)
WHAT YOU WILL NEED (Cont.)
NOTE: The only GE Appliances approved
SODVWLF WXELQJ LV WKDW VXSSOLHG LQ 6PDUW&RQQHFW
5HIULJHUDWRU 7XELQJ NLWV 'R QRW XVH DQ\ RWKHU SODVWLF water supply line because the line is under pressure at all times. Certain types of plastic will crack or rupture with age and cause water damage to your home.
•A GE Appliances water supply kit (containing tubing, shutoff valve and fittings listed below) is available at extra cost from your dealer or from Parts and Accessories, 877.959.8688 (in Canada 1.800.661.1616).
•A cold water supply. The water pressure must be between 20 and 120 p.s.i. (1.4–8.1 bar).
• Power drill.
•1/2” or adjustable wrench.
•Straight and Phillips blade screwdriver.
•Two 1/4” outer diameter compression nuts and 2 ferrules (sleeves)—to connect the copper tubing to the shutoff valve and the refrigerator water valve. OR
,I \RX DUH XVLQJ D 6PDUW&RQQHFW 5HIULJHUDWRU
Tubing kit, the necessary fittings are preassembled to the tubing. 
,I \RXU H[LVWLQJ FRSSHU ZDWHU OLQH KDV D IODUHG ILWWLQJ at the end, you will need an adapter (available at plumbing supply stores) to connect the water line to the refrigerator OR you can cut off the flared fitting with a tube cutter and then use a compression
ILWWLQJ 'R QRW FXW IRUPHG HQG IURP 6PDUW&RQQHFW
Refrigerator tubing.
•Shutoff valve to connect to the cold water line. The shutoff valve should have a water inlet
ZLWK D PLQLPXP LQVLGH GLDPHWHU RI ´ DW WKH
SRLQW RI FRQQHFWLRQ WR WKH &2/' :$7(5 /,1(
Saddle-type shutoff valves are included in many water supply kits. Before purchasing, make sure a saddle-type valve complies with your local plumbing codes.
,QVWDOO WKH VKXWRII YDOYH RQ WKH QHDUHVW IUHTXHQWO\ XVHG drinking water line.
1SHUT OFF THE MAIN WATER SUPPLY
Turn on the nearest faucet long enough to clear the line of water.
2CHOOSE THE VALVE LOCATION
Choose a location for the valve that is easily
DFFHVVLEOH ,W LV EHVW WR FRQQHFW LQWR WKH VLGH RI a vertical water pipe. When it is necessary to
FRQQHFW LQWR D KRUL]RQWDO ZDWHU SLSH PDNH WKH connection to the top or side, rather than at the bottom, to avoid drawing off any sediment from the water pipe.
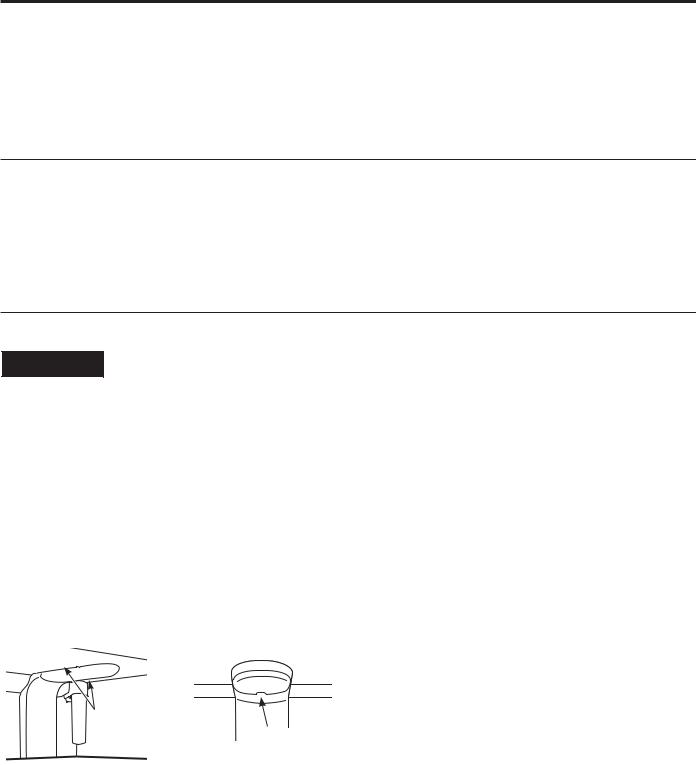
3DRILL THE HOLE FOR THE VALVE
'ULOO D ´ KROH LQ WKH ZDWHU SLSH HYHQ LI XVLQJ a self-piercing valve), using a sharp bit. Remove any burrs resulting from drilling the hole in the pipe.
Take care not to allow water to drain into the drill.
)DLOXUH WR GULOO D ´ KROH PD\ UHVXOW LQ UHGXFHG ice production or smaller cubes.
30 |
49-60646-6 |
 Loading...