

Page 1
Page 2

CHAPTER ONE - GAME OVERVIEW
1.0 Introduction 3
1.1 The Mission Editor 3
1.2 The Game 3
1.3 Scramble 4
1.4 Preferences 5
1.5 Multiplayer 8
1.6 The Campaigns 11
1.7 The Aircraft Cockpit 17
CHAPTER TWO - FLYING
2.1 The Aircraft 19
2.2 First Flight 20
2.3 Combat Manoeuvers Training 21
2.4 Advanced Combat Manoeuvers 23
The Half roll 23
Loop 23
Immelmann Turn 24
Dive and zoom 24
FLYING CORPS GOLD CONTENTS
CHAPTER THREE - TACTICS
Tactics 25
Mannock’s Rules 26
Formations 26
The Approach. 27
Attack 28
The Dogfight 29
Offensive Manoeuvres 30
Defensive Manoeuvres 31
Attacking Two- seaters 32
Shooting 33
Attacking Balloons 35
Ground Attack 35
Archie 36
CHAPTER FOUR - CAMPAIGN HISTORIES
Flying Circus 37
German Markings 42
Jasta 11 42
1
Page 3
FLYING CORPS GOLD CONTENTS
Tank Battle-Cambrai 1917 43
The Jastas 45
Jagdgeschwader 1 45
German Fighter Aircraft at the
Front Nov 1917 46
British Units 46
Cambrai in the Game 46
Spring Offensive 47
54 Squadron 51
German Fighter Aircraft at the
Front Feb 1918 52
Hat in the Ring 53
Rickenbacker and the
‘Hat in the Ring’ Squadron 57
The Jastas 58
CHAPTER FIVE - THE AIRCRAFT IN
5.1 Flyable Aircraft 59
Nieuport 28 59
Spad XIII 60
FLYING CORPS GOLD
Fokker Triplane 61
Albatros DIII 62
Sopwith Camel 63
SE5a 64
Fokker DVIII 65
5.2 Other Aircraft 61
Nieuport 17 & Sopwith Pup 66
1 & 1/2 Strutter & Bristol F2a 67
BE2c & RE8 68
FE2b & DH9 69
Pfalz DIII & Aviatik 70
Rumpler & Halberstadt CLII 71
BIBLIOGRAPHY 72
CREDITS 74
APPENDIX 75
QUICK STA RT 78
2
Page 4
CHAPTER ONE GAME OVERVIEW
1.0 INTRODUCTION
Flying Corps Gold is a simulation of World War 1
aerial combat over France. You can choose to take
part in single “scramble” missions or to immerse
yourself in one of four major campaigns. Extensive
configurable options allow you to customise Flying
Corps Gold to give you the style and type of game
you require. The aircraft in Flying Corps Gold have
been exhaustively researched and are characterised
by flight models which incorporate individual
characteristics and idiosyncrasies. The game’s
artificial intelligence is geared towards First World
War tactics, and each computer-controlled pilot is
treated as a separate individual with differing
priorities and abilities. The dogfights in Flying Corps
Gold take place over some of the most detailed
terrain seen in a flight simulation, using data taken
from period trench maps and actual wartime aerial
photography. Flying Corps Gold will take you closer
to the front than you’ve ever been before.
This manual is organised into five main chapters and
an appendix. This chapter deals with the overall
layout of Flying Corps Gold, and all of the options
within the game. Chapter Two provides the
information to enable you to fly the actual aircraft
available in Flying Corps Gold. Chapter Three covers
the wide range of tactics you will need to employ as a
First World War pilot. Chapter Four details all of the
aircraft to be found in the skies while playing Flying
Corps Gold. Chapter Five is a detailed historical
account of the major air campaigns which are
featured in the game. This is followed by a detailed
bibliography and game credits. The appendix lists the
keyboard and joystick controls for the game.
1.1 THE MISSION EDITOR
The Flying Corps Gold Mission Editor is installed
during the installation procedure. Although the
Mission Editor is a Windows 95™ only application,
missions and Campaigns can be saved for future play
with both the Windows 95™ and the DOS version of
CHAPTER 1 - GAME OVERVIEW
the game. For full instructions on how to use the
Mission Editor, refer to the on-line manual which is
activated in the Help menu within the Mission Editor.
1.2 THE GAME
To install and load Flying Corps Gold refer to the
installation and loading instructions in the separate
TECHNICAL SUPPLEMENT. The game begins
with an animated title sequence. Should you not wish
to view this, press the space bar to leave the title
sequence and progress to the options screen.
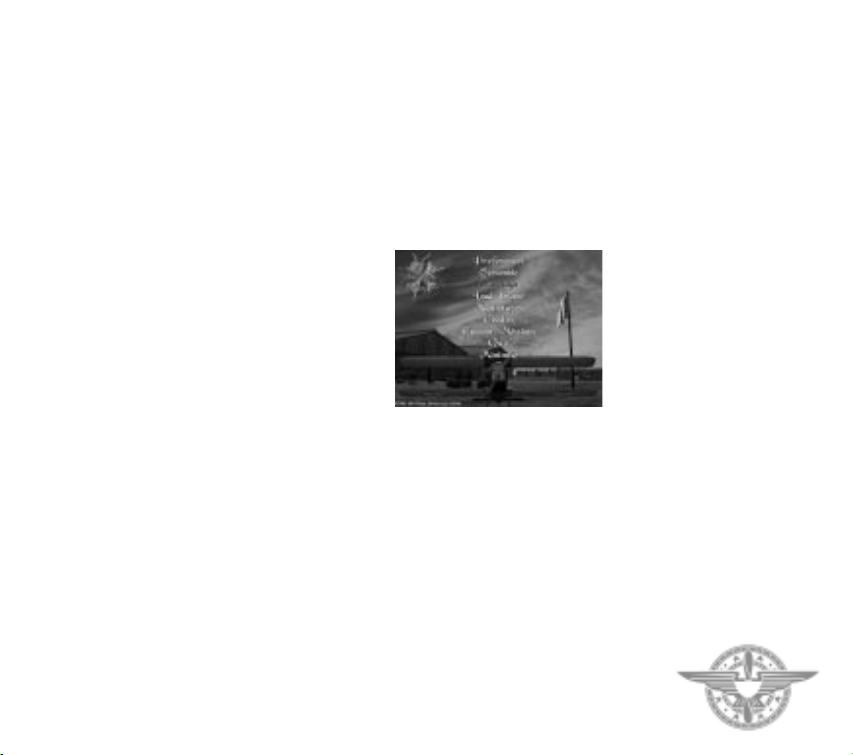
The Options Screen
The options available at the start of the game are
displayed on the options screen:
Preferences
Preferences allows you to set up all of the detailed
game characteristics ranging from your joystick and
sound settings to precise characteristics of the aircraft
you will be flying. This feature is also available
in-flight.
Scramble
The Scramble option gives you the choice of a
number of single missions ranging from a simple ‘first
flight’ to more complex stalking manoeuvres. This is
the ideal entry into the game, and it will teach you
how to survive more complex missions.
3
Page 5
CHAPTER 1 - GAME OVERVIEW
Campaign
Campaign is the option which leads you to one of four
major campaigns, which will provide the most severe
test of your strategic skill and mettle. This is the heart
of Flying Corps Gold.
Load Game
Load game allows you to retrieve a previously saved
game, which may be stored on your hard disc.
Quit
Quit will end your session of Flying Corps Gold, after
you have verified that you wish to exit, and return you
to DOS or Windows.
Multiplayer
Multi player allows you to play Flying Corps Gold
with someone else, but is an option only available to
players who are running Flying Corps Gold under
Windows 95. See section 1.5.
Credits
Credits takes you to the game credit screen.
Selections can be made by highlighting an option with
the mouse pointer and clicking with the left mouse
button, or moving the highlight with the up or down
cursor key and pressing the Enter key. All selections
in Flying Corps Gold can be made using either mouse
or keyboard.
The preferences, scramble and campaign options are
now discussed in more detail. In order to allow you
to make a quick start the next section, part three,
deals with the scramble option. The full range of
available preferences are detailed in part four, and
details of the campaign elements of the game are
supplied in part five. Part six provides a schematic
description of the aircraft cockpit.
1.3 SCRAMBLE
If you wish to get straight into the action select
Scramble. Here you will find and fly small individual
missions.
First of all, you are presented with a list of the flyable
aircraft in Flying Corps Gold. Each aircraft has its
own unique set of characteristics, and are described
more fully in Chapter Five of this manual. Select the
aircraft you wish to fly using the mouse or keyboard.
The screen then displays the full choice of available
scramble missions.
First Flight
This is the simplest scramble mission. The aim is to
take off from your airfield, climb to 2000 feet and fly
a complete circuit around the airfield. Land and come
to a halt in the centre of the field. Chapter Two has a
section which deals with how you should approach
this first flight.
Follow Leader
Starting in the air, follow your leader as he performs
a series of manoeuvres designed to throw you off his
tail. You need to stay with him for about 3 minutes.
Turkey Shoot
Dive on to the tail of a novice pilot who is flying a
straight and regular course. He presents a perfect
target but he might turn if he spots you.
4
Page 6
One on One
Your opponent will pass on your right,heading in the
opposite direction. The aim is to get on his tail as
rapidly as possible.
Ground Attack
Fly low and disable tanks on the ground with your
bombs. A truck convoy and an observation balloon
present further ground targets.
Squadron Encounter
Lead your squadron of three flights against a large
enemy formation that is rushing towards you.
Stalking Prey
Your flight is above and to the rear of an enemy flight
that is unaware of your presence. Stalk your prey and
draw close enough to make a surprise attack.
First Patrol
Lead two flights of three aircraft on a patrol of the
front lines.You must be able to identify and respond
to possible threats.
Quit
Takes control back to the main options screen.
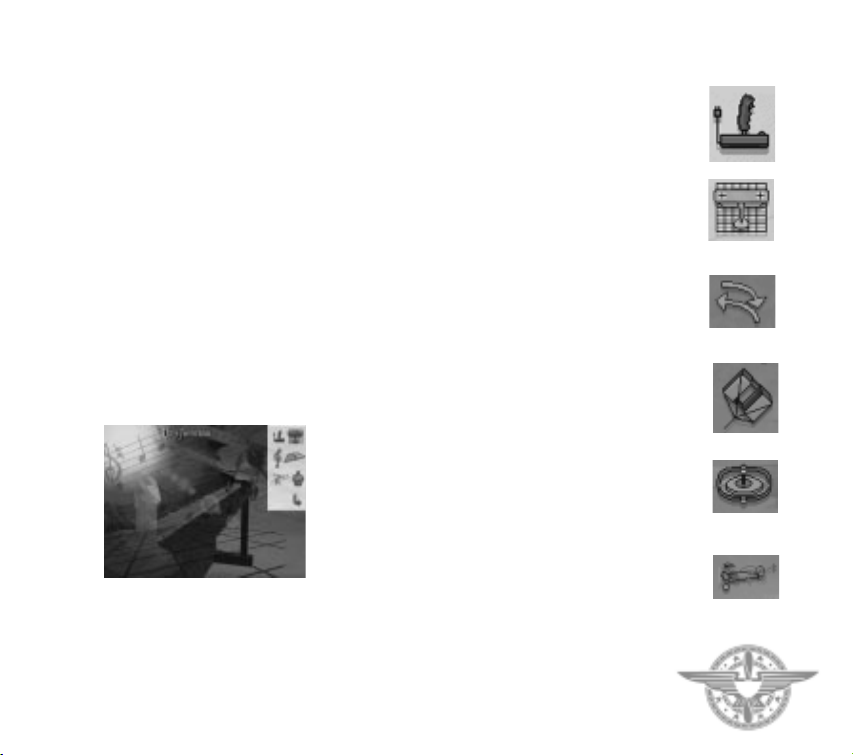
1.4 PREFERENCES
You may alter your game preferences on the main
options screen, or while you are flying - in which case
you must press the F12 key. The preferences screen
displays a number of icons which you can select:
CHAPTER 1 - GAME OVERVIEW
Joystick icon: Joystick setup
This allows you to configure Flying Corps Gold to suit
your analogue control system.
The coolie hat and throttle controls are provided on a
number of advanced joysticks and the following
options apply to the CH and Thrustmaster products.
If you are using a stick that is plugged into a separate
programmable throttle then the coolie hat should be
programmed using the software provided by the
throttle adaptor manufacturer. In these circumstances
the Flying Corps Gold Coolie Hat option should be
disabled.
If you are using a stick fitted with a coolie hat and if
the stick is plugged directly into the games port, then
you should enable the Flying Corps Gold Coolie Hat
option.
After you have chosen your desired setup the in-built
calibration system will start. Follow on-screen
instructions to set up the control system.
Aircraft on grid icon: Aircraft setup
This sets the flight preferences and therefore allows
you to adjust the realism and difficulty levels of the
flight model. Flight Preference Options are:
Torque effects
When enabled, the rotating propeller will affect the
flight model.
Wind
When enabled, wind will affect all aircraft.
Gyroscopic effects
When enabled, this will allow the gyroscopic effects of
rotary engined aircraft to affect the flight model. In all
of the rotary engined aircraft featured, the gyroscopic
effect is clockwise from the pilots seat perspective.
See Chapter Two, which describes the gyroscopic
effects in more detail.
Slipstream effects
When enabled, the slipstream from the propellor will
affect the airflow over the aircraft’s lifting surfaces.
Joystick
Aircraft
on grid
Torque
Effects
Wind
Gyroscopic
effects
Slipstream
effects
5
Page 7
CHAPTER 1 - GAME OVERVIEW
Co-ordinated rudder
When enabled, the rudder will be controlled in
harmony with the stick, making flight easier. Disable
if you have rudder pedals or you want a more realistic
Co-ordinated
rudder
Power boost Ground
Spinning
collisions
Two aircraft Limited Arms
Vulnerability Spinning
Decelerate
Trigger
Bomb Weight
Compass
Padlock
Blackouts
6
response.
Spinning
Disabling the option will reduce the chance of your
aircraft spinning if mishandled.
Power boost
When enabled, the engine of your aircraft will be
more responsive and powerful, making flight easier.
Ground collisions
When enabled, collision with the ground will damage
or destroy your aircraft.
Two aircraft icon: Difficulty options
The following options set the level of game difficulty
when playing Flying Corps Gold.
Limited Arms
When enabled you will be able to carry
approximately 500 rounds. Otherwise your
ammunition is unlimited.
Vulnerability
When enabled you will be vulnerable to enemy fire.
Spinning Compass
When enabled, the flight compass will behave more
accurately when the aircraft is turned violently - the
compass will spin, and will only return to equilibrium
in level flight.
Decelerate Trigger
This setting is relevant after using the time
acceleration TAB key during the game.
When the trigger is set to combat, your aircraft will
drop back into real time when you are directly
threatened and enemy aircraft can fire at you. Enemy
aircraft will also be more aggressive and will not try to
escape. Use this setting when you want fast and
furious action.
If the trigger is set to tactical, then real time is reset
much earlier in the encounter. This will give you time
to engage the enemy at a tactical level and allow you
to gain height or manoeuvre, so that you may be able
to achieve tactical dominance. Enemy aircraft will be
more cautious and act more realistically. For instance,
they may turn tail and run! Use this setting for
additional realism.
Padlock
Padlock refers to the locking of head movements
from within the cockpit, or locking the viewing angle
if you are using an outside view.Two types of padlock
are supported:
Only when visible:The enemy aircraft must be in view
before the padlock can be initiated. This is the more
realistic option.
In visible range: You will be able to initiate a lock
when an enemy is within visible range. It is not
necessary to have the enemy in view to initiate the
lock.
Bomb Weight
When enabled bomb weight and drag affects the
performance of the aircraft.
Blackouts
When enabled the pilot will temporarily blackout
after pulling a high ‘g’ turn.
Whiteouts
When enabled there will be a whiteout when you look
into the sun.
Auto Pilot skill
This refers to the AI settings of your computer
opponents and therefore affects the skill level of
opposing pilots. Possible setting are novice, regular,
ace. In the game, each enemy pilot can have a
different skill level. By selecting novice,you will force
the range of skills encountered to be low.
Alternatively, selecting ace will mean that the range
of skills you encounter will be relatively high.
Page 8
Target size
Altering this setting affects the accuracy of your guns.
Possible settings are small, regular and large. The
smaller the target size the more realistic the setting.
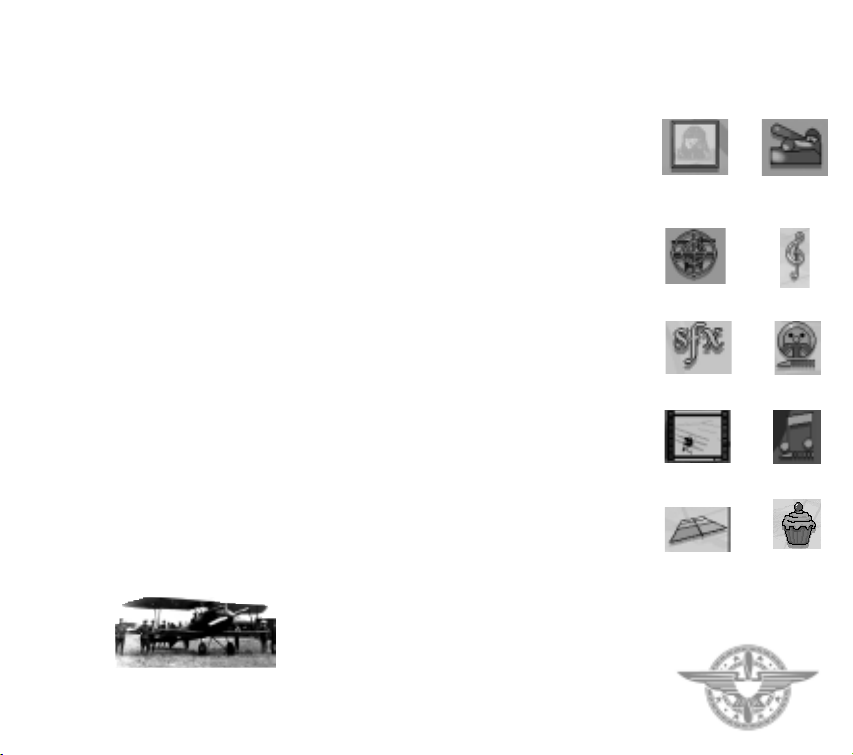
Treble clef icon:Audio Volumes
These options enable you to customise your audio
output:
SFX
Allows you to adjust the volume of in-game sounds
such as gun noise and explosions.
Engine
Allows you to alter the level of engine noise. The
engine level is also affected by the SFX level.
Film
This controls the sound channel for the animation
sequences.
Musical note
This controls the volume of music in the game.
Rectangular icon: Graphics Options
Adjusting the graphics parameters alters the way
your hardware will perform during the course of a
game.
The most significant performance factor is resolution.
Only attempt to run Flying Corps Gold at the highest
resolutions if you have fast and up-to-date hardware.
Experiment with the settings that provide the best
compromise between frame rate and detail level.
In Flying Corps Gold it is possible to set the
preferences and difficulty options in a great variety of
different ways. Player are encouraged to experiment
with the settings to produce a customised version of
Flying Corps Gold which best suits their style of play.
CHAPTER 1 - GAME OVERVIEW
Cake Icon: Extra Switches
These are additional switches that allow you to
customise the game difficulty, game play and aircraft
behaviour.
Gun Jams Enabled/Disabled
Translucent Smoke Enabled/Disabled
Blackout when Injured Enabled/Disabled
Mid Air Collisions Enabled/Disabled
Peripheral Vision Markers Enabled/Disabled
When this option is enabled a number of markers will
be drawn in the 3D to indicate the position of any
aircraft that lie just outside the field of view ( just off
screen). In addition, when the option is enabled and
you are on an inside padlock view a wireframe
aircraft is drawn overhead. This wireframe gives
orientation information that is supplied by the “seat
of the pants” in real life.
Priority Messages Enabled/Disabled
If disabled messages within the 3D will not appear.
Healed Pilots to Reserve Pool Enabled/Disabled
AI Pilots Sometimes/Always use Complex Model
If AI pilots always use the complex model, both
player and computer controlled aircraft will conform
to the same aerodynamic constraints.
Stick Stiffness Enabled/Disabled
Pause on entering 3D Enabled/Disabled
When enabled press P to unpause the 3D.
Auto Inside/Outside Padlock Toggle
When this option is enabled and you are on an inside
padlock view, the camera will automatically switch
between the inside and outside padlock views. The
switch to outside occurs when the tracked aircraft
gets behind you. The switch to inside occurs when the
tracked aircraft is in front of you.
Whiteouts Auto pilot
Target size
skill
Treble clef
SFX Engine
Film Musical note
Rectangular
icon
Cake
icon
7
Page 9
CHAPTER 1 - GAME OVERVIEW
PREFERENCES AND DIFFICULTY SUMMARY
The Beginner Ultimate realism
Torque effects disabled Torque effects enabled
Wind disabled Wind enabled
Gyroscope effects disabled Gyroscope effects enabled
Slipstream effects disabled Slipstream effects enabled
Co-ordinated rudder enabled
Spinning minimised Spinning enabled
Power Boost enabled Power Boost disabled
Ground collisions disabled Ground collisions enabled
Limited arms disabled Limited Arms enabled
Vulnerability disabled Vulnerability enabled
Spinning compass disabled Spinning compass enabled
Decelerate Trigger Combat Decelerate Trigger Tactical
Initiate Padlock if target is Initiate Padlock only
within visible range when target visible
Bomb weight & drag disabled Bomb weight & drag enabled
Blackouts disabled Blackouts enabled
Whiteouts disabled Whiteouts enabled
Autopilot skill : Novice Autopilot skill :Ace
Target size:Large Target size: Small
Gun Jams: disabled Gun Jams:enabled
Tail Heaviness:disabled Tail Heaviness:enabled
Mid air Collisions: disabled Mid air Collisions:enabled
AI pilots sometimes AI pilots always
use complex model use complex model
Stick Stiffness: disabled Stick Stiffness:enabled
Auto inside/outside Auto inside/outside
padlock: enabled padlock: disabled
8
Co-ordinated rudder disabled
1.5 MULTIPLAYER
This option allows players to host or join a
multiplayer game. Multiplayer only works using the
Windows 95 version of Flying Corps Gold.
Selecting a service
Firstly, select a service provider. A box will appear
containing a list of services that your machine
supports. Select the one you wish to use by clicking on
it and then click on the 'select service' option to
confirm. See below for details of starting Wireplay
games.The various services supported are:
•IPX Connection (Network play) - Max players 8
•Internet TCP/IP Connection - Max players 8
•Modem Connection - Max players 2
•Serial Connection (Null Modem) - Max players 2
Once a valid service has been selected you will be
asked if you wish to create (host) or join a game.
Creating a game
• IPX Connection & Internet Connection
Click on the create game option. You will then be
asked to enter your name. Type in your name and
click on the tick icon. From here you will go to the
pre-game preferences screen.
• Modem Connection
Click on create game option and enter name as above
for IPX and Internet. A Windows 95 dialogue box will
then appear allowing you to configure your modem if
required and to wait for the other player to join.
When you have selected your modem setup click on
the answer box. When the other player has dialled
you, you will be taken to the pre-game preferences
screen. When selecting the speed of your modem,
select the speed equal to or one higher than your
modem’s fastest speed.
• Serial Connection
Click on create game option and enter name as
above. A Windows 95 dialogue box will then appear
requesting your serial connection settings. Use the
highest baud rate with which you can create a session:
115200 baud or higher is a good rate, 57600 is
acceptable. Click on OK to confirm your selections
and you will be taken to the pre-game preferences
screen.
Page 10

Joining a game
• IPX Connection
Click on the Join Game option. A list of network
games available will appear. Select the one you wish
to join by clicking on it and click on Join Game again
to confirm your choice. You will then be asked to
enter your name and be taken to the pre-game
preferences screen.
• Internet Connection
Click on the Join Game option. A Windows 95
dialogue box will appear asking you for the name, or
IP address of the computer that is hosting the game.
Enter the address (if known) and click on OK. If you
do not know the name of the host, leave the text box
blank and click on OK. After a short period a list of
games available will appear. Click on the one you
wish to join and then click on Join Game again to
confirm. You will then be asked to enter your name
and be taken to the pre-game preferences screen.
• Modem Connection
Click on the Join Game option. A Windows 95
dialogue box will appear asking for the number of the
host of the game. You may also configure your
modem at this stage (see creating a game using
modem). Enter the phone number of the host and
click on OK. Your computer will then attempt to
connect with host. Once connected a list of available
games will be shown. Select the one you wish to join
and click on Join Game again to select.You will then
be asked to enter your name and be taken to the pregame preferences screen.
• Serial Connection
Click on the Join Game option.A Windows 95 dialog
box will appear requesting your serial connection
settings (see creating a serial game above). Once you
have selected your settings click on OK to confirm.A
list of available games will appear. Select the one you
wish to join by clicking on it and then confirm your
selection by clicking on Join Game again. You will
then be asked to enter your name and be taken to the
pre-game preferences screen.
CHAPTER 1 - GAME OVERVIEW
• Wireplay Games
To play using Wireplay you must first connect to a
Wireplay server using a Wireplay client. Details of
how to do this will be available from the Wireplay
client. Once a Wireplay game has begun you will be
taken to the pre-game preferences screen. Wireplay
Flying Corps Gold supports a maximum of 8 players.
The Pre-Game Preferences Screen
This screen is used to select all the preferences and
options that will be used during the game. It also
shows the status of other players and their
accumulated score from previous games. You may
communicate with other players at this stage by
moving the mouse pointer over the dialogue section
and typing in a message. Pressing return will send this
message to other players.
Selecting the game duration
Only the host may change the game time.This is done
by clicking on the clock icon. The available durations
are 5 mins, 10 mins, 30 mins and 1 hour.
Selecting the game scenario
Only the host may change the game scenario. This is
done by clicking on the map icon. There are two main
types of game: Deathmatch and Teamplay. Each has
three different starting types:
9
Page 11
CHAPTER 1 - GAME OVERVIEW
Random: All players start off facing in a random
direction and with different heights
Implode: Players start off in a circle facing inwards
towards each other.
Explode: Players start off in a circle facing outwards.
In deathmatch play all players fight against
everybody else. In teamplay, teams are determined by
aircraft type, german vs allied. Each team is
represented by a different colour on the preferences
screen.
Selecting your aircraft and colour scheme
All players may change their aircraft type and colour
schemes. This is done by clicking on the paint can
icon.
Selecting game preferences
To make the game fair, all options that affect aircraft
handling and game difficulty are controlled by the
host. Other options may be altered by any player.
Starting the game
Once everybody is ready the host may start the game
by clicking on the large Flying Corps icon in the top
right of the screen.
Leaving the game
To leave the preferences screen click on the cancel
icon.
Multiplayer in-game keys
S: Resurrect.When you have been dead for 5 seconds,
you may press S in order to resurrect yourself. An
explosion will occur to notify other players that you
have done so.
Q: When you have been killed you will spiral upwards
in a regeneration phase. Once the view has gone incockpit, pressing Q will give you back control. The
spiral will continue up to 10000 feet, or 2000 feet
10
above the highest other aircraft, whichever is the
lowest.
General Notes
It is best for the host to have the fastest machine
available due to overheads managing the game.
In non-wireplay games when the host leaves the
game, that game ends and all players will be taken
back to the pre-game preferences screen. If the host
exits from the preferences screen all players will be
taken back to the main game menu.
Changing game type from deathmatch to teamplay
will wipe the scores as these are no longer
appropriate.
In teamplay F/Fire stands for friendly fire. You will
not be credited with a kill for killing your own team
members.
In some cases a service provider may be listed but is
not usable for a game. This is because parameters
related to that service are not set up correctly. For
example, to use Internet TCP/IP your computer will
require a valid IP address setting.
If you have been shot up or are out of ammo, landing
will regenerate your aircraft to full health/ammo and
put you into a resurrect spiral.
When the host is in the paint-shop or preferences
screens other players will be unable to join. The host
must be at the pre-game preferences screen for other
players to be allowed to join.
Page 12
How to get the most from your
Preferences settings
On entering 3D flight you will be inside the cockpit.
Press TAB and the aircraft will fly in accelerated time
along the patrol route.When the enemy are very close
the aircraft will drop out of accelerated time. Toggle
the i key to get the full help text across the top of the
screen. Switch to outside view (F6) and padlock to the
nearest unfriendly aircraft (F1). The nearest enemy
aircraft will be moved to the centre of the screen.
Maneuver your aircraft so that it is pointing at the
enemy (i.e. away from you). Switch to the inside
cockpit (F7) view. Note that switching between
outside and inside view does not alter the padlock
status, so you are now on an inside padlock view. If
you cannot keep the enemy in sight then switch back
to the outside view. Keep flying until you are on the
enemy’s tail and can shoot him down. If you are still
having difficulty then change some of the Preference
options: for instance set Target Size to ‘large’ and
Auto Pilot Skill to ‘novice’.
For a more realistic game,consider enabling all of the
Preference options except Power Boost and Coordinated rudder. Set the Decelerate Trigger to
‘tactical range’. This will result in accelerated time
being turned off just before enemy aircraft are visible.
This will make it possible to stalk the enemy and
maneuver into a position of advantage before
launching an attack. Set the Initiate Padlock View to
‘only when target visible’.The computer will now only
padlock onto a target that has already appeared on
the screen. This is quite realistic as experienced pilots
tend to stay aware of previously spotted aircraft and
keep them in view.
For the most realistic play, read your mission brief
and go to the map screen. Plot the waypoints onto the
paper maps provided. When flying do not use
accelerated time, but navigate your aircraft along the
patrol route using your map, looking out for
important landmarks to ensure that you are still on
course. Stay in the cockpit,using the number pad keys
to look around. Constantly search the sky and when
CHAPTER 1 - GAME OVERVIEW
an enemy aircraft is spotted attempt to stalk it so that
a surprise attack can be launched. Only use the
Padlock View once the enemy has been spotted.
When you have initiated combat you should
endeavour to maintain the element of surprise as
fighting from the cockpit requires considerable skill.
Joystick users should note that joysticks with four or
more buttons can emulate some of the important
view functions, and that a coolie hat can be used for
rotating the view.
There are four campaigns in Flying Corps Gold.
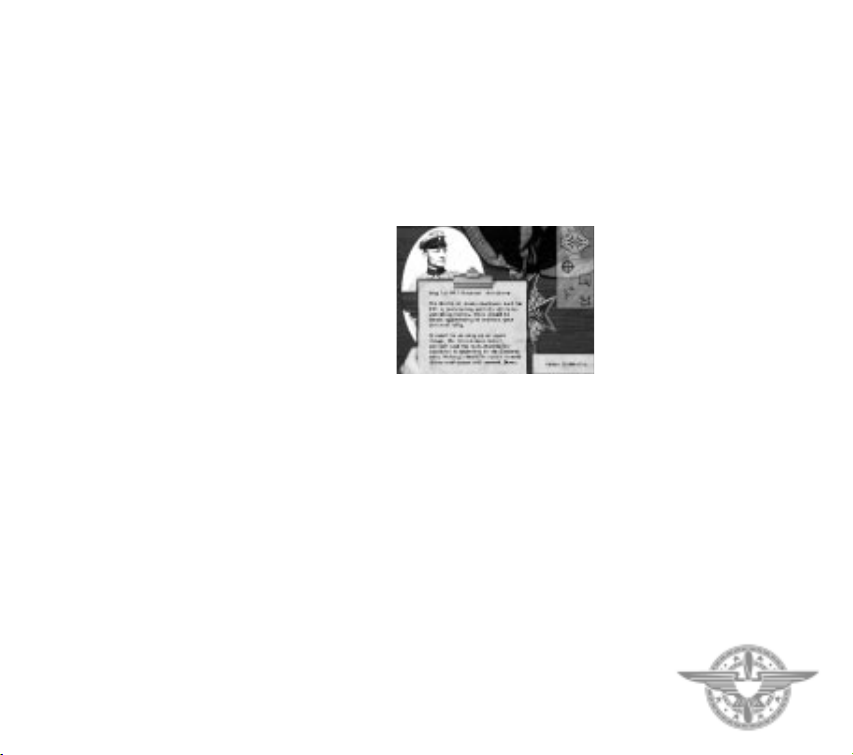
In this campaign you play the part of Lothar von
Richthofen. On May 1st, 1917, Manfred, your
illustrious older brother goes on leave having scored
52 victories, goes on leave, and places you in
command of the celebrated Jasta 11.
You already have 16 victories to your credit but your
objective is to exceed Manfred’s score before he
returns in June.To accomplish this you will not only
have to shoot down enemy aircraft but also lead the
squadron successfully, ensuring that morale remains
high and that crack pilots apply to come and fly with
you. You will be presented with a variety of typical
fighter missions and must be wary of the ‘anti
Richthofen’ unit, the crack 56 British Squadron,
which has just arrived at the front.
This is a good campaign for learning the basics of
squadron management and for perfecting your
1.6 THE CAMPAIGNS
FLYING CIRCUS
11
Page 13

CHAPTER 1 - GAME OVERVIEW
dogfighting skills. Your aircraft is the Albatros DIII,
which is superior to most of the enemy machines that
you will encounter. You are allowed to take an
unhistorical option and use a Fokker Triplane instead
of the Albatros if you wish.
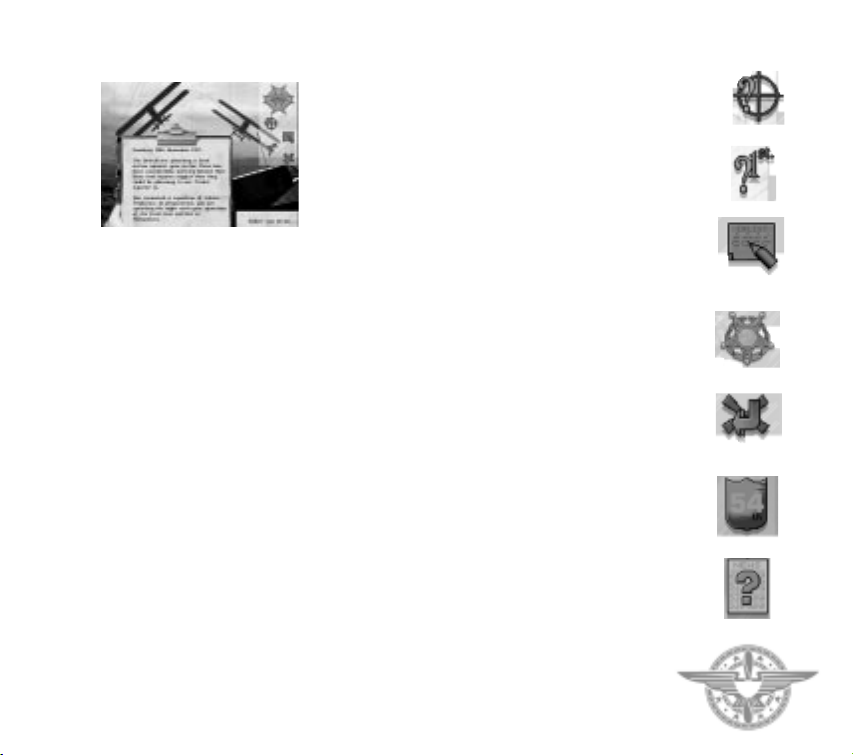
THE BATTLE OF CAMBRAI
In this campaign you take on the role of a German pilot
based at the forward airfield of Flesquieres.The British
have just launched a surprise attack, spearheaded by a
large number of tanks. These are already approaching
your airfield when the campaign starts.
Your first objective is to escape in your Fokker Triplane
and delay the British advance while your ground crew
retreat to the rear base at Proville.To win the campaign
you must halt the enemy tanks and stop the British
reaching Cambrai.
Tanks can be destroyed by bombing or by shells fired by
field guns. You must therefore attack the British forces
as they advance whilst protecting your own ground
troops from enemy aircraft and artillery.
This is a good campaign for planning missions on the
map, attacking ground targets and prioritising efforts
against the greatest threat. For instance, if there are
tanks approaching Cambrai, they must be dealt with as a
matter of urgency. If German field guns are being lost,
it may be necessary to fly in their support against
British aircraft or artillery. Attacks against British
supplies will slow the ground advances and raids against
British airfields can be initiated in order to reduce the
enemy air threat.
History has been slightly altered in the presentation of
this campaign to allow us to place more emphasis on air
operations. The weather is better than it was - in the
actual battle it was foggy - and your Jasta is equipped
with the Triplane. Historically this aircraft was grounded
at the time after a series of fatal crashes.
SPRING OFFENSIVE
In this campaign you are a new British pilot who
arrives at 54 Squadron in February 1918, just prior to
the massive ground offensive which the Germans
launched in March. The Germans were attempting to
12
win the war before the Americans reached France in
strength. You will need to prove yourself quickly, and
your objective is to help to halt the German advance
and qualify for command of your own squadron.
Initially you will take part in training missions before
flying over the front to undertake balloon busting and
other strike missions. When the German offensive
starts, you fly a variety of close air support missions.
The aim of the campaign is to weaken the German
forces so that, when they launch their last effort to
take Amiens,they cannot break the British defences.
During this last effort you will be involved in the first
ever tank versus tank battle.
This campaign features a wide variety of missions.
Your first mission is in the SE5a; thereafter you will
fly the Sopwith Camel. Once you become squadron
leader you can choose which of these aircraft to fly.
HAT IN THE RING
In this campaign you play the part of Eddie
Rickenbacker. Your objective is to equal or exceed
his achievement of scoring 26 victories and becoming
leader of the 94th ‘Hat in the Ring’ Squadron.
Rickenbacker finished the war as America’s ‘Ace of
Aces’ and won the Congressional Medal of Honor.
In this campaign, the German Army is being driven
back by Allied attacks but the German Air Service is
still a formidable foe - especially since the crack
fighter units have been grouped into
Jagdgeschwaders and issued with the Fokker DVII,
possibly the best all round fighter of the war.
This campaign features the Nieuport 28 and the Spad
XIII as the flyable aircraft.
GETTING STARTED IN A CAMPAIGN
To start a campaign choose Campaign from the
options screen. Click on the large arrows to cycle
through the four campaigns available. Once you have
chosen the campaign you wish to play, confirm your
choice by selecting the Medal icon.
Page 14
The Introductory Campaign Screen
This screen presents you with a basic overview of the
campaign on a clipboard. On the right hand side of
the screen there are a number of icons which can be
selected:
Gunsight
Select this to review the campaign objectives.
1st
Displays the briefing for the first mission.
Pencil/Paper Enlist
Allows you to enlist for this campaign.
Medal
Select this to start the campaign.
Arrow & Cross
Return to the previous screen.
Selecting the medal will start an animated sequence.
When this finishes you will find yourself in the
cockpit flying the first mission of the campaign. The
animated sequence can be terminated at any time by
pressing the space bar. At the end of a campaign
mission you will be given a report on what occurred.
Select the TICK to continue the campaign. This will
lead you to the main campaign screen.
The Main Campaign Screen
This screen allows you to decide how to conduct the
CHAPTER 1 - GAME OVERVIEW
rest of your campaign by letting you select missions,
alter your squadron formations, read news events and
examine mission maps. On the top right of the screen
there are a number of selectable icons:
Medal
Select this icon to fly the currently selected mission.
You will start the mission in the cockpit of your
aircraft. At the end of the mission you will be given a
summary of what occurred.
Mission Selection
The method of selecting a mission is different in each
of the campaigns.
In the Flying Corps Gold campaign, the Left/Right
arrows can be used to cycle through the three areas to
patrol: Arras, Cambrai and Douai. Douai patrols are
behind friendly lines and are therefore the easiest.
The Cambrai area will be the most difficult because it
is patrolled by the 56 squadron.
In Hat in the Ring campaign you will have no choice
initially in selecting missions. Once promoted you will
be able to choose which type of mission you wish to
fly - balloon busting, escort, patrol or roving.
In the Spring Offensive campaign your missions are
determined for you.
The Cambrai campaign requires you to plan your
mission by positioning waypoints on the map.
Shield
Selecting the shield brings up the squadron
information screen and preferences screen. Squadron
information is where you plan the details of your
mission. This allows you to ensure that the squadron
is using a suitable formation for the mission, that the
correct pilots are assigned and that they have been
issued with necessary orders.You can also access the
Paintshop, where you can assign markings and
insignia to the aircraft under your command.
News
Selecting this icon brings up news about events
Gunsight
1st
Pencil/Paper
Enlist
Medal
Arrow &
Cross
Shield
News
13
Page 15
CHAPTER 1 - GAME OVERVIEW
occurring in your area. This can give useful
information on local enemy activity.
Map
Select the map icon to see a map of your local area.
Map
Arrow/cross
Medal
Computer Joystick
Paintpot Shield
Arrow
14
Disk
Use this to obtain information about your patrol
route, ground targets and balloon activity. In the
Cambrai campaign you will need to use the map to
plan your missions.
Disk
Selecting the disk allows you to save the game to a
specified drive or directory.
Arrow/cross
Quit the current campaign
Selecting either the shield icon or the map icon takes
you to further screens which allow you to configure
the setup of your squadron or plan the campaign
using a mission map. These further screens are now
discussed in more detail.
The squadron screen
This screen is accessed by selecting the shield icon on
the main campaign screen. There are a group of
selectable icons in the top right corner of the
squadron screen:
Medal
Selecting this icon takes you directly into flying a
mission.
Computer
Select to adjust difficulty settings and to configure
sound and control devices.
Joystick
Select to configure the controls on your joystick.
Paint Pot
Selecting this icon takes you to the Paintshop, where
you are able to assign individual colours and
markings to your squadron’s aircraft.
Shield
This icon transfers you to the squadron information
screen, and allows you to configure squadron
formations and select personnel. You will be able to
assign aircraft and pilots for today’s mission, set the
formation to be used and issue the pilots with their
instructions.
Disk
Select this icon to save the game.
Arrow
Returns control to the main campaign screen
Selecting the shield icon leads to the squadron
information screen:
The squadron information screen
There are a number of selectable icons in the top right
of the screen:
Right/Left Arrows
Select the arrows to view the possible squadron
formations for your next mission. The formations are
shown as flights on the main part of the screen, with
each flight of the squadron in a separate box. Select
the shield icon if you want to change the number of
aircraft or pilots in the flights. You can change the
formation by clicking on the right/left arrows on the
top right of each flight formation box.
Shield
Select the shield if you wish to transfer to the flight
assignment screen, which allows you to select pilots
for today’s mission and to issue new pilot orders.
Arrow with Cross
Select this icon to return to the previous menu
without accepting any squadron changes.
Arrow
Select this icon to confirm any squadron changes you
may have made, and go to back to the previous menu.
The orders for each flight are displayed in a grid at
the bottom of the screen. Any order can be changed
by selecting it. A clipboard will appear and new
orders can be chosen.
Page 16

SQUADRON PLANNING AND PILOT ASSIGNMENT
SCREEN
On this screen you can view the pilots in your
squadron and their current assignments. Pilots are
attached to A, B or C Flight (or Staffel) or are
unassigned in the reserve. New pilots appear during
the course of a campaign, and their quality will
depend on the morale of your squadron. The higher
the morale, the better the quality of the new pilots
arriving. Many of the areas on this screen are
selectable:
Pilot slots
Each named pilot occupies a slot within one of the four
flight boxes. You can move pilots within flights, to a
different flight or to and from the reserve. Select the
pilot you wish to move and then select the slot to which
you wish to move him. If that slot is currently occupied
CHAPTER 1 - GAME OVERVIEW
by another pilot then they will swap positions.
Flight select
Select or deselect an entire flight (or staffel) by
selecting the tick/cross in the left hand corner of the
flight’s box. This will determine whether or not the
flight will take part in the next mission.
Pilot select
Select or deselect a pilot by clicking on the left hand
column to the left of his slot. If a pilot is selected then
his numbered plane will appear in the flight’s
formation box in the centre of the screen.
Flight arrows
Select the left/right arrows on any flight box to view
the names,skill level, position and orders of each pilot
in the flight. Select the left arrow once to view
information on the pilot’s morale, character, skill and
current number of kills. Select a second time to view
details on a pilot’s position in the current formation.
You will be given his range from the flight leader,
bearing from the leader and altitude difference.
Select a third time to bring up the current orders
assigned to the pilots in the flight. Select the orders
to display a clipboard which lists the orders which
may be issued. Click on the order you wish to give to
the pilot. Note that you cannot assign orders to the
flight leaders.
Formation arrows
Select the left/right arrows on the small formation
box of each flight to cycle through the different
combination of available flight formations.
Tick
Select the tick when you have completed your
squadron planning.
It is important that you assign individuals correctly.
Poor planning will lead to increased losses and this
will have a detrimental effect on the moral of the
pilots in your squadron. It is usually unwise to assign
a rookie pilot to a rear or exposed position as this will
put the pilot in extra danger. On the other hand you
Shield Staffel /flight
Arrows, +/- in
circles
arrows
Aircraft over
double arrows
Tick Aircraft
Top wing
Rudder &
engine cowling
Bottom wing Fuselage
Elevators
Head/Eagle
insignia
15
Page 17
CHAPTER 1 - GAME OVERVIEW
Waypoint
German airfield
Allied airfield
Field artillery
Important bridges
Active balloons
Tank depot
Tank convoy
Supply dump
Command centre
16
might wish to have your most experienced pilots next
to you! Make sure that you have a clear
understanding of the mission objectives as this will
indicate the difficulty of the mission and therefore the
strength of the squadron required to accomplish
the task.
Paintshop screen
Select the paintpot on the Squadron screen to visit
the Paintshop. As it’s name suggests, it is where you
can decorate your squadron’s aircraft. It is essential
that friendly aircraft and their pilots are swiftly
identified. Without radios the best way of facilitating
this is to give each pilot an aircraft with a unique
marking. At the top right corner of the screen there
are a number of selectable icons:
Shield
Selecting the SHIELD causes all aircraft in the
current flight or squadron to be painted in the
leader’s colours. This icon is disabled if the current
pilot is not a flight or squadron leader.
Staffel/Flight arrows
Select the arrows opposite the name of the staffel or
flight to toggle through the flights.
Pilot arrows
Select the arrows to cycle through the individual
pilots of the chosen flight.
Arrows,+/- in circles
Select this icon to rotate and zoom the view of the
aircraft in the paintshop.
Aircraft over double arrows
Select the aircraft icon to change the aircraft type in
the paintshop.
Tick
Select the tick to confirm your paintshop orders.
Down the right hand side of the screen, underneath
the above icons, there are further selectable icons
which indicate features that can be cycled by selecting
the up and down arrows next to them:
Aircraft
Selects the eight overall paint schemes for the
entire aircraft.
Top wing
Selects the colour scheme for the top wing only.
Rudder & engine cowling
Selects the colour scheme for the engine cowling on
rotary aircraft or tail fin if stationary-engined.
Bottom wing
Selects the colour scheme for the bottom wing.
Fuselage
Selects the colour scheme for the fuselage.
Elevators
Select the colour scheme for the elevators.
Head/Eagle insignia
Select the individual insignia for fuselage markings.
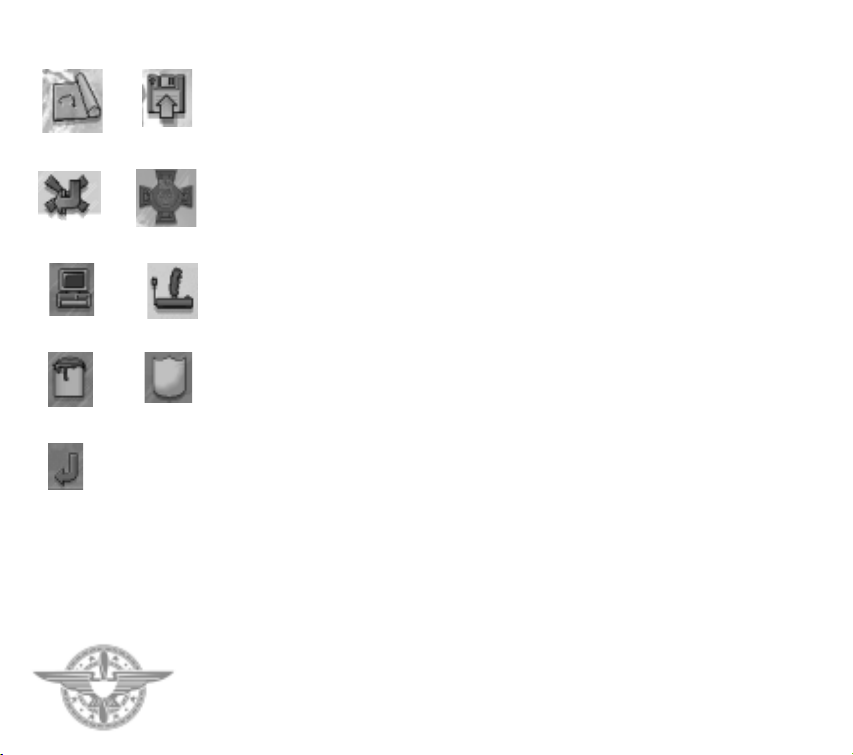
THE MAP SCREEN
The map screen is accessed from the main Campaign
screen, and displays waypoints and the course of your
flight path. The flight path is displayed as a line
joining the waypoints. Each map screen also displays
information about strategically important Allied and
German facilities and munition dispositions. The
symbols you will find on the map screens are as
follows:
Page 18
Each of these symbols will highlight when underneath
the pointer. If the symbol is in a square box then it is
a German feature, if in a circle then it
is an Allied feature.Selecting any symbol will open a
dialogue which gives further information about the
feature as well as its map location.
The map screen is especially useful during the Tank
Battle Campaign, where it must be used to alter your
patrol route by clicking on the waypoints shown and
dragging them across the map to the position
required. You can drop the waypoint icons on top of
other icons on the map.The waypoint action will then
change from patrol to attack, and your Jasta will
attack the item represented by the icon. When attack
waypoints are set, it is possible to use the F3 key
during flight to padlock on to the target.
Note that you will have to attack ground targets in
this campaign to make maximum impact on the
course of the ground fighting.To gain information on
the current status of ground units, select them with
the pointer.
In the Flying Circus, Spring Offensive and Hat in the
Ring campaigns, the waypoint positions cannot be
altered. However selecting a waypoint will lead to
further information about that point. Click on the
buttons on the panel in the top right of the map to
gain additional information on places of interest, such
as the locations of active balloons and the location of
airfields and bridges.
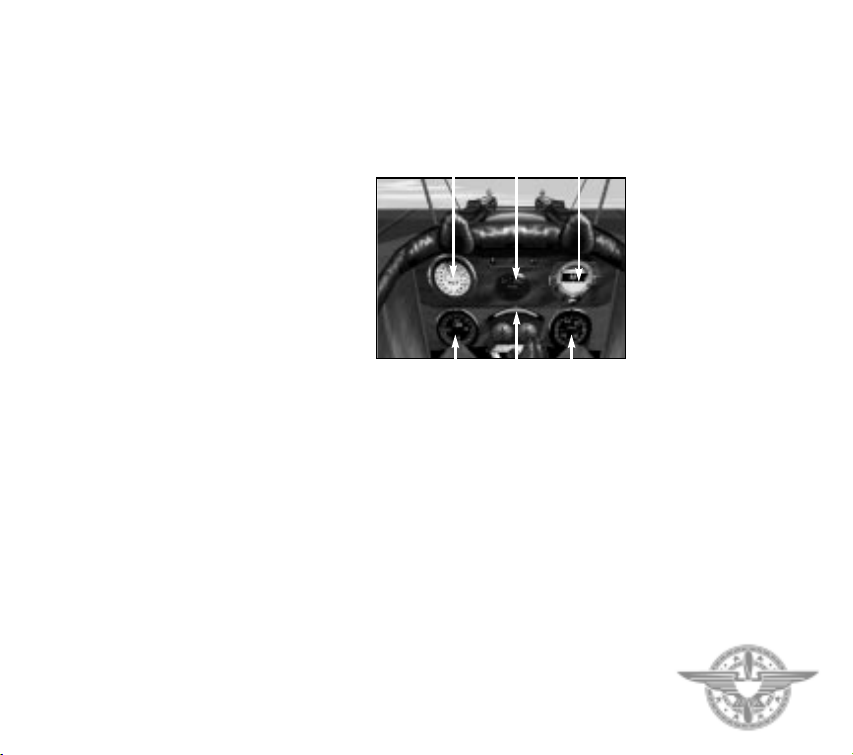
1.7 THE AIRCRAFT COCKPIT
Players should note that not all cockpits have the
same instruments.
To receive further information on your aircraft’s
flight status press the i key. There are 3 levels of
information which may be obtained by pressing the i
key consecutively three times. Pressing it a fourth
time will remove all information from the screen.
Pressing i once gives stall warning lights (your aircraft
is in danger of stalling if either of these lights is not
green), current altitude (height above ground),
current bearing (course), machine gun ammunition
left, bombs remaining and current thrust (or rpm).
CHAPTER 1 - GAME OVERVIEW
Pressing i again gives tactical information (where
your target is for instance).
Pressing i the third time gives information on the
current view selection being used.
ALTIMETER
RPM SLIP INDICATOR
FUEL
COMPASS
SPEED
17
Page 19
CHAPTER TWO - FLYING
2.1 THE AIRCRAFT
Of the many aircraft featured in “Flying Corps Gold”,
six can be flown by the player. These six have been
chosen to represent the two main types of aircraft
available towards the end of the war. The rotary
engines group, which includes the Sopwith Camel,
Fokker Triplane and Nieuport 28, were highly
manoeuvrable and agile. However, when compared
with the stationary engined group, they were slow
and underpowered.
The stationary engined group,which is represented by
the SE5a, Albatros D3 and Spad 13, were high
performance aircraft with high speeds and good
sustained climbs.These aircraft were relatively stable
in flight and were generally easier to control than
rotary engined aircraft.
The rotary engine was very temperamental and
vulnerable to mistreatment. For instance, an aircraft
fitted with a rotary engine could not be left to tick
over. To avoid “meltdown”, the aircraft had to be
airborne within minutes of ignition.
Fuel delivery on the rotary engine was complicated.
The pilot had to balance the air and fuel intakes and
even then there was not a great range of control. In
fact, on the early rotary engines the pilot had a blip
switch: he could choose between no power and full
power. In Flying Corps Gold we have provided a
straight forward set of controls for power. It can be
changed in steps of one or ten percent. In addition, by
using the comma (0% thrust) and fullstop (100%
thrust) keys, it is possible to “blip” the engine.
However it was not just the fuel delivery system that
made the rotary engined aircraft difficult to master.
The huge mass of the engine rotating at high speed
gave rise to very large gyroscopic effects which forced
the aircraft to nose down in right turns and nose
upwards in left turns. These large gyroscopic forces
caught many inexperienced pilots by surprise and
were the cause of many fatalities during training.
Fortunately in Flying Corps Gold you will not have to
deal with the gyroscopic effect when doing your
initial training. The default aircraft model is fairly
neutral and, to some extent, it behaves like a modern
single prop two-seater. There are some differences
though. For instance, in the default model even
slipstream and torque effects are turned off. Also,
because World War One aircraft were tail heavy, you
will find that at the beginning of a mission you will
need forward pressure on the stick to fly level.
Generally this tail heaviness weakens during the
course of a mission as fuel usage gives rise to a shift in
the centre of gravity.
To see the range of effects that can be introduced into
the flight model, select Preferences from the main
menu and then choose the “aircraft on a grid” icon.
Some effects are more apparent on certain aircraft.
Obviously the rotary engined aircraft display the
greatest change in manoeuvrability when the
gyroscopic effects are turned on.
The co-ordinated rudder option is less obvious. This
option is designed to balance the adverse yaw effect
that occurs during a roll. Consider a clockwise roll as
viewed from the pilot seat. The roll occurs because
the lift on the left wing is greater than the lift on the
right wing. Now there is always a drag associated with
a lift and the bigger the lift the bigger the drag. This
drag acts to pull the wing backwards.The left wing has
the bigger lift and so it has the bigger drag with the
result that the aircraft yaws to the left.
The effect is called adverse yaw because the aircraft
ends up turning in the wrong direction. If a pilot
wants to turn to the right, he will roll the aircraft
clockwise. If the adverse yaw effect is not balanced
then the aircraft yaws to the left.
CHAPTER 2 - FLYING
19
Page 20

CHAPTER 2 - FLYING
20
In modern aircraft adverse yaw is designed out of the
aircraft. However the effect was present on early
aircraft and is most noticeable on the SE5. Adverse
yaw is counteracted by use of the rudder. If you don’t
have rudder pedals we suggest that you enable coordinated rudder.
2.2 FIRST FLIGHT
“Always wear a belt or harness when flying the
Sopwith Camel as there is a tendency to leave
the seat when diving vertically” - Pilots’ Notes
Select Preferences from the main options menu and
then select the joystick icon. Configure your joystick
by following the on-screen instructions.
From the main menu, select scramble. Choose to fly
the “Camel” aircraft and the “First Flight” mission.
Your first flight starts at Boiry St Martin airfield
which is south of the city of Arras.As you enter the
cockpit, the power is already set to 100% and the
speed is increasing. Press the i key to get the general
information line at the top of the screen. Most of the
data provided on the information line is available
from the cockpit instrumentation. However for your
first few flights, at least, we suggest that you use the
information line because it is easier to interpret.
At about 20mph the airflow on the tail is sufficient for
the tail to lift off the ground. The aircraft will pick up
speed quicker now that the tail is not dragging on the
ground. At about 40 mph gently pull back on the stick
and the aircraft should leave the ground.
Use the stick to control the speed to 55-60mph. This
range of speed will give the best climb. To speed up
push the stick forward and to slow down pull the stick
back. Leave the power setting at 100%.
At 500ft push the stick forward and try to fly straight
and level. Don’t forget that because World War One
aircraft were tail heavy, you will need forward
pressure on the stick to fly level.
At this stage, you should be over the main railway
going south from Arras.Press m to get to the in-flight
map screen. The aircraft icon represents your current
position. The numbered icons represent the
waypoints for the current mission. In this case the
mission is a cross country familiarisation route.
Starting at Boiry St Martin, the route takes you down
the Ancre Valley to the town of Albert, then follows
the road up to Bapaume before turning north to
return home.
During the war, new pilots were sent up to get
familiar with the surrounding country side. You
should do the same so that you are able to find your
way home after a mission. Boiry St Martin should be
relatively easy to find because of the railway junction
to the north of the airfield.
Return to the cockpit by clicking on the icon or
pressing the return key. Now press p to pause the
game and try to get your bearings. The number pad
keys or joystick coolie hat can be used to rotate the
view around the cockpit. The view out the front is
restricted by the engine and guns and so a view to the
side is often better when navigating.This is especially
true when the aircraft is rolled slightly.
To get an even better view of the surrounding area,
press F6 to get an outside view. The plus and minus
keys can be used to zoom in and out when on
the outside view. Press F7 to return to the cockpit.
Press 5 on the number pad to reset the view to
facing forward.
Press p to unpause the game and try some of the
other views available on Flying Corps Gold. F8 gives
a forward view with the cockpit removed, F9 gives a
flyby which drops into a chase view and F10 gives a
satellite view. Keys F1 to F5 are used for a set of
Page 21
padlock views.These will be described later when the
mission involves more aircraft.
Try a gentle turn by rolling the aircraft about twenty
degrees. Pull back gently on the stick to maintain
altitude.
At this stage you can either try the suggested cross
country route, get used to the aircraft or explore the
landscape.You have about two hours of fuel.
When TAB is pressed the view changes to the map
and the aircraft will follow the waypoints in
accelerated time. Accelerated time is disengaged
manually by clicking on the return icon.
Press F12 during flight to access the Preferences.
Flight difficulty factors, like the gyroscopic effect,can
be turned on and off during flight.
When exploring the landscape fly high, 3000ft at least,
to get your bearings. World War One pilots would
then fly really low,“chasing” the contours.Around the
Somme area the ground is quite flat and so you have
to go really low when contour chasing. The height
figure on the information line is measuring the height
above the ground. Try to keep the reading below 20ft.
When you are ready to land, approach the field on a
gentle glide (5-10 degrees) with the power off. You
should aim to cross the airfield boundary at about
50mph and 50ft off the ground. Pull back gently on
the stick. The speed should drop and contact with the
ground should be made at under 40mph. When the
speed has dropped to below the stall, the stick can be
pulled back so that the tail makes contact with the
ground. This will increase the deceleration.
Use short bursts of power to taxi the aircraft and steer
with the rudder. It is also possible to steer on the
ground by making use of the adverse yaw effect
mentioned earlier.
In Flying Corps Gold it is not necessary to land at the
end of each mission. You can exit the mission at any
point by pressing alt-x.
2.3 COMBAT MANOEUVRES TRAINING
In your first flight, the recommended manoeuvres
were gentle, so you should not have lost control of the
aircraft. However during combat you will be flying
much closer to the “edge” and stalling and spinning is
very likely.The purpose of the next training flight is to
show you how to lose control, recover control and
avoid losing control.
Fly the “First Mission” option again. Make sure that
all the flight difficulty options, except spinning, are
disabled. The spinning option should be enabled.
After take-off press the u key a few times. This key
elevates the aircraft 500ft for every key press.This is a
very useful cheat because in reality World War One
aircraft took a long time to gain altitude.
Set up for straight and level flight and then reduce the
power to 0% but maintain the altitude by pulling
back on the stick. Over the course of a few seconds
you will have pulled the stick back as far as it will go
and the speed will slowly drop to around 35mph. At
this point the aircraft will either stall or spin.
If you entered the maneuver flying absolutely straight
and level then the aircraft will stall. This means that
the nose of the aircraft will drop even though you are
pulling back on the stick. Recovering from a stall is
easy: release the stick, wait for the airspeed to build
up to about 50mph and then gently pull back on the
stick.
If the aircraft was rolling or yawing when you entered
the maneuver then the aircraft is more likely to spin.
CHAPTER 2 - FLYING
21
Page 22
CHAPTER 2 - FLYING
22
The spin can be guaranteed by applying and
maintaining full rudder when the aircraft enters the
spin. Recovering from a spin is a little more tricky:
release the stick and apply full rudder to counter the
spin, wait for rotations to cease and then release the
rudder. Allow the airspeed to build up to about
50mph and then gently pull back on the stick.
In the above example, the spin occurred at low speed.
In combat, spins will generally occur at higher speeds.
Try this example: Select full power and gain some
altitude by pressing the u key a few times. Roll the
aircraft into a vertical or 90 degree bank. The aircraft
will start to lose altitude, so pull back on the stick.
Keep pulling on the stick to tighten the turn.At some
point you will lose control and, depending on aileron
input, the aircraft will either spin in or out of the turn.
Neither situation is desirable in combat and so we
need to consider how to maintain control rather than
how to recover once control is lost.
If you are going to maintain control of your aircraft
during air combat, some understanding of the theory
of flight is necessary. Many books have been written
on the subject and we have recommended a few in the
bibliography. We cannot hope to do justice to the
subject in a few lines, but we do have the advantage
that we can let you try things out on the flight model.
First though, we need to define some terms. An
aircraft wing is design to provide a lifting force.When
this force is greater than the weight, the aircraft will
go up. The amount of lift provided by the wing
depends on the following factors:
Shape Some wings are better lifters than others.
Velocity squared: The faster the air flow the bigger
the lift.
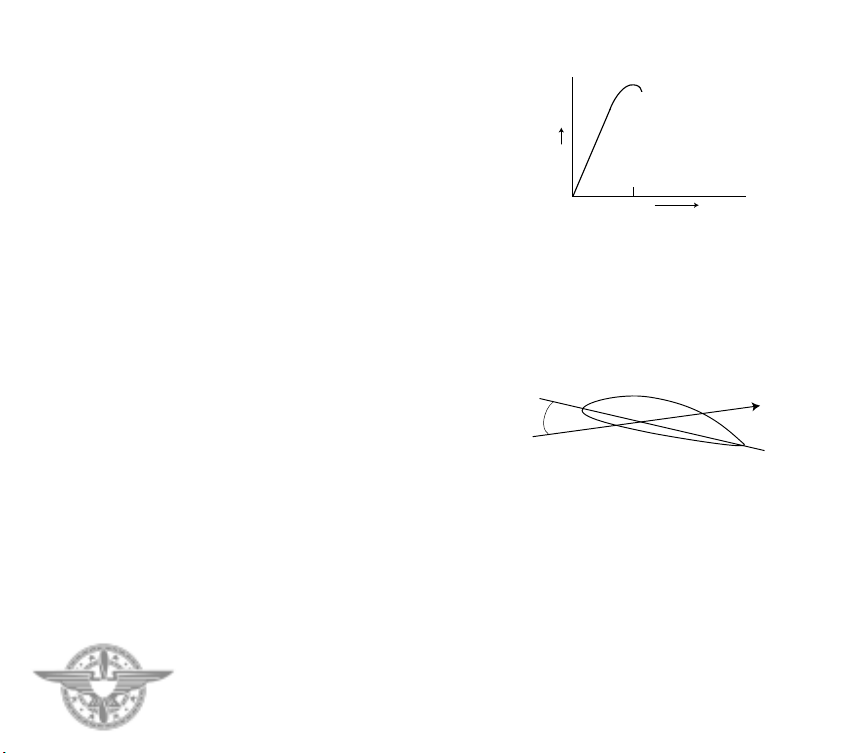
Angle between the wing chord and the airflow:
This angle, which is shown in the diagram, is
commonly called the angle of attack.
lift
angle of attack
If an aircraft which is flying straight level slows down,
then there is a tendency for the lift to reduce and the
aircraft will go down. To maintain level flight , the pilot
compensates for the loss of speed by increasing the angle
of attack. This is done by pulling back on the stick. At
some point though, increasing the angle of attack no
longer results in an increase in lift. At this critical point
which is known as the stall, the lift actually starts to
decrease as the angle of attack increases.
wing cross-section
direction of
angle of
attack
In Flying Corps Gold the top general information line
contains angle of attack indicators for both left and
right wings:
Indicator Colour Angle of Attack Meaning
green <13
not stalled
yellow 13-15
near stall
pink 15
at stall
red >15
stalled
airflow
wing chord
O
O
O
O
Page 23
If the conditions of both wings are indicating red then
both wings are stalled. If only one indicator is red
then only one wing is stalled and the aircraft will spin
because the lift on the two wings is not in balance.
To maintain control, the wings should never be
allowed to enter the stall zone. In a tight turn the
indicators should be yellow. After a few combat
missions you will develop a feel for the aircraft, you
will recognise the initial signs of a spin and won’t have
to rely on the indicators.
Practice vertical turns by simultaneously rolling the
aircraft to close to 90 degrees and pulling back on the
stick until the indicators turn yellow. A tendency to
roll out of the maneuver is ideally compensated for by
using the rudder. Aileron can also be used but you
then run the risk of stalling the top wing and spinning
out. Maintain full thrust and balance the aileron,
elevator and rudder controls, to turn as tightly as
possible with the minimum of altitude loss. Push the
aircraft to the limit until you can turn on the “edge”
but retain control.
If your aircraft will not spin even when you have
applied full elevator in a tight turn then you need to
recalibrate your stick. When the stick is calibrated
properly it is not possible to maintain control with full
elevator applied.
2.4 ADVANCED COMBAT MANOEUVRES
‘He must be able to loop, turn his machine on its back,
and do various other flying stunts - not that these are
actually necessary during combat but from the fact
that he has done these things several times he gets
absolute confidence, and when the fight comes along
he is not worrying about how the machine will act. He
can devote all his time to fighting the other fellow,the
flying part of it coming instinctively.’ - Bishop
In a combat situation, most fighter pilots considered
anything more than a tight turn to be tooexotic.
Richthofen was not interested in aerobatics and said
that he would never do a loop. He was more
interested in a positive attitude and shooting ability.
However some manoeuvres are useful and as Bishop
said, practising aerobatics gives the pilot confidence.
You do have to be very careful when performing
aerobatics in combat.There is the danger that you will
concentrate too much on the maneuver and not
enough on what your opponent is doing. Also many
manoeuvres will slow the aircraft down and a slow
aircraft is very vulnerable in combat. Even if you can
see that your opponent is not in a shooting position, it
is still dangerous to slow down. There are other
aircraft in the sky.
THE HALF ROLL
Yeates described this as the “only stunt useful in
fighting” and in World War II, this maneuver became
known as the Split S. The stunt is useful when you
need to shake someone off your tail. It is performed
by rolling the aircraft on its back and then pulling
back on the stick.
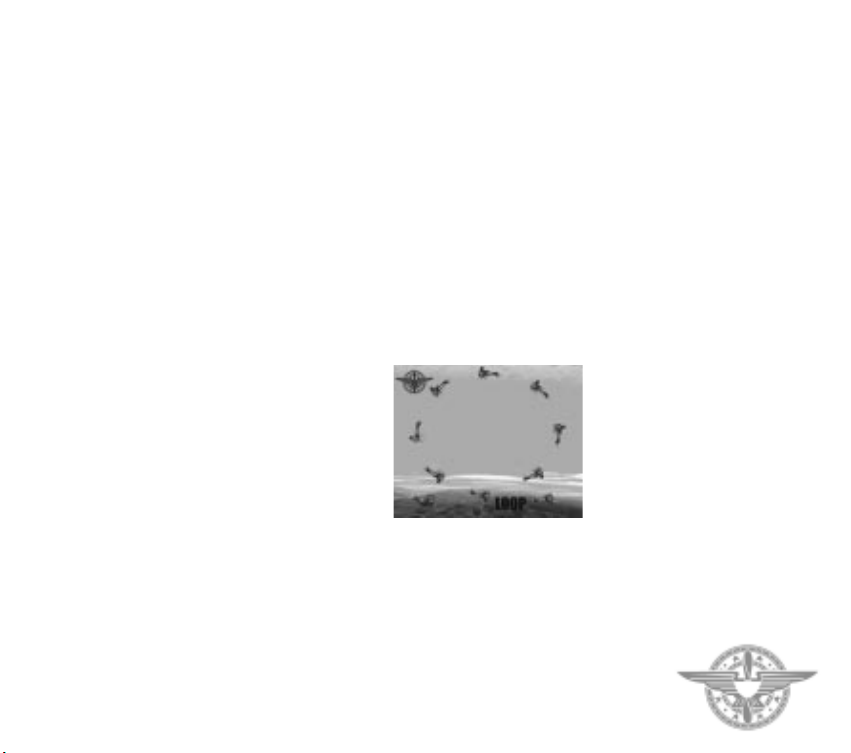
LOOP
This maneuver is seldom used in combat. It simply
involves pulling back on the stick and keeping it there.
The aircraft will climb.At the top of the manoeuvre, the
aircraft will be inverted and facing in the opposite
direction. Keep pulling back on the stick and the aircraft
will dive. Eventually it will be right side up and flying on
its original heading. A loop is best entered from a slight
dive and with relatively high speed. In the stationary
engined aircraft this maneuver is straightforward,
CHAPTER 2 - FLYING
23
Page 24
CHAPTER 2 - FLYING
whereas in the rotary engined aircraft, plenty of left
rudder will be required at the top of the maneuver
whilst inverted.
In both types of aircraft you will need ‘to feel’ the
amount to pull back on the stick. Too much or too
little may result in a stall.
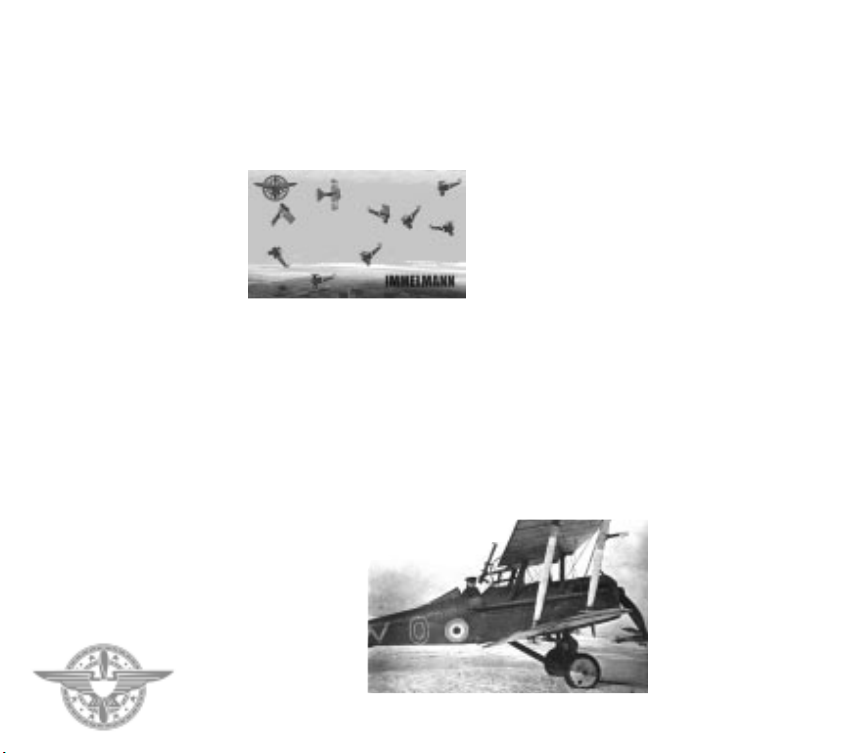
IMMELMANN TURN
This maneuver is used to reverse your direction and
there are two versions. In the first, pull back on the
stick and keep it back, as if you were going to loop.
When the aircraft is inverted and facing in the
opposite direction to which it commenced the
manoeuvre, roll the aircraft the right way up. This is,
in effect, the half roll in reverse.Although it has the
advantage of gaining height whilst reversing
direction, it should be used with circumspection in
combat, as the aircraft is slow and vulnerable near the
top of the manoeuvre.
There are many variations of the second version of
the manoeuvre. In its purest aerobatic form it
becomes the “Hammerhead”. However, this is no
good in combat because it involves going very slowly
at the top of the climb. In fact, the combat maneuver
is more like a Wingover: pull back on the stick and
immediately apply rudder and aileron in the same
direction. It is possible to intentionally stall the lower
wing to increase the rollrate. On rotary engined
aircraft, the pull back will result in a yaw to the right
which will make right turns faster.
DIVE AND ZOOM
This maneuver consists of diving down on your
opponent and opening fire at about 150m. When the
range is about 50m, stop firing and pull out of the
dive.As you fly over your opponent, he could pull up
sharply and get in a snapshot at you. To avoid this,
apply a little roll when pulling out of the dive.At the
end of the maneuver you should have regained your
height advantage over your opponent.
Dive and Zoom tactics suit the stationary engined set
of aircraft. These aircraft have a high performance
and can outclimb the lower powered rotary engined
aircraft. However, rotary engined aircraft are better
in turning fights.
24
Page 25

CHAPTER 3 - TACTICS
‘Always above, seldom on the same level, never
underneath.’ - Mannock (61 - 73 victories)
The function of aerial tactics is to gain an advantage,
and the good patrol leader will never attack without
an advantage. Many of the factors to consider when
assessing advantages are just as important today as
they were in World War I. It is probable that
maintaining the element of surprise will always be the
most significant factor. However, the patrol leader
should also consider firepower, aircraft performance,
pilot skill and numerical advantage.The advantage of
height though is no longer as important as it was.
During WWI, aircraft had little excess power and
gaining height took a long time. In WWI the pilot of
the higher aircraft often had the luxury of being able
to choose whether he should enter the fray or
disengage. Mannock’s simple instruction can be
paraphrased as... never attack without an advantage.
By 1917 success or failure in air combat was largely
dictated by the skill and ability of the patrol leader.
i.e. success was to do with choosing the time to fight
rather than being good at fighting
‘The commanding officer is responsible that neither
he nor any of his pilots are surprised by the enemy.If
he cannot see to that, he is no good as a leader.’ - von
Richthofen (80 victories)
Tactics can largely be divided into two sections. Firstly
those used by the patrol leader to approach the
enemy and gain an edge for the forthcoming dogfight,
and secondly those used by an individual during the
dogfight. Clearly, if the patrol leader has done his job
well, there will be no dogfight. The enemy will have
been surprised and destroyed before he has had a
chance to react.
‘The best way to shoot down an enemy aircraft was to
surprise him and get as close as possible before
opening fire.’ - Rochford (29 victories).
Fighter pilots in World War I had no previous
experience to draw on to guide them in air combat
and so had to devise the best methods for attack and
defence themselves. The earliest example of a set of
rules for air combat was the ‘Dicta Boelcke’. These
were drawn up by Oswald Boelcke (40 victories),
Germany’s leading air ace at the time and the guiding
force behind the formation of the fighter Jasta
(squadron) in 1916. Although he was killed later in
the year, the Jastas followed his principles and
decimated the Royal Flying Corps (RFC) during
‘Bloody April’ 1917.
As the war progressed, air combat became
more complex, and solo patrols became a thing of the
past. Flying in formation and teamwork became
more important.
‘German air strategy was intended to be scientific;
they were unwilling to attack except from a winning
position derived from the advantages of height,
surprise and numerical superiority, and they did not
hesitate to avoid or run away from combat when
these factors were not in their favour. They also
avoided crossing the lines, to have the further
advantage of fighting above their own terrain. ...They
were also adopting the idea of large circuses, flying in
layers, and when you attacked one of the layers, it
CHAPTER 3 - TACTICS
25
Page 26

CHAPTER 3 - TACTICS
26
melted away eastwards while the people above dived
on you.’ Yeates (5 victories)
It is this period of intensifying air combat that Flying
Corps Gold portrays. To be successful, a player will
have to master the arts of both patrol leading and
individual combat. Many Allied fliers regarded ‘Mick’
Mannock as the expert in both these fields,so it seems
appropriate to set down his rules.
MANNOCK’S RULES
‘Pilots must dive to the attack with zest, and must
hold their fire until they get within one hundred yards
of their target.
Achieve surprise by approaching from the East (i.e.
from the German side of the lines).
Utilise the sun’s glare and clouds to achieve surprise.
Pilots must keep physically fit by exercise and the
moderate use of stimulants.
Pilots must sight their guns and practise as much as
possible as targets are normally fleeting.
Pilots must practise spotting machines in the air and
recognising them at long range, and every aeroplane
is to be treated as an enemy until it is certain it is not.
Pilots must learn where the enemy’s blind
spots are.
Scouts must be attacked from above and 2 seaters
from beneath their tails.
Pilots must practise quick turns, as this maneuver is
more used than any other in a fight.
Formation flying at 25 yards apart must be practised.
Pilots must practise judging distances in the air as
these are very deceptive.
Decoys must be guarded against - a single enemy is
often a decoy - therefore the air above should be
searched before attacking.
If the day is sunny,machines should be turned with as
little bank as possible, otherwise the sun glistening
on the wings will give away their presence at a
long range.
Pilots must keep turning in a dogfight and never fly
straight except when firing.
Pilots must never, under any circumstances, dive away
from an enemy, as he gives his opponent a nondeflection shot - bullets are faster than aeroplanes.
Pilots must keep their eye on their watches during
patrols,and on the direction and strength of the wind.’
‘Fighting tactics varied with circumstances;
there were rarely two identical situations
... consequently adjustment of tactics had to be made
to suit the occasion. However, the main principle
remained the same: the enemy must be surprised and
attacked at a disadvantage, if possible with superior
numbers so the initiative was with the patrol. To
achieve this objective, it was sometimes necessary to
spend over half the time of the patrol maneuvering
the enemy formation into an unfavourable position.
Having got it there, pilots must dive to the attack with
zest ... The combat must continue until the enemy has
admitted his inferiority, by being shot down or
running away’ - Mannock
FORMATIONS
‘Formation flying ... was our great forte, our
compactness and drill often intimidating superior
formations.’ - Fullard (40 victories).
World War I aircraft did not carry radios, and apart
from some very basic signals such as flares and wing
waggling, communication was impossible once
airborne. Therefore pilots must be briefed,
Page 27

instructions issued and the formation to be flown set
out before the patrol leaves the ground. In some
cases the requirements of the mission and the
availability of pilots and aircraft will dictate the
formation to be used.
‘The formation adopted must admit of quick and
easy maneuver by the formation as a whole.’
- RAF Instructions
Ideally a formation should be stacked in layers, with
the leader in front and all other aircraft above and
behind him. The rear aircraft can convert this altitude
into speed and close up with the leader when
required. The leader is the strike force and
responsible for manoeuvring his patrol into a position
of advantage. His followers provide a look out and
cover his tail. When setting up the formation, any
novices should go to the immediate right or left of the
leader as these are the safest positions.The tail is the
most vulnerable area of the formation and this is
where experienced pilots should go.
‘Within the flight, each [pilot] has a distinguishing
emblem on his machine.’ Richthofen
Rapid identification of aircraft and pilots is vital in
a dogfight, and aircraft should be clearly marked
to help achieve this. This is especially true of the
leader’s aircraft.
THE APPROACH
‘The great thing is to see things.... Many a fresh pilot
is shot down before he even knows there is a Hun
within miles ... practise looking round you so that you
study every square foot of the earth and sky every
two minutes.Watch the region of the sun especially.’ Yeates
It is estimated that 80% of pilots shot down never saw
what hit them until it was too late. Spotting the enemy
before he spots you is therefore of crucial importance
in becoming a successful airfighter.
‘Whenever you’re over the lines, you have to keep
twisting your neck in all directions every minute, or
you’re sure to be surprised.’
- Rickenbacker (26 victories)
The very best World War I pilots
could possibly glimpse an enemy
aircraft at about 5 miles
(approx. 8,000 m). Most pilots
could start to pick out a target at
around half this. In Flying Corps
Gold the range at which there is
a reasonable chance of spotting
an aircraft is around 2 1/2 miles.
When aircraft are spotted the
first thing to determine is who
and what they are. The leader
must fix their position,
maneuver his flight to gain an
advantage and gain more
information.
If the aircraft is under fire
from ‘archie’ - anti-aircraft or AA guns - , it may be
possible to deduce which side it is on, since German
AA shell bursts were black and the Allied white.
However, the situation is complicated by the fact that
the Germans developed a system of firing close to
their own aircraft in order to warn them of possible
attack, although these tended to be individual shells
rather than full barrages. Nevertheless, if the machine
is over friendly lines and being fired at, it is
reasonable to assume that it is hostile.
In the absence of ‘archie’, the following information
can be deduced from the numbers and action of the
unidentified aircraft:
A formation of six or more machines, flying on no
definite course = an offensive patrol of fighters.
A single machine low down, flying a regular oblong
course = a two-seat artillery observation machine.
A single machine low down, flying a very irregular
course = a fighter attacking ground targets.
A single machine, flying very high on a straight course
= a long distance reconnaissance mission.
A formation of six or more machines, flying at
medium altitude and two or three below them flying
a nearly straight course = a photographic patrol
with escort.
CHAPTER 3 - TACTICS
27
Page 28

CHAPTER 3 - TACTICS
28
Two large formations one above the other flying on a
straight course = a bombing mission with escort.
Depending on the aircraft’s position relative to the
front lines, it may be clear whether they are hostile or
not. The patrol leader should also be aware that
fighters often fly in stacked formations, so having
spotted one ‘layer’ he should check above and below
for more. Similarly, if a small group of aircraft is
behaving rather recklessly, they could well be ‘bait’,
with a large group of friends above them, ready to
pounce on any ill-considered attack, or they could
be part of a large fighter formation out ‘looking
for trouble’
‘Always remember it may be a trap!’
- Lufbery (17 victories).
To approach an unidentified aircraft, patrol leaders
should follow Mannock’s advice, and approach from
an unexpected direction, ideally using the sun and
cloud cover to gain a position of advantage. If in
doubt - climb! The patrol leader should be constantly
thinking ahead, planning his attack and keeping a
lookout for further aircraft.
‘Mannock planned every maneuver like a chess
player.’ - Jones (40 victories)
During the approach the target should be continually
observed. If it starts to climb or manoeuvre,one must
assume that it is hostile and experienced; if it carries
on undisturbed, it is either friendly or unaware; if it
dives for home, it can probably be attacked with
impunity ... unless it is bait!
‘Almost every evening we would find well-laid traps
set for us. It required careful manoeuvring to avoid
falling into them. Several times we did, and it took a
lot of trouble to get out safely. Four or five Huns
would come along and we would engage them. Then
suddenly as many as 15-20 would appear from all
angles and join in the fight.’ - Bishop (72 victories)
The leader is the strike force of the patrol. All other
aircraft are concerned with keeping a look-out. This
rule should apply no matter how many aircraft are in
the patrol. When the enemy is spotted, it is the patrol
leaders responsibility to decide what to do - attack,
maneuver or disengage.
‘It must be impressed on pilots that the group is the
fighting unit and not the individual.’
RAF Instructions
If the patrol finds itself being stalked, the decision
must be made whether to attack, maneuver or
disengage. This decision may well be determined by
the relative abilities of the machines involved, or by
the patrol’s mission. If the patrol’s aircraft are
superior, they can maneuver and attempt to turn the
tables. If inferior, a swift decision must be made
whether to immediately attack, which may be enough
to scare the attacker off, or to disengage. Ideally
the latter should be done by a climb towards
friendly lines.
ATTACK
Once in position the attack is commenced. The
purpose of the first attack is to destroy or scatter as
many of the enemy as possible, to minimise the effect
of a counterattack
‘The leader must always ensure that his formation is
well closed-up before attacking, giving the rear
machines time if necessary,so that all pilots can attack
their adversaries simultaneously.’ RAF Instructions
Against enemy fighters, the attack will ideally have
been launched from above and behind. The leader
will start to fire at his target at between 100 and 200
yards, and keep firing until collision is imminent.
Page 29

‘Mannock would take the leader [of an enemy
formation] in order to give his pilots coming down
behind him a better chance of an easy shot.’ - Jones
During an attack, opinion was divided on whether it
was better for pilots to concentrate on a single enemy
or each engage an individual target. It was important
to try and eliminate the enemy leader on the first
attack, yet at the same time, more targets engaged
tended to mean more casualties inflicted and greater
confusion. In addition, many pilots converging on a
single enemy tended to be worried more about
colliding with their friends than pushing the attack to
the limit. They had reason - there were far more
collisions in World War I air combat than in later
conflicts. Mannock and von Richthofen were both
of the view that it was not worth ‘ganging up’ on a
single target.
After attacking, the decision must be made whether
to stay and dogfight, entering a turning engagement
with the enemy, or to pull out in a zoom climb. ‘Dive
& Zoom’ tactics are generally safer for the attacker,
especially if he turns as he zooms, since he gains
separation from the enemy thereby minimising the
chance of a counterattack whilst preserving the
advantage of height, thereby allowing him to either
attack again or disengage. This decision may well be
influenced by the types of machines engaged. Rotaryengined scouts on the attack may prefer to stay
and enter a turning contest with a high performance
enemy.
If leading a smaller formation against a larger one, or
even flying alone, it is especially important that the
first attack should inflict considerable damage and
confusion. Care should also be taken to ensure there
is a safe retreat route. This could be a zoom climb to
safety,or by using the speed built up in a diving attack
a run for home. If the smaller formation cannot
launch an attack with these advantages, the decision
to engage should perhaps be
reconsidered.
Finally, a lone pilot could launch a
stealthy attack, ideally from behind
or below (although the surrendering
of the advantage of height is not
normally recommended). The object
of such an attack is to pick off the
rearmost enemy, hopefully without
the other enemy pilots noticing. It is
suggested that a lone attack should
only be contemplated if the
attacker’s aircraft has significant
advantage in either speed or climb or the lone pilot is supremely
confident in his own abilities!
THE DOGFIGHT
When two patrols meet with neither having
a positional advantage, a dogfight develops
fairly rapidly.
‘It was when five or six met five or six that real dog
fights occurred.’ - Yeates
When one formation has surprised another, a
dogfight will form after the initial shock has
dissipated. Formations tend to break up into a series
of one on one engagements with pilots desperately
trying to find a target, whilst avoiding becoming one
themselves! In such confused aerial melees there is
still a vital role for both teamwork and leadership. A
patrol should fight as a team, with pilots looking to
protect one another’s tails,and the leader ensuring he
remains aware of the general course of the fight.
‘A patrol leader’s work is to pay more attention to the
main points affecting the fight than to do all the
fighting himself.The main points are
1) arrival of more enemy aircraft who have tactical
advantage i.e. height.
CHAPTER 3 - TACTICS
29
Page 30

CHAPTER 3 - TACTICS
Note: Turning towards an attacker is the better way to proceed. Turning
away from an attacker is not recommended.
30
2) patrol is drifting too far east
3) patrol getting below the bulk of enemy formation.
As soon as any of these conditions occur, it is usually
better to break off the fight temporarily, and to rally
and climb above the enemy before attacking them
again.’ - RAF Instructions
OFFENSIVE MANOEUVRES
‘The main point is to make tighter turns and to stay
above the opponent.’ - Richthofen
‘I fly close to my man, aim well and then of course he
falls down.’ - Boelcke
This in a nutshell is what offensive tactics are all
about, keeping the advantage,manoeuvring to within
100 yards of the enemy and getting in position, ideally
directly behind, to deliver the decisive burst. There
are however a few more tricks that may be of benefit
to budding aces.
Firstly, fight according to your strengths, not the
enemies. If you are in a high performance stationaryengined scout, it is folly to enter a turning contest on
equal terms with a nimble rotary-engined enemy.
New pilots were told by 56 Squadron (SE5a) to ‘dive
and zoom’, not dogfight.
Secondly, most pilots find it easier to turn to the
left, so perhaps an attack from the right should
be contemplated.
Thirdly, the opponent can sometimes be panicked
into adopting foolish tactics.If an enemy looks as if he
is outdistancing you, a few long range bursts may
distract him and encourage him to start weaving.This
will slow him down and allow you to get within
effective range. Richthofen used this trick on more
than one occasion.
‘Being under fire is bad for the nervous system.’
- Coppens (37 victories)
Stark (11 victories) found himself up against a Camel
which continually evaded him by turning. Stark fired
a quick burst which so startled the Camel pilot that he
came out of his turn and flew straight, presenting an
easy target. The key things to remember in a dogfight
are to keep the initiative, make the enemy react to
you, try to stay above your opponent and always fly
with a cool head.
‘He who gets excited in fighting is sure to make
mistakes’ - von Richthofen
Fourthly, constantly monitor what is going on around
you. In a dogfight there are often no second chances,
and one of the biggest mistakes that can be made is to
lose awareness of what else is going on and where the
other enemy machines are.
‘It is well ... never to stay long after one machine.’
- Bishop
Yet as Mannock said,every fight is different, there are
no ‘universal rules’ to success in the air, only guides.
Established tactics must be adapted to the situation,
and sometimes ignored completely.
Finally, remember that all the great aces emphasise
that it takes considerable experience and practice to
become adept at dogfighting. The Flying Corps Gold
novice would be wise to bear in mind Yeates’ advice
to a raw pilot on what to do in an aerial combat:
‘Never mind about shooting down Huns; if one gets in
your way,shoot at it, but make quite sure first that no
Page 31

other Hun is getting into position to put a burst into
you ... give yourself a chance.Anyone can shoot you
down if you don’t see him coming .’ Yeates
DEFENSIVE MANOEUVRES
‘He was no good, the durn fool just put his nose down
and flew straight. He was cold meat.’
- Maclaren (54 victories).
If you are attacked, the important thing is to do
something, anything, to put the enemy off his aim.
Many raw pilots simply froze and were shot down
with ease. Clearly, some defensive manoeuvres are
better than others,and the defender will have to make
a quick decision on whether he wishes to simply
evade the attack or attempt to turn defence into
offence.
When you are under attack from the rear, the best
defensive tactic is to turn in the direction the attack is
coming from. If the attack is coming from the left,
perform a hard left turn.If the attack is coming from
directly behind, a turn in either direction should be
made, but try to remember the relative performance
of the aircraft engaged. If you are flying a rotary, a
turn to the right is probably best, whilst if you are in a
stationary-engined scout against a rotary,a left turn is
advised.
‘Watching carefully over your shoulder and judging
the moment he will open fire, you turn your machine
quickly so as to fly at right angles to him. His bullets
will generally pass behind you during this
manoeuvre.’ - Bishop
With the defensive turn, timing is critical. Too soon
and the attacker has time to make a smooth
adjustment and keep you in his sights. Too late and
you present him with a simple close range shot. If
possible, climb whilst turning, as in this way you may
be able to turn the tables on your attacker.
‘If I am attacked by a single-seater from above, I
make it a point never to let up on the throttle; rather
to make all turns and dives at full speed. I turn
towards the opponent and try by pulling up in each
turn to attain the enemy’s altitude and get the better
of him’ - Richthofen
As an alternative to the turn, 56 Squadron advised
new pilots:
‘If the enemy fire is too hot - hard rudder and no
bank - sideslip!’
Richthofen was against such a manoeuvre, possibly
because it limited the chance of being able to gain the
initiative and turn defence into attack. Clearly these
manoeuvres could be combined; many Camel pilots
found the best way of throwing an enemy off his aim
was a hard turn with a sideslip, which made any
aimed shot at their aircraft almost impossible.
German pilots could do much the same with the
triplane, Voss utilising these tactics against
McCudden, turning defence into attack -
‘To my amazement,he kicked on full rudder without
bank, pulled his nose up ... gave me a burst ...and then
kicked on opposite rudder.’
A sudden zoom is another ploy which may be used,
but this works best if being attacked by a single
enemy who is very close, the aim being to make him
overshoot. This could be combined with a roll to
further reduce speed and maybe change direction, or
carried on into a loop or Immelmann. Much here
would depend on the relative speeds and
performance of the aircraft involved.A poorly-judged
zoom would almost invariably be fatal as the
defender would be left at very low speed, offering an
easy shot. McCudden (57 victories) describes the
CHAPTER 3 - TACTICS
31
Page 32

CHAPTER 3 - TACTICS
result of a zoom and turn contest where the inferior
machine initiated the manoeuvre -
‘I zoomed, the SE just went up a little higher,then we
both turned inwards and the Hun losing height, I at
once did a quicker turn and got behind him.’
Most pilots thought the loop a waste of time in
combat, Mannock saying that a zoom followed by a
turn was far better.
A roll may also force an attacker to overshoot.
Although presenting a difficult target, it has much the
same disadvantages as the zoom, and was especially
dangerous against multiple enemies. Most pilots
advised against this ploy.
‘For 1,500m,with almost full motor, I spun, nose dived
and slithered.’ - Brooks
If a pilot simply wanted
to escape, a spin
would sometimes be
deliberately induced. This
made the aircraft a very
difficult target and might
possibly persuade the
attacker he had got in a
fatal burst. But this
maneuver involved the
loss of a great deal of
height, with the added
disadvantage that if the
attacker followed the
defender down, he was
given an easy shot when
his target pulled out of
the spin. Most aces
recommended against
this ploy, but most also
used it at least once to
escape during their
career!
Lothar even sometimes used a spin to lure the enemy
into close range before suddenly pulling out and
surprising his attacker, turning the tables.
What all pilots were instructed not to do when
attacked was simply to dive away. Even fast-diving
aircraft such as the Spad and the SE5a couldn’t
outrun bullets, and the straight dive away simply
presents the attacker with an easy shot. If you are in a
fast machine and wish to disengage then you must
first throw the attackers aim off or get out of the field
of fire before commencing your dive to safety.
If you do find yourself under attack and are unsure
what do:
‘follow the very simple rule of not diving away, but
turning sharply from an enemy’s fire.’ - Jones
ATTACKING TWO-SEATERS
Two-seaters with their lower performance were often
regarded as ‘easy victims’, especially the poorer
British aircraft such as the BE2 and RE8.
‘If you sat properly under its tailplane, the Hun
couldn’t touch you. Of course you had to keep there
and that was a matter of flying, and a scout ought
always to outfly a two-seater.’ - McCudden.
Despite McCudden’s views a two-seater with an
32
Page 33

observer manning the rear gun was both much harder
to surprise than a fighter and had the added
advantage of being able to fire both forwards and
backwards. The approved method to attack one of
these machines was, as McCudden said,to fire from a
position about 100 yards behind and 20 yards below.
The RAF instructions also advised that a short
vertical dive directly onto the two-seater could work,
as this would present the observer with a difficult
shot. Richthofen suggested:
‘One attacks the two-seater from behind at great
speed... the only way to avoid the adroit observer’s
machine gun fire is to stay calm and put the observer
out of action with the first shots’
However, a well handled two-seater could make lone
attacks both difficult and dangerous, and several aces
were killed attacking a so-called ‘easy victim.’
A rather better method for the average flight was to
attack as a team.
‘At least two Camels should work together against a
two-seater; while the observer was firing at one, the
other killed him. The same might be said of any other
scout, for it took a great man like McCudden to work
alone.’ - Yeates
The standard defence of a two-seater under attack
was either to dive for home, hoping to prevent the
attackers from getting in the observers blind spot
under the tail, or to turn and lose height at as slow a
speed as possible, forcing the attacker to overshoot or
pull out to a point where the observer could have a
clear shot.
SHOOTING
Nearly all the great aces emphasised that the most
important skill in aerial combat was accurate shooting
‘The most important thing in fighting was shooting,
next the various tactics in coming into a fight and, last
of all, flying ability itself.’ - Bishop
Yet,apart from a few natural shots, most World War I
flyers found actually hitting the target in a dogfight
very difficult indeed. Beauchamp-Procter (54
victories) and McElroy (47 victories) hit nothing
during their first five months of active service whilst
Jones (40 victories) took part in 16 aircombats before
claiming a victory.
‘When one has shot down one’s first, second or third
opponent, then one begins to find out how the trick is
done.’ - Richthofen
CHAPTER 3 - TACTICS
33
Page 34

CHAPTER 3 - TACTICS
As with every other facet of this new war
in the air, successful aerial gunnery
required both practice and experience
In pursuit of successfully engaging the
enemy, pilots were handicapped by their
weapons. Machine guns were prone to
freezing at high altitudes and there was
always the risk of them jamming,
especially if a long burst was fired. Most
aces spent hours on the ground checking
their guns and loading the ammunition
themselves, to minimise the chance of a
‘A well- firing machine gun is better than a smoothrunning engine.’ - Richthofen
Aircraft on both sides carried about 500 rounds of
ammunition per gun, enough for about 50 seconds of
firing. German scouts could carry more but most
pilots preferred not to, in order to save weight. The
ammunition load normally comprised a variety of
rounds, the Germans tending to have a mix of
standard ball, armour-piercing and phosphorus. This
was fine for short ranges, 50 yards or less, but added
to the inaccuracy of long-range fire due to the
different ballistic properties of the assorted rounds.
According to a RAF pamphlet the cone of fire from
an aerial machine gun was 10’ by 15’ at 200 yards and
this inaccuracy made a destructive burst of long range
fire unlikely.
With unreliable weapons and primitive sights, pilots,
ideally, wished to be directly behind and within 30
yards of an enemy in order to have a reasonable
chance of hitting and destroying him with a short
burst. Short bursts were important to minimise the
chance of a jam. Successful fire from outside this
envelope was simply beyond most pilots. This was
why the objective of every patrol leader was to attack
malfunction at a crucial moment
with surprise - to give his pilots the benefit of the
simplest shot possible.
However, determined pilots could work out
rudimentary methods of hitting targets which were
not in the ideal position. For deflection shooting,
Mannock advised his pilots to sight about 5 yards in
front of the target’s engine, fire, and, whilst firing,
bring the sight back as far as the enemy pilot and then
push it forward again. Jones achieved several of his
victories following this technique. In the twisting,
turning dogfights of 1917 and 1918 mastery of this
skill gave a pilot a huge advantage.
Recognising some of the problems the RAF gave the
following advice on aerial gunnery:
‘Opportunities in the air are almost invariably
fleeting. Fire should therefore be reserved until a
really favourable target is presented and should then
be in rapid bursts. Fire should only be opened at
ranges over 300 yards when the object is to prevent
hostile machines from coming to close quarters. ...and
should not be opened at ranges of over 500 yards
under any circumstances. In offensive fighting the
longer fire can be reserved and the shorter the range,
the greater the probability of decisive result. Pilots
must accustom themselves to judging the range by the
apparent size of the hostile aeroplane ... this needs
constant practice ... A reserve of ammunition should
be kept for the return journey when fighting far over
the lines.’
Before embarking on a full Flying Corps Gold
campaign, you are advised to practise your gunnery in
the SCRAMBLE missions, for, as Mannock said:
‘Good flying has never killed a Hun yet; get
on with sighting your guns and practise
spotting Huns. Then shoot them down before they
shoot you.’
34
Page 35

ATTACKING BALLOONS
Due to the large amount of ‘archie’ (anti aircraft
guns) around a balloon position, attacks on these
targets were normally cordially disliked by most
pilots, although there were specialists such as
Coppens who shot down 36. The generally preferred
method was the fast, steep dive,56 Squadron in SE5s
going in at 250 mph, hoping that the speed gained
would protect the attacker from archie and surprise
the crew so that they had insufficient time to pull the
balloon down to safety.The diving attack also allowed
the assailant to either zoom to safety above the archie
or streak towards the sanctuary of the front lines at
low level and high speed, either way minimising
exposure to hostile fire.
However, the sneak attack was also used, often by a
lone aircraft. This involved approaching the target at
low level from an unexpected direction.The preferred
times for these raids were either dawn or dusk.
Sometimes the approach would be made with the
engine off, by Rickenbacker for example, to minimise
the chance of detection. Allied pilots reported that
German scouts employing this method were
sometimes painted in dark colours to help them blend
into the gloom.
Regardless of whichever method was used, the
attackers often had to get perilously close to their
target, British Buckingham (i.e. incendiary)
ammunition being of little use beyond
150 yards.
GROUND ATTACK
Although some pilots enjoyed this work, most hated
it, the feeling being that no matter how good or lucky
you were, sooner or later,ground fire would get you.
Attacks were normally made in pairs. Camels tended
to attack the same target simultaneously, both
converging on it from different directions, but 84
Squadron in SE5s preferred a method where one
pilot would dive on the target from 500’ and, as he
pulled out, at 50’, the second aircraft would
commence its attack. This latter method did appear to
reduce casualties.
As for hitting the target:
‘The method found by experience to give the best
results is to dive the machine steeply at a point on the
ground a few yards in front of the target. The lag of a
bomb released from a few hundred feet on a steep
dive is very little. Individual pilots must find out by
experiment exactly how far ahead they must aim.’ RAF Instructions
Experienced RAF pilots preferred a rather different
method, and also suggested ways in which the danger
from ground fire might be minimised:
‘Machine guns were difficult to attack. You had to
look out for them more to avoid than encounter, for
if you went diving right down on a nest, giving them
a no-deflection shot, it would certainly be your last
CHAPTER 3 - TACTICS
35
Page 36

CHAPTER 3 - TACTICS
dive. ... If you had any bombs, you could try a lucky
drop without diving, but the great thing was to keep
turning and side-slipping.’ - Yeates.
ARCHIE (ANTI AIRCRAFT FIRE)
‘It was said that he [Archie] had once brought down
an enemy aircraft, but the story was apocryphal.’ Yeates
Anti-aircraft fire was not a great menace to fighters
unless they were damaged, flying under 1,000’ or
there was a large number of guns, for instance around
a balloon. Nevertheless,being under fire from archie
added to the strain of a patrol, and could distract
attention at a vital moment. Besides,there was always
the chance of a lucky hit.
‘His sudden appearance was more surprising than
dangerous, but it was not advisable to go on flying
straight for long when he was active.’ - Yeates
If fire from archie was unusually persistent or
accurate pilots were advised:
‘The enemy’s aim can be thrown out temporarily ...by
turning sharply, diving or climbing, but it is seldom
advisable to lose height, especially when far over the
enemy lines.’ - RAF Instructions
But archie had other uses apart from shooting down
aircraft. By merely firing on a formation, ‘he’ tended
to make it open out and become preoccupied,
possibly allowing an enemy patrol to launch an attack
in the confusion. Archie could also send signals to
friendly aircraft, warning them of danger, or
informing them of an opportunity. Archie can be
laughed at, but it’s better not to ignore him.
36
Page 37

CHAPTER 4 - CAMPAIGN HISTORIES
THE FLYING CIRCUS
hen the First World War started in August 1914,
military aviation was new and no one knew
W
quite what to make of it. As the Western Front became
deadlocked, the generals came to rely more
and more on reconnaissance aircraft for information
on what was going on ‘the other side of the hill.’
Very soon it became apparent that, not only
was it essential for your aircraft to gather information
behind the enemy front line, but it was also necessary
to stop him from doing the same behind yours.
Consequently, experiments in fitting weapons to
aircraft commenced, and fighting in the air started.
fter various false starts it became obvious that
the most effective weapon for an aircraft was a
A
machine gun, ideally mounted to fire directly forward.
By mid 1915 the Germans had developed a
synchronisation gear, allowing the pilot to simply aim
his aircraft at the enemy and pull the trigger, his gun
only firing when there wasn’t a propeller blade in the
way.With this weapon the Fokker Eindecker gained a
measure of air superiority for the Germans and the first
aces, such as Boelcke and Immelmann, were created.
The general tone of the air war was also set with the
Germans, usually having less aircraft than the Allies,
THE FLYING CIRCUS 1917
being on the defensive. Strategically this defensive
posture was later revealed to be a mistake, and a
misuse of airpower, but tactically it gave the Germans
significant advantages.
oth sides recognised the importance of achieving
supremacy in the air and the first pure fighter
B
units were created. Initially these tended to be flights,
sometimes of only two aircraft, ‘tacked’ onto an
existing reconnaissance squadron, but as airfighting
grew in intensity, specialist units consisting only
of fighters were formed. For the RFC, 24
Squadron arrived in France on the 27th February 1916,
equipped only with a single-seat fighter aircraft, the
DH2, which helped put an end to the ‘Fokker Scourge’.
The French formed the Cigones (Storks) at Verdun and
in August the Germans introduced the Jagdstaffel
(Jasta), a fighter squadron of 14 aircraft. The first
to be formed was Jasta 2, commanded by the leading
ace and tactician of the period Oswald Boelcke.
Equally importantly, a Jastaschule was set up at
Fomars, where would-be fighter pilots received final
training in aerial combat from experienced instructors.
By October there were seven Jastas in existence with
the German Air Service, and their impact was
immediate, as they had three significant advantages
over their opponents:
Firstly, the pilots were generally hand-picked for their
skill and aggression.
Secondly, they tended to operate in larger formations
than the Allies over the front lines.
Finally, their formation coincided with the
introduction of new German fighters, notably the
Albatros DII. This aircraft not only had a performance
advantage over many of the Allied machines in service
but also mounted two machine guns firing straight
forward, giving it a significant edge in firepower over
Allied fighters which only mounted one.
n the Allied side,the Royal Flying Corps (RFC)
was going through a phase of dramatic
O
expansion. Whilst this would later pay dividends, it
The Battle of Arras gets
underway, and the stakes
become high.
37
Page 38

THE FLYING CIRCUS 1917
CHAPTER 4 - CAMPAIGN HISTORIES
meant that, for the moment, the vast
majority of British aircrew had
insufficient training, little experience
and were flying machines of inferior
quality.As losses mounted, this became
a vicious circle with more and more
pilots committed to action with both
less training and a growing shortage of
experienced leaders to look after them.
In addition, the British Staff,unlike the
French and German Staff,distrusted the
policy of grouping the better pilots into
elite units.
oelcke (with 40 victories) was killed in a collision
on 28th October 1916 but his place was swiftly
B
filled by Manfred von Richthofen, who shot down
Britain’s leading pilot Lanoe Hawker on 23rd
November 1916. By the spring of 1917, there were 37
Jastas, led by hand-picked pilots who had already
proved themselves in combat. On 14th January 1917,
von Richthofen took command of Jasta 11, arranging
for his brother, Lothar, who had just finished pilot
training, to be posted to the unit.The war in the air was
about to enter a new phase.
or Spring 1917, the Allies planned a huge joint
offensive between Arras, the British, and the
F
Aisne, (the French). To support the British offensive,
the RFC deployed 25 squadrons with around 365
serviceable machines, of which perhaps a third were
fighters. There were further British squadrons to the
north, including many naval units,from the Royal Navy
Air Service or RNAS, which were based in France to
support the ground fighting. When the Arras battle
commenced on 9th April 1917 there were five German
Jastas in the region. This number rose to 8 as the battle
continued. The month of April 1917 was almost
catastrophic for the RFC, and has since been known as
‘Bloody April’.A total of 245 aircraft were lost due to
enemy action during the month, with 211 aircrew killed
or missing and 108 taken prisoner. This compared to a
38
grand total of 499 aircrew lost in the five month Battle
of the Somme the previous year. The average life of a
RFC fighter pilot at this time was less than 2 weeks.The
French lost approximately 55 aircraft in April. The
German pilots claimed 298 Allied aircraft destroyed
including 34 balloons, whilst the Allies claimed 196
German aircraft destroyed with a further 206 out of
control but German records, which are incomplete,
indicate losses of only 76.
This crushing German victory was due to a
combination of circumstances.
irstly, the average German pilot was vastly more
experienced than his British counterpart. The
F
autumn and the spring had been spent training,
mastering the new aircraft and being taught the ‘tricks
of the trade’ by experienced masters.
econdly, the German aircraft were generally
superior to those flown by the Allies (although not
S
exclusively so). The introduction of the Albatros DIII
only widened the margin of superiority, when, that is,
the aircraft held together.
hirdly, because the Jastas operated on the
defensive with faster machines, they could pick
T
and choose when to engage.A good Jasta leader would
only fight when he had the advantage and there was
Page 39

CHAPTER 4 - CAMPAIGN HISTORIES
THE FLYING CIRCUS 1917
little the British could do about this. For the British,
this meant that they tended only to be in combat when
at a disadvantage over enemy lines, often having to
fight their way to safety in slower machines,
outnumbered and with fuel running low.
ourthly, the Jastas normally operated over their
side of the lines. This minimised the chance of
F
capture if a machine was damaged or an engine
malfunctioned. In addition the prevailing wind was
usually in the German’s favour.This made it easier for
them to escape if things went badly whilst further
adding to British problems when they, in turn, were
trying to fight their way home.
inally,because British aircraft were always on the
offensive, the Germans operated in ‘a target-rich
F
environment’; there were always opportunities to
score, normally against inferior machines, such as the
elderly BE2 and FE2 observation machines. The
French, who were rather more circumspect, and who
had, in the main, better machines and pilots than their
allies at this time, suffered far less. Due to the less
aggressive nature of French pilots, German pilots
thought of a posting to the French front as something
of a rest, although there were some very capable
French pilots,especially those in the elite Les Cigones.
H. A.Jones, the official RAF historian, described von
Richthofen’s leadership and tactics as follows:
’Richthofen’s task was to inflict the greatest
damage with the minimum of loss to his own
service, and he knew that,on any day suitable for
flying, great numbers of aeroplanes of the Royal
Flying Corps would be over the German lines.
He seldom had to seek combat and he
could make his choice, and if it was ... to avoid
or to break off a fight, Richthofen would
never hesitate... [Richthofen’s unit] was,
therefore, not only extremely active, but also
extremely elusive.’
espite the Jasta’s advantages it should be noted
that the combat was not always completely one
D
sided. Konig (6 victories, Jasta 2) was killed on 2nd
April 1917 attacking a FE2d, Osterroht (7 victories,
Jasta 12) was killed on 23rd of the same month and
Festner (12 victories,Jasta 11) was killed two days later,
25th April. Lothar von Richthofen’s plane was
seriously damaged attacking a FE2b on the same day
and he was only saved by the timely intervention of
Schafer. It is sobering to bear in mind that,of the 14 top
German scorers in April 1917, only 2 would survive the
war, one of these being Lothar von Richthofen himself.
n addition, although the
British policy of a non-stop
I
aerial offensive has been much
criticised for resulting in heavy
losses, it did give an advantage
in both morale and experience
which would be vital in the
climactic battles of 1918. No
British aircraft was lost on its
airfield to a German aerial
attack, whilst the Germans were
quite often surprised or strafed
at their home base; in 1918, for
example, Jasta 40 lost all its
aircraft to a British attack on its
airfield.
he influence of an experienced and aggressive
leader on a fighter unit can be seen from Manfred
T
von Richthofen’s Jasta 11. When he took command
of the Jasta, it had no victories. Only one other
pilot, Schafer, had scored prior to joining Jasta 11,
despite the fact that all the pilots were experienced
flyers. Under Richthofen’s leadership, Jasta 11 scored
36 victories from January to March and 89 victories in
April, accounting for about a third of all RFC losses!
Richthofen himself claimed 36 of these victories,
bringing his total to 52, and making him the leading ace
of the war when he went on leave at the beginning of
May. His brother Lothar, meanwhile, had scored 16
victories, but Manfred was not altogether satisfied with
Lothar’s performance, feeling that he was too reckless,
a ‘shooter’ rather than a ‘hunter’ and overly-fixated
39
Page 40

THE FLYING CIRCUS 1917
CHAPTER 4 - CAMPAIGN HISTORIES
about scoring a kill on every flight. Nevertheless,
Lothar was placed in command of Jasta 11 during his
brother’s absence.
April had been a terrible month for the RFC
but there were some promising signs.
Firstly, despite the high casualties, the RFC
was still able to operate in German airspace.
Secondly new aircraft, such as the SE5 and
the Bristol Fighter, were on the way or had
just been introduced. Although due to
faulty tactics the Bristol Fighter had been
savaged by Jasta 11 in April, it was later to
become one of the finest aircraft of the war.
Thirdly, future leading aces, such as Bishop
and McCudden, had survived.
inally, and possibly most importantly of all,
56 Squadron had arrived at the front, flying
F
its first patrol on 22nd April 1917. For the formation of
this squadron, the RFC had overcome its dislike of
grouping crack pilots into a single unit and had combed
France for experienced flyers. Of 56’s initial
complement, seven pilots would go on to become aces,
and three of the pilots who joined in May 1917 would
also become aces. By the end of the war, 56 Squadron
would claim 427 victories. Amongst 56 Squadron’s
initial complement was Albert Ball, commanding A
Flight, who already had 31 victories. The brand new
squadron was given a brand new fighter aircraft - the
SE5. For almost two months, the squadron practised
with their new machine just outside London, far away
from the slaughter over Arras. Although initially the
new aircraft was not popular, being rather less
manoeuvrable than the Nieuports which most of the
pilots were familiar with, the squadron soon came to
appreciate its excellent qualities, including speed,
ruggedness and rate of climb. It was easy to fly and had
no serious vices. The RFC now had a fighter aircraft
that was equal, and in some areas superior, to the best
that the Jastas were equipped with. The SE5 also
mounted two machine guns and was a very stable firing
platform.
lthough 56 Squadron was not officially formed
as an ‘anti Richthofen’ squadron, it was soon
A
seen as such, and, in effect, perhaps it was, as 56’s
mission was to re-establish Allied air superiority over
Arras, which meant that sooner or later it would have
to engage and defeat Jasta 11. It is also interesting to
note that 56 tended to follow Jasta 11 and later JG1 up
and down the front for the rest of the war. In response,
the German press indignantly claimed that the British
had put a price on the head of their leading ace.
Curiously some German pilots also thought that 209
Squadron, which was engaged by Manfred von
Richthofen in his final fight in 1918, was also a special
‘anti Richthofen’ squadron, perhaps because the
squadron marking was red noses!
40
Page 41

CHAPTER 4 - CAMPAIGN HISTORIES
THE FLYING CIRCUS 1917
eanwhile, on the other side of the lines, the
Germans had formed the first fighter group,
M
combining Jasta 3, 4, 11 and 33 into a single fighting
unit. This concentration of fighter Jastas would later
become a permanent ‘Jagdgeschwader’. It would move
up and down the front, being sent to wherever the
fighting was hottest, and this mobility, combined with
the brightly coloured planes its pilots flew, led to it
being dubbed the ‘Flying Circus’ by the Allies.
Although April had been a successful month for the
Jastas, the Germans still planned to fight a defensive air
war as they were still outnumbered. The entry of
America into the war on the side of the Allies meant
that the numerical odds would tip further against the
Germans in the future.
ith his brother away on leave, Lothar steadily
increased his score, shooting down three
W
aircraft in the first week of May - an FE2b, an FK8 and
a Nieuport 17. On the other side of the lines 56
Squadron got steadily more aggressive with its patrols
and, with growing confidence, had several brief
encounters with red Albatrosses.Ball’s victory tally had
reached 44 by 6th May 1917. The following day,despite
poor conditions, both Jasta 11 and 56 Squadron were
patrolling the front around Douai, the home of Jasta 11,
as were 19 Squadron (Spads) and 8 RNAS Squadron
(Triplanes) together with some Nieuports and Bristol
Fighters. Jasta 3 may also have been in the area. What
followed was one of the most hotly-debated combats of
World War 1, the exact details of which will never be
known. Taking off at 5.30 p.m., the 11-strong 56 fought
a series of running battles with various numbers of
Albatrosses in worsening visibility, gradually getting
split up in the process. Finally Lothar was left locked in
single combat with Ball, the end result being Lothar
crash-landing and Ball being killed in a crash behind
German lines. Eventually the Germans decided that
Lothar must have shot him down, although Lothar
himself claimed a triplane, but it is equally likely that
Ball either became disorientated during his combat
with Lothar and lost control, or suffered a mechanical
malfunction, possibly due to battle damage or low fuel.
Only 5 pilots of 56 Squadron made it home, one other
pilot being killed and four crash-landing (with two
wounded) on the British side of the lines. They claimed
four definite victories and two possibles but Jasta 11
lost only Pluschow wounded, although other aircraft
may have been forced down without injury to the pilot.
56 Squadron’s defeat may have been due to over
aggressiveness in its showdown with Jasta 11, but the
Jasta seems to have had the clear edge in tactics, its
various flights providing much better support for one
another than the scattered individuals of 56. It was a
sobering lesson for the RFC, one that it would
eventually learn very well indeed.
fter his battle with Ball, Lothar further increased
his tally. On 9th May 1917, he shot down a
A
Bristol, on the 10th a Pup and on the 11th another
Bristol. On the 13th, flying with Karl Allmenroder,
41
Page 42

THE FLYING CIRCUS 1917
CHAPTER 4 - CAMPAIGN HISTORIES
Lothar, his score now 23,
spotted a BE2 which
dived away. Lothar
pursued and shot it down
at low level. With a light
haze obscuring the area,
Lothar stayed low looking
for landmarks so he could
find his position. Antiaircraft guns opened fire
on him, hitting the
Albatros and wounding
Lothar in the left hip. He
managed to stagger over
the lines and crashlanded, waking up in
hospital at Douai. His
news, remarked ‘Lothar has been playing the fool
again.’ His wounds would keep Lothar out of combat
for five months, his only consolation being the award of
the ‘Orden Pour le Merite’, otherwise known as the
Blue Max, on the 14th, a mere four months after it was
awarded to his brother. Manfred later wrote ‘Had my
brother not been wounded, I believe that, after my
return from leave, he likewise would have gone on
leave with 52 having been dispatched.’ By June 18th
Manfred was back in combat.
brother, upon hearing the
GERMAN MARKINGS
n early 1917, Manfred von Richthofen hit upon the
idea of painting his Albatros red. Whilst this could
I
be seen as an example of bravado, it did have practical
benefits. During air combat it was important for pilots
to instantly identify their leader, and it also helped
ground observers follow the course of an engagement.
Its impact on morale for both friend and foe should
also not be underestimated. Before long,other German
pilots were following his example. Lothar wrote:
‘It had long been our wish to have all the aeroplanes
of our staffel painted red... the request was granted...
42
As we could not see each other’s faces in the air, we
chose these colours as recognition symbols. Schafer...
had his elevator, rudder and most of the back part of
the fuselage black, Allmenroder used white on the nose
and spinner, Wolff used green and I had yellow’.
ndeed, most of Jasta 11’s aircraft at this time were
mainly, but not entirely, red. Typically, aircraft
I
would have red fuselages and struts, sometimes red
tailplanes and wings. Individual markings, applied in
addition to Jasta markings, were often based on the
colours of the pilot’s former army regiment.
Richthofen’s aircraft soon became known as ‘le diable
rouge’ or ‘le petit rouge’, as he referred to it.A rumour
went round the RFC that it was flown by a girl in the
fashion of Joan of Arc. Schafer meanwhile was referred
to as ‘the Pink Lady’ by British pilots.
JASTA 11
n 1st May 1917, when Manfred von Richthofen
went on leave, Jasta 11 included, in addition to
O
Lothar, the following pilots who had scored victories:
Pilot Victories to date Final total
Wolff 27 33
Allmenroder 9 30
Schafer 23 30
Mohnicke 1 9
Niederhoff 2 7
Brauneck 7 10
Of these Lothar, Mohnicke and Brauneck would
survive the war.
othar’s wingmen on the evening of 7th May were
Allmenroder (10 victories to date), Mohnicke (1)
L
and probably Simon (1). Although there are reports
that Wolff was flying, these are almost certainly
incorrect as he had been posted to command Jasta 29.
The confusion probably arises from Simon flying a
similarly marked Albatros.
o
Page 43

CHAPTER 4 - CAMPAIGN HISTORIES
TANK BATTLE- CAMBRAI 1917
he Allied ground attacks in spring 1917 achieved
little and left the French army on the verge of
T
mutiny.To keep the pressure off the French,the British
launched a series of offensives in Flanders,culminating
in 3rd Ypres. In October, the British attacks were
fought to a standstill in the mud and blood of
Passchendaele. Above the trenches the war in the air
intensified as both sides strove to achieve an advantage
that would tip the ground fighting in their favour.
he RFC continued to expand and was bolstered
by the arrival of new aircraft. The SE5 was given
T
a more powerful engine and, as the SE5a, became one
of the most successful fighter aircraft of the war. In
June, the Sopwith Camel arrived, and swiftly
established itself as the supreme dogfighting aircraft,
claiming the destruction of 1,294 enemy aircraft by the
end of the war. British training facilities had been
greatly improved following the Bloody April
nightmare. At the start of 1917 new British pilots
reaching the front had often had less than 20 hours
flying training - just sufficient to teach them the
rudiments of aircraft control, but not how to fly in
combat. By September new pilots arrived at their
squadrons with about 48 hours flying experience.
Across the lines, Jasta pilots soldiered on with the
Albatros, and although a new model was introduced,
the DV, many pilots complained of having to fight in
inferior machines. Richthofen referred to ‘this damned
Albatros’, whilst Osterkamp stated:
‘The Albatros is no longer sufficient; the Camel
and Spad are its superiors.’
he Pfalz DIII was introduced in the autumn but
offered little in the way of improvement, and the
T
one hope for the Jasta pilots was the Fokker DrI, or
triplane. Unfortunately, although it exhibited dazzling
manoeuvrability in the hands of a skilled pilot, there
were a series of fatal crashes in October which resulted
in it being taken out of service, whilst the reasons
were investigated and modifications made. It was
not until late December that the triplane returned to
front-line service.
BATTLE OF CAMBRAI 1917
n response to numerical and equipment inferiority,
the Germans officially formed Jagdgeschwader 1
I
(JG1) in June.This grouped Jastas 4, 6, 10 & 11 into a
single unit under the command of Manfred von
Richthofen, who could hand-pick his pilots. The unit
was given its own transport and was fully mobile. Its job
was to achieve air superiority over any critical area and
so, as the British offensives continued, JG1 moved up
and down the front to counter them.
s the fighting intensified, both on the ground and
in the air, some massive dogfights erupted over
A
the front lines. On 26th July 1917, up to 100 aircraft
were engaged in a single dogfight near Ypres.The day
of the lone flyer was all but over; what mattered now
was teamwork and formation tactics.Through the skill
and experience of their pilots, the Germans still,
perhaps, had a slight edge in aerial combat, but this
could not last forever. Allmenroder (with 30 victories)
died in June, leading Jasta 11 against the British
triplane squadrons. Schafer was killed in July (30
victories) and Dostler in August (26 victories) whilst
Manfred von Richthofen was wounded in July. Schafer,
Dostler and von Richthofen himself were shot
attacking lowly two-seaters. In September Wolff (33
victories) was killed by Camels and Voss (48 victories)
The Somme sector, south
of Arras, 20 November
1917... Hundreds of
British tanks are bursting
through the Hindenburg
line, with six infantry
divisions close behind. The
German defense is
collapsing. Cambrai, a
bastion for the German
army, is menaced.
43
Page 44

BATTLE OF CAMBRAI 1917
CHAPTER 4 - CAMPAIGN HISTORIES
lost an epic battle against 56 Squadron.
Both Wolff and Voss were flying early
versions of the Fokker Triplane.
Increasingly, the German aces and
Jasta leaders had to fly to the limit to
offset the increasing numbers and
dominance of the RFC, the result
being that more and more of them
were killed or wounded. The war in the
air was now becoming a very deadly
business indeed and there were few
easy victories.
evertheless, some daredevils still survived.In the
summer of 1917 Sibley (‘Squibs’) and Shone in a
N
Bristol Fighter flew over Germans on leave, who were
socialising with their girlfriends on the promenade at
Ostende, and showered them with rotten oranges.
They later dive-bombed a German aerodrome with a
bright red football and several streamers. In both
cases they were careful not to fire - that would have
ruined the joke!
he Third Battle of Ypres finished on 10th
November 1917 and it seemed that this would be
T
the end of serious ground fighting for the year.
However, the British had one last card to play. On 20th
November, they launched a surprise attack at Cambrai.
After a lightning barrage, the British went ‘over the
top’, the assault spearheaded by 374 tanks,with another
102 in reserve and supported by fighters flying ground
attack missions. Handicapped by poor visibility, the
German lines in many places collapsed completely,but
a combination of desperate German defence, notably
at Bourlon Wood and Flesquires, and poor British
staffwork, meant that a complete breakthrough ‘to the
green fields beyond’ was not achieved. Especially
important in halting the British advance was the
German artillery which was the best weapon to use
against tanks. It often continued firing until it was
overrun. At the end of the first day, 65 tanks had been
knocked out, 71 had broken down and 43 were stuck in
44
the trenches. The British continued the attack until
around the 25th but, although further gains were made,
the opportunity for a decisive success had passed. On
the 30th, the Germans counterattacked after a onehour barrage. German stormtroopers, who had spent
the year perfecting their specialised assault tactics
against the Russians and Italians, supported by
dedicated ground attack aircraft, broke through the
British lines. British reinforcements halted the German
offensive and after several days of see-saw fighting, the
battle petered out on December 6th with both sides
largely in their original positions. Although not
decisive, Cambrai pointed the way to how
battles would be fought in the future - with tanks,
specialised assault troops and the widespread use of
ground attack aircraft.
or Cambrai the British had massed 300 aircraft in
the area, including 134 fighters, some of which
F
came from 56 Squadron. In opposition, the Germans
only had Jasta 5 with some support from Jasta 12 and
37. They were fortunate that Jasta 5 was one of their
best fighter units, claiming 251 victories by the end of
the war which made it the third most successful Jasta.
On the 23rd, JG1 was rushed to the area, for once
mirroring the movements of 56, and the air fighting
intensified. 50 aircraft dogfights over Bourlon Wood
Page 45

CHAPTER 4 - CAMPAIGN HISTORIES
BATTLE OF CAMBRAI 1917
became common. Casualties were heavy, British
squadrons undertaking ground attack missions
suffering 30% losses a day. Despite these casualties,
both sides continued to attack ground targets during
the see-saw fighting. The objective of these missions,
according to a German memorandum, was ‘to shatter
the enemy’s nerve by repeated attacks in close
formation and thus to obtain a decisive influence on
the course of the fighting.’ The British admitted ‘the
morale effect of this was very great and no doubt
tended to facilitate the enemy’s success.’
THE JASTAS
asta 5 machines had green tails with a thin red
outline and red spinners.Wings were in the normal
J
German camouflage, although later white chevrons
were usually painted on these. Individual pilots often
had large numbers or initials on the fuselage to aid
identification. In reality, this unit received Triplanes in
May 1918 from JG1 and these aircraft probably
remained in their original markings. However, there is
some evidence that certain aircraft had new markings
painted on, but whether these were the Jasta 5
markings or individual pilots insignia is unclear.
Notable pilots with Jasta 5 at Cambrai were Rumy (2
victories at the start of the battle, finishing the war with
45), Konnecke (8/35) and Mai (2/30).
Jasta 12 aircraft had black tails and white spinners.
Their Triplanes had white cowlings.
asta 37 aircraft had tailplanes diagonally striped in
narrow black and white bands.The fuselages were
J
all black with white numerals on the nose and white
symbols on the fuselage.At Cambrai, the Jasta was led
by Udet, who had 14 victories (finishing the war as
Germany’s leading surviving ace with 62). He had a
white chevron on his nose and a white ‘LO’ (after his
girlfriend) on the fuselage.
lso in the area was ‘Green Tail’. McCudden, a
leading RFC ace with 56 squadron, had several
A
encounters with an unusually aggressive Albatros
Flight which had a very capable leader. On at least one
occasion, this Flight forced 56 to ‘run for it’. The
German leader’s aircraft had a green tail, yellow
fuselage and red nose.There was a large capital ‘K’ on
the top wing and an inverted white ‘V’. His flight all
had red noses and yellow fuselages but different
coloured tails - green, red, light blue, black, yellow and
black and white striped. Their first encounter with 56
was on 23rd November. On 19th December Mayberry,
of 56, who had 21 victories, was shot down by ‘Green
Tail.’ On 18th February 1918, McCudden in turn shot
down ‘Green Tail.’
JAGDGESCHWADER 1
Jasta 4 Triplanes had engine cowlings, wheels and
interplane struts in an off-white
colour.
Jasta 6 Triplanes had black
engine cowlings and black and
white stripes covering the
tailplane.
Jasta 11 Triplanes had red
engine cowling and interplane
struts. Sometimes wings and
fuselage were also red.
Jasta 10 was never issued with
Triplanes.
45
Page 46

BATTLE OF CAMBRAI 1917
GERMAN FIGHTER AIRCRAFT AT THE
Fokker Dr1 - 17 in October,35 in December. Aircraft
in reality grounded in November.
t Cambrai, the British committed the following
fighter squadrons: 64 and 68 with DH5s, 41, 56
A
and 84 with the SE5a, 3, 43 and 46 with Camels and 11
with Bristol Fighters. Aces included McCudden (19
victories at the start of the battle, final score 57),
Bowman (20/32), Mayberry (18/21) all from 56
Squadron and Maxwell (11/27) with 11 Squadron.
McCudden flew an SE5a with a white ‘G’ on the
fuselage and a white band around the fuselage
immediately in front of the tail. Later he fitted a large
red spinner from a captured LVG to the nose of the
aircraft and had a huge red ‘6’ painted on the planes.
We have made a few changes to the Battle of
Cambrai for game purposes.
Firstly, we have made the weather better than it
actually was to encourage air operations.
Secondly,we have allowed the Fokker Triplane to reenter combat faster than it did in reality.This is to allow
you to fly this classic First World War aircraft in a
campaign setting.
Finally, we have allowed the Triplane to carry 4
bombs, which in reality it never did, in order to assist
you against the British tank offensive.
46
CHAPTER 4 - CAMPAIGN HISTORIES
FRONT NOVEMBER 1917
Albatros DIII 446
Albatros DV 526
Albatros DVa 53
Pfalz DIII 276 (in December)
BRITISH UNITS
CAMBRAI IN THE GAME
o
Page 47

CHAPTER 4 - CAMPAIGN HISTORIES
SPRING OFFENSIVE
he winter of 1917 passed relatively uneventfully
on the ground after Cambrai, with both sides
T
preparing for 1918 which would in all likelihood prove
decisive. The collapse of Russia allowed the Germans
to shift large numbers of troops from the Eastern to the
Western Front,giving them the opportunity to resume
the offensive here once more. Indeed, they had little
choice as the Americans were starting to arrive and
soon the Allied strength would be unbeatable. For
Germany it was a race against time. Britain and France
had to be decisively beaten before the American buildup became irresistible. Extensive preparations were
made for a war-winning attack. A vital factor in its
success would be obtaining control of the air.To further
this objective the ‘Amerika Program’ was drawn up.
This doubled the number of Jastas from 40 to 80,
although many of the new Jastas had only 8 or 9 aircraft
and these tended to be the inferior types such as the
Albatros DV and Pfalz DIII. Although engine and
aircraft production was to be increased, and the
facilities for training new pilots expanded, the new
Jastas were never brought up to full strength.The twoseater ground attack units were formed into
SPRING OFFENSIVE 1918
Schlactstaffels and enlarged.To further the quest for air
superiority JG2 (Jasta 12, 13, 15, 19) and JG3 (Jasta 2,
26, 27, 36) were formed.
asta equipment remained relatively unchanged.
The Fokker Triplane was back in active service, but
J
it was seen only as a ‘stopgap’ measure until the Fokker
DVII became operational, and relatively few Jastas
were equipped with it. Jasta 6 and 11 (JG1) were all
Triplane units, Jasta 4 (JG1) had some delivered in
April. Jasta 10 (JG1) never received Triplanes, possibly
because von Richthofen was hoping for the swift
arrival of the DVII. The Jastas of JG2 all had some
Triplanes, with Jasta 12 becoming all Triplane, as did
JG3 (Jasta 27 all Triplane). This somewhat patchy
introduction of the Triplane and the retention of the
older aircraft meant that formations of mixed aircraft
types were common.
he RFC looked forward with confidence to spring
1918. Nearly all of the fighter squadrons had been
T
re- equipped with either the SE5a, the Camel, the Spad
XIII or the Sopwith Dolphin. The lessons of 1917 had
been taken to heart and, under experienced leaders, it
was felt that the RFC could overcome whatever the
German Air Service threw at them. Despite the
growing strength of the enemy, the RFC continued its
policy of a perpetual offensive. In addition, unlike the
Germans, the British did not form specialised ground
attack units, but preferred to use normal fighter
squadrons for this work. This was proved to be the
correct decision as it was a far more flexible doctrine,
allowing fighters, normally Camels, to bomb the
enemy and then undertake a normal patrol, something
the Schlactstaffels were unable to do. Indeed the
Schlactstaffels were to prove a disappointment in 1918,
making little impact on the ground battle and operating
at a disadvantage in the air.
he British Army, exhausted by the battles of 1917,
and given an extra 28 miles of front line to occupy
T
due to the weakened state of the French, adopted a
Early 1918, and the
German lines are cloaked
in secrecy. Plans for a last
great push are afoot. Can
the Germans recapture all
losses since 1915? Can
they break through the
entire Somme front?
Their goals include
Arras... Amiens...
and beyond.
47
Page 48

SPRING OFFENSIVE 1918
CHAPTER 4 - CAMPAIGN HISTORIES
defensive posture. It was confident that, despite the
increasing number of troops recalled from Russia, the
German offensive would be ‘shot to pieces’ when it
eventually came. After all, the British had been
attacking across no-man’s-land since 1915 and they had
never achieved a breakthrough. Why should a German
advance fare any better?
he German High Command planned to smash the
British Army first and then turn on the French.
T
The attack was meticulously planned and would use the
‘stormtroop’ tactics seen at Cambrai. Some 1,680
aircraft were massed against the British, 730 of them to
support the first attack, leaving only 367 to fight the
French. JG1 and JG2 were both employed against the
British, JG2 in the north around Ypres, whilst JG3 was
on the border between the British and French
positions. The RFC in the area chosen by the Germans
for their offensive could muster 579 aircraft. The
German assault commenced on 21st March after a
lightning barrage. Concealed by mist, the
stormtroopers rapidly broke through the British
positions. At the end of the first day of the ‘Kaiser’s
Battle’, the British had suffered 38,000 casualties, lost
532 guns and been driven back 10 miles.The RFC was
hurled into the battle to turn the tide. Despite its
numbers, the German Air Service (Luftstreitkrafte),
was unable to gain control of the air, the Jastas largely
remaining on the defensive. Offensive operations were
largely left to the Schlactstaffels, who fought at a
disadvantage if caught by British fighters. If the
German Air Service had concentrated on ground
attacks with all its aircraft, it is possible that the British
retreat might have been turned into a rout. As it was,
the British flyers started to exert a decisive influence
on the ground fighting. One German regiment
reported ‘Under the ... frequent attacks by air
squadrons the attack cannot go on.’ Nevertheless,
under incessant German attacks, the British line
continued to crumble, leading to the order ‘Squadrons
will bomb and shoot up everything they can see ... very
low flying is essential. All risks to be taken. Urgent.’
The British fighters accordingly attacked at very low
level, one German account saying ‘Lieutenant Nocke
had to fling himself flat on the ground, but for all that
he was struck on the back by the wheels of one
machine, thus literally being run over.’ The cost of such
attacks was high, however.Stock of 54 Squadron wrote:
‘We had very few pilots left of the old squadron by this
time. About six were missing and five had been
wounded.’ Many aircraft staggered back to base,
riddled with holes. A mechanic noted ‘Own aircraft
badly shot about, rather stirring times.’
lthough the priority for the RFC was to support
the troops on the ground, there was still
A
substantial fighting in the air. Trollope of 43 Squadron
(Camels) scored six victories on 24th March. On the
48
Page 49

CHAPTER 4 - CAMPAIGN HISTORIES
SPRING OFFENSIVE 1918
27th, the Germans claimed 26 victories (13 by JG1) and
a further seven from anti-aircraft fire. In reply, the
RFC claimed 16 confirmed victories. The following
day, Trollope was wounded and shot down and
43 Squadron lost five Camels from a patrol of 9 when
they ran into JG1. However, despite the pressing need
of their troops for air support, many of the Jastas
seemed reluctant to abandon their old defensive
tactics, much of the fighting being done by JG1; von
Richthofen scored 9 victories during the course of this
first German attack, taking his total to 75. But JG1
could not be everywhere at once. Stock, flying a
bombing mission, encountered six German aircraft
above his formation:‘The Huns went east, thus showing
their usual spirit of avoiding a scrap unless the
advantage is with them.’ This led a German ground unit
to complain ‘The English got valuable support from
their aircraft, which attacked regardless of the
consequences ... Our own airmen were absent.’
he first German attack was halted on the 5th of
April, 10 miles short of the vital town of Amiens.
T
Although there was a lull in the ground fighting, the
battle for air supremacy continued, 43 Squadron losing
another 5 Camels on the 6th when they once again
came across JG1. Meanwhile on April 1st the RFC and
RNAS were merged into a new independent
organisation - The Royal Air Force.Although the long
term results of this were to be highly significant, to the
weary British pilots at the time it meant little other
than amusement that in the new uniform they tended
to get mistaken for generals, and rather less happily
that pay would now be paid a month in arrears rather
than a month in advance. To co-ordinate the ground
battle better, the French general Foch had been placed
in supreme command of the Allied Armies on
April 3rd.
n April 9, in poor visibility, the Germans
launched a second offensive, once more against
O
the British, who had disregarded reconnaissance
reports from their pilots warning of the new German
build up.The German assault troops swept through the
British lines again, putting the Allied positions in grave
peril. Field Marshal Haig issued an order of the day to
the British forces:
‘There is no other course open to us but to fight
it out. Every position must be held to the last
man. There must be no retirement. With our
backs to the wall and, believing in the justice of
our cause, one must fight on to the end.’
espite some poor weather, fighting in the air
intensified with JG1 being particularly active
D
and successful for the Germans. For the RAF,
‘Willie’ Woollett of 43 Squadron equalled Trollope by
shooting down six German aircraft in one day on 12th
April. By the 18th, with the help of French
reinforcements rushed to the front, British troops
halted the German advance.
Nevertheless, over the battlefield,
the air fighting continued, with
some huge, multi-layered
dogfights developing.
On 21st April, Captain Roy
Brown of 209 Squadron (Camels)
filed the following combat report :
‘Dived on a large formation of
15 to 20 Albatros Scouts and
Fokker Triplanes, two of which
got on my tail and I came out.
Went back again and dived on a
pure red Triplane which was
49
Page 50

SPRING OFFENSIVE 1918
CHAPTER 4 - CAMPAIGN HISTORIES
firing on Lieut. May. I got a long burst into him
and he went down vertically and was observed to
crash ... I fired on two more but did not get
them.’
The pilot of the red Triplane was Manfred
von Richthofen, who the day before had
claimed his 80th victory.He was dead.
On the ground, heavy fighting continued
until the 25th, when the Germans broke off
the battle.Their next blow would be against
the French and, although this would bring
their artillery to within range of Paris, the
final chance for a German victory was gone.
he RAF emerged from these defensive
battles with a huge amount of credit.
T
Although losses had been heavy,their missions
had been ‘an important factor in stemming the
German onrush.’ (Liddell Hart). For the German
Air Service, spring 1918 had been less satisfactory.
Although certain individuals and Jastas had scored
heavily, overall they had failed to achieve air
superiority for some of the most crucial battles of the
war. In part, this was because they were suffering from
the rapid expansion, brought about by the ‘Amerika
Program’. There were not sufficient experienced pilots
to man all the Jastas, especially when the best ones
generally went to the Jagdgeshwaders. This tended to
mean that the average British squadron was superior to
the average German Jasta,especially as the British had
the edge in the quality of their aircraft. In addition, the
Jastas seemed to have had difficulty in adjusting to
offensive operations. One British pilot wrote of the
German fighters:
‘There were dangerous Huns about, circuses like
Richthofen’s ... [but] the German habit of
draining their best pilots away into circuses, left
the ordinary people very ordinary’ and
‘Their wind up was enormous; they were
exceedingly difficult to find and never attacked
without odds of four to one in their favour and
the advantage of height ... The only people with
any fight left in them seemed to be Richthofen’s
crowd.’ - Yeates,46 Squadron.
erman flying operations were further
handicapped by having to move forward to
G
strange aerodromes as the British were driven back.
The RAF retired onto its supply lines,but the Germans
were continually advancing beyond theirs, sometimes
seriously limiting the amount of support they could
give to the ground battle.
Fighting in the air was now both a complex and
sophisticated affair. Typical activity along the front
lines would consist of the following:
1. Over the front line itself there would be
ground attack and contact patrol aircraft, flying at
1,000’ or less.
2. Just over a mile behind the front line would be the
observation balloons, directing artillery onto
enemy positions. These would be protected by
anti-aircraft (‘archie’) batteries.
3. At about 4,000’, corps aircraft (2 seater
reconnaissance machines) would flit to and fro
across the lines, directing artillery and
photographing enemy positions. Hovering above
them at around 7,500’ would be fighters tasked
with protecting their own observation aircraft and
50
Page 51

CHAPTER 4 - CAMPAIGN HISTORIES
shooting down the enemies; for the British, these
fighters would normally be Camels, the Germans
often using Triplanes at this altitude.
4. At about 14,000’, there would be further fighter
patrols, the British tending to use SE5a squadrons
at this height, the Germans Albatros, Pfalz or
Triplanes.
5. At 18,000’, there would be further high-altitude
fighter cover, the British having Bristol Fighters or
Sopwith Dolphins here.At this height the top layer
of the Jagdstaffels would also lurk (Albatros and
Pfalz), usually in the sun.
n addition to all this aerial activity,Allied bombers
and long range reconnaissance missions would tend
I
to fly at between 10,000 and 14,000’, often with fighter
cover, and the Germans would have single highaltitude reconnaissance machines, nosing about
between 18 & 25,000’.
or the British, Camels would tend to patrol up to
about 10 miles behind enemy lines, the SE5s and
F
Bristols about 20 miles, although trips of 40 miles into
‘Hunland’ were not unknown, whilst the long range
reconnaissance and bombing machines would venture
up to 100 miles behind the front.
he result of all these air operations was that there
was nearly always some sort of air activity going
T
on between ground level and 20,000’, over a strip of
territory at least 20 miles wide. There were constant
opportunities to surprise an enemy aircraft or
formation - and to be surprised oneself. Often a
formation would dive on what appeared to be an easy
SPRING OFFENSIVE 1918
target, only to be jumped in turn by another enemy
formation in the area. A simple flight against flight
dogfight could suddenly escalate into a massive aerial
melee with over a 100 aircraft engaged. In this
confusing and constantly changing situation, good
squadron and flight commanders were at a premium.
Experienced leaders were required to keep friendly
losses to a minimum whilst inflicting maximum
damage on the enemy.
54 SQUADRON
his was a fairly typical RFC (later RAF) fighter
unit. It was formed in May 1916.After a period in
T
which it held its own in the air, flying Sopwith Pups, it
51
Page 52

SPRING OFFENSIVE 1918
was re-equipped with Camels in December 1917, which
it flew until the end of the war. It finished the war with
something over 125 victories. During the fighting 11
pilots became aces whilst flying with 54. It was heavily
engaged during the German Spring Offensive, often
flying ground attack missions, losing 40 Camels
between February and April, mainly to ground fire.
Notable pilots with the squadron at the start of the
German attack were Hackwill (3 victories by 21st
March and a final score of 9), Kitto (4/9), Gonne (5/5)
and Maxwell (5/9).
nlike the Jastas, most British units tended not to
use colourful markings. The Camels of 54
U
Squadron were in the standard British colour scheme,
with metal cowlings and large white numerals on the
fuselage sides, sometimes in front of the roundel,
sometimes behind.
CHAPTER 4 - CAMPAIGN HISTORIES
GERMAN FIGHTER AIRCRAFT AT THE
FRONT - FE BRUA RY 1918
Albatros DV 250
Albatros DVa 475
Pfalz DIII 182
Pfalz DIIIa 261
Fokker Dr1 143
o
52
Page 53

CHAPTER 4 - CAMPAIGN HISTORIES
THE HAT IN THE RING
n 27th May 1918, the Germans attacked French
positions along the Chemin des Dames,and once
O
again a breakthrough was achieved. Most of the crack
German Jastas flew in support of this offensive, and
accordingly many French squadrons suffered heavy
losses. American troops were moved forward to
contain the German advance. On 29th May, the 1st US
Division attacked and captured the village of Cantigny,
fighting off a series of violent German counterattacks
in the process. The first offensive operation by
American forces had been a success. Further US forces
were committed to the fighting as the German attack
continued. Between 30th May and 17th June, the 2nd
and 3rd US Divisions checked and then repulsed the
German advance at Belleau Wood and Chateau
Thierry. The Germans had driven a bulge over 20 miles
deep in the Allied lines since 27th May, but this had
been a last effort. Two further German offensives were
launched, but with little effect. By 17th July, the
HAT-IN-THE-RING 1918
opportunity for a ‘knock out’ blow had passed and the
German armies went onto the defensive. The initiative
in the war was now firmly with the Allies,especially as
300,000 fresh American troops were now arriving in
France every month. British, French and American
forces all prepared to attack. Germany’s last hope was
to fight a defensive war until the Allies became
exhausted, so avoiding battlefield defeat and allowing
some sort of compromise peace to be negotiated.
he Americans were also making their mark in the
air. On the 14th April 1918, the 94th Aero
T
Squadron - ‘Hat in the Ring’- scored its first two
victories, a Pfalz and an Albatros falling to Campbell
and Winslow. From this beginning,the squadron would
score 67 victories by the end of the war.Although these
victories were not the first scored by Americans during
the war, they were the first scored by an ‘official’ US
squadron. This was a significant achievement for a
force which in 1917 had mustered only 250 aircraft,
none of which were fit for combat, and 131 officers.The
Americans, struggling to develop an effective aero
industry, were equipped with British and French
aircraft. Initially the main fighter was the somewhat
suspect Nieuport 28, which had been largely rejected
by the French in favour of the Spad XIII, but
shortcomings in material were to a degree offset by the
excellent quality of the American flyers. The
requirements for a pilot were:
‘The candidate should be naturally athletic and have
a reputation for reliability,punctuality and honesty.He
should have a cool head in emergencies,a good eye for
distance, a keen ear for familiar sounds, a steady hand
and a sound body with plenty of reserve; he should be
quick-witted, highly intelligent and tractable.
Immature, high strung, over-confident, impatient
candidates are not desired.’
It’s 1918, and the US
Expeditionary Force is
unleashing its new aero
pursuit squadrons, to
help roll back the German
lines once and for all.
Control of the air is vital.
53
Page 54

HAT-IN-THE-RING 1918
CHAPTER 4 - CAMPAIGN HISTORIES
It is, however, curious to note that
these latter characteristics would have
disqualified many of the top
European aces from achieving
greatness in the air.
he first American operations
were conducted on the relatively
T
quiet Meuse - Argonne front. In June
the 1st Pursuit Group (94th and 95th
Aero Squadrons) moved to the
main battle front in the Chateau
Thierry-Soissons area. Initially, the
time against the vastly more knowledgeable Jastas,
especially as most of the Jagdgeschwaders were, by
now, flying the Fokker DVII. On 1st August, six
American pilots were lost. However, the combat was
not all one-sided. Menckhoff, the commander of the
successful Jasta 72 with 39 victories to his name, was
shot down and captured over Chateau Thierry by the
95th Squadron on 25 July. The situation continued to
improve when the 2nd Pursuit Group arrived, and the
Americans replaced their Nieuports with Spads. They
were also given a respite when JG1, 2 and 3 moved
back to the British front to counter the attack at
Amiens. The RAF, in turn, also suffered heavily from
this concentration of German aerial expertise. But the
Jagdgeschwaders could only hinder,not stop,Allied air
operations, and they could not cover the entire front.
D
Squadron) attacked a Pfalz which started to burn. The
pilot leapt from the cockpit and deployed a parachute,
the first time this had been done from an aeroplane in
combat. Only the German Air Service would utilise this
invention during the war and it would save many pilots,
including Udet who would finish the war as their top
inexperienced pilots had a very tough
uring the August fighting a new invention was
seen. On 11 August, Gardner (RAF, 19
surviving ace. The RAF declined to use it, believing
‘that pilots, given a means to escape, would be tempted,
when under threat, to abandon their machines
prematurely.’ An astonishing insult to the courage of
airmen who had flown a non-stop offensive from the
dawn of air combat, often in inferior machines, and
whose morale had never cracked.
y now, the infamous Triplane had been largely
withdrawn from German service (there were
B
only 65 at the front in July), partly because it was too
slow and partly because a shortage of lubricating oil
made it almost impossible to maintain. A few aces
managed to hold on to a triplane for personal use,
despite an official order that all were to be withdrawn,
but it was an uphill struggle to keep them serviceable.
Jacobs (Jasta 7, flying an all black aircraft) was forced
to use captured Camel engines in his machine, offering
German infantry a crate of champagne for every
engine they could salvage for him from the front lines.
He managed to keep his aircraft airworthy into
October. Jacobs finished the war with 48 victories. 30 of
54
Page 55

CHAPTER 4 - CAMPAIGN HISTORIES
HAT-IN-THE-RING 1918
these scored whilst flying a Triplane, making him the
most successful Triplane pilot of the war. The Fokker
DVII was a worthy replacement, but there were simply
not enough. Jastas which had failed to establish a
reputation had to continue to use the now severely
outclassed Albatros and Pfalz. The next generation of
German fighter aircraft; the Fokker DVIII and
Siemens-Schuckert DIV, were delayed due to engine,
fuel and oil shortages.
n 12th September, the Americans launched
an attack around St. Mihiel to keep the pressure
O
on the Germans. In the air, they were supported
by 12 fighter squadrons, 3 bombing squadrons, 10
observation squadrons and one night reconnaissance
squadron. To these American units, ‘Billy’ Mitchell,
commander of the 1st Army Air Service, could add 61
French squadrons. This combined force totalled 701
fighters, 366 reconnaissance aircraft, 323 day bombers
and 91 night bombers. In defence, the Germans had
around 72 fighters, 24 bombers, 105 reconnaissance
aircraft, six ground attack aircraft and six long distance
photo aircraft. Some of the German fighter units in the
area were currently re-equipping with the DVII. On
the second day of the battle, JG2 arrived, which could
only field about 40 aircraft, but these were all Fokker
DVIIs with the more powerful BMW engine. During
September, this unit claimed more than 80 victories for
the loss of five pilots.An American infantryman would
write of JG2’s activities:
‘They had absolute control of the air where I was and
flew at will over us ... they flew in squadrons of 5 to 35.’
G1, now commanded by Herman Goring, arrived
in the area towards the end of the month, partly to
J
check the Americans and partly because its pilots
needed a rest. Against the British in August, despite its
successes, it had lost all 4 of its Jasta commanders,
Lowenhardt killed, Lothar von Richthofen and Wenzel
wounded, and Udet withdrawn from active duty,
exhausted. JG1 was also equipped with DVIIs, and
possibly some of the new monoplane Fokker DVIII.
The Jastas continued to claim victories but Stark of
Jasta 34 commented:
‘The enemy’s material superiority was making itself
more and more felt, and so dooming us to failure.’
eptember was to be an extremely bloody month
for all of the opposing air services. Indeed, it
S
almost made the losses of Bloody April pale into
insignificance. For the Jasta pilots, it was to be their
‘final hurrah.’ Shortages of fuel and equipment were
starting to seriously curtail their operations, and the
strain of continual combat was taking its toll. Many
Jastas were lucky if they could mount patrols with more
than six aircraft, and success mainly depended on one
or two skilled pilots. Jasta 11, so long the scourge of
Allied squadrons became a shadow of its former self,
scoring only eight victories in September. Jasta 36 of
JG3 was withdrawn from the
front after being reduced to
three aircraft. Unlike Bloody
April, during September 1918
the German fighters were
normally prevented from
getting at the vulnerable Allied
two-seater reconnaissance
machines, and, although they
had the ability to inflict a lot of
damage on the escorting Allied
fighters, their impact on the
battlefield was minimal. In the
main the Allied fighter
squadrons were more than
55
Page 56

HAT-IN-THE-RING 1918
CHAPTER 4 - CAMPAIGN HISTORIES
capable of looking after themselves. It was only if they
were unlucky enough to come across a Jagdgeschwader
at full strength or a top quality unit such as Jasta 5 that
losses could be severe.
he Americans played a vital role in sustaining
Allied air supremacy in September. Their fighter
T
pilots were aggressive, and their commanders were far
more willing than their RAF counterparts to patrol in
large numbers with multiple squadrons. However, their
bombing squadrons took a large number of
unnecessary losses, mainly due to operating in small
flights without escorts. Nevertheless, despite the
sometimes heavy casualties often incurred when
confronting the best of the Jastas, American squadrons
continued to operate effectively over the battlefield.
The Americans lost 87 aircraft (37 of these being
fighters) in September and claimed 135 victories.Total
Allied losses in September were 560 aircraft. In total
the Allies claimed 765 to 1,180 victories. German
records admit to at least 107 losses but figures are
incomplete, and generally only refer to crew casualties
rather than aircraft lost. Although the raw figures
might indicate an Allied defeat in the air, this was not
the case.The Germans could inflict casualties on Allied
air operations, but not stop them. This aerial support
greatly aided Allied ground offensives with strafing,
bombing, reconnaissance and artillery spotting
missions. Equally importantly, they prevented German
aircraft from carrying out these tasks, making it even
harder for the German Army to respond to the almost
continual advance of the Allied forces.Yet, despite the
intensity of the combat, there were still occasions when
chivalry between opponents was seen. Stark had the
following encounter with a RAF pilot :
‘... we attack and begin to turn ... neither can get on
the other’s tail and put in a burst ... is it not senseless to
think of fighting now? The other pilot raises his hand
and waves to me; simultaneously both machines pull
out of their turns.Now they are flying side by side, quite
close to one another.Weary of the combat,two birds of
prey soar through the evening sky on peaceful wings ...
I wave to him for the last time; we detach our thoughts
from one another and break off our flight.’
he American squadrons continued to grow in
strength and expertise after September. By the
T
end of the war, there were 45 American squadrons at
the front with 740 aircraft. Victories claimed by the
Armistice totalled 781 (with 88 aces) for 289 losses.
n 27th September, Allied Armies attacked the
much-vaunted Hindenberg Line defences. This
O
German position fell remarkably quickly and, by 8th
October, it was in Allied hands.The advance continued
and on 17th October, a Camel landed at the recently
liberated port (and favourite leave destination for
German troops) of Ostende. Although the German
56
Page 57

CHAPTER 4 - CAMPAIGN HISTORIES
HAT-IN-THE-RING 1918
defences were crumbling, air combat could still be
intensive - and deadly. On 30th October, the RAF lost
41 fighters (and claimed 67 victories). The Jastas
continued to fight to the end, but it was to no avail.As
the British fought their way through the Hindenberg
Line, the American Army was pushing forward in the
Meuse-Argonne region. Fighting was bitter and initial
progress was slow as German reinforcements rushed to
the area. At the start of November, fresh troops led a
resumption of the American assault.The final German
defensive positions were overrun and American
spearheads broke out into open country.
n 11th November Germany accepted defeat, the
guns fell silent and the Great War was over. The
O
cost of the war in the air had been enormous. The
German Air Service had lost 5,853 men killed, 7,302
wounded and 2,751 prisoner or missing. The RAF had
lost 6,166 killed, 7,245 wounded and 3,212 prisoner or
missing. Yet, for some, there remained regrets, and the
wingless future was regarded with uncertainty:
‘The land that encircles us is an alien land. The life
that swallows us up is an alien life. We live in an alien
country that we cannot know. Our home - our home is
dead. And this home of ours was the Jasta.’ - Rudolph
Stark, commander Jasta 35
RICKENBACKER AND THE
‘HAT IN THE RING’ SQUADRON
ickenbacker claimed his first victory on 29th
April, and by 30th May, he was an ace with five
R
victories (despite flying the unpopular Nieuport 28)
and had been promoted to flight commander.
Unfortunately, he developed a serious ear infection
which kept him out of combat until September. Indeed,
initially it was feared that he would never be able to fly
again. He scored at least six victories in September
piloting a Spad XIII, flying against the best of the
German airforce. By the end of October,he had scored
26 victories and was commanding the 94th ‘Hat in the
Ring’ Squadron. Other American pilots were not
far behind, Lambert scored 18 to 22 serving
with the RAF,Iaccaci 17 to 18 (also with the
RAF) and Luke, who also won the
Congressional Medal of Honour
(posthumous), scored 18. A German
who witnessed Luke’s last fight
wrote:
‘He was a man of dazzling
courage, one of the bravest we
fought in the war.’
he 94th Squadron tended to
sport rather more colourful
T
aircraft than most Allied units.
Rickenbacker’s Spad had a red
band around the nose, a red ‘1’ on
the top wing and fuselage, and red,
white and blue stripes on the upper
wing. Chambers’ aircraft had a blue
nose with white stars, red and white
striped fuselage (fore to aft), red and
white striped upper wing and a blue tail
with white wings. Palmer had an aircraft with
red and blue diamonds on the upper surfaces and
a blue and white striped fuselage. Other aircraft
included one covered in black and white stripes and
one with white wings, blue fuselage and covered in red
and blue spots.
otable pilots with the squadron (in addition to
Rickenbacker) included Coolidge with 8
N
victories, Chambers 7,Cook 7 and Campbell 6.
57
Page 58

HAT-IN-THE-RING 1918
CHAPTER 4 - CAMPAIGN HISTORIES
Jagdgeschwader 2 fought extensively against the
Americans. Its markings were as follows:
Jasta 12 DVIIs had dark blue fuselages with white
noses and tails.
asta 13 DVIIs had green noses and dark blue
fuselages.Tailplanes were blue and the wings were
J
covered in the standard German lozenge camouflage
pattern. Buchner who ended the war with 40 victories,
mainly scored on the American front,had a DVII in the
above markings but with the addition of a white and
green chequer board stripe around the fuselage,
and the fuselage cross was replaced by a picture
of a werewolf. The 94th had several encounters
with this Jasta.
THE JASTAS
Jasta 15 DVIIs had blue fuselages, red noses and
white upper wings and fin.
Jasta 19 DVIIs had yellow noses, dark blue fuselages
and tailplanes and a white rudder and fin.
enckhoff’s Jasta 72 had white fins and lozengecovered wings and tailplanes. Menckhoff’s own
M
aircraft carried a large white ‘M’ on the fuselage and
top wing centre section.
ther notable German pilots active against the
Americans included Haussmann (Jasta 13, 15
O
victories), Hantelmann (Jasta 15, 25 victories including
the American aces Putnam and Wehner), Becker (Jasta
12, 23 victories) and Beaulieu-Marconnay (Jasta 15 and
19, 25 victories).
he above were not the only Jastas flying against
the Americans, merely some of the more
T
successful ones. Rickenbacker reports that JG1 aircraft
all had red noses and JG2 all had yellow undersides.An
American officer reported a unit (which from the
context would appear to be JG2) as having red noses,
yellow and black sides and white tails with a black
cross. There are also references to all red aircraft and
aircraft sporting a chequer board pattern.
o
58
Page 59

NIEUPORT 28
TECHNICAL DATA
Speed: 128 mph at sea level, 123
Climb Rate: 5.0 minutes to reach 6,500’,
Maximum Ceiling: 20,000’
Wingspan: 26’ 9”
Length: 21’
Weight approx: 1,540 lbs loaded
Armament: 2 Vickers machine
Fuel endurance approx: 36 gallons, endurance
FLYING THE NIEUPORT 28
The Nieuport is a rotary-engined scout with a 160 hp
powerplant. It is therefore a fast and manoeuvrable
machine, but its performance is compromised by
serious structural weakness. Pilots should generally
attempt to outmaneuver their opponents in a turning
fight for although the Nieuport is capable of
competing in a zoom and dive engagement with the
older German scouts (such as the Albatros and Pfalz),
these tactics should be used with circumspection as
the Nieuport ‘has a grim tendency to shed its wings’.
Wing failure is likely either during a prolonged power
dive, or when the aircraft is pulled into an overly
abrupt climb at high speeds. Equally, stunting or
spinning the aircraft are not recommended. Should
the machine’s wings start to collapse, it may be
possible to crash land if the aircraft can be righted
and flown with minimal throttle.
Although the Nieuport is fast for a rotary-engined
aircraft, the more recent German fighting machines
have a speed advantage. This, coupled with the
aircraft’s structural weakness, can make
mph at 6,500’, 121 mph at
9,800’, 119 mph at 13,100’
9.0 minutes to 9,800’,
21.25 minutes to 16,400’
guns firing forward.
approx. 2.25 hours
CHAPTER 5 - THE AIRCRAFT IN FLYING CORPS GOLD
disengagement from an aerial encounter
problematical. Consequently, pilots are advised
always to maintain a height advantage over their
opponents.Allowing the enemy to get above you in a
dogfight is invariably hazardous; doing so in a
Nieuport can be fatal as the German fighters can
trade this edge for superior manoeuvrability far more
efficiently than the Nieuport. Diving away from an
aerial battle is always dangerous; in the Nieuport it is
doubly so. Similarly, diving attacks must be executed
with care. All enemy fighters are superior to the
Nieuport in dive performance.
Changes in throttle setting should be gradual, as the
aircraft is sensitive to sudden changes in power. This
applies to both level flight and take off, where aileron
assistance may be required to keep the aircraft
under control.
The Nieuport’s high altitude
performance may be suspect as many
of them struggle to get above 18,000’.
The Nieuport therefore requires a
gentle hand, it does not take kindly to
being thrown about. However,provided
pilots are prudent in how they handle
their aircraft and are mindful of its
shortcomings, they should find
it adequate in most aerial
combats.
NIEUPORT 28
59
Page 60

CHAPTER 5 - THE AIRCRAFT IN FLYING CORPS GOLD
SPAD XIII
TECHNICAL DATA
SPAD XIII
Speed: 133 mph at 6,500’,
Climb Rate: 2.3 minutes to reach 3,280’,
Maximum Ceiling: 22,000’
Wingspan: 26’ 6’’
Length: 18’ 11’’
Weight approx: 1,850 lbs
Armament: 2 Vickers machine guns
Fuel endurance approx: 2 hours
131 mph at 10,000’,
127 mph at 13,000’.
5.0 minutes to 6,500’, 8.3
minutes to 9,800’.
firing forward.
FLYING THE SPAD
The Spad is very fast, very powerful and very stable.
To succeed, pilots need to make maximum use of
these qualities. The aircraft takes considerable effort
to turn and sudden changes of direction are difficult.
Pilots are strongly advised not to dogfight with
enemy triplanes or Fokkers but rather stick to dive
and zoom tactics or the vrille manoeuvre.The Spad is
immensely strong and can be dived at considerable
speed. This speed can, in turn, be converted into an
excellent zoom climb. Pilots should therefore dive
onto their prey and climb out after the attack using
the speed which has built up and prepare for another
go. High-speed attacks are rendered easier as the
Spad is a very stable gun platform due to its inherent
stability. It is comfortable at all altitudes and a
suitable aircraft for ground strafing.
To avoid enemy attacks, pilots are encouraged to
utilise either the Spad’s fine climb performance or a
prolonged dive with evasive manoeuvres. Not even
the Fokker can stay with the Spad in this area. The
superior speed of the Spad makes disengagement
from a difficult situation possible by the simple
expedient of outrunning the enemy, but this still
requires a degree of careful timing.
Pilots are advised always to keep the Spad’s speed
high in combat. Firstly, because this is one of its main
advantages over enemy aircraft and secondly,
because the Spad is difficult to handle at low
airspeeds and is tail-heavy. Caution should be
exercised when switching the engine off in flight, as
the sole method of restarting the motor is a long dive
of around 1,500’ to force the propeller to revolve.
Care must also be taken when landing the Spad. It
has a dauntingly high glide angle and so has to
be brought in under power and it is also prone to
ground looping.
60
Page 61

FOKKER DRI TRIPLANE
TECHNICAL DATA
Speed: 110 mph at sea level, 97 mph
Climb Rate: 2.9 minutes to reach 1,000m,
Maximum Ceiling: 19,600’
Wingspan: 23’ 7’’
Length: 18’ 11’’
Weight approx: 1,290 lbs loaded
Armament: 2 Maxim machine guns
Fuel endurance approx: 1.5 hours
FLYING THE DRI
The DrI is a classic rotary-engined fighter, a superb
aerobatic machine. Indeed,it is an inherently unstable
machine which ‘climbs like a monkey and
manoeuvres like the devil’. It is,however, rather slow,
especially when compared to the high-performance
Allied machines such as the Spad XIII and the SE5a.
Pilots should be aware that the triplane is very
sensitive on every axis, it is light and follows the
slightest movement of the controls. One can turn on
the spot like a top and the aircraft climbs like a lift. In
combat, pilots should make maximum use of its
manoeuvrability and stick close to their opponent.
The triplane turns sharply, especially to the right and
is capable of rolling rapidly. It delights in snap
manoeuvres and is capable of very rapid flat turns.
Because the triplane has such extraordinary climbing
ability, it is superior in aerial combat to any enemy.
The triplane can also hang on its prop for a
considerable period of time.
When attacked, pilots should always turn to the right,
as in this direction it should be able to out-turn every
Allied aircraft. Left turns should be avoided, as
machines such as the SE5a have an equal
performance in this direction.
at 3,000m, 86 mph at 4,000m.
5.5 minutes to 2,000m,
9.3 minutes to 3,000m.
firing forward.
CHAPTER 5 - THE AIRCRAFT IN FLYING CORPS GOLD
Pilots should be aware that the triplane does have two
major weaknesses. Firstly,it is slow, both in level flight
and the dive. Even the
Camel, the enemy’s most
notable rotary-engined scout,
is superior to the DrI in this
respect. This is especially
marked at high altitudes.
Secondly, the triplane is a very
lightly-built aeroplane and
has difficulty in withstanding
the heavy strain of the
sharp turns and dives
which are so often
necessary in a
dogfight.
The aircraft
also has some
idiosyncrasies which pilots need to be aware of. The
nose goes down in right- hand turns and up in lefthand turns. In both cases, to maintain a constant
altitude in steep turns, left rudder is required. The
triplane is also laterally unstable on the ground so
care must be taken during take off and landing.
In summation, pilots will find the triplane an
extremely flexible machine, but possibly too slow
for a truly effective fighter. Because of its
manoeuvrability, it is hard for the enemy to shoot
down. On the other hand, because the enemy
is generally faster, it is easy for him to escape
the same fate.
FOKKER DRI TRIPLANE
61
Page 62

CHAPTER 5 - THE AIRCRAFT IN FLYING CORPS GOLD
ALBATROS DIII
ALBATROS DIII
TECHNICAL DATA
Speed: 108 mph at sea level, 96 mph
Climb Rate: 3.7 minutes to reach 1,000m,
Maximum Ceiling: 18,000’
Wingspan: 29’ 7’’
Length: 24’
Weight approx: 1,950 lbs
Armament: 2 Maxim 08/15 Maxim
Fuel endurance approx: 1.75 hours
FLYING THE ALBATROS
at 2,000m, 93 mph at 4,000m
8 minutes to 2,000m,
12 minutes to 3,000m
machine guns firing forward.
This aircraft is a scout with a 160 hp in-
line engine. It is therefore a fast
machine whilst the sesquiplane layout
makes it manoeuvrable. This layout
also increases the view from the
cockpit. It is generally superior to the
enemy rotary engined machines with
regard to speed, and, although care
must be taken when entering a
turning engagement, the Albatros can
compete effectively in this style of
also
fighting.The Albatros performs best at under 12,000’,
an altitude it can reach efficiently by climbing at
about 60 mph. Below this height, the Albatros can
waltz around most enemy machines if its superior
climb and speed are utilised. Pilots will find the
engine reliable, and the Albatros is comfortable to fly
due to the absence of torque effect from the
powerplant. Pilots should also note the advantage
they have with regards to armament compared to the
enemy machines. The Albatros is fitted with two
synchronised machine guns, firing through the
propeller arc. Currently no Allied machine carries
such a concentration of firepower.
Although it is a fine machine, pilots should be aware
that the Albatros does have some shortcomings. At
15,000’, it is an uncertain swimmer and is heavy and
clumsy when turning. When fighting at this altitude,
the Sopwith Pup can comfortably out-turn the
Albatros so pilots will have to use their speed
advantage to offset this. It is said that the enemy
Nieuport can outclimb the Albatros. If this is so,
pilots should use the Albatros’ superior speed
and zoom climb.
Regrettably the wings of this scout are relatively
weak. Structural failure can occur in high speed dives
or during an over-vigorous pull up.
Overall, the aircraft is easy to fly with few vices.It is
unlikely to catch fire, has a comfortable gliding angle
and good fields of view from the cockpit. Pilots will
be pleased to learn that the radiator has been
moved from the wing centre section, thereby
minimising the chance of scalding, should it be
damaged during combat.
62
Page 63

TECHNICAL DATA
SOPWITH CAMEL
Speed: 122 mph at sea level,
Climb Rate: 6.5 minutes to reach 6,500’,
Maximum Ceiling: 19,000’
Wingspan: 28’
Length: 18’ 9”
Weight approx: 1,450 lbs
Armament: 2 Vickers machine guns firing
Fuel endurance approx: 2.5 hours
FLYING THE CAMEL
Camels are wonderful fliers once you have got used to
them, which takes about three months of hard flying.
At the end of that time you are either dead, a nervous
wreck or a terror to the Huns.The Camel is inherently
unstable and has to be held in flying position all the
time as it is out of it in a flash. Steep turns are a real
joy,nothing in the skies can follow so tight a circle and
the Camel can turn three times to the right in the time
it takes an Albatros to do two. Full left rudder is
required to stop the nose from sliding down towards
the earth in right hand turns and from climbing
towards the sky in left hand turns. Do not be afraid to
let the speed fall below 70 knots when turning. Nothing
will half roll like the Camel. A twitch of the stick and
flick of the rudder and you are on your back. The nose
drops at once and you pull out, making a complete
change of direction in the least possible time.Although
the Camel can be dived at speed, care must be taken
not to lose engine pressure, and at over 150 knots the
aircraft does not handle so well.
The Camel will loop very quickly but this stunt
requires a great deal of practice and is seldom of any
use in combat.
The Camel does have a tendency to spin. To recover,
centralise the controls, and after about four turns the
115 mph at 6,500’,
113 mph at 10,000’
10.8 minutes to 10,000’,
21.8 minutes to 15,000’
forward.
CHAPTER 5 - THE AIRCRAFT IN FLYING CORPS GOLD
machine will come out of the spin. It can be forced out
more quickly by applying opposite rudder and pushing
the stick forward briskly but this does not always have
the desired result. Pilots are advised to allow lot of
height for spin recovery.
The drawback of the Camel is its speed - if it was only
50% faster! A Camel can neither catch anything
except by surprise, nor hurry away from an awkward
situation and seldom has the option of either accepting
or declining combat. Camels are happier at lower
altitudes, and patrols should generally be carried out at
12,000’ or below as above this the machine becomes
less manoeuvrable, giving the advantage to the Hun.
They are, however, good machines for ground strafing
and can dive straight down on anything, and, when a
few feet off the ground, go straight up again.
The Camel is generally robust and is armed with twin
synchronised machine guns firing forward, being
the first Allied scout to equal the Germans in
this particular.
During take off or landing the Camel
must be treated with respect. Keep plenty
of speed when low down and remember to
use plenty of left rudder to keep the nose
straight. Visibility is poor over the
engine cowling and, when taking
off, it is suggested that the tail
skid is brought off the ground as
soon as speed allows in order to
improve this.
SOPWITH CAMEL
63
Page 64

CHAPTER 5 - THE AIRCRAFT IN FLYING CORPS GOLD
SE5A
126 mph at 10,000’,
123 mph at 15,000’
11 minutes to 10,000,
19.9 minutes to 15,000’
fire through propeller arc, 1
Lewis mounted on top wing
and practical asset in any form of war.
SE5A
TECHNICAL DATA
Speed: 137 mph at sea level,
Climb Rate: 4.92 minutes to reach 5,000’,
Maximum Ceiling: 20,000
Wingspan: 26’ 8’’
Length: 20’ 11’’
Weight approx: 1,980 lbs
Armament: 1 Vickers synchronised to
Fuel endurance approx: 2.5 hours
FLYING THE SE5A
The SE5a is a stationary-engined scout and is the
fastest fighter currently in service. It is a high
performance machine and performance
means initiative which is the most valuable
rapidly appreciate its good points; great
strength, diving and zooming powers and
its splendid view. It is a very easy machine
to fly with innocuous stalling characteristics.
With its new and more powerful engine,the
SE5a retains its performance and
manoeuvrability at high level (unlike the
Pilots
will
Camel). It is more agile than the Spad and easier to
handle.Although the SE5a is a capable dogfighter, for
best results pilots should utilise dive and zoom tactics.
The SE5a has such a climb and reserve of power that
it is quite usual for a machine to get some speed first
and then do a vertical zoom, getting in a burst. It
delights in a steep dive, and is steady and quick to
gather speed whilst diving. It can be looped, rolled
and dived vertically at speed without fear of breaking
up. It is well-armed with two machine guns and is a
stable gun platform.
In combat a well-handled SE5a should be able to
outzoom any hostile scout encountered. Against the
German triplane don’t ever attempt to dogfight it on
anything like equal terms as regards to height,
otherwise he will get on your tail and stay there until
he shoots you down. To avoid a triplane, stay in a
vertical bank (preferably to the left) with full throttle,
flick out of the turn as soon as the triplane appears to
be changing his position and then run like hell for
home, kicking your rudder hard from side to side.
Pilots will find it very fine to be in a machine which is
faster than the Huns, and so be able to run away
should things get too hot.
The SE5a can be used for ground attacks, the
suggested method being to dive from 500’, pulling out
at about 50’. The dive and steep pull out can be made
without fear of structural failure.
The SE5a poses no difficulties with regard to take off
or landing, being easy to handle at low airspeeds due
to its stability.It can be floated onto the airfield.
Possessing an excellent combination of speed,
manoeuvrability and performance at altitude, the
SE5a can be used successfully both as an offensive
and defensive machine.
64
Page 65

CHAPTER 5 - THE AIRCRAFT IN FLYING CORPS GOLD
TECHNICAL DATA
FOKKER DVII
Speed: 115 mph at sea level, 114
Climb Rate: 3.9 minutes to reach to
Maximum Ceiling: 20,000’ to 23,000’
Wingspan: 29’ 2’’
Length: 22’ 10’’
Weight approx: 1,900 lbs loaded
Armament: 2 Maxim 08/15 Maxim
Fuel: 21 imperial gallons,
mph at 3,000m, DVIIF 124
mph at 3,000m
1,000m. DVIIF 2.5 minutes
to reach 1,000m
machine guns firing forward.
endurance approx. 2 hours
NOTES
This was one of the outstanding fighters of the war.
It was fortunate for the Allies that there were only
407 in service by July 1918. Donald Hardman (19
Squadron RAF 9 victories) detailed its strengths
as follows:
‘It could climb to 20,000’ at terrific speed, very good
speed on the level and could dive at almost any rate
... it turned at lightning speed and would perform any
stunt better than any other machine. Its success was
attributable to the fact that it was a fairly easy, yet
responsive machine to fly.’
65
Page 66

CHAPTER 5 - THE AIRCRAFT IN FLYING CORPS GOLD
TECHNICAL DATA
Speed: 111.5 mph at sea level, 106
Climb Rate: 5.16 minutes to reach 5,000’,
Maximum Ceiling: 18,500’
Wingspan: 26’ 6’’
Length: 19’ 4’’
Weight: 1,099 lbs loaded
Armament: 1 Vickers or 1 Lewis
Fuel: 18.5 imperial gallons,
15,000’ and, at high altitude, completely outclassed
the Albatros,being able to turn twice as quickly and,
disadvantage against the German Scouts. In common
with all Allied fighters at this time, the standard
armament was a single machine gun against two on
the Albatros. Its wings were stronger than the
Nieuports with at least one pilot diving at 180 mph,
although this was not recommended.
66
SOPWITH PUP
mph at 6,500’, 104 mph at
10,000’, 94 mph at 15,000’
approx. 13.75 minutes to
10,000’
endurance 3 to 4 hours
NOTES
British designed stablemate to
the Nieuport, the Pup, was a
very popular machine being ‘a
delight to fly’. Its strengths were
that it was fully aerobatic to over
equally importantly, maintaining height whilst
turning. Its weaknesses were similar to the
Nieuports; it suffered from being relatively
slow and the initial climb was mediocre which
meant that at low level it fought with a definite
NIEUPORT 17
TECHNICAL DATA
Speed: 103 mph at sea level,
Climb Rate: 3.09 minutes to reach 3,280’,
Maximum Ceiling: 17,390’
Wingspan: 26’ 9’’
Length: 19’
Weight: 1,232 lbs loaded
Armament: 1 Vickers or 1 Lewis
Fuel: 17.6 imperial gallons,
NOTES
The French Nieuport was generally liked by its pilots
who appreciated its manoeuvrability. Its strengths
were that it could turn tightly and had a fair rate of
climb. Its weaknesses were that it was slower than the
Albatros, had only 1 machine gun and exhibited a
tendency to shed its wings in a dive.The Nieuport 17
equipped many RFC and French squadrons in 1917.
A more powerful engine was later fitted
which improved performance but the Albatros
still held the advantage.
99 mph at 6,560’,
96 mph at 9,840.’
6.83 minutes to 6,560’,
11.5 minutes to 9,840.’
endurance 1.75 hours
Page 67

CHAPTER 5 - THE AIRCRAFT IN FLYING CORPS GOLD
1
SOPWITH 1
TECHNICAL DATA
Speed: 91 mph at sea level,
Climb Rate: 29.5 minutes to reach 10,000’
Maximum Ceiling: 16,000’
Wingspan: 33’ 6’’
Length: 25’ 3’’
Weight: 2,223 lbs loaded
Armament: 1 Vickers firing forward,
Fuel endurance approx: 3 to 4 hours
/
STRUTTER
2
87 mph at 10,000’
1 Lewis manned by the
observer for rear protection
NOTES
A British two-seat aircraft mainly used for
reconnaissance and bombing, the Strutter was
originally designed as a two-seat fighter and was
the first British aircraft to carry a synchronised
machine gun firing forward through the propeller,
whilst the Scarff No2 mount gave the observer a
better field of fire than on previous British twoseaters.Unfortunately it was rapidly outclassed by the
Albatros in the fighter role. Although more capable
of looking after itself in a battle than most Allied twoseaters in 1917, it still suffered when caught by the
Jastas. On bombing missions it often flew without the
reargunner to allow more bombs to be carried.
TECHNICAL DATA
BRISTOL F2A
Speed: 110 mph at sea level,
Climb Rate: 14.5 minutes to reach
Maximum Ceiling: 16,000’
Wingspan: 39’ 3’’
Length: 16’ 2’’
Weight: 2,600 lbs loaded
Armament: 1 Vickers firing forward,
Fuel endurance approx: 3 hours
NOTES
The Bristols’ introduction at the start of ‘Bloody
April’ was disastrous when 48 Squadron lost four
from a flight of six to Jasta 11.This was mainly due
faulty tactics which relied on the rear gunners for
defence. Following this easy victory, the Germans
regarded the Bristol as yet another lumbering twoseater unable to adequately defend itself. However,
once British pilots learnt to use the ‘Brisfits’
performance offensively and dogfight, German pilots
learnt to treat it with respect and a degree of caution.
The later versions combined the performance of a
fighter (Stark commented on it being ‘amazingly
nimble’) with the added protection of a rear gunner.
101 mph at 10,000’
to 10,000’
1 Lewis manned by the
observer for rear protection
67
Page 68

CHAPTER 5 - THE AIRCRAFT IN FLYING CORPS GOLD
TECHNICAL DATA
Speed: 72 mph at 6,500’
Climb Rate: 20 minutes to reach 6,500’
Maximum Ceiling: 10,000’
Wingspan: 37’
Length: 27’ 3’’
Weight: 1,650 lbs loaded
Armament: 1 Lewis manned by
Fuel endurance approx: 3 hours
the observer
NOTES
This was the standard British reconnaissance aircraft
in 1917. It had first flown in 1912 and then been
modified to increase its stability, leading to the
nickname ‘Stability Jane.’ Whilst this principle made it
an admirable machine for leisurely reconnaissance, it
was disastrous for a fighting aircraft. Initially
unarmed, at least in 1917 it carried an observer armed
with a Lewis gun for defence, but,unfortunately, as he
sat in the front cockpit, his field of fire was somewhat
limited. Written off as ‘Fokker Fodder’ in 1915,it was
to suffer worse in ‘Bloody April.’, 75 being shot down
in that month.
68
TECHNICAL DATA
Speed: 98 mph at 6,500’,
Climb Rate: 22 minutes to reach
Maximum Ceiling: 13,000’
Wingspan: 42’ 7’’
Length: 27’ 10’’
Weight: 2,600 lbs loaded
Armament: 1 Vickers firing forward,
Fuel endurance approx: 4.25 hours
NOTES
A reconnaissance machine conceived as a
replacement for the BE2 when the requirements of
air combat were becoming known, the ‘Harry Tate’
must rank as one of the worst designs to see action
in WWI. It was slow, underpowered and
unmanoeuvrable. Pilots found it difficult fly, it would
spin at the slightest opportunity and was tricky
to land. Structurally weak, it also showed a tendency
to burn when damaged. On 13th April 1917,
59 Squadron sent out six RE8s on a reconnaissance
mission; all were shot down by Jasta 11 in around
five minutes.
BE2C
RE8
93 mph at 10,000’
to 10,000’
1 Lewis manned by the
observer for rear protection
Page 69

CHAPTER 5 - THE AIRCRAFT IN FLYING CORPS GOLD
TECHNICAL DATA
FE2B
Speed: 93 mph at 6,500’
Climb Rate: 10 minutes to 6,500’
Maximum Ceiling: 16,500’
Wingspan: 42’ 5’’
Length: 30’ 6’’
Weight approx: 3,469 lbs loaded
Armament: varied, typically 2 to 3
Fuel endurance approx: 3 hours
NOTES
Another aircraft used by the RFC for observation
and bombing work, it played an important role in
ending the ‘Fokker Scourge.’ It was a ‘pusher’, with
the engine at the rear of the fuselage. Although this
layout gave an excellent field of fire forward for pilot
and observer it did increase the danger from rear
attacks. Visibility behind was poor and the observer,
having to stand up in the nose of the aircraft, had
great difficulty in bringing his gun to bear in this
direction. Although obsolete by spring 1917 ‘Fees’
(unlike the BEs) could give a good account of
themselves if cornered. The FE2 was sometimes
used in the fighter role and later went on to pioneer
night bombing
Lewis guns manned by
pilot and observer
TECHNICAL DATA
DH9
Speed: 118 mph at 10,000’
Climb Rate: 11 minutes to 6,500’
Maximum Ceiling: 13,000 - 17,500’
Wingspan: 42’ 5’’
Length: 30’ 6’’
Weight approx: 3,584 lbs loaded
Armament: 1 Vickers firing forward,
Fuel Endurance aprox: 4.5 hours
NOTES
Based on the highly successful DH4 the DH9 was
designed to be a fast strategic bomber. However,
there were problems with the Siddeley Puma engine
which resulted in the DH9 being underpowered,
being a ‘good aeroplane spoiled by a bad engine’.As
a result, early DH9s with a full bomb load struggled
to reach 13,000’. Consequently DH9 squadrons on
long-range missions could suffer heavy casualties,
being less able than the DH4 to either outdistance
pursuit or fight their way out of trouble. It was not
until the American Liberty engine arrived that the
aircraft lived up to its potential.
1 Lewis manned by the
observer for rear protection
69
Page 70

CHAPTER 5 - THE AIRCRAFT IN FLYING CORPS GOLD
PFALZ DIII
TECHNICAL DATA
Speed: 112 mph at 700m,
Climb Rate: 3.25 minutes to reach to
Maximum Ceiling: 17,000’
Wingspan: 30’ 11’’
Length: 23’ 2’’
Weight approx: 2,000 lbs loaded
Armament: 2 forward firing 08/15 Maxim
Fuel: 21.5 imperial gallons,
NOTES
Introduced in late 1917, the Pfalz does not seem to
have been overly popular with German pilots, whose
preference generally was Fokker first, Albatros
second and Pfalz last. A notable exception to this
was Berthold (44 victories) who preferred the Pfalz
to the Albatros. It’s strengths were a very good
dive rate (‘a famous diver’ - Rickenbacker), general
manoeuvrability and fairly rugged construction. It
was possibly better at high altitude than the Albatros.
Weaknesses were a slow roll rate,a tendency to catch
fire and a poor glide. It suffered from being unable to
either outmaneuver the Allied rotary scouts or outfly
70
the high performance Spad or SE5a.
103 mph at 3,000m
1,000m, 7.25 min to 2,000m,
11.75 min to 3,000m
machine guns
endurance approx. 2.5 hours
TECHNICAL DATA
Speed: 97 mph at 2,000m.
Climb Rate: 7 minutes to reach 1,000m
Maximum Ceiling: 15,000’
Wingspan: 42’ 10’’
Length: 26’ 1’’
Weight approx: 2,948 lbs loaded
Armament: 1 Maxim firing forward,
Fuel endurance approx: 4.5 hours
NOTES
The Aviatik was a two-seat reconnaissance aircraft
introduced in 1917 which tended to operate at lower
altitudes than the Rumpler. This, together with a
relatively poor speed (despite a streamlined
appearance) and a tendency to either disintegrate or
burn when hit, made it vulnerable to Allied fighters.
Its best defence was a dive to safety, although on
occasion a skilful crew could fight their way out of
trouble. McCudden (57 victories) shot down at least
12 Aviatiks but twice he was outfought by one, and it
was a tougher aircraft to tackle than the RE8 was for
German pilots.
AVIATIK C
1 Parabellum manned
by the observer
Page 71

CHAPTER 5 - THE AIRCRAFT IN FLYING CORPS GOLD
TECHNICAL DATA
RUMPLER CV
Speed: 101 mph at 3,000m
Climb Rate: 4 minutes to reach 1,000m
Maximum Ceiling: 17,500’, later models 20,000
Wingspan: 41’ 6’’
Length: 26’ 11’’
Weight approx: 3,400 lbs loaded
Armament: 1 Maxim firing forward, 1
Fuel endurance approx: 4 hours
NOTES
German two-seat reconnaissance aircraft introduced
in 1917. Its strengths were its relatively high speed
(for a two-seater) and good performance at high
altitude. The Rumpler’s best defence was to fly high
and alone, thereby making discovery and interception
by Allied fighters problematical. If it was caught, the
advantage was generally with the fighter. Although a
veteran crew could make life difficult for the attacker,
the best defence was usually a dive towards the
German lines, and the Rumpler’s speed and dive
ability gave it a good chance of escaping. If the crew
were inexperienced or failed to spot the attacker in
time, their chances were poor.
Parabellum manned by the
observer.
TECHNICAL DATA
HALBERSTADT CLII
Speed: 97 mph at 3,000m
Climb Rate: 39.5 minutes to 5,000m
Maximum Ceiling: 13,500’
Wingspan: 35’ 4”
Length: 24’
Weight approx: 2,500 lbs loaded
Armament: 1 or 2 machine guns firing
Fuel endurance approx: 3 hours
NOTES
This aircraft was designed as a specialised ground
attack machine and was first seen in action at
Cambrai. It was efficient in this role, having good
performance below 1,000’ and a strip of armour
plating on the underside. This, coupled with the pilot
and observer (who had a good field of fire) being
close together to facilitate a co-ordinated defence,
made it a tough aircraft for Allied fighters to attack.
McCudden, a master at destroying two-seaters had
several encounters with this aircraft but never
managed to shoot one down. Its weakness was that it
was over-specialised and lacked the high level
performance which the Bristol had to be a true
two-seat fighter.
forward,
1 Parabellum machine gun
manned by the observer
71
Page 72

FLYING CORPS GOLD BIBLIOGRAPHY
A. Imrie, The Fokker Triplane, London, Arms and
Armour Press, 1992
C. Bowyer, Sopwith Camel, Bourne End, Aston
Publications Ltd, 1988
J. Bruce, British Aeroplanes 1914 - 1918, London,
Putnam, 1982
P. Liddle, The Airmans War 1914 - 1918, Poole,
Blandford Press, 1987
A. Clarke, Aces High, London, George Weidenfeld &
Nicolson, 1973
N. Franks, R. Guest, F. Bailey, Bloody April, Black
September, London, Grub Street,1995
N. Franks, F. Bailey, R. Guest, Above the Lines,
London, Grub Street, 1993
C. Shores, N. Franks, R. Guest, Above the Trenches,
London, Grub Street, 1990
D. Winter, First of the Few, London, Penguin Books
Ltd, 1982
A. Revell, Brief Glory, London, William Kimber &
Co Ltd, 1984
C. Bowyer, Albert Ball, VC, Wrexham, Bridge
Books, 1994
D. Baker, Manfred von Richthofen, London, Outline
Press Ltd, 1990
72
P. Kilduff, Over the Battlefronts, London, Arms and
Armour Press, 1996
P. Kilduff, Germanys First Airforce, London, Arms
and Armour Press, 1991.
P. Kilduff, Richthofen,Beyond the Legend of the Red
Baron, London,Arms and Armour Press, 1994
R. Jackson, Aces Twilight, London, Sphere Books
Ltd, 1988.
N. Franks, Aircraft versus Aircraft, London, Guild
Publishing, 1986.
M. Hiscock, Classic Aircraft of WWI, London,
Osprey,1994
N. Franks, F. Bailey, R. Duiven, The Jasta Pilots,
London, Grub Street, 1996
R. Barker, The Royal Flying Corps in France (from
Bloody April 1917 to Final Victory), London,
Constable, 1995.
A. Scott, 60 Squadron 1916 - 1919, London, Greenhill
Books, 1990
Maj. O. Stewart, Strategy & Tactics of Air Fighting,
London, Longmans,Green & Co, 1925
D. Ogilvy (Editor), From Bleriot to Spitfire,
Shrewsbury,Airlife, 1991.
B.York, Bristol F2b Fighter, F.A. Stokes Co, 1919
E. Rickenbacker, An Autobiography, London,
Hutchinson, 1967
I. Jones, King of Air Fighters, Bungay, Richard Clay
(The Chaucer Press) Ltd, 1986 edition
W.Bishop, Winged Warfare, New York, Arco, 1981.
I. Jones, An Air Fighters Scrapbook, London,
Greenhill Books, 1990
D. Grinnell-Milne, Wind in the Wires, London,
Mayflower, 1966
V. Yeates, Winged Victory, St.Albans, Mayflower,1974
J. McCudden,Flying Fury, Whitstable, Baily Brothers
and Swinfen Ltd, 1973
E. Udet, translated by R. Riehn, Ace of the Iron
Cross, New York,Arco, 1981
Page 73

A. Gould Lee,No Parachute, London,Jarrolds, 1968
A. Gould Lee,Open Cockpit, London, Jarrolds, 1969
G. Lewis, Wings over the Somme, London, William
Kimber, 1976
N. MacMillan, Into the Blue, London, Duckworth,
1929
N. MacMillan, Offensive Patrol, London, Jarrolds,
1973
W.Moore, Early Bird, London, Putnam, 1963
P. Hill, To know the Sky, London, Kimber, 1962
M.Kahnert, Jagdstaffel 356,London, Greenhill, 1985
Letters of an American Airman:a war record of Capt.
H. Coolidge, USA
C. Walsh, Mud, Songs and Blighty, Hutchinson
K. Munson, Fighters 1914 - 1919, Poole, Blandford,
1976 (rev.)
W. Green & G. Swanborough, Flying Colours,
London, Salamander, 1981
J. Woodhouse & G. Embleton, The War in the Air
1914 - 1918, London,Almark, 1974
Flt. Cdr. W. McMinnies, Practical Flying, London,
Temple Press,1918
J. Noffsinger, WW1-An annotated bibliography of
aviation books, London, Scarecrow Press, 1987
Flying Vintage Aircraft, Talk given by Wing
Commander Hartman, DFC RCAF
Fighting in the Air, RAF Manual 1918 edition.
Notes on Teaching Flying for Instructors Course at
No 1 Training Squadron
British Military Aircraft of WWI - Official Technical
& Rigging notes for RFC & RNAS Fighting &
Training aeroplanes 1914-1918
54 Squadron Songbook
FLYING CORPS GOLD BIBLIOGRAPHY
73
Page 74

FLYING CORPS GOLD CREDITS
FLYING CORPS CREDITS
PROGRAMMING TEAM: Paul Dunscombe, Rod
Hyde, Andrew McRae, Andrew McMaster, Rob
Slater, James Taylor, Dave Whiteside
ARTWORK TEAM: Richard Cook, Andy McCann,
Andy Manns
GAME DESIGN: Rod Hyde, Mark Shaw
MUSIC: Paul Robotham
PHOTOS:Steve Hyde
SOUND EFFECTS: Sounds Appealing
VOICE ARTIST: Adam Longworth
LANDSCAPE: Andy Curry, Amanda Fair McCann,
Andrew Wilkins and Chris Hollis
TESTING TEAM: Darren Thompson, Tristram
Defries, Mahendra Sampath, Danny Rawles, Nick
Fellas, Derek Davies Internet: Len Hjalmarson,
Dennis Newberry,Nos in Vancouver
74
TECHNICAL ASSISTANCE & SPECIAL THANKS:
Andy Kemp, Stuart Leslie, Andy Sephton
E.I. TEAM:Tony Bond,Mark Havens, Terry Phillips,
Alison Ryan, Nick Walkland, Benedict Wilkins, Phil
Goldfinch, Matt Venn, Gary Lucken, Sharon O’Neill
and Clare Brown
Uses Miles Sound System. Copyright © 1991-1996 by
Invisible, Inc. d.b.a. RAD Software. Uses Smacker
Video Technology. Copyright © 1994-1996 by
Invisible, Inc. d.b.a. RAD Software. Images used in
this manual courtesy of the Stuart Leslie Collection,
the David Baker Collection and the Archives
Division of the National Air and Space Museum,
Smithsonian Institution.
© 1997 Rowan Software Ltd.
Published by Empire Interactive.
Page 75

FLIGHT CONTROLS - KEYBOARD AND JOYSTICK FLYING CORPS GOLD APPENDIX
Flight
Aileron Left (to bank to the left) Joystick to Left or Left Cursor
Aileron Right (to bank to the right) Joystick to Right or Right Cursor
Elevator Forward (to push nose down) Joystick Forward or Up Cursor
ElevatorBack (to pull nose up) Joystick Back or Down Cursor
Left Rudder Num Pad Ins
Right Rudder Num Pad Del
Keyboard Sensitivity K
Keyboard Sensitivity Shift K
WEAPONS
Fire Guns Joystick Button 1 or Space key
Unjam Guns [
Drop Bombs Num Pad Enter or ]
POWER
rpm 10% 1
rpm 20% 2
rpm 30% 3
rpm 40% 4
rpm 50% 5
rpm 60% 6
rpm 70% 7
rpm 80% 8
rpm 90% 9
rpm 100% 10
rpm 100% .
rpm minimum ,
rpm: big step up shift equal, i.e. +
rpm: big step down shift minus, i.e. _
rpm: small step up equal (=)
rpm: small step down minus (-)
SIGNALS TO OTHER PILOTS
Inform squadron to break off and re-form R
Inform squadron to break off and go home H
GAME CONTROLS
Screenshot Ctrl P
The following controls are enabled during flight:
Exit Key Alt x
Infopanel Toggle (3 levels of information) I
Pause P
Accelerated Time Tab
Detail level change Ctrl D
Joystick Configure Alt J
Configure Menu F12
Map M
Multiplayer resurrect S
Multiplayer Rejoin (after resurrect) Q
NB: When flying with ‘spinning enabled’, keyboard control
of aileron, elevator and rudder is not recommended. When
flying without rudder pedals enable co-ordinated rudder.
See TECHNICAL SUPPLEMENT for joystick button
configurations.
75
Page 76

FLYING CORPS GOLD APPENDIX
VIEWS
Padlock next nearest enemy F1
Padlock next nearest friendly F2
Padlock next nearest ground target F3
Padlock next waypoint F4
Padlock subject of message F5
Turn off padlock Esc
Padlock nearest enemy Ctrl F1
Padlock nearest friendly Ctrl F2
Padlock nearest ground target Ctrl F3
Padlock next waypoint Ctrl F4
Outside View F6
Inside View F7
Invisible Cockpit F8
Fly by/Chase Toggle F9
Satellite View Toggle F10
ImpactToggle F11
Padlock On/Off Toggle Enter
Inside/Outside View Toggle Backspace
Toggle Panning Views/Fixed Views Scroll Lock
PANNING VIEWS
Rotate down Num Pad 2
Rotate up Num Pad 8
Rotate right Num Pad 6
Rotate left Num Pad 4
Rotate down & left Num Pad 1
Rotate down & right Num Pad 3
Rotate up & left Num Pad 7
Rotate up & right number pad 9
Holding down the shift key when pressing a rotate view key will
accelerate the movement.
Rotate and Zoom Reset Num Pad 5
Zoom In Num Pad +
Zoom Out Num Pad -
F
IXED VIEWS
Left Back Quarter View Num Pad 1
6 o'clock View Num Pad 2
Right Back Quarter View Num Pad 3
Left View Num Pad 4
Look Straight Up Num Pad 5
Right View Num Pad 6
Left Forward Quarter View Num Pad 7
Forward View Num Pad 8
Right Forward Quarter View Num Pad 9
Next Fixed View to the Left /
Next Fixed View to the Right *
Look Up/Down Toggle +
Look up toggle enable/disable. Num Lock
76
Page 77

FLYING CORPS GOLD APPENDIX
The camera will only remain on the following views while the keys
are held down. Releasing the keys will cause the camera to revert to
the previously selected view. Holding down the Num Lock key in
conjunction with the following keys will produce a version of the view
with the camera pitched upwards.
Front inside cockpit view
Home
Right front inside cockpit view Page Up
Right rear inside cockpit view Page Down
Left rear inside cockpit view Delete
Front left inside cockpit view Insert
6 o/clock Inside Cockpit View End
The versions of these views with the camera pitched upwards are
duplicated on the following key combinations;
Front Cockpit View Ctrl+Num Pad 8
Right Front Cockpit View Ctrl+Num Pad 9
Right Cockpit View Ctrl+Num Pad 6
Right Rear Cockpit View Ctrl+Num Pad 3
Left Rear Cockpit View Ctrl+Num Pad 1
Left Cockpit View Ctrl+Num Pad 4
Left Front Cockpit View Ctrl+Num Pad 7
ROTATE AN D ZOOM VIEW KEYS
Holding down the shift key when pressing a rotate view
key will accelerate the movement.
Rotate and Zoom Reset Num Pad 5
Zoom In Num Pad +
Zoom Out Num Pad -
77
Page 78

FLYING CORPS GOLD QUICK START
GAME CONTROL GLOSSARY
Accelerated time - speeds up the flight time between
waypoints. Cannot be used in combat.
Invisible cockpit - removes your cockpit from the
screen, giving a much wider field of view. A set of
cross-hairs will appear on the centre of the screen to
assist you when firing.
Impact view - switches the view to target when hit.
Outside - view from behind object with heading and
pitch maintained.
Padlock - lock the view onto the object indicated.
Padlock next nearest - will toggle the padlock views
through all the indicated objects.
Padlock subject of message - using this view option
will padlock your view onto the subject of the last
message printed at the top of the screen.
Padlock reverse angle - view from the object you have
padlocked (i.e. from target to you).
Satellite - view the object from above.
Viewees - the object being viewed.This will appear at
the centre of the screen.
ENDING A FLIGHT
You can end a flight by either landing and coming to
a halt, pressing alt-x . . . or by being shot down.
‘It was him or me, and I would sooner it was him’
- Mannock
1) Install and start the game after referring to the
installation instructions in the TECHNICAL
SUPPLEMENT.
2) The game starts with an animated title sequence.
Press any key to go to the Options screen.
3) Highlight the configure option either by using the
mouse pointer and clicking with the left mouse
button, or moving the highlight with the cursor key
and then pressing the Enter key. All selections in
Flying Corps Gold can be made in this way.
4) The preferences are initially set up for a beginner,
so for your first flight you only need to configure your
joystick. Select the tick icon to return to the options
screen.
5) Select the scramble option, which allows you to fly
a single mission.
6) In the scramble menu screen first select Camel and
then select First flight.
The first flight scramble option requires you to fly a
simple circuit of the airfield. For more guidance on
flying this particular mission, refer to Chapter Two of
the main manual. Check the controls listed in the
appendix, which define all of the keyboard and
joystick definitions. If you wish to pause the game
78
Page 79

while in flight, press p.For more information on how
your aircraft is performing whilst flying, press i.
7) Use the joystick to control your aircraft’s attitude
and direction when flying. Pull the joystick back and
the nose of the aircraft will rise and you will start to
climb. Push the joystick forward and the nose will
drop and the aircraft will begin to dive. Moving the
stick to the left or right will cause the aircraft to roll
in that direction.To turn gently, roll the aircraft into a
bank and then ease the stick towards you. Extreme or
sudden movement of the stick can cause the aircraft
to stall. Use the number keys to control the engine
power setting (1 minimum, 0 maximum).See Chapter
2 for more details on flying.
8) Once you are familiar with flying an aircraft select
the second scramble mission - ‘Follow the Leader’.
On this mission you have to follow your leader
through a series of manoeuvres. Once familiar with
the basics of flying, you can move onto the scramble
missions which involve combat.
9) You will get the real opportunity for long term
strategy and combat when you take part in a
campaign. To do this, select campaign on the main
options menu and then select the left/right arrows to
rotate through the available campaigns. Click on the
large medal icon when you have decided which
campaign to play.
FLYING CORPS GOLD QUICK START
The four campaigns are:
FLYING CIRCUS You are Lothar von Richthofen
and must exceed your brother’s score whilst he is on
leave.Try this campaign first.
TANK BATTLE You lead a German Jasta and try to
halt the British tank offensive before your last
defences are overrun.
SPRING OFFENSIVE You fly with the RFC as the
Germans make their final attempt to win the war.
HAT IN THE RING You attempt to emulate
Rickenbacker to become America’s ‘Ace of Aces’.
For more details on the campaigns see the main
manual.
10) Finally, before you start, remember the following
four ‘Golden Rules’:
1. Every attack must be made with determination and
with but one object, the destruction of the opponent.
2. Surprise must be employed whenever possible.
3. If surprised or forced into an unfavourable
position, a pilot must never,under any circumstances,
dive straight away from his opponent. To do so is to
court disaster, since a diving machine is an almost
stationary target. Moreover, the tactical advantage of
height is lost by diving, and the initiative surrendered
to the hostile machine.
4. Height invariably confers the tactical advantage.
RAF Instructions
79
 Loading...