


MAKING MODERN LIVING POSSIBLE
Electronic 7 Day
Programmable Room Thermostat
TP7000 Range
Danfoss Heating
User Guide

For a large print version of these instructions please call Marketing on 0845 121 7400.
®
Certification Mark
Danfoss can accept no responsibility for possible errors in catalogues, brochures, and other printed material. All trademarks in this material are property of the respective companies. Danfoss and the Danfoss logotype are trademarks of Danfoss A/S. All rights reserved.
2 |
|
TP7000 RANGE |
Thank you for buying a Danfoss product
Merci d’avoir choisi les produits Danfoss
Wir bedanken uns, dass Sie sich für ein Danfoss Produkt entschieden haben
Gracias por adquirir productos Danfoss
Tak fordi du købte et Danfoss produkt
Bedankt dat u een Danfoss product heeft gekocht
Grazie per aver acquistato un prodotto Danfoss
Σας ευχαριστούμε για την αγορά ενός Danfoss προϊόντος
Dziękujemy za zakup produktu Danfoss
Dėkojame, kad perkate Danfoss Produktus
Děkujeme Vám za nákup výrobku firmy Danfoss
Zahvaljujemo na kupovini Danfoss proizvoda
Vă mulţumim că aţi achiziţionat un produs Danfoss
GB
F
D
ES
DK
NL
I
GR PL
LT
CZ HR RO
|
|
|
|
|
|
|
|
|
|
|
Danfoss Heating |
|
3 |
|
GB
F
D
ES DK NL I GR PL LT CZ HR RO
User Instructions
TP7000 Range
Electronic Programmable Room Thermostat
Index
1.0 |
User Instructions ....................................................................................... |
5 |
|
|
1.1 |
Your programmable room thermostat ...................................... |
6 |
|
1.2 |
Preset programmes........................................................................... |
6 |
|
1.3 |
Before you start .................................................................................. |
6 |
|
1.4 |
Display preferences........................................................................... |
6 |
|
1.5 |
Setting the clock and day ............................................................... |
7 |
|
1.6 |
Setting the OSC period.................................................................... |
7 |
|
1.7 |
Accepting the preset programme ............................................... |
7 |
|
1.8 |
Before you change the preset programme.............................. |
8 |
|
1.81 |
Programming in 7-day mode ........................................................ |
8 |
|
1.82 |
Programming in 5/2 day mode..................................................... |
9 |
2.0 |
Advanced ................................................................................................... |
10 |
|
|
2.1 |
To convert to thermostat mode ................................................ |
10 |
|
2.2 |
To programme holiday mode..................................................... |
10 |
|
2.3 |
User overrides .................................................................................. |
11 |
|
2.4 |
Changing batteries......................................................................... |
11 |
4 |
|
TP7000 RANGE |
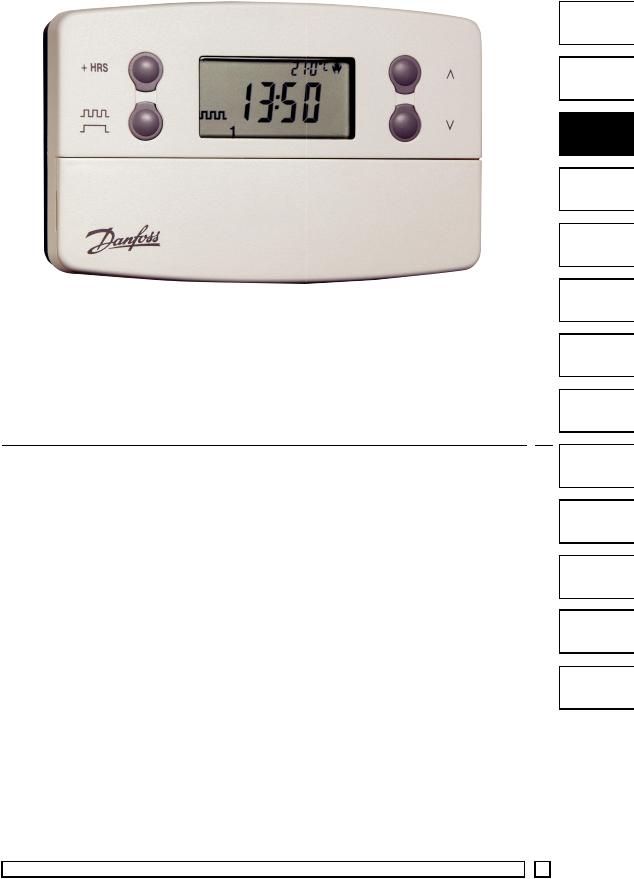
What is a programmable room thermostat?
... an explanation for householders
A programmable room thermostat is both a programmer and a room thermostat. A programmer allows you to set ‘On’ and ‘O ’ time periods to suit your own lifestyle. A room thermostat works by sensing the air temperature, switching on the heating when the air temperature falls below the thermostat setting, and switching it o once this set temperature has been reached.
So, a programmable room thermostat lets you choose what times you want the heating to be on, and what temperature it should reach while it is on. It will allow you to select di erent temperatures in your home at di erent times of the day (and days of the week) to meet your particular needs.
Turning a programmable room thermostat to a higher setting will not make the room heat up any faster. How quickly the room heats up depends on the design of the heating system, for example, the size of boiler and radiators.
Neither does the setting a ect how quickly the room cools down. Turning a programmable room thermostat to a lower setting will result in the room being controlled at a lower temperature, and saves energy.
The way to set and use your programmable room thermostat is to find the lowest temperature settings that you are comfortable with at the di erent times you have chosen, and then leave it alone to do its job. The best way to do this is to set low temperatures first, say 18°C, and then turn them up by one degree each day until you are comfortable with the temperatures. You won’t have to adjust the thermostat further. Any adjustments above these settings will waste energy and cost you more money.
If your heating system is a boiler with radiators, there will usually be only one programmable room thermostat to control the whole house. But you can have di erent temperatures in individual rooms by installing thermostatic radiator valves (TRVs) on individual radiators. If you don’t have TRVs, you should choose a temperature that is reasonable for the whole house. If you do have TRVs, you can choose a slightly higher setting to make sure that even the coldest room is comfortable, then prevent any overheating in other rooms by adjusting the TRVs.
The time on the programmer must be correct. Some types have to be adjusted in spring and autumn at the changes between Greenwich Mean Time and British Summer Time.
You may be able to temporarily adjust the heating programme, for example, ‘Override’, ‘Advance’ or ‘Boost’. These are explained in the manufacturer’s instructions.
Programmable room thermostats need a free flow of air to sense the temperature, so they must not be covered by curtains or blocked by furniture. Nearby electric fires, televisions, wall or table lamps may prevent the thermostat from working properly.
GB
F
D
ES DK NL I GR PL LT CZ HR RO
Danfoss Heating |
|
5 |
|
|
1.0 |
User Instructions |
|||
|
|
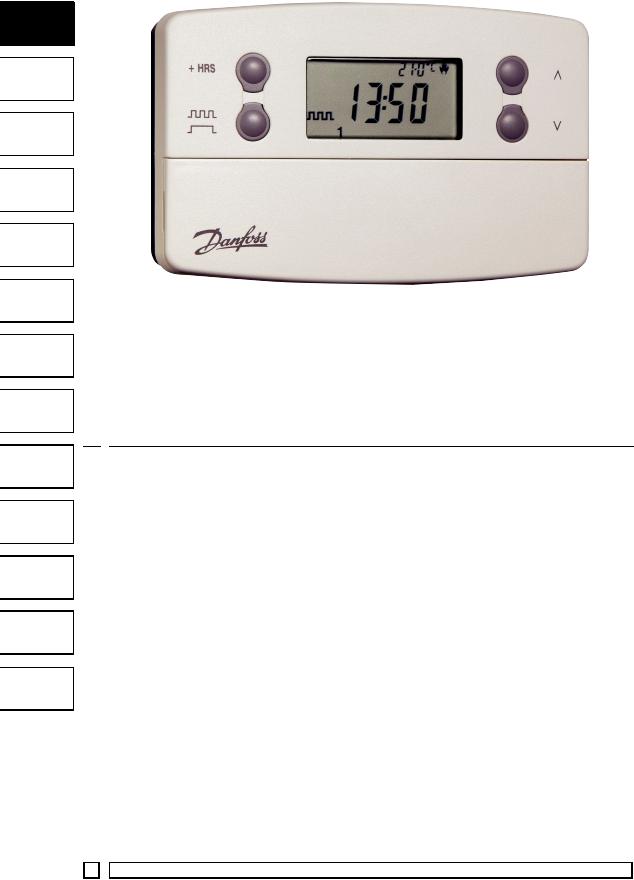
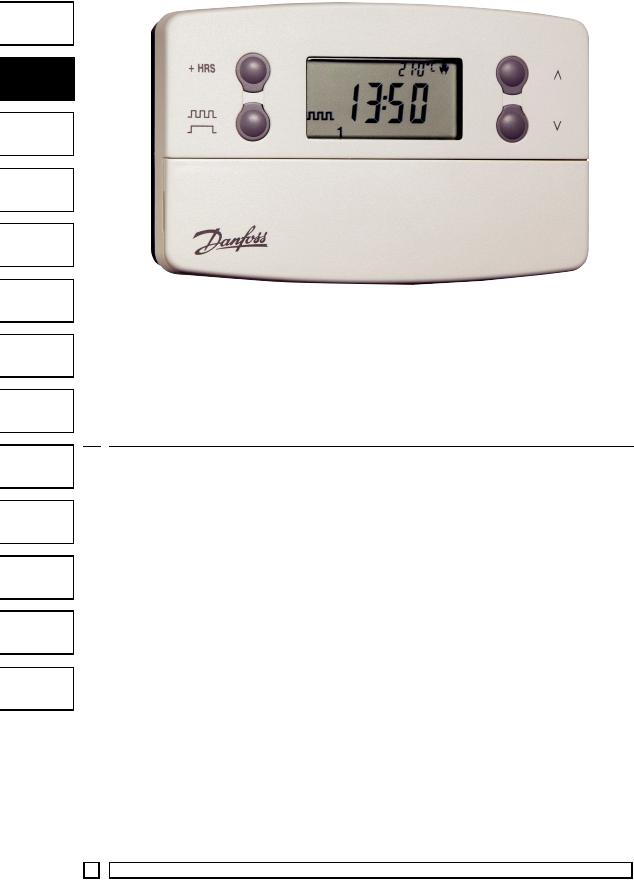
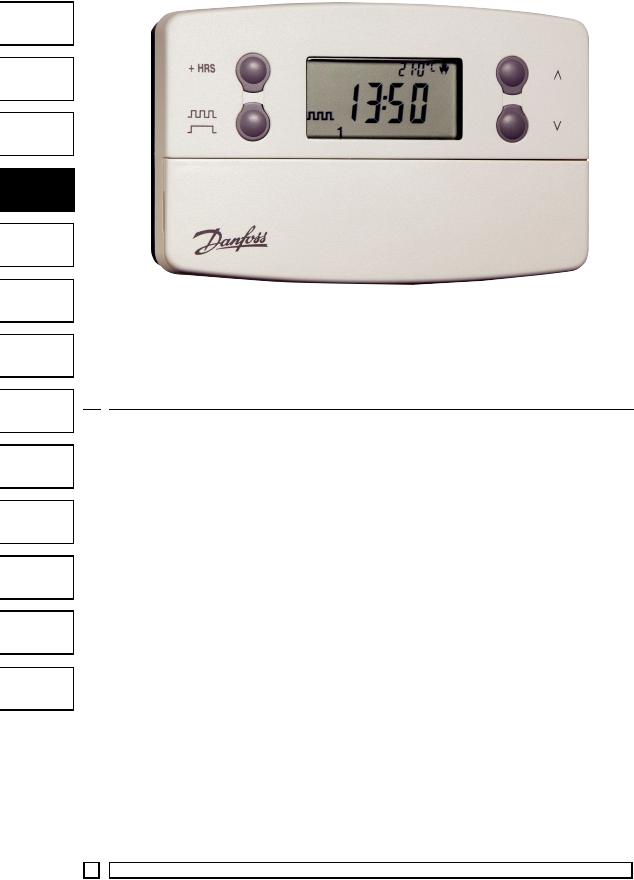
1.1 |
Your programmable room thermostat |
|||
|
|
|
|
|
|
|
|
|
|
|
|
The TP7000 allows you to programme up to 6 di erent time and |
|
|
|
|
|
|
temperature settings for each day of the week, providing complete |
|
|
|
|
|
|
flexibility. It provides several energy saving features and features |
|
|
|
|
|
|
several useful user overrides, including a 99 day holiday mode. |
|
|
|
1.2 |
Preset Programmes |
|||
|
GB |
|||||
|
|
|
|
|
|
|
FYour TP7000 comes ready programmed with a set of operating times and temperatures which often suit most people.
D
ES
DK
NL
I
GR
PL
LT
CZ
HR
RO
Weekdays (Mon-Fri)
Event |
Time |
Temp °C |
|
|
|
1 |
06:30 |
20 |
|
|
|
2 |
08:30 |
15 |
|
|
|
3 |
11:30 |
20 |
|
|
|
4 |
13:30 |
15 |
|
|
|
5 |
16:30 |
21 |
|
|
|
6 |
22:30 |
15 |
|
|
|
Weekend (Sat-Sun)
Event |
Time |
Temp °C |
|
|
|
1 |
07:30 |
20 |
|
|
|
2 |
09:30 |
20 |
|
|
|
3 |
11:30 |
20 |
|
|
|
4 |
13:30 |
20 |
|
|
|
5 |
16:30 |
21 |
|
|
|
6 |
22:30 |
15 |
|
|
|
If you want, you can change any of these settings by following the instructions on pages 8-9. First follow the steps on pages 6-7 to set your display preferences and the correct time and date.
1.3 |
Before you start |
|
|
|
|
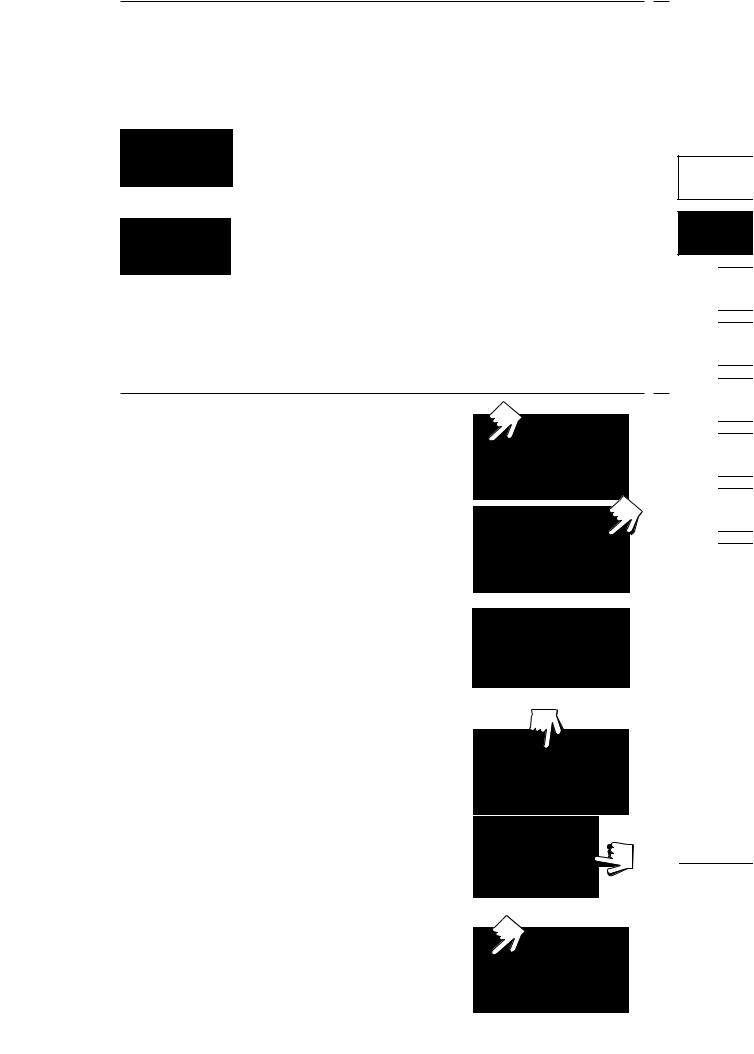
Open |
the flap on the front of your |
RESET |
programmer. Using a non-metallic object, press the recessed RESET button, until you hear a click and the display goes blank.
1.4 Display Preferences
Temperature display (°C or °F)
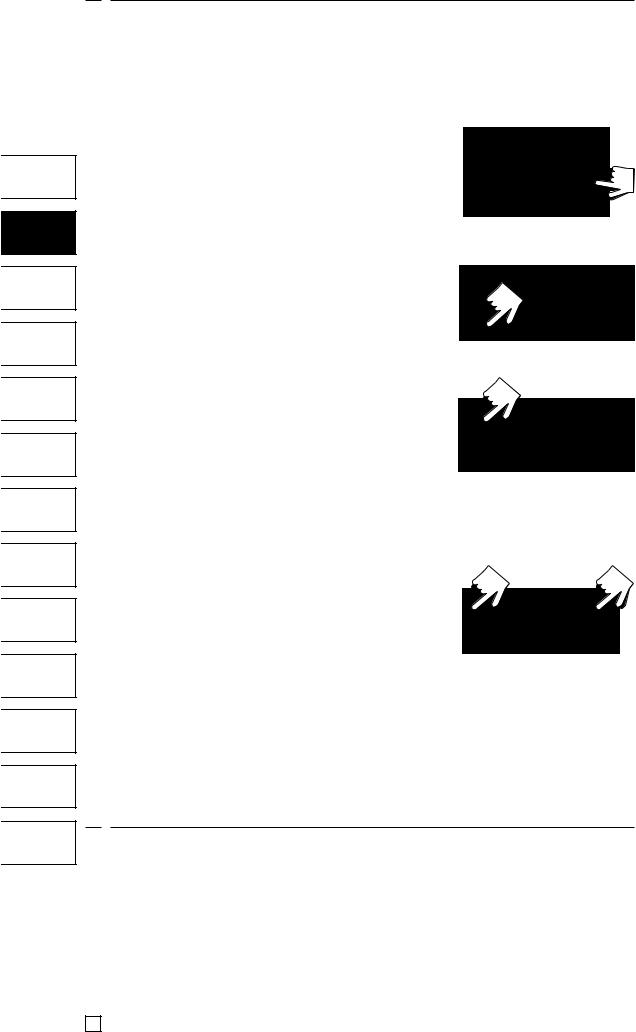
Press and hold DAY & COPY (for 2-3 seconds) until display changes.
6 |
|
TP7000 RANGE |

Clock display (12 or 24 hr)
Press and hold NEXT & DAY (for 2-3 seconds) until display change.
(AM or PM will appear in 12 hr mode)
1.5 Setting the Clock & Day
Press PROG to begin programming.
DAY - Press DAY until correct day is shown (1=Monday, 2=Tuesday etc).
TIME - Press + and - to change time (press and hold to change in 10 min increments).
1.6 Setting the OSC Period, if enabled
This display will ONLY appear if the OSC function has been enabled by your installer.
Use the + or - buttons to select the OSC period. The choices are 0:30 (30 mins), 1:00 (1 hr), 1:30 and 2:00.
The recommended setting is 0:30. If set to 0:00 the function is disabled.
1.7 Accepting the preset programmes
If you are happy to use the preset programmes on page 6, you don’t need to do anything else. To accept these settings just close the front cover and after 2 minutes the pre-settings will automatically be accepted.
The unit is now in RUN mode (colon flashes in display) and the heating will operate according to the preset programmes.
GB
F
D
ES
DK
NL
I
GR
PL
LT
CZ
HR
RO
Danfoss Heating |
|
7 |

GB
F
D
ES
DK
NL
I
GR
PL
LT
CZ
HR
RO
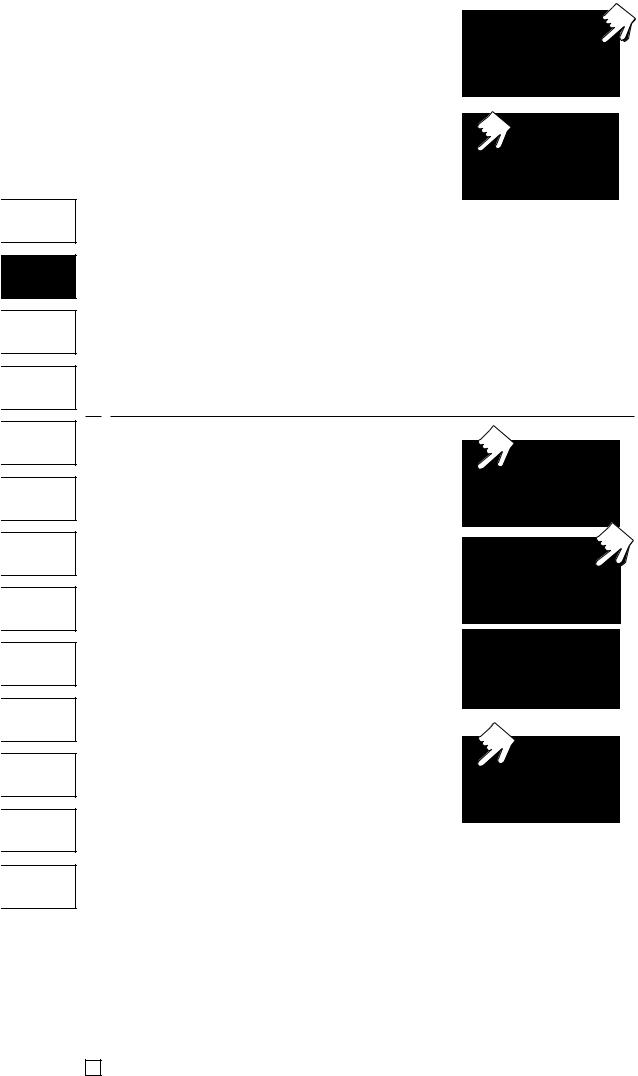
1.8 Before you change the preset programmes
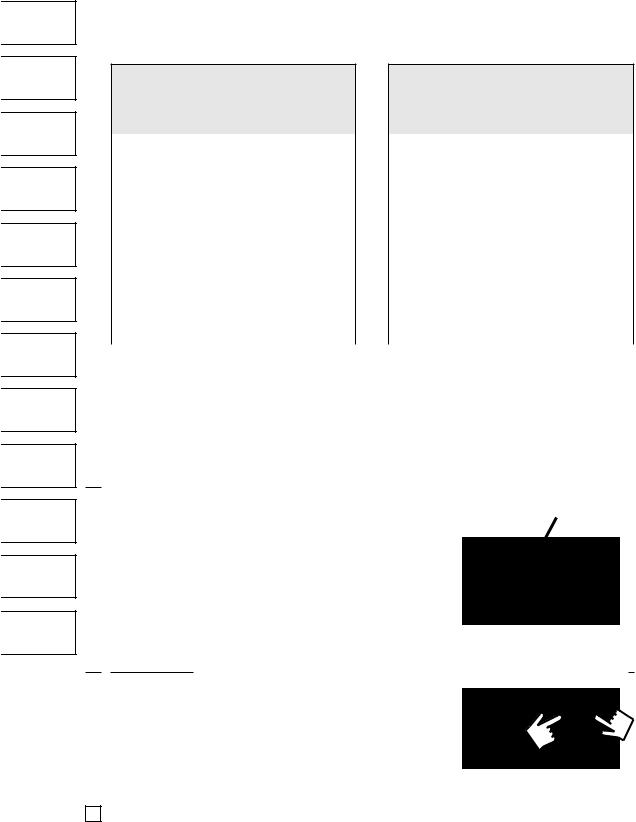
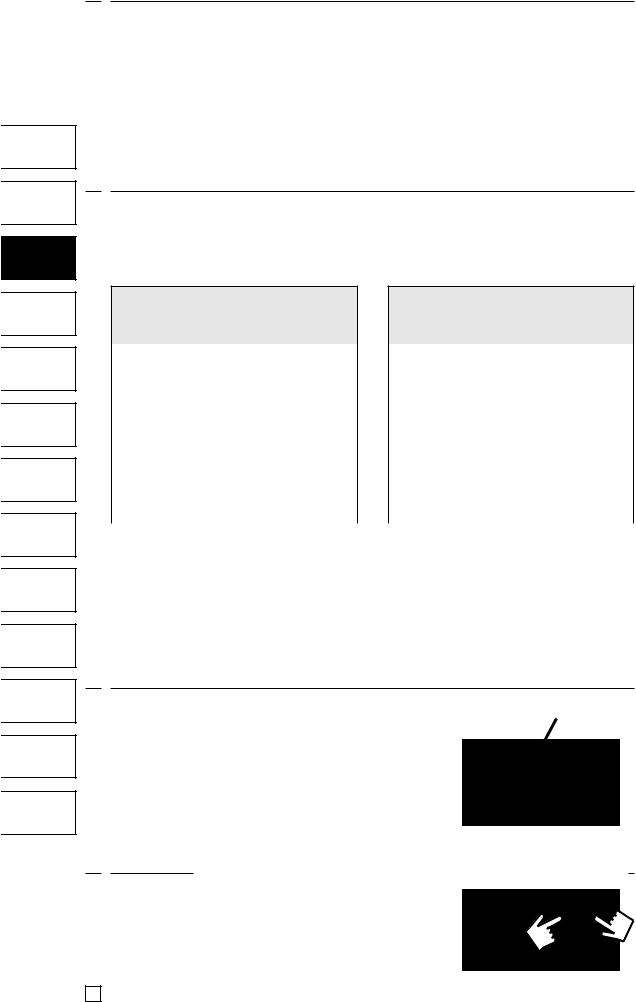
Your installer will have set your unit to operate in either 7-day mode or 5/2 day mode. To tell which mode your unit is set press PROG until Event 1 flashes in the display.
|
This unit is in 7-day mode and you can programme |
|
di erent settings for each day of the week (see page |
1 |
8-9). |
|
This unit is in 5/2 day mode and you can enter one of |
|
set of programmes for weekdays and another set for |
1 2 3 4 5 |
weekends (see page 91). |
|
1.81 Programming in 7-day mode
(separate programmes for each day of the week)
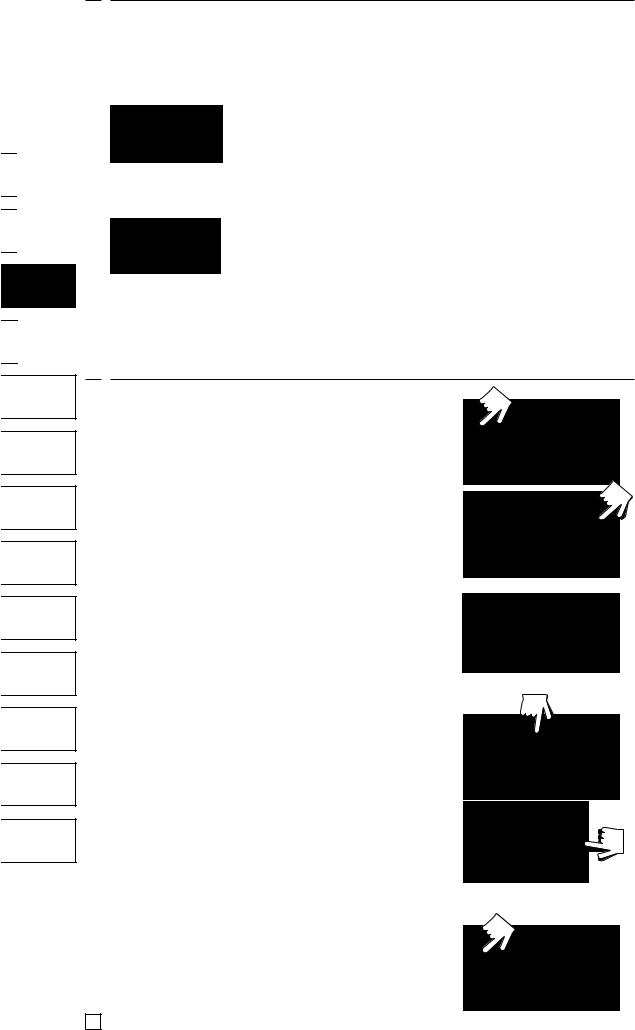
a) Press PROG until Event 1 flashes, then press DAY to move from current day to Day 1.
b) Amend the time and temperature as
follows: |
|
|
|
|
|
i) |
Use + and – buttons to alter time |
|
|
||
|
(press and hold to change in 10 min |
1 |
|
||
|
increments). |
|
|
|
|
ii) |
Use |
and |
buttons to alter |
|
|
|
|
||||
|
|
||||
|
temperature in 0.5°C (1°F) steps. |
|
|
||
iii) |
Press NEXT to advance to next |
|
|
||
|
Event. |
|
|
|
|
iv) Repeat steps i,ii & iii above for Events 2, 3, 4, 5 & 6.
c) When all 6 events are correct, press DAY to programme events for Day 2.
8 |
|
TP7000 RANGE |
(If you wish to repeat the previous day’s programme simply press COPY).
d)Repeat steps b and c above to programme (or COPY) events for Days 3, 4, 5, 6 & 7.
Returning to RUN Mode – press PROG until colon flashes in display.
1.82 Programming in 5/2 day mode
(one set of programmes for weekdays, another for weekends)
Press PROG until Event 1 flashes, then press DAY until display shows Day 1-5.
Follow steps b and c on page 8-9 to programme times and temperatures for weekdays.
Press DAY to programme events for weekend (Day 6-7) or press COPY to repeat weekday programme.
Returning to RUN Mode – press PROG |
1 2 3 4 5 |
until colon flashes in display. |
|
GB
F
D
ES DK NL
I
GR PL LT CZ HR
RO
Danfoss Heating |
|
9 |
2.0Advanced
2.1To convert to Thermostat mode
GB
F
D
ES
DK 
 NL
NL
I
GR
PL
LT
CZ
HR
RO
The TP7000 can be converted to control at a constant user selected temperature, instead of following the set programme.
Press and |
hold |
|
and |
together until |
|
display changes to colon blinking & default |
|
||||
temperature (8°C). |
|
|
|
||
Press |
or |
to |
alter |
temperature as |
|
required. |
|
|
|
|
|
NOTE: unit will remain in thermostat mode until the |
and |
||||
buttons are pressed together again. |
|
||||
2.2 To programme Holiday Mode
(whilst in Thermostat Mode)
The TP7000 can control at a constant low temperature while you are away on holiday, returning to your programmed settings after a specified number of days (maximum 99 days).
(If not already in Thermostat Mode, press and hold and together until display changes to colon blinking and 8°C).
Press DAY (display will show a suitcase and :00).
Press + and - to enter number of days of holiday (max. 99).
Use and buttons to alter the constant temperature, if required.
When selected number of days have elapsed, the unit will return to normal, controlling according to your set programmes.
NOTE: Press and buttons together to exit holiday mode if necessary.
10 |
|
|
TP7000 RANGE |
|
2.3 User Overrides
Sometimes you may need to change the way you use your heating temporarily, i.e. due to unusually cold or warm weather. The TP7000 has several user overrides, which can be selected without a ecting the set programmes.
To temporarily increase or decrease the programmed temperature.
– press |
or |
to select the desired |
temperature. |
|
|
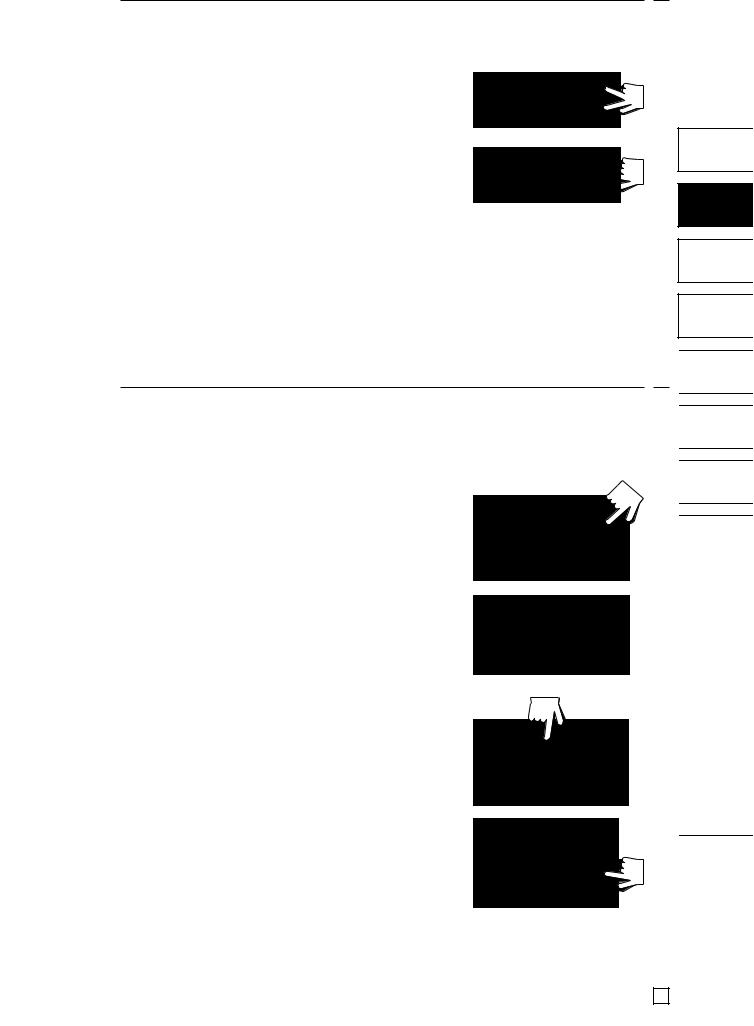
Extend Event 1 (i.e. 06.30 20°C) to last all day (so that heating remains on at a constant temperature all day).
– press button once as shown.
To extend the current set temperature by 1, |
|
2 or 3 hours. |
|
– press button once for 1 extra hour, |
2 |
|
|
twice for 2 extra hours, 3 times for 3 |
|
extra hours, and press 4 times to remove |
|
override. |
|
To alter main LCD display to show either time or actual room temperature.
– press NEXT & COPY together.
2.4 Changing Batteries (not TP7000M)
Batteries will last in excess of two years. Low battery indicator will flash on the LCD display. The user has 15 days in which to replace the batteries with high quality alkaline cells.
GB
F
D
ES
DK
NL
I
GR
PL
LT
CZ
HR
RO
Danfoss Heating |
|
11 |
GB
F
D
ES DK NL I GR PL LT CZ HR RO
Instructions d’utilisateur
Série TP7000
Thermostats d’ambiance programmable
Index
1.0 |
Instructions d’utilisateur.................................................................... |
13 |
|
|
1.1 |
Votre thermostat d’ambiance programmable ..................... |
13 |
|
1.2 |
Programmes Prédéfinis................................................................. |
13 |
|
1.3 |
Avant de commencer.................................................................... |
13 |
|
1.4 |
Préférences d’a chage ................................................................ |
13 |
|
1.5 |
Régler l’Heure et le Jour ............................................................... |
14 |
|
1.6 |
Régler la Période OSC, si activée ............................................... |
14 |
|
1.7 |
Accepter les programmes prédéfinis....................................... |
14 |
|
1.8 |
Avant de modifier les programmes prédéfinis .................... |
15 |
|
1.81 |
Mode 7 jours..................................................................................... |
15 |
|
1.82 |
Mode 5/2 jours................................................................................. |
16 |
2.0 |
Informations Avancées........................................................................ |
17 |
|
|
2.1 |
Pour passer en mode Thermostat............................................. |
17 |
|
2.2 |
Pour programmer le Mode Vacances ...................................... |
17 |
|
2.3 |
Dérogations utilisateurs ............................................................... |
18 |
|
2.4 |
Changer les Piles (pas sur le TP7000M)................................... |
18 |
12 |
|
TP7000 RANGE |
1.0Informations de base
1.1Votre thermostat d’ambiance programmable
Le TP7000 vous permet de programmer jusqu’à 6 heures et températures di érentes pour chaque jour de la semaine, o rant une flexibilité totale. Il intègre plusieurs fonctions d’économie d’énergie ainsi que plusieurs fonctions prioritaires très utiles pour l’utilisateur, dont un mode vacances de 99 jours.
1.2 Programmes Prédéfinis
Votre TP7000 est livré préalablement programmé avec une série d’heures et de températures de fonctionnement qui conviennent généralement à la plupart des utilisateurs.
Jour de semaine (Lun-Ven)
Période |
L’heure |
Temp °C |
|
|
|
1 |
06:30 |
20 |
|
|
|
2 |
08:30 |
15 |
|
|
|
3 |
11:30 |
20 |
|
|
|
4 |
13:30 |
15 |
|
|
|
5 |
16:30 |
21 |
|
|
|
6 |
22:30 |
15 |
|
|
|
Week-end (Sam-Dim)
Période |
L’heure |
Temp °C |
|
|
|
1 |
07:30 |
20 |
|
|
|
2 |
09:30 |
20 |
|
|
|
3 |
11:30 |
20 |
|
|
|
4 |
13:30 |
20 |
|
|
|
5 |
16:30 |
21 |
|
|
|
6 |
22:30 |
15 |
|
|
|
GB
F
D
ES
DK
NL
I
Si vous souhaitez modifier l’un de ces réglages, il vous su t de suivre les instructions aux pages 15-16. Suivez tout d’abord les points indiqués à la pages 13-14 pour régler l’heure et la date.
1.3 Avant de commencer
Ouvrez le couvercle à l’avant de votre |
RESET |
thermostat. A l’aide d’un objet non- |
|
métallique, appuyez sur la touche RESET |
|
encastrée, jusqu’à ce que vous entendiez un |
|
clic et que l’écran s’éteigne. |
|
1.4 Préférences d’a chage
A chage de la température (°C ou °F)
Appuyez sur DAY & COPY en les maintenant (pendant 2-3 secondes) enfoncés jusqu’à ce que l’a chage change.
GR
PL

 LT
LT
CZ
HR
RO
Danfoss Heating |
|
13 |
A chage de l’horloge (12 ou 24 hr)
Appuyez sur NEXT & DAY en les maintenant (pendant 2-3 secondes) enfoncés jusqu’à ce que l’a chage change (AM ou PM s’a chera en mode 12 heures).
|
1.5 Régler l’Heure et le Jour |
|
GB |
Appuyez sur PROG pour commencer la |
|
programmation. |
||
|
F
D
ES
DK
NL 

I
JOUR - Utilisez les boutons + ou – jusqu’à ce que le bon JOUR s’a che (1 = Lundi, 2 = Mardi, etc.).
L’HEURE - Utilisez les boutons + ou – pour régler l’HEURE (appuyez sur les boutons en les maintenant enfoncés pour changer l’heure par incréments de 10 min).
1.6 Régler la Période OSC, si activée
Cet écran s’a chera UNIQUEMENT si la fonction OSC a été activée par votre installateur.
GR
PL
LT
CZ
Utilisez les touches + ou - pour sélectionner la période OSC. Les options proposées sont 0:30 (30 min), 1:00 (1 h), 1:30 et 2:00.
Le réglage recommandé est 0:30. Si cette valeur est définie à 0:00, la fonction est désactivée.
1.7 Accepter les programmes prédéfinis
HR
RO
Si les programmes prédéfinis indiqués à la page 13 vous conviennent, aucune autre manipulation ne sera nécessaire. Pour accepter les pré-réglages, fermez le couvercle frontal et après 2 minutes les pré-réglages seront automatiquement acceptés (et les deux-points clignoteront).
L’appareil est désormais en mode RUN (Fonctionnement) (les deux-points clignotent à l’écran) et le chau age fonctionnera selon les programmes prédéfinis.
14 |
|
TP7000 RANGE |
1.8 Avant de modifier les programmes prédéfinis
Votre installateur aura réglé votre appareil pour qu’il fonctionne en mode 7 jours ou en mode 5/2 jours. Pour connaître le mode de réglage de votre appareil, appuyez sur PROG jusqu’à ce que la Période 1 clignote à l’écran.
|
Cet appareil est en mode 7 jours et vous pouvez |
|
programmer des réglages di érents pour chaque |
1 |
jour de la semaine (voir pages 15-16). |
|
Cet appareil est en mode 5/2 jours et vous pouvez |
|
entrer une série de programmes pour les jours de la |
1 2 3 4 5 |
semaine et une autre série pour le week-end (voir |
|
|
|
page 16). |
1.81 Mode 7 jours
(périodes séparés pour chaque jour de la semaine)
a) Appuyez sur PROG jusqu’à ce que la Période 1 clignote, puis appuyez sur DAY pour passer du jour courant au Jour 1.
b) Modifiez l’heure et la température comme suit:
i)Utilisez les boutons + et – pour modifier l’heure (appuyez sur les
boutons en les maintenant enfoncés |
1 |
|
||
|
|
|||
pour changer l’heure par incréments |
|
|
||
de 10 min). |
et |
|
|
|
|
|
|
||
ii) Utilisez les boutons |
pour |
|
|
|
modifier la température par incréments de 0,5°C.
iii)Appuyez sur NEXT pour passer à la
Période suivante.
iv) Répétez les points i, ii et iii ci-dessus pour les Périodes 2, 3, 4, 5 & 6.
c) Lorsque les 6 périodes sont correctement programmés, appuyez sur DAY pour programmer les périodes du Jour 2.
GB
F
D
ES DK NL I GR PL LT CZ HR
RO
Danfoss Heating |
|
15 |
GB
F
D
ES
DK
NL
I
GR
PL
LT
CZ
HR
RO
Si vous souhaitez répéter le programme du jour précédent, il vous su t d’appuyer sur COPY.
d) Répétez les points b et c ci-dessus pour programmer (ou COPY) les périodes des Jours 3, 4, 5, 6 & 7.
Retourner au Mode
FONCTIONNEMENT – appuyez sur PROG jusqu’à ce que les deux-points clignotent à l’écran.
1.82 Mode 5/2 jours
(une série de périodes pour les jours de la semaine, une autre série pour les week-ends)
Appuyez sur PROG jusqu’à ce que la Période 1 clignote, puis appuyez sur DAY jusqu’à ce que Jour 1-5 s’a che à l’écran.
Suivez les points b et c (page 15-16) pour programmer les heures et températures des jours de la semaine.
Appuyez sur DAY pour programmer les périodes du week-end (Jour 6-7) ou appuyez sur COPY pour répéter le
programme de la semaine.
1 2 3 4 5
Retourner au Mode
FONCTIONNEMENT – appuyez sur PROG jusqu’à ce que les deux-points clignotent à l’écran.
16 |
|
TP7000 RANGE |
2.0Informations avancées
2.1Pour passer en mode Thermostat
Le TP7000 peut être réglé pour maintenir une température constante sélectionnée par l’utilisateur, au lieu de suivre le programme défini.
Appuyez sur et simultanément en les maintenant enfoncés jusqu’à ce que les deux-points clignotent et la température par défaut (8°C) s’a che à l’écran.
Appuyez sur ou pour modifier la température selon les besoins.
REMARQUE: L’appareil restera en mode thermostat jusqu’à ce que l’utilisateur appuie une nouvelle fois simultanément sur les touches
et .
2.2 Pour programmer le Mode Vacances
(en Mode Thermostat)
Le TP7000 peut maintenir une température basse constante pendant vos vacances, et reprendre vos réglages programmés après un nombre de jours spécifié (99 jours maximum).
(Si l’appareil ne se trouve pas déjà en mode Thermostat, appuyez simultanément sur les touches et en les maintenant enfoncées jusqu’à ce que les deux-points clignotent et 8°C s’a che à l’écran).
Appuyez sur DAY (une valise et :00 s’a cheront à l’écran).
Appuyez sur + et - pour entrer le nombre de jours de vacances (max. 99).
Utilisez les touches et pour modifier la température constante, si nécessaire.
Une fois le nombre de jours sélectionné
écoulé, |
l’appareil repassera en |
mode |
de |
fonctionnement normal, |
régulant |
la température en fonction de votre programmation.
REMARQUE: Appuyez simultanément sur les touches et pour sortir du mode vacances si nécessaire.
GB
F
D
ES
DK
NL
I
GR PL LT CZ HR RO
Danfoss Heating |
|
17 |
GB
F
D
ES
DK
NL
I
GR
PL
LT
CZ
HR
RO
2.3 Dérogations utilisateurs
Vous pouvez parfois avoir besoin de modifier temporairement le mode de fonctionnement de votre chau age, ex. en raison d’un temps exceptionnellement froid. Le TP7000 intègre plusieurs fonctions prioritaires pour l’utilisateur, qui peuvent être sélectionnées sans a ecter la programmation du thermostat.
Pour augmenter ou diminuer temporairement la température programmée
– appuyez sur ou pour augmenter ou baisser la température.
Etendre la période 1 (i.e. 06.30 20°C) à toute la journée (afin que le chau age reste à une température constante toute la journée) – appuyez une fois sur la touche comme illustré.
Pour étendre la température couramment |
2 |
|
|
définie de 1, 2 ou 3 heures. |
|
– appuyez une fois sur le bouton pour 1 |
|
heure de plus, deux fois pour 2 heures |
|
de plus, 3 fois pour 3 heures de plus, |
|
et appuyez 4 fois pour supprimer la |
|
priorité. |
|
Pour modifier l’écran LCD principal afin qu’il a che l’heure ou la température ambiante e ective
– appuyez sur NEXT et COPY simultanément.
2.4 Changer les Piles (pas sur le TP7000M)
Les piles ont une durée de vie de plus de deux ans. Un indicateur de piles faibles clignotera sur l’écran LCD. L’utilisateur dispose de 15 jours pour remplacer les piles usagées par des piles alcalines de qualité.
18 |
|
TP7000 RANGE |
Benutzeranweisungen
Serie TP 7000
Programmierbare Raumthermostate
Inhaltsverzeichnis
1.0 |
Benutzeranweisungen......................................................................... |
20 |
|
|
1.1 |
Der programmierbare Raumthermostat................................ |
20 |
|
1.2 |
Werkseinstellung ............................................................................ |
20 |
|
1.3 |
Bevor Sie beginnen........................................................................ |
20 |
|
1.4 |
Präferenzen für die Anzeige........................................................ |
20 |
|
1.5 |
Einstellen von Uhrzeit & Tag ....................................................... |
21 |
|
1.6 |
Einstellen der OSC-Periode ......................................................... |
21 |
|
1.7 |
Annahme der Werkseinstellung................................................ |
21 |
|
1.8 |
Vor Änderung der Werkseinstellung........................................ |
22 |
|
1.81 |
7 Tage-Modus................................................................................... |
22 |
|
1.82 |
5/2-Tage-Modus .............................................................................. |
23 |
2.0 |
Weitere Einstellmöglichkeiten ........................................................ |
24 |
|
|
2.1 |
In den Thermostat-Modus zurückkehren .............................. |
24 |
|
2.2 |
Programmierung des Ferien-Modus........................................ |
24 |
|
2.3 |
Manuelle Eingri smöglichkeit................................................... |
25 |
|
2.4 |
Batteriewechsel (nicht TP7000M) ............................................. |
25 |
GB
F
D
ES DK NL I GR PL LT CZ HR RO
Danfoss Heating |
|
19 |
1.0Grundsätzliches
1.1Der programmierbare Raumthermostat
Der TP7000 kann mit 6 verschiedenen Zeit-und Temperatureinstellungen für jeden Wochentag programmiert werden. Er verfügt über mehrere Energiesparfunktionen und hilfreiche Möglichkeiten für den manuellen Eingri , einschließlich eines 99 Tage Ferienmodus.
GB
1.2 Werkseinstellung
F
Der TP7000 wird mit einer Werkseinstellung ausgeliefert, wobei die verschiedenen Einstellungen für Betriebszeiten und Temperaturen in
Dvielen Fällen vom Kunden direkt übernommen werden können.
ES
DK
NL
I
GR
PL
LT
CZ
HR
RO
Wochentag (Montag bis Freitag)
Schaltpunkt |
Zeit |
Temp °C |
|
|
|
1 |
06:30 |
20 |
|
|
|
2 |
08:30 |
15 |
|
|
|
3 |
11:30 |
20 |
|
|
|
4 |
13:30 |
15 |
|
|
|
5 |
16:30 |
21 |
|
|
|
6 |
22:30 |
15 |
|
|
|
Wochenende (Samstag-Sonntag)
Schaltpunkt |
Zeit |
Temp °C |
|
|
|
1 |
07:30 |
20 |
|
|
|
2 |
09:30 |
20 |
|
|
|
3 |
11:30 |
20 |
|
|
|
4 |
13:30 |
20 |
|
|
|
5 |
16:30 |
21 |
|
|
|
6 |
22:30 |
15 |
|
|
|
Falls diese Einstellungen geändert werden sollen, kann dies durch Befolgen der Arbeitsschritte auf den Seiten 22 und 23 bewerkstelligt werden. Führen Sie für die korrekte Einstellung von Zeit und Datum zuerst die Arbeitsschritte auf Seiten 20 und 21 durch.
1.3 Bevor Sie beginnen
Ö nen Sie die Klappe auf der Vorderseite |
RESET |
||
|
|||
des TP7000. Drücken Sie mit einem |
|
||
nichtmetallischen |
Gegenstand |
die |
|
versenkte RESET-Taste, bis Sie ein Klicken hören und die Anzeige erlischt.
1.4 Präferenzen für die Anzeige
Temperaturanzeige (°C or °F)
Halten Sie DAY und COPY gedrückt (für 2 bis 3 Sekunden), bis sich die Anzeige ändert.
20 |
|
TP7000 RANGE |
Zeitanzeige (12 or 24 hr)
Halten Sie NEXT und DAY gedrückt, bis sich die Anzeige ändert (im 12 Stundenschema erscheint AM oder PM).
1.5 Einstellen von Uhrzeit & Tag
Drücken Sie PROG, um die Programmierung zu beginnen.
TAG - drücken Sie DAY, bis der korrekte Tag angezeigt wird (1= Montag).
UHRZEIT - drücken Sie zur Änderung der Zeit + oder - (gedrückt halten zur Änderung in 10-Minuten Abständen).
1.6 Einstellen der OSC-Periode
Die Anzeige erscheint NUR, WENN die OSCFunktion von Ihrem Installateur aktiviert wurde.
Verwenden Sie die Tasten + oder -, um die OSC-Periode zu wählen. Zur Auswahl stehen 0:30 (30 Minuten), 1:00 (1 Stunde), 1:30 und 2:00.
Der empfohleneWert ist 0:30. Bei Einstellung von 0:00 ist die Funktion deaktiviert.
1.7 Annahme der Werkseinstellung
Falls Sie die auf Seite 20 erwähnte Werkseinstellung übernehmen möchten, brauchen Sie nichts weiter zu tun. Schließen Sie zur Übernahme dieser Einstellungen die Vorderabdeckung, wodurch die Voreinstellungen automatisch nach 2 Minuten übernommen werden (Doppelpunkt blinkt).
Das Gerät befindet sich jetzt im RUN-Modus (blinkender Doppelpunkt auf der Anzeige) und die Heizung arbeitet gemäß der eingestellten Programme.
Danfoss Heating |
|
21 |
GB
F
D
ES
DK
NL
I
GR
PL
LT
CZ
HR
RO
GB
F
D
ES
DK
NL
I
GR
PL
LT
CZ
HR
RO
1.8 Vor Änderung der Werkseinstellung
Ihr Installateur hat das Gerät entweder auf 7-Tage-Modus oder 5/2-Tage-Modus eingestellt. Zur Abfrage welcher Modus eingestellt wurde, drücken Sie PROG, bis das Ereignis 1 auf der Anzeige blinkt.
|
Dieses Gerät befindet sich im 7-Tage-Modus und |
|
es können unterschiedliche Einstellungen für jeden |
1 |
Wochentag vorgenommen werden (siehe Seiten |
|
22 und 23). |
|
Diese Gerät befindet sich im 5/2-Tage-Modus und es |
|
können jeweils für Wochentage und Wochenenden |
1 2 3 4 5 |
unterschiedliche Einstellungen vorgenommen |
|
werden (siehe Seite 23). |
1.81 7 Tage-Modus
(unterschiedliche Ereignisse (Schaltpunkte) für jeden Tag der Woche)
a) Drücken Sie PROG, bis Ereignis 1 blinkt und drücken Sie dann DAY, um vom aktuellen Tag zu TAG 1 zu wechseln.
b) Zeit und Temperatur werden wie folgt geändert:
i)Verwenden Sie zur Änderung der Zeit die Tasten + und – (gedrückt
|
halten zur Änderung in 10-Minuten- |
1 |
|
|
|
|
|
|
Abständen). |
|
|
ii) |
Verwenden Sie zur Änderung der |
|
|
|
|
||
|
Temperatur in Abständen von 0,5°C |
|
|
|
(1°F) die Tasten und . |
|
|
iii) |
Drücken Sie auf NEXT, um zum |
|
|
|
nächsten Ereignis vorzurücken. |
|
|
iv) |
Wiederholen Sie die Arbeitsschritte |
|
|
|
i,ii und iii oben für die Ereignisse 2, |
|
|
|
3, 4, 5 & 6. |
|
|
c) Drücken Sie auf DAY, wenn alle sechs Ereignisse korrekt sind, um Ereignisse für TAG 2 zu programmieren.
22 |
|
TP7000 RANGE |
(Falls Sie die Programmierung für den vorherigen Tag übernehmen möchten, drücken Sie einfach auf COPY).
d) Wiederholen Sie die Arbeitsschritte b und c für die Programmierung (oder das Kopieren) von Ereignissen der Tage 3, 4, 5, 6 & 7.
Um in den RUN-Modus zurückzukehren - drücken Sie PROG, bis der Doppelpunkt in der Anzeige blinkt.
1.82 5/2-Tage-Modus
(Einstellungen für Ereignisse an den Wochentagen - 1 bis 5 - und Einstellungen für Ereignisse am Wochenende - 6 und 7)
Drücken Sie PROG, bis Ereignis 1 blinkt und drücken Sie dann DAY, bis Tag 1-5 angezeigt wird.
Wiederholen Sie zur Programmierung von Zeiten und Temperaturen für Wochentage die Arbeitsschritte b und c (siehe 7-Tage-Modus).
Drücken Sie DAY, um Ereignisse für das  Wochenendezuprogrammieren(TAG6-7) 1 2 3 4 5 oder drücken Sie COPY zur Wiederholung
des Wochentagprogramms.
Um in den RUN-Modus zurückzukehren - drücken Sie PROG, bis der Doppelpunkt in der Anzeige blinkt.
GB
F
D
ES DK NL I
GR PL LT CZ HR
RO
Danfoss Heating |
|
23 |
|
2.0 Weitere Einstellmöglichkeiten |
|
|
2.1 In den Thermostat-Modus zurückkehren |
|
|
Der TP7000 kann so eingestellt werden, dass er -anstatt einem |
|
|
eingestellten Programm zu folgeneine vom Benutzer gewählte |
|
|
konstante Temperatur regelt. |
|
|
Halten Sie und gleichzeitig gedrückt, |
|
GB |
bis die Anzeige zu einem blinkenden |
|
Strich und der voreingestellten Temperatur |
||
|
zurückkehrt (8°C). |
|
F |
Drücken Sie zur Änderung der Temperatur |
|
|
||
D |
und . |
|
HINWEIS: Das Gerät verbleibt im Thermostat-Modus bis die Tasten |
||
|
||
ES |
und erneut gleichzeitig gedrückt werden. |
|
|
DK |
|
|
|
2.2 Programmierung des Ferien-Modus |
|
|
|
|
(während des Thermostat-Modus) |
|
||||
NL |
|
|
|
|
|
|
|
Der TP7000 kann die Temperatur konstant niedrig halten, während Sie |
|
|
|
|
|
|
|
||||
|
|
|
|
in den Ferien sind, und kehrt nach einer bestimmten Anzahl von Tagen |
|
I(maximal 99 Tage) zu den programmierten Einstellungen zurück.
GR
PL
LT
CZ
HR
RO
(Falls Sie noch nicht im Thermostat-Modus sind, halten Sie und gleichzeitig gedrückt, bis die Anzeige zu einem blinkenden Strich und der voreingestellten Temperatur zurückkehrt (8 °C).
Drücken Sie DAY (es wird ein Ko ersymbol und :00 angezeigt).
Drücken Sie + und - zur Eingabe der Anzahl von Ferientagen (max. 99).
Verwenden Sie die Tasten und , um die konstante Temperatur, falls erforderlich, zu ändern.
Nach Ablauf der eingestellten Anzahl von Tagen kehrt das Gerät in den Normalbetrieb zurück und regelt gemäß der eingestellten Programme.
24 |
|
TP7000 RANGE |

HINWEIS: Drücken Sie gleichzeitig die Tasten und , um den Ferien-Modus, falls erforderlich, zu verlassen.
2.3 Manuelle Eingri smöglichkeit
Unter bestimmten Umständen kann es erforderlich werden den üblichen Heizzyklus zu ändern, z. B. bei ungewöhnlich kaltem Wetter. Der TP 7000 verfügt über mehrere hilfreiche Möglichkeiten für den manuellen Eingri , die ohne Auswirkungen auf die Thermostatprogrammierung gewählt werden können.
Zur kurzzeitigen Erhöhung oder Senkung der programmierten Temperatur.
– drücken Sie zur Erhöhung oder Senkung der Temperatur oder .
Ereignis 1 (z.B. 06:30, 20 °C) auf den ganzen Tag ausdehnen (so dass die Heizung ganztägig bei einer konstanten Temperatur läuft)).
– drücken Sie die Taste einmal wie dargestellt.
Zur Ausdehnung der aktuell eingestellten |
|
Temperatur um 1, 2 oder 3 Stunden |
|
– drücken Sie die Taste einmal für eine |
2 |
|
|
Verlängerung um 1 Stunde, 2 mal zur |
|
Verlängerung um 2 Stunden, 3 mal zur |
|
Verlängerung um 3 Stunden und 4 mal |
|
zur Aufhebung der Übersteuerung. |
|
Änderung der Haupt-LCD-Anzeige, um Zeit oder tatsächliche Raumtemperatur anzuzeigen.
– drücken Sie gleichzeitig NEXT und COPY.
Batteriewechsel (nicht TP7000M)
Die Lebensdauer der Batterien beträgt mindestens 2 Jahre. Bei niedriger Batterieleistung blinkt das entsprechende Symbol auf dem LCD. Sie haben für den Batteriewechsel 15 Tage Zeit. Verwenden Sie stets hochwertige Alkalibatterien Typ AA LR6.
GB
F
D
ES
DK
NL
I
GR
PL
LT
CZ
HR

 RO
RO
Danfoss Heating |
|
25 |
GB
F
D
ES DK NL I GR PL LT CZ HR RO
Instrucciones del usuario
Serie TP7000
Cronotermostatos
Indice
1.0 |
Instrucciones del usuario ................................................................... |
27 |
|
|
1.1 |
Su cronotermostato de temperatura ambiente .................. |
27 |
|
1.2 |
Programas Preestablecidos......................................................... |
27 |
|
1.3 |
Antes de comenzar ........................................................................ |
27 |
|
1.4 |
Preferencias de visualización en Pantalla............................... |
27 |
|
1.5 |
Ajustar el reloj y la fecha............................................................... |
28 |
|
1.6 |
Establecimiento del Período de OSC....................................... |
28 |
|
1.7 |
Aceptación de los programas preestablecidos.................... |
28 |
|
1.8 |
Antes de que usted cambie los programas |
|
|
|
preestablecidos ............................................................................... |
29 |
|
1.81 |
Modo 7 días ...................................................................................... |
29 |
|
1.82 |
Modo días 5/2 .................................................................................. |
30 |
2.0 |
Avanzado ................................................................................................... |
31 |
|
|
2.1 |
Para pasar al modo Termostato ................................................. |
31 |
|
2.2 |
Para programar el Modo Vacaciones ....................................... |
31 |
|
2.3 |
Anulaciones de usuario ................................................................ |
32 |
|
2.4 |
Cambiar las pilas (no en el TP7000M)...................................... |
32 |
26 |
|
TP7000 RANGE |
1.0Básico
1.1Su cronotermostato de temperatura ambiente
El TP7000 permite que usted programe hasta 6 combinaciones diferentes de ajustes de horas y temperaturas para cada día de la semana, proporcionando una completa fl exibilidad. Tiene diversas confi guraciones de ahorro de energía y permite varias cancelaciones útiles para el usuario, incluyendo un modo de funcionamiento en vacaciones de 99 días.
1.2 Programas Preestablecidos
Su TP7000 se entrega ya programado con una combinación de horas y temperaturas de funcionamiento que a menudo satisfacen a la mayoría de las personas.
Dias de la semana (LunVier)
Evento |
Hora |
Temp °C |
|
|
|
1 |
06:30 |
20 |
|
|
|
2 |
08:30 |
15 |
|
|
|
3 |
11:30 |
20 |
|
|
|
4 |
13:30 |
15 |
|
|
|
5 |
16:30 |
21 |
|
|
|
6 |
22:30 |
15 |
|
|
|
Fin de Semana (Sab-Dom)
Evento |
Hora |
Temp °C |
|
|
|
1 |
07:30 |
20 |
|
|
|
2 |
09:30 |
20 |
|
|
|
3 |
11:30 |
20 |
|
|
|
4 |
13:30 |
20 |
|
|
|
5 |
16:30 |
21 |
|
|
|
6 |
22:30 |
15 |
|
|
|
Si usted desea cambiar cualquiera de estos ajustes previos, lo puede hacer siguiendo las instrucciones indicadas en las páginas 29-30. En primer lugar, seguir los pasos indicados en la páginas 27 - 28 para ajustar la hora y la fecha correctas.
GB
F
D
ES
DK
NL
I
GR
PL
LT
1.3 Antes de comenzar |
CZ |
|
|
||
Abrir la tapa frontal de su programador. |
RESET |
|
Utilizando un objeto no-metálico, oprimir |
HR |
|
el botón RESET (restablecer) alojado en |
||
|
||
un entrante, hasta que oiga un “clic” y la |
RO |
|
pantalla se borre. |
1.4 Preferencias de visualización en Pantalla
Visualización de las temperaturas (°C or °F)
Pulse y mantenga presionado DAY y COPY (durante 2-3 segundos) hasta que cambie la visualización.
Danfoss Heating |
|
27 |

GB
F
D
ES
DK
NL
I
GR
PL
LT
CZ
HR
RO
Visualización del Reloj (12/24 hr)
Pulse y mantenga presionado NEXT y DAY hasta que cambie la visualización (aparecerá AM o PM en el modo de 12 horas).
1.5 Ajustar el reloj y la fecha
Pulse PROG para iniciar la programación.
DÍA - pulse DAY hasta que aparezca el día correcto (1=lunes).
HORA - pulse + y - para cambiar la hora.
1.6Establecimiento del Período de OSC, si está habilitada
Esta visualización aparecerá en pantalla SÓLO si la función OSC ha sido habilitada por su instalador.
Utilizar los botones + o - para seleccionar el período de OSC. Las opciones son 0:30 (30 mins.), 1:00 (1 hora), 1:30 y 2:00.
El |
período recomendado |
es de |
0:30. |
Si |
se selecciona 0:00 la |
función |
queda |
desactivada.
1.7 Aceptación de los programas preestablecidos
Si a usted le va bien utilizar los programas preestablecidos según lo indicado en la página 27, no necesita hacer nada más. Para aceptar los programas preestablecidos cerrar la tapa frontal y después de 2 minutos los preajustes serán aceptados automáticamente (y el signo de dos puntos centelleará).
La unidad está ahora en el modo de RUN (funcionamiento), (el signo de dos puntos centellea en la pantalla) y la calefacción funcionará de acuerdo con los programas preestablecidos.
28 |
|
TP7000 RANGE |

1.8Antes de que usted cambie los programas preestablecidos
Su instalador habrá ajustado su unidad para funcionar en el modo de 7-días o en el modo de 5/2 días. Para saber en qué modo está ajustada su unidad, oprimir PROG hasta que“Evento 1”centellea en la pantalla.
|
Esta unidad está en el modo de 7-días y puede |
|
usted programar diferentes ajustes para cada día de |
1 |
la semana (ver páginas 29-30). |
|
Esta unidad está en el modo de 5/2 días y puede |
|
usted programar una combinación de ajustes para |
1 2 3 4 5 |
los días laborables y otra combinación de ajustes |
|
para los fi nes de semana (ver página 30). |
1.81 Modo 7 días
(eventos independientes para cada día de la semana)
a) Pulse PROG hasta que se ilumine el Evento 1, después pulse DAY para pasar del día actual al Día 1.
b) Cambie la |
hora y la temperatura de la |
|
|
|
|
|||
|
|
|
|
|||||
siguiente forma: |
|
|
|
|
|
|
||
i) |
Utilice los pulsadores + y – para |
|
|
|
|
|||
|
cambiar la hora (pulse y mantenga |
1 |
|
|
|
|||
|
presionado para |
cambiar |
en |
|
|
|
||
|
incrementos de 10min.). |
|
|
|
|
|
||
ii) |
Utilice los pulsadores |
y |
para |
|
|
|
|
|
|
cambiar la temperatura en pasos de |
|
|
|
|
|||
|
0,5°C (1°F). |
|
|
|
|
|
|
|
iii) |
Pulse NEXT para pasar al siguiente |
|
|
|
|
|||
|
Evento. |
|
|
|
|
|
|
|
iv) |
Repita los pasos i, ii y iii anteriores |
|
|
|
|
|||
|
para los Eventos 2, 3, 4, 5 y 6. |
|
|
|
|
|
||
c) Cuando los 6 eventos sean correctos, pulse DAY para programar los eventos del Día 2.
GB
F
D
ES
DK
NL
I
GR PL LT CZ HR
RO
Danfoss Heating |
|
29 |
GB
F
D
ES
DK
NL
I
GR
PL
LT
CZ
HR
RO
Si desea repetir el programa del día anterior, simplemente pulse COPY.
d)Repita los pasos b y c anteriores para programar (o COPIAR) eventos para los
Días 3, 4, 5, 6 y 7.
Volver al Modo FUNCIONAR (RUN) - oprimir PROG hasta que el signo de dos puntos centellea en la pantalla.
1.82 Modo días 5/2
(una serie de eventos para los días de semana, y otra para los fines de semana)
Pulse PROG hasta que se ilumine el Evento 1, a continuación pulse DAY hasta que aparezca en la pantalla Día 1-5.
Siga los pasos b y c anteriores para programar horas y temperaturas para los días de semana.
Pulse DAY para programar eventos para el fin de semana (Día 6-7) o pulse COPY para repetir el programa de los días de
semana.
1 2 3 4 5
Volver al Modo FUNCIONAR (RUN) - oprimir PROG hasta que el signo de dos puntos centellea en la pantalla.
30 |
|
TP7000 RANGE |
 Loading...