

Page 1

INSTRUCTIONS
INSTALLATION OF MOTOR CABLE CLAMP BRACKET FOR VLT® FRAMES D3,
D4 AND E2 (IP00)
This instruction sheet is for the installation of the motor cable clamp brackets for VLT® frame
D3, D4 and E2 drives (IP00/Chassis). Pages 2 and 3 pertain to the D3 and D4 frame drives,
pages 4 and 5 pertain to the E2 frame drive.
Kit Part Numbers
VLT Frame Kit Part Number
D3 176F1774
D4 176F1746
E2 176F1745
Kit Contents
• Cable clamp bracket
• Cable clamps
• Hardware
• 175R1109, Instructions
Required Tools
• Metric Socket Set, 7-19mm
• Socket Exte nsi o ns
• Torx Driver Set: T10-T40
• Torque Wrench : 0.7 -6 N-M (6-50 in-lbs)
Torque Requirements
• M5/T25 Torx screws: 2.3 N-M (20 in-lbs)
MI.38.S1.02 - VLT® is a Danfoss Registered Trademark 1
Page 2
INSTRUCTIONS FOR D3 AND D4 FRAME FREQUENCY CONVERTER
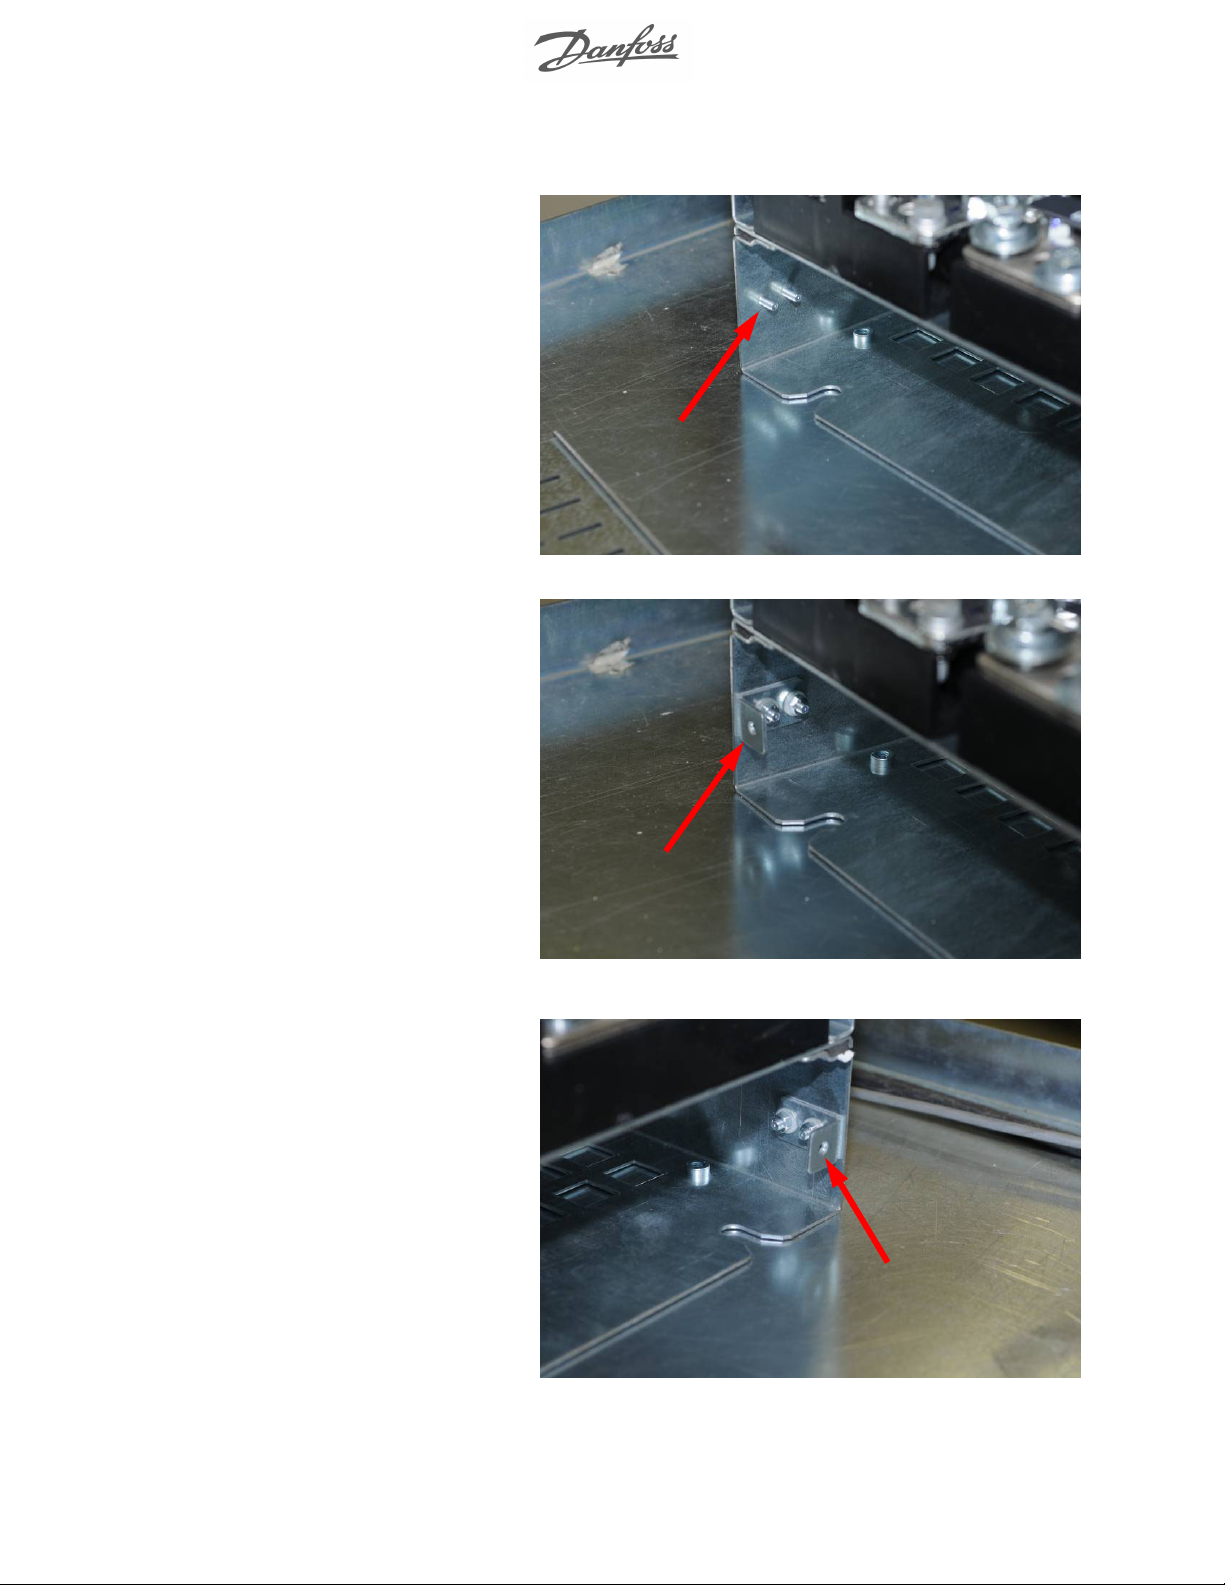
1. Install mounting tabs over studs
as shown and secure with nuts. Do
this on the left and right side. Reference Figur es 1, 2 and 3.
Figure 1. Studs for mounting tabs.
Figure 2. Mounting tab installed on left side of D3/D4
frame.
Figure 3. Mounting tab installed on right side of D3/
D4 frame.
MI.38.S1.02 - VLT® is a Danfoss Registered Trademark 2
Page 3
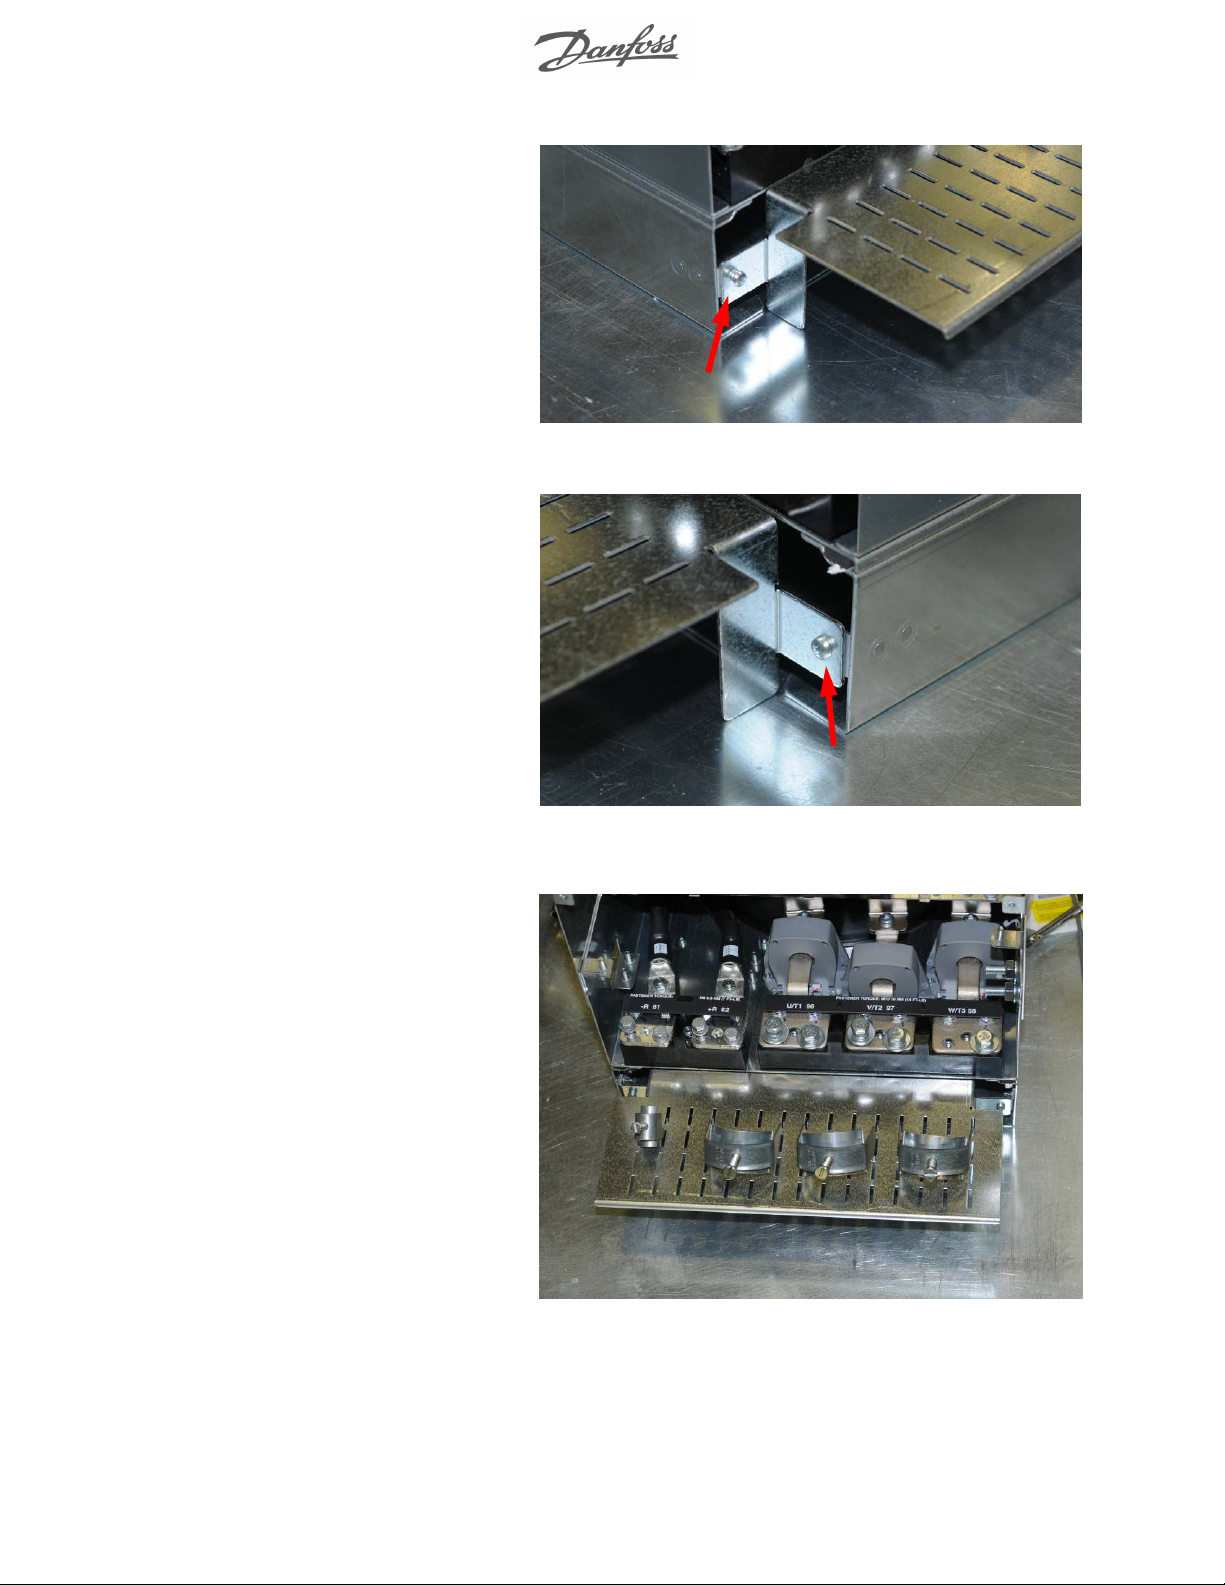
2. Mount cable-clamp bracket on the
mounting tabs and secure using the
screws supplied with the kit. Do this
on the left and right side. Reference
Figures 4, 5 and 6.
Figure 4. Cable-clamp bracket mounted on mounting
tab, left side of D3/D4 frame.
Figure 5. Cable-clamp bracket mounted on mounting
tab, r ight side of D3/D4 frame.
Figure 6. Cable-clamp bracket mounted on D3
frame.
MI.38.S1.02 - VLT® is a Danfoss Registered Trademark 3
Page 4
INSTRUCTIONS FOR E2 FRAME FREQUENCY CONVERTER
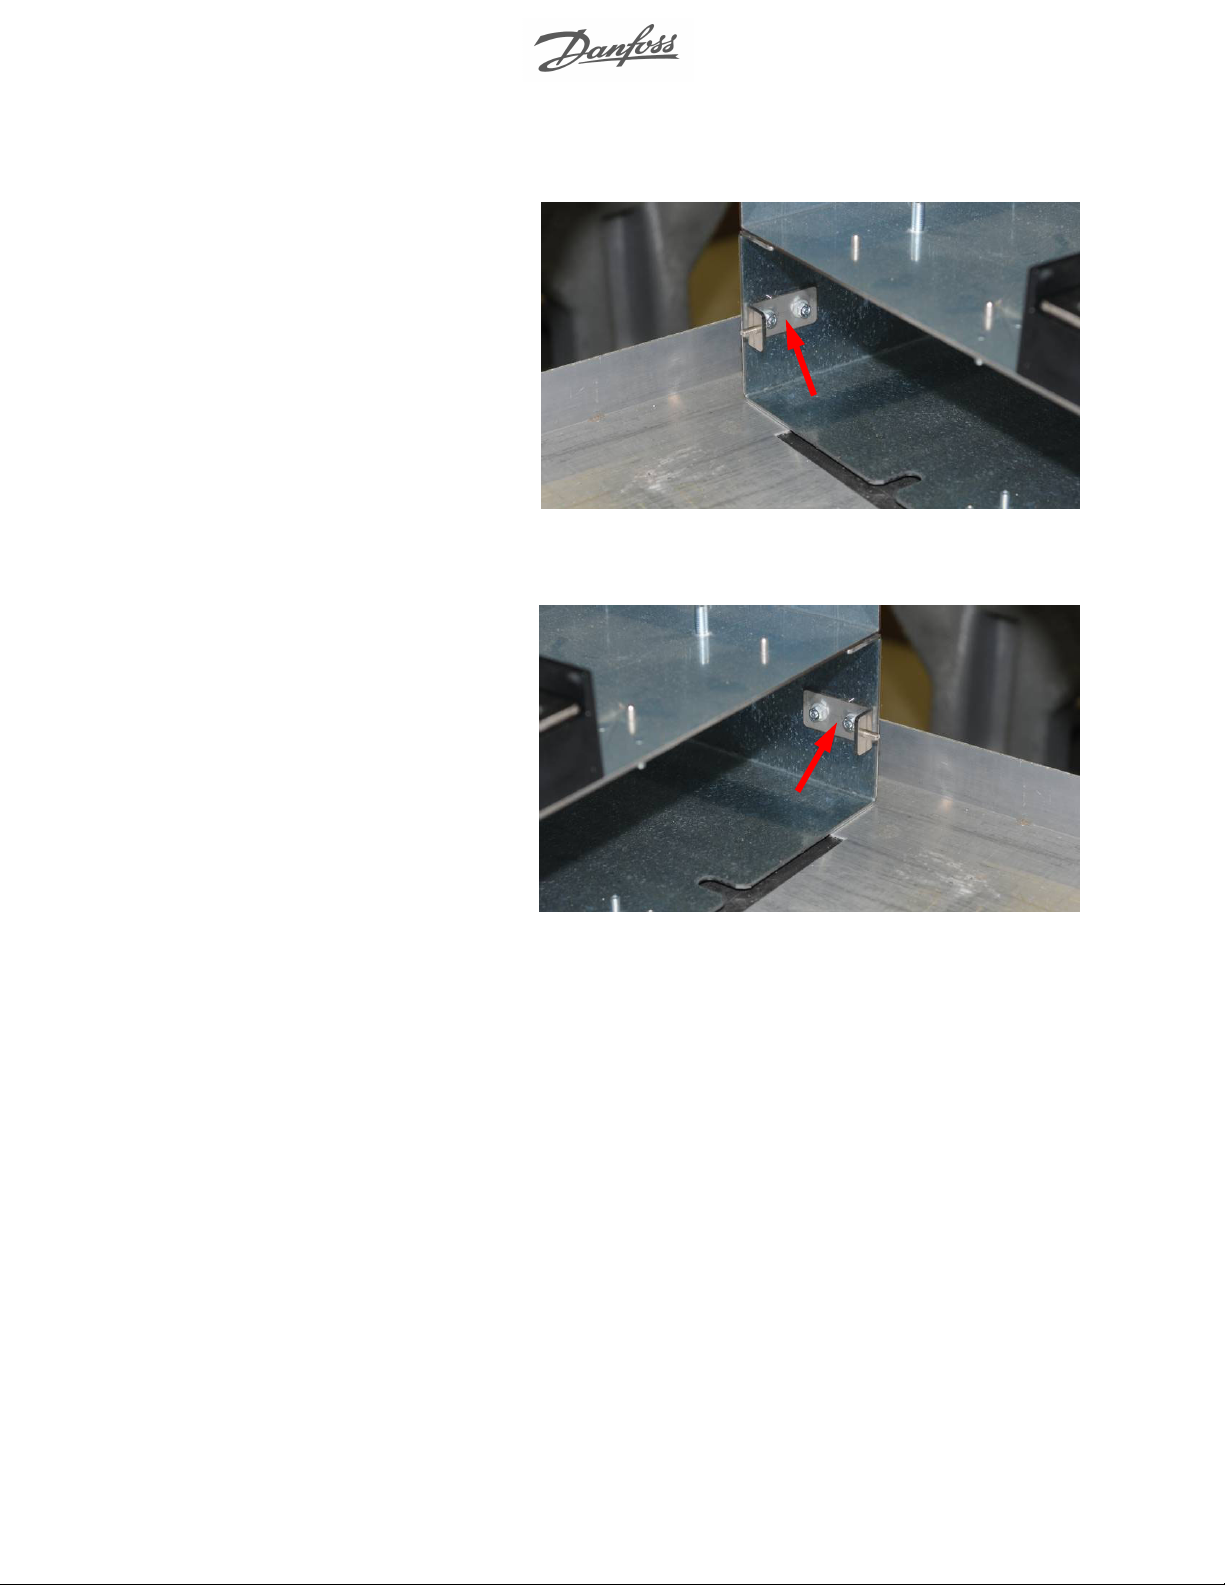
1. Install mounting tabs over studs
as shown and secure with nuts. Do
this on the left and right side. Reference Figur es 7 an d 8.
Figure 7. Mounting tab installed on left side of E2
Figure 8. Mounting tab installed on right side of E2
frame.
MI.38.S1.02 - VLT® is a Danfoss Registered Trademark 4
Page 5
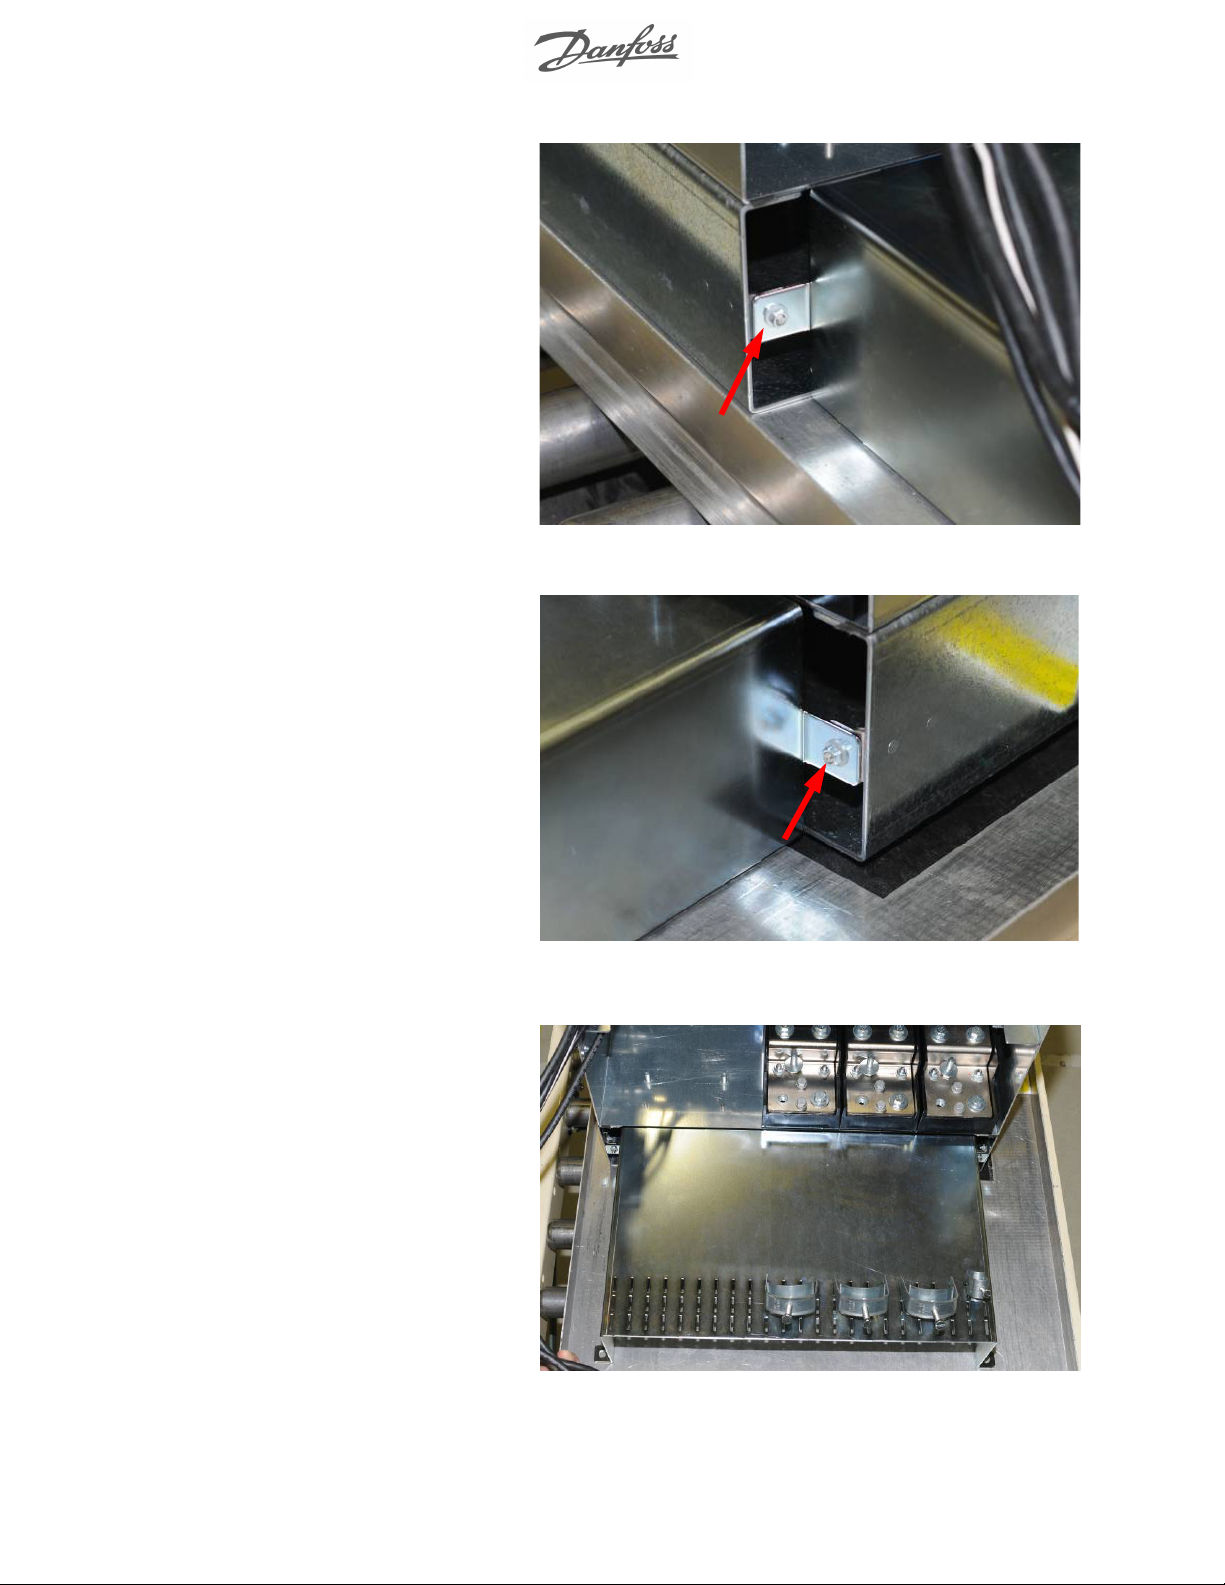
2. Mount cable-clamp bracket on the
studs that are located on the mounting tabs and secure using the nuts
supplied with the kit. Do this on the
left and right side. Reference Figures
9, 10 and 11.
Figure 9. Cable-clamp bracket mounted on mounting
tab, left side of E2 frame.
Figure 10. Cable-clamp bracket mounted on mounting tab, right side of E2 fram e.
Figure 11. Cabl e-c lamp brack et m ou nte d on E2
frame.
MI.38.S1.02 - VLT® is a Danfoss Registered Trademark 5
 Loading...