

Page 1
Owner's Handbook
Contents
A to Z
Online Edition for Part-No. 01 41 0 159 725 © 09/05 BMW AG
for Vehicle
The Ultimate
Driving Machine
Page 2

523i
Online Edition for Part-No. 01 41 0 159 725 © 09/05 BMW AG
525i
530i
540i
550i
525xi
530xi
530xd
520d
525d
530d
535d
Owner's Handbook
Congratulations on your choice of a BMW.
The better you are acquainted with your car, the easier you will
find it is to handle. We would therefore like to offer you the following advice:
Please read the Owner's Handbook before setting out in your
new BMW. It contains important notes on how to operate the car,
enabling you to derive maximum benefit from the technical
advantages of your BMW. It also contains useful information
which will help you to uphold both the operating safety and full
resale value of your BMW.
Supplementary information is provided in the other documents
of on-board literature.
We wish you many a safe and enjoyable journey,
BMW AG
Page 3

© 2005 Bayerische Motoren Werke
Online Edition for Part-No. 01 41 0 159 725 © 09/05 BMW AG
Aktiengesellschaft
Munich, Germany
Not to be reproduced, wholly or in part, without
written permission from BMW AG, Munich.
Order No. 01 41 0 159 725
English VIII/05, 05 09 510
Printed in Germany
Printed on environmentally friendly paper,
bleached without chlorine, suitable for recycling.
Page 4

Contents
Online Edition for Part-No. 01 41 0 159 725 © 09/05 BMW AG
The quickest access to a particular topic or item
is by consulting the detailed alphabetical index,
see page 228.
About this Owner's Handbook
4 Notes
Overview
8 Driving area
14 iDrive
20 Voice input system
Controls
26 Opening and closing
42 Adjusting
53 Child safety
56 Driving
71 Everything under control
82 Technical features for driving comfort and
safety
93 Lights
98 Climate
109 Practical interior equipment
Driving hints
122 Driving precautions
Navigation
132 Starting navigation system
134 Destination input
147 Route guidance
156 What to do if ...
Entertainment
160 On/off and settings
164 Radio
169 CD player and CD changer
175 TV
Mobility
180 Refuelling
182 Wheels and tyres
185 In the engine compartment
190 Maintenance
192 Replacing parts
200 Mutual aid
Reference
208 Technical data
223 Short commands for the voice input
system
228 From A-Z
Entertainment OverviewControlsDriving hintsNavigationMobilityReference
Page 5

Notes
Online Edition for Part-No. 01 41 0 159 725 © 09/05 BMW AG
About this Owner's
Notes
Handbook
We have tried to make all the information in this
Owner's Handbook easy to find. The quickest
access to a specific topic or item is by consulting the detailed alphabetical index at the end.
Consult the first chapter for an overview of your
car.
When the time comes to sell your BMW, please
remember to hand over this Owner's Handbook; it is an important part of the car.
Additional sources of information
If you have any queries, BMW Service will be
glad to advise you.
Information on BMW, e.g. on technical aspects,
can also be found on the Internet at
www.bmw.com.
Symbols used
Indicates precautions that must be fol-
lowed precisely in order to avoid the possibility of personal injury and serious damage to
the vehicle.
Indicates information that will assist you
in gaining the optimum benefit from your
vehicle and enable you to care more effectively
for your vehicle.
Refers to measures that can be taken to
help protect the environment.
< Marks the end of a specific item of informa-
tion.
*
Identifies optional extras or specific nationalmarket items of equipment, as well as equipment and functions not yet available at the time
of printing.
"..." Identifies texts on the control display for
selecting functions.
{...} Identifies commands for the voice input
system.
{{...}} Identifies replies by the voice input system.
Symbol for components and
assemblies
Recommends that you study the relevant
section of this Owner's Handbook in con-
nection with a particular part or assembly.
4
Page 6

Your car
Online Edition for Part-No. 01 41 0 159 725 © 09/05 BMW AG
When you ordered your BMW, you chose various items of equipment.This Owner's Handbook describes all models and equipment
specifications which BMW offers within this
particular model line.
This explains why the Owner's Handbook may
also contain details of items which you have not
ordered. The differences can easily be identi-
*
fied by the asterisk
extras.
If your BMW contains equipment that is not
described in this Owner's Handbook, Supplementary Owner's Handbooks will be supplied
and you are requested to study and comply with
them.
In cars with right-hand drive, some of the
controls are arranged differently from
those shown in the illustrations of this Owner's
Handbook.<
shown against optional
Status at time of printing
The high safety and quality standards of BMW
vehicles are maintained by unceasing development work on designs, equipment and accessories. In rare instances, your car may therefore
differ from the information supplied in the
Owner's Handbook.
For your own safety
Maintenance and repair
The advanced technology behind this car,
for example the use of modern materials
and high-performance electronics, means that
specially adapted methods of maintenance and
repair are required. Always have the necessary
work on your BMW performed either by BMW
Service or by a workshop that operates to BMW
specifications and has suitably trained personnel. If such work is performed inexpertly, it could
result in consequential damage and thus constitute a safety risk.<
Parts and accessories
BMW recommends using parts and
accessory products on this car that are
specifically approved for this purpose by BMW.
You are recommended to consult BMW Service
for advice on Genuine BMW parts and accessories, other BMW-approved products and competent advice on all related matters.
The safety and compatibility of these parts and
products in conjunction with BMW vehicles
have been checked by BMW. BMW accepts
product liability for them.
BMW cannot accept liability for parts or accessory products of any kind which it has not
approved.
BMW is unable to assess each individual product of outside origin as to its suitability for use
on BMW vehicles without safety risk. Nor can
suitability be assured if an official permit has
been issued for it in a specific country. Tests
performed for such permits cannot always
cover all operating conditions for BMW vehicles, and some of them therefore are insufficient.<
Entertainment OverviewControlsDriving hintsNavigationMobilityReference
5
Page 7
Online Edition for Part-No. 01 41 0 159 725 © 09/05 BMW AG
Page 8
Overview
Online Edition for Part-No. 01 41 0 159 725 © 09/05 BMW AG
Overview
This summary of buttons, switches and
displays serves as an initial guide.
In addition, it gives you an insight into the
principles behind the various ways in which
functions can be performed.
Page 9
Driving area
Online Edition for Part-No. 01 41 0 159 725 © 09/05 BMW AG
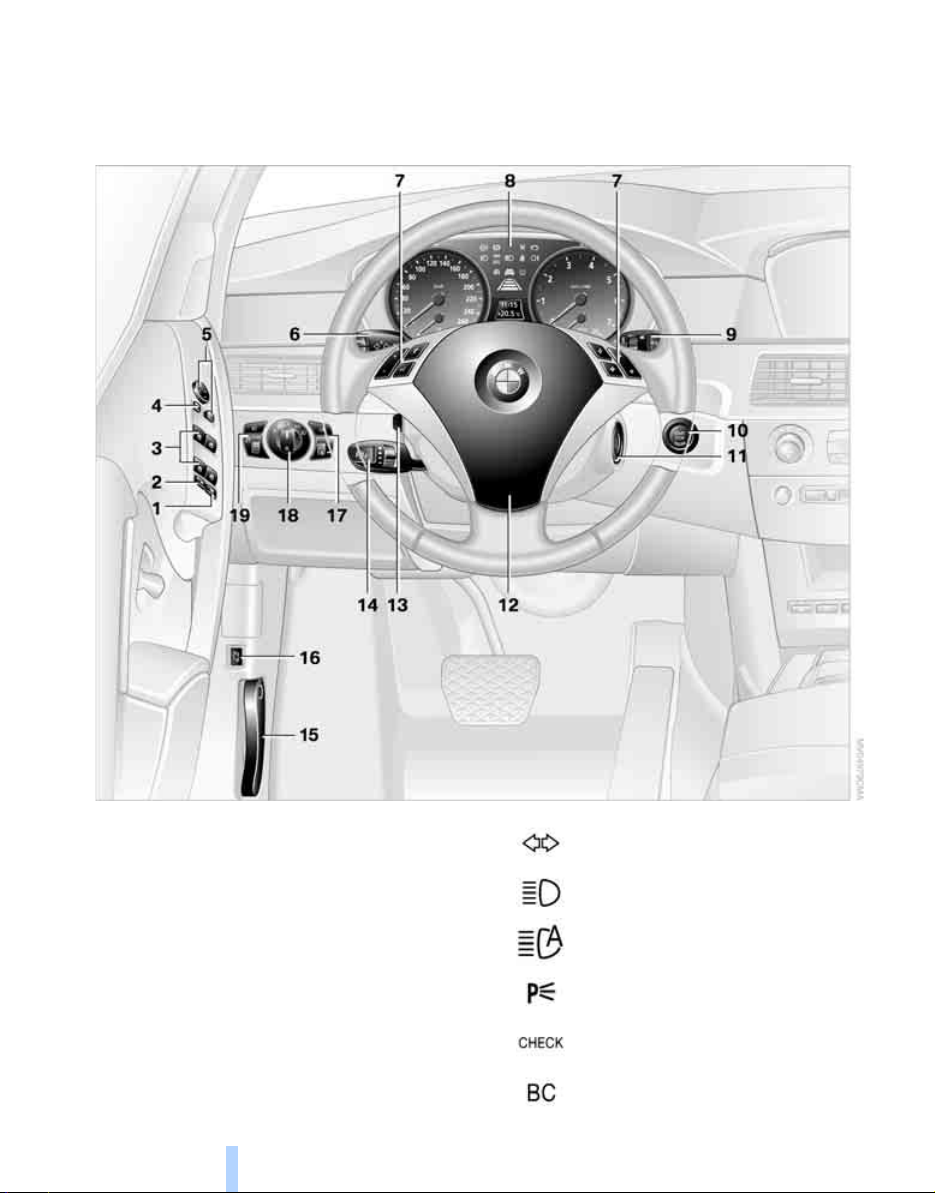
Around the steering wheel: controls and displays
Driving area
1 Saloon: roller sun blind* for rear
window 110
2 Safety switch for rear windows 38
3 Opening and closing windows 37
4 Folding outside mirrors in and out
5 Adjusting outside mirrors 49
Parking position function
8
*
50
6
*
49
Flashing turn indicators 62
High-beam headlights, headlight
flasher 95
High-beam headlights
*
assistant
Parking lights 95
Check Control 76
Computer 72
95
Page 10
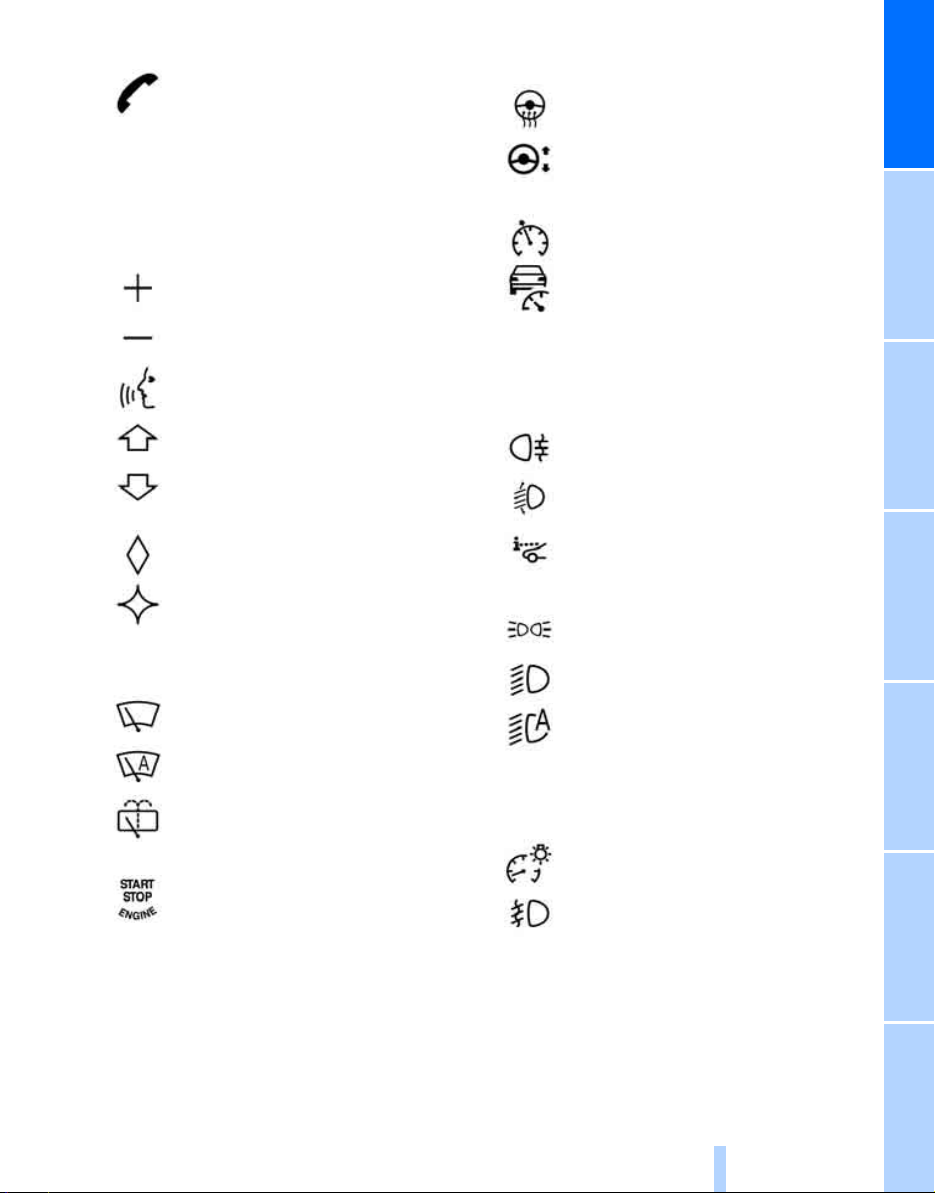
7 Buttons on the steering wheel
Online Edition for Part-No. 01 41 0 159 725 © 09/05 BMW AG
*
Telephone
> Press: receiving and ending a
call, dial starting
selected phone number and
redialling if no phone number
has been selected
> Press and hold down:
redialling
:
*
for a
12 Horn, entire surface
13
14
Heated steering wheel
Steering wheel adjustment
Cruise control
*
51
*
50
*
64
Volume control
Activating/deactivating voice input
*
system
Changing radio station
Selecting a music track
Changing TV station
Scrolling in the telephone book
and in lists of stored numbers
Individually programmable
Individually programmable 51
8 Instrument cluster 10
9
10
Windscreen wipers 63
Rain sensor 63
Touring: rear window wiper 64
Switching the ignition on/off and
starting/stopping the engine 56
20
Active Cruise Control
15 Releasing the engine compartment lid 185
16 Opening the luggage compartment lid/
tailgate 33
17
*
*
51
18
19
Rear fog lights
Headlight beam throw
adjustment 94
Head-Up Display
Side lights 93
Low-beam headlights 93
Automatic driving lights
*
*
94
95
control
Adaptive head light
High-beam headlights
assistant
Instrument lighting 97
Front fog lights
*
66
*
97
*
91
*
94
Entertainment OverviewControlsDriving hintsNavigationMobilityReference
*
96
11 Ignition lock 56
9
Page 11
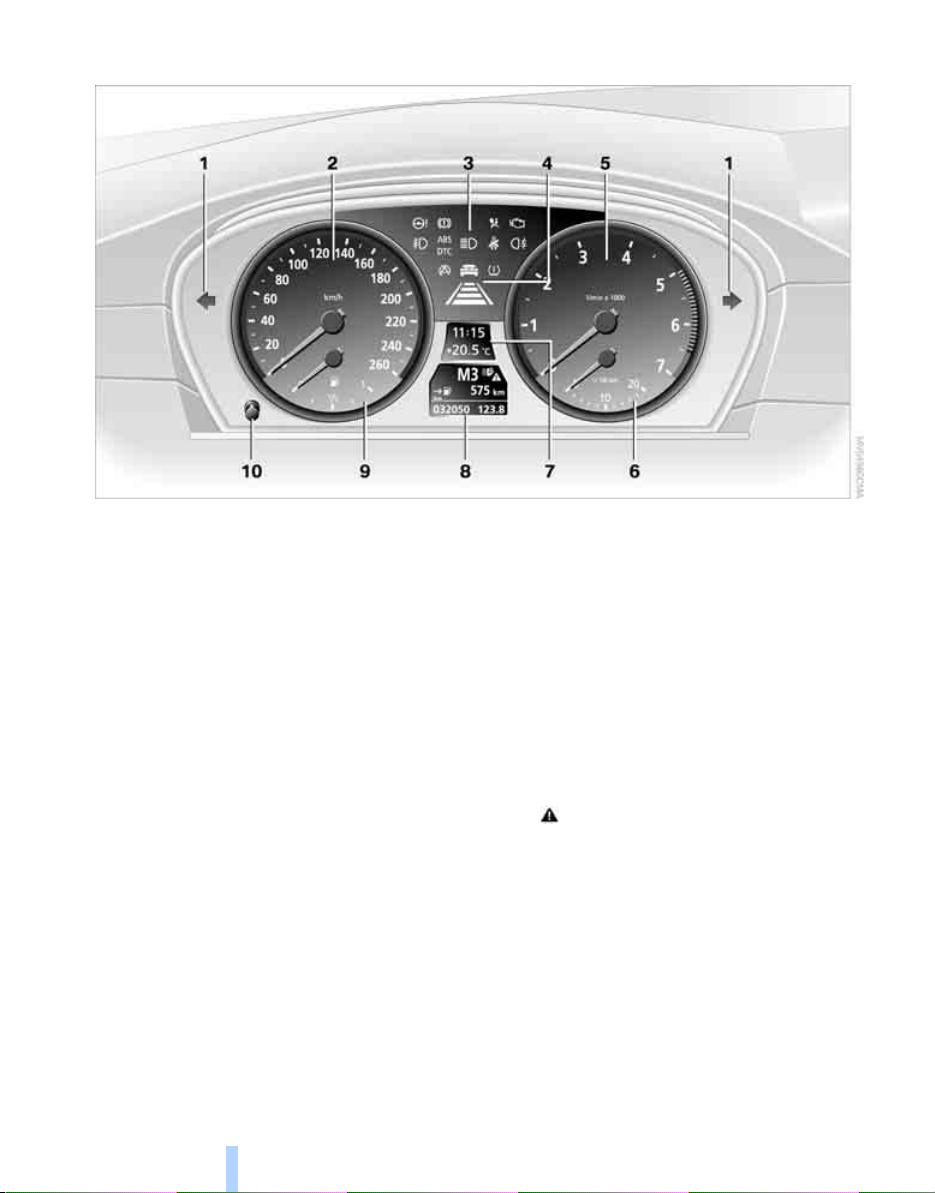
Instrument cluster
Online Edition for Part-No. 01 41 0 159 725 © 09/05 BMW AG
Driving area
1 Flashing turn indicators
2 Speedometer
3 Indicator and warning lamps 11
4 Display for Active Cruise Control
5 Revolution counter 71
6 Energy control 72
7 Display for
> Time/date 71
> Outside temperature 71
> Indicator and warning lamps 76
> Cruise control speed
> Desired speed for Active Cruise
Control
*
66
*
64
8 Display for
> Distance recorder – odometer – and trip
distance recorder 71
*
68
> Computer 72
> Date and remaining distance to next
Service 74
> Automatic transmission with
Steptronic
> Sequential Manual Gearbox SMG
> Hill Descent Control HDC
> High-beam headlights assistant
> Current Check Control message 76
9 Fuel gauge 72
10 Resetting trip distance recorder 71
*
61
*
85
*
59
*
95
10
Page 12
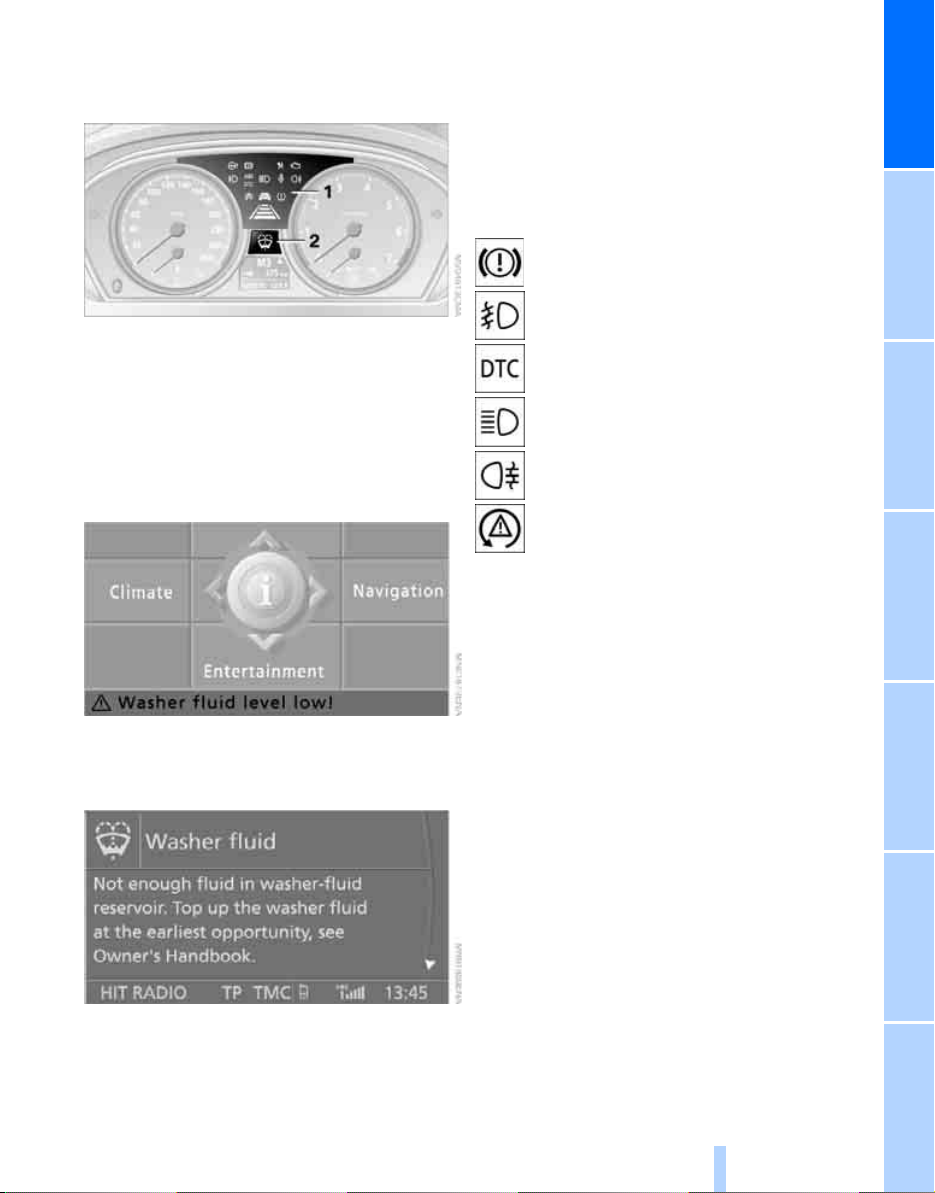
Indicator and warning lamps
Online Edition for Part-No. 01 41 0 159 725 © 09/05 BMW AG
Principle
If action is required as a matter of urgency, this
information is flashed up as soon as the accompanying lamp comes on.
Indicator lamps not accompanied by
text messages
The following indicator lamps in display area 1
indicate that certain functions are active:
Handbrake applied 58
Indicator and warning lamps may light up in a
variety of colours and combinations both in the
panel 1 and in the display 2.
Some lamps in the panel are checked for proper
functioning and thus come on briefly when the
engine starts or the ignition is switched on.
Explanatory text messages
Text messages appearing along the lower edge
of the control display explain the meaning of the
indicator and warning lamps that have come on.
Front fog lights
Dynamic Traction Control DTC 85
High-beam headlights/
headlight flasher 95
Rear fog lights
Lamp flashes:
DSC or DTC is regulating the propulsive and brake forces in order to maintain driving stability 84
*
96
*
97
Entertainment OverviewControlsDriving hintsNavigationMobilityReference
You can call up further information, e.g. on the
cause of a fault and on what action is required,
via the Check Control, see page 76.
11
Page 13
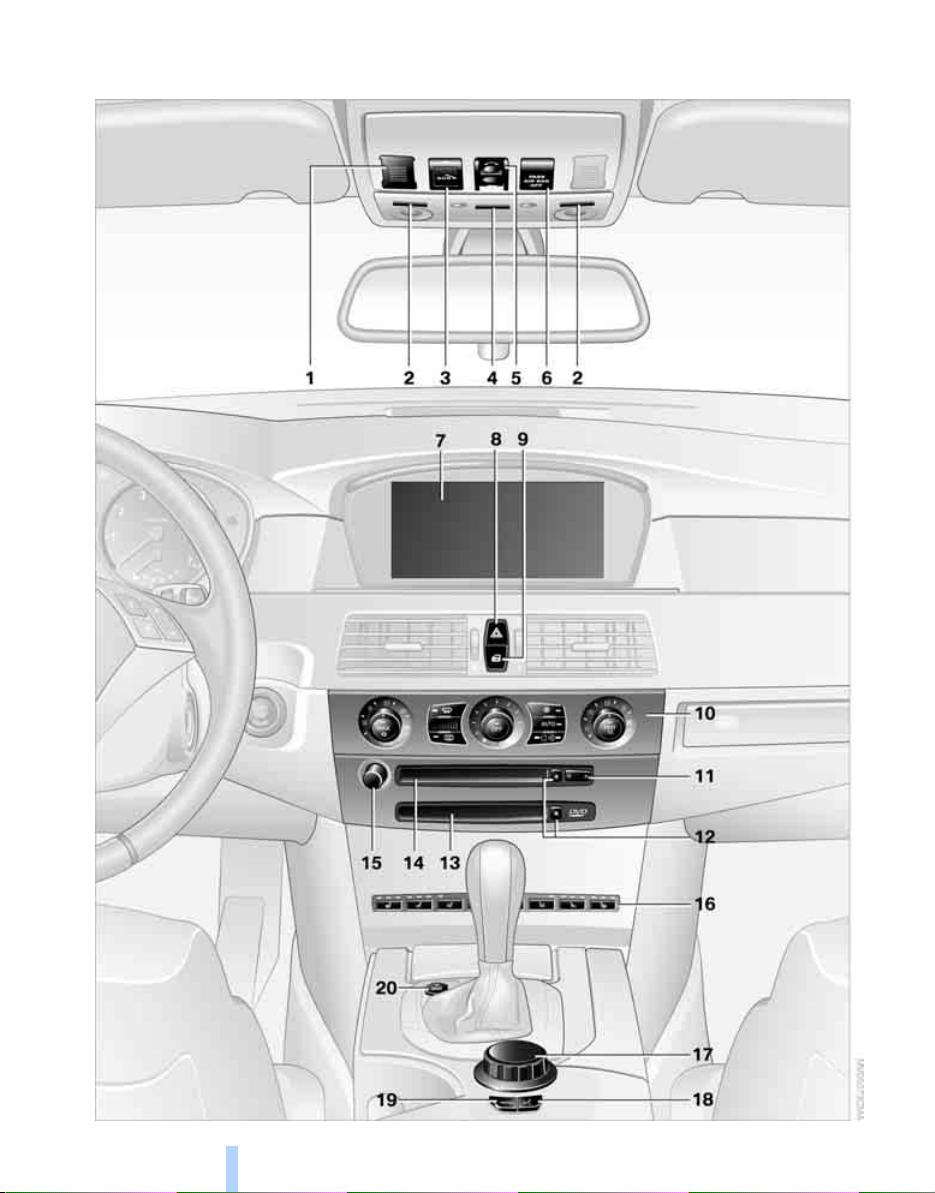
Around the centre console: controls and displays
Online Edition for Part-No. 01 41 0 159 725 © 09/05 BMW AG
Driving area
12
Page 14

1 Microphone for hands-free operation of the
Online Edition for Part-No. 01 41 0 159 725 © 09/05 BMW AG
telephone
and for the voice input system*20
2 Reading lights 97
3 Making an emergency call
4 Interior light 97
5 Glass roof, electric
Panorama glass roof
6 Indicator/warning light,
front passenger airbags
7 Control display 14
8 Hazard warning flashers
9 Central locking system 30
10 Automatic air conditioning 99
Automatic air conditioning with extended
range of features
*
*
200
*
38
*
39
*
54
*
102
Temperature adjustment, left/
right 99, 103
11 Changing
> Radio stations 160
> Tracks 160
12 Eject button for
> Navigation DVD
> Audio CD 160
13 Drive for navigation DVD for Professional
navigation system 132
14 Drive for
> Navigation DVD for Business
tion system 132
> Audio CD 160
15 Switching entertainment audio output on/
off and adjusting volume 160
16
Seat heating
Active seat ventilation
*
160
*
naviga-
*
48
*
48
*
Air distribution 99, 103
Automatic air distribution and
volume 99, 102
Cooling function 100, 104
Automatic Recirculated Air Control
AUC
*
104
Recirculated-air mode 100, 104
Maximum cooling effect
Residual heat utilisation
Switching off automatic air
conditioning 100, 105
Air volume 99, 103
Defrosting windows and removing
mist 100, 103
Heated rear window 99, 102
*
104
*
104
Active backrest width
*
adjustment
Active seat
Park Distance Control PDC
Dynamic Traction Control DTC 85
17 Controller 14
Can be turned, pressed, or moved horizontally in four directions
18 Activating voice input system
19 Calling up start menu on control display 15
20 Dynamic Driving Control
44
*
49
*
82
*
20
*
60
Entertainment OverviewControlsDriving hintsNavigationMobilityReference
13
Page 15
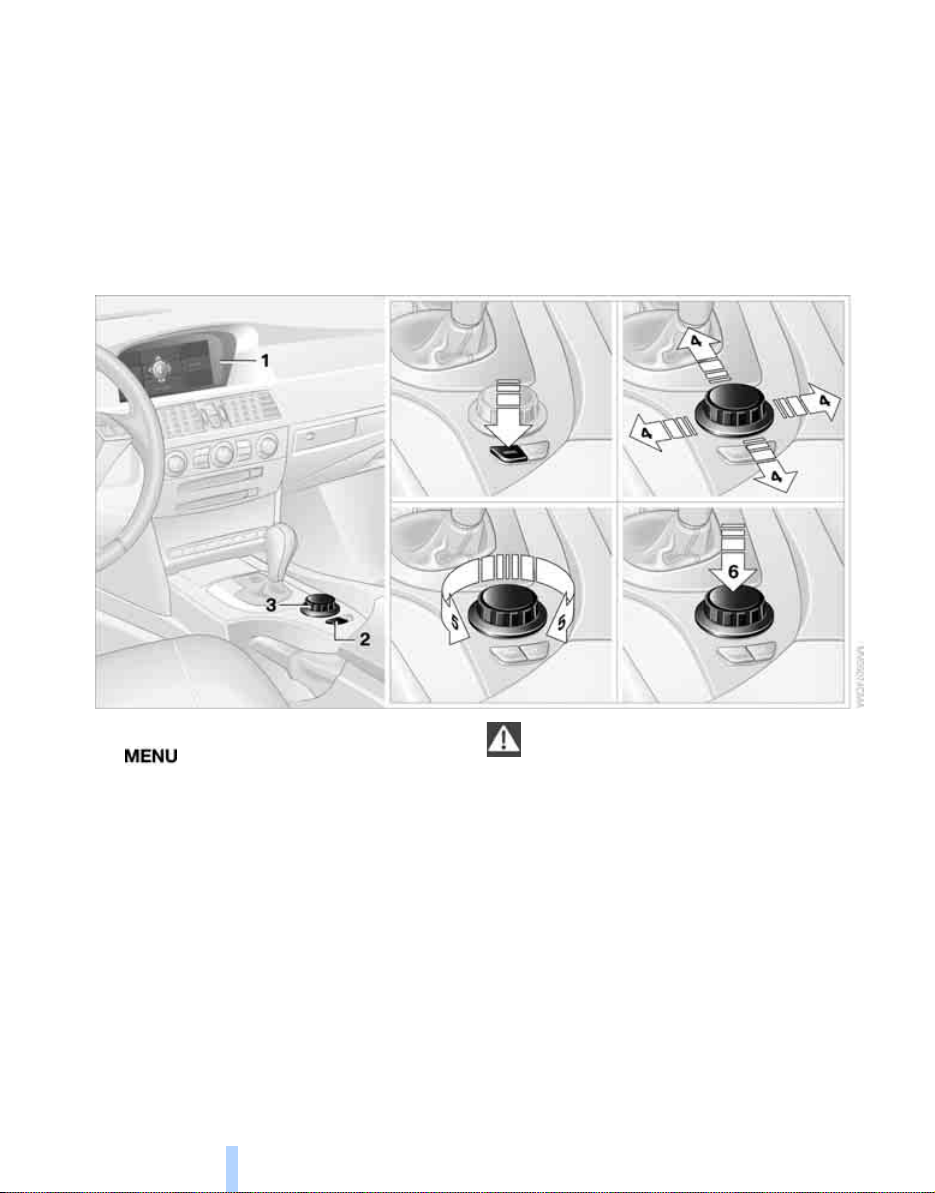
iDrive
Online Edition for Part-No. 01 41 0 159 725 © 09/05 BMW AG
iDrive integrates the functions of a large
iDrive
number of switches. These functions can now
be controlled from one central point. The basic
menu-guided operating principle is explained
Controls
below. Details of how to control individual functions are provided under the descriptions of the
items of equipment concerned.
1 Control display
2 button
To call up the start menu
3 Controller
You can select menu items and adjust settings with the controller:
> Move it in four directions, arrow 4
> Turn it, arrow 5
> Press it, arrow 6
14
Only make adjustments if the traffic conditions are sufficiently quiet or clear, so as
not to endanger the car's occupants and other
road users by being distracted.<
Page 16
Menu summary
Online Edition for Part-No. 01 41 0 159 725 © 09/05 BMW AG
Operating principle
Communication
> Telephone*, see separate Operating
Instructions
> BMW Assist
*
, see separate Operating Instructions
ice
*
, BMW Online* or TeleServ-
Navigation or on-board information
> Navigation system
> On-board information, e.g. to display the
average fuel consumption
*
Entertainment
> Radio
> CD player and CD changer
> TV
*
*
Climate
> Air distribution
> Seat climate control
> Automatic program
> Auxiliary heater/independent ventilation
system
*
*
menu
> Switching off control display
> Tone and display settings
> Traffic information settings
> Settings for your car, e.g. for the central
locking
> Display of maintenance requirements and
dates of next statutory emissions test and
vehicle inspection
> Settings for telephone
Start menu
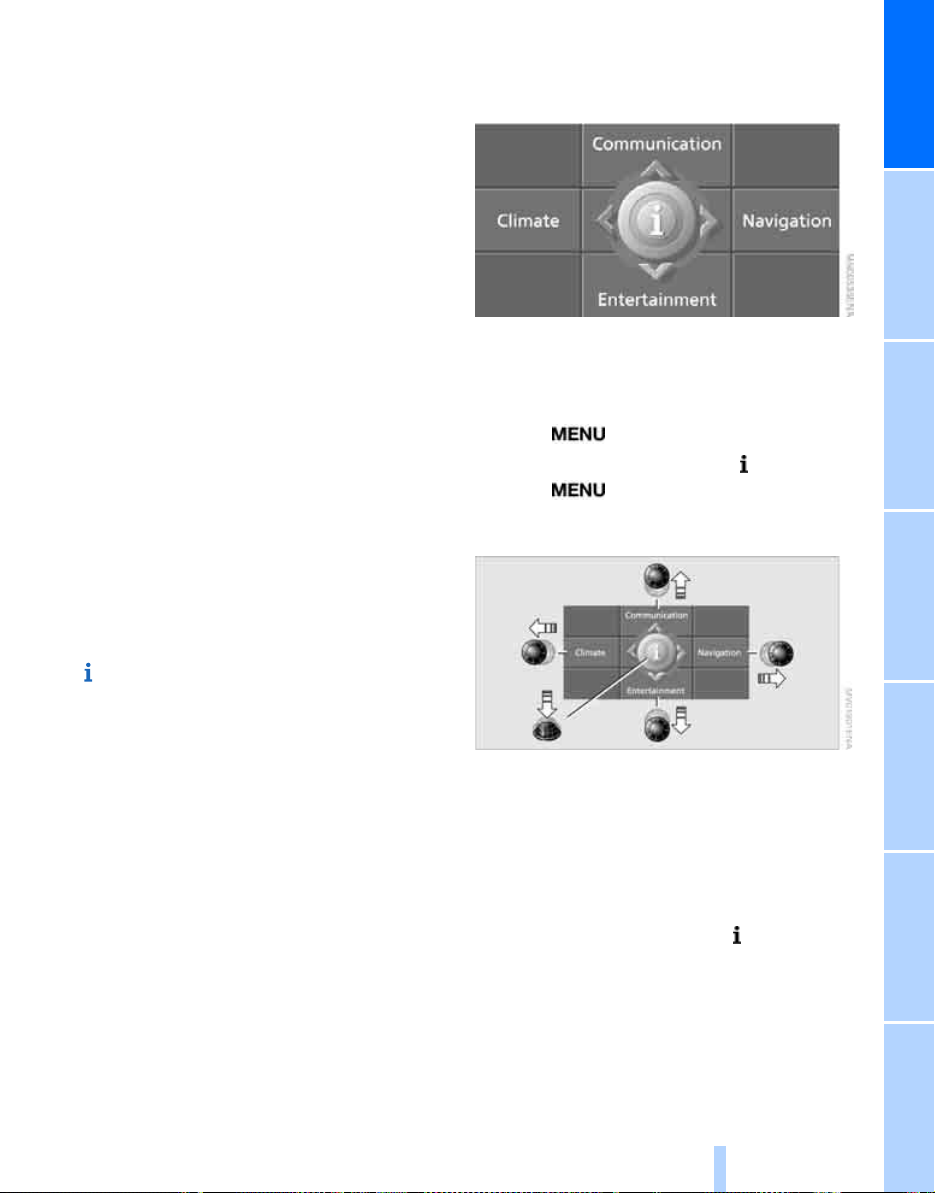
All iDrive functions can be called up via five
menu items.
Calling up the start menu
Press the button.
To call up the start menu from the menu:
Press the button twice.
Calling up menu items in the start menu
Following radio readiness, see page 56:
You can call up the four menu items Communication, Navigation, Entertainment and Climate
via the start menu by moving the controller left,
right, forwards or back. Depending on the
selection, the menu previously called up will be
shown.
Press the controller to call up the menu.
Entertainment OverviewControlsDriving hintsNavigationMobilityReference
15
Page 17
Comfort menu item selection
Online Edition for Part-No. 01 41 0 159 725 © 09/05 BMW AG
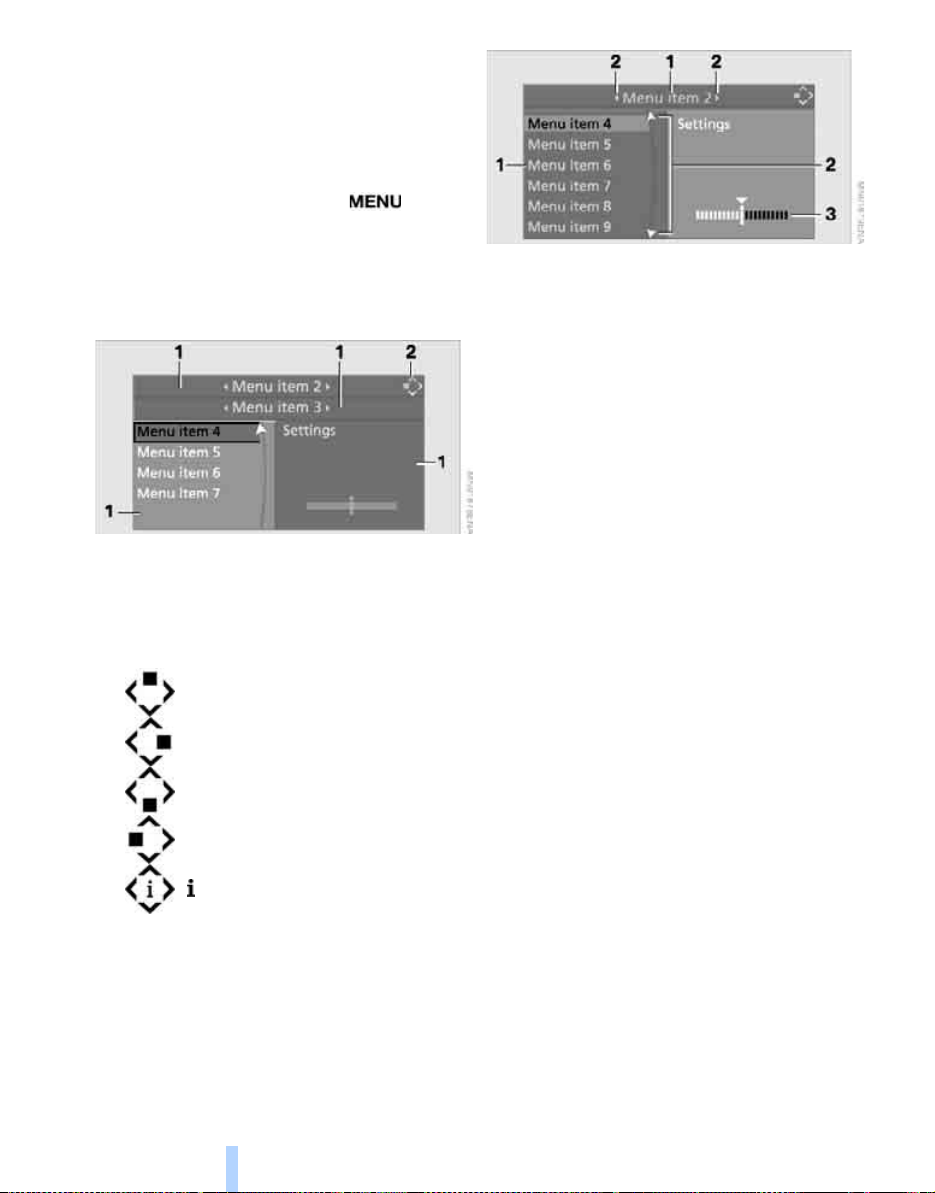
The comfort selection feature enables you to:
> Call up a menu item in the start menu in the
iDrive
last configuration used
> Toggle directly between Communication,
Navigation, Entertainment and Climate
without needing to press the button
To do this, move the controller in the relevant
direction and hold it in position for more than
about 2 seconds.
Displays in the menu
1 Each menu is subdivided into different
fields. The field currently selected appears
highlighted in the display.
2 A symbol shows you which menu item of
the start menu was last selected:
1 Menu items are usually grouped in horizon-
tal or vertical lists.
2 Arrows indicate that there are additional
menu items within a list, but that they are
not currently visible.
3 Settings are represented graphically or as
numerical values.
Communication
Navigation or on-board information
Entertainment
Climate
menu
16
Page 18
Operating principle at a glance
Online Edition for Part-No. 01 41 0 159 725 © 09/05 BMW AG
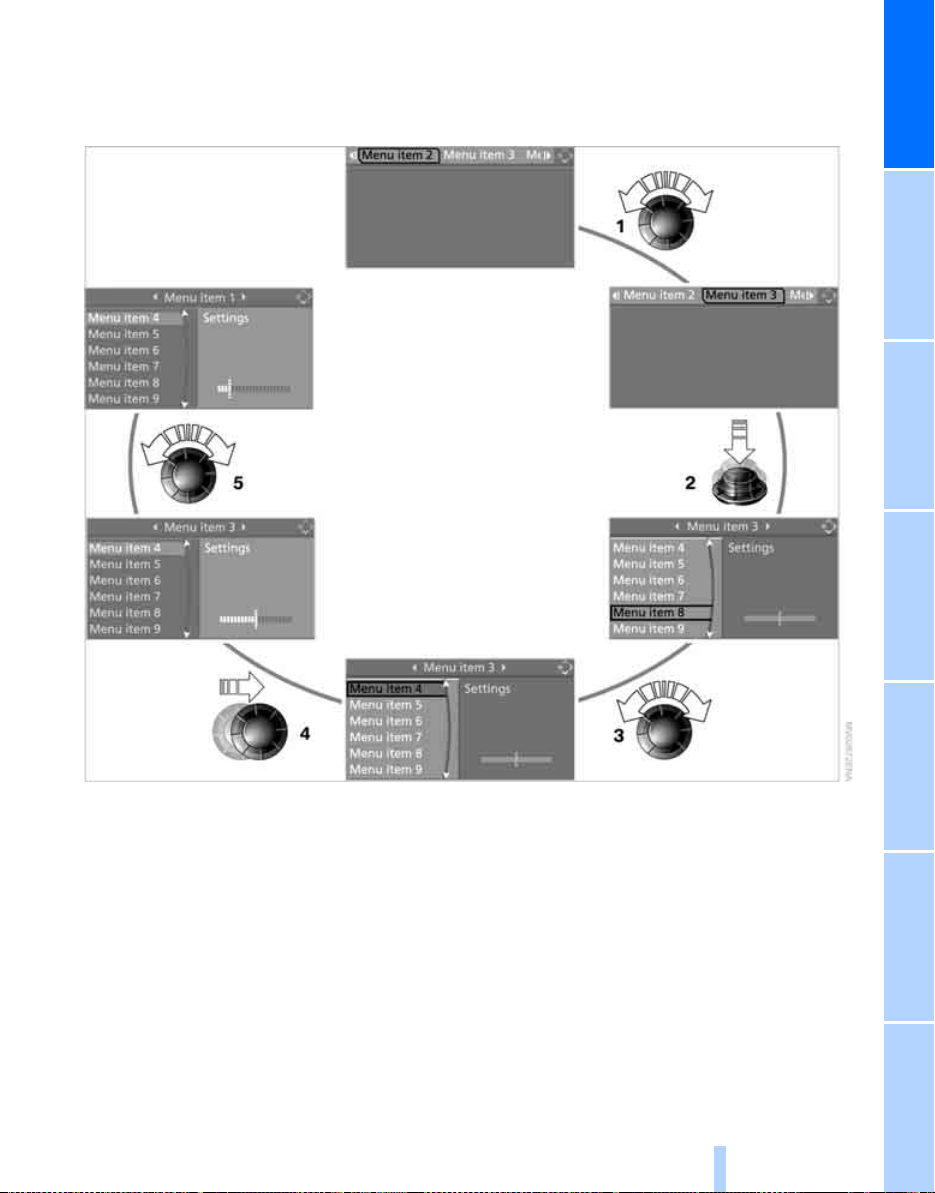
This illustration shows how the car can be operated via iDrive.
The individual steps are explained under Settings on the control display, Setting time, see
page 79.
1 Select a menu item:
> Turn the controller; the highlighted
marker moves
> Menu items in white can be selected by
highlighting them
2 To activate a menu item:
> Press the controller
> New menu items are displayed or the
function is executed
3 Select a menu item: see 1
4 To switch between fields:
> Slightly move the controller to the left,
right, forwards or backwards
> Release the controller
> The active field becomes brighter in col-
our
5 To perform adjustments:
> Turn the controller
> Graphic display, numerical value or text
displays can be changed
> Confirm by changing the field
17
Entertainment OverviewControlsDriving hintsNavigationMobilityReference
Page 19
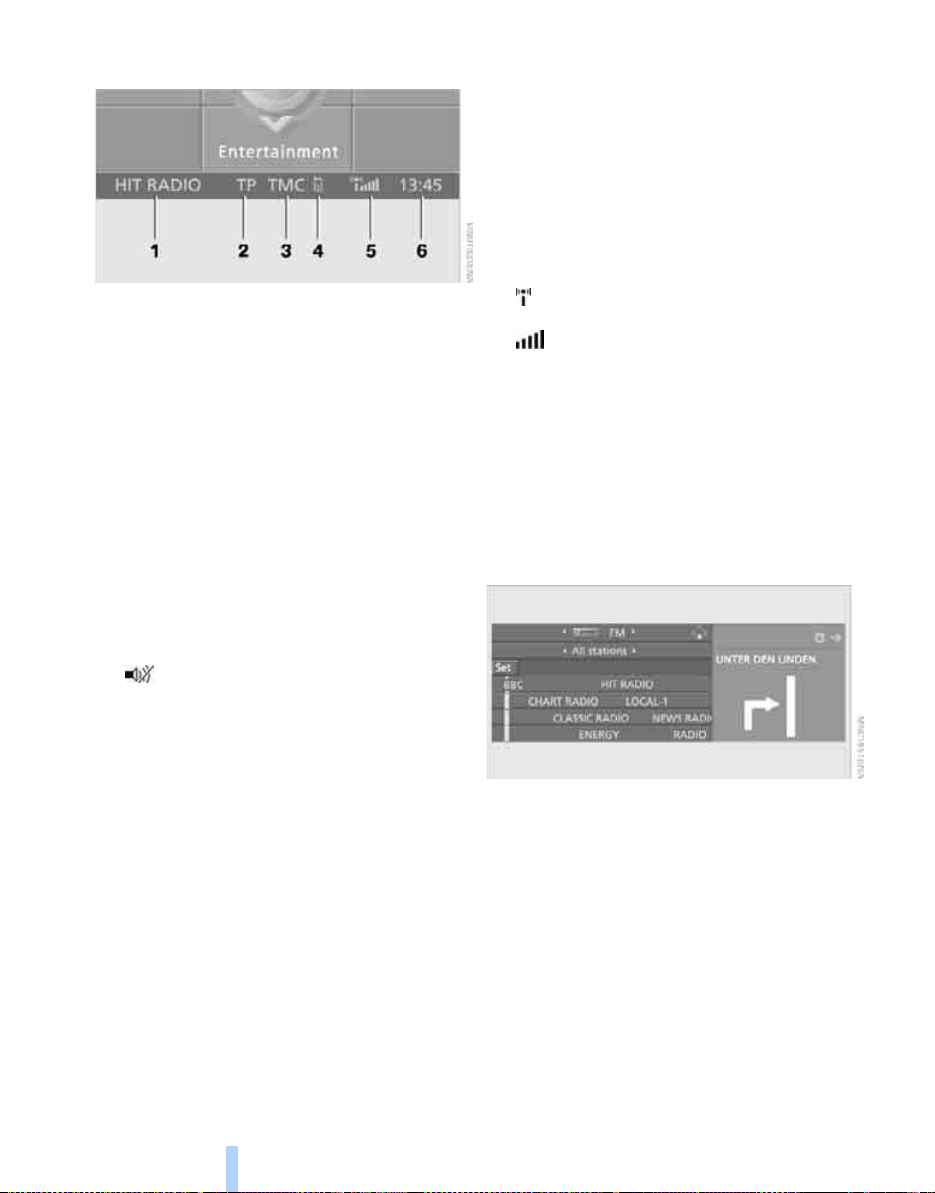
Status information
Online Edition for Part-No. 01 41 0 159 725 © 09/05 BMW AG
iDrive
1 Display for:
> Entertainment:
Radio, CD, TV
> Telephone*:
Name of network operator, no network,
or name of mobile phone registered with
the car
> "Car Phone"*:
Active voice connection for emergency
calls if BMW Assist is not initialised
> "BMW Assist"
Active voice connection with a
BMW Assist service
> "Online" or "GPRS Online"
Active connection with BMW Online
2 Entertainment sound output off or
display for traffic announcements
> "TP":
Traffic Programme switched on
> "T":
Traffic Programme is switched off but
the selected radio station does broadcast traffic reports
> No display:
The selected radio station does not
broadcast traffic reports
*
*
:
3 Display for traffic information
> "TMC":
Traffic information for the navigation
system can be received and broadcasting is switched on
> "Ti+":
Traffic info + traffic information can be
received and broadcasting is switched
on
4 Calls not accepted
5 It is possible to use the telephone* if the
mobile phone is registered with the car
Mobile phone network reception
strength depends on the mobile phone
6 Time
Other displays:
Status information is temporarily hidden during
Check Control message displays or inputs via
the voice input system
*
*
.
*
:
Assistance window*
*
:
*
*
:
Additional information can be displayed in the
assistance window:
> The computer or journey computer
> The arrow or map view for cars with naviga-
tion system
> The car's position
*
*
*
18
Page 20
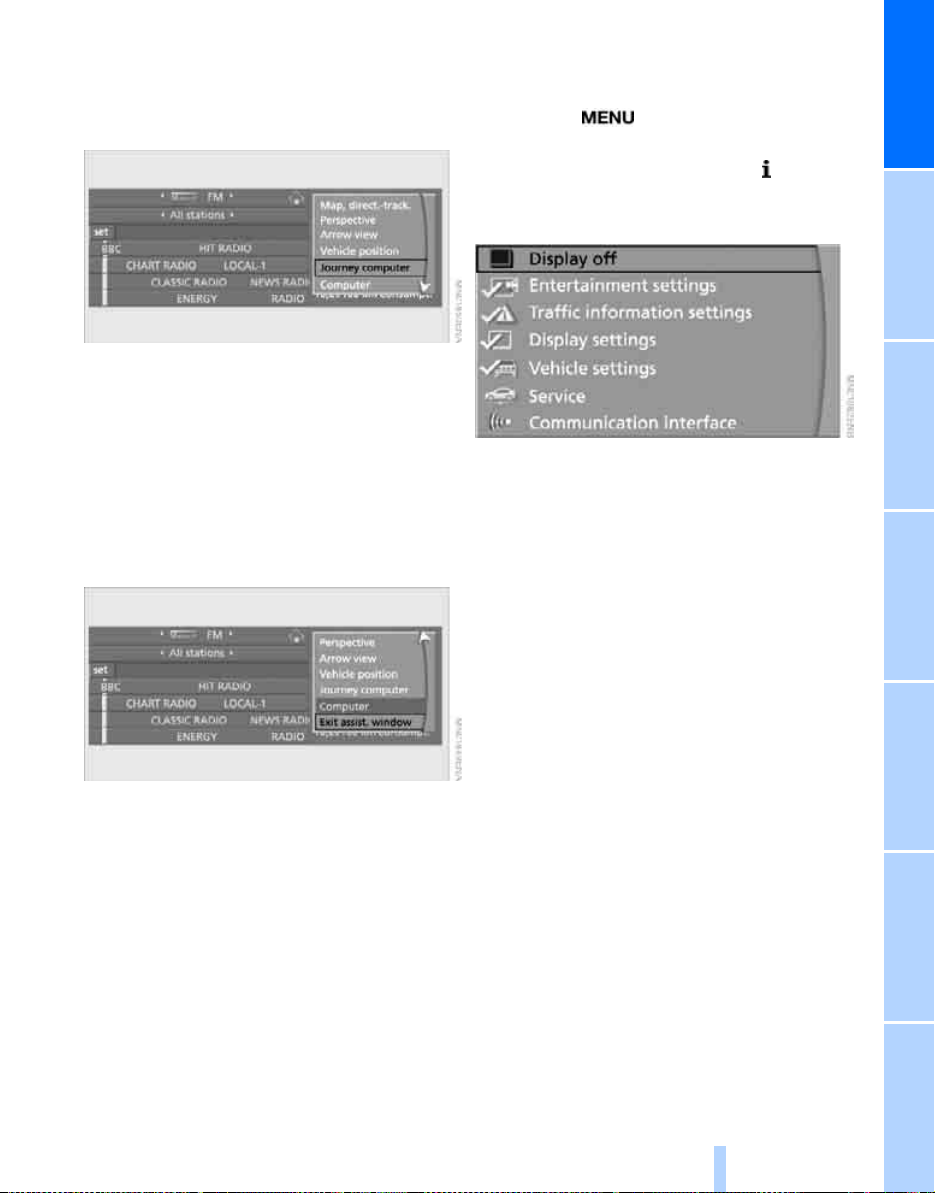
Selecting display
Online Edition for Part-No. 01 41 0 159 725 © 09/05 BMW AG
1. Move the controller to the right to switch to
the assistance window and press the controller.
2. Select a menu item.
3. Press the controller.
Switching assistance window on/off
1. Move the controller to the right to switch to
the assistance window and press the controller.
2. Select "Exit assist. window" and press the
controller.
Switching control display on/off
1. Press the button.
The start menu is called up.
2. Press the controller to call up the menu.
3. Select "Display off" and press the control-
ler.
Press the controller to switch on.
To turn back on, switch to the assistance window and press the controller.
Entertainment OverviewControlsDriving hintsNavigationMobilityReference
19
Page 21
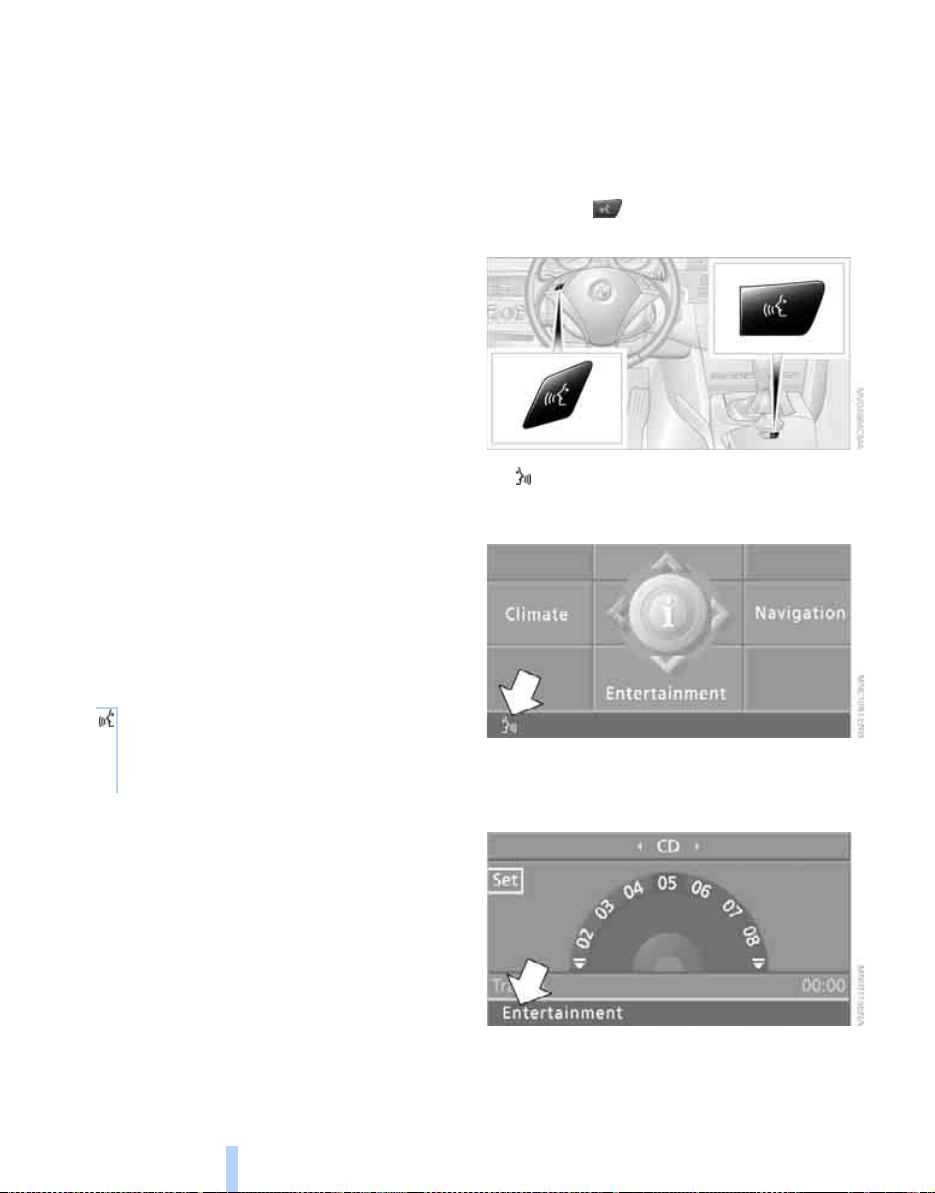
Voice input system
Online Edition for Part-No. 01 41 0 159 725 © 09/05 BMW AG
*
Principle
The voice input system enables you to operate
various items of equipment on your car without
having to take your hands off the steering
wheel.
Individual menu items on the control display
can be selected by means of short commands.
It is not necessary to use the controller to select
them.
The voice input system translates your com-
Voice input system
mands into control signals for the system in
question, and prompts you by means of
announcements or questions.
The voice input system includes a special
microphone positioned near the interior mirror,
see page 12.
Condition
Via iDrive, select the language in which the
voice input system is operating, so that the spoken commands can be identified. Selecting the
language for iDrive, see page 81.
Symbol in the Owner's Handbook
{...} Say the commands marked with this
symbol word for word.
{{...}} Identifies the replies by the voice
input system.
Speaking commands
Activating voice input
1. Press the button on the steering wheel
or in the centre console.
This symbol on the control display and an
acoustic signal indicate that the voice input
system is ready to pick up commands.
2. Issue the command.
The command appears on the control display.
20
Page 22
This symbol appears on the control display if
Online Edition for Part-No. 01 41 0 159 725 © 09/05 BMW AG
further commands can be given.
If no further commands are possible, continue
by operating the item of equipment via iDrive.
Ending or interrupting voice input
Press the button on the steering wheel or in
the centre console
or
{Cancel}
Commands
Having possible commands read aloud
You can prompt the system to read out the
commands that are possible, depending on
which menu item is selected on the control display.
To have the possible commands read out to
you:
{Options}
For instance, if you have selected "CD", the
commands available for operating the CD
*
player and CD changer
will be read out.
Calling up start menu
{Main menu}
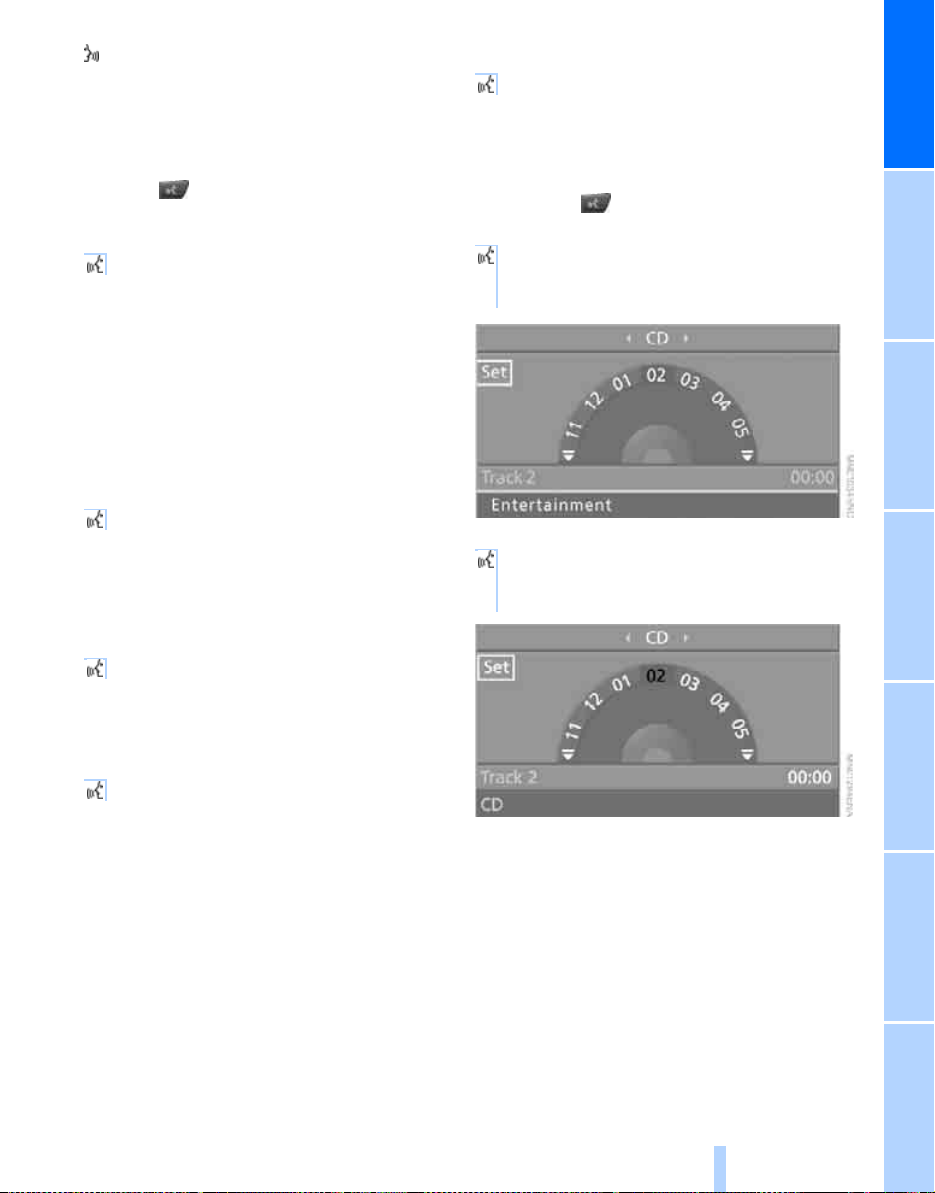
An example: selecting a track
1. If necessary, switch on entertainment audio
output.
2. Press the button on the steering wheel
or in the centre console.
3. {Entertainment}
The system says:
{{Entertainment}}
4. {CD}
The system says:
{{CD drive switched on}}
Requesting help
{Help}
Using alternative commands
There are often several different commands
available for performing the same function, e.g.:
{Settings menu} or {i menu}
Calling up functions immediately using
short commands
Short commands enable you to perform certain
functions straight away, irrespective of which
menu item is selected, see page 223.
Entertainment OverviewControlsDriving hintsNavigationMobilityReference
21
Page 23
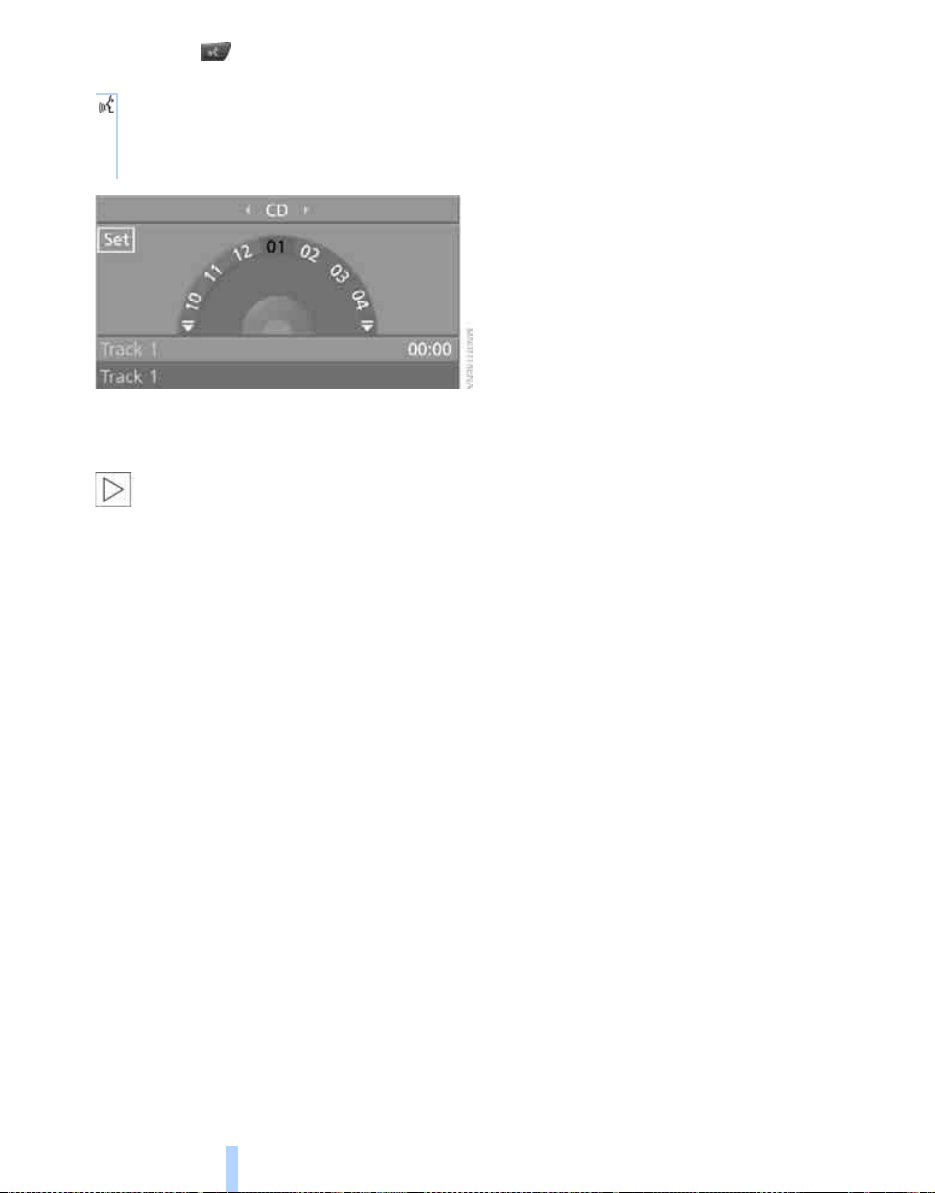
5. Press the button on the steering wheel
Online Edition for Part-No. 01 41 0 159 725 © 09/05 BMW AG
or in the centre console.
6. Select a music track, e.g.:
{Track 1}
The system says:
{{Track 1}}
Voice input system
Notes
More information about voice control of
the telephone appears in the separate
Operating Instructions.<
When speaking commands, note the following:
> Say the commands and numbers fluently
and at normal volume; avoid unnatural
emphases and pauses between words. This
also applies to spelling a destination entry.
> Always speak the commands in the lan-
guage of the voice input system.
> When selecting a radio station, use the
standard pronunciation of the station name.
> When making entries in the voice-activated
phone book, use only names in the language of the voice input system, and do not
use abbreviations.
> Keep the doors, windows and glass roof
*
panorama glass roof
avoid interference from outside noise.
> Avoid causing background noise in the car
while you are speaking.
closed in order to
*
or
22
Page 24

Online Edition for Part-No. 01 41 0 159 725 © 09/05 BMW AG
Entertainment OverviewControlsDriving hintsNavigationMobilityReference
23
Page 25
Online Edition for Part-No. 01 41 0 159 725 © 09/05 BMW AG
Page 26
Controls
Online Edition for Part-No. 01 41 0 159 725 © 09/05 BMW AG
Controls
This chapter enables you to operate your car
with greater ease. All equipment items that are
of relevance for driving and make your journey
safer and more comfortable are described here.
Page 27
Opening and closing
Online Edition for Part-No. 01 41 0 159 725 © 09/05 BMW AG
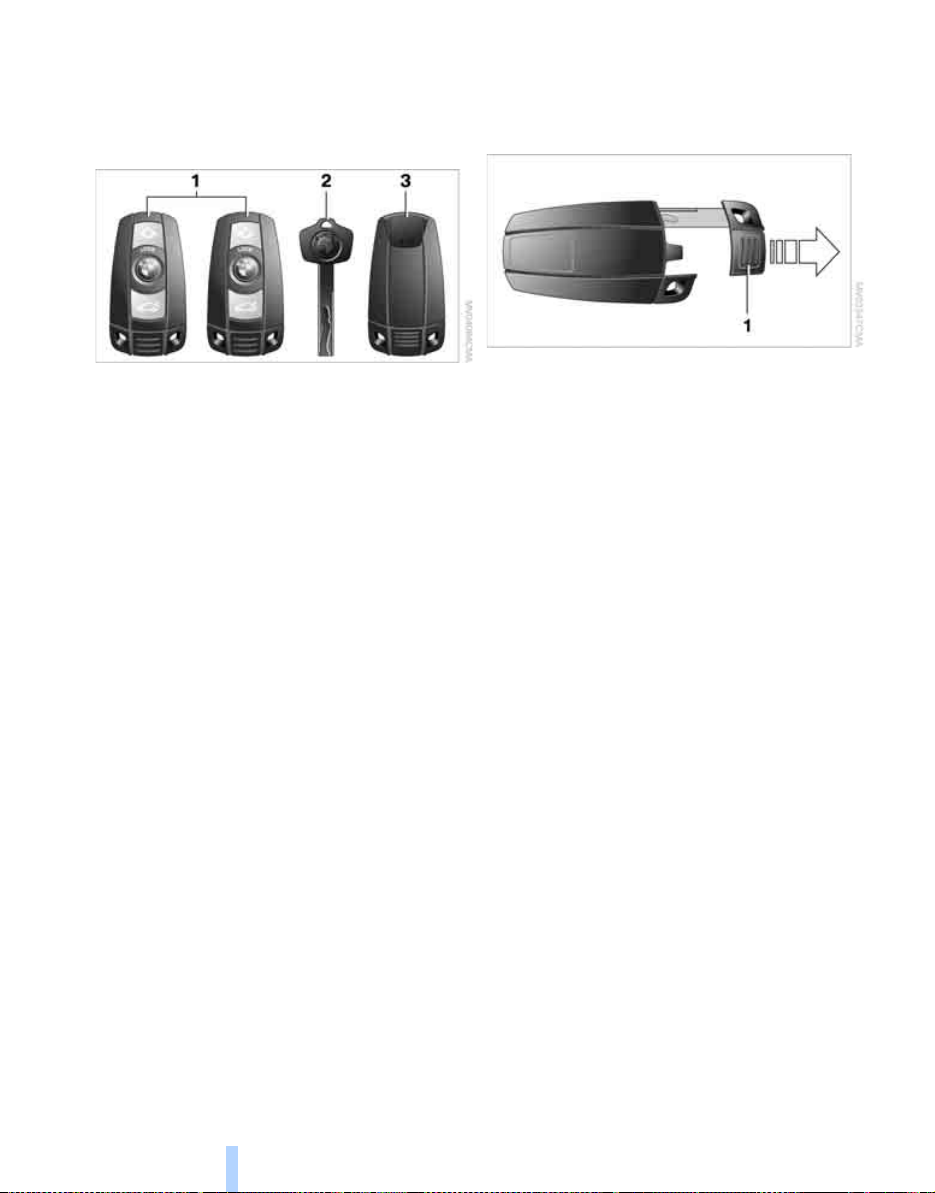
Key/Remote control
1 Remote control with integrated key
Opening and closing
2 Spare key
3 Adapter for spare key, in glove box
Remote control with integrated key
Every remote control contains a rechargeable
battery that is automatically recharged when it
is in the ignition lock while the car is being
driven. Use the remote control at least twice a
year in order to keep the battery charged. If your
*
car is fitted with comfort access
control will feature a replaceable battery, see
page 37.
On the basis of the remote control detected
when unlocking the car, various settings will be
called up in the car and applied, see Personal
Profile, page 27.
In addition, information about service requirements is stored in the remote control, see Service data in the remote control, page 190.
, the remote
Integrated key
Press button 1 to release the key.
The integrated key fits the following locks:
> Key switch
see page 53
> Glove box, see page 111
> Touring: floor panel flap in load area, see
page 117
> Driver's door, see page 30
> Luggage compartment lid, see page 31
*
for front passenger airbags,
New remote controls
BMW Service can supply new remote controls
with integrated keys, as additional units or as
replacements in the event of loss.
Spare key
Spare key, to be kept in a safe place, for
instance in a purse or wallet. This key is not
intended for regular use.
The spare key and integrated key for the remote
control fit the same locks.
26
Adapter for spare key
You need the adapter to start the car with the
spare key or to switch on radio readiness.
Page 28
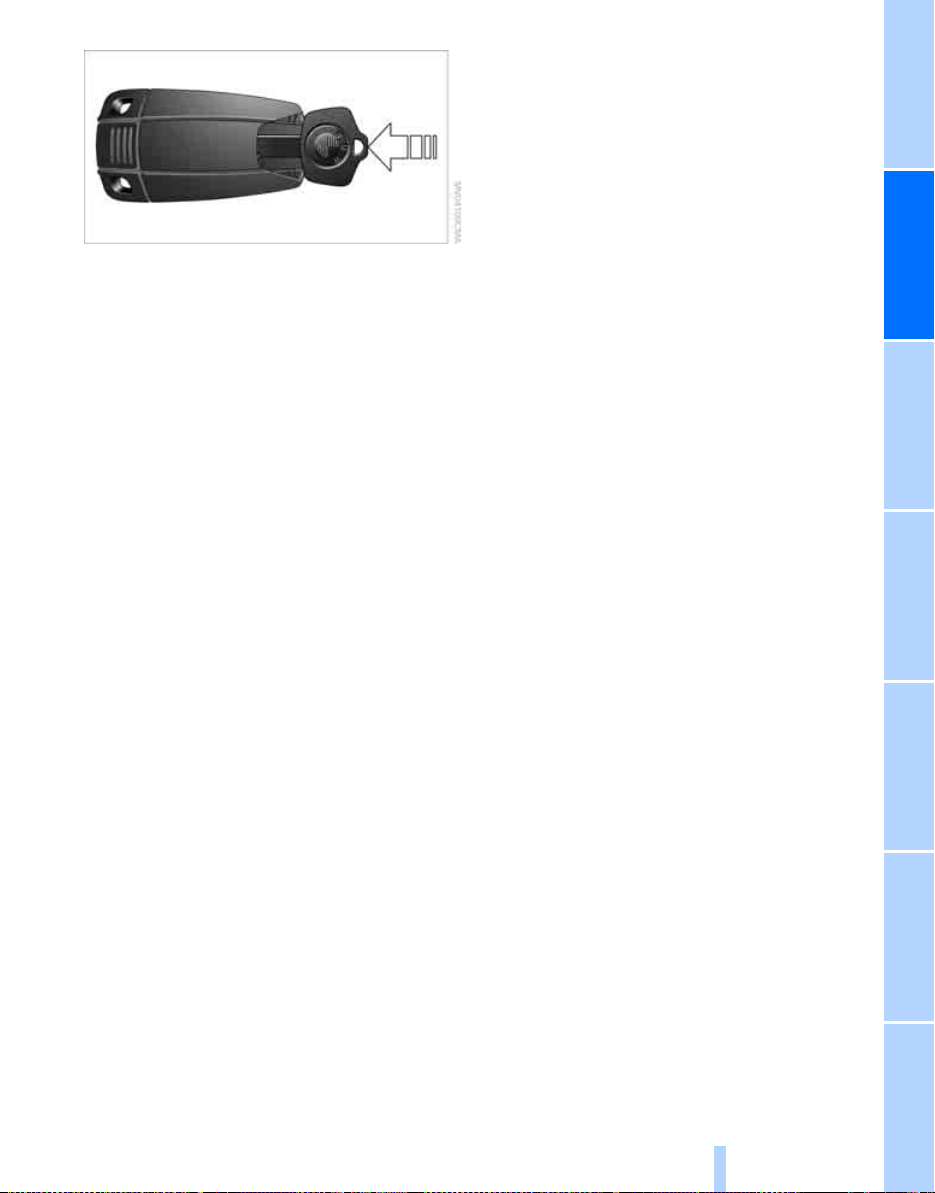
Remove the adapter from the holder in the
Online Edition for Part-No. 01 41 0 159 725 © 09/05 BMW AG
glove box and insert the spare key into the
adapter.
Personal Profile
Principle
You can set many of your BMW's functions to
suit your personal needs and preferences.
Without any action on your part, Personal Profile ensures that most of these settings are
saved for the remote control currently in use.
When you unlock the car the remote control
used for the purpose is recognised and the settings saved for it are called up and implemented.
This means that your personal settings are
active when you return to your BMW, even if the
car was used in the interim by someone else
with a remote control of their own and the settings were changed accordingly. Individual settings are saved for up to four remote controls.
Personal Profile settings
> When unlocking with the remote control,
either the driver's door only or the entire car
is unlocked, see page 28
> Locking the car after a short time or after
setting off, see page 30
> Assignment of the programmable buttons
on the steering wheel, see page 51
> Settings shown on the control display:
> Brightness of the control display, see
page 80
> Units of measurement for fuel consump-
tion, distance, temperature and pressure, see page 81
> Language on the control display, see
page 81
> 12 hour/24 hour mode of clock, see
page 80
> Date format, see page 80
> Displaying optical warning for Park Dis-
tance Control PDC
> Selection and brightness of Head-Up Dis-
play
*
, see page 91
> Air distribution, temperature to upper body
and intensity for automatic air conditioning
with extended range of features
page 102
> Adjusting spoken instructions for route
guidance by navigation system
page 150
The last settings of the following items of
equipment are in addition called up when the
car is unlocked:
> Position of driver's seat, door mirrors and
steering wheel
> The volume and tone settings for audio and
video sources, see page 161
> The display of memorised stations for the
radio, see page 164
*
, see page 83
*
, see page 45
Central locking
Principle
The central locking becomes active when the
driver's door is closed. The following are
*
unlocked or locked in combination:
> Doors
> Luggage compartment lid/tailgate
> Fuel filler flap
*
*
, see
, see
Entertainment OverviewControlsDriving hintsNavigationMobilityReference
27
Page 29
Operating from outside
Online Edition for Part-No. 01 41 0 159 725 © 09/05 BMW AG
> via the remote control
> via the door lock
> with comfort access
The alarm system is also operated at the same
time. This prevents the doors being unlocked
either at the safety lock buttons or door handles. The alarm system* is also armed or disarmed. The interior light and the ground lights
are also switched on or off with the remote control.
For more information about the alarm system
see page 34.
Operating from inside
Opening and closing
Via the button for the central locking system,
see page 30. The fuel filler flap is not locked
In the event of an accident of sufficient severity,
the central locking is released automatically.
The hazard warning flashers and the interior
light are in addition switched on.
*
via the door handles
Opening and closing: from the outside
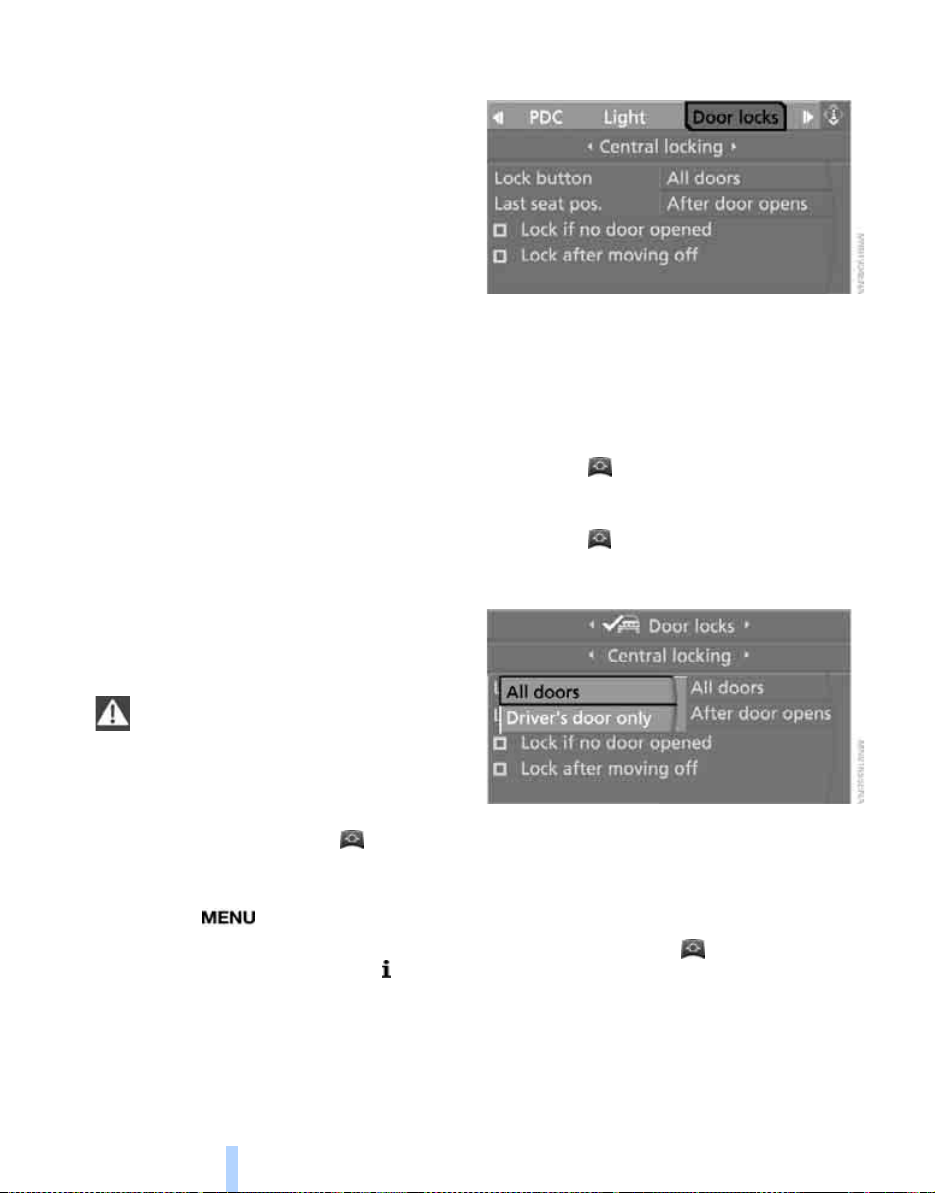
4. Select "Door locks" and press the control-
ler.
*
5. Select "Central locking" and press the con-
*
,
*
.
troller.
6. Select "Lock button" and press the control-
ler.
7. Select a menu item:
> "All doors"
Press button once to unlock the
entire car.
> "Driver's door only"
Press button once to unlock only the
driver's door and the fuel filler flap.
Press it twice to unlock the entire car.
With the remote control
Persons remaining in the car or pets left
inside can lock the doors from the inside.
Take the remote control with you, so that the
car can be opened from the outside.<
Unlocking
You can unlock the car with the button,
depending on its settings.
iDrive concept, see page 14.
1. Press the button.
The start menu is called up.
2. Press the controller to call up the menu.
3. Select "Vehicle settings" and press the
controller.
28
8. Press the controller.
The setting is saved for the remote control currently in use.
Comfort opening
Press and hold down the button. The windows and the glass roof* are opened.
Page 30
Locking
Online Edition for Part-No. 01 41 0 159 725 © 09/05 BMW AG
Press the button.
Do not lock the car from the outside when
there is someone inside it, as it cannot
then be unlocked from the inside in some
national-market versions.<
Comfort closing
Press and hold down the button. The
windows and the glass roof
Watch the closing movement to ensure
that no-one is trapped. The closing pro-
cedure is interrupted immediately if the button
is released.<
*
are closed.
Switching on the interior light
With the car locked, press the button.
This function enables you to locate the car, for
instance in a parking garage.
Panic mode*
You can also activate the alarm system in the
event of danger:
Press the button for at least three seconds.
To switch the alarm off: press any button.
Saloon: opening the luggage
compartment lid
Press the button for about one second.
The luggage compartment lid opens, regardless of whether it was locked or unlocked.
The luggage compartment lid swings
rearwards and upwards when opened.
Make sure that there is sufficient clearance.
To avoid locking yourself out of the car inadvertently, do not leave the remote control in the
luggage compartment. If the luggage compartment lid was previously locked, it will be locked
again as soon as it is closed.<
Touring: unlocking the tailgate
Press the button for about one second.
The tailgate opens a short way, regardless of
whether it was locked or unlocked.
The tailgate swings rearwards and
upwards when opened. Make sure that
there is sufficient clearance.
To avoid locking yourself out of the car inadvertently, do not leave the remote control in the
luggage compartment. If the tailgate was previously locked, it will be locked again as soon as it
is closed.
The load area cover is raised when the tailgate
is opened. Before closing the tailgate, press the
cover down until it engages in position.<
Wrap protective material around any
sharp ends or edges of items of luggage
that could strike the rear window while the car is
moving, to prevent these damaging the heating
conductors in the rear window.<
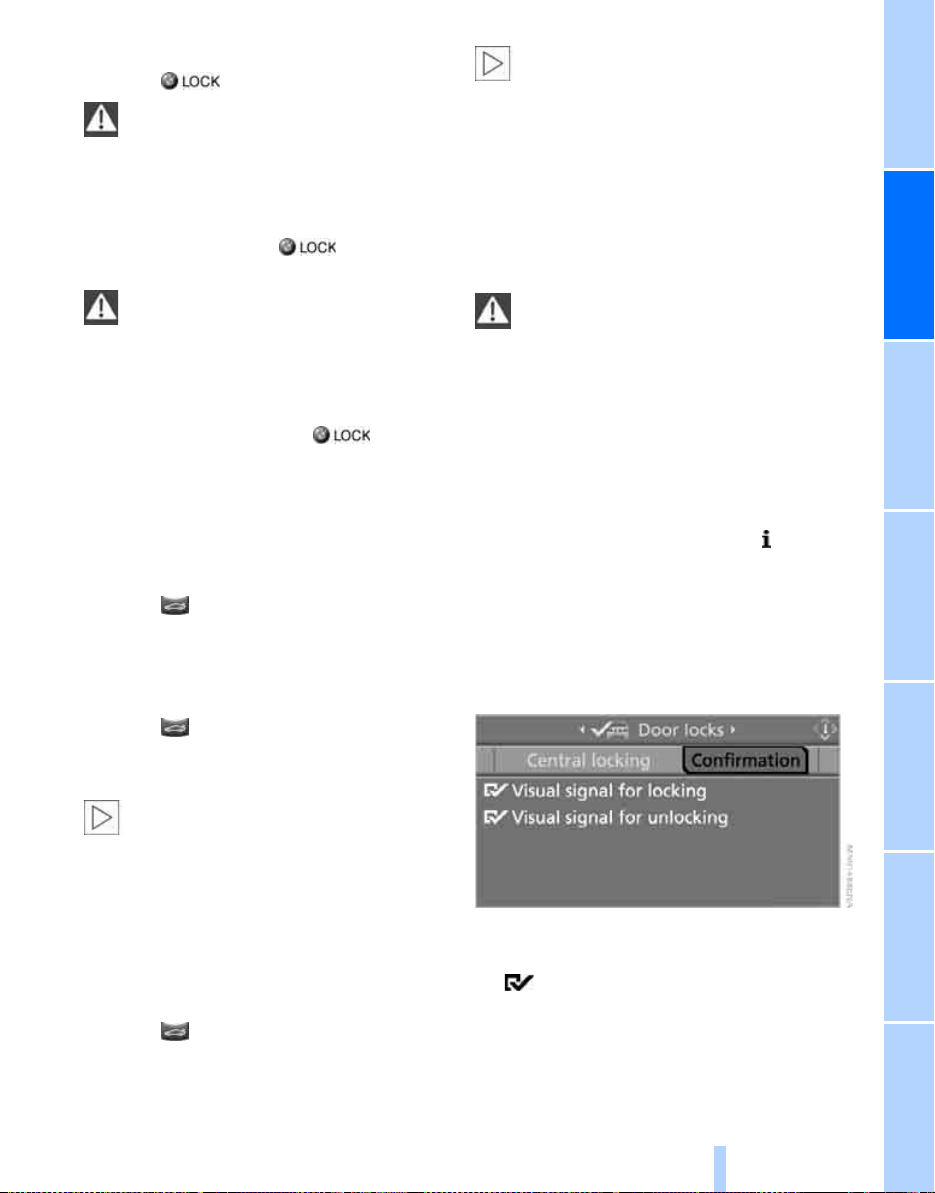
Adjusting confirmation signals
You can also deactivate the optical acknowledgement signal for unlocking or locking.
1. Call up the start menu.
2. Press the controller to call up the menu.
3. Select "Vehicle settings" and press the
controller.
4. Select "Door locks" and press the control-
ler.
5. Select "Confirmation" and press the con-
troller.
Entertainment OverviewControlsDriving hintsNavigationMobilityReference
6. Select the desired signal.
7. Press the controller.
The signals are switched on.
29
Page 31
Malfunctions
Online Edition for Part-No. 01 41 0 159 725 © 09/05 BMW AG
The remote control may malfunction as a result
of interference from localised radio signals.
If this occurs, unlock and lock the car by inserting the key into the door lock.
If the car can no longer be locked with a remote
control, the battery in the remote control is flat.
Use this remote control when driving a relatively
long distance to recharge its battery, see
page 26.
Via the door lock
Opening and closing
Watch the closing movement to ensure
that no-one is trapped. The movement is
stopped when the key is released.<
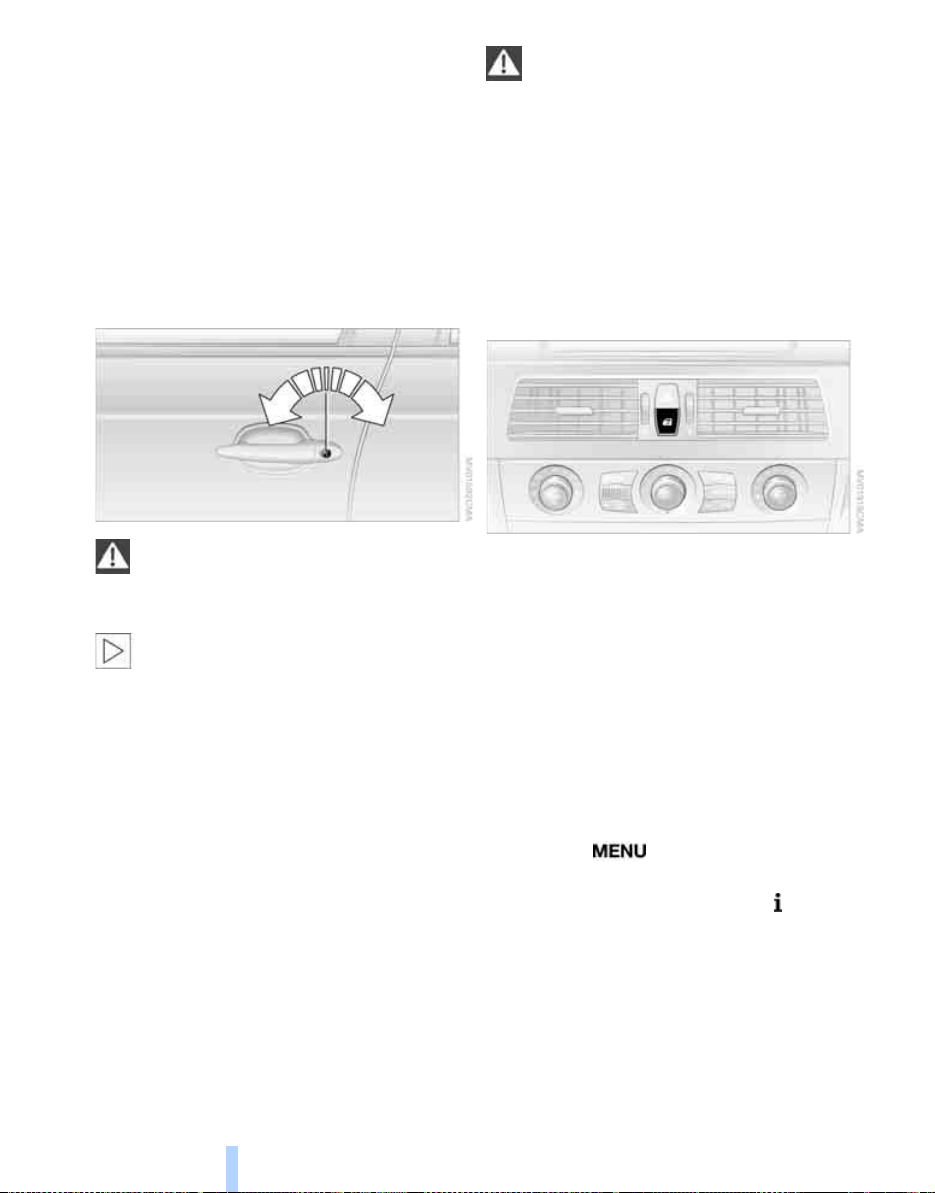
Manual operation
In the event of an electrical fault, you can lock
and unlock the driver's door by turning the key
to the limit positions in the door lock.
Opening and closing: From the inside
Do not lock the car from the outside when
there is someone inside it, as it cannot
then be unlocked from the inside in some
national-market versions.<
In some national versions, the alarm sys-
tem* is triggered when the door lock is
unlocked.
To switch off the alarm:
Unlock the car with the remote control, see
page 28, or insert the remote control fully into
the ignition lock.<
*
For further details of the alarm system
page 34.
, see
Comfort operation
The windows and the glass roof* can also be
operated via the door lock.
> Opening:
When the door is closed, turn the key in the
door lock to the unlocking position and hold
it there.
> Closing:
When the door is closed, turn the key to the
locking position and hold it there.
This button unlocks or locks the doors and luggage compartment lid/tailgate when the front
doors are closed, but does not deadlock them.
*
The fuel filler flap remains unlocked
You can in addition select the following settings:
> The central locking is engaged automati-
cally after a short while if no door has been
opened.
> The central locking is engaged as soon as
you drive off.
iDrive concept, see page 14.
1. Press the button.
The start menu is called up.
2. Press the controller to call up the menu.
3. Select "Vehicle settings" and press the
controller.
4. Select "Door locks" and press the control-
ler.
.
30
Page 32
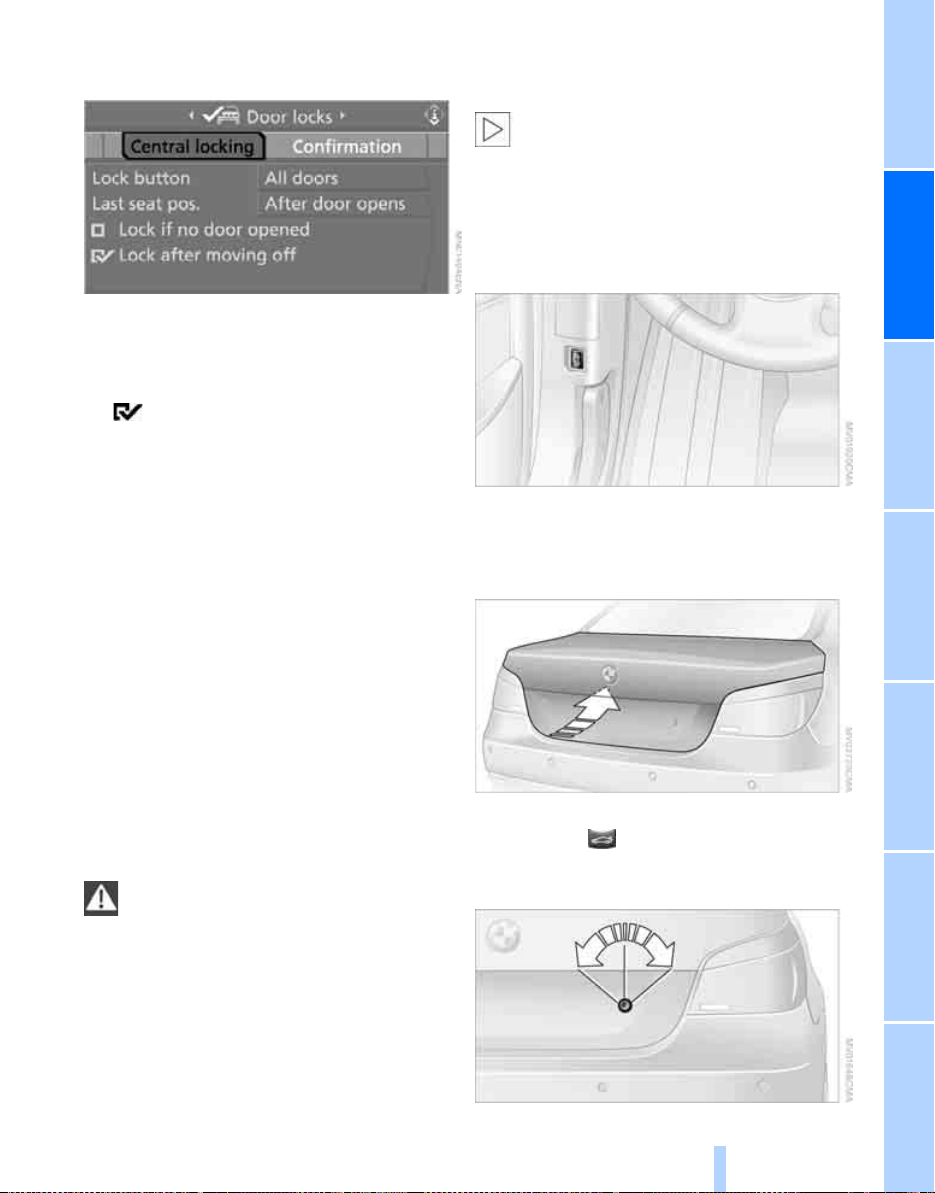
5. Select "Central locking" and press the con-
Online Edition for Part-No. 01 41 0 159 725 © 09/05 BMW AG
troller.
6. Select "Lock if no door opened"
or
"Lock after moving off".
7. Press the controller.
indicates that the setting is selected.
The setting is saved for the remote control currently in use.
Luggage compartment lid/ tailgate
The luggage compartment lid/tailgate
swings rearwards and upwards when
opened. Make sure that there is sufficient clearance.<
Saloon
Opening from inside
Unlocking and opening
> Either use the central locking button to
unlock all doors at once, then pull the door
handle above the armrest, or
> Pull the handle on each individual door
twice: the first time to unlock the door, and
the second time to open it.
Locking
> Either lock all doors by pressing the central
locking button, or
> Press down the safety lock button on the
door in question. To avoid being shut out of
the car accidentally, the driver's door cannot be locked with the safety lock button
when it is open.
Persons remaining in the car or pets left
inside can lock the doors from the inside.
Take the remote control with you, so that the
car can be opened from the outside.<
Press the button: the luggage compartment lid
will open as long as it is not deadlocked.
Opening from outside
Press the button on the luggage compartment
lid or press the button on the remote control
for approx. 1 second: the luggage compartment
lid opens.
Entertainment OverviewControlsDriving hintsNavigationMobilityReference
31
Page 33
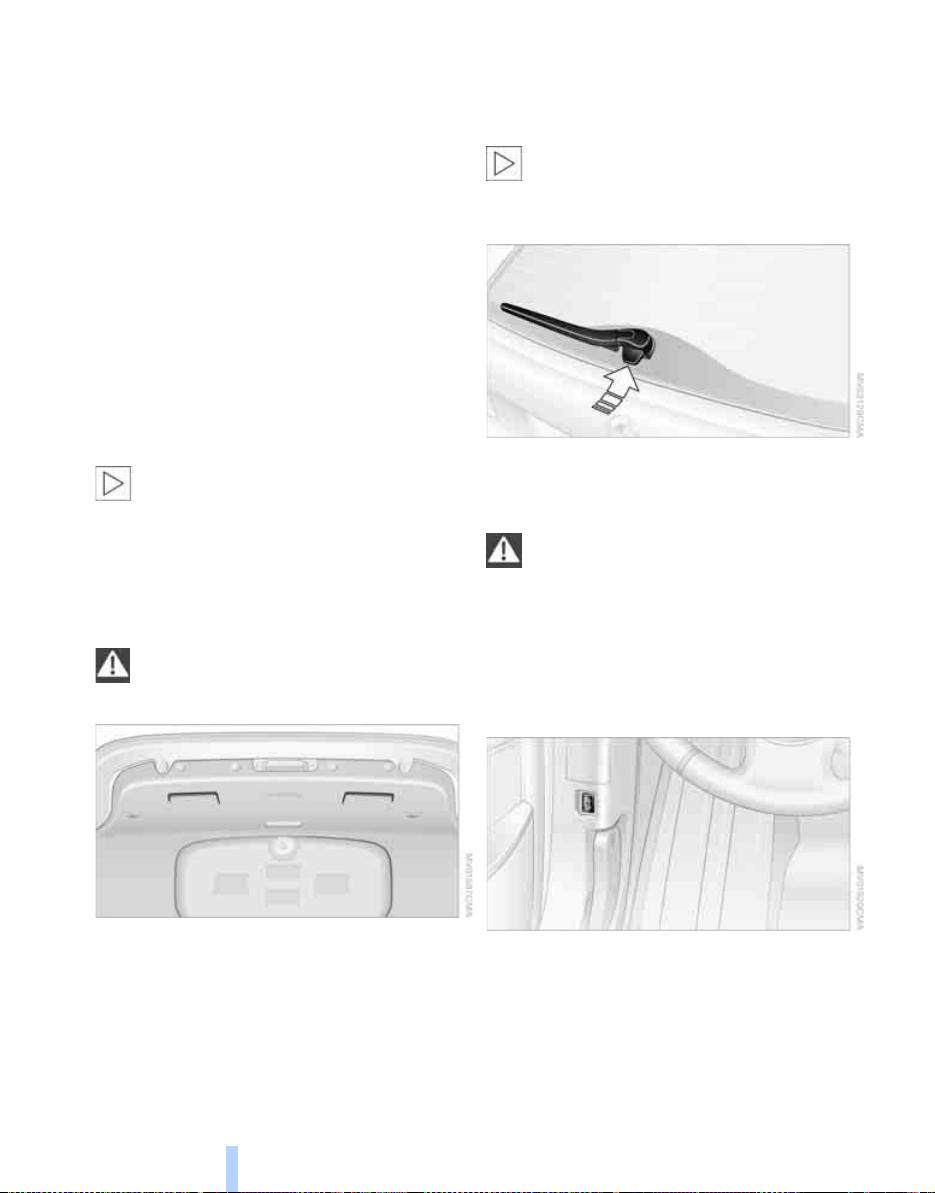
All keys, see page 26, fit the lock on the luggage
Online Edition for Part-No. 01 41 0 159 725 © 09/05 BMW AG
compartment lid.
Locking separately
Turn a key in the luggage compartment lid
beyond a pressure point clockwise and remove
in the horizontal position.
This locks the luggage compartment lid and
disconnects it from the central locking system.
If you then give the remote control to a third
party with the integrated key, see page 26, it will
not be possible to access the luggage compartment. This is an advantage at hotels, for example.
Releasing and opening manually
Opening and closing
Turn the key as far as possible anti-clockwise:
The luggage compartment lid opens.
If you open the luggage compartment lid
via the lock when the alarm system
armed, the alarm will be triggered off. You
should therefore unlock the car first. If the alarm
has inadvertently been triggered off: switching
off the alarm, see page 35.<
Closing
To avoid injuries, make sure that the clos-
ing area of the luggage compartment lid is
unobstructed.<
Touring: opening and closing rear
window
The rear window can be opened separately for
ease of loading and unloading small items.
The load area cover is raised when the
rear window is opened. Before closing the
rear window, press the cover down until it
engages in position.<
Press the button: the rear window opens a short
*
is
way. It can now be swung upwards.
Press the window shut to close it.
Wrap protective material around any
sharp ends or edges of items of luggage
that could strike the rear window while the car is
moving, to prevent these damaging the heating
conductors in the rear window.<
Touring: tailgate
Opening from inside
The recessed handles in the luggage compartment lid lining make it easie r to pull the luggage
compartment lid down.
32
Press the button: the tailgate will open as long
as it is not deadlocked.
Page 34
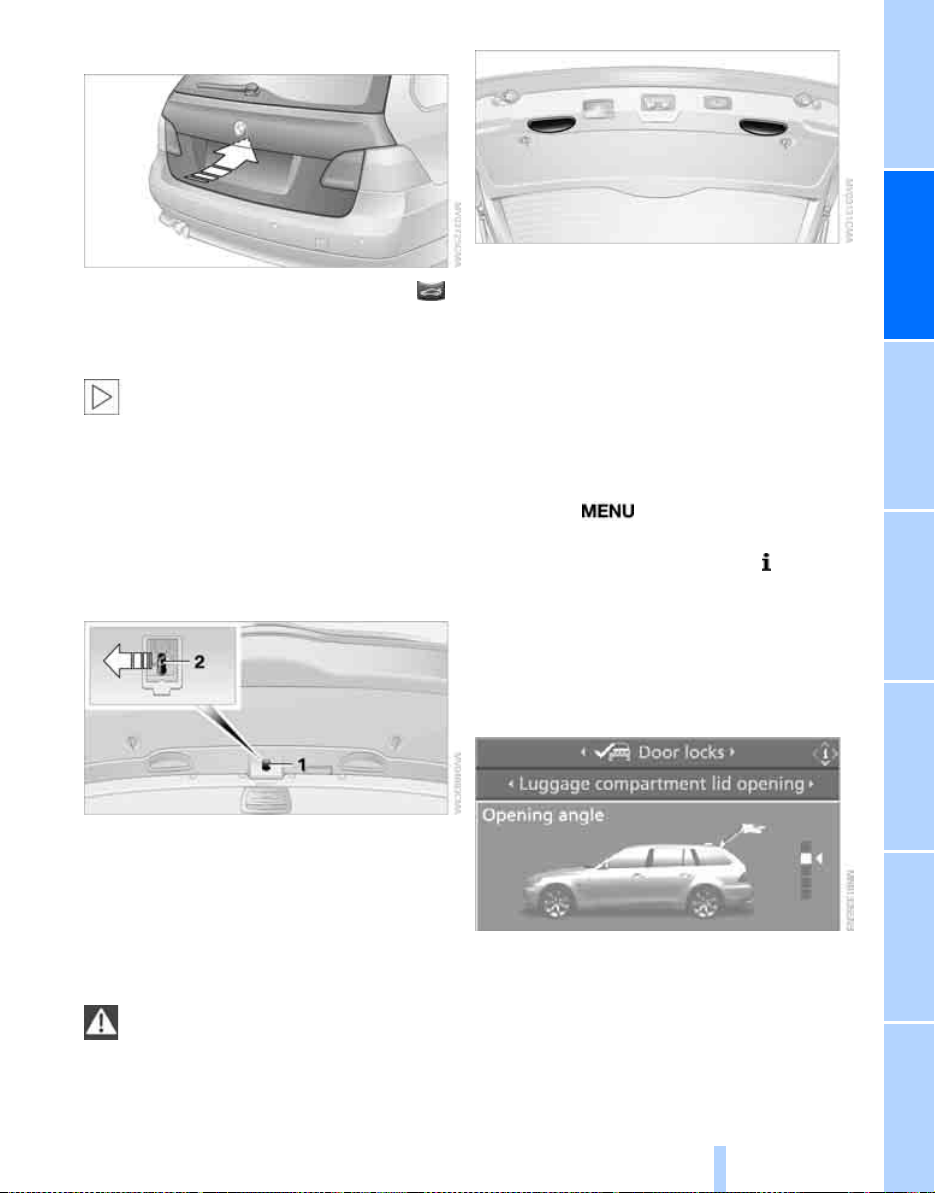
Opening from outside
Online Edition for Part-No. 01 41 0 159 725 © 09/05 BMW AG
Press the button on the tailgate or press the
button on the remote control for approx.
1 second: the tailgate opens a short way. It can
now be swung upwards.
The load area cover is raised when the
tailgate is opened. Before closing the tail-
gate, press the cover down until it engages in
position.<
Opening manually
In the event of an electrical fault:
1. From inside the load area, press out the
cover 1 attached to the tailgate with a
screwdriver.
The recessed handles in the tailgate lining
make it easier to pull the lid down.
To close the tailgate, press it down only lightly.
The actual closing action is automatic.
Touring: automatic tailgate operation*
Adjusting limit of opening
You can set how far the tailgate is to open.
iDrive concept, see page 14.
1. Press the button.
The start menu is called up.
2. Press the controller to call up the menu.
3. Select "Vehicle settings" and press the
controller.
4. Select "Door locks" and press the control-
ler.
5. Select "Luggage compartment lid opening"
and press the controller.
2. Press the bar 2 in the direction of the arrow.
3. Open the tailgate and press the cover back
into place.
The tailgate is locked again as soon as it is
closed.
Closing
To avoid injuries, ensure that the closing
area of the tailgate is unobstructed.<
Entertainment OverviewControlsDriving hintsNavigationMobilityReference
6. Turn the controller. The setting is adopted;
you can now change to another field.
33
Page 35
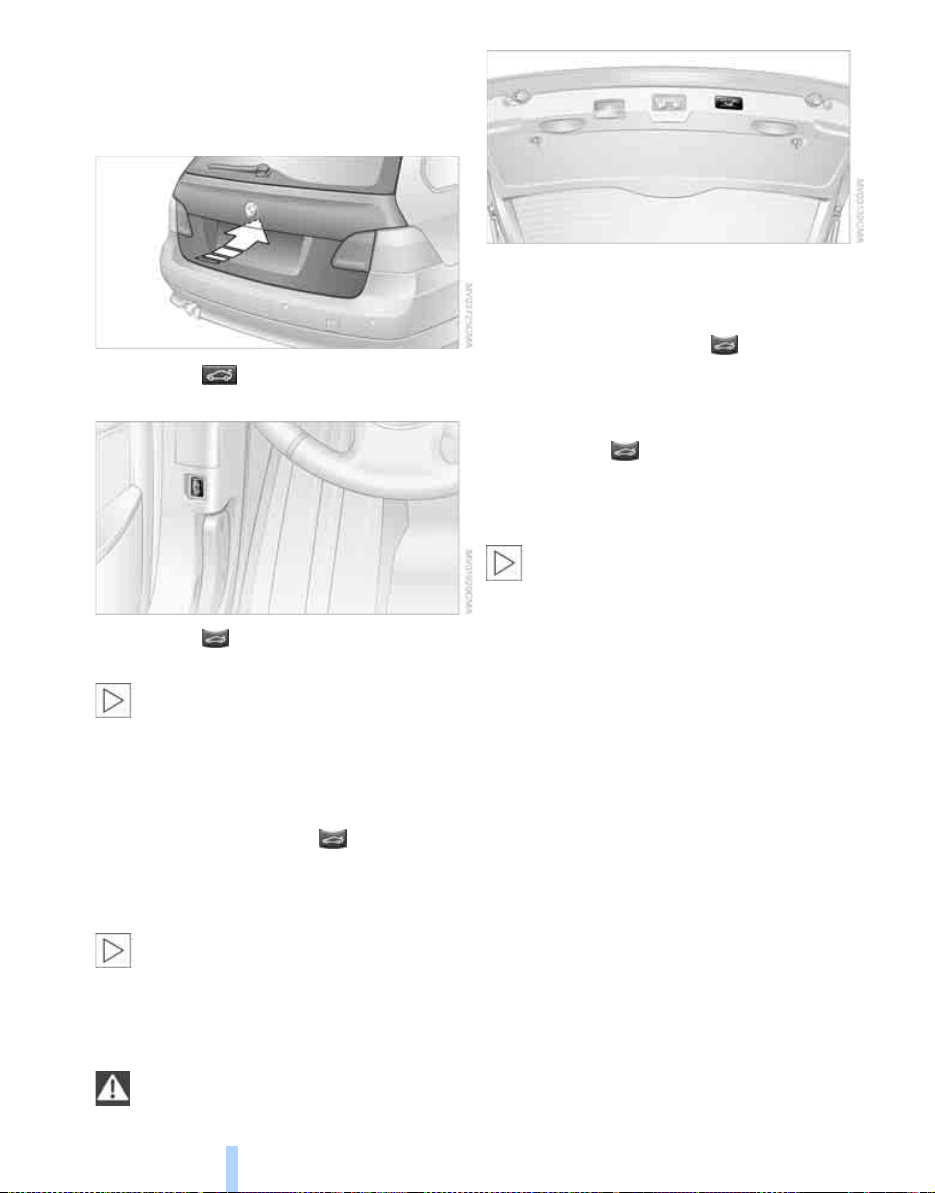
Opening tailgate
Online Edition for Part-No. 01 41 0 159 725 © 09/05 BMW AG
The tailgate opens automatically if you:
> Press the button on the outside of the tail-
gate when the car is unlocked.
> Press the button in the driver's side
Opening and closing
footwell.
The tailgate closes automatically if you:
> Press the button on the inside of the tail-
gate.
> Press and hold down the button on the
remote control.
To interrupt the closing operation:
> Press the button on the inside of the tailgate
> Release the button on the remote con-
trol
> Press the button on the outside of the tail-
gate
The closing operation will not be interrupted if you set off in the car.<
> Press the button on the remote control
for approx. 1 second.
The tailgate swings rearwards and
upwards when opened. Make sure that
there is sufficient clearance.<
To interrupt the opening operation:
> Press the button on the outside of the tail-
gate.
> Press and hold down the button on the
remote control.
> Press the button on the inside of the tail-
gate.
The load area cover is raised when the
tailgate is opened. Before closing the tail-
gate, press the cover down until it engages in
position.<
Closing the tailgate
To avoid injuries, ensure that the closing
area of the tailgate is unobstructed.<
34
Alarm system*
Principle
The alarm system reacts if:
> Opening a door, the engine compartment
lid, the luggage compartment lid/tailgate or
the rear window
> There is any movement inside the car: inte-
rior movement detector, see further below
> The car's inclination changes, for instance
if an attempt is made to jack it up and steal
the wheels or to raise it prior to towing away
> There is an interruption in the power supply
from the battery
The alarm will respond briefly as follows to indicate unauthorised attempts to access the car:
> Acoustic alarm
> Activation
*
*
of the hazard warning system
Page 36
Arming and disarming
Online Edition for Part-No. 01 41 0 159 725 © 09/05 BMW AG
Whenever the car is locked or unlocked, either
with the remote control or at the door lock, the
alarm system is armed or disarmed at the same
time.
Even when the alarm system is armed, you can
open the luggage compartment lid/tailgate by
pressing the button on the remote control,
see page 31. When you close the luggage compartment lid/tailgate subsequently, it will be
locked and monitored.
Opening certain national-market versions
via the door lock triggers off the alarm.<
Switching off alarm
> Unlock the car with the remote control, see
page 28, or
> Insert the remote control into the ignition as
far as it will go, see page 56.
Indicator lamp displays
> If the indicator light flashes after unlocking
until the remote control is inserted in the
ignition, but for no longer than approx.
5 minutes: an attempt was made to tamper
with the car.
Tilt alarm sensor
The car's angle is monitored. The alarm is set
off for instance if an attempt is made to steal the
car's wheels or tow it away.
Interior movement detector
Before the interior movement detector can
operate correctly, the windows and glass roof
must be closed.
Avoiding false alarms
The tilt alarm sensor and the interior movement
detector can be switched off together. This prevents false alarms, e.g. in the following situations:
> In two-level garages
> When the car is being transported by auto-
rail
> If pets are to remain inside the car
*
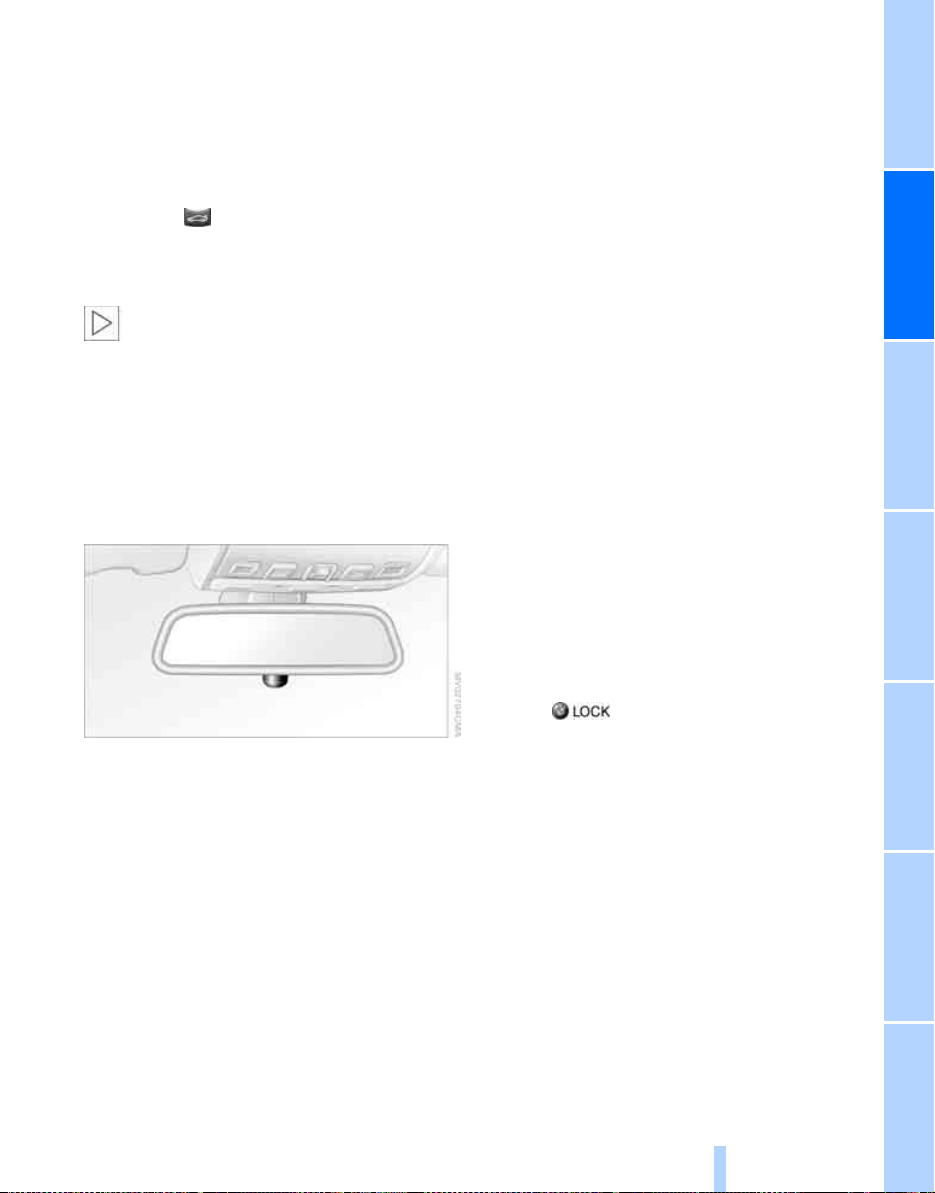
> The indicator lamp beneath the inside mir-
ror flashes steadily: the system is armed.
> The indicator lamp flashes after the car has
been locked: the doors, luggage compartment lid/tailgate or rear window* have not
been closed properly. Even if an item is not
closed fully, the remaining items are deadlocked and the indicator lamp begins to
flash steadily after 10 seconds. However,
the interior movement detector is not activated.
> The indicator lamp goes out after the car
has been unlocked: no attempt was made to
tamper with the car during your absence.
Switching off the tilt alarm sensor and
interior movement detector
Press the button on the remote control
again immediately after locking the car.
The indicator lamp comes on briefly, then continues to flash steadily. The tilt alarm se nsor and
interior movement detector are switched off
until the car is next unlocked and locked.
Comfort access*
Comfort access enables you to access your car
without having to take the remote control into
your hand. It is sufficient to have the remote
control on your person, for example in a jacket
pocket. The car automatically recognises your
remote control when it is in the immediate vicinity or inside the car.
35
Entertainment OverviewControlsDriving hintsNavigationMobilityReference
Page 37
Comfort access supports the following func-
Online Edition for Part-No. 01 41 0 159 725 © 09/05 BMW AG
tions:
> Unlocking/locking the car
> Starting the engine
> Comfort closing
Operating requirements
> The car can only be locked once it has
ascertained that the remote control on your
person is not inside the car.
> About two seconds have to elapse before
the car can again be unlocked and locked.
> The engine can be started only when the
car ascertains that the remote control on
Opening and closing
your person is inside the car.
Special features in contrast to
conventional remote control
Generally speaking, it makes no difference
whether you control the functions outlined
above by using comfort access or by pressing
the buttons on the remote control. Consequently, you should begin by familiarising yourself with the instructions for opening and closing, starting on page 26.
The features specific to comfort access are
described below.
Releasing
Locking
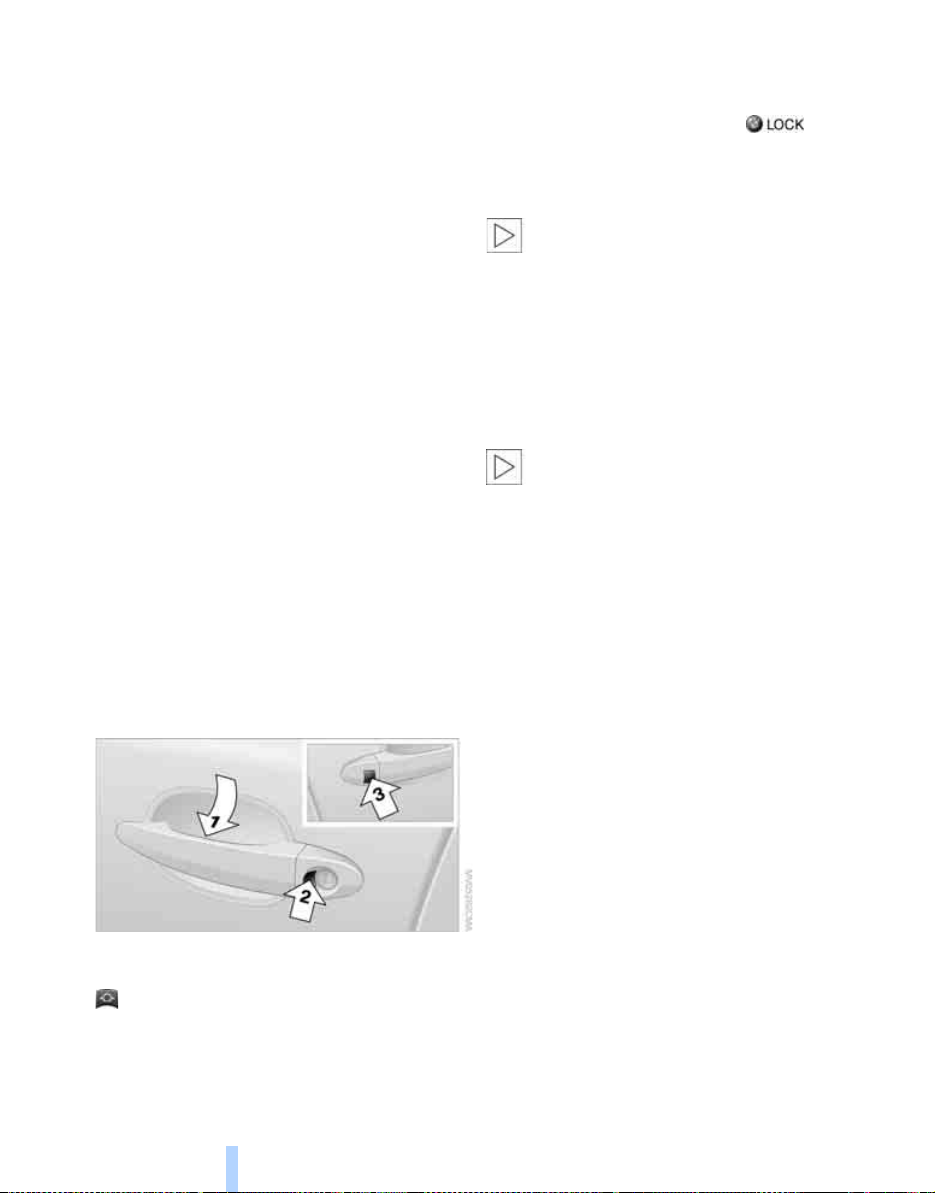
Touch the area, arrow 2 on the driver's door
or 3 on the other doors, for approx. 1 second.
This corresponds to pressing the button.
For comfort closing, press the area, arrow 2 or 3
with your finger.
If the car detects a remote control which
has been left in the luggage compartment/load area accidentally once the luggage
compartment lid/tailgate has been closed, the
lid will reopen. The hazard warning system
*
flashes and a signal
sounds.<
Switching on radio readiness
Lightly touching the start/stop button switches
on radio readiness, see page 56.
Do not depress the brake, otherwise the
engine will start immediately.<
Starting the engine
You can start the engine or switch on the ignition when a remote control is inside the car. It is
not necessary to insert the remote control i n the
ignition lock, see page 56.
If you take the remote control with you when
you leave the car with the engine running, a
warning light will come on. In addition, a message will appear on the control display. As long
as the car does not detect a remote control,
once the engine has been switched off, you will
not be able to restart it for approx. 10 seconds.
Take a firm hold of one of the door handles,
arrow 1. This corresponds to pressing the
button.
When a remote control is detected inside the
passenger compartment after the car has been
unlocked, the electric steering wheel lock disengages, see page 56.
36
Switching off the engine, automatic
transmission
The engine can be switched off only when the
selector lever is in position P, see page 58.
To switch off the engine with the selector lever
in position N, the remote control must be in the
ignition lock.
Page 38
Before driving a car with automatic
Online Edition for Part-No. 01 41 0 159 725 © 09/05 BMW AG
transmission into a car wash
1. Insert the remote control in the ignition lock.
2. Depress the brake.
3. Engage selector lever position N.
4. Switch off the engine.
The car will be able to roll.
Malfunction
Comfort access may malfunction as a result of
interference from local radio signals. In this
case, open or close the car using the buttons on
the remote control or the key. You can subsequently start the engine by inserting the remote
control into the ignition lock.
Changing the battery
The battery in the remote control for comfort
access requires replacement from time to time.
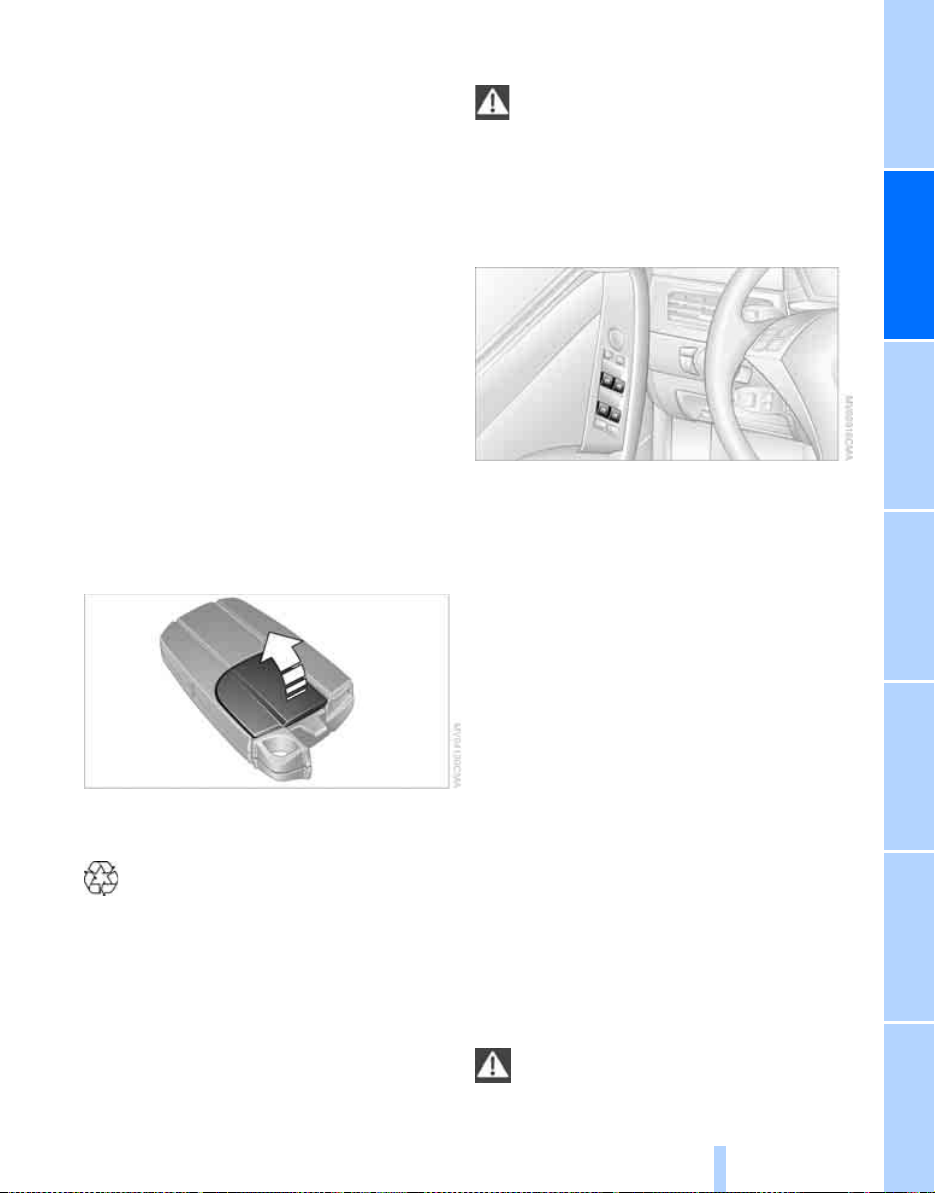
1. Remove the integrated key from the remote
control, see page 26.
2. Remove the cover.
Windows
Observe the windows during the closing
procedure, to avoid any injuries.
Take the remote control with you when you
leave the car, otherwise children, for example,
could operate the windows and possibly injure
themselves.<
Opening, closing
> Press the switch until the pressure point is
felt:
The window is opened for as long as you
press the switch.
> Press the switch beyond the pressure point:
The window opens automatically. Press the
switch again to halt the opening movement.
Close the window similarly by pulling the
switch.
For comfort operation using the remote control
or door lock, see page 28 or 30.
Comfort closing with comfort access see Locking on page 36.
3. Insert a new battery with the plus side up.
4. Press the cover back into position.
Dispose of the old battery only at an
authorised collecting point or hand it in to
BMW Service.<
After the ignition is switched off
You can still operate the windows for approx.
1 minute after the remote control has been
removed or the ignition switched off.
Trap protection
If the closing force of a window exceeds
a specific value as it closes, the closing action is
interrupted immediately and the window reopens slightly.
Despite the trap protection function,
make sure that the windows are not
obstructed as they close; if this precaution is
37
Entertainment OverviewControlsDriving hintsNavigationMobilityReference
Page 39
not taken, the risk remains that thin objects, for
Online Edition for Part-No. 01 41 0 159 725 © 09/05 BMW AG
instance, could fail to interrupt the closing
movement.
To restrict the trap protection function, pull the
switch beyond its pressure point and hold it in
position. In this instance, if the closing force
exceeds a specific value the window is opened
only a short way.
If the switch is pulled beyond the pressure point
again within approx. 4 seconds and held in that
position, the trap protection function is overridden.<
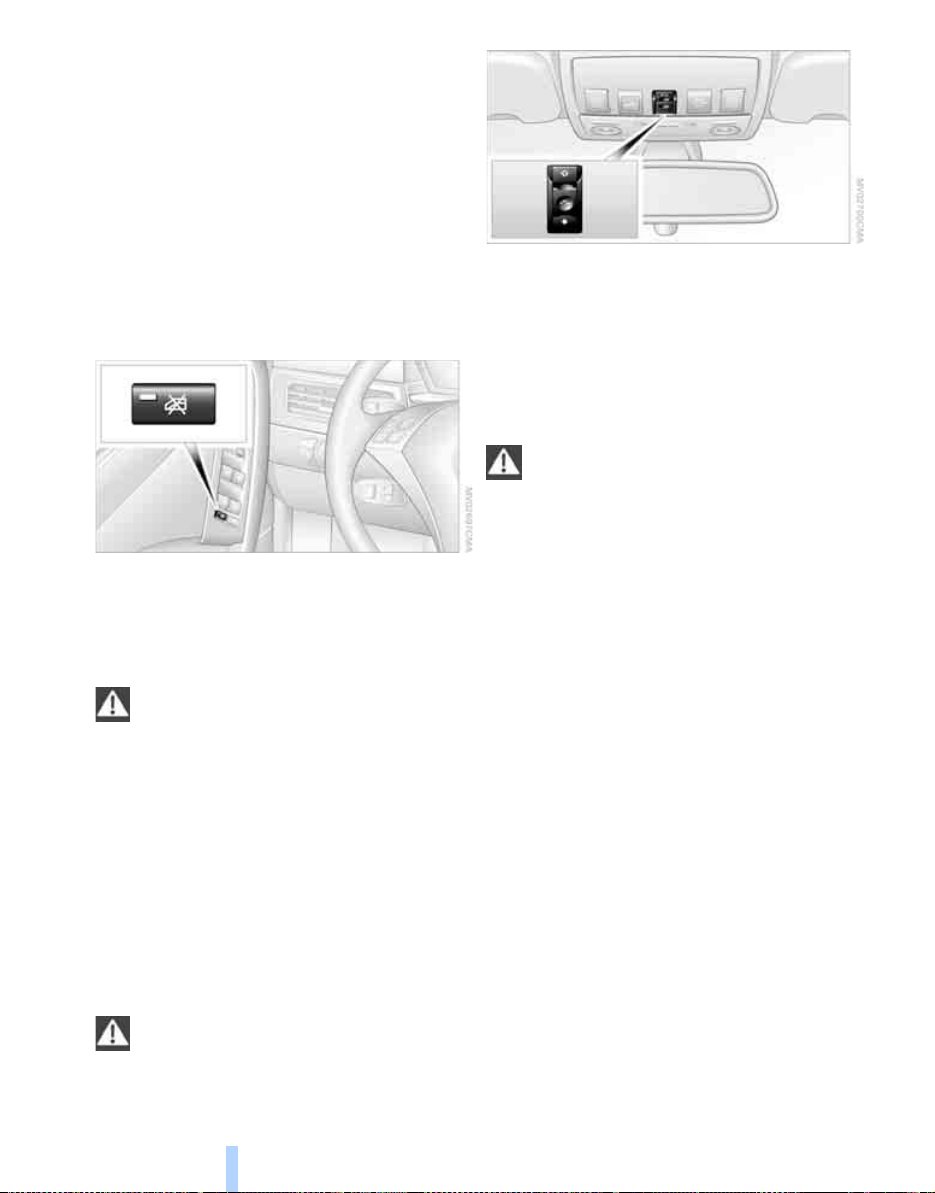
Safety switch
Opening and closing
This enables you to prevent the rear door windows being opened and closed at the switches
in the rear seat area, for instance by children.
When the safety function is switched on, the
LED comes on.
Press the safety switch when carrying
children on the rear seat, otherwise care-
less closing of the windows could result in
injury.<
Accessories near the windows
If you fit accessories within the window movement range, e.g. a clip-on aerial for your mobile
phone, the system must be initialised to teach it
the new conditions. BMW recommends that
you have this work performed by BMW Service.
Raising
Press the switch.
> If the glass roof is closed, it is raised and the
sliding trim opens slightly.
> If the glass roof is open, it automatically
moves to the raised position. The sliding
trim remains fully open.
Do not close the sliding trim forcibly with
the roof in the raised position, as this
could damage the mechanism.<
Opening, closing
> Push the switch back as far as the pressure
point.
The glass roof and sliding trim open in unison for as long as you hold the switch in
position.
> Push the switch back beyond the pressure
point.
The glass roof and sliding trim open automatically. Press the switch again briefly to
halt the opening movement.
The glass roof is closed in the same way by sliding the switch forwards. The sliding trim
remains open and can be closed manually.
For comfort operation using the remote control
or door lock, see page 28 or 30.
Comfort closing with comfort access see Locking on page 36.
Glass roof, electric*
Observe the glass roof during the closing
procedure, to avoid any injuries.
Take the remote control with you when you
leave the car, otherwise children could operate
the roof and possibly injure themselves.<
38
After the ignition is switched off
You can still operate the roof for approx.
1 minute after the remote control has been
removed or the ignition switched off.
Page 40
Automatic opening and closing
Online Edition for Part-No. 01 41 0 159 725 © 09/05 BMW AG
Press the switch beyond the pressure point.
Further to this, the following movements are
automated:
> When the roof is open, press the switch in
the direction for raising: the roof moves to
the fully raised position.
> When the roof is raised, press the switch in
the direction for opening: the roof moves to
the fully open position.
Pressing the switch again stops this movement.
Trap protection
If the glass roof encounters an obstruction during closing from approximately the centre of the
roof aperture, or during closing from the raised
position, the closing movement is interrupted
and the glass roof is opened again slightly.
Despite the trap protection function,
make sure that the roof is not obstructed
as it closes; if this precaution is not taken, the
risk remains that thin objects, for instance,
could fail to interrupt the closing movement.
The trap protection function is overridden by
pressing the switch beyond its pressure point
and holding it in position.<
Manual operation
In the event of an electrical fault, you can move
the glass roof manually:
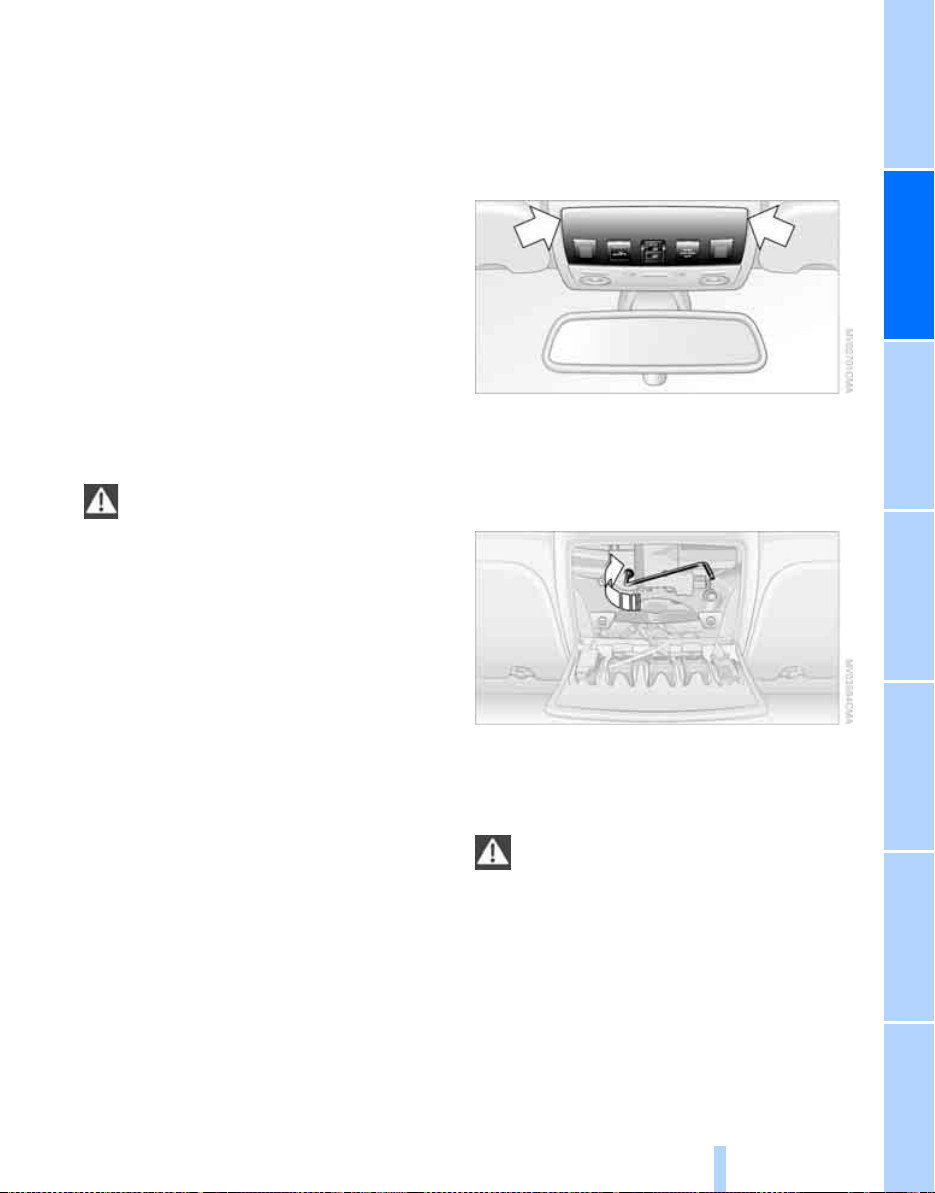
1. Fold the cover down, possibly with the aid
of the screwdriver from the toolkit, see
page 192.
2. Insert the Allen key from the toolkit, see
page 192, into the designated aperture.
Turn the glass roof in the desired direction.
To close, turn in the direction indicated by
the arrow.
After a power failure
After a power failure, it is possible that the roof
will only move to the raised position. The system must be initialised. BMW recommends that
you have this work performed by BMW Service.
Touring: Panorama glass roof*
Observe the panorama glass roof during
the closing procedure, to avoid any injuries.
Take the remote control with you when you
leave the car, otherwise children could operate
the roof and possibly injure themselves.<
39
Entertainment OverviewControlsDriving hintsNavigationMobilityReference
Page 41
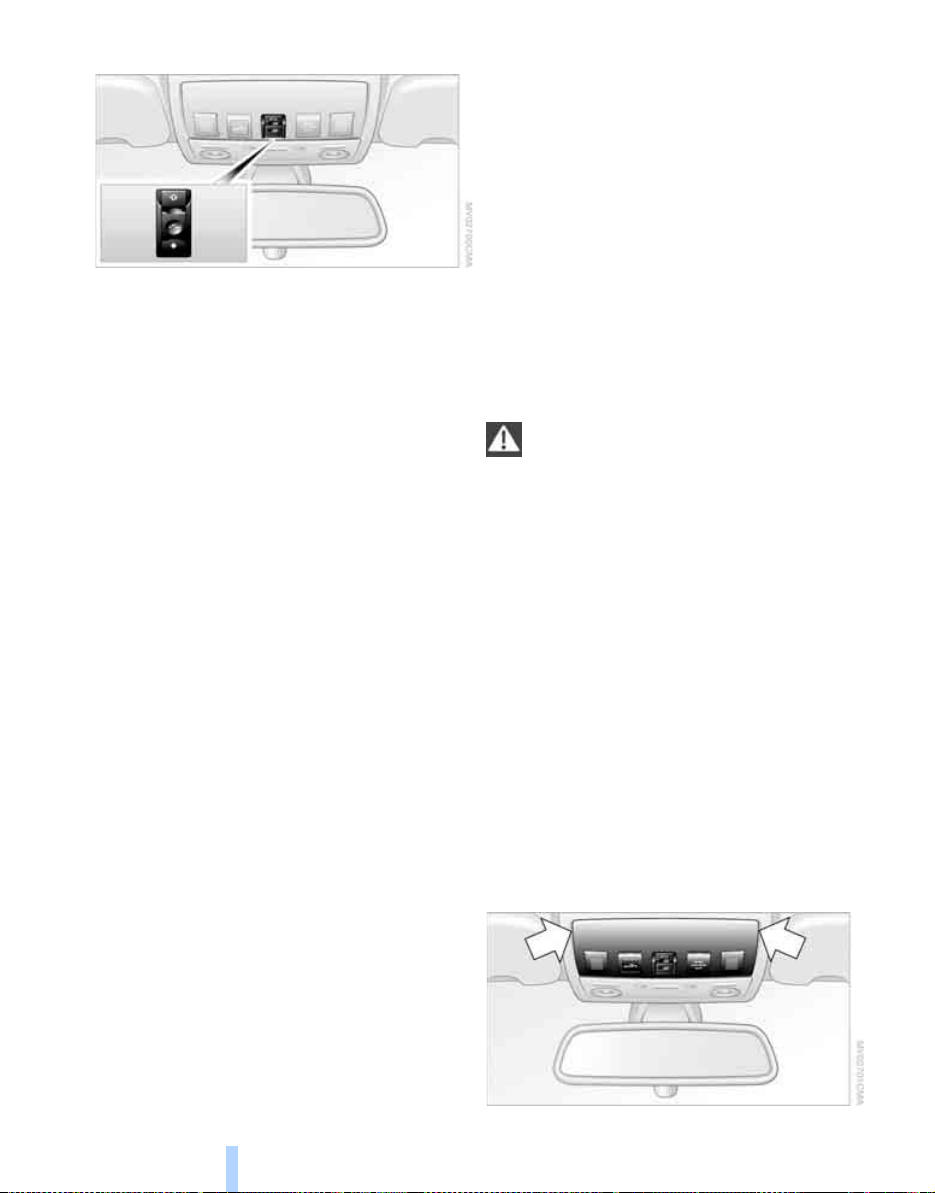
Raising, opening, closing
Online Edition for Part-No. 01 41 0 159 725 © 09/05 BMW AG
Press the switch or push it in the required direction as far as the pressure point.
The sliding trim is opened:
> In unison with the roof
> A short distance when the roof is raised
Opening and closing
When the roof is closed or in the raised position,
the sliding trim can be opened or closed independently.
For comfort operation using the remote control
or door lock, see page 28 or 30.
Comfort closing with comfort access see Locking on page 36.
Vent position
Press the switch:
The glass roof is raised and the sliding trim
opened a short distance.
After the ignition is switched off
You can still operate the roof for approx.
1 minute after the remote control has been
removed or the ignition switched off.
Automatic opening and closing
Press the switch beyond the pressure point.
Pressing the switch again stops this movement.
Comfort position
Each time it is fully opened and subsequently
closed, the panorama glass roof halts in the
comfort position. If desired, the movement can
then be continued using the switch.
The comfort position minimises wind noise
inside the car.
Trap protection
If the panorama glass roof or sliding trim
encounters an obstruction during closing from
approximately one-third of the roof aperture, or
during closing from the raised position, the
closing movement is interrupted and the panorama glass roof and sliding trim are opened
again slightly.
Despite the trap protection function,
make sure that the roof is not obstructed
as it closes; if this precaution is not taken, the
risk remains that thin objects, for instance,
could fail to interrupt the closing movement.
The trap protection function is overridden by
pressing the switch beyond its pressure point
and holding it in position.<
After a power failure
After a power failure, it is possible that the roof
will only move to the raised position. The system must be initialised. BMW recommends that
you have this work performed by BMW Service.
Manual operation
In the event of an electrical fault, you can move
the roof manually:
1. Fold the cover down, possibly applying the
screwdriver from the toolkit at the point
indicated, see page 192.
Opening and closing roof and sliding
trim together
Press the switch twice in rapid succession
beyond the pressure point.
Pressing the switch again stops this movement.
40
Page 42
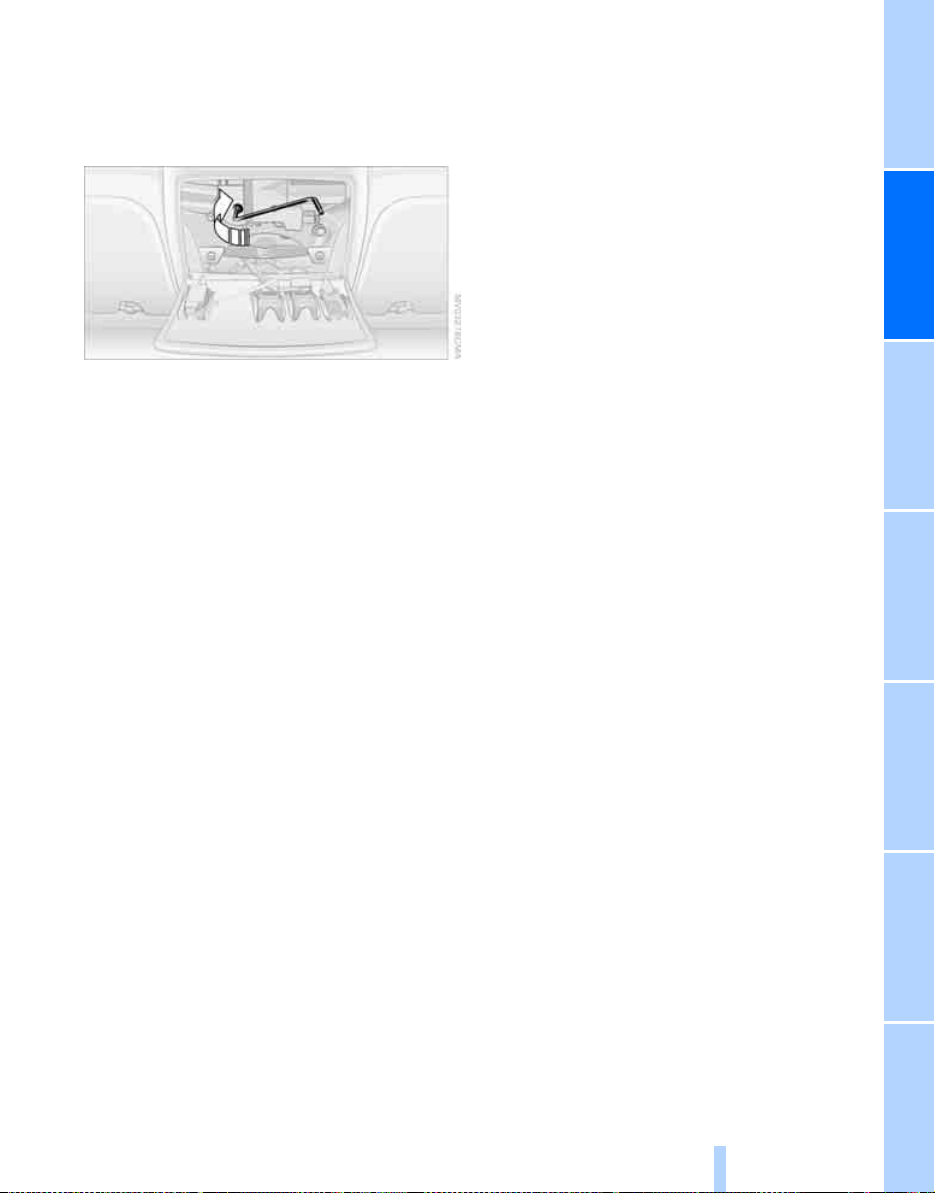
2. Take the Allen key from the holder next to
Online Edition for Part-No. 01 41 0 159 725 © 09/05 BMW AG
the toolkit and insert it into the designated
aperture. Turn the roof in the desired direction. To close, turn in the direction indicated
by the arrow.
Entertainment OverviewControlsDriving hintsNavigationMobilityReference
41
Page 43

Adjusting
Online Edition for Part-No. 01 41 0 159 725 © 09/05 BMW AG
Safe seated position
A seated position that suitably reflects your
requirements is a vital condition of relaxed driv-
Adjusting
ing with a minimum of fatigue. In conjunction
with the seat belts, the head restraints and the
airbags, the seated position has a major influence on your safety in the event of an accident.
You should therefore observe the following
notes in order to maintain the protective function of the car's safety systems.
For additional notes on carrying children in
safety, see page 53.
Airbags
Keep your distance from the airbags.
Always grip the steering wheel on the rim,
with your hands in the 3 o'clock and 9 o'clock
positions, to minimise the risk of injury to the
hands or arms in the event of the airbag being
triggered off.
No other persons, pets or objects should be
held or permitted to remain between the airbag
and yourself.
Do not use the front airbag cover on the front
passenger's side as a tray. Make sure that the
front passenger likewise adopts a correct
seated position and does not rest feet or legs on
the instrument panel, for example, otherwise
he/she could sustain leg injuries in the event of
the front airbag being triggered.
Make sure that passengers do not use the side
or head-level airbags as headrests, otherwise
they may sustain injuries in the event of the airbags triggering.<
Even if all these instructions are complied with,
certain injuries as a result of contact with the
airbag cannot be entirely ruled out, depending
on the circumstances in which an accident
occurs. Occupants with sensitive hearing may
be subject to brief and generally temporary
impaired hearing caused by the ignition and
inflation noise.
The locations of the airbags and additional
notes are given on page 90.
Head restraints
Head restraints adjusted to the correct height
reduce the risk of injuries to the neck in the
event of an accident.
Adjust the head restraint in such a way
that its centre is at approximately ear
level; otherwise, there is an increased risk of
injury should an accident occur.<
Seat belt
All occupants should always fasten their seat
belts before you set off. The airbags are a complementary safety feature and not a substitute
for the seat belts.
Never restrain more than one person with
each seat belt. Babies or small children
must not travel on the lap of another occupant.
Pregnant women should also wear the seat belt,
making sure that the strap in the pelvic area is
well down on the hips and does not press on the
abdominal region of the body. The seat belt
must not pass across the neck, become
trapped at any point or chafe against any sharp
edges. The seat belt should not be twisted and
must be positioned firmly over the pelvis and
shoulder, as close to the body as possible. It
should not pass over hard or fragile objects,
otherwise the belt in the pelvic area could slide
over the hips in the event of a head-on collision
and injure the lower abdomen. Avoid wearing
bulky clothing and regularly pull the belt in the
upper-body area taut, otherwise its restraining
effect could be impaired.
Touring: if the centre seat belt is used, the wider
backrest must be locked in position, see
page 116, otherwise the centre seat belt will not
have any restraining effect.<
Operating seat belts, see page 47.
42
Page 44
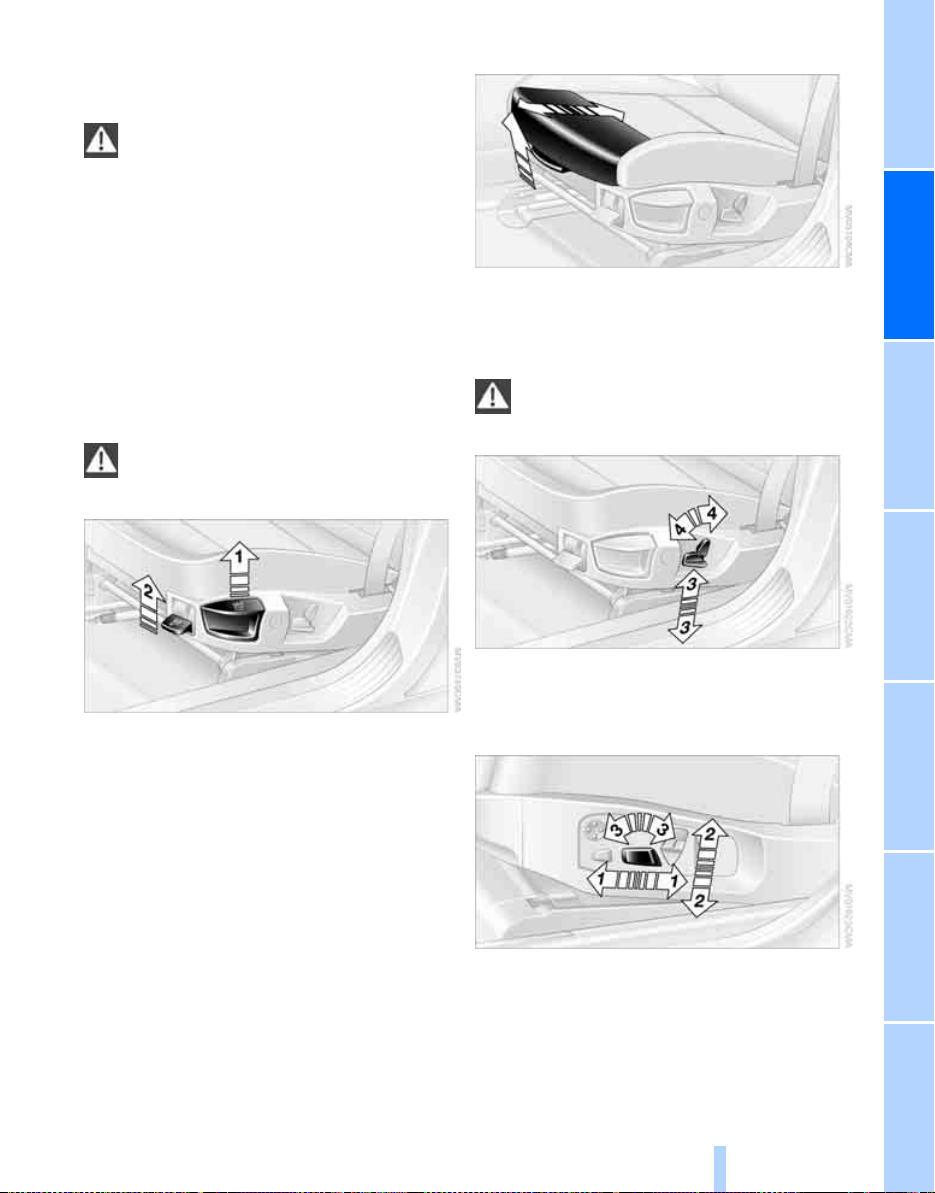
Seats
Online Edition for Part-No. 01 41 0 159 725 © 09/05 BMW AG
Note before adjusting
Do not reposition the driver's seat while
the car is in motion. The seat could move
unexpectedly, leading to the driver losing control of the car, so that an accident could be
caused.
Do not recline the driver's or front passenger's
seat back too far, otherwise there will be a risk
of sliding under the seat belt in an accident, so
that the belt loses its protective effect.<
Observe also the notes on damaged seat belts
on page 48 and on the active front head
*
restraint
Adjusting manually
safety.<
on page 47.
Comply with the notes on page 42, or
there may be a risk to your personal
Thigh support*
Pull the lever and move the thigh support forward or back.
Electrical adjustment
Comply with the notes on page 42, or
there may be a risk to your personal
safety.<
1 Forward/back
2 Angle of driver's seat
Forward/back: pull the lever up and slide the
seat to the preferred position. After releasing
the lever, move the seat gently forward or back
to make sure it engages properly in position.
Angle of driver's seat: pull the lever up and
move the seat until the desired angle is
obtained. After releasing the lever, move the
seat gently forward or back to make sure it
engages properly in position.
3 Height
4 Seat back
Non-standard, depending on seat:
1 Longitudinal direction
2 Height
3 Seat tilt
*
*
*
43
Entertainment OverviewControlsDriving hintsNavigationMobilityReference
Page 45
Adjusting
Online Edition for Part-No. 01 41 0 159 725 © 09/05 BMW AG
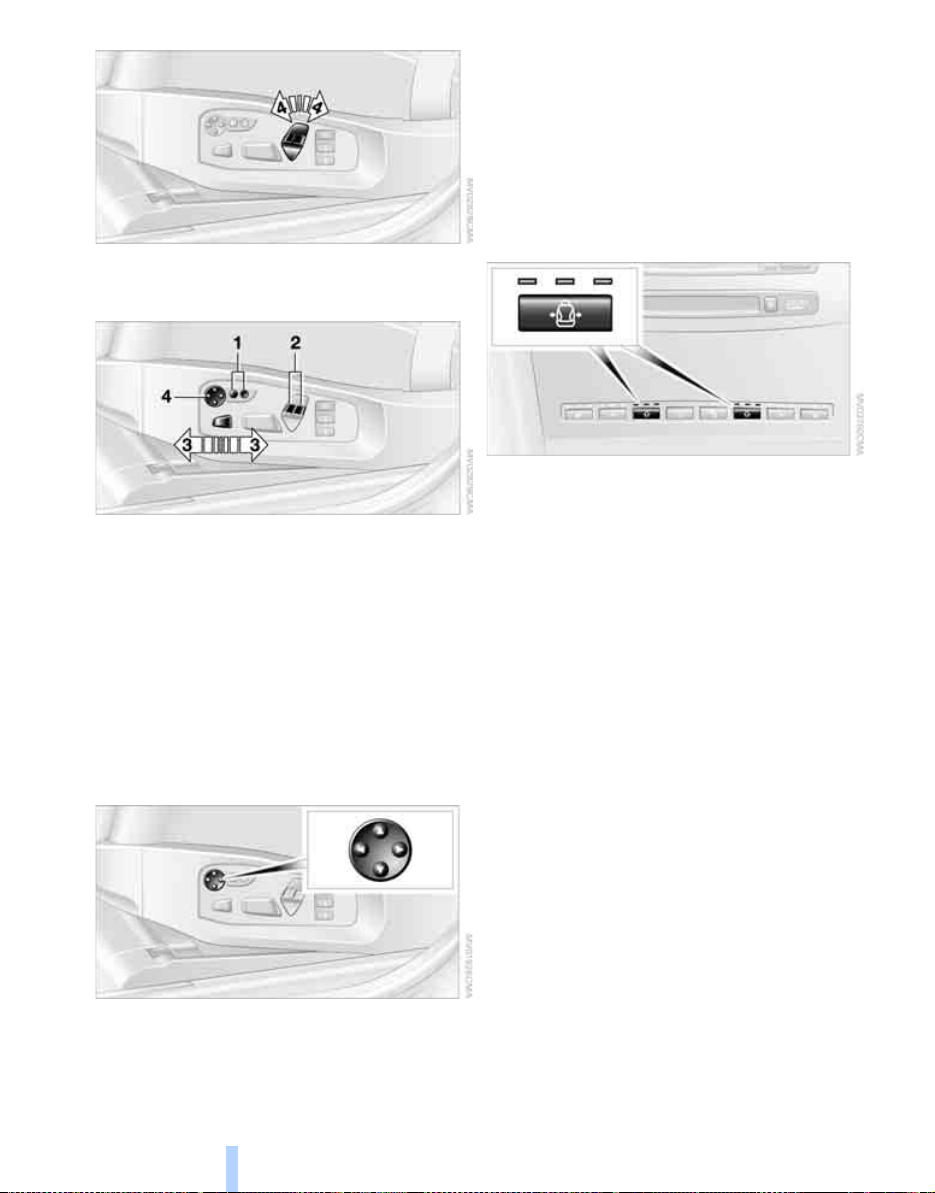
4 Backrest
Additional, depending on seat:
1 Backrest width
2 Shoulder support
3 Thigh support
4 Lumbar support*, see further below
Shoulder support: the adjustable upper section
of the seat back supports the shoulder area of
the occupant's body. This results in a relaxed
seated position and reduces the load on the
shoulder muscles.
Adjusting lumbar support*
*
*
*
*
The upper edge of the pelvis and the spinal column are supported, to encourage an upright but
relaxed seated position.
> To increase or reduce the curvature: press
switch at front or rear edge.
> To move the curved section up or down:
press switch at top or bottom.
Active backrest width adjustment*
First adjust the width of the backrest to a comfortable position, see further above. Using the
selected backrest width as the basis, lateral
support is automatically adapted to the current
driving situation.
The extent to which the backrest is adjusted
and the speed with which this takes place
depend on the program. You can choose from
three programs, ranging from comfortable to
sporty.
Each press of the button switches between the
programs:
> "Comfort" program: one LED
> "Normal" program: two LEDs
> "Sport" program: three LEDs
To switch off: press and hold down button.
The seat back contour can be altered to provide
more support to the curved, lumbar section of
the spine.
44
Easy entry/exit*
To facilitate entry and exit, the backrest width is
temporarily opened fully.
Page 46
Seat, mirror and steering
Online Edition for Part-No. 01 41 0 159 725 © 09/05 BMW AG
wheel position memory*
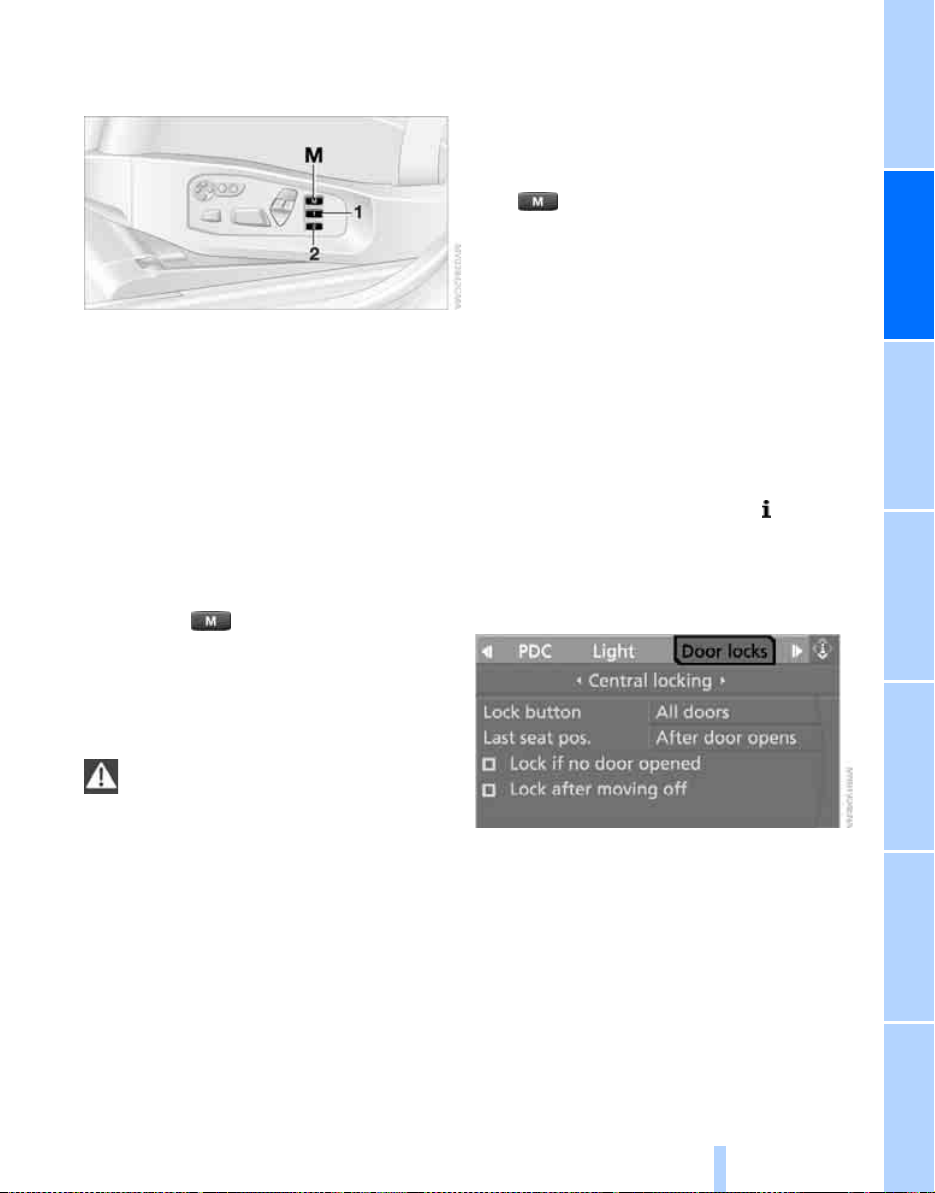
You can memorise and call up two different
positions for the driver's and front passenger's
*
, the outside mirrors and the steering
seat
wheel.
The lumbar support setting is not stored in the
position memory.
Memorising
1. Switch on radio readiness or the ignition,
see page 56.
2. Select the desired seat, outside mirror and
steering wheel positions.
3. Press the button:
The LED in the button comes on.
4. Press the desired memory button 1 or 2:
The LED goes out.
Safety function
1. Close the driver's door and switch the igni-
tion on or off.
2. Press memory button 1 or 2 as desired until
the adjusting procedure has been completed.
If the button was pressed accidentally:
Press the button again; the LED will go out.
Request with remote control
The last driver's seat, outside mirror and steering wheel position selected is memorised in the
remote control currently in use.
You can choose when the position is called up:
> Calling up when unlocking the car
> Calling up when opening the driver's door
iDrive concept, see page 14.
1. Call up the start menu.
2. Press the controller to call up the menu.
3. Select "Vehicle settings" and press the
controller.
4. Select "Door locks" and press the control-
ler.
Calling up
Do not call up the memory while the car is
in motion, otherwise an unexpected seat
or steering wheel movement may cause an
accident.<
Convenience function
1. Unlock and open the driver's door or switch
on radio readiness.
2. Briefly press memory button 1 or 2 as
desired.
The positioning movement is interrupted
immediately if you briefly press a seat
adjustment switch or one of the memory
buttons.
5. Select "Central locking" and press the con-
troller.
6. Select "Last seat pos." and press the con-
troller.
45
Entertainment OverviewControlsDriving hintsNavigationMobilityReference
Page 47
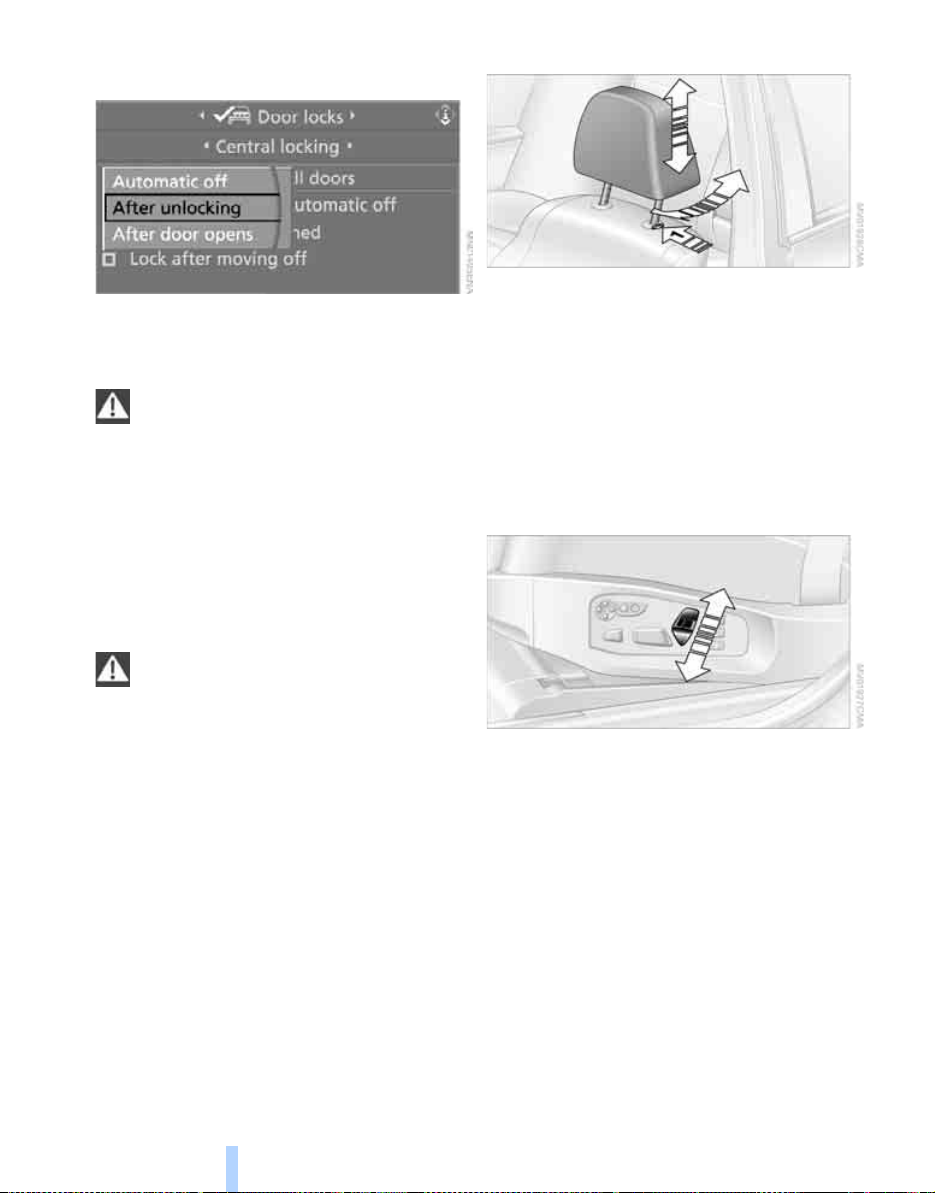
7. Select "After unlocking" or "After door
Online Edition for Part-No. 01 41 0 159 725 © 09/05 BMW AG
opens".
Adjusting
8. Press the controller.
To switch off the calling-up procedure:
Select "Automatic off" and press the controller.
If this function is used, first make sure that
the footwell behind the driver's seat is
unobstructed. Otherwise persons could be
injured or objects damaged if the seat should
start to move towards the rear.<
Head restraints
Head restraints adjusted to the correct height
reduce the risk of injuries to the neck in the
event of an accident.
Adjust the head restraint in such a way
that its centre is at approximately ear
level; otherwise, there is an increased risk of
injury should an accident occur.<
Adjusting manually
Up: pull.
Down: press the button, arrow 1, and slide the
head restraint down.
To remove:
1. Pull the head restraint up as far as its limit of
travel.
2. Press the button, arrow 1, and pull the head
restraint fully out.
Adjusting electrically*
Front seats: adjusting height
You can adjust the height of the head restraints
manually or electrically, depending on the type
of seat.
46
Front seats: adjusting angle
Tilt the head restraint as required.
On the Comfort seat, you adjust the distance
between the head restraint and the back of your
head via the shoulder support.
Page 48
Adjusting side sections on
Online Edition for Part-No. 01 41 0 159 725 © 09/05 BMW AG
Comfort seat
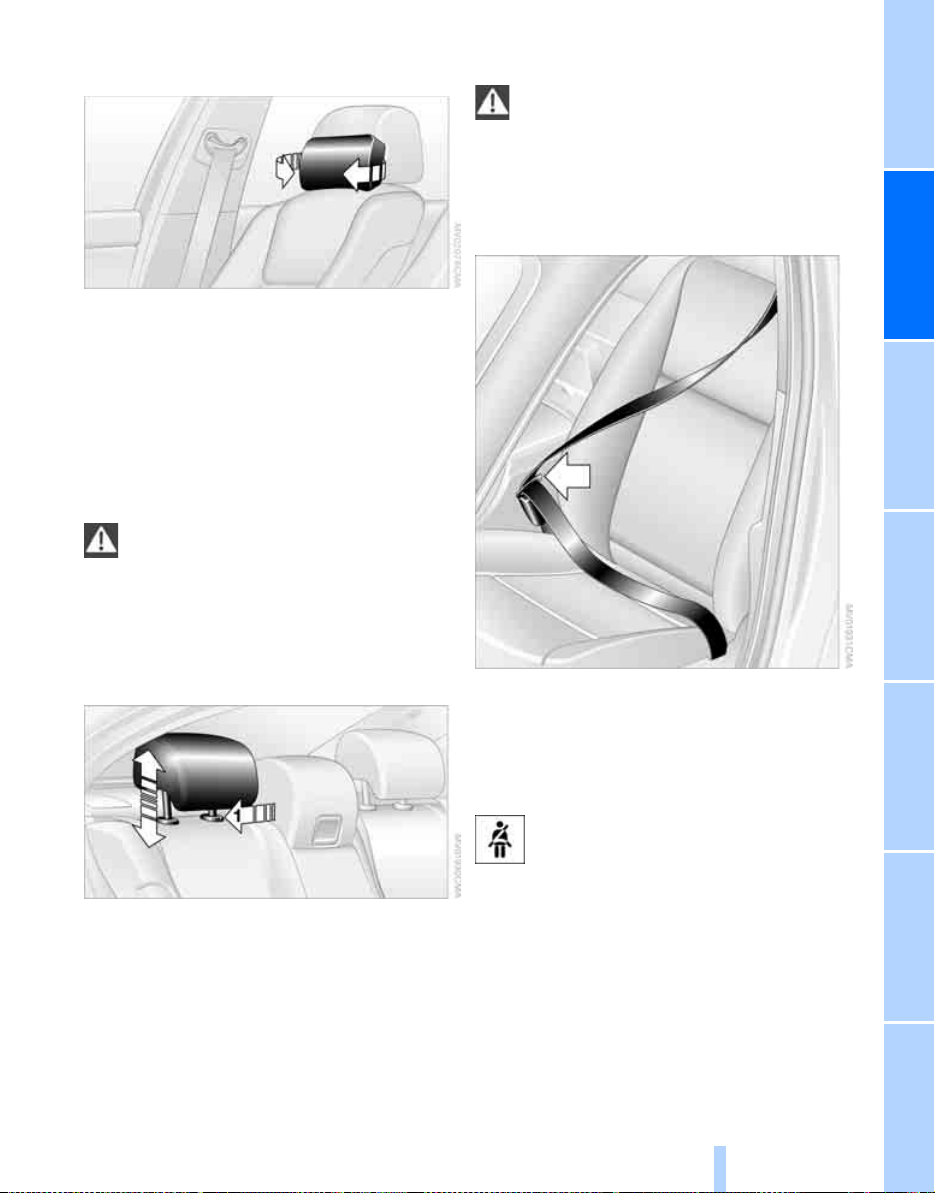
Fold the side sections forward to provide
greater lateral support in the rest position.
Front head restraint, active*
The Comfort seats are equipped with an active
head restraint.
In the event of a sufficiently serious rear-end
collision, the active head restraint reduces the
distance between itself and the head.
Do not use seat or head restraint covers
or hang objects, e.g. coat-hangers, from
the head restraints or attach accessories to the
seat or head restraint; this will impair the protective function of the active head restraints,
thereby putting personal safety at risk.<
Seat belts
Comply with the notes on page 42, or
there may be a risk to your personal
safety.<
All occupants should always fasten their seat
belts before you set off. The airbags are a complementary safety feature and not a substitute
for the seat belts.
Rear seats: adjusting height
Up: pull.
Down: press the button, arrow 1, and slide the
head restraint down.
Fastening
The seat belt buckle must be heard to engage.
Belt reminder for driver's and front
passenger's seat*
The indicator lamp comes on and an
acoustic signal sounds. In addition, a
message will appear on the control display. Please check whether the seat belt is fastened correctly.
The 'Fasten seat belts' reminder is issued as
long as the driver's seat belt has not been fastened. On certain national-market versions, the
'Fasten seat belts' reminder is also activated at
road speeds above approx. 8 km/h, approx.
5 mph, if the front passenger's seat belt is not
fastened, if heavy objects are placed on the
front passenger seat, or if the driver or front
passenger unfasten their seat belts.
47
Entertainment OverviewControlsDriving hintsNavigationMobilityReference
Page 49
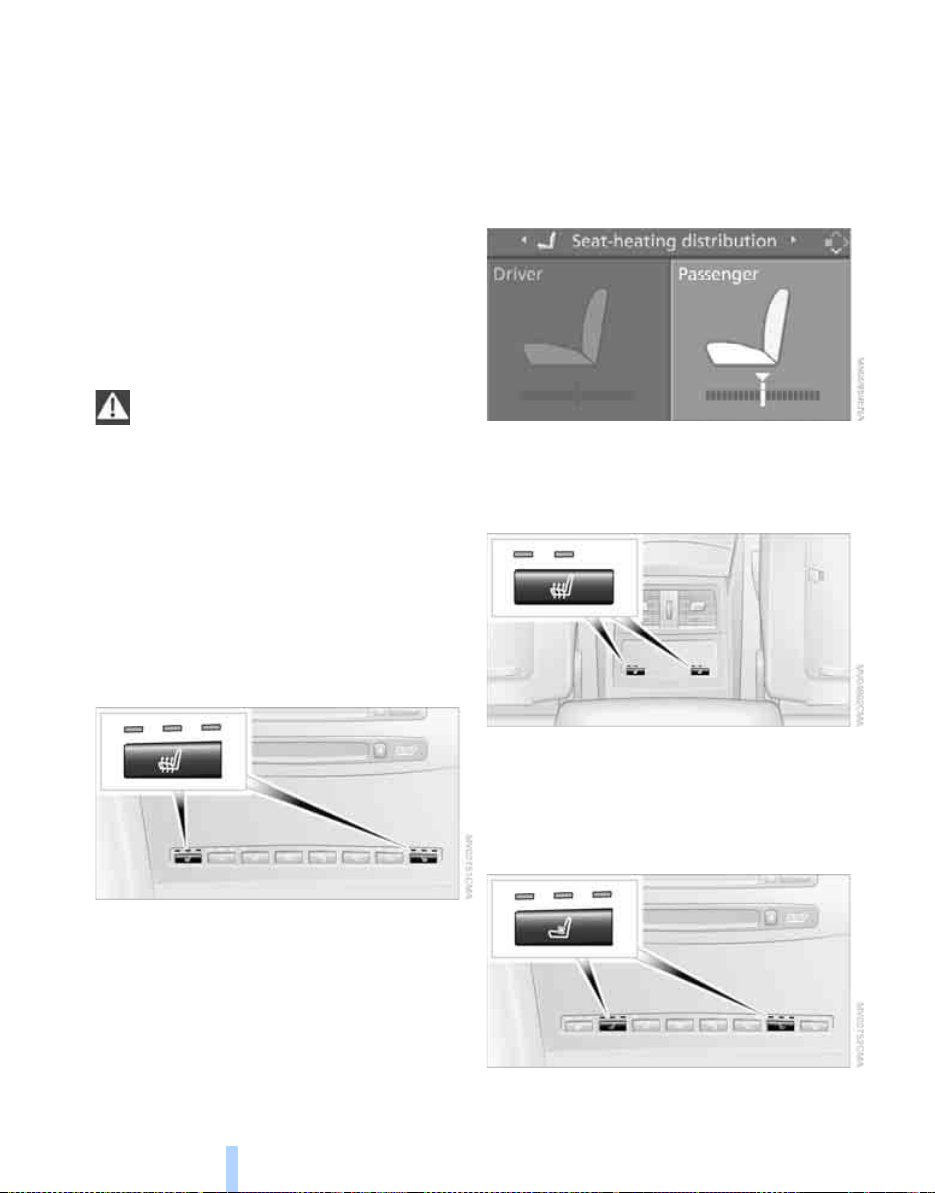
Opening
Online Edition for Part-No. 01 41 0 159 725 © 09/05 BMW AG
1. Hold onto the belt.
2. Press the red button on the belt buckle.
3. Guide the belt back up to the reel.
The upper belt anchorage is suitable for adults
of any stature as long as they are sitting correctly, see page 43.
Adjusting
The two seat belt buckles integrated into the
rear seat are intended for the left and right seat
occupants. The buckle marked CENTER is only
to be used by a person occupying the centre
rear seat.
Damaged seat belts
Should the seat belts be placed under
strain in the event of an accident or sustain damage, replace the belt system including
the seat-belt tensioner and have the belt tensioner tested. Have this work performed only by
BMW Service or by a workshop that operates to
BMW specifications and has suitably trained
personnel, otherwise the correct functioning of
this safety equipment is not guaranteed.<
1. Call up the start menu.
2. Move the controller to the left to call up
"Climate".
3. Select "Seat-heating distribution" and
press the controller.
4. Move the controller to the left or right to
select "Driver" or "Passenger".
5. Turn the controller. The setting is adopted;
you can now change to another field.
Rear
Heated seats*
Front
Press once per temperature stage. Three LEDs
indicates the highest preset temperature.
To switch off: press and hold down the button.
Temperature distribution
The temperature distribution between the seat
cushion and seat back can be varied.
iDrive concept, see page 14.
48
Function as for heated front seats, two temperature stages.
Active seat ventilation*
Press once per ventilation stage.
Page 50
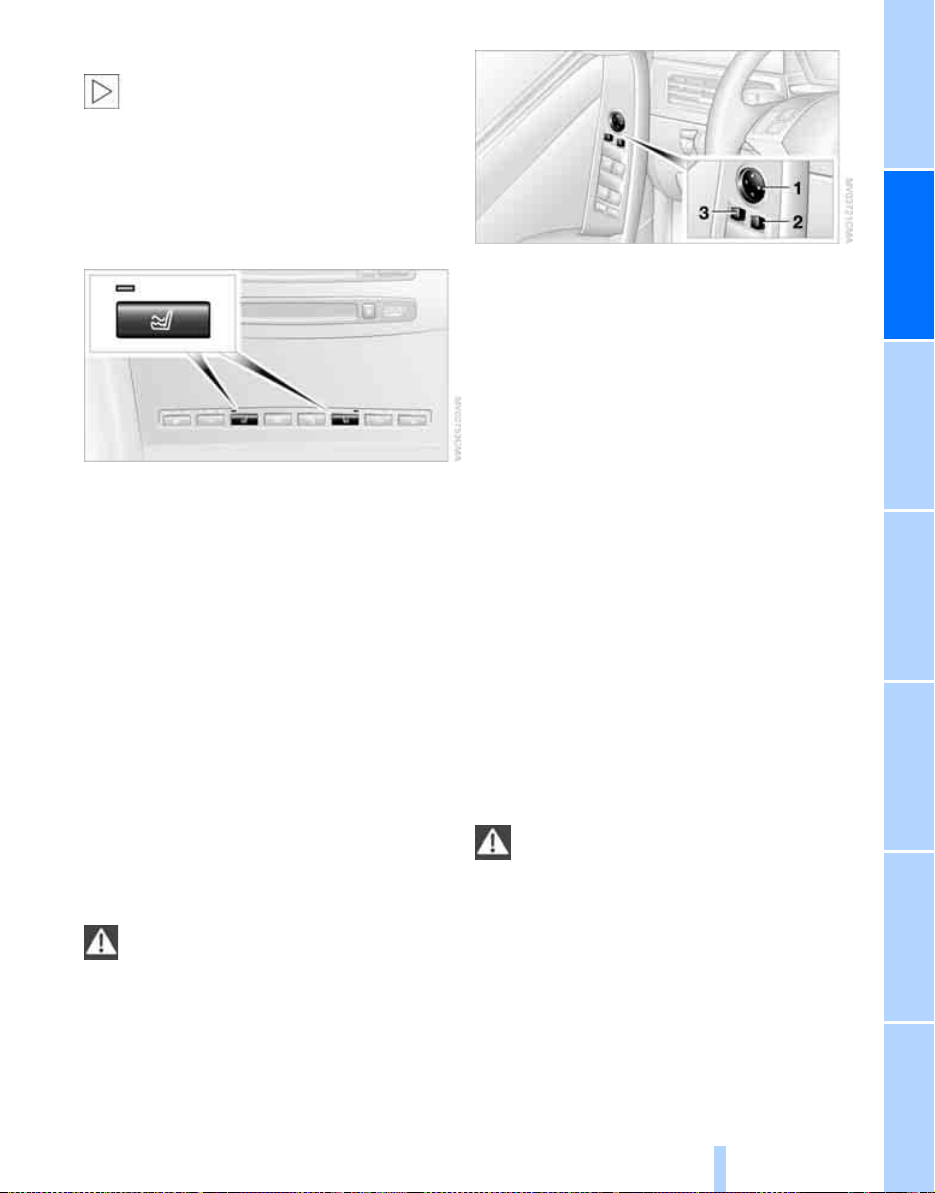
To switch off: press and hold down the button.
Online Edition for Part-No. 01 41 0 159 725 © 09/05 BMW AG
The highest stage with three LEDs lit is
for a rapid cooling effect, e.g. if the car's
interior has become very hot. The system automatically switches down a stage after a short
time to avoid overcooling.<
Active seat*
The seat cushion is actively varied by the right
and left halves of the seat cushion being raised
and lowered alternately. This helps to avoid
muscular strain and signs of fatigue, and thus
guards against back pains in the lumbar region.
To switch on, press the button; the LED lights
up.
When you switch off the active seat, it may take
up to 1 minute for the two halves of the base
cushion to return to their home positions.
Mirrors
Door mirrors
The outer sections of the mirrors depict a larger
field of view* than the inner sections. In this
way, the view to the rear is extended and the
blind spot, as it is known, is reduced in size.
The objects seen in the mirrors are closer
than they appear. Do not gauge your distance from following traffic based on what you
see in the mirrors; otherwise there is an
increased risk of accident.<
1 Adjusting
2 Changing over to the mirror on the other
side or to the automatic parking function,
see Passenger-side mirror tilt-down on
page 50
3 Folding mirrors in and out
To memorise mirror positions, see Seat, mirror
and steering wheel position memory on
page 45.
*
Adjusting manually
The mirrors can also be adjusted manually by
pressing the edge of the glass.
Folding mirrors in and out*
At speeds up to approx. 30 km/h, approx.
20 mph, you can fold the mirrors in or out by
pressing button 3. This can be useful for example in car washes or narrow streets, or to fold
the mirrors back out into the correct position
after they have been folded in manually. If the
mirrors have been folded in, they automatically
fold out again when a speed of approx. 40 km/h,
approx. 25 mph, is reached.
Before putting the car through a car wash,
fold the mirrors in either manually or by
pressing button 3, otherwise they could be
damaged on account of the car's width.<
Automatic heating
Both outside mirrors are heated automatically
while the engine is running or the ignition
switched on.
Entertainment OverviewControlsDriving hintsNavigationMobilityReference
49
Page 51
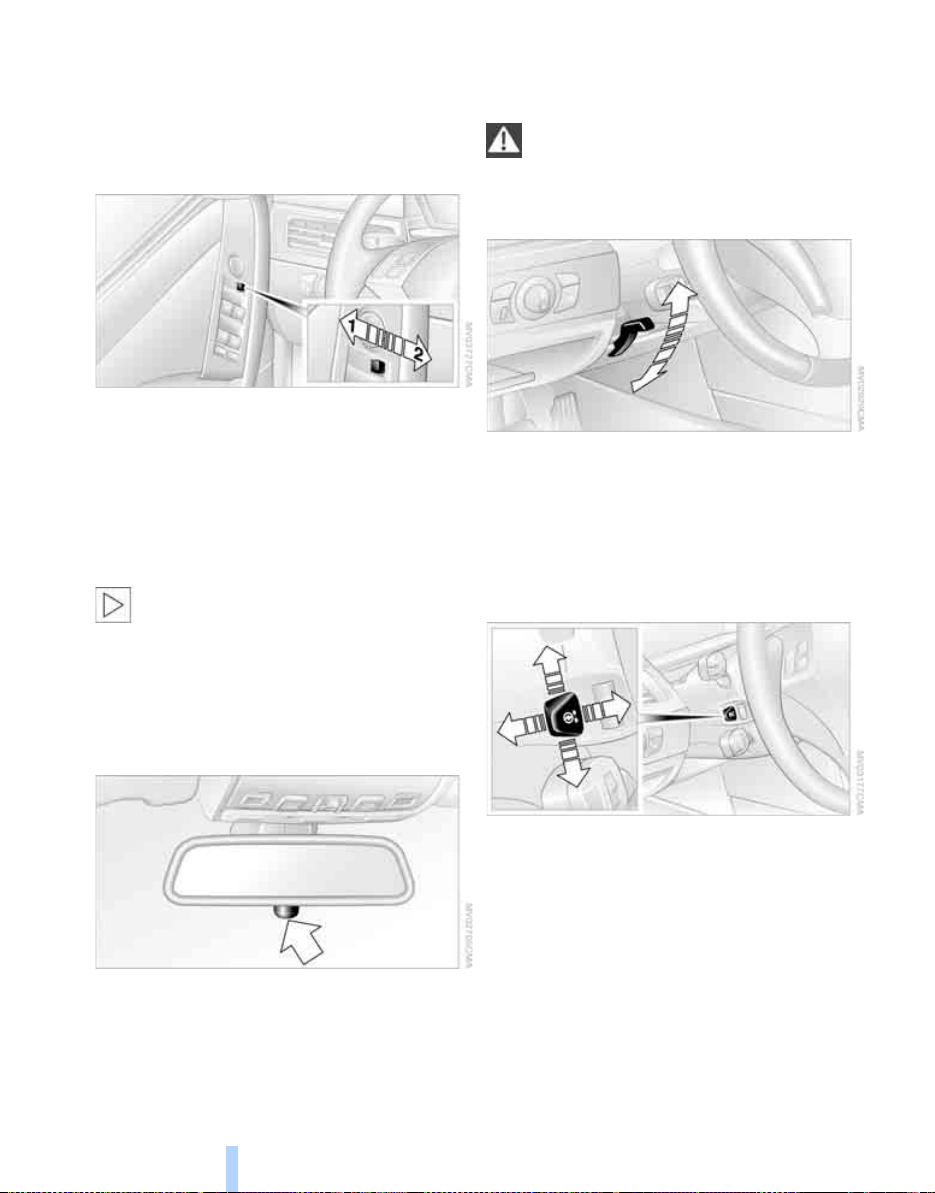
Passenger-side mirror tilt-down –
Online Edition for Part-No. 01 41 0 159 725 © 09/05 BMW AG
Automatic parking function*
Activating
1. Push the switch to the position for the
driver-side mirror, arrow 1.
Steering wheel
Adjusting
Do not adjust the steering wheel position
while the car is in motion, or an accident
may result from any unexpected movement.<
Adjusting
2. Engage reverse gear or move the selector
lever to position R.
The glass in the mirror on the passenger
side tilts slightly down. The road surface
close to the car, e.g. the kerb, is then
brought within the driver's field of view in
the mirror, for instance while parking the
car.
The parking position function is switched
off if you are towing a trailer.<
Deactivating
Push the switch to the position for the passenger-side mirror, arrow 2.
Inside mirror
Adjusting manually
1. Fold the lever down.
2. Move the steering wheel to the preferred
height and angle to suit your seated position.
3. Fold the lever back up.
Adjusting electrically*
To reduce glare from following vehicles after
dark, turn the knob.
Automatic-dim mirrors
50
*
see page 123.
The steering wheel can be adjusted in four
directions.
To memorise steering wheel position, see Seat,
mirror and steering wheel position memory,
page 45.
Electric steering-wheel lock
The steering wheel locks or unlocks automatically when the remote control is removed or
inserted, see page 56.
Page 52
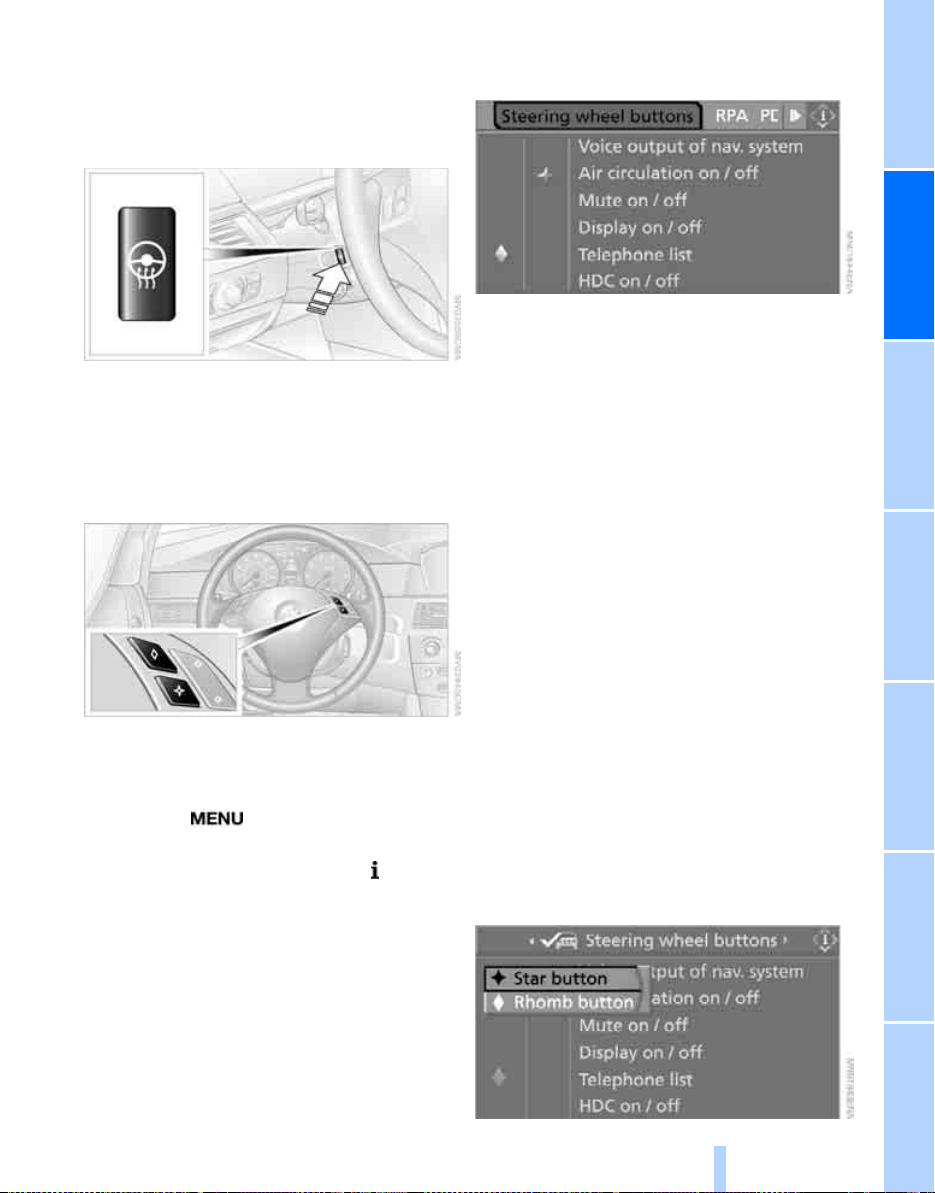
Easy entry/exit*
Online Edition for Part-No. 01 41 0 159 725 © 09/05 BMW AG
To facilitate entry and exit, the steering wheel
temporarily moves to its highest position.
Heated steering wheel*
Press the button with the ignition switched on.
When the steering wheel heating is on, the LED
in the button is lit.
Programmable buttons* on the
steering wheel
You can program the buttons with a function of
your choice.
iDrive concept, see page 14.
1. Press the button.
The start menu is called up.
2. Press the controller to call up the menu.
3. Select "Vehicle settings" and press the
controller.
4. Select "Steering wheel buttons" and press
the controller.
A list showing various functions is displayed:
> "Voice output of nav. system"
Spoken instructions for the navigation
system
*
> "Air circulation on / off"
Permanently shutting off the entry of
outside air, see Automatic Air Recirculation Control AUC on page 104
> "Mute on / off"
To mute the audio sources
> "Display on / off"
To switch the control display on/off
> "Telephone list"
Show/hide telephone book or last list of
saved numbers displayed
> "HDC on / off"
To switch Hill Descent Control HDC
on/off
> "Next entertainment source"
To change the audio source
5. Select the desired function and press the
controller.
6. Select a button if appropriate and press the
controller.
*
Entertainment OverviewControlsDriving hintsNavigationMobilityReference
51
Page 53

The chosen function can be operated with the
Online Edition for Part-No. 01 41 0 159 725 © 09/05 BMW AG
appropriate key.
The setting is saved for the remote control currently in use.
Operating a function
Press the appropriate button on the steering
Adjusting
wheel.
If you have programmed "Voice output of nav.
system" for one of the buttons:
> Switching spoken instructions on/off:
Press and hold down the button.
> Repeating the last spoken instruction:
Press the button.
> With Business navigation system, interrupt-
ing spoken instructions during an
announcement:
Press the button.
52
Page 54
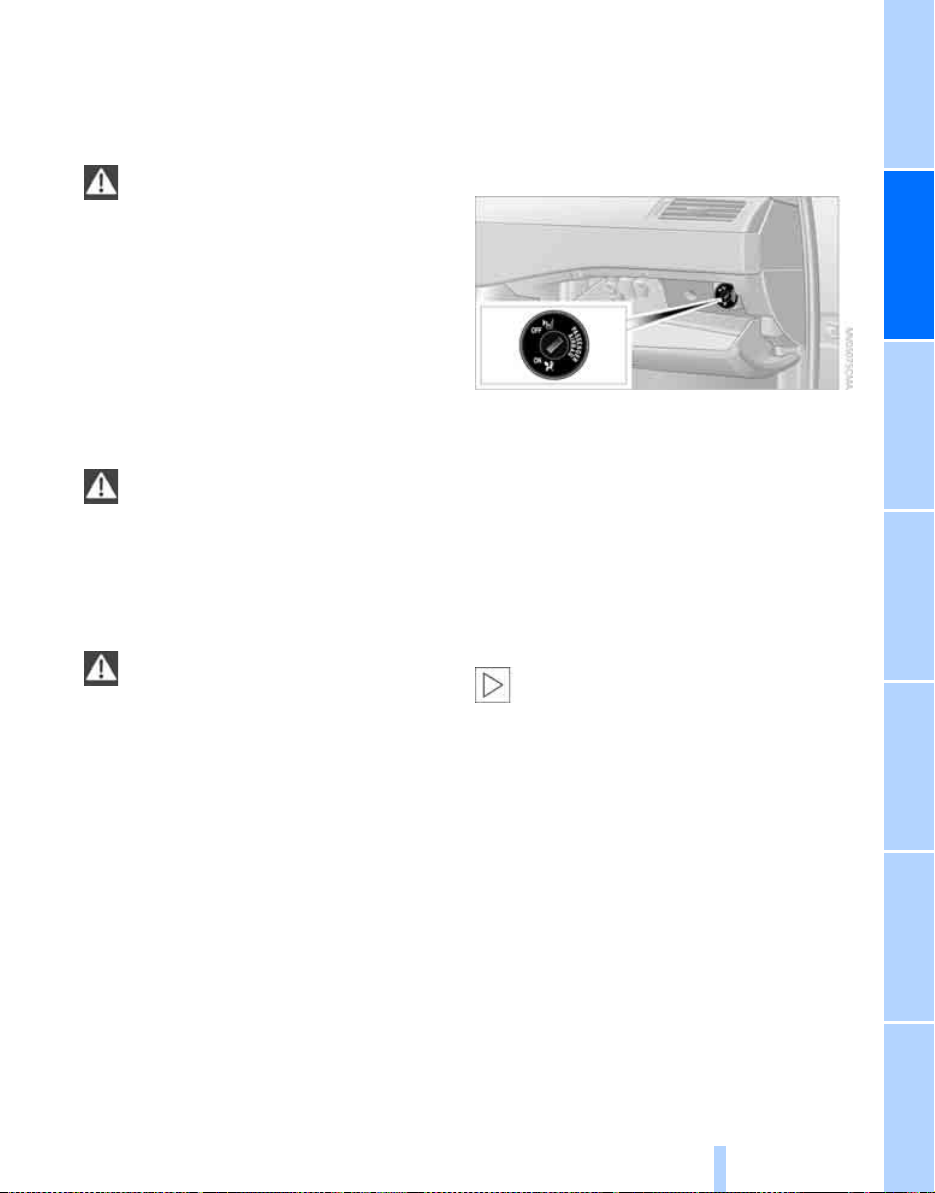
Child safety
Online Edition for Part-No. 01 41 0 159 725 © 09/05 BMW AG
Important considerations
Do not leave children unattended in the
car, as they could otherwise endanger
themselves and/or other persons by opening
the doors, for example.<
All the seats in your BMW, except for the
driver's seat, are in principle suitable for the
installation of universal child restraint systems
for all age groups, provided these have been
approved for the age group in question.
Always carry children at the rear
Accident research has shown that the safest
place for children is in the rear seat.
Children under 12 or smaller than 150 cm,
approx. 5 feet, should always travel at the
rear using suitable child restraint systems, otherwise there is a greater risk of injury in the
event of an accident.<
Exception for the front passenger's
seat
If you nevertheless need to fit a child
restraint system on the front passenger's
seat, the passenger's front and side airbags
must be deactivated, otherwise a child travelling on that seat will be at considerable risk of
injury if the airbags are triggered, even if it is
wearing a child restraint system. BMW Service
will be pleased to advise you on this.<
Key switch* for front passenger airbag
You can deactivate and subsequently reactivate
the front and side airbags for the front passenger by means of a key switch. This is located in
the glove box.
Deactivating
Use a key to turn the key switch to the OFF
position.
The airbags for the front passenger are deactivated when the switch is in this position. The
airbags for the driver remain fully active.
Once the child restraint system has been
removed, immediately reactivate the air-
bags for the front passenger so that they can
deploy correctly in the event of an accident.<
Reactivating
Turn the key switch to the ON position.
The front passenger's airbags are reactivated
and can deploy correctly if the need arises.
Entertainment OverviewControlsDriving hintsNavigationMobilityReference
53
Page 55
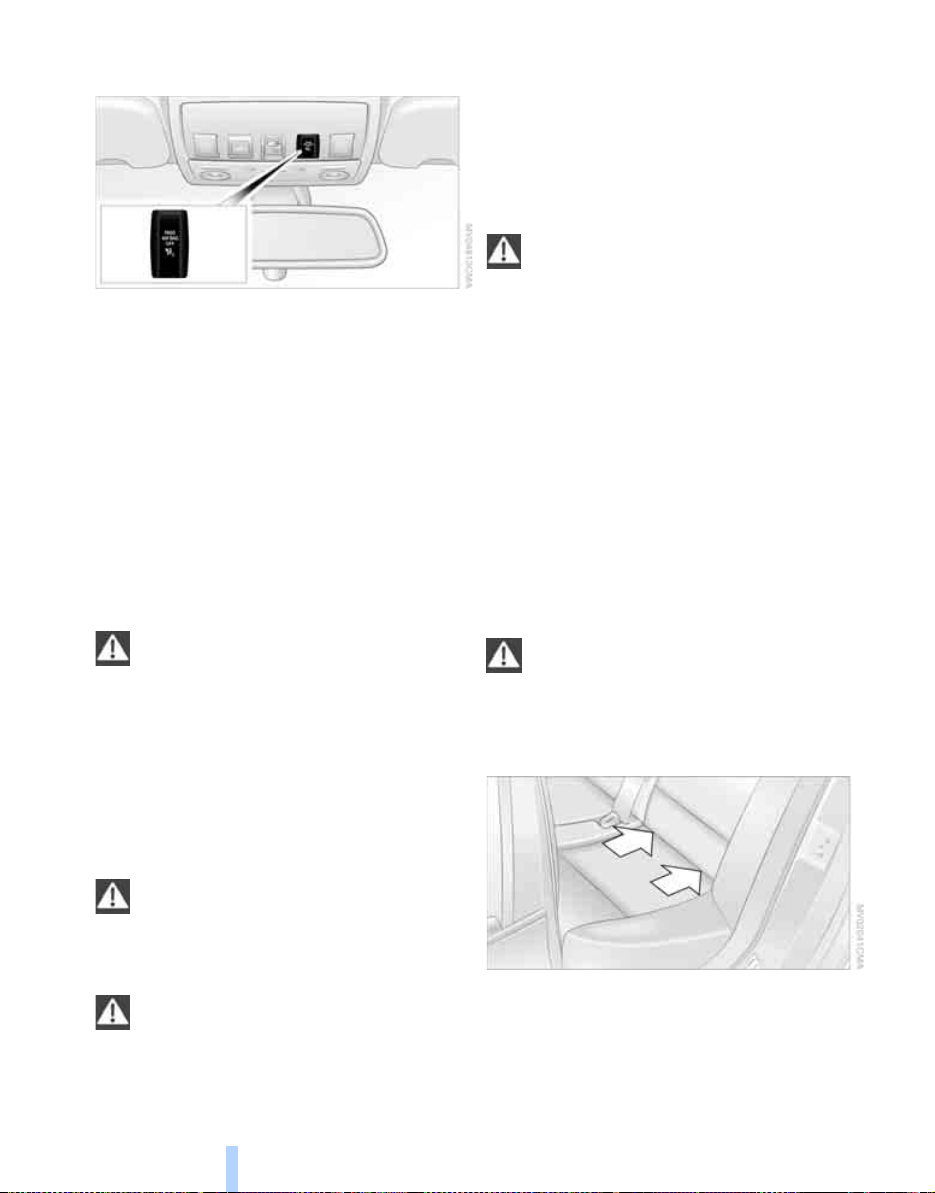
Functional state of front passenger
Online Edition for Part-No. 01 41 0 159 725 © 09/05 BMW AG
airbag
Child safety
The layout of the switches and indicator lamps
may vary depending on the car's equipment.
> The indicator lamp remains on if the front
passenger's airbags have been deactivated.
> The indicator lamp does not come on if the
front passenger's airbags have been activated.
Fitting child restraint systems
BMW Service can supply suitable child restraint
systems for every age and weight category.
When selecting, installing and using child
restraint systems, observe the manufacturer's instructions, as the protective effect
could otherwise be impaired.
Following an accident, have all components of
the child restraint system and the seat belt that
was used to secure it checked and renewed if
necessary. Always have this work performed
either by BMW Service or by a workshop that
operates to BMW specifications and has suitably trained personnel.<
Touring: comply with the notes on seat
belts on page 42, or there may be a risk to
your personal safety.<
Seat height
Before fitting a universal child restraint system
to the front passenger s eat, move the seat up as
far as it will go in order to achieve optimal placement of the seat belt. Do not adjust the height of
the seat with the child restraint system fitted.
Backrest width*
The backrest width adjustment feature of
the front passenger's seat must be fully
extended. Once the child seat has been fitted,
no memory positions may be called up and
active backrest width adjustment must be
deactivated in order not to restrict the stability
of the child seat on the front passenger's seat.<
1. After unlocking the car, sit on the front pas-
senger's seat and close the door in order to
call up the memory position.
2. Open the backrest adjustment fully, see
page 44.
3. Deactivate active backrest adjustment, see
page 44.
4. Fit the child seat.
ISOFIX* child seat mountings
For details of how to install the ISOFIX
child seat, please consult the separate
operating and safety instructions supplied by
the seat's manufacturer.<
Saloon: rear seats
On the front passenger's seat
Before fitting a child restraint system on
the front passenger's seat, make sure
that the front and side airbags on the front passenger side have been deactivated, otherwise
the child travelling on that seat will be at considerable risk of injury if the airbags are triggered.<
54
The ISOFIX child seat mountings are located
behind the positions marked by arrows.
Before fitting the ISOFIX child seat, pull the belt
away from the area around the mountings.
Page 56
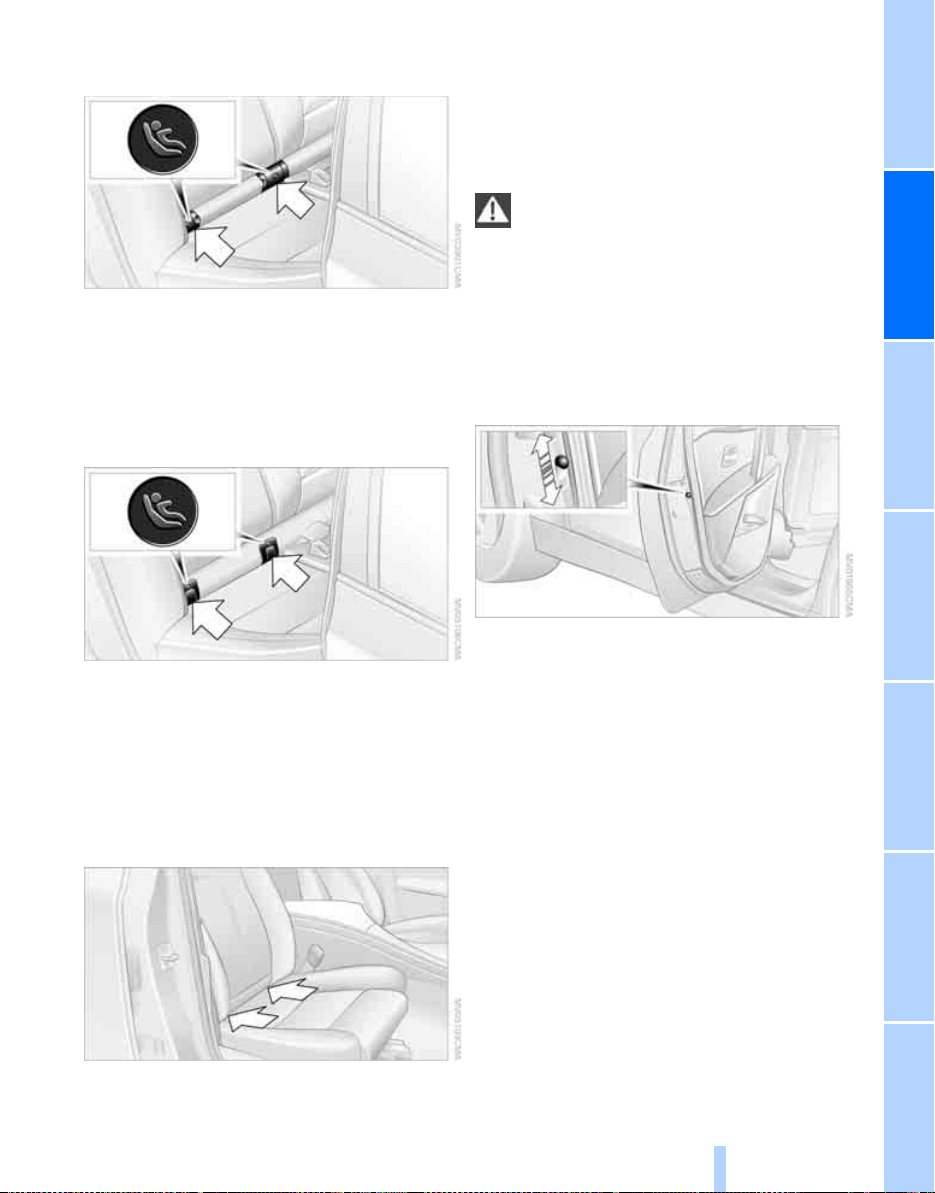
Saloon: rear seats with through loading
Online Edition for Part-No. 01 41 0 159 725 © 09/05 BMW AG
system*
The brackets for the ISOFIX child seat mountings are located behind the caps as shown.
Before fitting the ISOFIX child seat, remove the
caps and pull the belt away from the area
around the child seat mountings.
Touring: rear seats
Before fitting the ISOFIX child seat, tilt the front
*
seat down fully
rest is fully upright, see page 43.
and make sure that the back-
When driving with children
If your car has rear side airbags, do not
allow children travelling in child seats to
lean out towards the door trim, as serious injuries could occur if the side airbags were to be
triggered.<
You can have the side airbags at the rear disabled. BMW Service will be pleased to advise
you on this.
Child safety catches in rear doors
The brackets for the ISOFIX child seat mountings are located behind the caps as shown and
are covered again once the child seat has been
removed.
Before fitting the ISOFIX child seat, pull the belt
away from the area around the mountings.
Front passenger's seat
The ISOFIX child seat mountings are located
behind the points marked with arrows.
Push down the locking lever on the rear doors:
The door in question can now only be opened
from the outside.
Safety switch for window lifts
Press the safety switch for the window lifts, see
page 38, if children are travelling on the rear
seat.
Entertainment OverviewControlsDriving hintsNavigationMobilityReference
55
Page 57
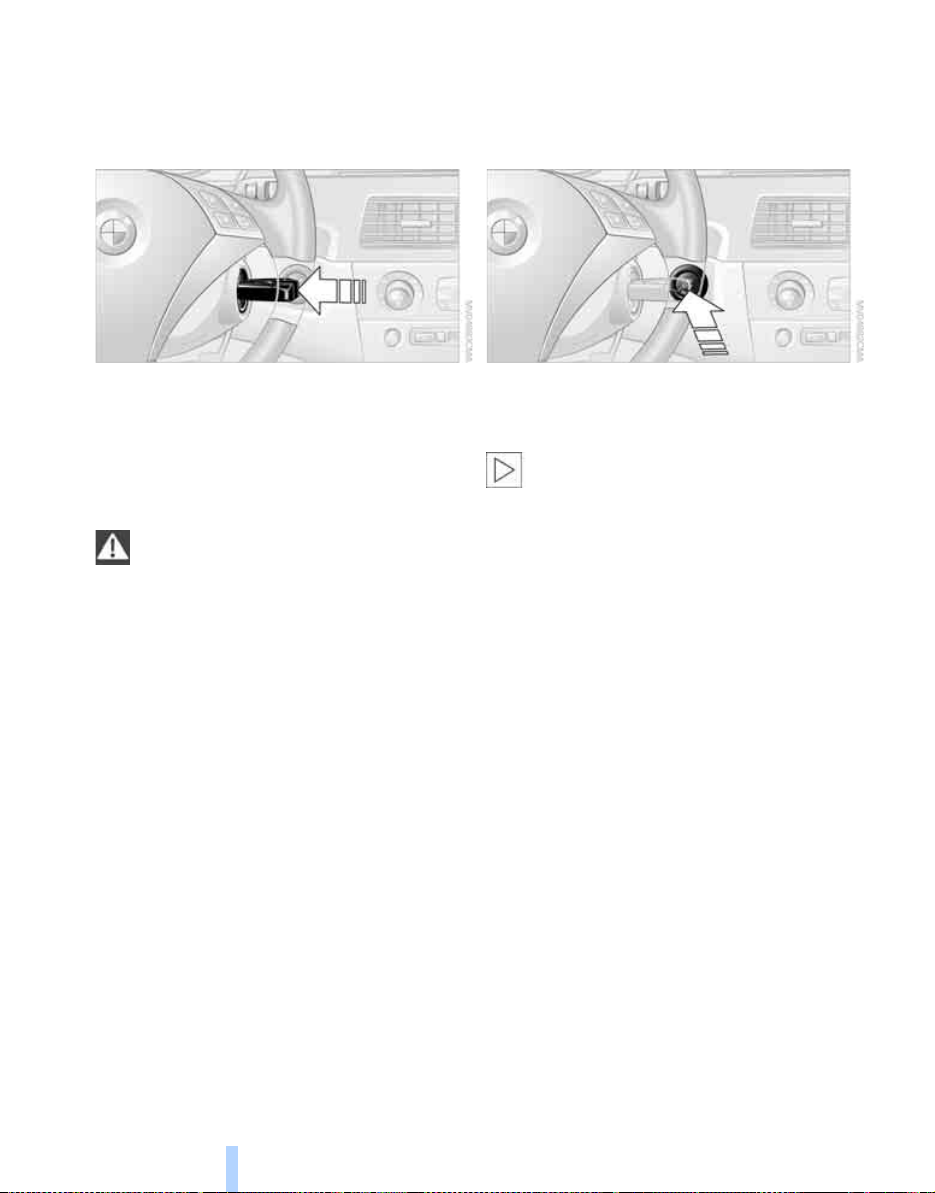
Driving
Online Edition for Part-No. 01 41 0 159 725 © 09/05 BMW AG
Ignition lock
Driving
Insert the remote control fully into the ignition
lock.
> Radio readiness switches on.
Individual electrical consumers can operate.
> The electric steering wheel lock disen-
gages audibly.
Insert the remote control into the ignition
lock before starting off, otherwise the
electric steering wheel lock will not disengage
and you will not be able to steer the car.<
Removing the remote control from the
ignition lock
Press the remote control in briefly; it is ejected a
short way.
At the same time:
> The ignition switches off, if it was on before-
hand.
> The electric steering wheel lock engages
audibly.
Automatic transmission
You cannot take out the remote control unless
the selector lever is in the P position: interlock.
Start/stop button
Each time the start/stop button is pressed
briefly, radio readiness or the ignition are
switched on or off.
Touching the start/stop button while the
brake or clutch is depressed starts the
engine.<
Radio readiness
Individual electrical consumers are ready for
operation. The time and the outside temperature are displayed in the instrument cluster.
Radio readiness is switched off automatically:
> Immediately when the remote control is
removed from the ignition lock
> When you touch the sensitive panel on the
door handle, if the car is fitted with comfort
access
*
, see Locking on page 36
Ignition on
Most of the indicator and warning lamps in
panel 1 of the instrument cluster, see page 11,
light up and remain on for different lengths of
time.
Radio readiness and ignition off
All indicator and warning lamps in the instrument cluster go out.
56
Page 58
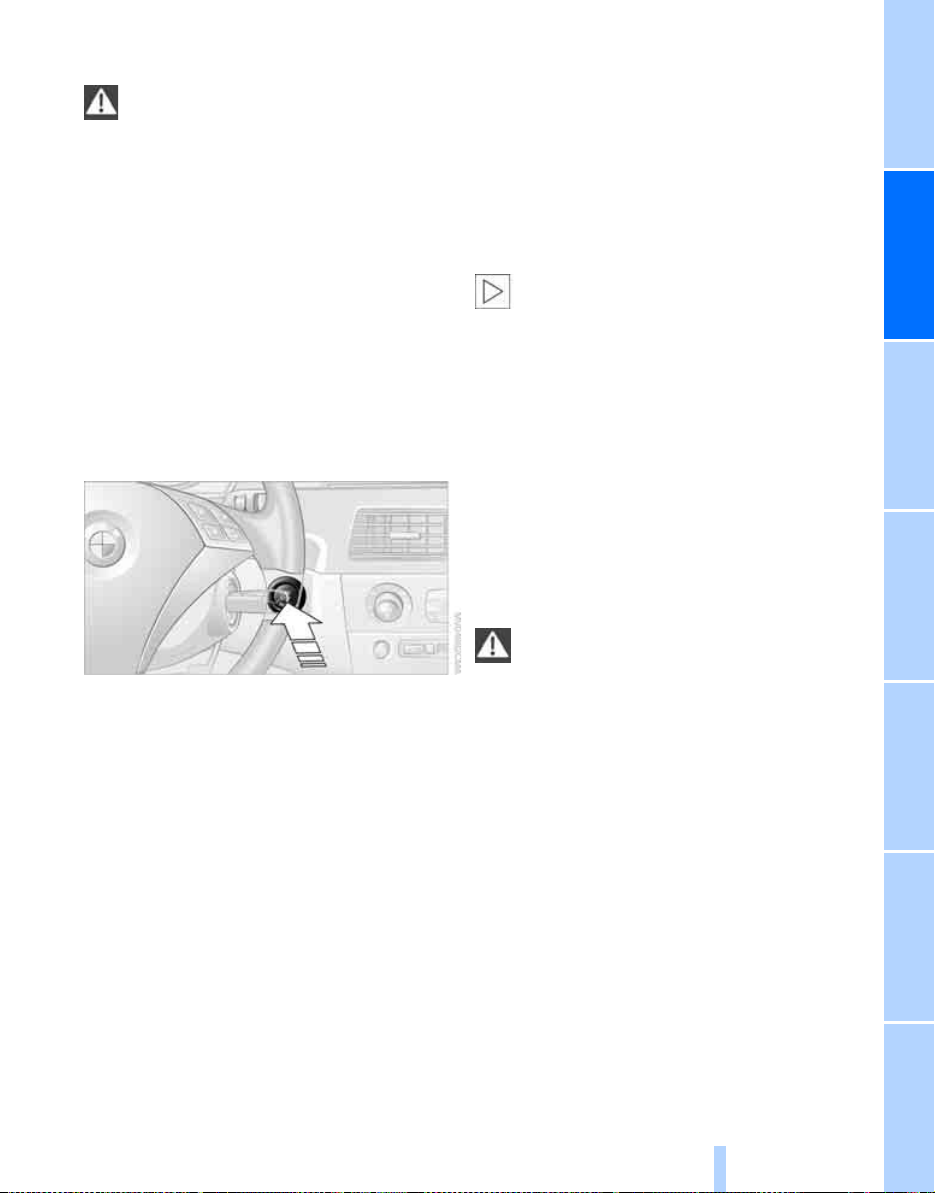
Starting the engine
Online Edition for Part-No. 01 41 0 159 725 © 09/05 BMW AG
Never run the engine in enclosed spaces,
as inhaling the harmful exhaust gas can
lead to loss of consciousness with fatal consequences. The exhaust gas contains carbon
monoxide, which is colourless and odourless,
but highly toxic. Do not leave the car unattended with the engine running, as this constitutes a hazard.
Before leaving the car with the engine running,
select neutral or selector lever position P and
apply the handbrake, otherwise the car could
roll away.<
Do not press the accelerator pedal while starting the engine.
Do not warm up the engine with the car at a
standsti ll; it is preferabl e to set off straig ht away,
driving at moderate engine speeds.
Manual gearbox
1. Apply the handbrake.
2. Depress the clutch and engage neutral
gear.
3. Briefly press the start/stop button.
Starting proceeds automatically for a certain
time, and ceases automatically as soon as the
engine has started.
Automatic transmission with
Steptronic*
1. Depress the brake.
2. Briefly press the start/stop button.
Starting proceeds automatically for a certain
time, and ceases automatically as soon as the
engine has started.
Sequential Manual Gearbox SMG*
1. Depress the brake.
2. Select selector lever position N and make
sure that this position is also displayed on
the instrument cluster.
3. Briefly press the start/stop button.
Starting proceeds automatically for a certain
time, and ceases automatically as soon as the
engine has started.
If the engine does not start, depress the
brake and push the selector lever to the
right; then engage position N. Watch the instrument cluster display.<
Exceptional starting conditions
In the following situations, press the accelerator
pedal halfway down when starting the engine.
> If the engine does not start at the first
attempt, for instance when it is extremely
hot or cold.
> If the engine is started at very low ambient
temperatures of below approx. –156 /57
or at high altitudes of more than about
1,000 m, approx. 3,300 ft, above sea level.
Avoid starting, stopping and restarting
the engine in rapid succession or
repeated attempts to start the engine if it does
not fire, otherwise unburned or only partially
combusted fuel could reach the catalytic converter, which could overheat and be damaged
as a result.<
Diesel engine
When the engine is cold and the temperature is
below approx. 06/327, starting may be
delayed by automatic preheating. The preheating indicator lamp lights up on the instrument
cluster and a message appears on the Check
Control at the same time.
Entertainment OverviewControlsDriving hintsNavigationMobilityReference
57
Page 59
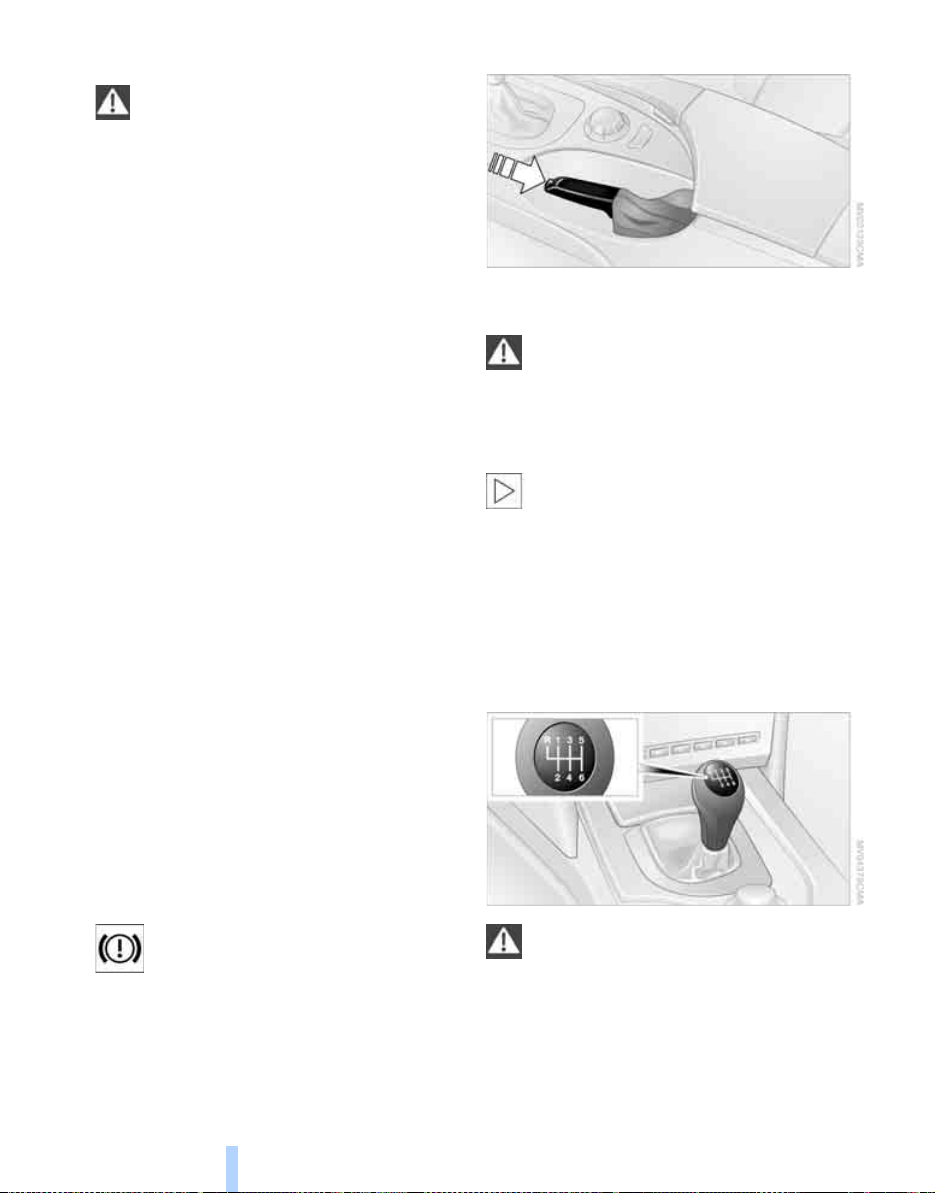
Stopping engine
Online Edition for Part-No. 01 41 0 159 725 © 09/05 BMW AG
Do not remove the remote control from
the ignition lock whilst the car is moving in
order to avoid the steering lock engaging during
steering.
Driving
Always take the remote control with you when
you leave the car. When parking on an incline,
apply the handbrake, otherwise the car could
roll away.<
Releasing
Manual gearbox
1. With the car at a standstill, briefly press the
start/stop button.
2. Engage first gear or reverse.
3. Apply the handbrake.
Sequential Manual Gearbox SMG*
1. Apply the handbrake.
2. Engage a drive position.
3. Briefly press the start/stop button.
If N is engaged when the engine is switched
off, a visual and audible warning will be output to indicate this.
Automatic transmission*
1. With the car at a standstill, move the selec-
tor lever to position P.
2. Briefly press the start/stop button.
Handbrake
The handbrake is primarily intended for preventing a stationary car rolling away, and acts
on the rear wheels.
Raise slightly, press the knob and move the
lever down.
If exceptionally it is necessary to use the
handbrake while on the move, do not
apply it too firmly. Keep the knob on the lever
held in all the time. Too violent an application of
the handbrake could overbrake the rear wheels
and cause the rear of the car to skid.<
To prevent corrosion or an imbalance
between the brakes on the right and left
side, apply the handbrake lightly from time to
time when coasting to a standstill, provided that
it is safe to do so.
The brake lights do not come on when the
handbrake is applied.<
Manual gearbox
Indicator lamp
The indicator lamp lights up; a signal
will also sound when driving off. The
handbrake is applied.
Applying
The lever engages automatically.
58
When shifting in 5th/6th gear, press the
gearshift lever to the right. Otherwise the
engine could be damaged if you inadvertently
shift into 3rd or 4th gear.<
Page 60
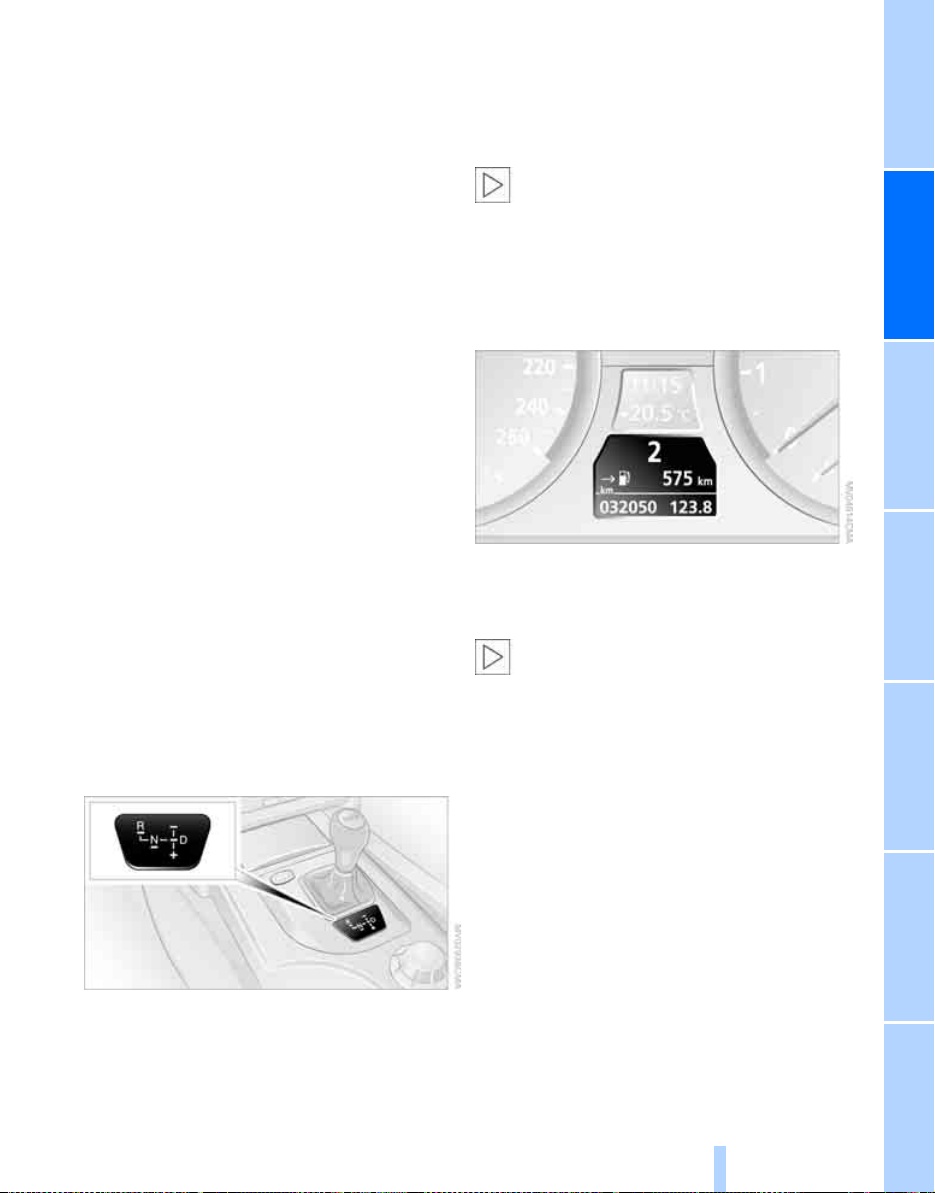
Reverse
Online Edition for Part-No. 01 41 0 159 725 © 09/05 BMW AG
Engage this gear only when the car is standing
still. When the gearshift lever is pressed to the
left, a slight resistance has to be overcome.
The reversing lights come on automatically
when the ignition is switched on.
Sequential Manual Gearbox SMG*
Principle
The Sequential M Gearbox SMG is an automated gearbox on which clutch operation and
gearshifts are performed by an electro-hydraulic system.
You operate SMG via the selector lever in the
centre console and two shift paddles on the
steering wheel.
It offers you the following functions:
> The choice of manual or automated opera-
tion: Sequential mode or Drive mode
> A choice of two driving programs: Normal or
Sport, see Dynamic Driving Control
page 60
> Automatic downshifts and protection
against gearshifting errors, including in the
Sequential mode
> Acceleration assistant, see page 61
Selector lever positions
> One-touch functions for the Sequential
mode:
+: manual upshifting
–: manual downshifting
> D: activate/deactivate Drive mode
N is automatically engaged if the driver's
door is opened while the engine is running and neither the pedals nor the shift paddles or selector lever are being operated.
This is indicated by an acoustic signal and the
flashing N display in the instrument cluster.<
Gear indicator
R N 1 to 6
The current gear is displayed, preceded by a D
in the Drive mode.
Only the information on this display will
tell you whether the required selector
lever position has been engaged.<
Shiftlock
Before moving the lever away from N with the
car stationary, first depress the brake, otherwise the desired gearshift will not be performed.
R Reverse
Engage this gear only when the car is standing
still.
Entertainment OverviewControlsDriving hintsNavigationMobilityReference
You will see the current selector lever position
in the centre console.
> R: reverse
> N: neutral
Sequential mode
Every time the engine is started, the Sequential
mode is active when you press the selector
lever to the right with the brake depressed.
You shift up and down via the shift paddles or
the selector lever, without needing to take your
foot off the accelerator.
59
Page 61
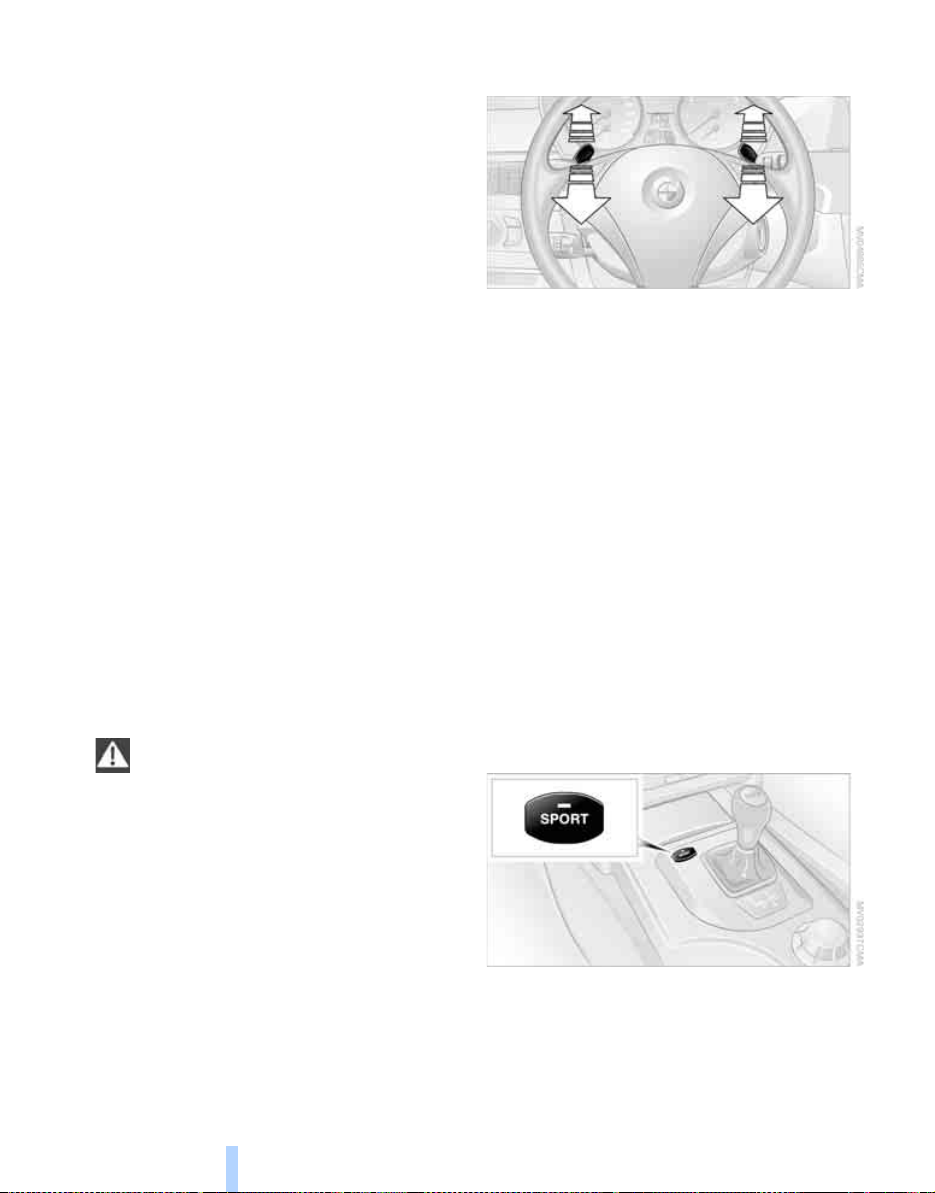
It is also possible to move off in second gear,
Online Edition for Part-No. 01 41 0 159 725 © 09/05 BMW AG
e.g. on slippery roads.
In the following situations, SMG will take control
on your behalf:
> Upshifts and downshifts are performed only
Driving
at a suitable engine or road speed; for
example, the gearbox cannot shift down if
the resulting engine speed would be too
high.
> When you bring the car to a halt, first gear is
selected automatically.
> Shortly before you reach the minimum
speed for the gear that is selected, the gearbox shifts down without any action required
on your part.
D Drive mode
In the Drive mode, all forward gears are
changed automatically.
To change over from the Sequential to the Drive
mode: press the selector lever to the right,
towards D.
Kick-down: to accelerate rapidly, e.g. for overtaking manoeuvres, press the accelerator down
fully. You achieve maximum acceleration.
To change back to the Sequential mode: press
the selector lever to the right again in
direction D or change gear using the shift paddles or the selector lever.
Drive off quickly when moving off on an
uphill gradient. Do not use the accelerator
to prevent the car rolling back down a slope;
apply the handbrake, to avoid causing the gearbox to overheat.<
Via the shift paddles on the steering
wheel
> To shift up, pull one of the shift paddles.
> To shift down, press one of the shift pad-
dles.
Dynamic Driving Control
Dynamic Driving Control allows you to call up an
enhanced sports response from your BMW at
the push of a button:
> The engine responds more spontaneously
to accelerator pedal movements.
> Gear changes are performed more rapidly.
> The engine's speed range is exploited to
the full in the Drive mode.
> 6th gear is not engaged in Drive mode.
> Cruise control
The memorised speed is established more
rapidly when called up.
*
:
Activating the system
Gear changes
Via the selector lever
> To shift up, pull the selector lever back.
> To shift down, push it forwards.
60
Press the SPORT button.
The LED in the button lights up and the SPORT
display appears in the instrument cluster.
Page 62
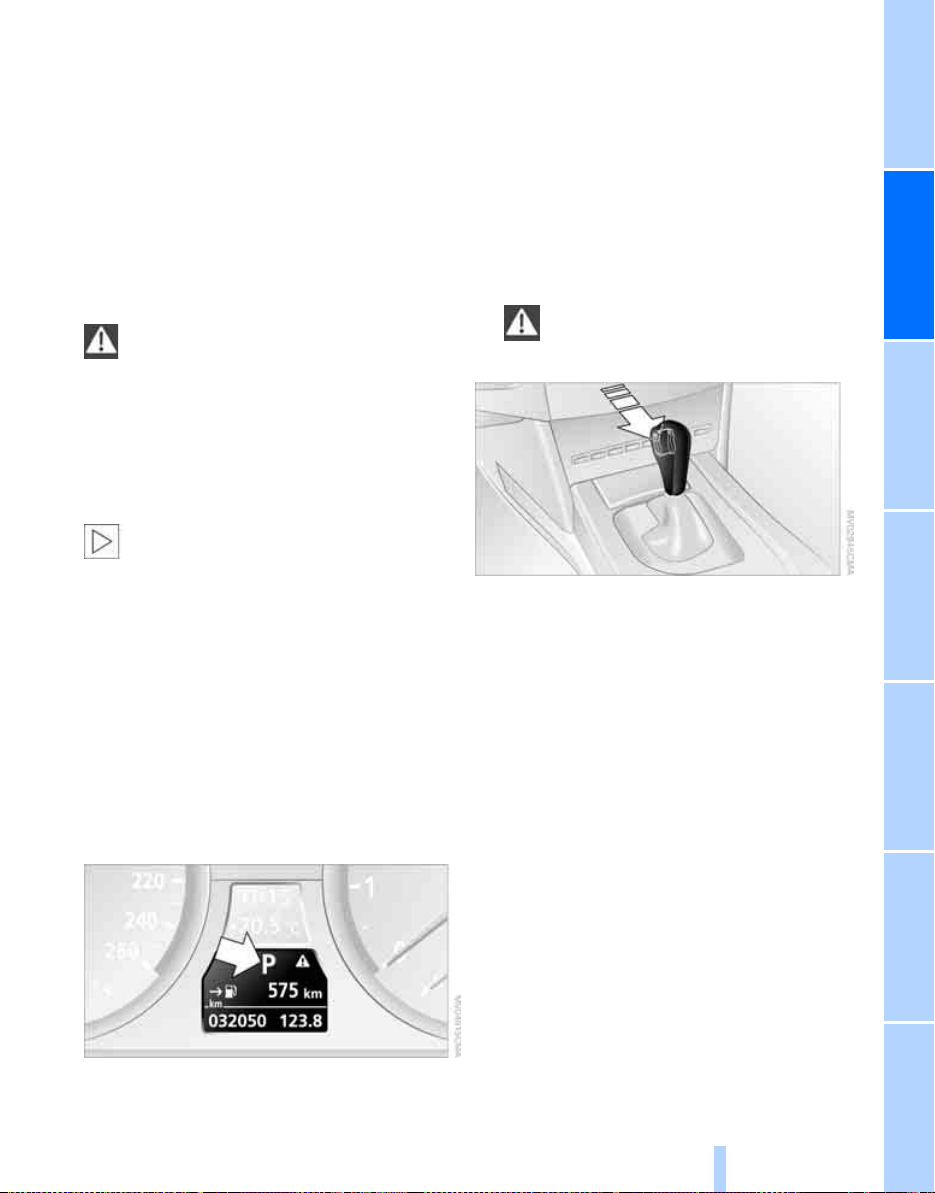
Deactivating the system
Online Edition for Part-No. 01 41 0 159 725 © 09/05 BMW AG
> Press the SPORT button again or
> Engage reverse or
> Switch off the engine.
The LED in the button and the SPORT display
in the instrument cluster go out.
Acceleration assistant
The acceleration assistant permits optimum
acceleration of the car from a standstill to motor
racing standards on high-grip surfaces.
Do not use the acceleration assistant too
frequently, otherwise various compo-
nents could be subjected to premature wear.<
1. Activate Dynamic Driving Control.
2. Deactivate DSC, see page 84.
3. Fully depress the accelerator pedal quickly:
kick-down. The optimum engine speed for
pulling away is established.
You should reactivate DSC subsequently
to maintain vehicle stability.<
Automatic transmission with Steptronic*
In addition to the fully automatic mode, you can
perform manual gearshifts with the Steptronic,
see page 62.
Selector lever positions
P R N D M/S + –
Displays in the instrument cluster
The selector lever position is displayed, or the
current gear in the manual mode.
Moving the selector lever
> Do not move the selector lever away from
position P until the engine is running: interlock.
> Before moving the lever away from P or N
with the car stationary, first depress the
brake, otherwise the selector lever will
refuse to move: shiftlock.
Apply the brake until you are ready to
move off; this will prevent the car
creeping when a gear is selected.<
A lock prevents the selector lever being inadvertently moved to the R or P position. To disengage the lock, press the button on the front of
the selector lever, see arrow.
P Park
Engage this gear only when the car is standing
still. The driven wheels are locked.
R Reverse
Engage this gear only when the car is standing
still.
Entertainment OverviewControlsDriving hintsNavigationMobilityReference
P R N D DS M1 to M6
N Neutral
You can select this in a car wash, for example.
The car will be able to roll.
D Drive, automatic position
Use this position for all normal driving. All forward gears are selected as necessary.
61
Page 63
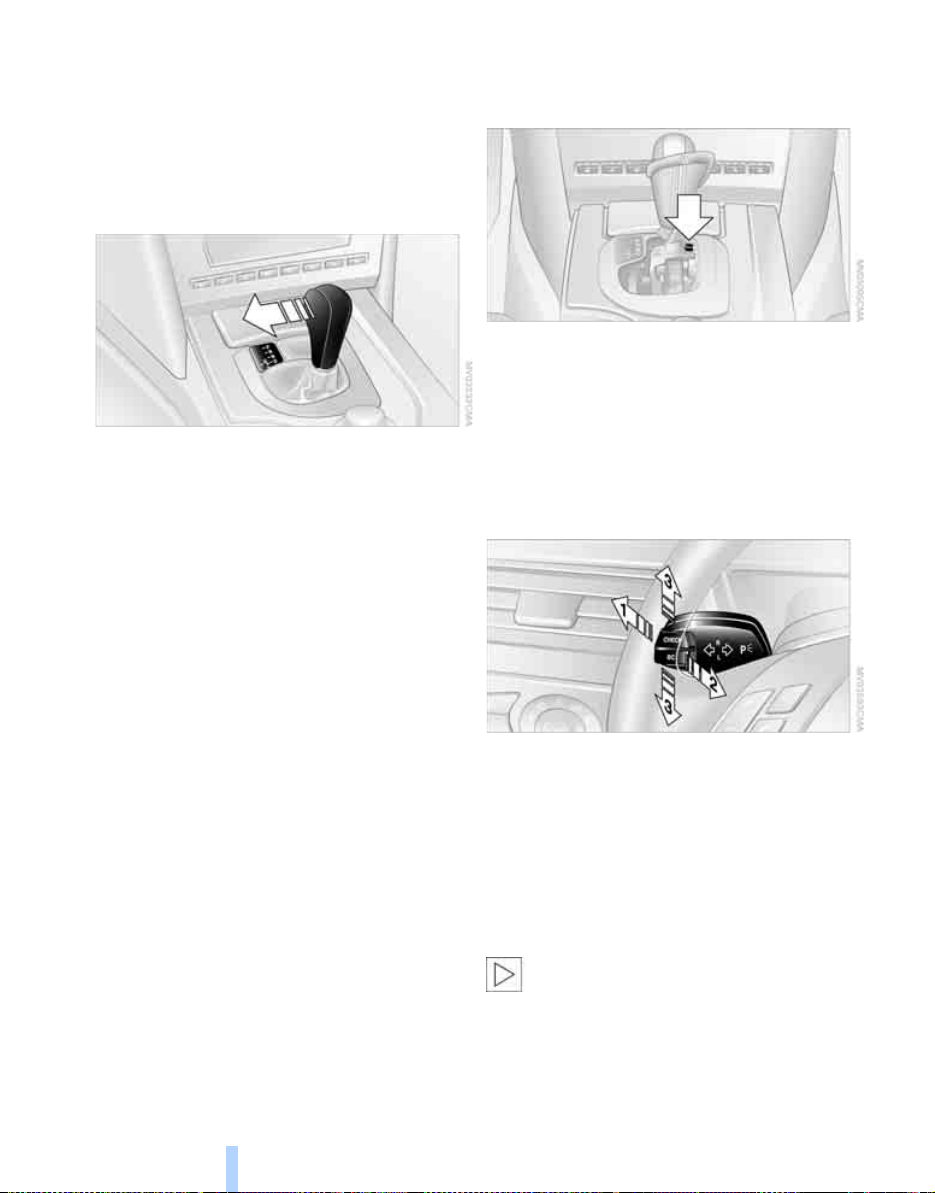
Kick-down
Online Edition for Part-No. 01 41 0 159 725 © 09/05 BMW AG
Kick-down enables you to achieve maximum
performance: press the accelerator pedal down
beyond the regular full-throttle position;
increased resistance will be felt.
Driving
Sport program and M/S manual-shift
mode
Move selector lever to the left from position D,
into the M/S selection gate:
The Sport program is activated and DS appears
in the instrument cluster. This position is recommended for a performance-oriented driving
style.
When you press the selector lever forwards or
back, the manual mode is activated and Steptronic changes gear. The instrument cluster
shows M1 to M6.
Upshifts and downshifts are performed only at a
suitable engine or road speed; for example, the
transmission will not shift down if the resulting
engine speed would be too high. The gear
selected appears briefly in the instrument cluster, followed by the gear actually in use.
To return to the automatic mode, move the
selector lever right into position D.
Overriding selector lever interlock
Should the selector lever be stuck in position P
despite the button on the selector lever being
pressed, the selector-lever lock can be overridden:
1. Unclip the gaiter of the selector lever.
2. Pull the gaiter up over the selector lever
until the gaiter is inside out.
3. Using the screwdriver from the toolkit, see
page 192, press the red section of the lever
while moving the selector lever to the
desired position at the same time.
Flashing turn indicators/ Headlight flasher
1 High-beam headlights
2 Headlight flasher
3 Flashing turn indicators
Indicating a turn
Press the lever beyond the pressure point.
To cancel it manually, press the lever as far as
the pressure point.
If the indicator lamp flashes more rapidly
than usual, a flashing turn indicator bulb
has failed; if towing a trailer, the failed bulb
could be on the trailer.<
62
Page 64
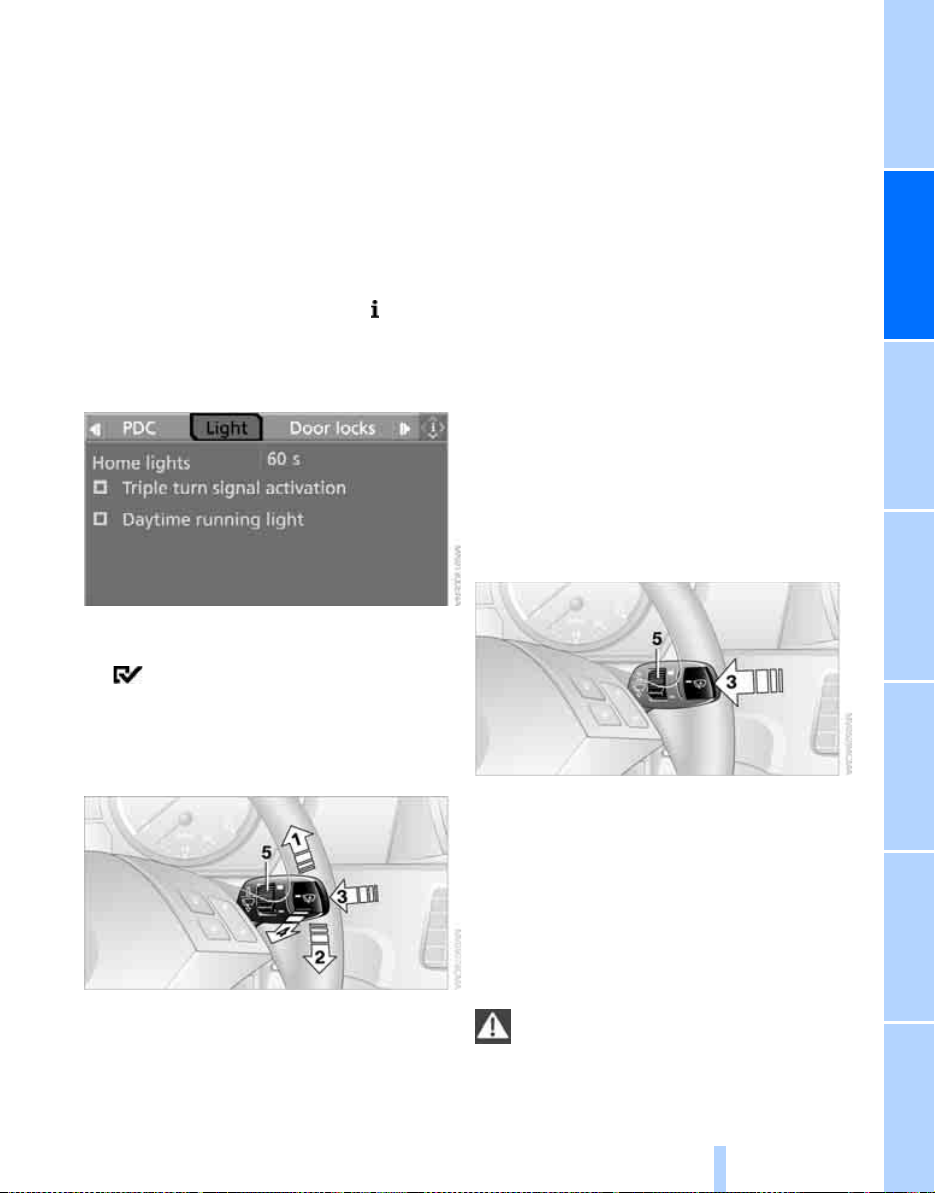
Indicating a turn briefly
Online Edition for Part-No. 01 41 0 159 725 © 09/05 BMW AG
Press and hold the lever as far as the pressure
point for as long as you wish to indicate a turn.
Triple turn signal
Press the lever as far as the pressure point; the
flashing turn indicator flashes three times.
You can activate or deactivate this function.
iDrive concept, see page 14.
1. Call up the start menu.
2. Press the controller to call up the menu.
3. Select "Vehicle settings" and press the
controller.
4. Select "Light" and press the controller.
5. Select "Triple turn signal activation" and
press the controller.
The triple turn signal function is
switched on.
5 Adjusting rain sensor
sensitivity
Switching on wipers
The lever returns to the home position when
released.
Normal wiper speed
Press once.
The wipers switch to intermittent wipe as the
car comes to a halt.
Fast wiper speed
Press twice or press beyond the pressure point.
The wipers switch to normal speed as the car
comes to a halt.
Rain sensor
The speed of the wipers is regulated automatically according to how hard it is raining. The rain
sensor is located on the windscreen, directly in
front of the inside mirror.
Activating the rain sensor
Wiper system
1 Switching on wipers
2 Switching off wipers or flick-wipe
3 Activating/deactivating the rain sensor
4 Cleaning windscreen and headlights
Press the button, arrow 3. The LED in the button comes on.
Adjusting rain sensor sensitivity
Turn the knurled wheel 5.
Deactivating the rain sensor
Press the button again, arrow 3. The LED goes
out.
Deactivate the rain sensor in an automatic
car wash, to prevent the car's wipers
being activated inadvertently and damaged.<
63
Entertainment OverviewControlsDriving hintsNavigationMobilityReference
Page 65
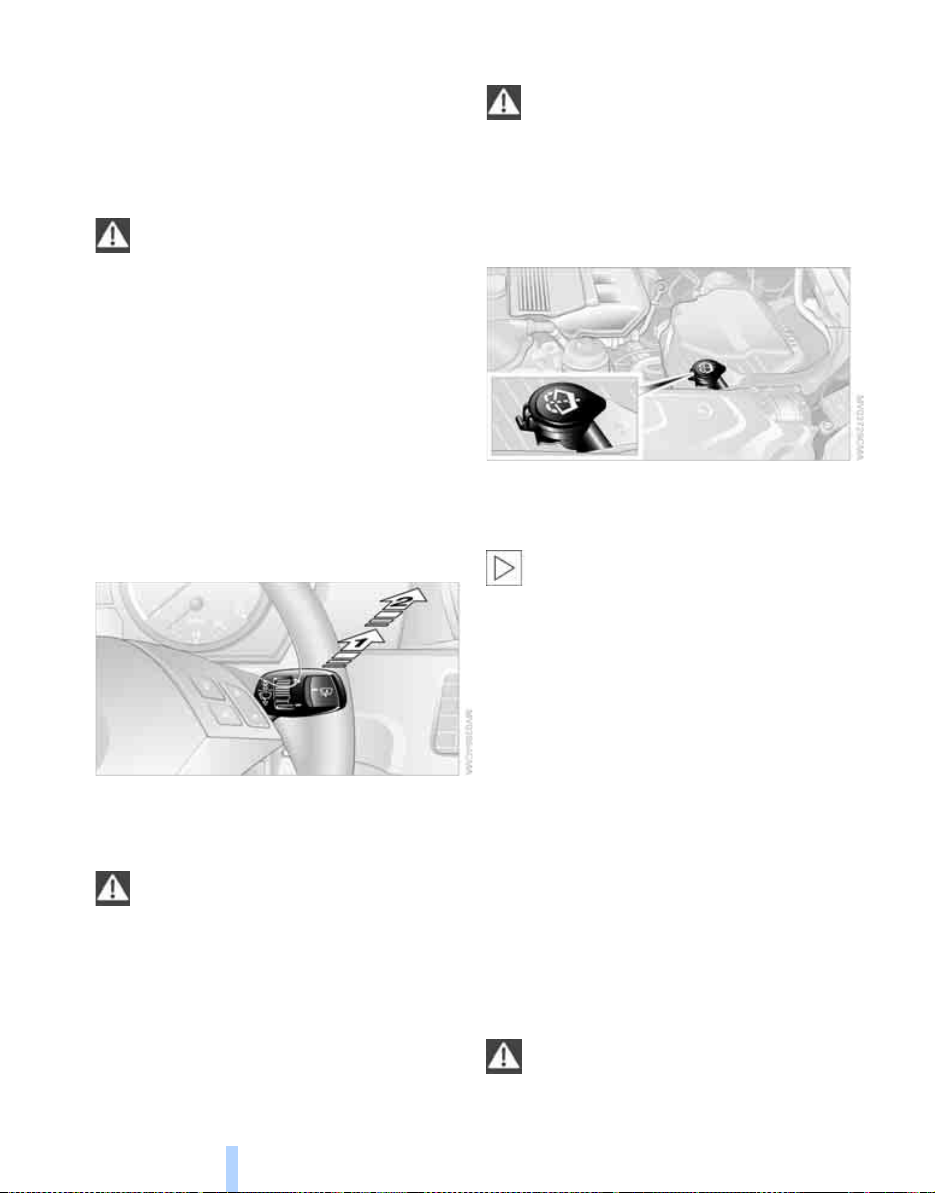
Cleaning windscreen and headlights*
Online Edition for Part-No. 01 41 0 159 725 © 09/05 BMW AG
Fluid from the washer fluid reservoir is sprayed
on to the windscreen and the wipers are operated briefly.
When the car's lights are switched on, the head-
Driving
lights are cleaned simultaneously at practical
intervals.
Only operate the washer systems and
cleaning equipment if you are certain that
the fluid will not freeze to the windscreen and
interfere with the view ahead. Screenwash
should therefore be added to the fluid, see
Washer fluid. Do not run the washer systems if
the washer fluid reservoir is empty, or the
washer pump will be damaged.<
Windscreen washer jets
The windscreen washer jets are heated automatically while the engine is running or the ignition switched on.
Touring:
Rear window wiper
Washer fluid
Screenwash for the washer fluid is highly
flammable. Keep it away from possible
ignition sources and store it only in the carefully
sealed original containers, out of reach of children. Comply with the instructions on the containers.<
Washer fluid reservoir
When filling with water, to which screenwash
has been added if required, always follow the
manufacturer's instructions.
Mix the water and screenwash additive
before filling the washer fluid reservoir, to
make sure the correct concentration is maintained.<
1 Intermittent operation. It operates continu-
ously when reverse gear is engaged
2 Rear window washer
Do not run the washer systems if the
washer fluid reservoir is empty, or the
washer pump will be damaged.<
64
Capacity
Saloon:
Approx. 3 litres, approx. 5 pints, with headlamp
*
cleaning system
9pints.
Touring: approx. 5 litres, approx. 9 pints.
approx. 5 litres, approx.
Cruise control*
Principle
You can activate cruise control once you reach
a speed of approx. 30 km/h or 20 mph. The car
then memorises and maintains the speed that
you specify using the lever on the steering column.
Do not use cruise control if adverse con-
ditions prevent driving at constant speed,
e.g. winding roads, heavy traffic or poor surface
conditions such as snow, rain, ice or loose
Page 66
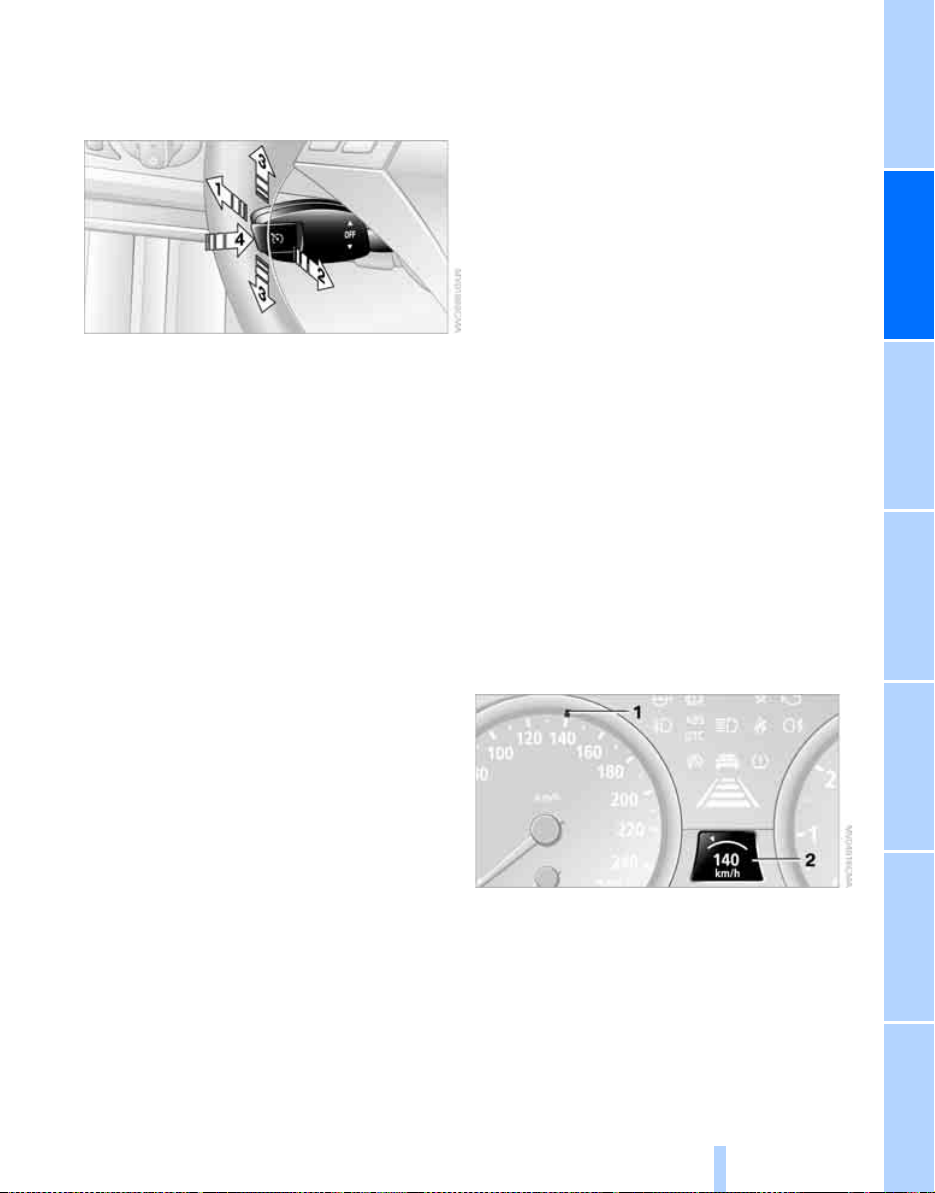
material. Otherwise you could lose control of
Online Edition for Part-No. 01 41 0 159 725 © 09/05 BMW AG
the car and cause an accident as a result.<
One lever for all functions
1 Maintaining and memorising speed, accel-
erating
2 Maintaining and memorising speed, decel-
erating
3 Interrupting cruise control
4 Recalling a speed
Maintaining and memorising speed,
accelerating
Press the lever as far as the pressure point,
arrow 1:
The car's current speed is maintained and
memorised. Display 1 in the speedometer
shows this controlled speed, see further below.
Each time the lever is pressed, the speed
increases by approx. 1 km/h or 1 mph.
Press the lever as far as the pressure point and
hold it there:
The car accelerates without the accelerator
pedal being pressed. As soon as you release
the lever, the speed the car has reached will be
maintained and memorised.
Press the lever beyond the pressure point:
Increase speed by 10 km/h or 5 mph.
If engine braking alone is insufficient on a downhill gradient, the set speed may be exceeded. It
may also prove impossible to maintain speed
with the available engine power on uphill gradients.
Maintaining and memorising speed,
decelerating
Pull the lever, arrow 2:
Functions as 1, except that the car's speed is
reduced instead.
Interrupting cruise control
Press the lever upwards or downwards,
arrow 3.
In addition, you interrupt the cruise control
function automatically:
> When braking
> When you operate the clutch or engage
automatic transmission/SMG position N
> When DSC has cut in
Recalling a speed
Press button 4:
The memorised speed is recalled and maintained.
Deactivating the system
Whenever the ignition is switched off, the system is deactivated and the speed stored in the
memory is deleted.
Displays in the instrument cluster
Entertainment OverviewControlsDriving hintsNavigationMobilityReference
1 Memorised speed
2 Selected speed is displayed briefly
65
Page 67

Active Cruise Control*
Online Edition for Part-No. 01 41 0 159 725 © 09/05 BMW AG
Principle
Active Cruise Control enables you to select a
speed which the car will then maintain automat-
Driving
ically, assuming your progress is not
obstructed.
Subject to reasonable limits, the system automatically adjusts the speed of your car if you
come up behind a slower vehicle. You can vary
the distance to be maintained from the vehicle
in front. For safety reasons, this distance
depends on the speeds in question. To maintain sufficient distance, the system automatically closes down the throttle, applies the
brakes if necessary, and speeds up again if the
vehicle in front accelerates. As soon as the road
ahead becomes clear, it accelerates to your
desired speed again. The desired speed is also
maintained on downhill gradients.
Read and carefully comply with the information
on the system's limits starting on page 69 so
that you can understand the system's range of
applications and use the system appropriately.
Professional navigation system*
If there is a navigation DVD in the drive, see
page 132, the system will adapt the way the car
is accelerated and slowed down to the road you
are currently driving along.
If the car's position is not known, e.g. because
you have left the area covered by the map, the
navigation system will cease to have an influence.
Braking sensation
The system 's automatic brake o peration results
in a braking sensation that is slightly different
from what you feel when you brake the car yourself in a similar situation. Unaccustomed noises
when the car is braked automatically are normal.
Manual gearbox
You can shift gears while cruise control is activated. A shift notice is issued or the system is
deactivated when you drive for an extended
period at very high or very low engine speeds.
SMG
In the Sequential mode, an instruction to shift
gear is issued or the system is deactivated if
you drive for an extended period at very high or
very low engine speeds.
In the Drive mode, the SMG behaves in a similar
way to an automatic transmission in position D.
When to use it
The optimum road speed range on main roads
and motorways in good condition is approx.
80 to 140 km/h, approx. 50 to 85 mph. Make
sure that you observe the relevant maximum
legal speed limit.
Ideally, minimum speeds should not undershoot 30 km/h or 20 mph and maximum speeds
not exceed 180 km/h or 110 mph.
Active Cruise Control does not release
you from your personal responsibility to
drive safely.
Consider road-surface, weather and visibility
conditions to decide whether and how the system should be used.
Use the system only when traffic is flowing
smoothly and not on roads with loose surfaces
or sharp bends, nor when there is road ice, fog,
snow or heavy rain.
Check the speed you are driving at as well as
your stopping distance, and remain in a position
to apply the brakes at all times. Otherwise operating conditions which violate the law or constitute an accident risk could result.<
66
Page 68
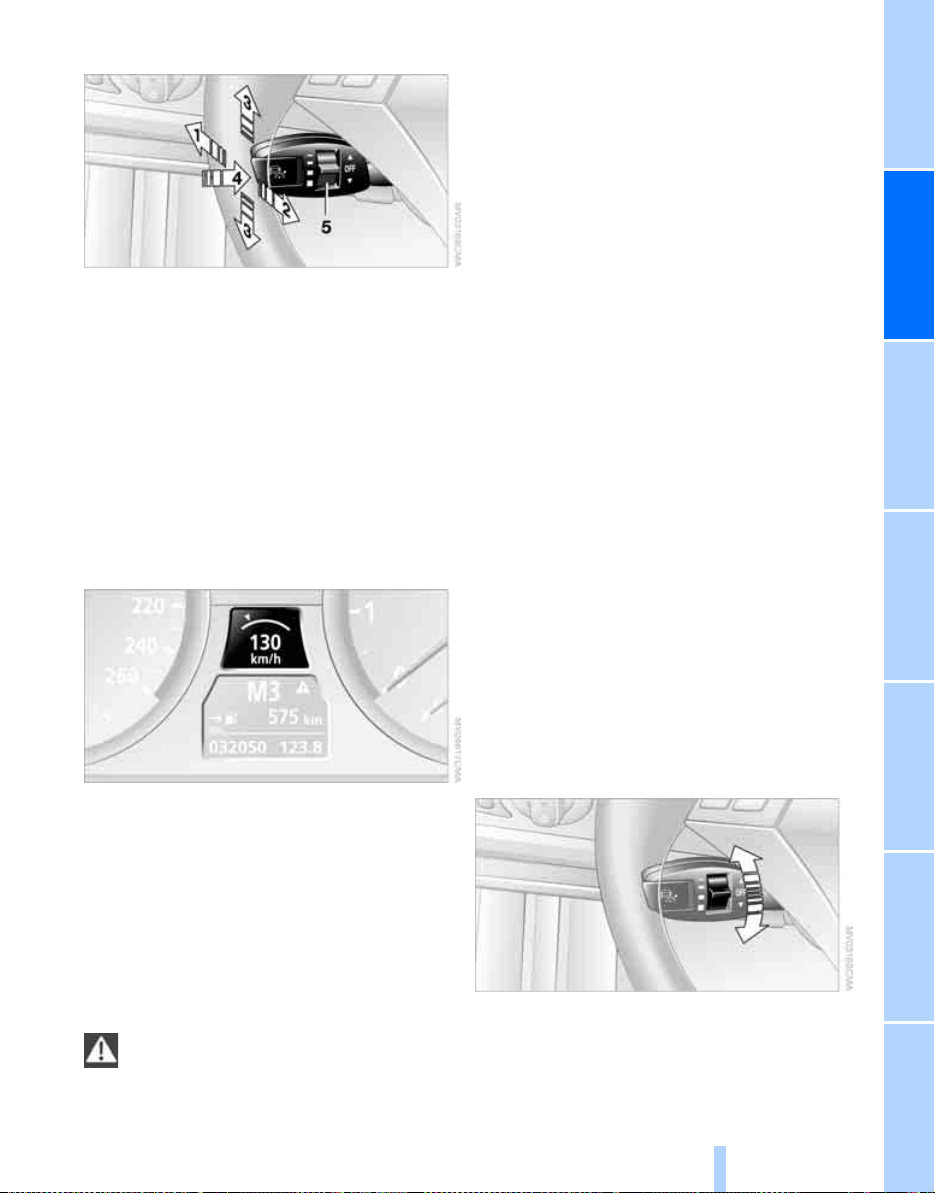
One lever for all functions
Online Edition for Part-No. 01 41 0 159 725 © 09/05 BMW AG
1 Memorising and increasing the desired
speed
2 Memorising and reducing the desired
speed
3 Deactivating the system, see page 68
4 Calling up memorised speed and distance,
see page 68
5 Selecting distance from vehicle in front, see
page 67
Maintaining current speed
Tap the lever, arrow 1, or pull briefly, arrow 2.
differences in speed in relation to vehicles travelling in front, e.g. if you get too close to a lorry
or if another vehicle swerves into your lane.<
Stepwise increase
Briefly press the lever repeatedly up to or
beyond the pressure point, arrow 1, until the
desired speed appears on the display.
> Every time you press the lever as far as the
pressure point, the desired speed increases
by approx. 1 km/h or 1 mph.
> Every time you press the lever beyond the
pressure point, the desired speed increases
to the next value of ten on the km/h or mph
speedo display.
The speed that is then shown is memorised and
will be achieved on a clear road.
Stepless increase
Briefly press the lever repeatedly up to or
beyond the pressure point, arrow 1, until the
desired speed is reached.
The speed that is then shown is memorised and
will be achieved on a clear road.
The car's current speed is memorised and
maintained. It is displayed on the speedometer
and appears briefly on the instrument cluster.
The controlled speed may be undershot when
driving uphill if there is insufficient engine
power. If the engine braking effect is insufficient
on steep slopes, the system will apply the
brakes lightly.
Setting the desired speed
Adapt your desired speed to the traffic
conditions and remain ready to apply the
br ak es at a ll time s, or th er e is a ri sk of ac ciden ts .
The system is not able to compensate marked
Decreasing
Pull the lever repeatedly, arrow 2, until the
desired speed appears on the display.
Functions analogous to stepwise/stepless
increase, except that the speed is decreased.
Selecting distance
Entertainment OverviewControlsDriving hintsNavigationMobilityReference
> Knurled wheel turned downwards:
To increase the distance.
> Knurled wheel turned upwards:
To reduce the distance.
67
Page 69
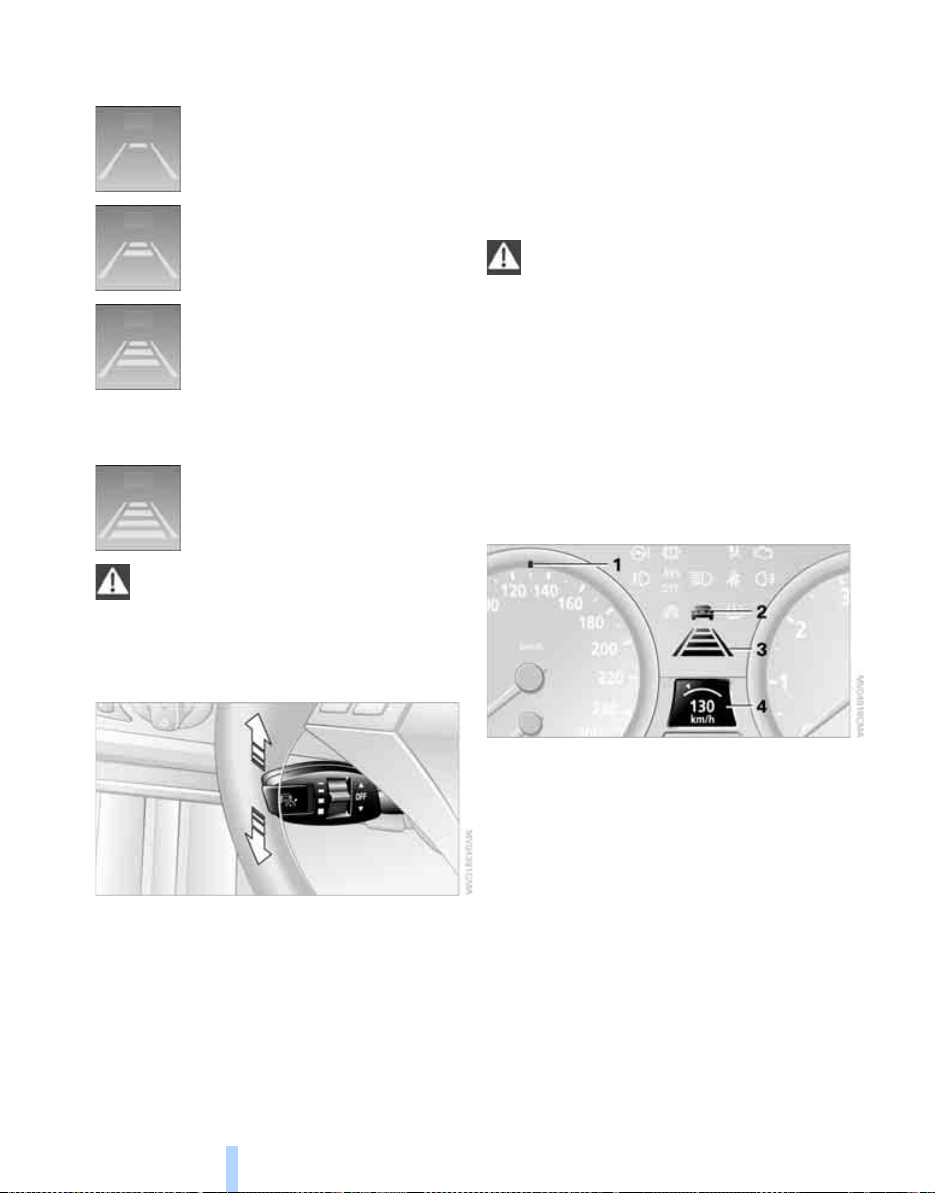
The selected distance is displayed in the instru-
Online Edition for Part-No. 01 41 0 159 725 © 09/05 BMW AG
ment cluster.
Distance 1
Driving
Distance 2
Distance 3
When you switch on the system
for the first time after starting the
engine, this distance is preset.
This corresponds to approx. half
the numerical value on the km/h or
mph speedo display.
Distance 4
Adapt the distance chosen from the vehicle in front to the traffic and weather con-
ditions, otherwise you may risk committing a
traffic offence or causing an accident.<
> When DSC is intervening or deactivated
> When the system does not detect any
objects for a lengthy period of time, e.g. on
infrequently driven roads without defined
boundaries or due to a dirty wheel sensor,
see page 69
> When your road speed is less than 30 km/h
or 20 mph due to a traffic situation
When the system is deactivated, you
must brake the car yourself and/or
manoeuvre as necessary, otherwise there is a
risk of an accident.<
Recalling the memorised desired
speed and distance level
Press button 4.
The displays appear in the instrument cluster.
The memorised speed is deleted when the ignition is switched off.
Displays in the instrument cluster
Deactivating the system
Press the lever up or down. The displays in the
instrument cluster go out.
The system is also deactivated whenever you
brake, shift gears very slowly, place the transmission in idle or move the gear selector lever to
position N. In addition, the system is automatically deactivated:
> When DTC is activated
68
1 Memorised desired speed
2 Lights up yellow: vehicle detected ahead
Flashes red, a signal sounds: system cannot maintain distance; driver must brake the
car
Flashes yellow: driving stability control systems are intervening; cruise control is deactivated
3 Selected distance to vehicle ahead
The display lights up as soon as the system
is activated
4 Memorised desired speed is displayed
briefly
Page 70
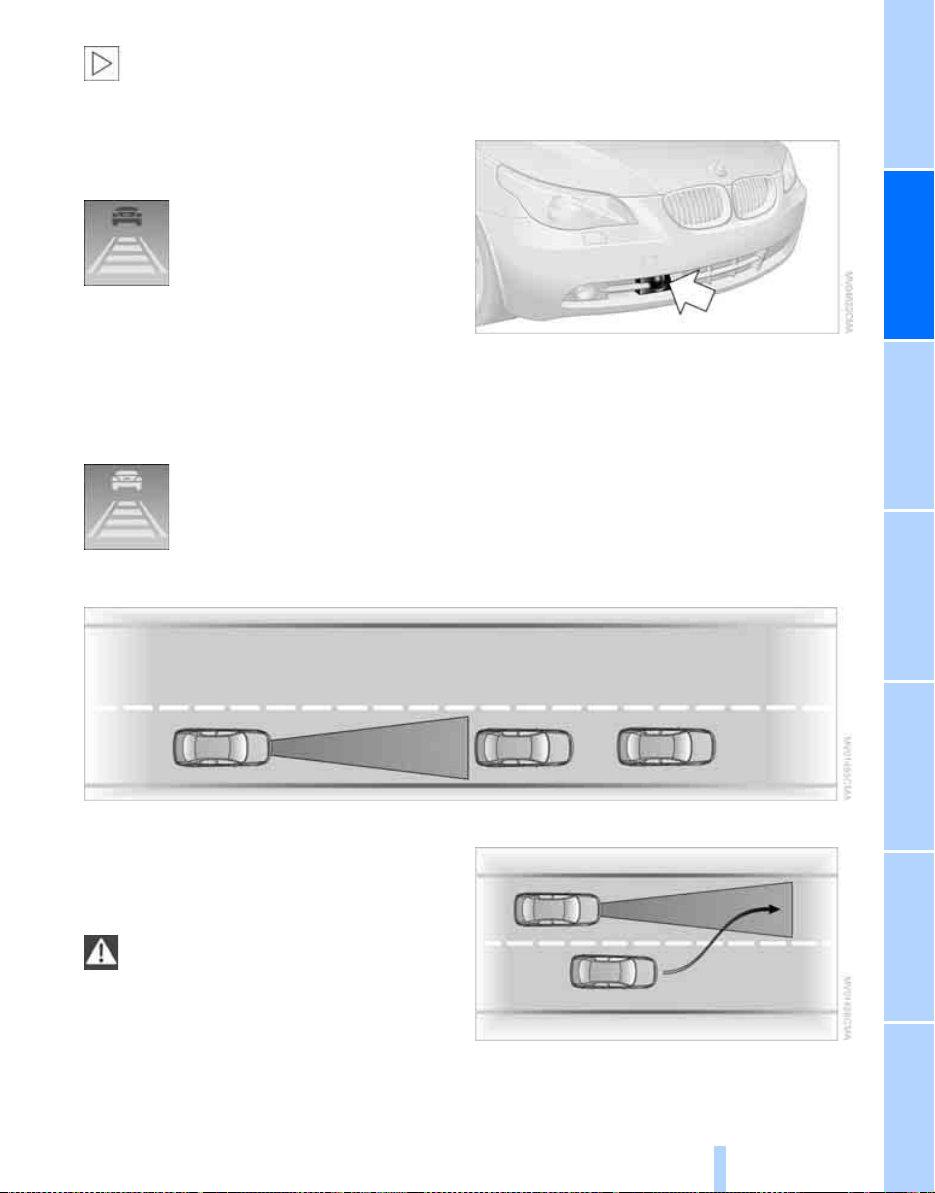
If --- km/h or --- mph appears briefly on
Online Edition for Part-No. 01 41 0 159 725 © 09/05 BMW AG
the instrument cluster, the system may
not be ready for operation. Calling up Check
Control messages, see page 76.<
Warning lamps
The display 2 flashes red, a signal
sounds.
The system instructs you to intervene by braking and, if necessary,
taking evasive action. Active
Cruise Control is unable to restore the distance
between your car and the vehicle in front automatically.
However, this display does not relieve you of
the responsibility to adapt the desired speed
and driving style to the traffic conditions.
Display 2 flashes yellow.
The prerequisites for operating
Active Cruise Control are not met,
e.g. as a result of ABS or DSC
System limits
interventions. The system intervenes by braking until you actively take over.
Radar sensor
Heavy rain, dirt, snow and ice may impair the
system's ability to detect preceding vehicles. If
necessary, clean the radar sensor at the front of
the car, beneath the bumper. Take particular
care when removing snow and ice.
If the sensor is not correctly aligned, Active
Cruise Control cannot be activated.
The range of the wheel sensor and the system's
capacity for braking the car automatically are
limited. It is possible, for example, that twowheelers in front of you will be detected later
than cars.
The system will not brake the car if you
approach a stationary obstruction on your
side of the road, e.g. a vehicle standing at red
traffic lights or the end of a tailback. You will
need to intervene to avoid the risk of an accident.<
The system does not respond to oncoming
vehicles.
Vehicles pulling out
If a vehicle pulls out in front of you, e.g. after
overtaking, the system will not identify the vehi-
69
Entertainment OverviewControlsDriving hintsNavigationMobilityReference
Page 71
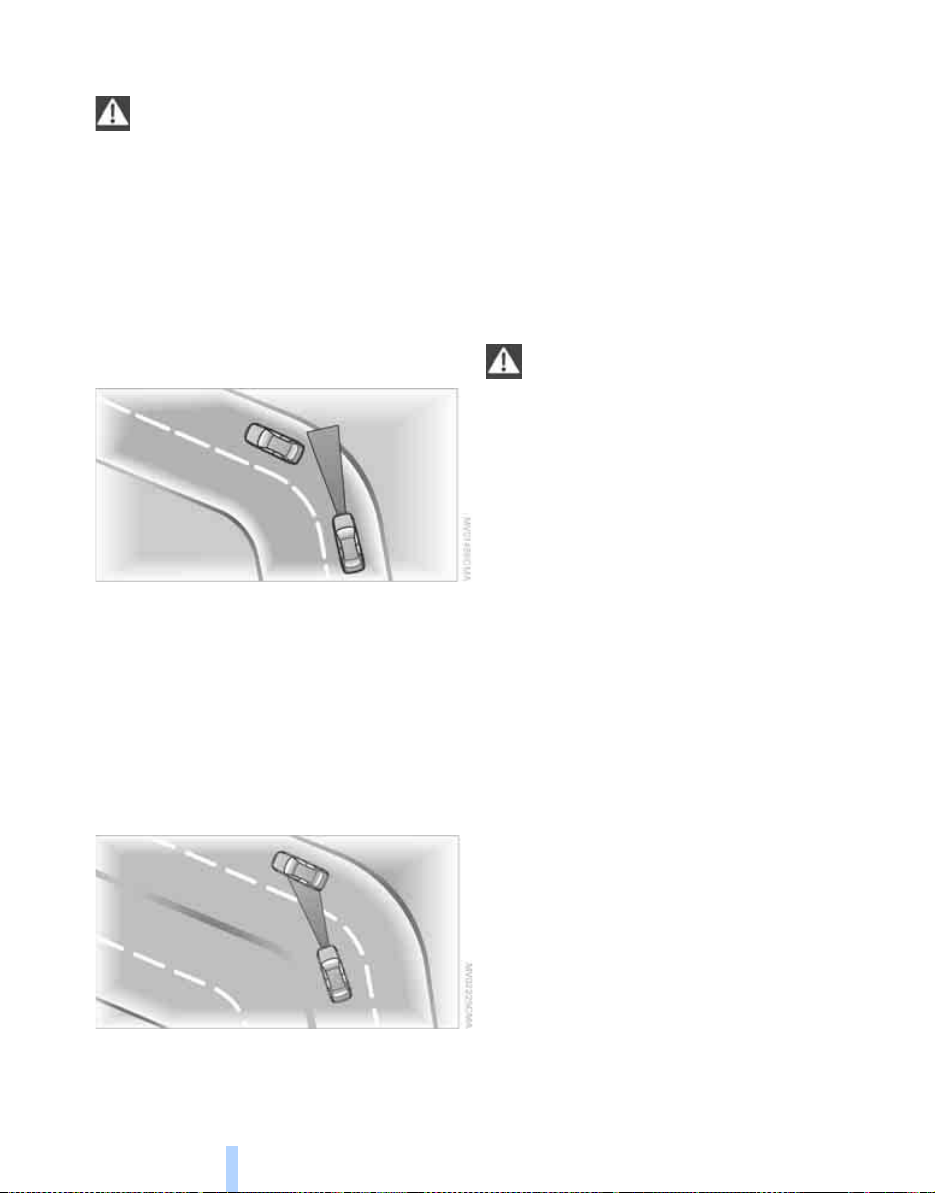
cle until it has moved entirely into the same lane
Online Edition for Part-No. 01 41 0 159 725 © 09/05 BMW AG
as your car.
If a vehicle ahead suddenly swerves into
your lane, the system may not always be
able to maintain the selected distance automat-
Driving
ically. The same applies to high differences
between your speed and that of preceding vehicles, e.g. when rapidly approaching a truck.
Once the system has established that a vehicle
is indeed in front of you, it will indicate that you
must brake and/or manoeuvre the car yourself.
You will need to intervene to avoid the risk of an
accident.<
Bends in the road
If the desired speed selected is excessive for a
bend, the system will reduce the speed while
the car is taking the bend. However, it is unable
to anticipate how sharp a bend in the road is.
You should therefore select an appropriate
speed before entering a bend.
Due to the wheel sensor's restricted range, the
situation may arise where a preceding vehicle
may not be detected on a bend in the road, or
detected very late.
decelerates in such a situation, the accelerator
can be used briefly to counteract this effect.
When the accelerator is released again, the system will resume control of the car's speed.
Your responsibility
Your actions have priority at all times. When you
press the accelerator pedal while driving with
Active Cruise Control, the automatic braking
function will be temporarily interrupted. When
the accelerator is released, the desired speed is
re-established or the selected distance from
the vehicle in front taken into account.
Do not leave your foot on the accelerator
pedal, and make sure that no objects
such as floor mats are resting on the accelerator
pedal, otherwise the system will not be able to
brake the car.<
When your car is approaching a bend, in view of
its curvature the system may respond temporarily to vehicles in the other lane. If your car
70
Page 72
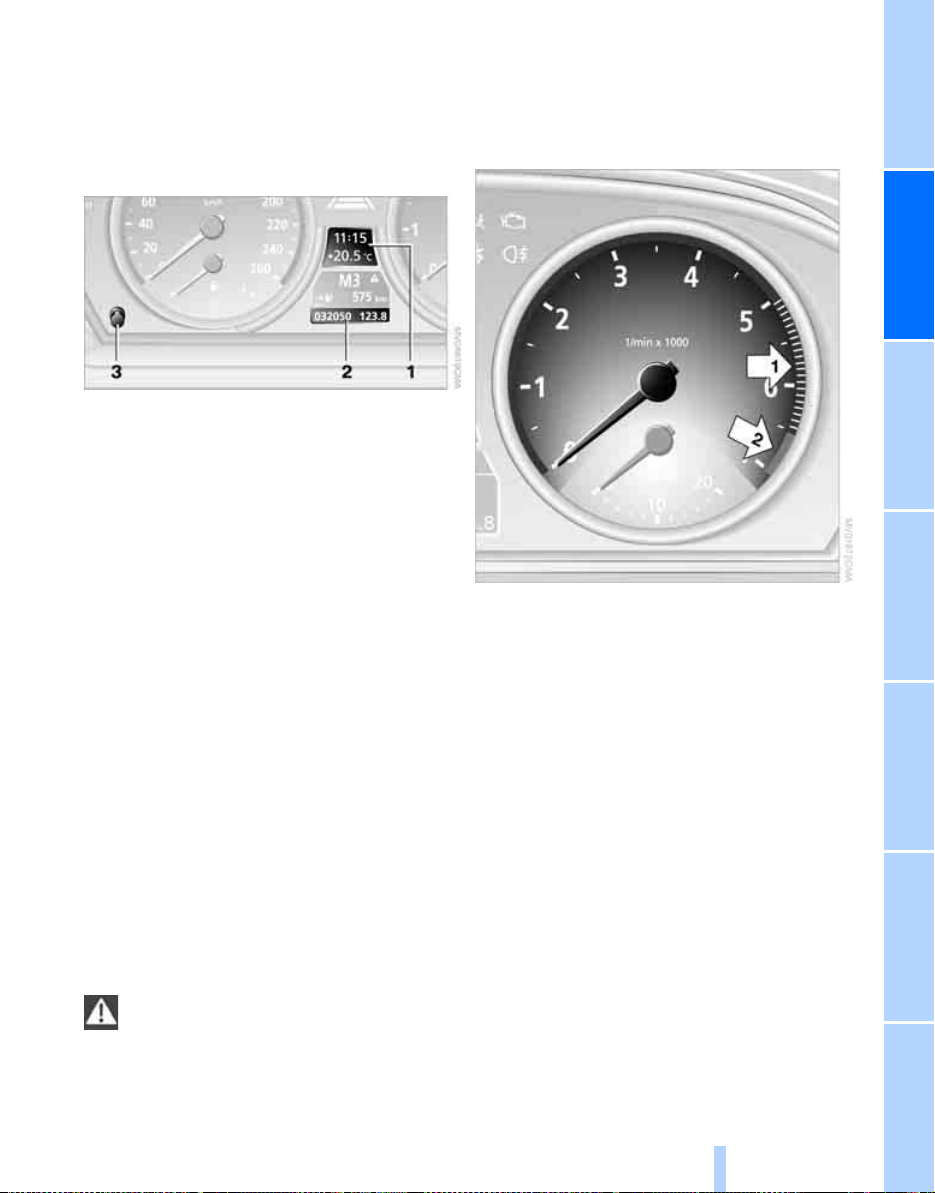
Everything under control
Online Edition for Part-No. 01 41 0 159 725 © 09/05 BMW AG
Odometer, outside temperature display, clock
1 Time, outside temperature and date
2 Distance recorder – odometer – and trip dis-
tance recorder
3 Press the knob:
> Reset trip distance recorder with the
ignition switched on
> With the ignition switched off, displaying
time, outside temperature display and
distance recorder for a short time
The outside temperature and time of day are
displayed following radio readiness.
To call up the date:
Press the CHECK button on the flashing turn
indicator lever, see page 77.
Setting the time and date, see page 79.
You can alter the unit of measurement 6 or 7
on the control display, see Units of measurement on page 81.
Outside temperature warning
Once the display shows a temperature of below
+36/377, a signal sounds and a warning
lamp comes on. There is an increased risk of
ice.
Ice can still form even at temperatures
above +36/377. You should therefore
drive carefully over bridges and shaded roads;
otherwise there is an increased risk of accident.<
Revolution counter
The white striped advance warning zone,
arrow 1, changes depending on the engine
temperature. As the engine temperature
increases, the advance warning zone reduces in
size accordingly. Avoid engine speeds in the
advance warning zone if possible.
You must avoid engine speeds in the red warning zone, arrow 2. In this zone the fuel supply is
interrupted to protect the engine.
Entertainment OverviewControlsDriving hintsNavigationMobilityReference
Coolant temperature
Should the coolant and therefore the engine
become too hot, a warning lamp will come on. In
addition, a message will appear on the control
display.
Checking coolant level, see page 188.
71
Page 73
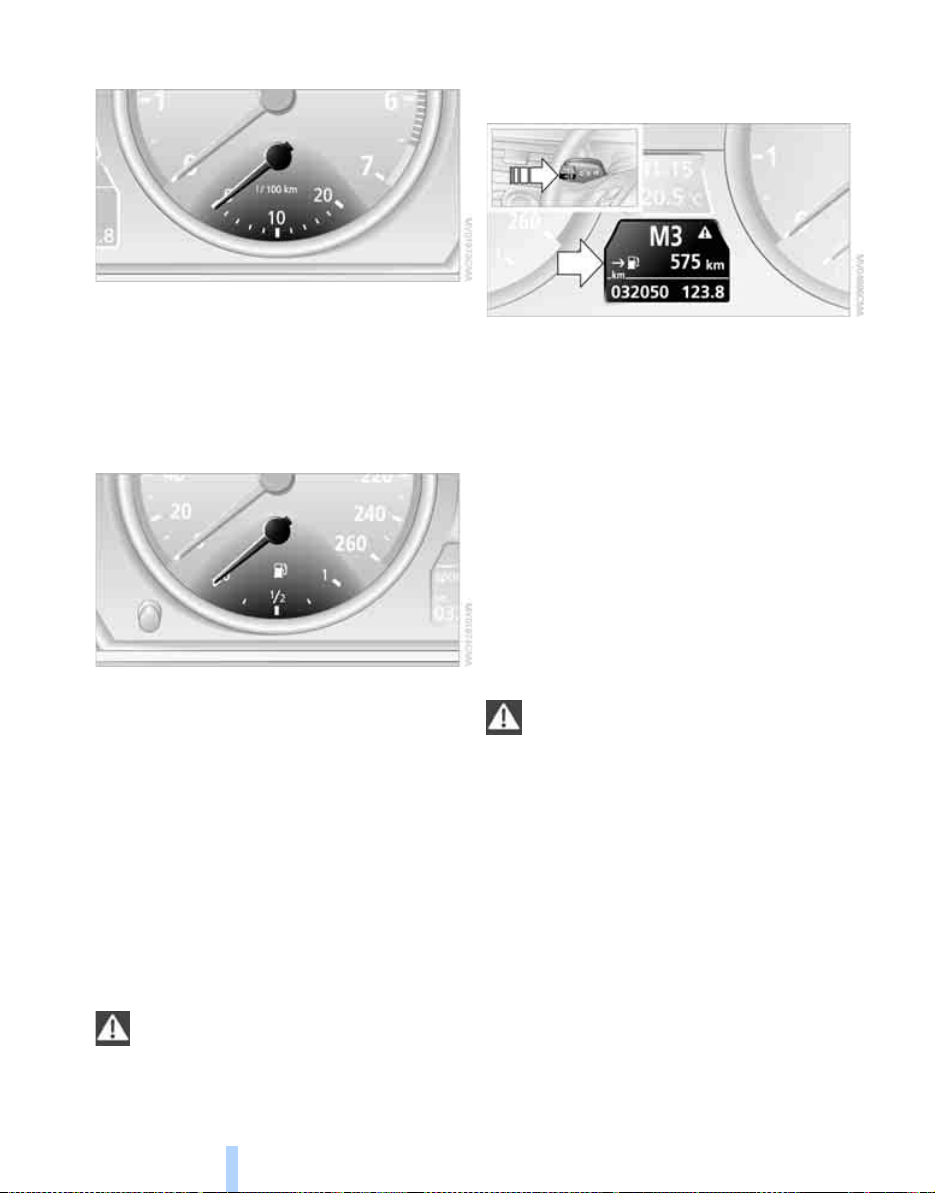
Energy control
Online Edition for Part-No. 01 41 0 159 725 © 09/05 BMW AG
Shows the momentary fuel consumption. This
enables you to check how economical and environmentally friendly your current driving style
is.
Fuel gauge
Everything under control
Fuel tank capacity: approx. 70 litres, approx.
15.4 gal. Notes on refuelling, see page 180.
If the car is at an angle for some time, for example on a long mountain road, the value in the display may fluctuate to some extent.
Reserve
Once the fuel level has fallen to the reserve
zone, a message appears on the control display
for a short time and the remaining operating
range is displayed on the computer. If the
remaining range is less than approx. 50 km,
approx. 30 miles, the message is displayed permanently on the control display.
If the range is below 50 km, approx.
30 miles, refuel the car, otherwise the
engine's functions are not assured and damage
may occur.<
Computer
Displays in the instrument cluster
To access the information, press the BC button
on the flashing turn indicator lever following
radio readiness.
The following items of information are displayed in the order listed:
> Range
> Average speed
> Average fuel consumption
Range
This display indicates how far the car can probably be driven on the fuel remaining in the tank.
The distance is calculated on the basis of the
way the car has been driven over the past
30 km, approx. 20 miles.
If the range is below 50 km, approx.
30 miles, refuel the car, otherwise the
engine's functions are not assured and damage
may occur.<
Average speed
The calculation of average speed ignores any
stationary periods where the engine was
switched off.
To reset the average speed: press the BC button on the flashing turn indicator lever for
approx. 2 seconds.
72
Page 74
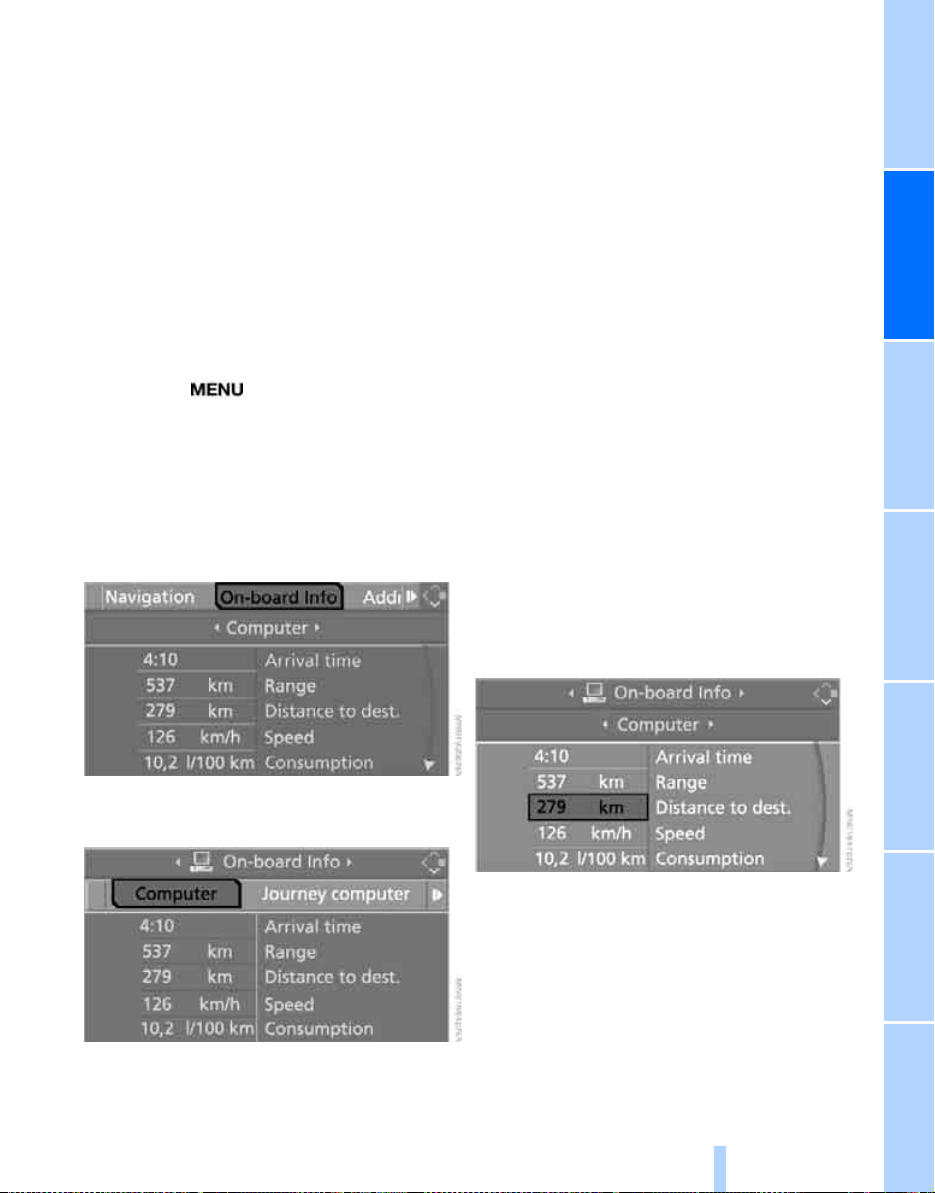
Average fuel consumption
Online Edition for Part-No. 01 41 0 159 725 © 09/05 BMW AG
The average fuel consumption is calculated for
the period since the engine was last started.
You can have the average fuel consumption for
two different distances displayed on the control
display, see Displays on the control display or
Journey computer* further below.
To reset the average consumption: press the
BC button on the flashing turn indicator lever for
approx. 2 seconds.
Displays on the control display
You can also call up the computer via iDrive,
principle see page 14.
1. Press the button.
The start menu is called up.
2. Move the controller to the right to call up
"Navigation".
On cars without navigation system
Call up "OBC".
3. Select "On-board Info" and press the con-
troller.
*
:
> Estimated arrival time:
> Enter a distance manually in the compu-
ter, see further below.
> Enter a destination in the navigation sys-
tem
*
, see page 134.
> Range
> Distance from destination:
> Enter a distance manually in the compu-
ter, see further below.
> Enter a destination in the navigation sys-
tem
*
, see page 134.
> Average speed
> Average fuel consumption
Resetting values
You can reset the values for average speed and
average consumption:
1. Select the respective menu item and press
the controller.
2. Press the controller again to confirm your
selection.
Entering distance manually
1. Select "Distance to dest." and press the
controller.
4. Select "Computer" and press the control-
ler.
2. Turn the controller to set the distance to the
destination. You may need to overcome a
slight resistance if you wish to enter a relatively high difference.
3. Press the controller to adopt the setting.
The distance is automatically preset during
route guidance by the navigation system
73
*
.
Entertainment OverviewControlsDriving hintsNavigationMobilityReference
Page 75
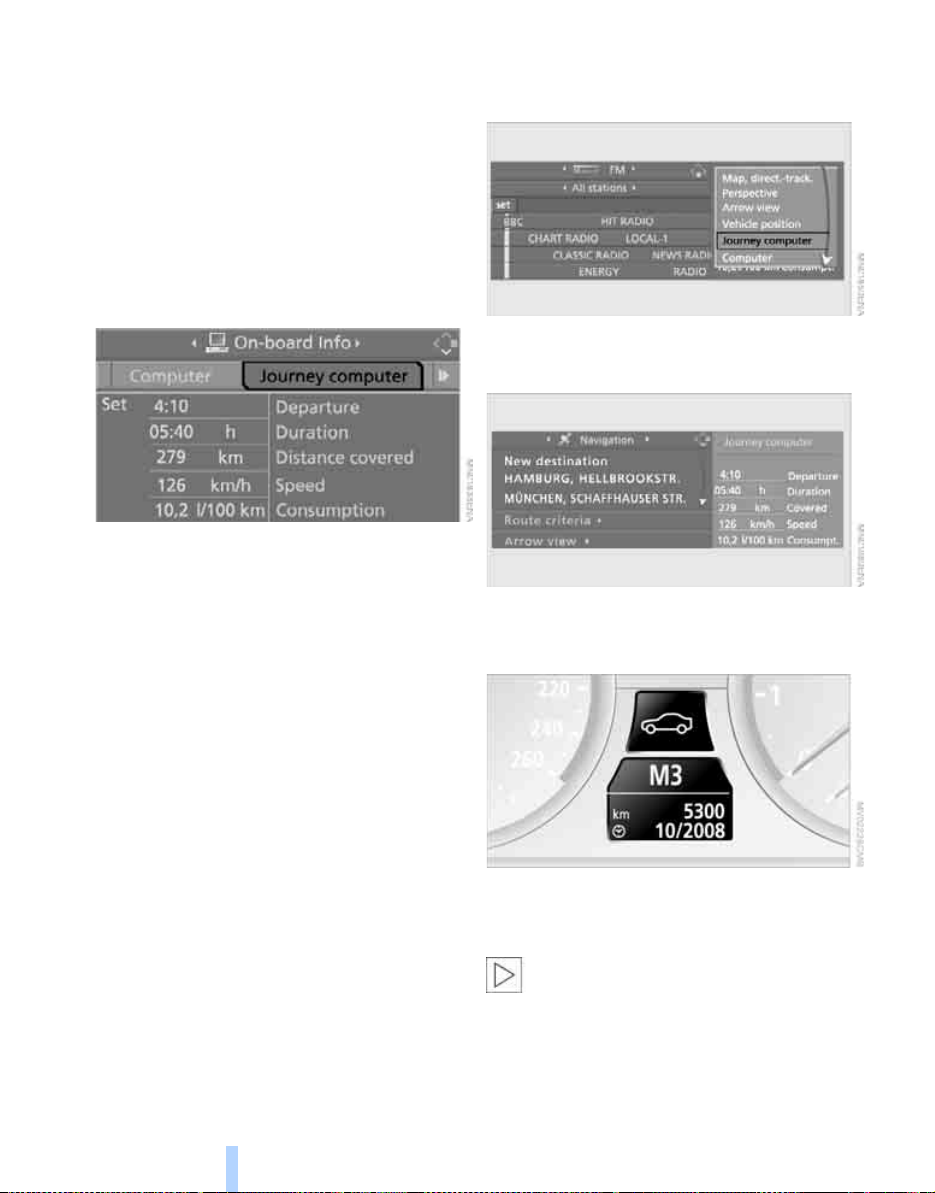
Journey computer*
Online Edition for Part-No. 01 41 0 159 725 © 09/05 BMW AG
The journey computer is suitable e.g. for a holiday trip.
1. Call up the start menu.
2. Call up "Navigation".
On cars without navigation system
"OBC".
3. Select "On-board Info" and press the con-
troller.
4. Select "Journey computer" and press the
controller.
Everything under control
> Departure time
> Journey time
> Distance covered
> Average speed
> Average fuel consumption
To start, stop or reset all values in the journey
computer:
1. Select "Set" and press the controller.
2. Select the desired menu item.
3. Press the controller.
*
: call up
1. Move the controller to the right to switch to
the assistance window and press the controller.
2. Select "Computer" or "Journey computer".
3. Press the controller.
Service requirements
Display options
You can have the computer or the journey computer displayed in the assistance window.
74
The distance remaining to the next service and
its date are displayed briefly when the ignition is
switched on.
The extent of service work required can
be read out from the remote control by
your BMW Service Advisor.<
Page 76
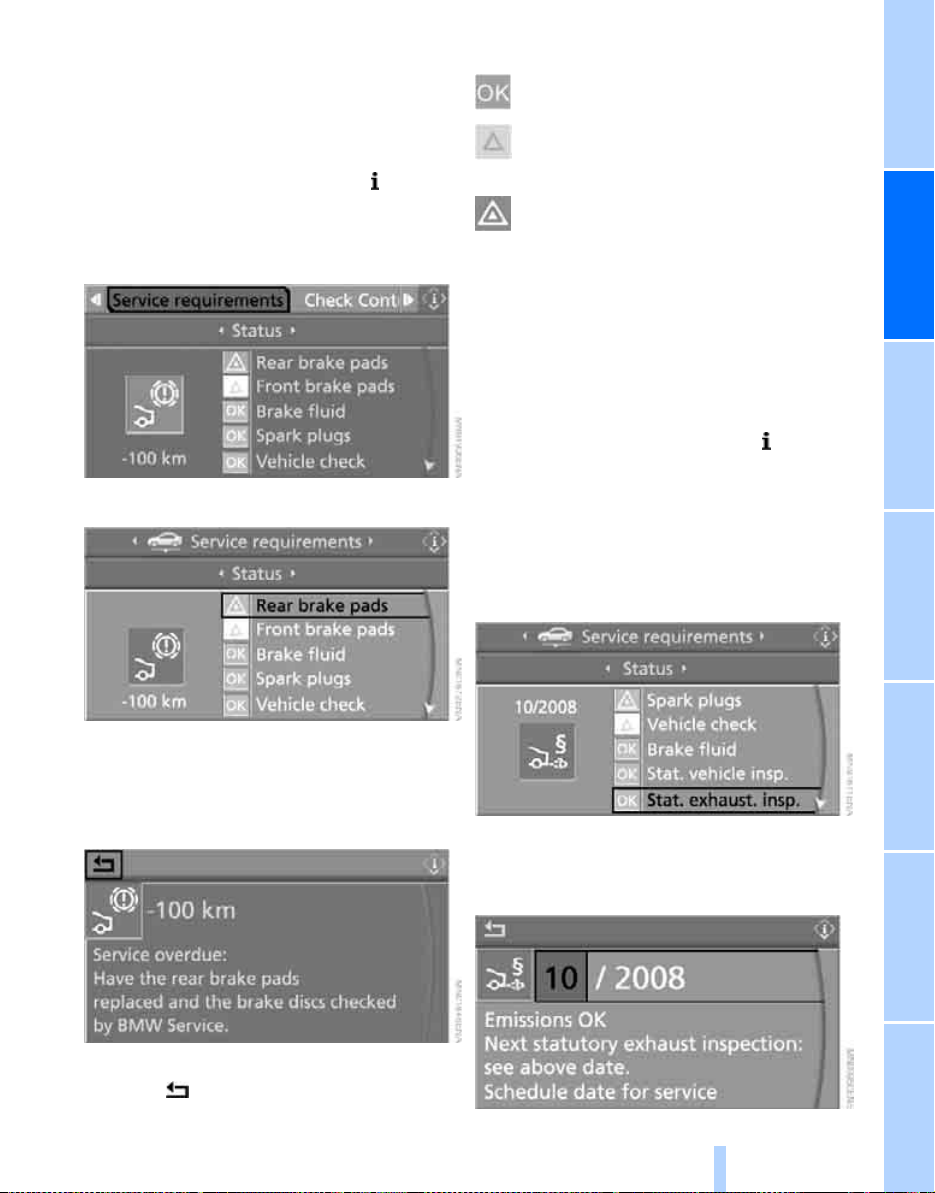
Further information
Online Edition for Part-No. 01 41 0 159 725 © 09/05 BMW AG
You can have further information on the scope
of maintenance displayed on the control display, see page 14.
1. Call up the start menu.
2. Press the controller to call up the menu.
3. Select "Service" and press the controller.
4. Select "Service requirements" and press
the controller.
5. Select "Status" and press the controller.
Symbols
No servicing is currently needed.
Servicing or an inspection required by law
is due soon. Please arrange a Service
appointment.
Servicing is overdue.
Entering dates of statutory emissions
tests and vehicle inspections*
Make sure that the date on the control display is
always set correctly, see page 80, otherwise
the Condition Based Service CBS cannot function correctly.
1. Call up the start menu.
2. Press the controller to call up the menu.
3. Select "Service" and press the controller.
4. Select "Service requirements" and press
the controller.
5. Select "Status" and press the controller.
6. Select "Stat. exhaust. insp." or "Stat. vehi-
cle insp." and press the controller.
A list of selected maintenance routines and
inspections required by law is displayed.
You can call up more information on each entry:
Select the entry and press the controller.
To exit the menu:
Select the arrow and press the controller.
7. Select "Schedule date for service" and
press the controller. The month is selected.
8. Turn the controller to make the adjustment.
75
Entertainment OverviewControlsDriving hintsNavigationMobilityReference
Page 77
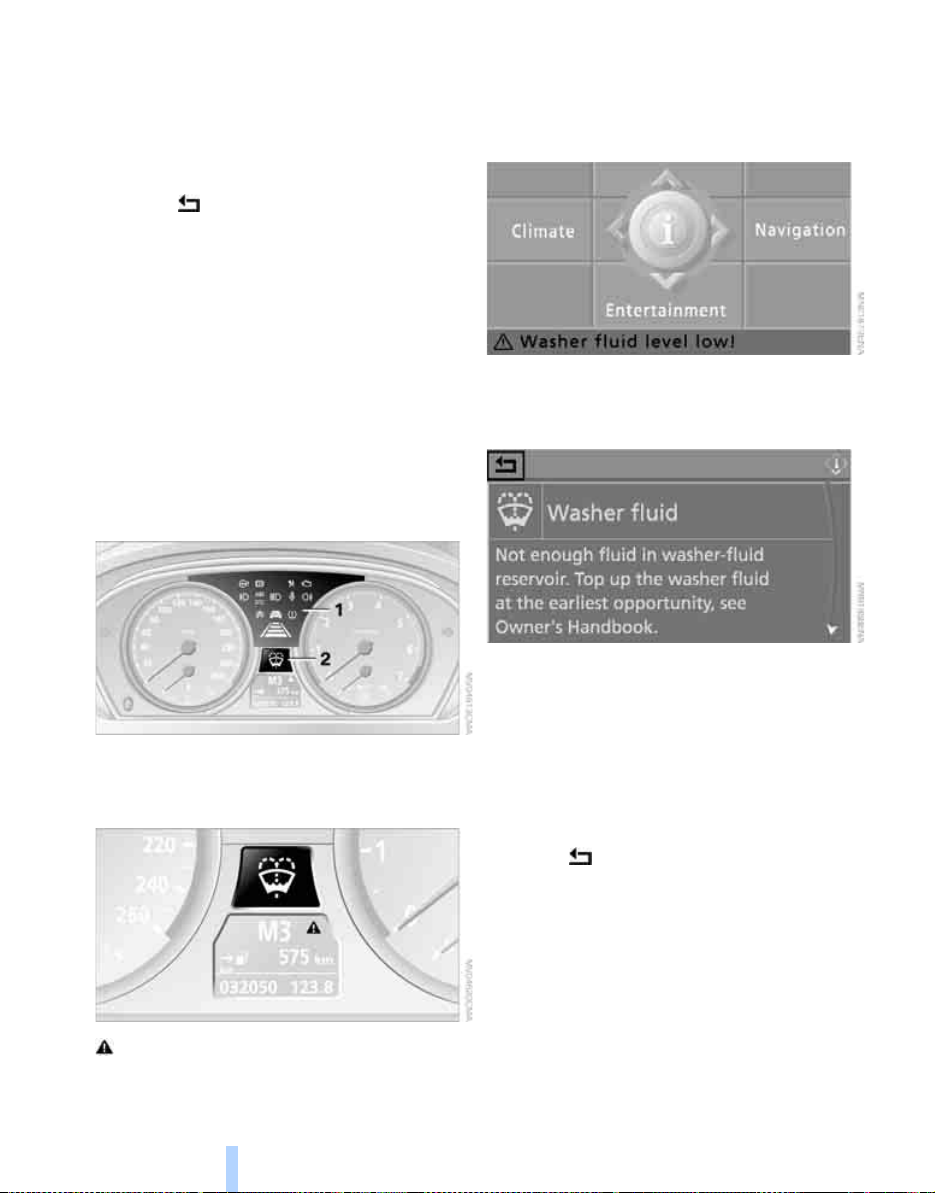
9. Press the controller to adopt the setting.
Online Edition for Part-No. 01 41 0 159 725 © 09/05 BMW AG
The year is selected.
10. Turn the controller to make the adjustment.
11. Press the controller to adopt the setting.
The date input is memorised.
To exit the menu:
Select the arrow and press the controller.
Check Control
Principle
The Check Control monitors car functions and
alerts you to any faults in the systems monitored. The system alerts you by means of indicator or warning lamps in the instrument cluster, possibly accompanied by an acoustic
signal, and text messages at the bottom of the
control display.
Everything under control
Indicator and warning lamps
after a short time. The warning lamp signals and
text messages are memorised and can be
called up again subsequently, see also page 77.
Explanatory text messages
Text messages appearing at the lower edge of
the control display explain the meaning of the
indicator and warning lamps that have come on.
Indicator and warning lamps may light up in a
variety of colours and combinations both in the
panel 1 and in the display 2.
means that a Check Control message has
been issued. The symbol remains visible even if
the Check Control message disappears again
76
You can subsequently call up additional information for most Check Control messages, e.g.
the cause of a malfunction and what action is
required on your part, see below.
If action is required as a matter of urgency, this
information is flashed up as soon as the accompanying lamp comes on.
Exit the displayed information:
Select the arrow and press the controller.
Order of importance of Check Control
messages
Important Check Control messages remain
until the faults in question have been rectified.
These messages cannot be deleted. If several
faults occur at the same time, they are displayed in succession.
Less important messages disappear after
approx. 20 seconds, but they remain memorised.
Page 78
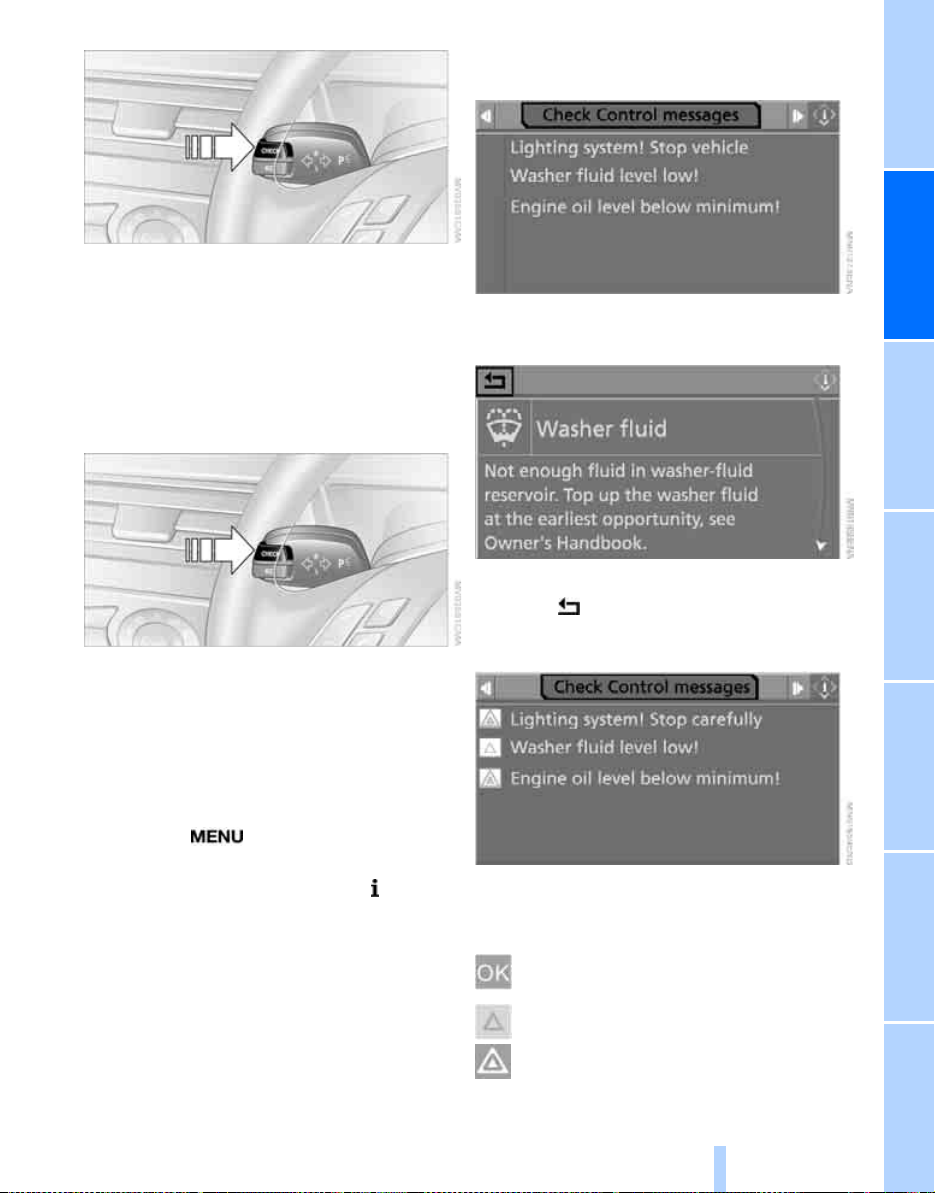
To hide these Check Control messages:
Online Edition for Part-No. 01 41 0 159 725 © 09/05 BMW AG
Press the CHECK button on the flashing turn
indicator lever.
Displaying memorised Check Control
messages
1. Press and hold down the button:
The first message stored is displayed.
4. Select "Check Control messages" and
press the controller.
5. Select a text message and press the con-
troller.
To exit the display:
Select the arrow and press the controller.
2. Press the button:
Every time you press the button, another
message is displayed.
Displaying further information
subsequently
iDrive concept, see page 14.
1. Press the button.
The start menu is called up.
2. Press the controller to call up the menu.
3. Select "Service" and press the controller.
Displaying the urgency of malfunctions
Entertainment OverviewControlsDriving hintsNavigationMobilityReference
Depending on the equipment specification, the
following symbols are displayed alongside the
Check Control messages in the memory:
There are no malfunctions in the systems
monitored.
There are malfunctions in the systems
monitored. Supplementary information is
given on the control display for certain
malfunctions.
77
Page 79
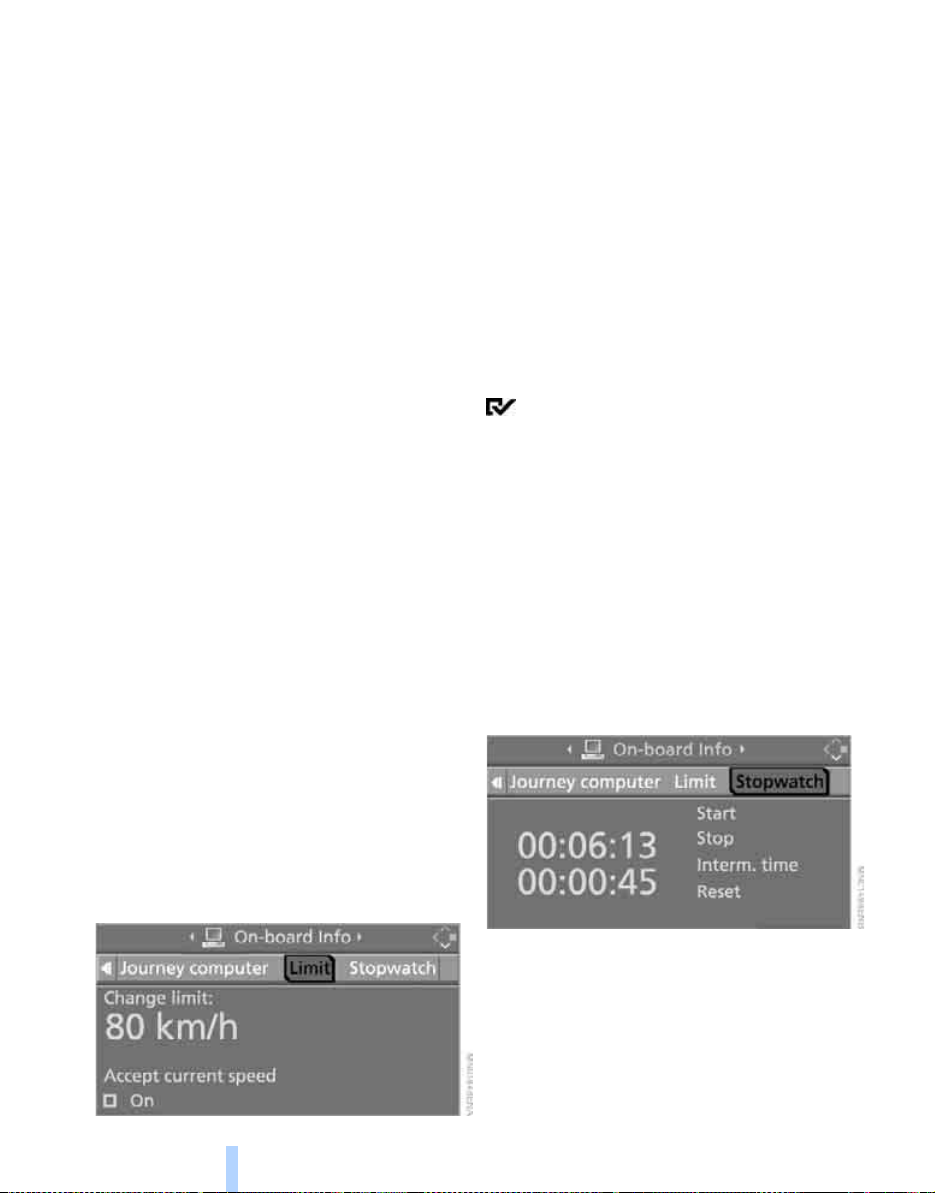
The symbols also show the service require-
Online Edition for Part-No. 01 41 0 159 725 © 09/05 BMW AG
ments status, see page 74.
Messages displayed at end of a journey
Malfunctions which have been indicated during
a journey are displayed again when you switch
off the ignition.
You can call up the messages again provided
the display has not yet gone out. Press CHECK
button for approx. 2 seconds. If there are several messages, press the CHECK button as
many times as necessary.
The display goes out
> Automatically after a short time
> If you press the CHECK button again for
approx. 2 seconds
5. Select the speed and press the controller.
6. Turn the controller to adjust the limit. You
may need to overcome a slight resistance if
you wish to enter a relatively high difference.
7. Press the controller to adopt the setting.
The limit is automatically switched on.
Memorising actual speed as limit value
Select "Accept current speed" and press the
controller. The actual speed is memorised as
the limit value.
Activating limit
Select "On" and press the controller.
The limit is automatically switched on.
Everything under control
Speed limit*
You can enter a speed at which you are to be
alerted by means of a Check Control message.
You can use this feature e.g. to ensure that you
do not exceed the speed limit in a built-up area.
A renewed reminder of this speed limit will not
be given unless you have undercut it by at least
5 km/h, approx. 3 mph, in the meantime.
Displaying, setting or altering limit
iDrive concept, see page 14.
1. Call up the start menu.
2. Call up "Navigation".
On cars without navigation system
"OBC".
3. Select "On-board Info" and press the con-
troller.
4. Select "Limit" and press the controller.
*
: call up
Stopwatch*
iDrive concept, see page 14.
1. Call up the start menu.
2. Call up "Navigation".
On cars without navigation system
"OBC".
3. Select "On-board Info" and press the con-
troller.
4. Select "Stopwatch" and press the control-
ler.
Starting, stopping or resetting
> Select "Start" and press the controller. The
stopwatch starts at the time displayed.
> Select "Reset" and press the controller.
The stopwatch is reset and starts again if it
was running previously.
*
: call up
78
Page 80
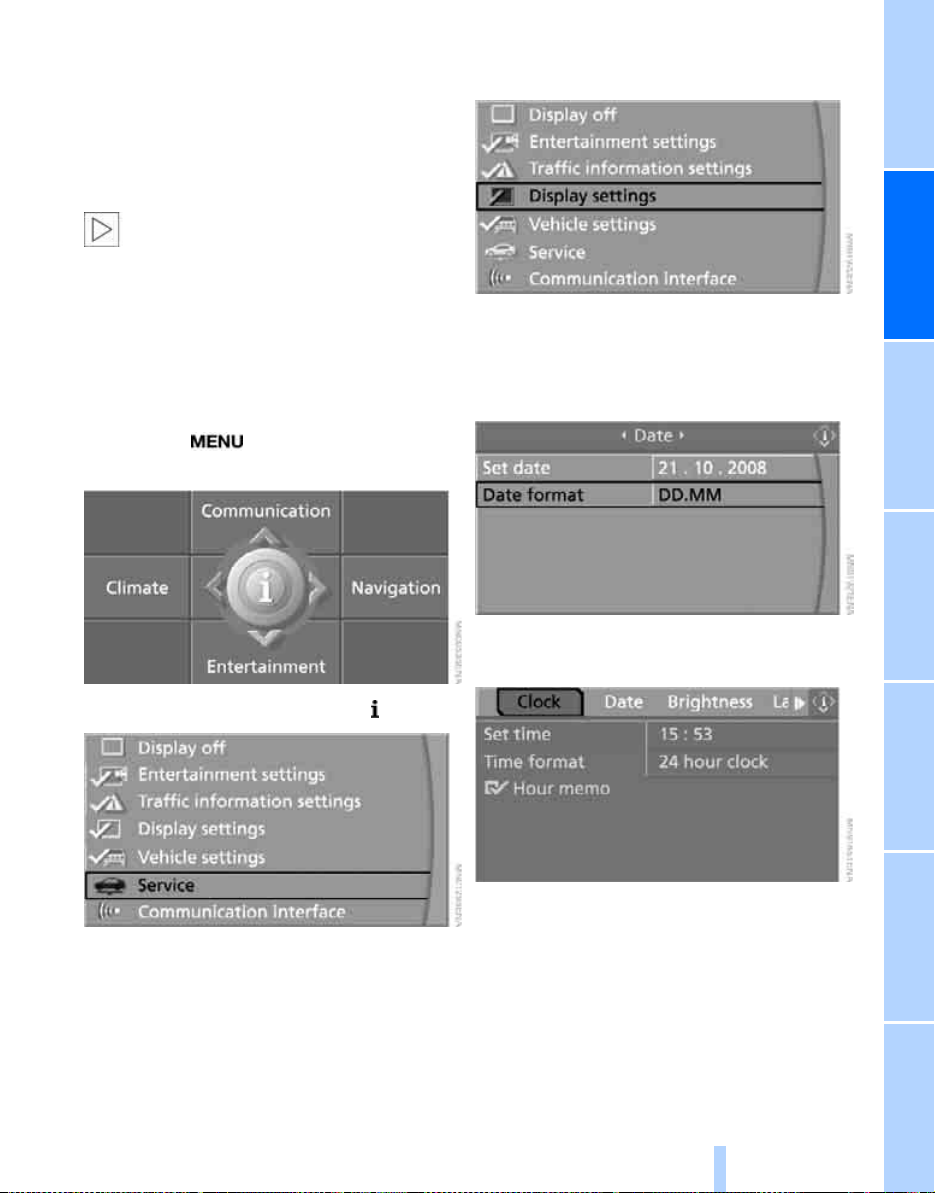
> Select "Stop" and press the controller.
Online Edition for Part-No. 01 41 0 159 725 © 09/05 BMW AG
Timekeeping is stopped.
Taking an intermediate time reading
Select "Interm. time" and press the controller.
The intermediate reading is displayed below
the current time display.
You can also call up other functions at any
time while the stopwatch is running. The
stopwatch continues to run in the background.<
Settings on the control display
iDrive concept, see page 14.
1. Press the button once or twice until
the start menu is displayed.
3. Turn the controller until "Display settings"
is selected and press the controller.
Setting time
1. You may need to move the controller for-
ward once to switch to the first field from
the top.
2. Press the controller to call up the menu.
2. Turn the controller until "Clock" is selected
and press the controller.
Entertainment OverviewControlsDriving hintsNavigationMobilityReference
79
Page 81
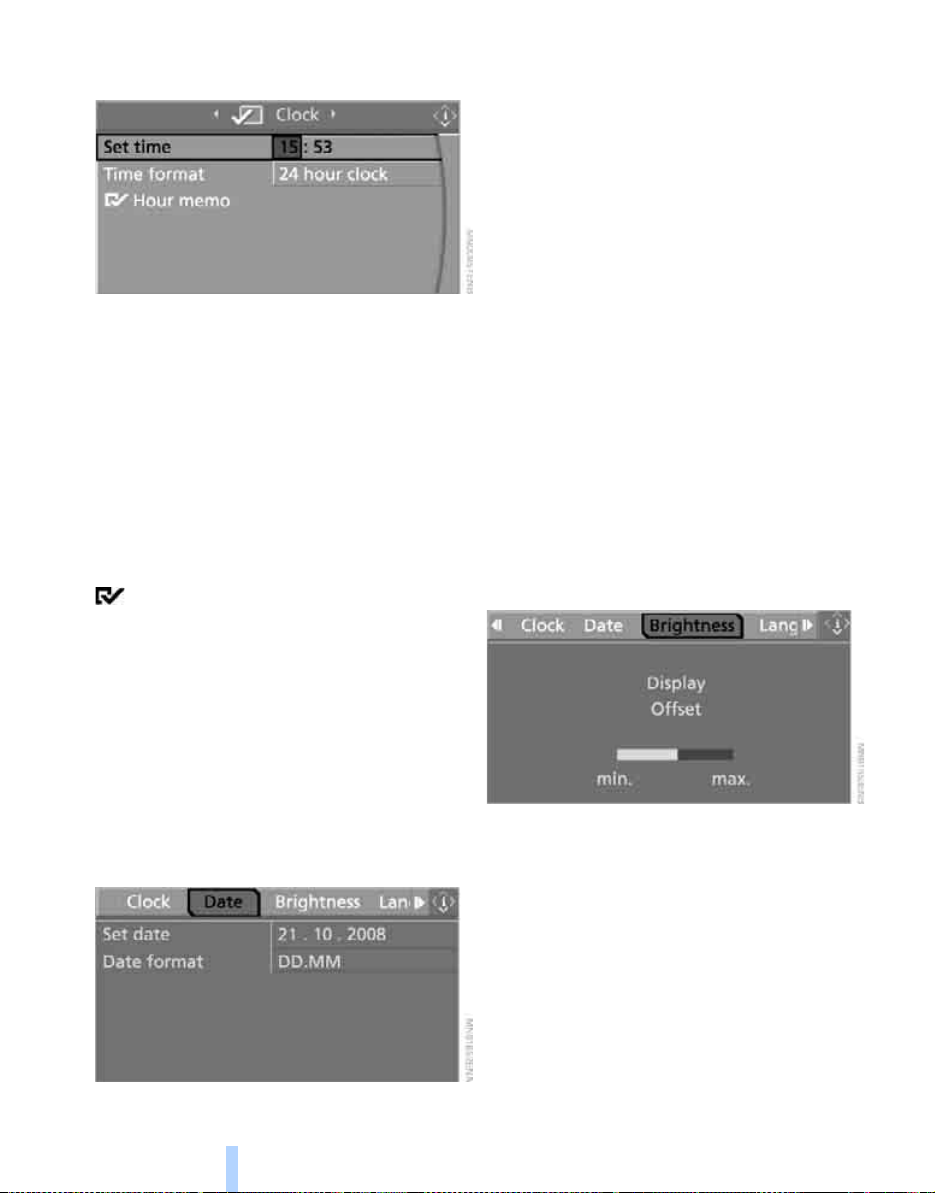
3. Turn the controller until "Set time" is
Online Edition for Part-No. 01 41 0 159 725 © 09/05 BMW AG
selected and press the controller.
Adjusting settings
1. Turn the controller to set the hour and press
the controller.
2. Turn the controller to set the minutes and
press the controller.
The system accepts the new time.
Everything under control
Switching on hour signal*
Shortly before the hour, three signal tones will
be emitted.
Select "Hour memo" and press the controller.
The hour signal is switched on.
2. Select "Set date" and press the controller.
The first part of the date setting is selected,
in this example the day.
3. Turn the controller to make the adjustment.
4. Press the controller to adopt the setting.
The next part of the time setting is selected.
5. Complete the setting. Once the setting has
been completed, the date is memorised.
Altering the date format
1. Select "Date format" and press the control-
ler.
2. Select the desired format and press the
controller.
The setting is saved for the remote control currently in use.
Brightness of the control display
The brightness is automatically adjusted to
ambient light conditions. However, you can
adjust the basic setting.
1. Select "Brightness" and press the control-
ler.
Setting the time format
1. Select "Time format" and press the control-
ler.
2. Select the desired format and press the
controller.
The setting is saved for the remote control currently in use.
Setting date
1. Select "Date" and press the controller.
80
2. Move the controller to the right if necessary,
to call up "Display Offset".
3. Turn the controller until the desired setting
is obtained.
The setting is saved for the remote control currently in use.
Page 82
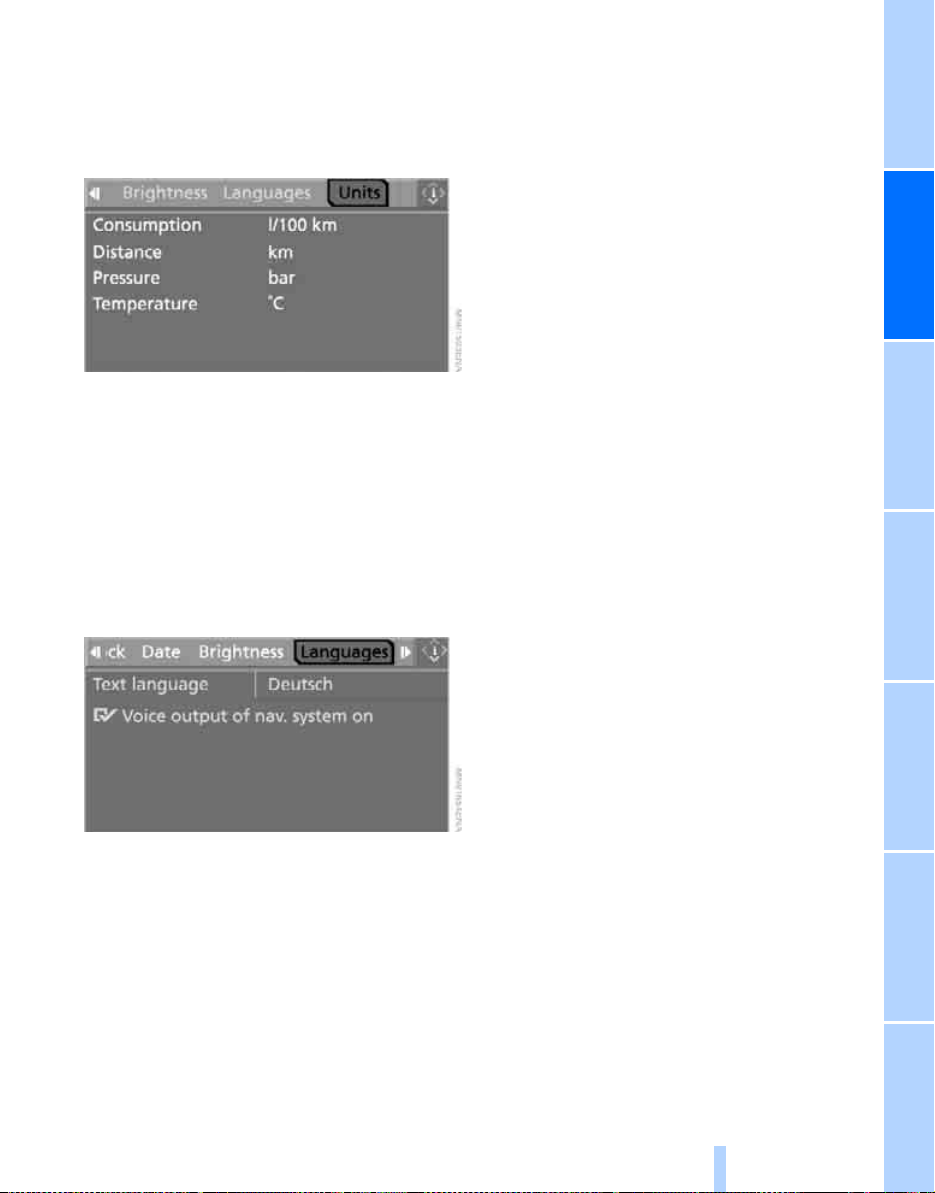
Units of measurement
Online Edition for Part-No. 01 41 0 159 725 © 09/05 BMW AG
You can alter the units of measurement for fuel
consumption, distance, temperature and pressure.
1. Select "Units" and press the controller.
2. Select the desired menu item and press the
controller.
3. Select the desired unit of measurement and
press the controller.
The settings are saved for the remote control
currently in use.
Language of the control display
1. Select "Languages" and press the control-
ler.
2. Select "Text language" and press the con-
troller. You can alter the language of the display texts.
3. Select the desired language and press the
controller.
The setting is saved for the remote control currently in use.
Entertainment OverviewControlsDriving hintsNavigationMobilityReference
81
Page 83
Technical features for driving comfort and
Online Edition for Part-No. 01 41 0 159 725 © 09/05 BMW AG
safety
Park Distance Control PDC*
Principle
PDC assists you when manoeuvring into
a parking space. Audible signals and a visual
*
display
object in front of or behind your car. Four ultrasonic sensors in each bumper measure the distance from it. The sensors cover a range of
approx. 2 m or 7 ft. An acoustic warning does
not sound, however, until an object is approx.
60 cm or 2 ft or closer to the front sensors or
rear corner sensors, and approx. 1.5 m or 5 ft or
closer to the rear centre sensors.
speed, as is usually the case when the car is
being parked. Avoid approaching an object rapidly, otherwise the system may be unable to
alert you in sufficient time in view of the physical
principles involved.<
If the car is towing a trailer, the rear sensors will
be unable to supply meaningful signals. They
therefore do not come on.
Automatic activation
With the engine running or the ignition switched
on, the system is activated automatically after
approx. 1 second when you engage reverse
gear or move the selector lever to position R.
Wait briefly before starting to drive, to allow the
system to become active.
Technical features for driving comfort and safety
indicate that you are approaching an
PDC is a parking aid which is capable of
registering objects approached at low
Switching on manually
Press the button, the LED comes on.
Switching off manually
Press the button again; the LED goes out.
Once you have driven approx. 50 m, approx.
165 ft, or travelled at a speed of more than
approx. 30 km/h, approx. 20 mph, the system is
deactivated and the LED goes out. Switch the
system on again manually as necessary.
Audible warning signals
The fact that you are approaching an object is
indicated by an intermittent warning signal for
the part of the car in question. For instance, if an
object is identified to the rear left of the car, the
warning signal sounds at the rear left loudspeaker. The closer the car approaches the
obstruction, the more rapid the sequence of
signals. When the distance from a detected
object is less than approx. 30 cm, approx. 1 ft,
the signal becomes continuous.
An intermittent tone is interrupted after approx.
3 seconds:
> If you remain in front of an object that was
detected by only one of the corner sensors
> If you are driving parallel to a wall
82
Page 84
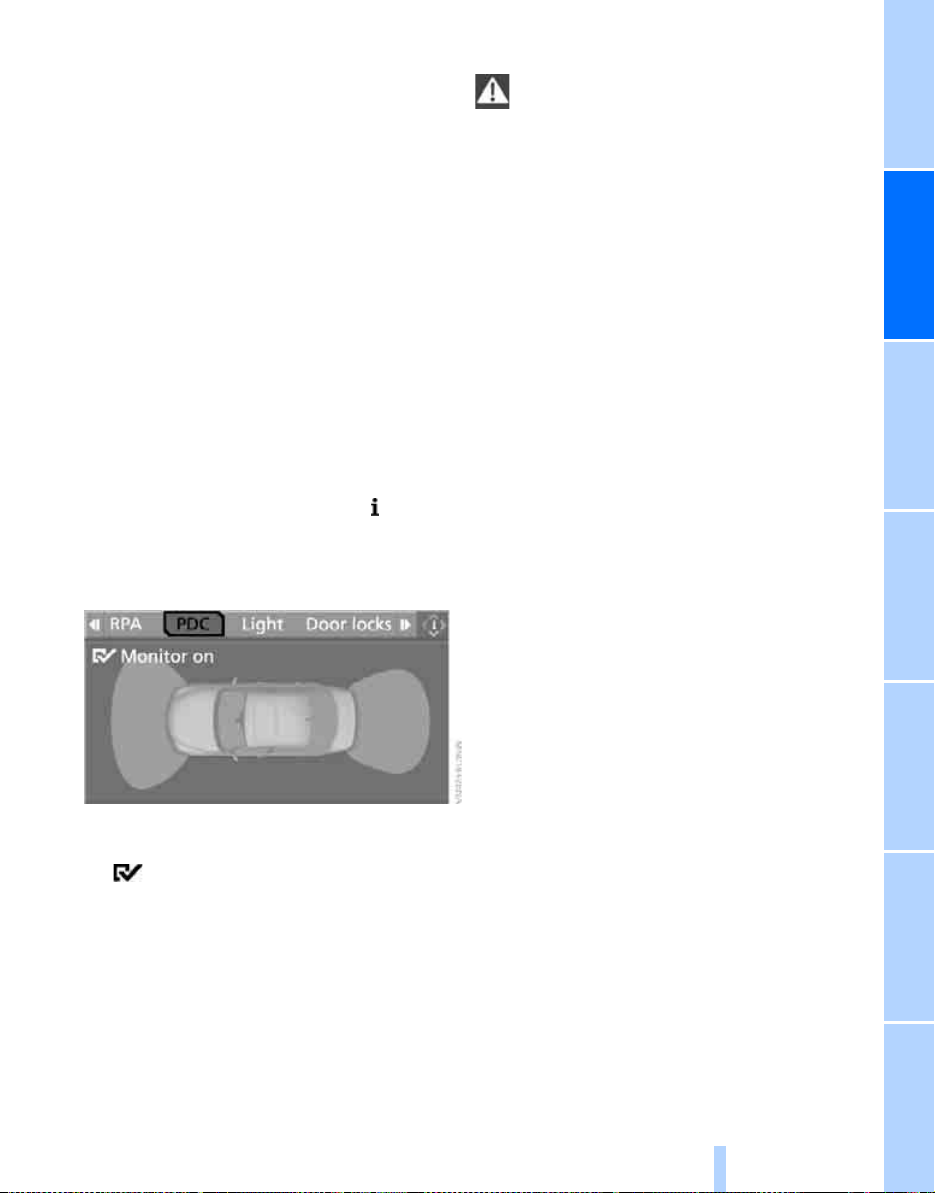
Malfunction
Online Edition for Part-No. 01 41 0 159 725 © 09/05 BMW AG
The LED in the button flashes and a message
appears on the control display. PDC has failed.
Have the system checked.
As a precautionary measure, keep the sensors
clean and free from ice, so that they always
operate reliably. Do not spray for any length of
time with high-pressure cleaning equipment,
and keep cleaning jets at least 10 cm, approx.
4 in, away from the sensors.
PDC with optical warning*
You can have the fact that you are approaching
an object indicated on the control display.
Objects that are further away from the car will
appear on the control display before an audible
warning signal is given.
iDrive concept, see page 14.
1. Call up the start menu.
2. Press the controller to call up the menu.
3. Select "Vehicle settings" and press the
controller.
4. Select "PDC" and press the controller.
System limits
PDC is no substitute for your personal
assessment of obstructions. The sensors
have certain dead areas in which objects cannot
always be detected. In addition, the identification of objects may not be possible if the physical limits of the ultrasonic measuring principle
are exceeded, for instance with trailer noses
and hitches, and thin or wedge-shaped objects.
Low objects already indicated, such as a kerb,
may enter the sensors' dead areas before a
continuous audible signal is given. Higher, protruding objects, such as ledges, may not be
detectable. Loud sound sources outside or
inside the car can drown out the PDC signal.<
Driving stability control systems
Your BMW has a number of systems that help
to maintain the car's stability even in adverse
driving conditions.
Anti-lock Brake System ABS
ABS prevents the wheels locking when the
brakes are applied. The car can consequently
still be steered even when the brakes are
applied hard. This increases active driving
safety.
ABS is ready to operate each time the engine is
started. Safe braking see page 124.
5. Select "Monitor on" and press the control-
ler.
The PDC image is switched on.
The display is shown on the control display as
soon as PDC is activated.
The setting is saved for the remote control currently in use.
Cornering Brake Control CBC
When the brakes are applied while cornering
when changing lanes, the car's stability and
steering characteristics are further enhanced.
Electronic Brake Force Distribution
The system regulates the braking pressure on
the rear wheels in order to stabilise the braking
behaviour.
83
Entertainment OverviewControlsDriving hintsNavigationMobilityReference
Page 85
Dynamic Brake Control DBC
Online Edition for Part-No. 01 41 0 159 725 © 09/05 BMW AG
If the brake is pressed down rapidly, this system
automatically boosts the braking force to a
maximum and thus helps to keep the braking
distance as short as possible when a full brake
application is made. It also makes full use of the
advantages offered by ABS.
Maintain pressure on the brake during the
entire brake application. If the brake is released,
DBC will be switched off.
Dynamic Stability Control DSC
DSC prevents the driving wheels losing traction
when you pull away from rest or accelerate.
DSC also recognises unstable driving conditions, for example if the rear of the car is about
to swerve or if momentum is acting at an angle
past the front wheels. In such instances, DSC
helps to keep the car on a stable course, subject
to the limits imposed by the basic laws of
dynamics, by reducing the engine output and
applying the brakes to individual wheels.
DSC is ready to operate each time the engine is
started.
Not even DSC can overcome the laws of
physics. It is therefore the driver's
responsibility to adopt a suitable driving style in
every situation. Do not undermine the additional safety afforded by this system by taking
driving risks.<
Deactivating DSC
Technical features for driving comfort and safety
enhancing intervention will now take place.
*
Intervention by the active steering
motes stability, is likewise
page 88.
A message appears on the control display:
Please also observe the supplementary information given there.
In the interests of dynamic stability, activate
DSC again as soon as possible.
deactivated, see
, which pro-
Activating DSC
Press the button; the indicator lamp in the
instrument cluster goes out.
Indicator lamps
If the indicator lamp is flashing:
DSC is regulating the propulsive and
braking forces.
If the indicator lamp is on:
DSC is deactivated.
Dynamic Traction Control DTC
DTC is a version of DSC that has been tractionoptimised for particular operating conditions,
e.g. driving on roads where the snow has not
been cleared. The system assures maximum
traction, but with reduced dynamic stability.
You should therefore drive with caution.
In the following exceptional situations it may be
best to activate DTC for a short time:
> Wh en driving uphill o n snow-covered ro ads,
in slush or on unploughed, snow-covered
roads
> For rocking the car out of a hollow or start-
ing in deep snow or on a loose surface
> When driving with snow chains
*
Hold the button pressed until the DSC indicator
lamp in the instrument cluster remains on permanently, but for no longer than approx.10 seconds. Both Dynamic Traction Control DTC and
DSC are deactivated. No stabilising or traction-
84
Page 86
Activating DTC
Online Edition for Part-No. 01 41 0 159 725 © 09/05 BMW AG
approx. 35 km/h, approx. 22 mph, is automatically reduced to about twice walking pace,
approx. 12 km/h, approx. 7 mph, and this speed
is then maintained.
You can alter this speed within the range of
about 5 km/h and 25 km/h, approx. 3 mph and
16 mph, by accelerating or braking.
You can specify a target speed within the same
range by using the cruise control lever.
Press the button; the DTC indicator lamp in the
instrument cluster comes on.
Deactivating DTC
Press the button again; the DTC indicator lamp
in the instrument cluster goes out.
Indicator lamps
If the indicator lamp is flashing:
DTC is regulating the propulsive and
braking forces.
If the indicator lamp is on:
DTC is activated.
xDrive 525xi, 530xi, 530xd
xDrive is the four-wheel-drive system of your
BMW. The combined effect of xDrive and DSC
further optimises traction and driving dynamics.
The four-wheel-drive system xDrive distributes
the torque flow variably to the front and rear
wheels in accordance with the driving situation
and the condition of the road surface.
Hill Descent Control HDC 525xi, 530xi,
530xd
Principle
HDC reduces the car's speed when driving
down steep inclines and thus makes your BMW
even easier to control in such conditions. The
car will then move at about twice walking pace,
without your having to regulate its speed.
HDC can be activated at speeds of less than
approx. 35 km/h, approx. 22 mph. When the car
starts to travel downhill, its speed of below
Activating HDC
You can activate HDC:
> With the programmable buttons on the
steering wheel, see page 51
> Via iDrive
iDrive concept, see page 14.
1. Call up the start menu.
2. Press the controller to call up the menu.
3. Select "Vehicle settings" and press the
controller.
4. Select "HDC" and press the controller.
5. Select "HDC on" and press the controller.
The HDC display in the instrument cluster
appears.
If the car is braked automatically, a message
appears on the control display for about 20 seconds.
Deactivating HDC
With the programmable buttons in the steering
wheel or via iDrive; the HDC display goes out.
At above approx. 60 km/h, approx. 37 mph,
HDC is deactivated immediately, and about
10 seconds after the ignition has b een switched
off.
Entertainment OverviewControlsDriving hintsNavigationMobilityReference
85
Page 87
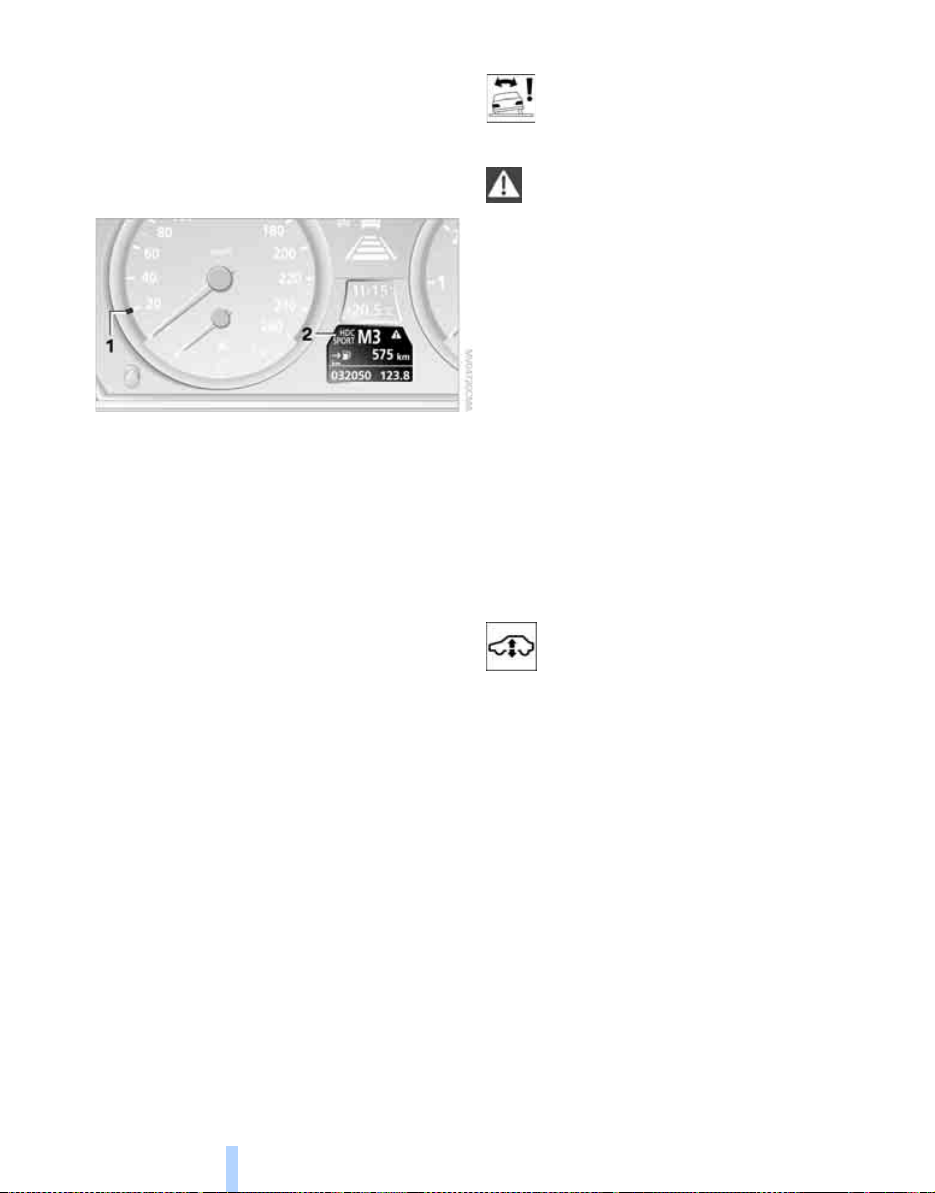
Using HDC
Online Edition for Part-No. 01 41 0 159 725 © 09/05 BMW AG
Manual transmission:
Use HDC in low gears and when reversing.
Automatic transmission:
HDC can be used in any transmission speed.
Displays in the instrument cluster
1 Display of target speed
2 HDC display
Malfunction
If the HDC display goes out while HDC is in
operation or does not come on:
HDC is temporarily unavailable due to the high
temperature of the brakes.
Dynamic Drive*
Principle
Dynamic Drive minimises side tilt of your car
and optimises dynamic stability when cornering
or taking evasive action.
Dynamic Drive is based on active stabilisers on
the front and rear axles. Depending on the driving situation, the suspension response is sporty
when cornering and relaxed when driving
Technical features for driving comfort and safety
straight ahead. The system constantly acts
within a fraction of a second while the car is on
the move.
The system is ready to operate each time the
engine is started.
Malfunction
The warning lamp lights up and a message appears on the control display:
the system is faulty. Have the system
checked as soon as possible.
If there is a malfunction, reduce your
speed accordingly, particularly on bends.
The car will lean over further when cornering
and under the influence of cross-winds, and the
suspension response will be noticeably softer
when cornering.
If a message instructing you to stop the car
appears on the control display, pull over as soo n
as possible and switch off the engine. In this
instance, the oil level in the reservoir may have
fallen below the minimum level, possibly due to
a leak in the hydraulic system.
Do not drive the car any further; contact BMW
Service instead.<
Touring: self-levelling suspension
Malfunction
If the warning lamp for self-levelling
suspension lights up yellow and a mes-
sage appears on the control display:
the self-levelling suspension is faulty. Stop the
car and check it. If the body is distinctly lower at
the back than at the front, and possibly standing
at an angle, for instance lower at the left than at
the right, take the car to the nearest BMW Service or to a workshop that operates to BMW
specifications and has suitably trained personnel. Drive cautiously while the car is in this condition. The car's ground clearance is reduced
and its ride comfort below the usual standard.
Even if the ca r's suspension level is normal, take
it to the nearest BMW Service or to a workshop
that operates to BMW specifications and has
suitably trained personnel if a fault is indicated.
86
Page 88
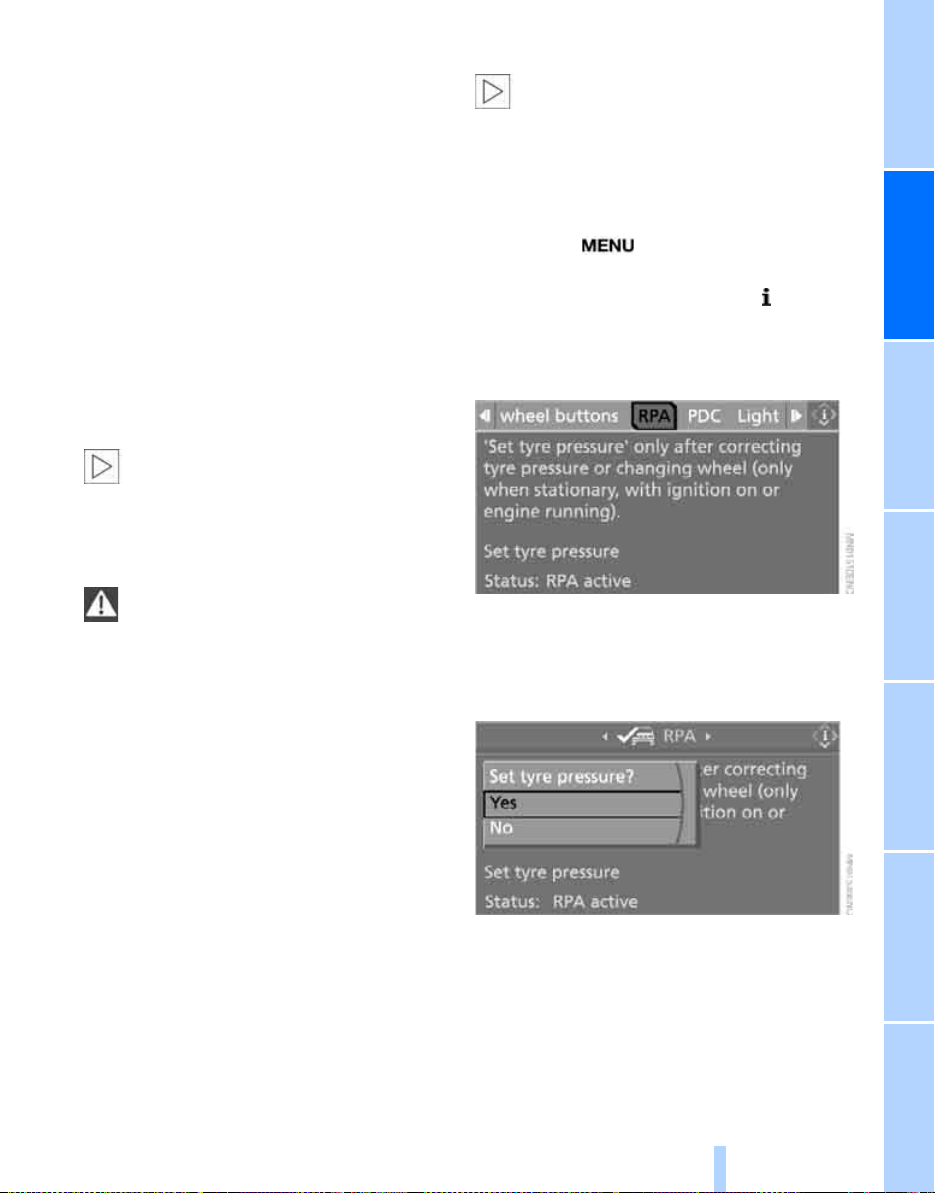
Run Flat Indicator RPA
Online Edition for Part-No. 01 41 0 159 725 © 09/05 BMW AG
Principle
The Run Flat Indicator monitors the pressures
in the four tyres fitted to the wheels while the
car is being driven. The system reports any signi fican t lo ss of p res sure i n on e tyre in r elati on to
another.
If a tyre loses pressure its rolling radius
changes, and this in turn alters the speed of
rotation. This change is detected and reported
as tyre failure.
Operating requirements
To ensure that tyre failure can be reported reliably, the system must have been initialised
while the tyre pressures are correct.
The system has to be reinitialised every
time tyre pressures are corrected, after
each change of a wheel or tyre, and after a trailer
has been attached or detached.<
System limits
The Run Flat Indicator is unable to warn
the driver of sudden, severe tyre damage
caused by external factors, nor can it identify
the gradual loss of pressure that will inevitably
occur in all four tyres over a lengthy period of
time.<
In the following situations, the system could be
slow to respond or operate incorrectly:
> If the system has not been initialised
> When driving on snow-covered or slippery
surfaces
> When driving with an enthusiastic style,
causing the driven wheels to spin, high lateral acceleration
> When driving with snow chains
The Run Flat Indicator is unable to function if
the compact wheel* is fitted.
*
Initialising the system
Initialising is completed by driving the car;
this process can be interrupted at any
time. Initialising resumes automatically when
you continue your journey. Do not initialise the
*
system while driving with snow chains
compact wheel* fitted to the car.<
iDrive concept, see page 14.
1. Press the button.
The start menu is called up.
2. Press the controller to call up the menu.
3. Select "Vehicle settings" and press the
controller.
4. Select "RPA" and press the controller.
5. Start the engine but do not drive off yet.
6. Select "Set tyre pressure" and press the
controller.
7. Select "Yes" and press the controller.
8. Drive off.
The message "Initialising..." is displayed.
Initialising is completed during the journey. The
control display then shows "Status: RPA
active" again.
or a
Entertainment OverviewControlsDriving hintsNavigationMobilityReference
87
Page 89

Indication of a flat tyre
Online Edition for Part-No. 01 41 0 159 725 © 09/05 BMW AG
The warning lamp shows red. A message appears on the control display. An
acoustic signal also sounds. There is a
flat tyre or substantial loss of tyre pressure.
1. Reduce your speed and stop the car care-
fully. Avoid violent or sudden braking and
steering manoeuvres.
2. Identify the damaged wheel.
If you are unable to identify where the
problem lies, contact BMW Service.<
3. Change the wheel with the damaged tyre,
see Changing a wheel, page 196.
Drive with caution and do not exceed
80 km/h, approx. 50 mph. If there is a loss
of tyre pressure, the car's handling properties
will change. These include reduced track stability during braking, longer braking distances and
altered self-steering properties.
If unusual vibration or loud noises occur during
the journey, this may be an indication that the
damaged tyre has finally failed. Reduce your
speed and pull over to a suitable location as
soon as possible. Otherwise, parts of the tyre
could come loose, which could result in an accident. Do not drive the car any further; contact
BMW Service instead.<
Run-flat tyres*
1. Carefully reduce your speed to no more
than 80 km/h, approx. 50 mp h. Avoid violent
or sudden braking and steering manoeuvres. Do not exceed a speed of 80 km/h,
approx. 50 mph, after this.
If the car is not fitted with run-flat
tyres, see page 183, do not continue
your journey, as driving on a flat tyre could
result in a serious accident.<
2. Check the pressure in all four tyres at the
next opportunity.
If all four tyres are inflated to the correct pressures, the Run Flat Indicator
might not have been initialised. Initialise the
system.<
3. If a tyre is completely deflated, you can esti-
mate how far you will be able to drive using
the following guidelines:
> With low loads:
1 to 2 persons, without luggage:
Technical features for driving comfort and safety
approx. 250 km, approx. 155 miles
> With moderate loads:
2 persons, luggage compartment or load
area full, or 4 persons without luggage:
approx. 150 km, approx. 90 miles
> With full load:
4 persons or more, luggage compartment or load area full:
approx. 50 km, approx. 30 miles
Active steering*
Principle
Active steering is a system which actively varies
the steering lock of the front wheels in relation
to steering wheel movements.
At low speeds, e.g. in built-up areas or when
parking, the steering lock is accentuated, i.e.
the steering response becomes very direct. At
higher speeds, on the other hand, the steering
lock is gradually reduced. This improves the
handling of your BMW across the entire speed
range.
In critical situations, the system can specifically
correct the angle through which the driver has
turned the wheels, and thus to stabilise the car
before the driver starts to take corrective action.
This stability-enhancing action is deactivated
when DSC is shut down, see page 84.
Malfunction
The warning lamp lights up and a message appears on the control display:
the active steering is faulty and deactivated. At low speeds, more pronounced movement of the steering wheel is required, whereas
the car will respond more sensitively to steering
wheel movements at higher speeds. The stabilising intervention may also be deactivated.
Drive cautiously and think well ahead. Have the
system checked.
88
Page 90
Two-stage brake lights*
Online Edition for Part-No. 01 41 0 159 725 © 09/05 BMW AG
Picture on the left: normal braking.
Picture on the right: strong braking when rear
fog lights
*
are not switched on.
Entertainment OverviewControlsDriving hintsNavigationMobilityReference
89
Page 91
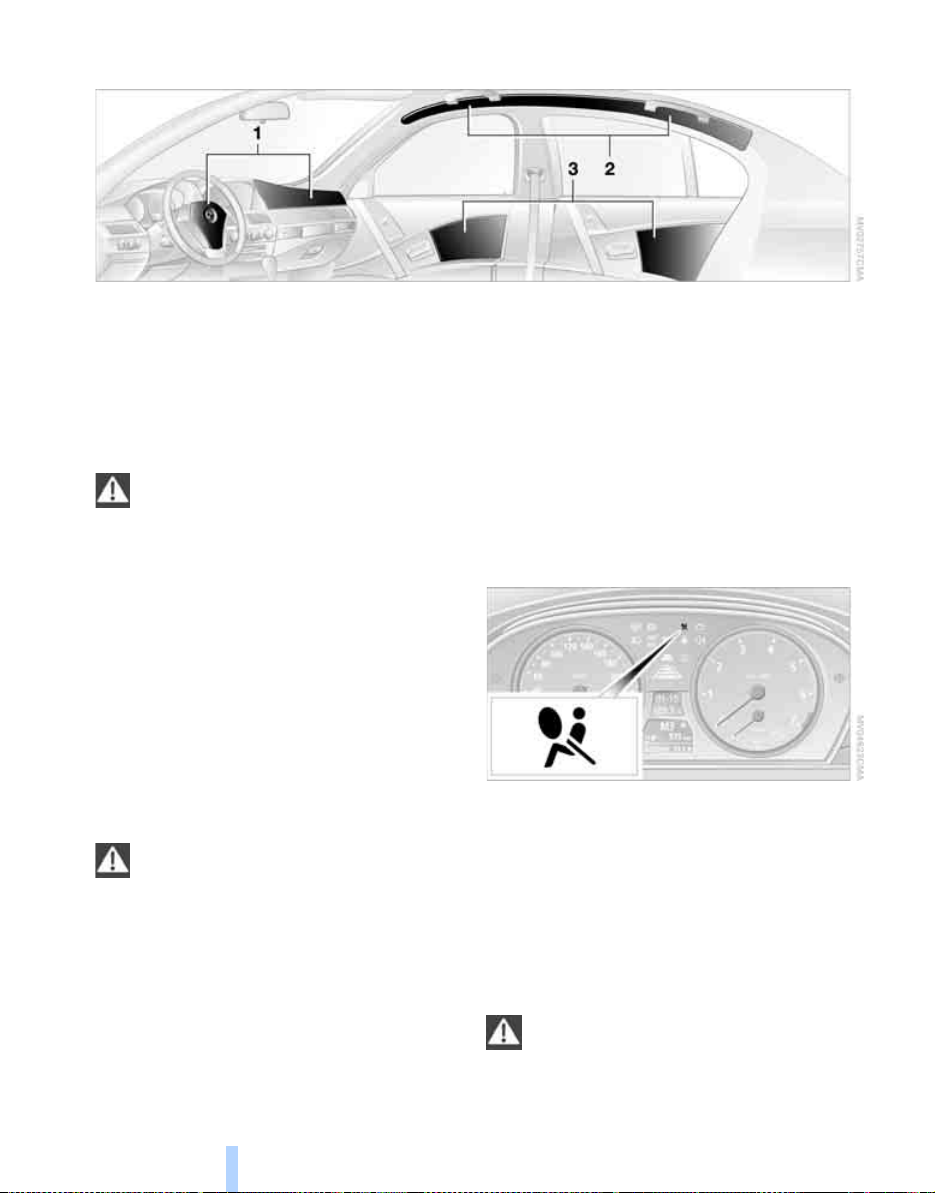
Airbags
Online Edition for Part-No. 01 41 0 159 725 © 09/05 BMW AG
There are the following airbags beneath the
covers indicated:
1 Front airbags
2 Head-level airbag
3 Side airbags at front and rear
*
Protective effect
Comply with the notes on page 42, or
there may be a risk to your personal
safety.<
The front airbags protect the driver and front
passenger in the event of a head-on collision, if
the protective action of the seat belts alone
would be insufficient. The head-level and side
airbags provide protection in the event of a
side-on collision. The side airbag has the effect
of supporting the upper body from the side. The
head-level airbag supports the head of the
seat's occupant.
The airbags will purposely not be activated by
every collision, e.g. in more minor accidents,
certain roll-over situations and rear-end collisions.
Never attach any material to the airbag
covers with adhesive, place material over
Technical features for driving comfort and safety
them or modify them in any way. Do not dismantle the airbag occupant restraint system.
Do not modify the individual components of the
system or its wiring in any way. This includes
the upholstered covers on the steering wheel,
instrument panel, doors and roof posts as well
as the sides of the roof lining. Do not remove the
steering wheel. Avoid touching the system's
components immediately after it has been triggered off, as there is a risk of sustaining burns. If
the airbag occupant restraint system develops
a fault, is shut down out of use or has been activated, have it checked, repaired or dismantled
and the airbag generators scrapped only by
BMW Service or by a workshop that operates to
BMW specifications and has suitably trained
personnel and the necessary permits for handling explosive devices. Any careless or
unskilled interference with the system could
lead to its failure or to accidental triggering off
with the risk of injury.<
Operational status of airbag system
Following radio readiness, see page 56, the
warning lamp comes on for a short time to indicate that the entire airbag system and the belt
tensioners are operational.
Airbag system faulty
> Warning lamp does not come on following
radio readiness.
> Warning lamp remains permanently on.
In the event of a fault in the airbag system,
have it checked without delay, as there is
otherwise the risk that the system will not function as intended even if a sufficiently severe
accident occurs.<
90
Page 92
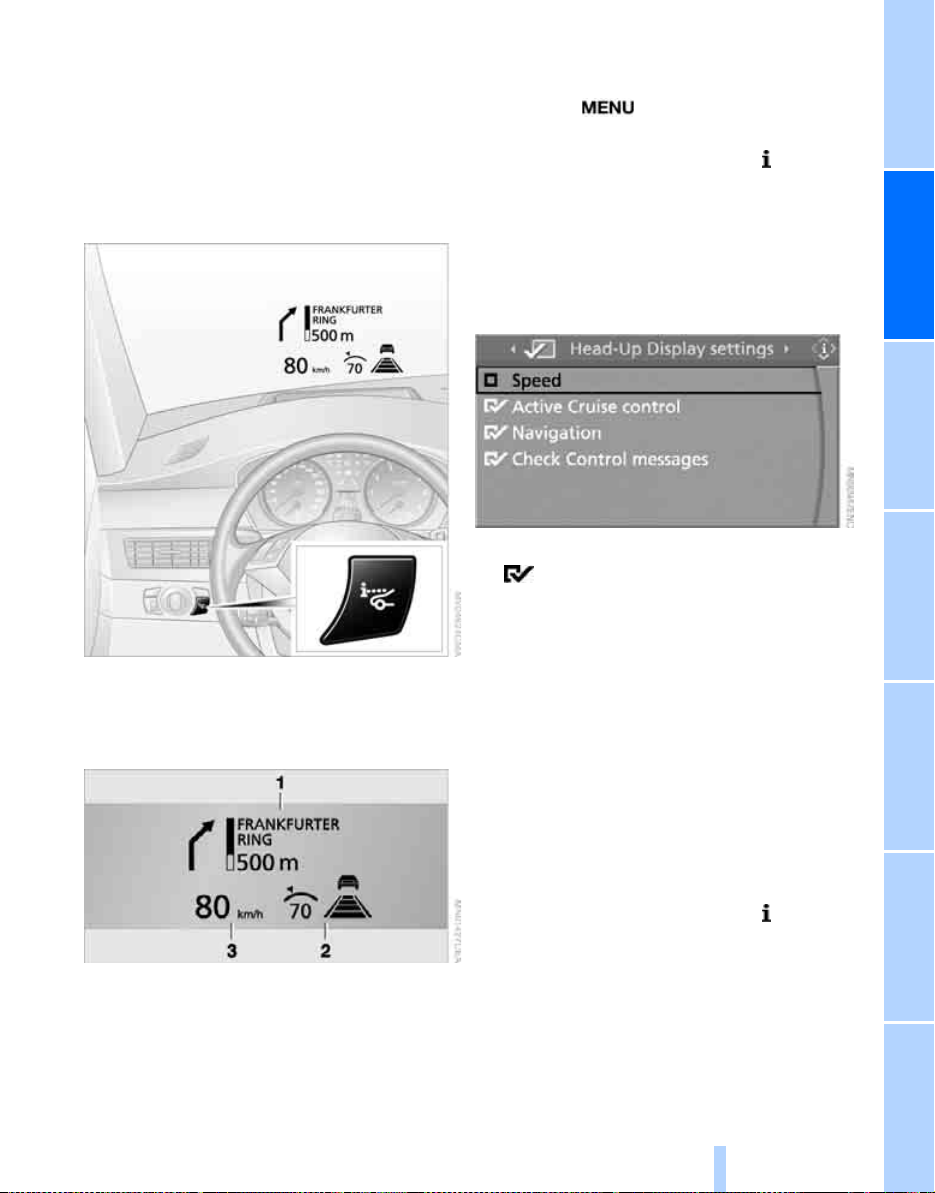
Head-Up Display*
Online Edition for Part-No. 01 41 0 159 725 © 09/05 BMW AG
Principle
The Head-Up Display projects important information into the driver's field of view, e.g. navigation instructions. This enables you to register
this information without having to divert your
eyes from the road.
Selecting displays
iDrive concept, see page 14.
1. Press the button.
The start menu is called up.
2. Press the controller to call up the menu.
3. Select "Display settings" and press the
controller.
4. Select "Head-Up Display settings" and
press the controller.
5. Select the desired information for the Head-
Up Display.
6. Press the controller.
The information is shown on the Head-
Up Display.
The settings are saved for the remote control
currently in use.
Switching on/off
With the engine running or ignition switched on:
To switch on or off, press the button.
1 Navigation instructions
2 Display
> Cruise control
> Active Cruise Control
3 Speed
Adjusting brightness
The brightness of the display is automatically
adjusted according to ambient light conditions.
However, you can adjust the basic setting.
When the low-beam headlights are switched
on, the brightness can also be adjusted using
the knurled wheel for the instrument lighting.
iDrive concept, see page 14.
1. Call up the start menu.
2. Press the controller to call up the menu.
3. Select "Display settings" and press the
controller.
91
Entertainment OverviewControlsDriving hintsNavigationMobilityReference
Page 93
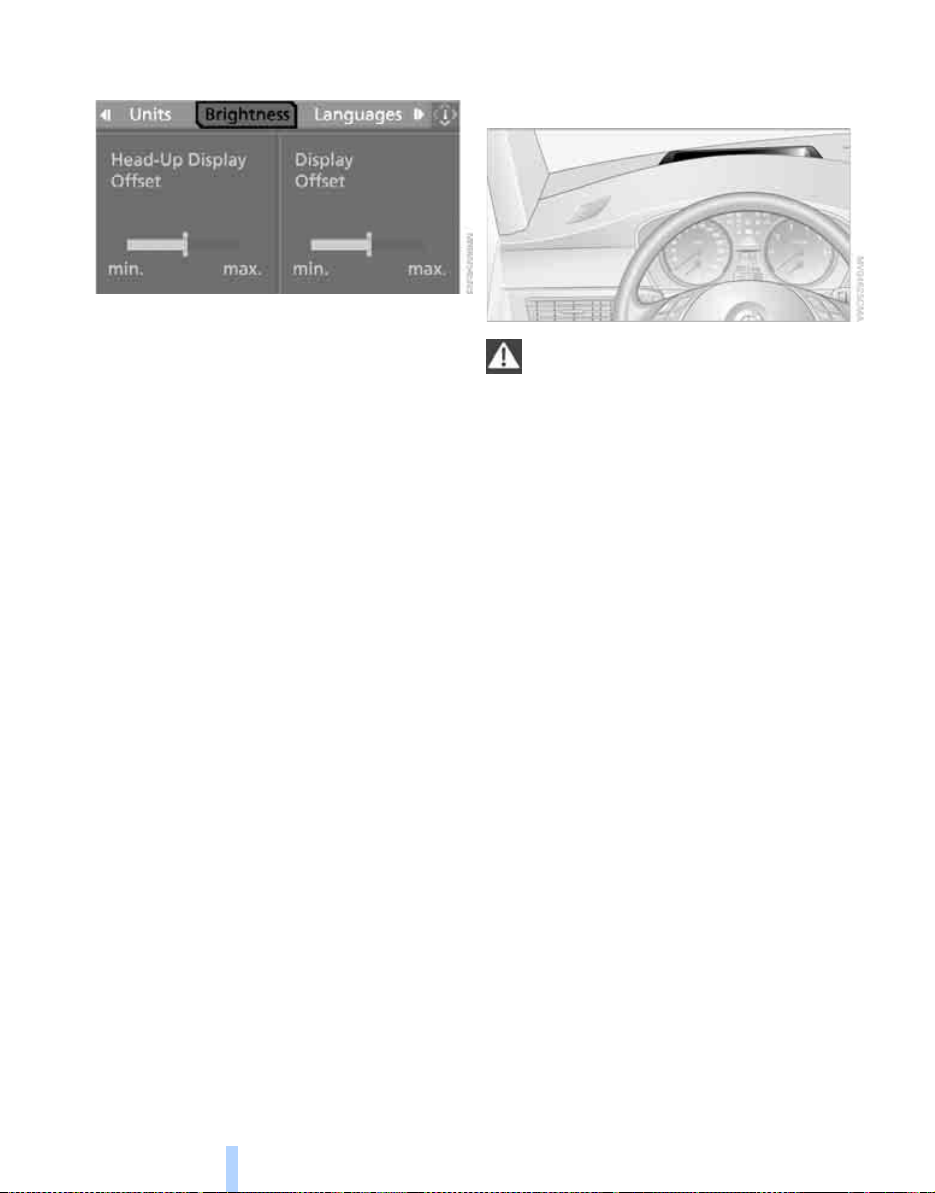
4. Select "Brightness" and press the control-
Online Edition for Part-No. 01 41 0 159 725 © 09/05 BMW AG
ler.
5. Move the controller to the left if necessary,
to call up "Head-Up Display Offset".
6. Turn the controller until the desired setting
is obtained.
The setting is saved for the remote control currently in use.
Notes
The visibility of information in the Head-Up Display is influenced by:
> Sunglasses with certain polarisation filters
> Certain seated positions
> Objects resting on the Head-Up Display's
cover
> Wet roads and poor light conditions
If the image is shown distorted, have the basic
settings checked.
Care notes
For useful information on this subject, see the
booklet Looking after your car.
To avoid damage when cleaning the
Head-Up Display's cover, use only a soft,
non-scratching cloth or a cleaning cloth for display screens.<
Special windscreen
The windscreen constitutes part of the system.
The windscreen is shaped in a way that satisfies
the requirements of the Head-Up Display and
permits the projection of precise images. A film
in the windscreen prevents double images
Technical features for driving comfort and safety
occurring.
Always have a windscreen replaced only either
by BMW Service or by a workshop that operates to BMW specifications and has suitably
trained personnel.
92
Page 94
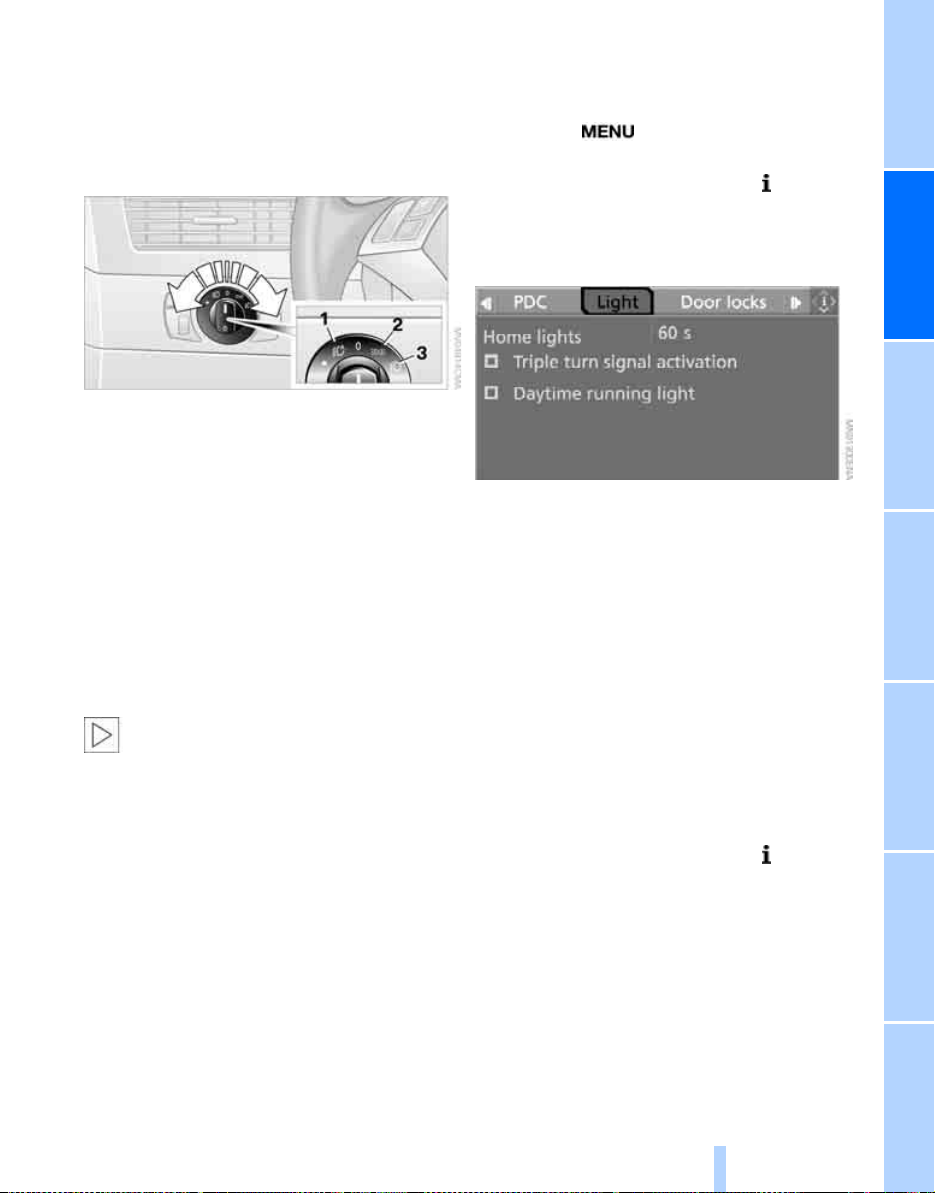
Lights
Online Edition for Part-No. 01 41 0 159 725 © 09/05 BMW AG
Side lights/Low-beam headlights
1 Automatic driving lights control*, Adaptive
*
Head Light
assistant
2 Side lights
3 Low-beam headlights and daytime driving
lights
Side lights
When the switch is in position 2 the lights are on
all round the car. You can use the side lights for
parking. There is the additional option of
switching on the lights on the side nearest the
road when parked, see page 95.
The side lights will discharge the battery.
Do not leave them switched on for too
long, otherwise the engine may fail to start.<
Low-beam headlights
The low-beam headlights come on in switch
position 3 if the ignition is switched on; otherwise the side lights come on.
Headlight courtesy delay feature
If you activate the headlight flasher after parking
the car, with the lights switched off, the lowbeam headlights come on and remain on for a
certain time. You can adjust the operating
period or deactivate the function using iDrive.
iDrive concept, see page 14.
and High-beam headlights
*
1. Press the button.
The start menu is called up.
2. Press the controller to call up the menu.
3. Select "Vehicle settings" and press the
controller.
4. Select "Light" and press the controller.
5. Select "Home lights" and press the control-
ler.
6. Turn the controller to set the appropriate
duration.
7. Press the controller to adopt the setting.
Daytime driving lights
If desired, the light switch can remain in
position 3.
If necessary, switch on the side lights as
described under Side lights.
You can activate or deactivate the daytime driving lights:
1. Call up the start menu.
2. Press the controller to call up the menu.
3. Select "Vehicle settings" and press the
controller.
4. Select "Light" and press the controller.
Entertainment OverviewControlsDriving hintsNavigationMobilityReference
93
Page 95
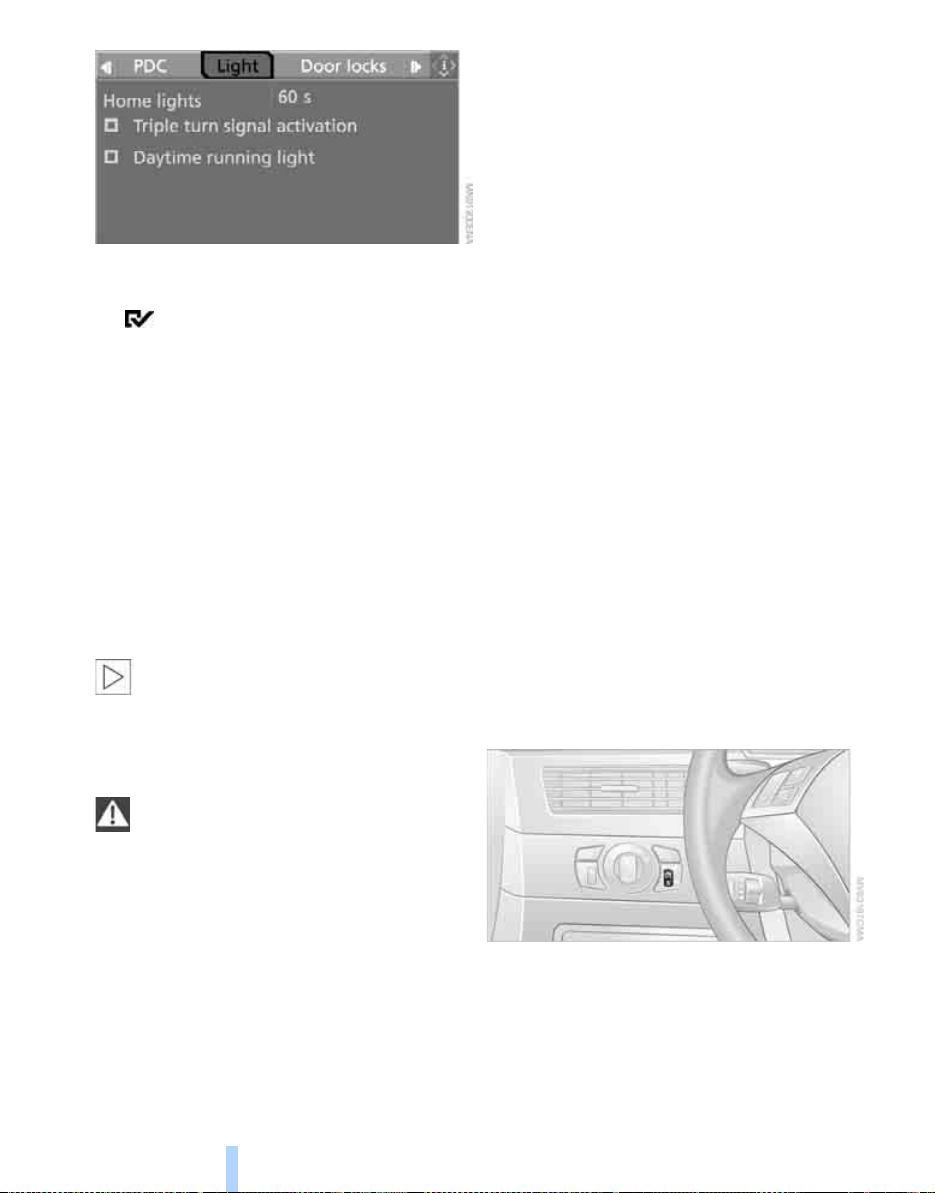
Lights
Online Edition for Part-No. 01 41 0 159 725 © 09/05 BMW AG
5. Select "Daytime running light" and press
the controller.
Daytime driving lights are switched on.
Automatic driving lights control*
When the switch is in position 1, the low-beam
headlights are switched on and off automatically depending on ambient light conditions,
e.g. in a tunnel, twilight, and in precipitation.
*
Adaptive Head Light
beam headlights are on, the LED next to the
symbol is lit.
When driving into brightly illuminated tunnels,
there may be a delay before the headlights
switch on.
The headlights may also switch on when the
sun is sitting low on a blue sky.
The low-beam headlights remain
switched on irrespective of the ambient
light conditions if you switch on the fog lights*.
For daytime driving lights,
lights always come on with the switch in this
position when the ignition is switched on.<
The driving lights control function is no
substitute for your individual judgement
of when it is necessary to switch on the lights.
The sensors are unable, for instance, to recognise fog or hazy weather. In such situations,
switch on the lights manually to avoid any safety
risk.<
is active. When the low-
the low-beam head-
Adaptive Head Light*
Principle
Adaptive Head Light is a variable headlight control system that makes it possible to illuminate
the road surface more effectively. The light
cones from the headlights are directed to suit
the road ahead on the basis of steering angle
and other parameters.
Activating Adaptive Head Light
In switch position 1, Adaptive Head Light is
active and automatic driving lights control is
switched on.
To avoid dazzling the drivers of oncoming vehicles, Adaptive Head Light is not active when the
car is reversing and directs the light to the front
passenger's side when the car is at a standstill.
Malfunction
The LED next to the symbol for automatic driving lights control flashes. Adaptive Head Light
is faulty or has failed. Have the system checked
as soon as possible.
Headlight beam throw adjustment
Halogen lights
The beam throw of the low-beam headlights
must be adjusted manually to suit the load carried in the car, otherwise the drivers of oncoming vehicles could be dazzled.
94
Page 96
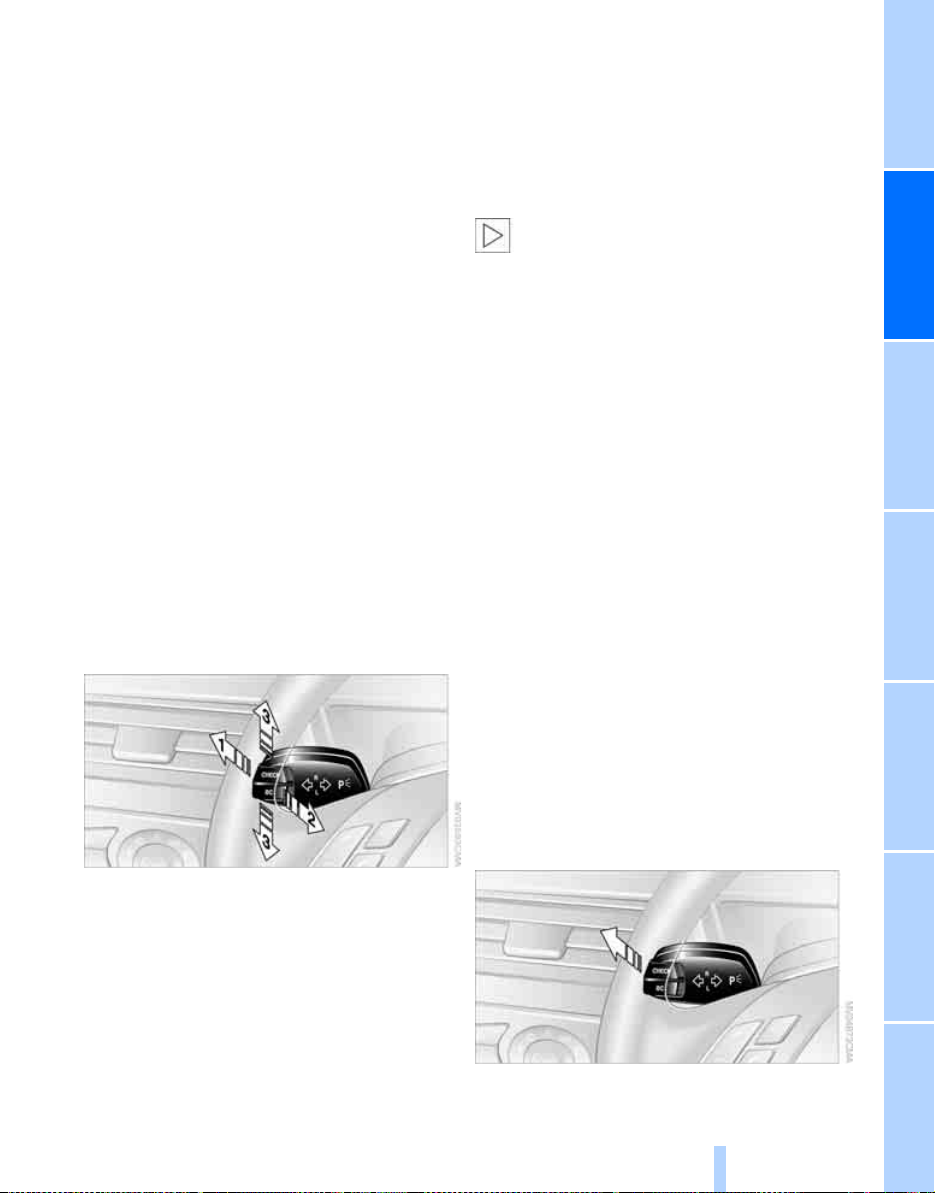
Saloon
Online Edition for Part-No. 01 41 0 159 725 © 09/05 BMW AG
The second value in each case applies when
towing a trailer.
0 / 1 = 1 to 2 persons without luggage
1 / 1 = 5 persons without luggage
1 / 2 = 5 persons with luggage
2 / 2 = 1 person, luggage compartment full
Comply with rear axle load limit, see page 214
onwards.
Touring
All load conditions: 0.
Exception: 1 person, load area full and with a
trailer being towed: 1.
Comply with rear axle load limit, see page 215
onwards.
Xenon headlights*
The headlight beam throw is regulated automatically, e.g. when accelerating and braking
and to adapt to the different loads being carried.
High-beam headlights/ parking lights
Right or left parking lights*
There is an additional option of switching on the
lights on the side of the car facing the road
when parked, if permitted in the country of use:
Once you have switched the engine off, push
the lever beyond the pressure point in the corresponding direction 3.
The parking lights will drain the battery.
Do not leave them switched on for too
long, otherwise the engine may fail to start.<
High-beam headlights assistant*
Principle
This system switches the high-beam headlights on and off automatically. The process is
controlled by a sensor on the front of the inside
mirror. The assistant ensures that the highbeam headlights are switched on whenever
permitted by the situation in which the car is
being driven. This relieves the load on you the
driver and optimises your view of the road. You
can of course intervene at any time and switch
the high-beam headlights on and off in the
usual way.
1 High-beam headlights
2 Headlight flasher
3 Parking lights
Activating the high-beam headlights
assistant
1. Turn the illumination switch to switch
position 1, see page 93.
2. With the low-beam headlights switched on,
briefly press the flashing turn indicator lever
towards high-beam headlights.
Entertainment OverviewControlsDriving hintsNavigationMobilityReference
95
Page 97
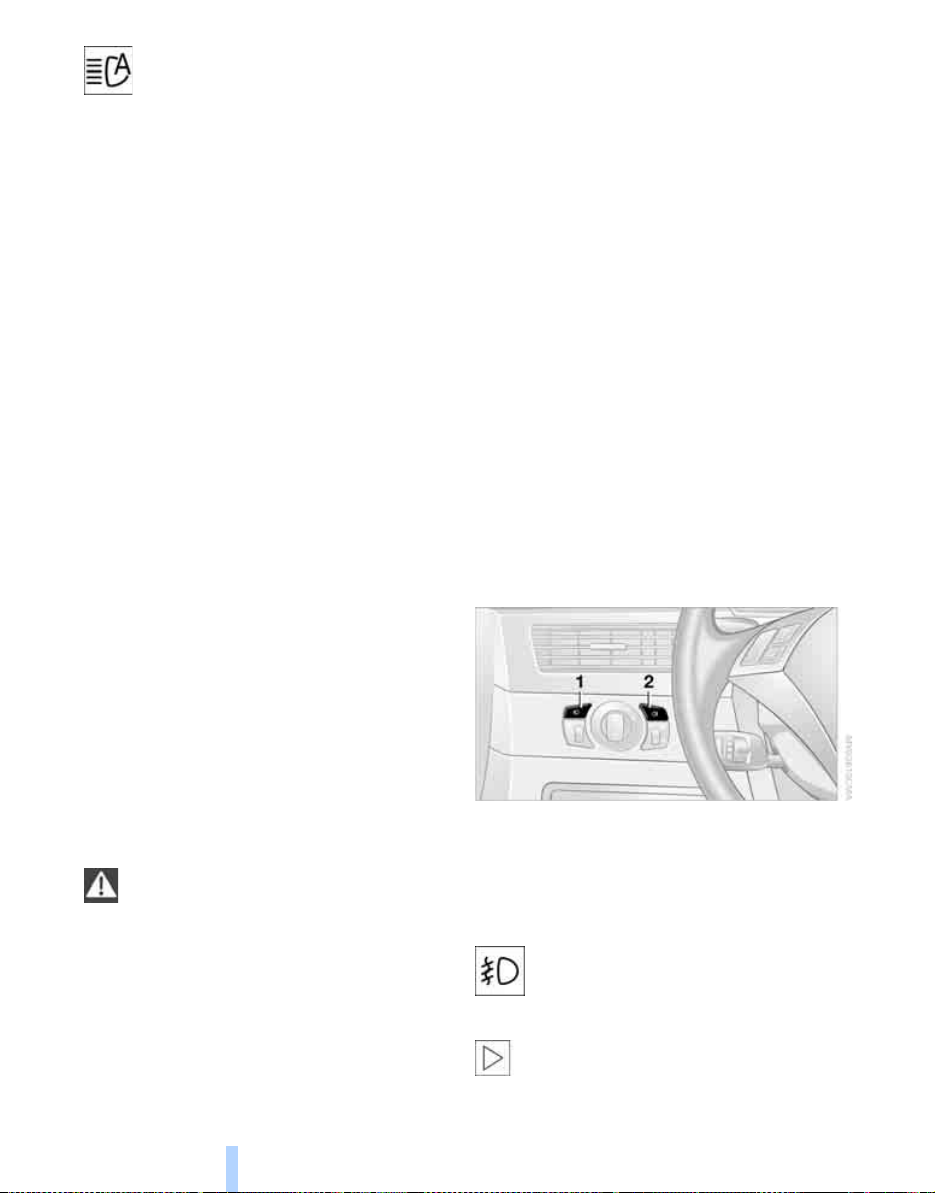
The indicator lamp on the instrument
Online Edition for Part-No. 01 41 0 159 725 © 09/05 BMW AG
cluster comes on when the high-beam
headlights assistant is active. The
lights are turned up and down automatically as
the system responds to traffic travelling in front
Lights
and in the oncoming direction, and also when
ambient lighting is sufficient, e.g. in built-up
areas.
Turning up and down manually
You can intervene at any time as required or if
required by the situation:
> If the high-beam headlights assistant has
switched on the high-beam headlights but
you would prefer the low-beam headlights
to be switched on, simply use the flashing
turn indicator lever to turn the lights up and
down accordingly. This will deactivate the
high-beam headlights assistant.
To reactivate the system, press the flashing
turn indicator again briefly towards highbeam headlights.
> If the high-beam headlights assistant has
switched on the low-beam headlights but
you would prefer the high-beam headlights
to be switched, turn the lights up in the
usual way. This deactivates the system and
you will have to turn the lights down by
hand.
To reactivate the system, press the flashing
turn indicator again briefly towards highbeam headlights.
> You can use the headlamp flasher in the
usual way when the headlights are dimmed.
System limits
You should always give priority to your
own judgement over that of the highbeam headlights assistant in respect of the use
of high-beam headlights. In such situations you
should turn the headlights down manually in
order not to create a safety hazard.<
In the following example situations, the system
will not operate or its operation will be subject to
restrictions and your intervention may be
required:
> In extremely unfavourable weather condi-
tions such as dense fog or heavy rain
> In order to be able to perceive poorly-lit road
users such as pedestrians, cyclists, horses
and riders, carts, in situations where trains
or ships are travelling in the vicinity of the
road, deer passing
> On narrow bends, steep uphill or downhill
gradients, at traffic junctions or if your view
of oncoming traffic on a motorway is
obstructed
> In poorly lit towns and where there are very
reflective signs
> At low road speeds
> If the windscreen in the area in front of the
inside mirror has fogged over, is dirty or is
covered with stickers, labels, etc.
> If the sensor is dirty. Use a cloth soaked in
glass cleaner to clean the sensor on the
front of the inside mirror
Fog lights
To switch on/off, press the respective button.
1 Front fog lights
2 Rear fog lights
Front fog lights*
The side lights or low-beam headlights
must be switched on. The green indicator lamp in the instrument cluster
comes on when the front fog lights are in use.
If automatic driving lights control has
been activated, the low-beam headlights
come on automatically when the front fog lights
are switched on.<
*
*
96
Page 98
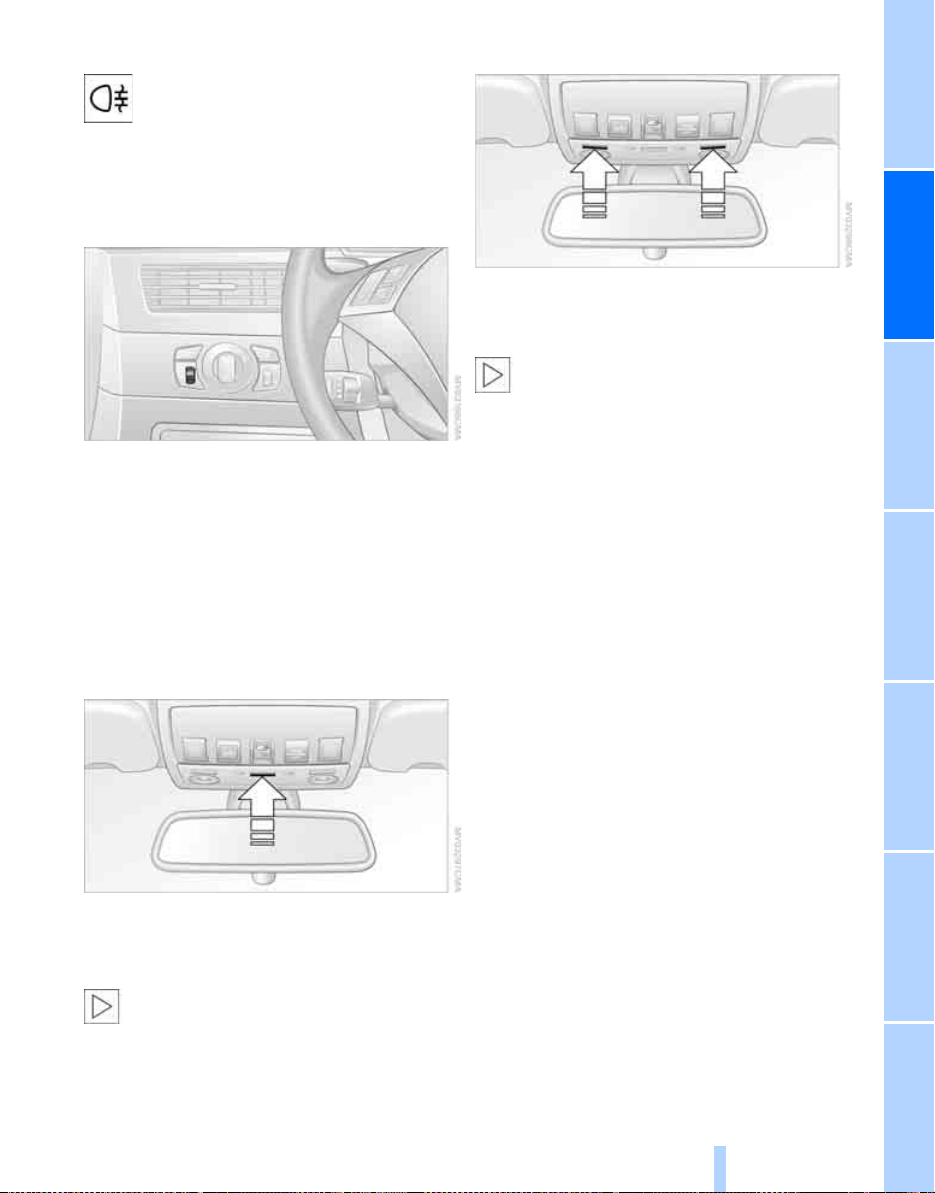
Rear fog lights*
Online Edition for Part-No. 01 41 0 159 725 © 09/05 BMW AG
The low-beam headlights or front fog
lights must be switched on. The yellow
indicator lamp in the instrument cluster
comes on when the rear fog lights are in use.
Instrument lighting
You can adjust the lighting intensity with the
knurled wheel.
Interior light
The interior light, the footwell lights, the door
*
entry lighting, the load area lights
*
ground lights
are controlled automatically.
and the
Reading lights
There are reading lights at the front and rear,
next to the interior lights. To switch on/off,
press the button.
To save the battery, all the lights in the car
will be switched off approx. 15 minutes
after radio readiness has been switched o ff, see
Start/stop button on page 56.<
Switching interior light on/off manually
Press the button.
To switch off the light permanently, hold the
button pressed for about 3 seconds.
If you switch on the independent ventila-
tion system
remote control, the interior light comes on for a
short time by way of confirmation.<
*
or auxiliary heater* with the
Entertainment OverviewControlsDriving hintsNavigationMobilityReference
97
Page 99
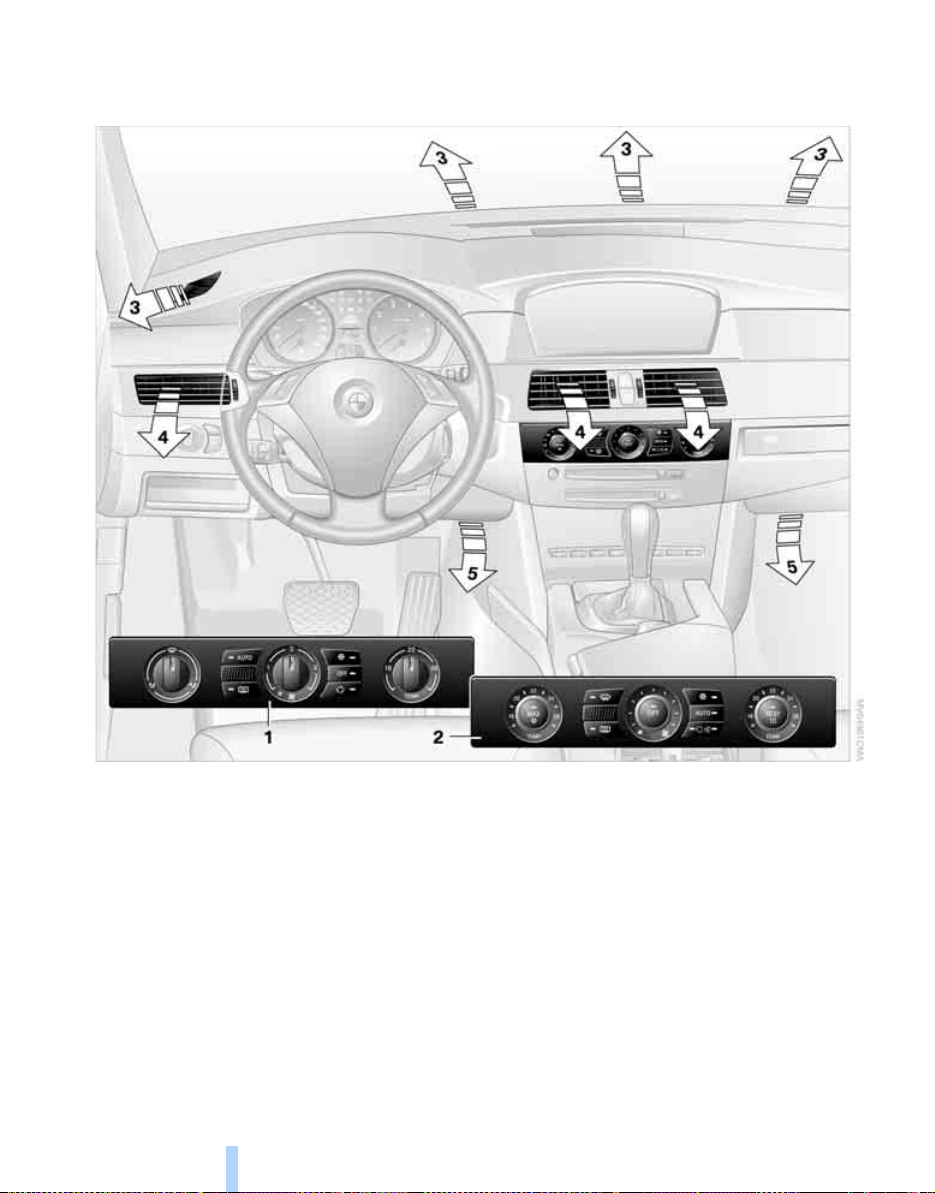
Climate
Online Edition for Part-No. 01 41 0 159 725 © 09/05 BMW AG
Climate
Equipment versions
There are two versions of automatic air conditioning, depending on the equipment fitted to
your car.
1 Automatic air conditioning
2 Automatic air conditioning with extended
range of features
Air vents
3 Air to windscreen and side windows
4 Air to the upper body area, see Ventilation
at front on page 100 and 105
5 Air to footwells
*
98
Page 100
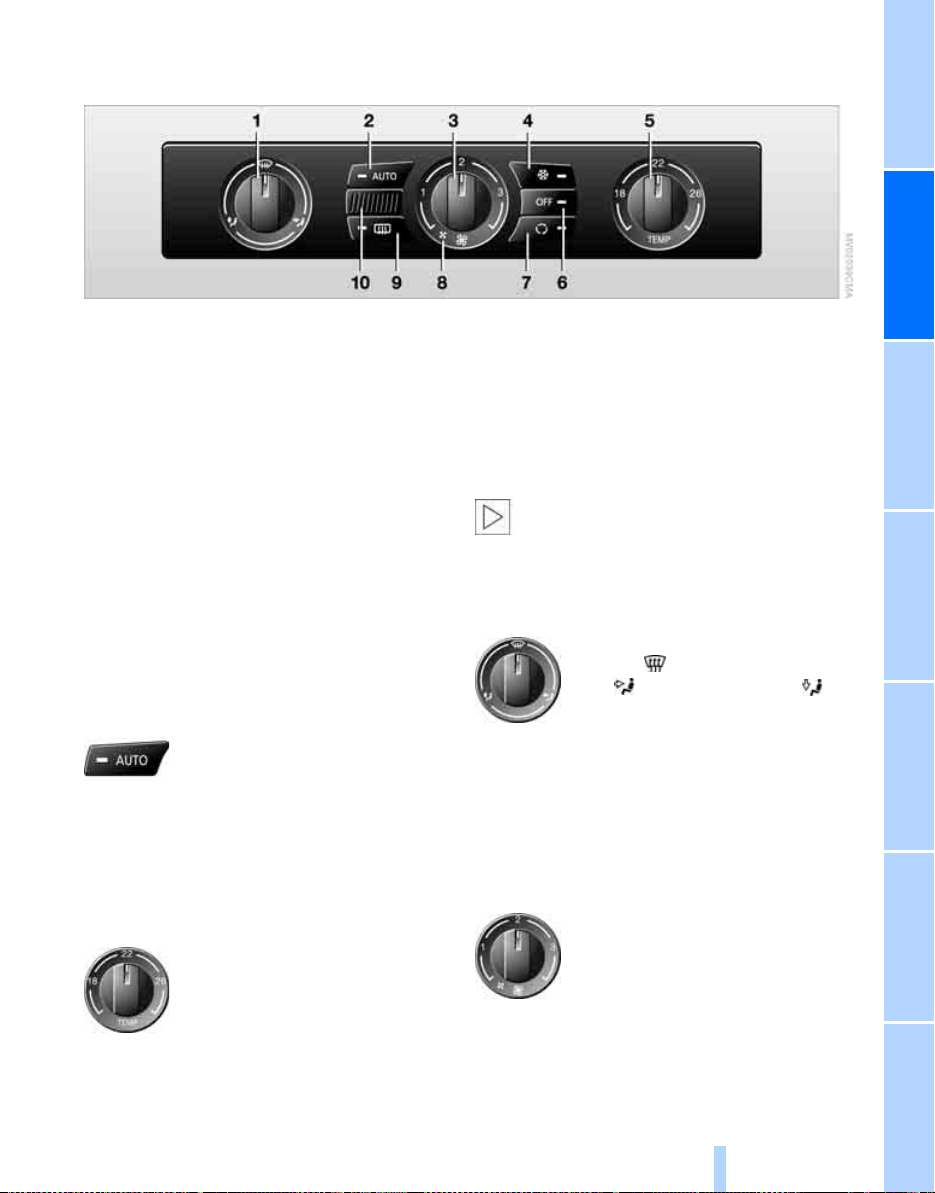
Automatic air conditioning
Online Edition for Part-No. 01 41 0 159 725 © 09/05 BMW AG
1 Air distribution, adjusting manually
2 AUTO program
3 Air volume, adjusting manually
4 Switching cooling function on/off manually
5 Temperature control
Preferred interior climate
The AUTO program 2 can optimise air distribution and air volume in virtually any situation, see
AUTO program below. All you need to do is
select an inside temperature 5 which is comfortable for you.
The following sections inform you in detail
about how to adjust the settings.
AUTO program
The AUTO program takes charge
of setting the air volume and air
distribution to the windscreen and
side windows, to the upper body and to the
footwell.
The cooling function is switched on automatically in the AUTO program.
Temperature
The scale values are guide figures
for the interior temperature.
The automatic air-conditioning
system attains this temperature as
quickly as possible regardless of the season by
using maximum cooling or heating power if necessary. The temperature is then maintained.
6 Switching off automatic air conditioning
7 Recirculated-air mode
8 LED for auxiliary heater
9 Rear window heating
10 Air inlet grille for interior temperature sen-
sor, keep unobstructed
The automatic air-conditioning system
does not have sufficient time to establish
the set temperature when temperature settings
are changed quickly in succession.<
*
Adjusting air distribution manually
You can direct the air volume to the
windows , towards the upper
body and into the footwell .
Any intermediate setting is possi-
ble. You can switch the automatic
function for air distribution back on with the
AUTO button.
The air volume continues to be regulated automatically when the air distribution is adjusted
manually.
Adjusting air volume manually
Turn to vary the air volume. You
can switch the automatic function
for the air volume back on by
pressing the AUTO button.
The higher the air volume, the more effective
the air conditioning will be.
Entertainment OverviewControlsDriving hintsNavigationMobilityReference
99
 Loading...