How it Works
Log In / Sign Up
Buy Points
How it Works
FAQ
Contact Us
Questions and Suggestions
Users
Beko
Loading...
W
WMD15100P
WMD 25086 T
WMD25100
WMD 25100 R
WMD 25100 T
3
WMD 25100 TBL
4
WMD 25100 TS
4
WMD 25101 T
WMD25105T
WMD25120
WMD 25120 T
2
WMD 25121 T
WMD 25125 M
WMD 25126 T
WMD 25145 M
WMD 26100 T
2
WMD 26100 TS
WMD26101T
WMD 26106
WMD 26120 T
2
WMD 26120 TS
WMD26121T
WMD26125
WMD26140
WMD 26140 T
WMD 26140 TS
WMD26145
WMD 261 W
WMD 54500
2
WMD 54500 BL
WMD 54500 S
WMD 54580
WMD 55060
WMD 55080
2
WMD 55100
2
WMD 55100 BL
WMD 55100 S
WMD 56100
WMD56120
3
WMD 56120 BL
WMD 56120 S
2
WMD 56140
WMD 56140 S
WMD 56160
2
WMD57122
3
WMD 57142
2
WMD 57162
2
WMD 65085
2
WMD 65105
2
WMD 65105S
2
WMD 65125
2
WMD 66106
WMD 66106 S
WMD 66120
2
WMD 66120 S
2
WMD 66140
2
WMD 66140 S
2
WMD 66160
2
WMD 66160 S
WMD 67105
WMD 67106
2
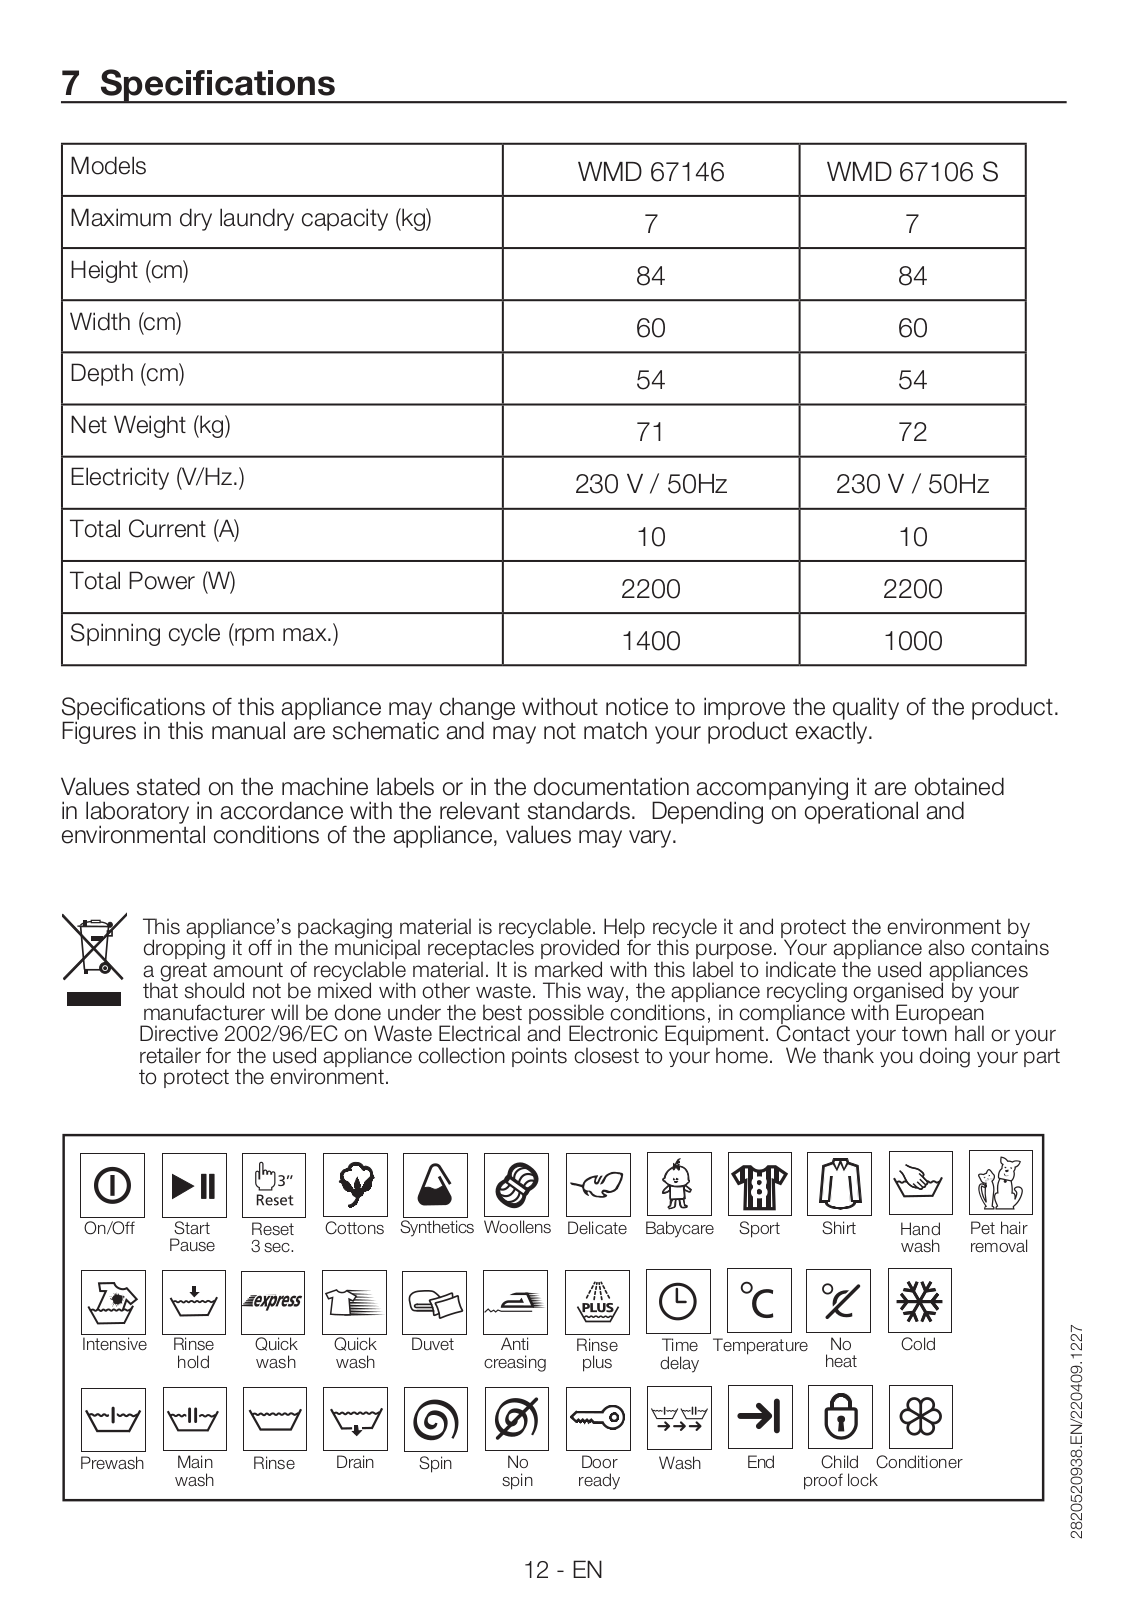
WMD 67106 S
2
WMD 67125
2
WMD 67126
2
WMD 67146
WMD 75080
WMD 75085
WMD 75100
WMD 75105
WMD 75106
WMD 75107
WMD 75120
WMD 75125
WMD 75125 S
WMD 75126
WMD 75126 S
WMD 75127
WMD 76080
WMD 76100
WMD 76106
WMD 76120
WMD 76126
WMD 77087
WMD 77106
WMD 77107
2
WMD 77107 D
WMD 77126
WMD 77127
3
WMD 77127 S
3
WMD 77140
WMD 77146
WMD 77147
2
WMD 78107
WMD 78124 CD
WMD 78127
2
WMD 78127 A
WMD 78127 PB
WMD 78127 S
2
WMD 78127 SD
2
WMD 78144
Loading...
Loading...
Nothing found
WMD 67106 S
User manual
48 pgs
2.49 Mb
0
User Manual
48 pgs
2.76 Mb
0
Table of contents
Loading...
Beko WMD 67106 S, WMD 67146 User manual
...
Beko User manual
Download
Loading...
+
33
hidden pages
Unhide
You need points to download manuals.
1 point = 1 manual.
You can buy points or you can get point for every manual you upload.
Buy points
Upload your manuals
 Loading...