


Motion 2
Table of contents
 Loading...
Motion 2
User Manual

Apple Computer, Inc.
© 2005 Apple Computer, Inc. All rights reserved.
Under the copyright laws, this manual may not be
copied, in whole or in part, without the written consent
of Apple. Your rights to the software are governed by
the accompanying software license agreement.
The Apple logo is a trademark of Apple Computer, Inc.,
registered in the U.S. and other countries. Use of the
“keyboard” Apple logo (Option-Shift-K) for commercial
purposes without the prior written consent of Apple
may constitute trademark infringement and unfair
competition in violation of federal and state laws.
Every effort has been made to ensure that the
information in this manual is accurate. Apple Computer,
Inc. is not responsible for printing or clerical errors.
Apple Computer, Inc.
1 Infinite Loop
Cupertino, CA 95014-2084
408-996-1010
www.apple.com
Apple, the Apple logo, Final Cut Pro, FireWire, iTunes,
Logic, Mac, Mac OS, Macintosh, QuickTime, Shake,
Soundtrack and TrueType are trademarks of Apple
Computer, Inc., registered in the U.S. and other
countries.
Finder, GarageBand, iPhoto, LiveType, and Pixlet are
trademarks of Apple Computer, Inc.
iTunes Music Store is a service mark of Apple Computer,
Inc., registered in the U.S. and other countries.
Adobe and PostScript are trademarks or registered
trademarks of Adobe Systems Incorporated in the U.S.
and/or other countries.
Primatte RT Copyright (c) Photron USA, Inc. 2004. All
rights reserved.
Other company and product names mentioned herein
are trademarks of their respective companies. Mention
of third-party products is for informational purposes
only and constitutes neither an endorsement nor a
recommendation. Apple assumes no responsibility with
regard to the performance or use of these products.
Some images used to demonstrate the application in
this manual were acquired from Getty Images, Inc. All
rights reserved.

1
Contents
Preface 9 Motion 2 Documentation and Resources
9
Onscreen Help
12
Additional Resources
Chapter 1 15 Getting To Know Motion
15
About Motion Graphics
18
About the Motion Workspace
27
The Toolbar
35
The Canvas
53
The Project Pane
67
The Timing Pane
87
The Utility Window
10 5
The Dashboard
10 7
Preferences
12 4
Menus
Chapter 2 139 Creating and Managing Projects
13 9
Creating New Projects
15 2
Managing Projects
157
Editing Project Properties
15 8
Browsing Media Files in Motion
163
File Types Supported by Motion
174
Adding Media to Your Project
17 9
Managing Objects in Your Project
183
Deleting Objects From a Project
18 4
Exchanging Media in a Project
185
Object Media Tab Parameters
18 9
Using Media in the Library
19 4
Organizing Layers and Objects in Motion
211
Customizing and Creating New Templates
3

Chapter 3 217 Basic Compositing
219
Layer and Object Order
221
Object and Layer Transforms in the Canvas
243
Editing Opacity and Blending
269
Drop Shadows
Chapter 4 273 Using the Timeline
274
Getting Familiar With the Timeline
282
Working in the Timeline
293
Editing Objects in the Timeline
306
Working in the Ruler
312
Adding Markers
Chapter 5 317 Using Behaviors
320
Browsing for Behaviors
321
Applying and Removing Behaviors
329
Customizing Behaviors
331
Working With Behaviors
335
Changing the Timing of Behaviors
341
Animating Behavior Parameters
343
Saving and Sharing Custom Behaviors
344
Behavior Descriptions
392
Behavior Examples
Chapter 6 401 Keyframes and Curves
405
Animating in the Canvas
409
Animating With the Dashboard
414
Animating Using the Inspector
419
Animating in the Timeline
424
Animating in the Keyframe Editor
446
Animating On the Fly
Chapter 7 453 Using Text
454
Using Text in Motion
456
Setting Object Duration Preferences
457
Working With Text
464
About Fonts
468
Using the Text Tools
473
Editing Text in the Inspector
524
Using Text Animation and Text Sequence Behaviors
556
Using Other Behaviors With Text Objects
559
Animating Text With Keyframes
560
Using LiveFonts
4
Contents

Chapter 8 565 Working With Particles
567
The Anatomy of a Particle System
569
Using Particle Systems
585
Creating Graphics and Animations for Particle Systems
586
Advanced Particle System Controls
610
Animating Objects in Particle Systems
610
Using Behaviors With Particle Systems
612
Applying Filters to Particle Systems
613
Particle System Examples
619
Saving Custom Particle Effects to the Library
Chapter 9 621 Using the Replicator
623
The Anatomy of the Replicator
627
Using the Replicator
645
Advanced Replicator Controls
673
Animating Replicator Parameters
681
Using the Sequence Replicator Behavior
696
Using Behaviors With Replicators
698
Applying Filters to Replicators
699
Saving Custom Replicators to the Library
Chapter 10 701 Using Filters
701
About Filters
701
Working With Filters
702
An Introduction to Filters
709
Working With Filters
785
Tiling Filters
793
Working With Third-Party Filters
Chapter 11 795 Working With Generators
795
About Generators
Chapter 12 819 Using Shapes and Masks
820
The Difference Between Shapes and Masks
820
Shape and Mask Drawing Tools
835
Illustrating Using the Shape Tools
847
Animating Shapes
851
Masking Objects to Create Transparency
865
Applying Image Masks to an Object
869
Using Masks to Aid Keying Effects
873
Manipulating Alpha Channels Using Filters
Contents
5

Chapter 13 877 Working With Audio
878
Audio Files in Motion Projects
887
Working With Audio Tracks
894
Keyframing Level and Pan Changes
897
Using Soundtrack Pro With Motion
898
Exporting Audio
Chapter 14 899 Exporting Motion Projects
900
Exporting Your Project
901
Using Export Presets
905
Setting Export Options
909
Exporting With Compressor
912
Exporting an Audio File
Appendix A 913 Keyboard Shortcuts
913
General Interface Commands
915
Motion Menu
915
File Menu
916
Edit Menu
917
Mark Menu
919
Object Menu
920
View Menu
922
Window Menu
923
Help Menu
923
Audio Editor
923
Audio Tab
924
Canvas
933
Dashboard
933
File Browser
934
Inspector
934
Keyframe Editor
934
Layers
935
Library
936 Media Tab
936 Timeline
938 Keyframing Commands
939 Shape and Mask Commands
939 Toolbar
Appendix B 941 Video and File Formats
941 Supported File Formats
944 Standard Definition vs. High Definition Video Formats
948 Popular Video Codecs for File Exchange
6
Contents

950 What Is Field Order?
951 Using Square or Nonsquare Pixels When Creating Graphics
953 Differences in Color Between Computer and Video Graphics
953 Using Fonts and Creating Line Art for Video
953 Scaling Imported High-Resolution Graphics
954 Creating Graphics for HD Projects
Appendix C 955 Integration With Final Cut Pro
955 Using a Motion Project in Final Cut Pro
957 Using Final Cut Pro Clips and Sequences in Motion
Appendix D 961 Using Gestures
Index 973
Contents 7


Motion 2 Documentation and Resources
Motion is an exciting new motion graphics application
that lets you create content for broadcast and video.
Discover all the resources you can use to help you learn
this versatile application.
This user manual provides a detailed description of the features in Motion and how to
use them to create compelling visual projects.
In addition to this document, your software comes with the printed book, Motion
Getting Started, which is an introduction to Motion’s major features, including examples
and tips. It is recommended that you start by reading through Motion Getting Started
to familiarize yourself with the basics of working in Motion.
Onscreen Help
The Motion Help menu allows you to access information about every aspect of the
application directly onscreen while you are working in Motion, including the Motion 2
User Manual, Late-Breaking News, the Motion website, and so on.
Preface
The items in the Help menu are described below.
To access the Motion User Manual and other help:
m
In Motion, choose Help, then choose an item from the list.
User Manual
The Motion 2 User Manual is a comprehensive document that contains detailed
information about all features in the application.
When the user manual is first opened, the Motion 2 User Manual access page appears.
The Preview drawer on the side contains a list of links that allow you to locate specific
information in the user manual. Click on any bookmark in the drawer to begin
exploring the user manual.
9

Links in the body of the access page provide an additional way to locate important
help and other documentation tools to assist you in learning and using Motion. Most of
these links are also available directly from the Help menu:
• Late-Breaking News
• New Features
• Getting Started
• Tutorials
• Motion Support
• Motion on the Web
• Apple Training Centers
• Feedback
This link takes you directly to the Motion feedback page, where you can provide
Apple with your valuable insights, suggestions, and feedback about your experience
with working in Motion.
Accessing the Motion User Manual Contents
Once you have chosen Motion User Manual from the Help menu, use the following
guidelines to navigate the extensive document.
To access the contents of the Motion 2 User Manual:
m
In Preview (the application that displays the manual), click the Drawer button on the
toolbar to display the contents of the user manual.
Among the useful sections included in the Preview drawer list are the following:
• Keyboard Shortcuts
This item takes you to an appendix containing a comprehensive list of keyboard
commands available in Motion. Getting familiar with these shortcuts can dramatically
increase your productivity when working in Motion.
• Using Gestures
This item takes you to an appendix that explains how to use a Wacom graphics tablet
and pen as an input device in Motion. “Gestures” are pen-tool shortcuts that allow
you to navigate and perform various tasks without a keyboard or mouse.
• Index
This item takes you to the user manual index—a comprehensive list of controls,
features, and functions within Motion. Each entry is a hyperlink that takes you
directly to the page in the user manual where that feature is described. Additionally,
common motion graphics tasks and terminology are listed to aid you in learning
about specific tasks.
You can also type keywords into the Search field at the top of the Preview drawer to
quickly find specific information in the user manual.
10 Preface Motion 2 Documentation and Resources

Because Motion is a creative tool, documentation can only go so far in describing its
potential. The Motion 2 User Manual provides a detailed description of the Motion
interface, features, and functionality, and introduces you to the built-in templates and
resources to give you a sense of the versatility of the product. In the end, you are
limited only by your own imagination. The best way to learn all that Motion has to offer
is to jump in and start exploring with the documentation at your fingertips.
Late-Breaking News
The Late-Breaking News document contains information about issues with third-party
hardware and software, and known bugs. It also contains information about any new
features or changes to the software that occurred after the Motion 2 User Manual was
completed. It is highly recommended that you review this document in order to be
completely up-to-date on the functionality of the software.
New Features
This option opens a PDF version of the New Features in Motion 2 document, which briefly
describes what’s new in the latest version of Motion, as well as where to find detailed
information about those features in the user manual. This document is identical to the
printed New Features in Motion 2 found in the Motion box.
Motion Getting Started
This option opens a PDF version of the Motion Getting Started book, which provides
an overview of the application and its workflow. This is identical to the printed Motion
Getting Started book found in the Motion box.
Tutorials
This option opens the PDF-format Motion 2 Tutorials. The tutorials are step-by-step
lessons that walk you through the basic workflow and interface elements of Motion.
Show Welcome
This option opens the Welcome Screen in the Motion application, which offers access
to web-based QuickTime tours of Motion, as well as a library of professionally designed
Motion project templates.
Motion Support
This option opens your web browser and takes you directly to the Motion support
page on the Apple website.
Motion on the Web
This option opens your web browser and takes you directly to the Motion product
page on the Apple website.
Apple Training Centers
This option takes you to the Apple Training Centers webpage, where you can find
information about Apple-authorized training centers in your area.
Preface Motion 2 Documentation and Resources 11

Create Support Profile
This option generates a special file describing the technical details about your
computer such as processor speed, video card specifications, and so on. This file is used
only by authorized Apple technical support technicians.
Additional Resources
For additional information about Motion, use the resources listed below.
Motion on the Web
You can visit the Motion website for general information and updates as well as the
latest news on Motion.
To go to the Motion website, do one of the following:
m
In Motion, choose Help > Motion on the Web.
m
Open your Internet browser, then enter http://www.apple.com/motion.
There are a variety of forums, discussion boards, educational resources, and marketing
materials pertaining to Motion on the web.
Apple Service and Support Website
You can visit the support website for software updates and answers to the most
frequently asked questions regarding Motion. Additionally, you can find product
specifications, reference documentation, and Apple and third-party technical articles.
To go to the Motion support web page, do one of the following:
m
Choose Help > Motion Support.
m
Open your Internet browser, then enter http://www.apple.com/support/motion.
Other Apple Websites
Apple provides a wide array of information that can enhance your experience working
with Apple products such as Motion.
http://www.apple.com
Start at the Apple main home page to find the latest information about Apple
products.
http://www.apple.com/quicktime
QuickTime is the Apple industry-standard technology for handling video, sound,
animation, graphics, text, music, and 360-degree virtual reality (VR) scenes. QuickTime
provides a high level of performance, compatibility, and quality for delivering digital
video. Go to the QuickTime website for information on the types of media supported, a
tour of the QuickTime interface, specifications, and more.
12 Preface Motion 2 Documentation and Resources

http://www.apple.com/creative
This website provides news, information, and other resources on seminars, events, and
third-party tools used in digital video, design and print, music and audio, web
publishing, and the media arts.
http://www.apple.com/education
Look here for resources, stories, and information about projects developed by users in
education using Apple software, including Motion.
http://store.apple.com
Go here to buy software, hardware, and accessories direct from Apple. You can also find
special promotions and deals that include third-party hardware and software products.
Preface Motion 2 Documentation and Resources 13


1 Getting To Know Motion
1
This chapter introduces you to the basic concepts of
motion graphics and the Motion interface. It also
describes how to work with all of the basic tools you
need to get started.
Motion is a behavior-driven motion graphics application that can be used for a wide
variety of projects, including titles, broadcast graphics, and simulations.
If you have not yet read the Motion Getting Started book, you are encouraged to
explore that guide to get a quick introduction to the major functions and capabilities
of Motion. It is also suggested that you take the time to work through the tutorials, to
get a hands-on introduction to working in Motion.
This chapter provides an introduction to motion graphics and the Motion workspace,
and how to navigate and use common tools and controls.
About Motion Graphics
Motion graphics is a type of visual effects work most commonly associated with title
sequences and show openers, bumpers and interstitials, and interface design like DVD
menus. It is also frequently used in technical settings for simulations of moving systems
such as traffic patterns or scientific models.
Motion graphics usually incorporates multiple objects onscreen simultaneously and is
typically governed by design considerations and a strong sense of visual impact.
Sophisticated motion graphics artists often combine traditional layout and design
techniques with tools borrowed from special effects work such as keying, masking,
compositing, and particle systems to create dynamic moving designs. The tools
commonly used for motion graphics fall into several categories.
15

Design Tools
Graphic designers have been using software to facilitate their work for many years.
Motion has incorporated many of the most valuable tools commonly found in layout
and design applications, including guides, alignment, and direct manipulation for
positioning, transforming, and distorting objects. It also contains some of the most
flexible and sophisticated tools for creating and handling text elements. This is
especially important because text is such a critical component of motion graphics
design.
Timing Tools
The principal difference between traditional design and motion graphics is that motion
graphics is time based. This means that you are concerned with creating a wellcomposed and readable layout, and you must also manipulate that layout over the
duration of the show. Motion provides a Timeline that contains tools usually found in a
video editing application (such as trimming, markers, slipping, and snapping) to allow
you to hone and compose the temporal aspects of your project.
Motion also supports audio files, including basic audio mixing, so you can create a
soundtrack for your project and make timing decisions based upon the audio as well as
visual components. Furthermore, you can animate objects, filters, behaviors, and other
elements to create elegant and precise compositions.
Compositing
Any time you have more than one object onscreen simultaneously, you must employ
some version of compositing to combine the elements. This might mean moving the
objects onscreen so they don’t overlap, adjusting the objects’ opacities so they are
partly visible, or incorporating blend modes that mix the overlapping images in a
variety of ways. Compositing is fundamental to motion graphics work. Fortunately,
Motion makes it easier than ever before, allowing you to control layer and object order,
group and lock objects, and apply more than 25 different blending options to create
unique effects.
Special Effects Tools
You can further enhance your motion graphics projects by employing many of the
same tools used in movies to combine dinosaurs with live actors, sink luxury liners in
the ocean, or create space battles. Motion provides many of these tools such as keying
(isolating an object shot against a solid colored background), masking (to hide wires or
other objects that should not be seen in the final image), and particle systems (to
simulate natural phenomena such as smoke, fire, and water). In fact, Motion can be
used to create special effects shots like these, but its real power is in integrating these
tools with the design and editing tools described above.
16 Chapter 1 Getting To Know Motion

Unique Tools
As the field of motion graphics design has evolved, the tool sets in the most common
applications have grown, but Motion takes a completely fresh approach to the task. It
incorporates the cutting edge of software design and takes advantage of the latest
powerful Apple hardware. And while it does include the tools and techniques artists
have grown accustomed to, it also incorporates a streamlined, mode-less interface and
a new set of tools called behaviors that make previously complex (or near-impossible)
procedures as simple as drag and drop. A tool called the replicator creates a
customizable pattern from copies of an object, quickly creating complex design effects
that would take hours to build in other applications.
Behaviors
The Motion behaviors simplify the most common tasks such as scaling, fading, and
moving objects. They also allow you to create complex interactions between objects
with behaviors such as Edge Collision (making objects bounce off of one another) or
Attractor (which gives one object a gravitational pull on surrounding objects). And
because text is such a critical element of motion graphics work, Motion includes several
behaviors specifically designed for text elements that treat individual letters uniquely
while simultaneously affecting the entire object as a whole.
The Dashboard
One of the things that can bog down an otherwise fluid motion graphics experience is
having to stop and hunt for the location of a particular setting. Motion uses a special
floating window called the Dashboard to provide at-your-fingertips access to your
most frequently used parameters. The Dashboard changes dynamically, depending on
what is selected. The Dashboard also provides access to unique visual controls for some
of the behaviors.
The Dashboard also allows you to quickly add Parameter behaviors to the parameters
of the selected object. To add a Parameter behavior, Control-click a parameter in the
Dashboard, then choose a Parameter behavior from the shortcut menu. For more
information about Parameter behaviors, see “
page 326.
Real-Time Feedback
Finally, one of the strengths of Motion is that with the right hardware configuration,
nearly every effect and adjustment you make can be viewed in real time. This means
that you can watch how the various elements of your composition interact as you
adjust them. Not only does this mean less waiting time while the computer converts
your various clicks and drags into a watchable movie, it means that you can interact
with your creation in a more fluid and engaging way. Rather than making a set of
assumptions and then waiting to see how they turn out, you can now see how your
ideas work immediately, and make adjustments on the fly.
Chapter 1 Getting To Know Motion 17
Applying Parameter Behaviors” on
This turns the act of designing a motion graphics sequence into an act of exploration
and discovery, which is the way most artists prefer to create. Motion provides not just a
new set of brushes for the motion graphics artist, but a whole new type of work
environment.
Keyboard Shortcuts
If you have a three-button mouse connected to your computer, you can right-click to
access the same controls specified by the Control-click commands in the user
documentation. If you are working on a PowerBook G4, keep in mind that some
keyboard shortcuts require you to use the Function key (fn–next to the Control key) in
conjunction with the keys specified in the user documentation. For more information
about keyboard shortcuts in Motion, see Appendix A, “Keyboard Shortcuts.”
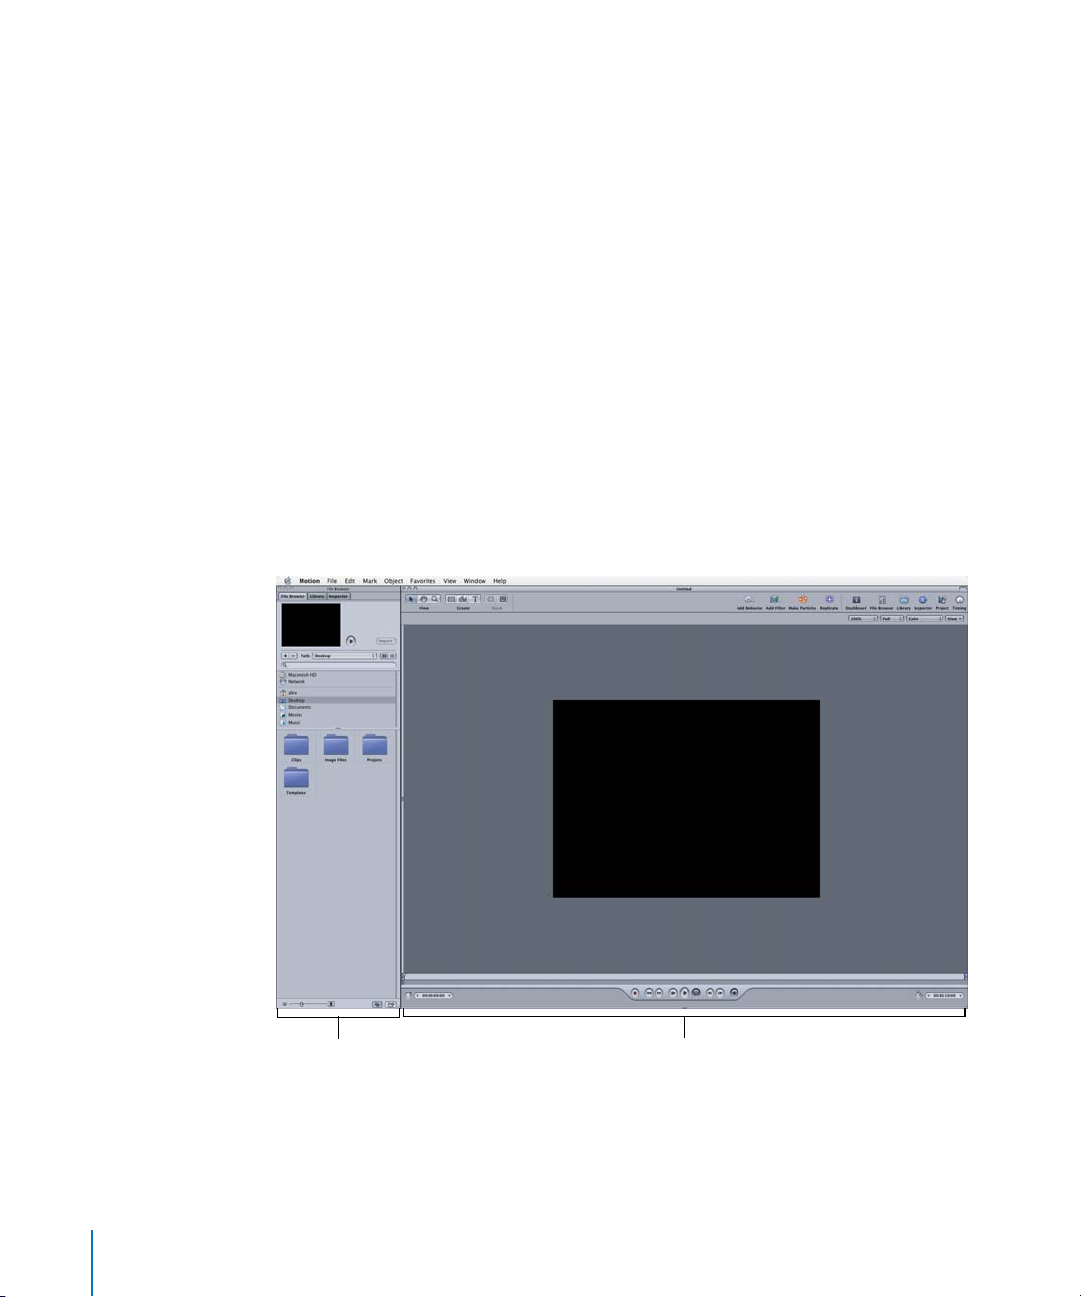
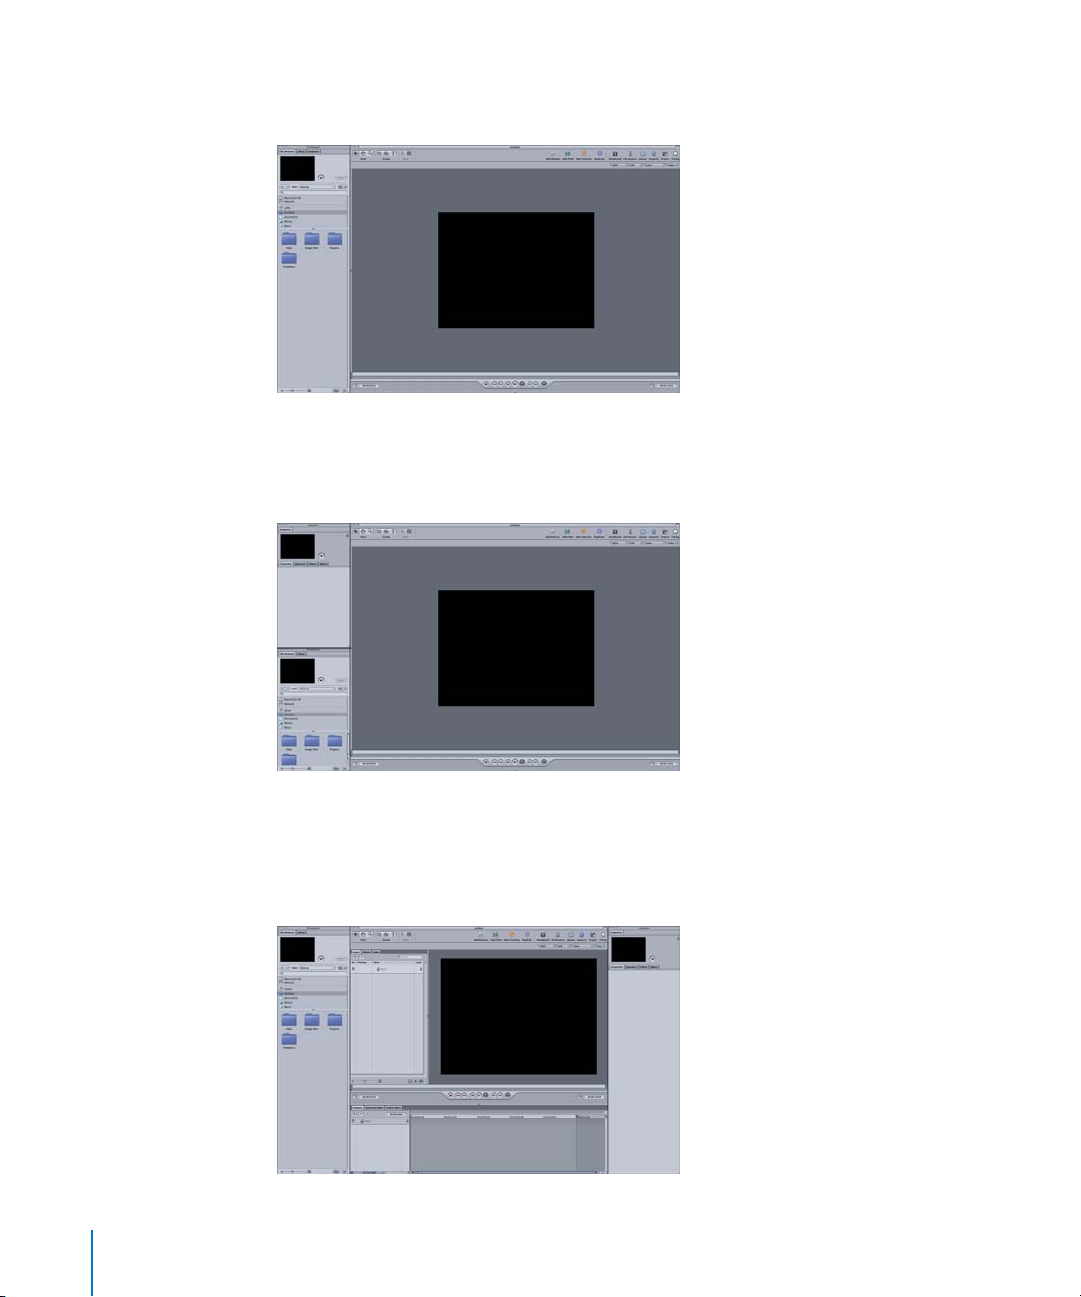
About the Motion Workspace
When you open Motion, the workspace fills your entire monitor, but the interface is
actually made up of several independent windows. The sizes and arrangements of
these windows are flexible to allow for the varying needs of different projects. There
are additional panes and windows that can be displayed along with the default set.
Utility window Canvas
18 Chapter 1 Getting To Know Motion
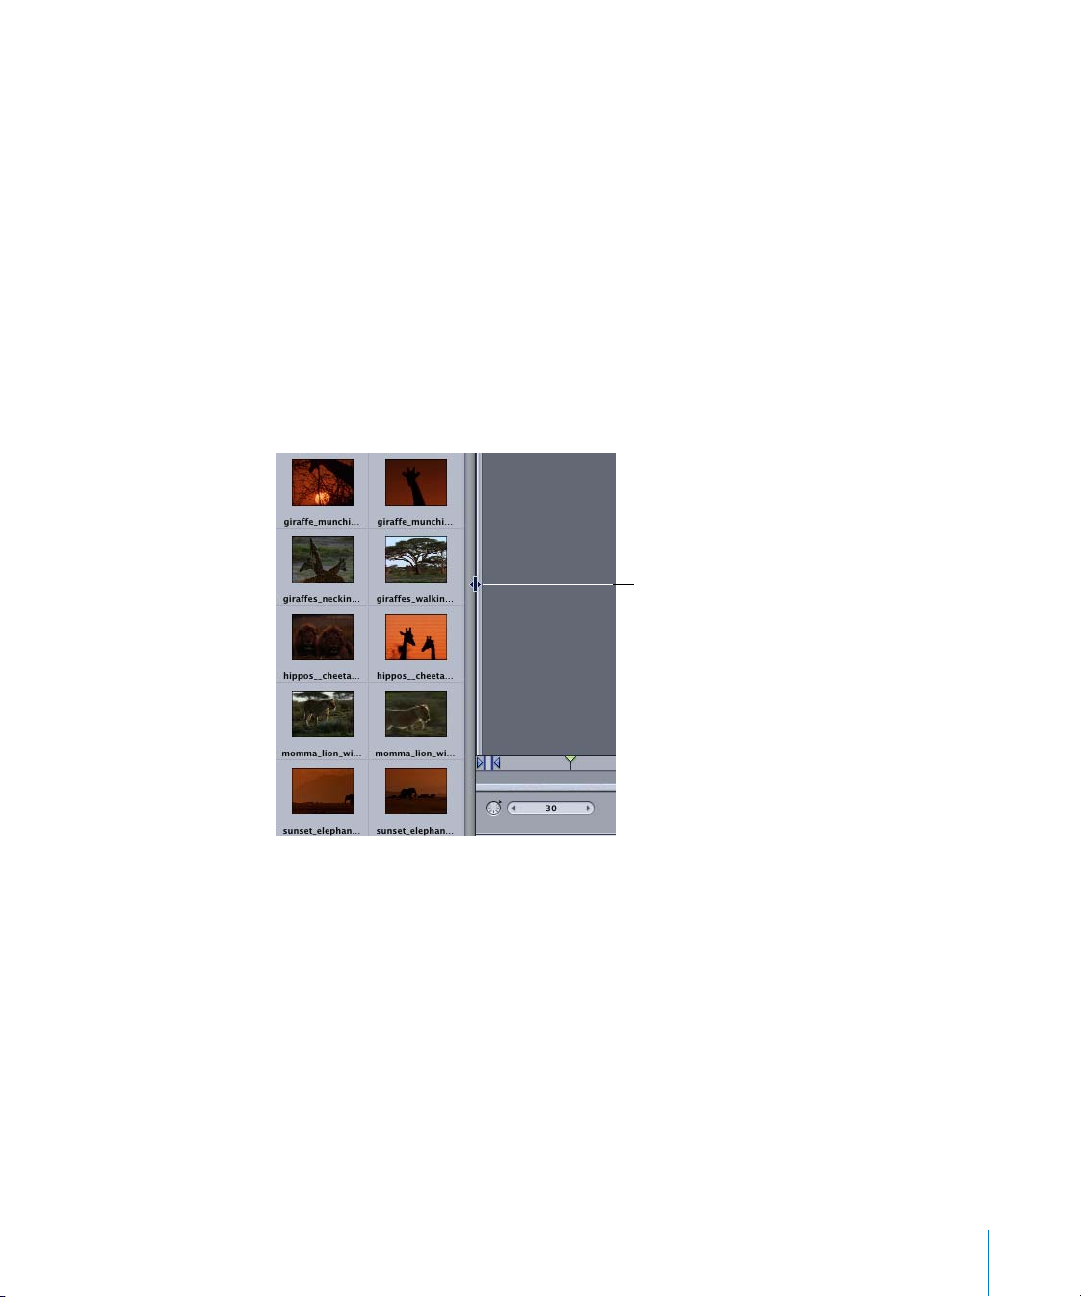
The Utility Window
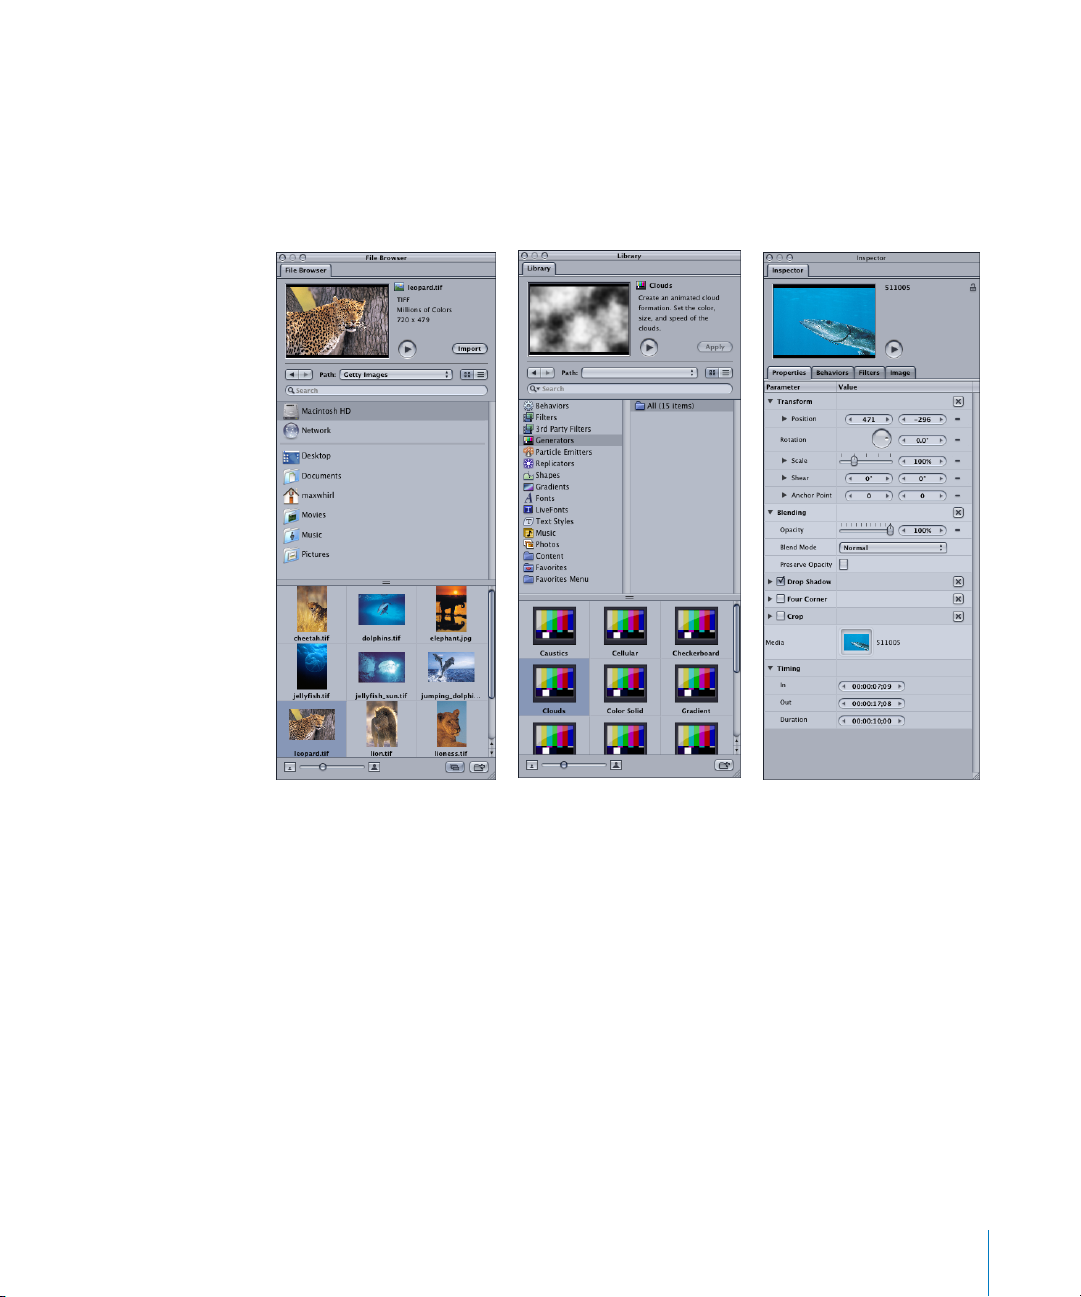
When you open Motion, the Utility window appears on the left side of the screen and
contains the File Browser from which you can add files to your project. The Utility
window also has tabs to display the Library, which contains all of the effects, templates,
and other goodies that come with Motion, and the Inspector, where you can
manipulate individual settings for those effects.
File Browser Library Inspector
The Canvas
The majority of your screen is occupied by your main work area, the Canvas. This is
similar to the document window in many other applications. It is here that you arrange
and lay out the objects that comprise your composite. Adding objects and effects to
your project is as simple as dragging them from the Utility window to the Canvas.
Chapter 1 Getting To Know Motion 19
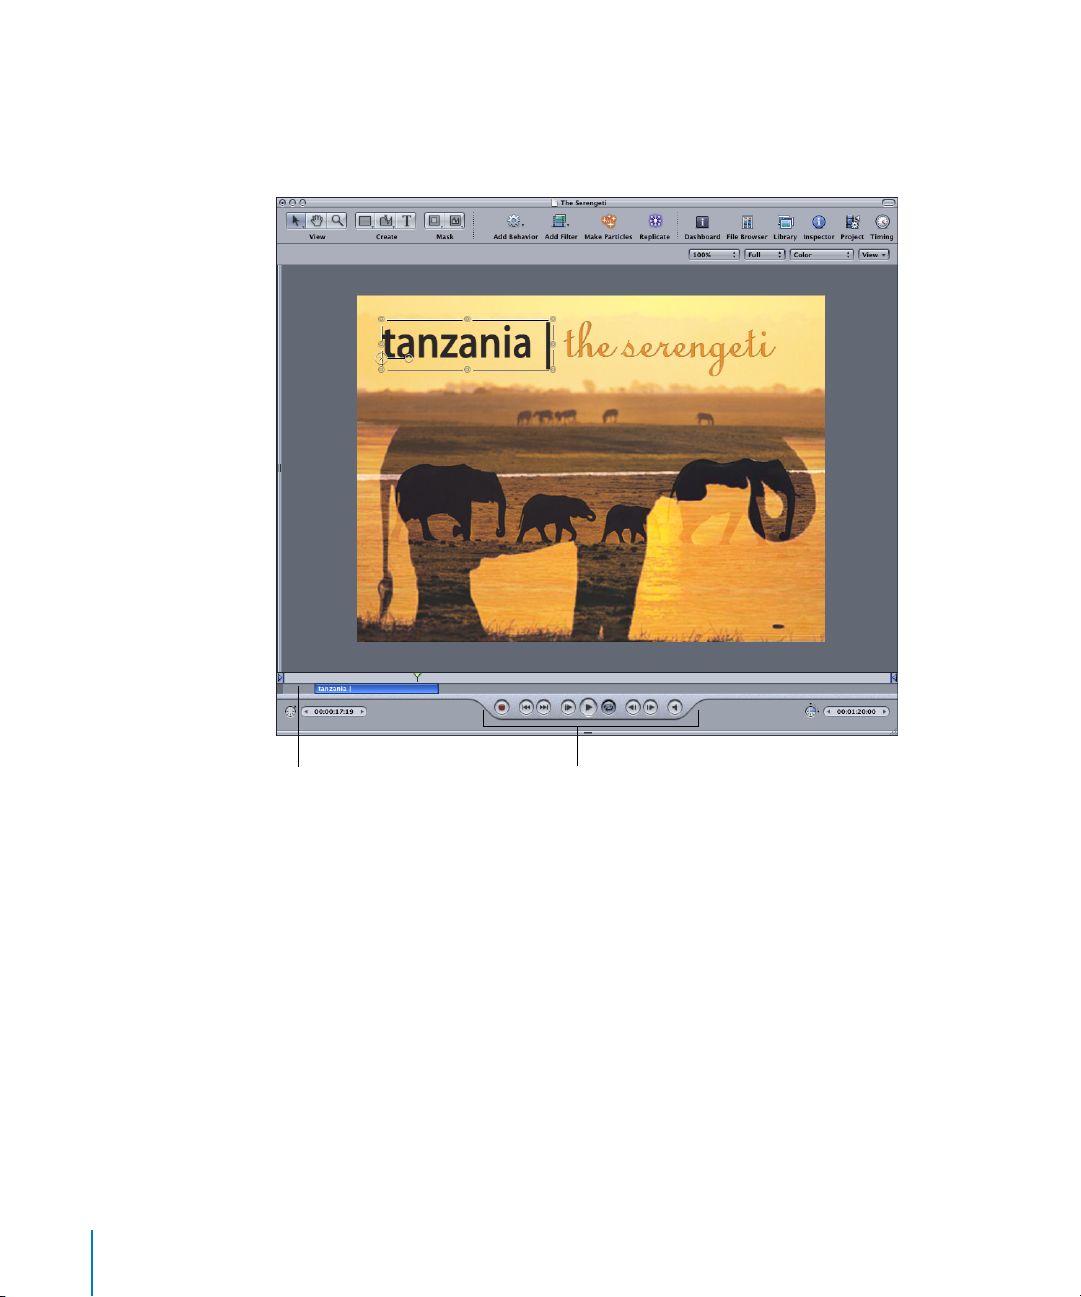
When you want to watch your project play back, the transport controls at the bottom
of the window allow you to play at regular speed or frame by frame. The mini-Timeline
lies just above the transport controls and below the main body of the window. This
control provides a view of where selected objects in the Canvas begin and end in time.
Mini-Timeline
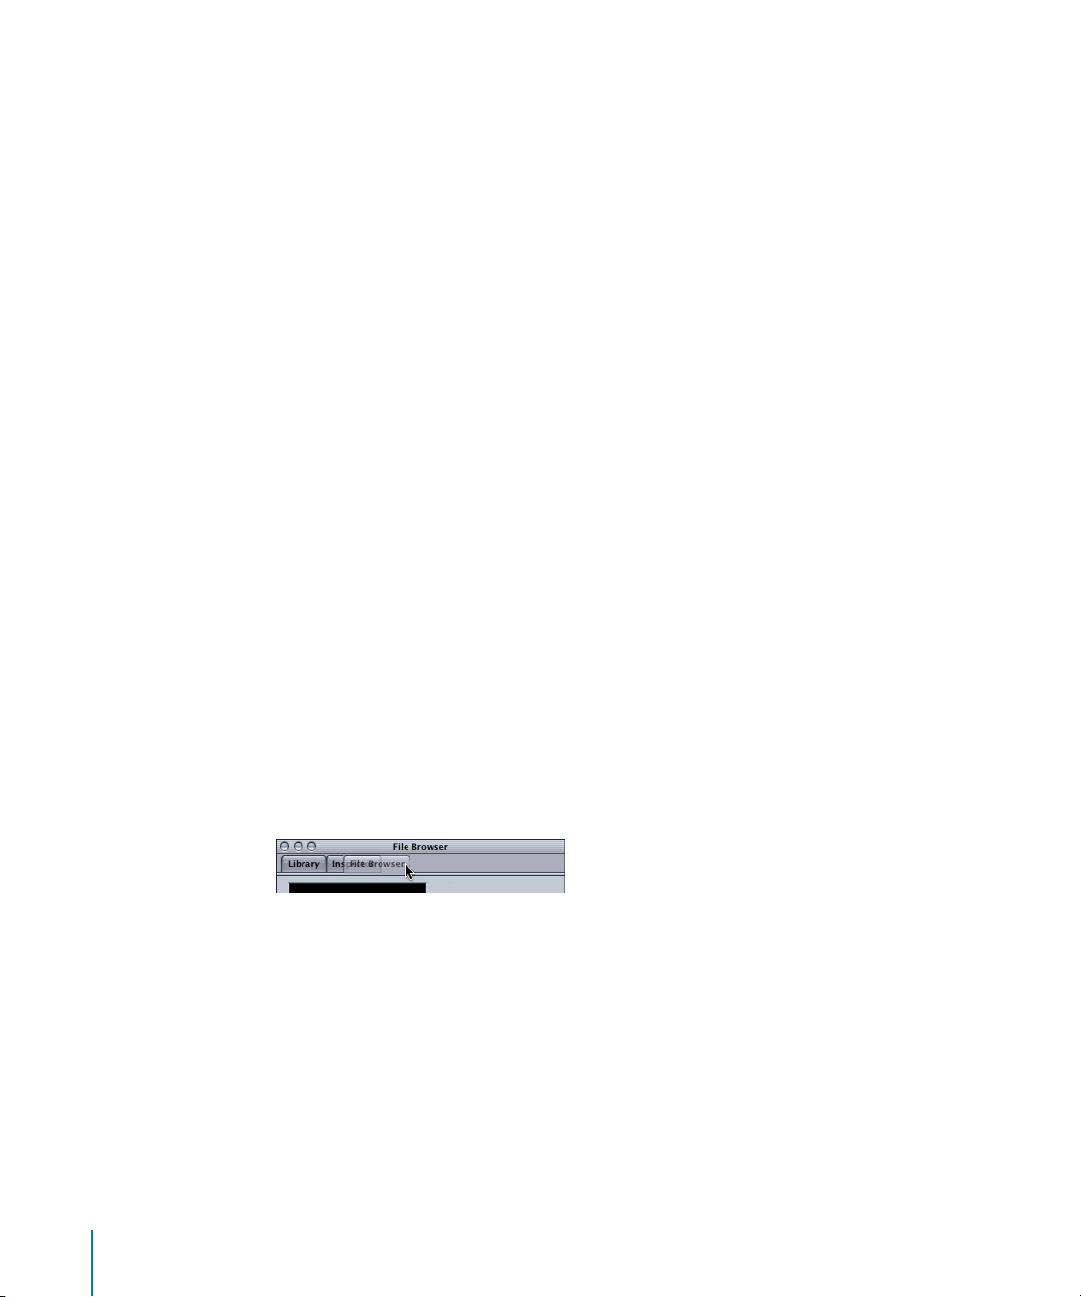
The Canvas also contains two additional panes that are hidden in the default view.
The Project Pane
The Project pane contains three tabs, each of which provides access to different aspects
of your project. The Layers tab displays the hierarchy of layers and objects in your
project. The Media tab shows all the files imported into your project whether or not
they appear in the Canvas. The Audio tab provides access to, and control of, any audio
objects in your project. All of these tabs are covered in more detail later in the chapter.
20 Chapter 1 Getting To Know Motion
Transport controls
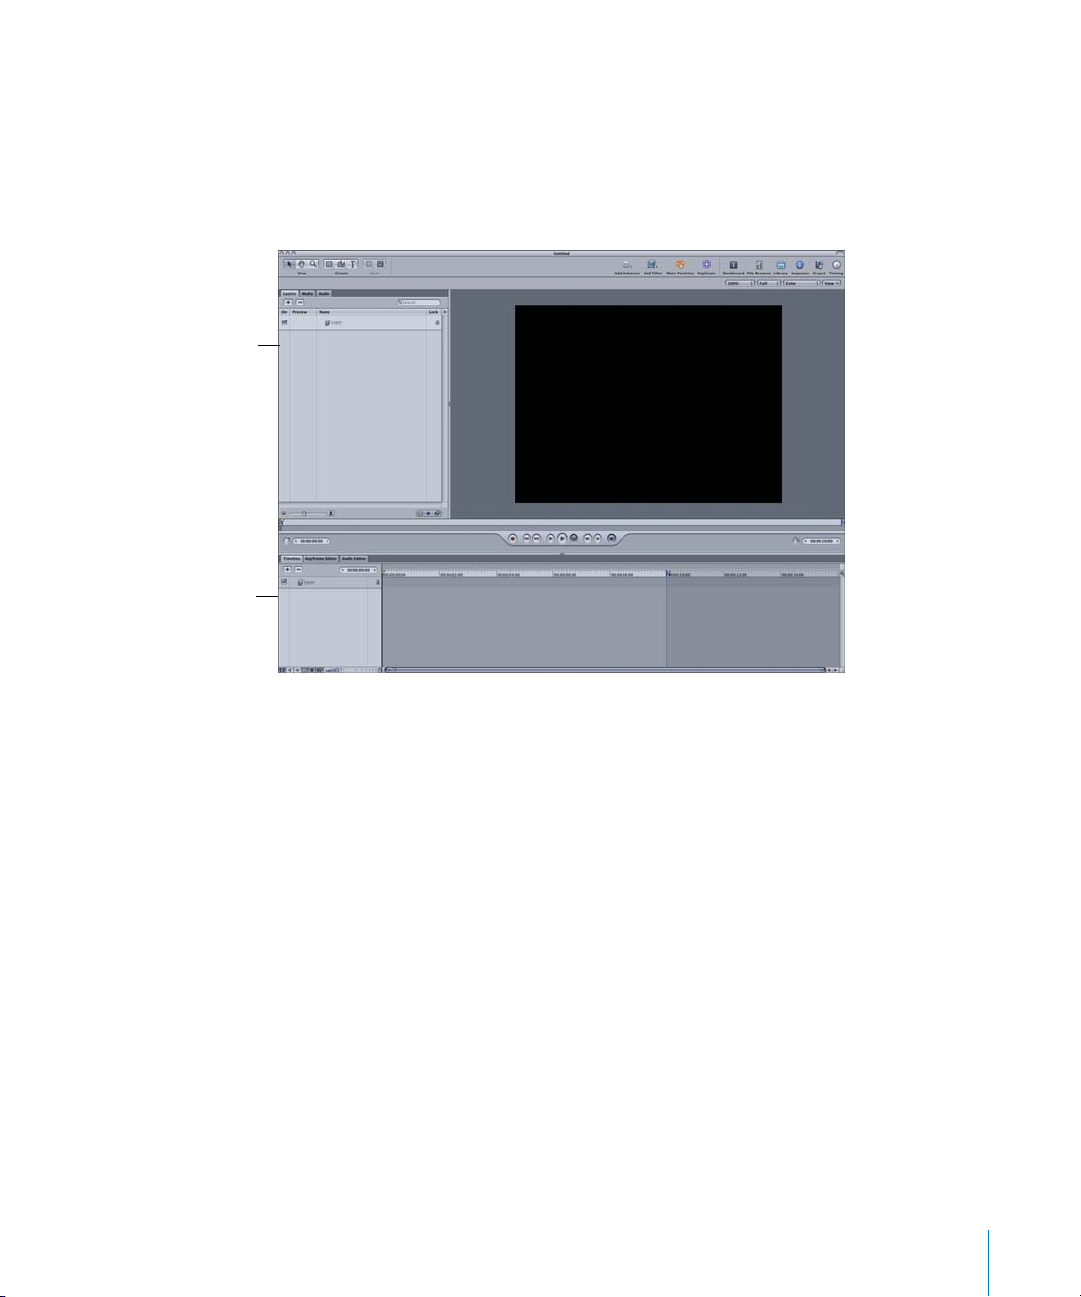
The Timing Pane
The Timing pane also has three tabs, each to control a different aspect of your project.
The Timeline is a broad overview of all the objects and effects and how they are laid
out over time. The Keyframe Editor displays the animation graphs for parameters and
effects, and the Audio Editor provides access to the level and pan controls for the audio
components of your project.
Project pane
Timing pane
All of these tabs are covered in more detail later in this chapter and throughout the
manual.
Window Arrangements
Different workflows require different sets of windows to be visible and in different sizes.
For example, when designing a layout for your composition, the bigger the Canvas, the
better. However, when tweaking or finessing an animated effect, you may want more
room dedicated to the Timing pane and the Inspector. Fortunately, Motion allows you
to switch between different layouts quickly and even save your own custom layouts.
Preset Layouts
Motion provides three preset window arrangements, called layouts. These layouts
distribute the application’s windows in varying ways to accommodate different
workflows.
To choose a preset window layout:
m
Choose Window > Layouts, then choose a layout from the submenu.
Chapter 1 Getting To Know Motion 21
Standard layout: This layout displays the Utility window on the left and the Canvas on
the right.
Alternate layout: This layout displays two Utility windows on the left, the top one
containing the Inspector and the bottom one containing the File Browser and Library.
The Canvas fills the remainder of the screen to the right.
Cinema layout: The Cinema layout also displays two Utility windows. The left side
contains the File Browser and Library and the right contains the Inspector. The Canvas
is in the middle with both the Project pane and the Timing pane displayed. This layout
is only available if you are using an Apple Cinema Display.
22 Chapter 1 Getting To Know Motion
Basic Window Controls
In addition to choosing from the preset arrangements, you can manually arrange your
windows, resize them, or minimize them to the Dock.
To move a window:
m
Drag a window by the title bar to the new location.
To resize a window:
m
Drag the resize control in the lower-right corner of the window to resize it to the
desired size.
To simultaneously resize adjacent windows:
m
Drag the boundary between the two windows (the black line along the edge of the
window). The pointer changes its shape over the boundary, indicating you can drag
from there.
Drag the thin black line
between two windows
to resize them at the
same time.
To minimize a window to the Dock:
m
Click the minimize button in the title bar. You can also double-click the title bar of the
Canvas to minimize it to the Dock.
Note: The Utility window cannot be minimized.
To close a window, do one of the following:
m
Click the close button.
m
Press Command+W in an active window.
Chapter 1 Getting To Know Motion 23
Tabs
Motion uses tabbed windows to provide convenient access to multiple windows at
once. You can switch between windows simply by clicking the appropriate tab. In
addition, you can drag any tab out of its docked position to show the tabbed window
in its own separate window. You can also drag a tab into another window. This lets you
view multiple tabbed windows from the same group at one time. For example, you can
drag the Inspector tab to a new location so that you can view the Library and the
Inspector windows simultaneously.
To detach a tab:
m
Drag the tab out of its docked position to any new location.
When you release the mouse button, the tab becomes its own window, and you can
use all standard window controls, such as closing, minimizing, and resizing.
To reattach a tab:
m
Drag the tab at the top of the window back to its original location. For example, drag
the Inspector tab back to its original group of tabs, and release the mouse button.
The tab is reattached.
To show or hide a tab:
m
In the Window menu, choose the name of the tab you want to show or hide. For
example, choose Window > Timeline to show or hide the Timeline tab. You can also
choose Keyframe Editor or Audio Editor to show or hide those tabs.
If the tab is detached from the Timeline area, click the close button. This closes the
window, and it does not reappear as a tab. To display the window again, use the
Window menu, and choose the appropriate command to show the window you want.
To reorder tabs:
m
Drag a tab left or right in the tab area to reorder the tabs.
Swapping the Project Pane and Canvas
Similar to changing tab order, you can also change whether the Project pane appears
to the left of the Canvas (default), or to the right. This can be especially useful when
working with multiple monitors. For example, if the Canvas occupies the entire left
monitor and your Utility windows are on the right monitor, moving the Project pane to
the right side of the Canvas would make it closer to the Utility windows.
To move the project pane to the opposite side of the Canvas:
m
Choose Window > Layouts > Swap Project Pane and Canvas.
24 Chapter 1 Getting To Know Motion
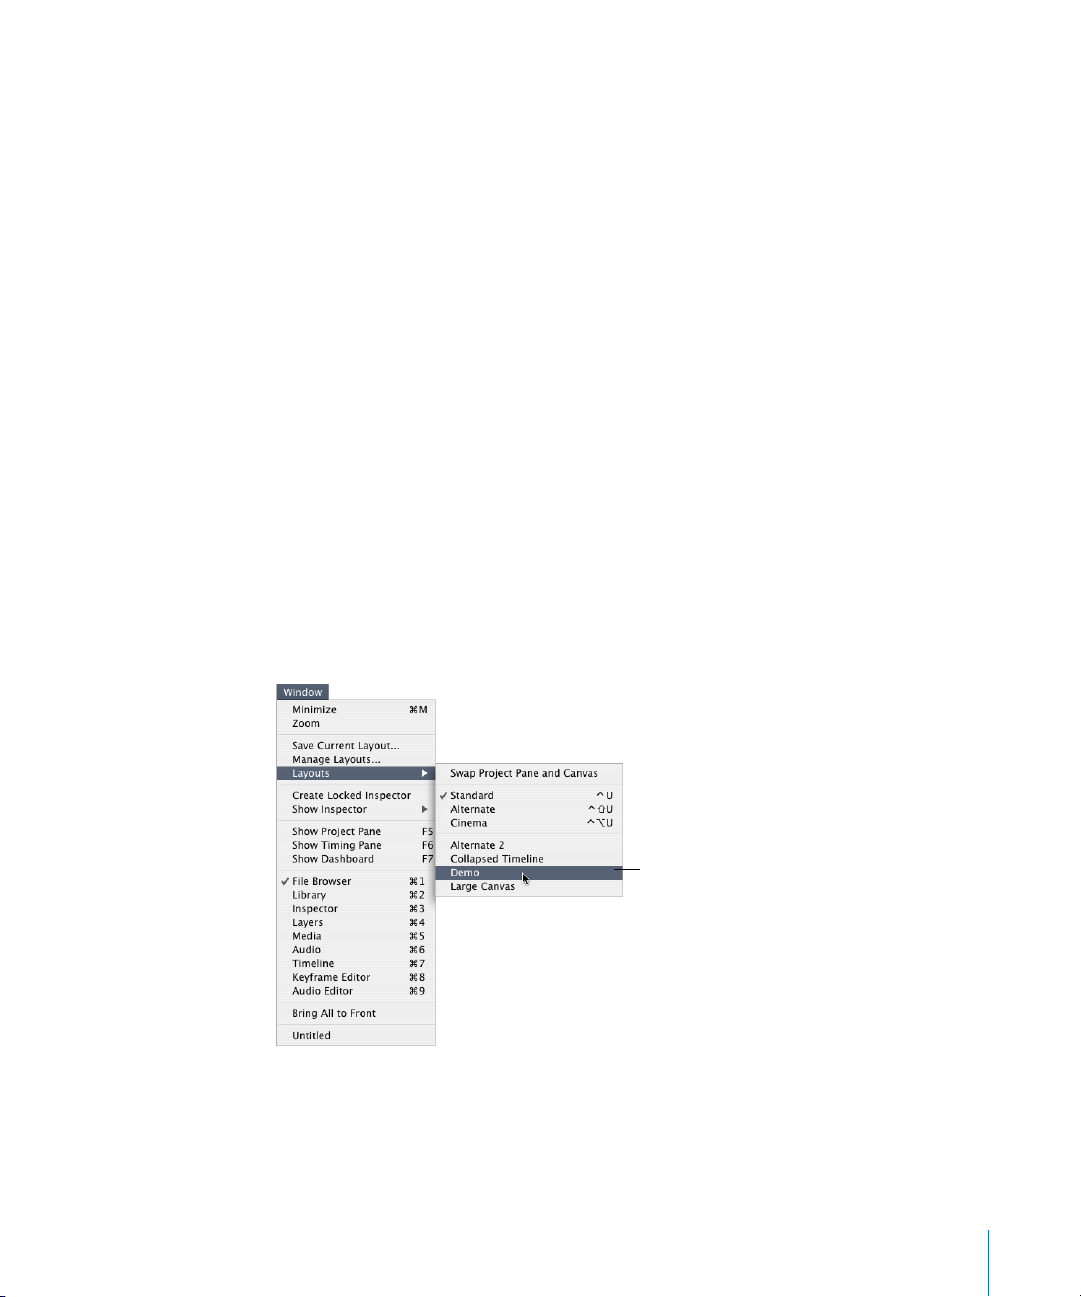
Saving Custom Layouts
Once you have the windows arranged to your liking, you can save your screen layout
with a relevant title so you can switch back to it later. This makes it easy to set up
layouts that help you perform certain tasks. For example, you might set up one layout
that is good for editing curves, while another layout has an expanded Timeline for
editing keyframes. You can switch between layouts in the Layouts submenu, and you
can delete and duplicate layouts in the Manage Layouts window.
When you save a layout, you save the following items:
• Window positions (size and location)
• Column orders (in the Project pane)
• Project pane position (left or right)
Note: Tab order, Timeline display options, and Canvas display options are not saved in
the custom layout.
To save a layout:
1 Organize the windows on your screen the way you want.
2 Choose Window > Save Current Layout.
The Create Window Layout dialog appears.
3 Type the name you want to use to save the layout, then click Save.
The layout is saved and now appears in the Layouts submenu.
The new layout appears in the bottom
section of the submenu.
Chapter 1 Getting To Know Motion 25
You can also create a new custom layout (based on the current state) by clicking the
Add (+) button in the Manage Layouts dialog.
To switch to a saved custom layout:
m
Choose Windows > Layouts, then choose the custom layout from the submenu.
To delete a saved layout:
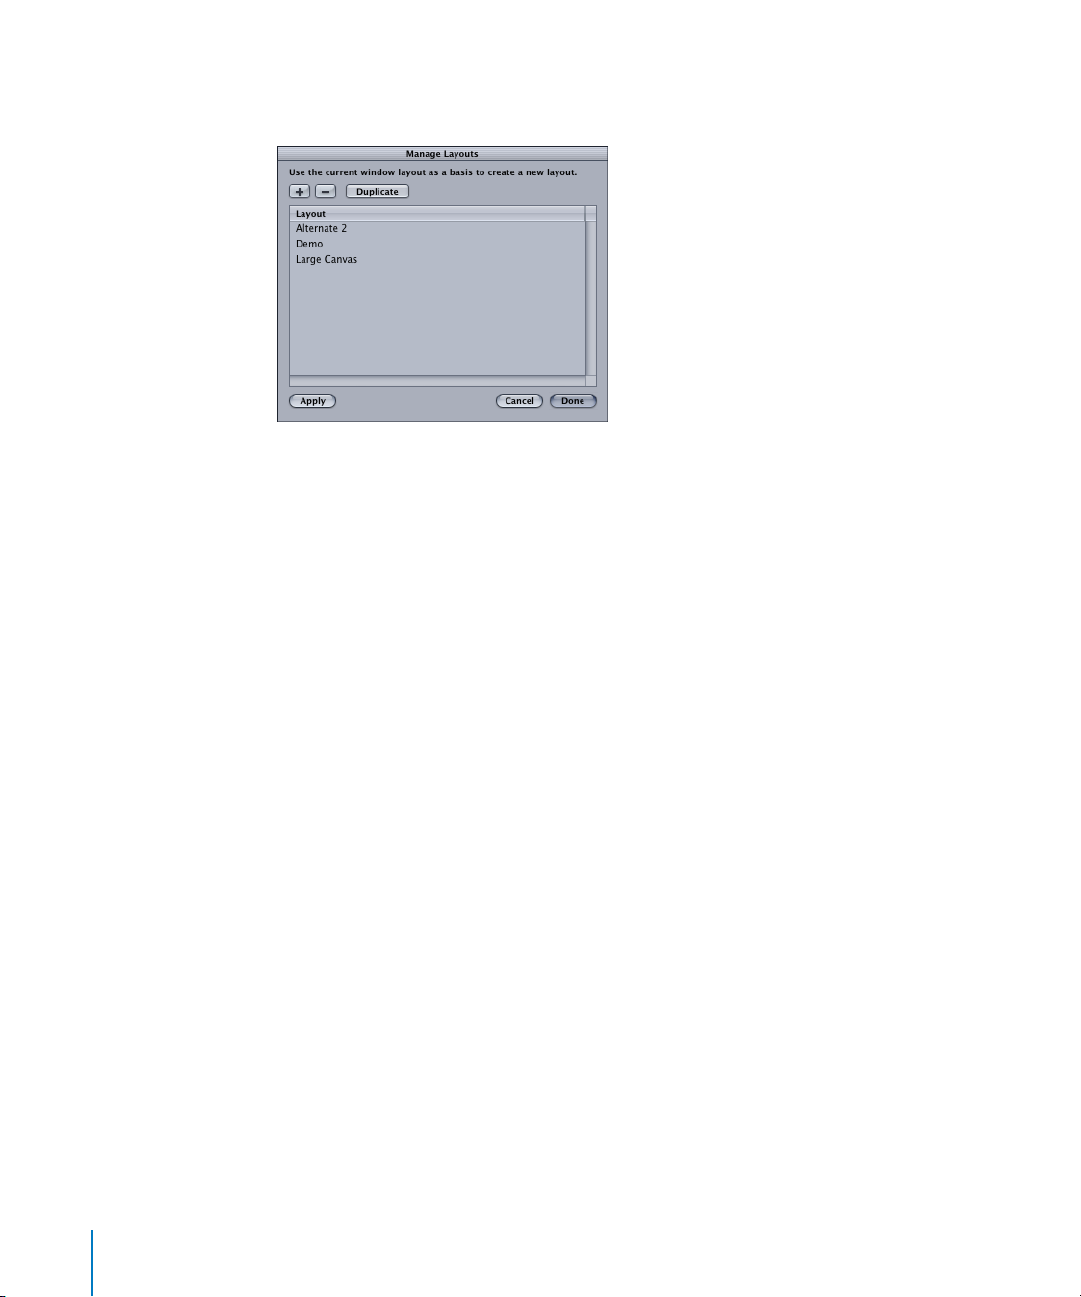
1 Choose Window > Manage Layouts.
The Manage Layouts dialog opens.
2 Select the layout you want to delete.
3 Click the Delete (–) button to remove the item from the list.
4 Click the Done button.
To duplicate a layout:
1 Choose Window > Manage Layouts.
The Manage Layouts dialog opens.
2 Select the layout you want to duplicate.
3 Click the Duplicate button.
A duplicate of the layout is added to the list. The word “copy” is appended to the name.
4 Click the Done button.
To rename a layout in the list:
1 Choose Window > Manage Layouts.
The Manage Layouts dialog opens.
2 Double-click the layout you want to rename in the list.
The name changes to a value field.
3 Type the new name in the value field.
4 Click the Done button.
26 Chapter 1 Getting To Know Motion
Full Screen Mode
Motion has an option to cover your entire monitor with the Canvas. This is helpful for
watching playback of your project without the distraction of the software interface. In
this mode, all of the tools and controls that affect the Canvas remain active, though you
have to rely on keyboard shortcuts and shortcut menus (Control-click) to change from
one tool or control to another. You can access the menu bar by positioning your
pointer at the top of the screen where the menu normally is.
To switch into Full Screen mode, do one of the following:
m
Choose View > Full Screen Mode.
m
Press F8.
To return to normal view, do one of the following:
m
Choose View > Full Screen Mode again.
m
Press F8 again.
The Toolbar
Motion’s Toolbar is located at the top of the Canvas. The default set of controls provides
access to all of the tools you need for manipulating objects in the Canvas and
elsewhere in the application. There are tools that create new text and shape objects as
well as particle systems and masks. There are also icons to apply filters and behaviors.
Finally, there are icons to show and hide the various windows and panes of the Motion
interface such as the Timeline, Dashboard, and others.
Tool Groups
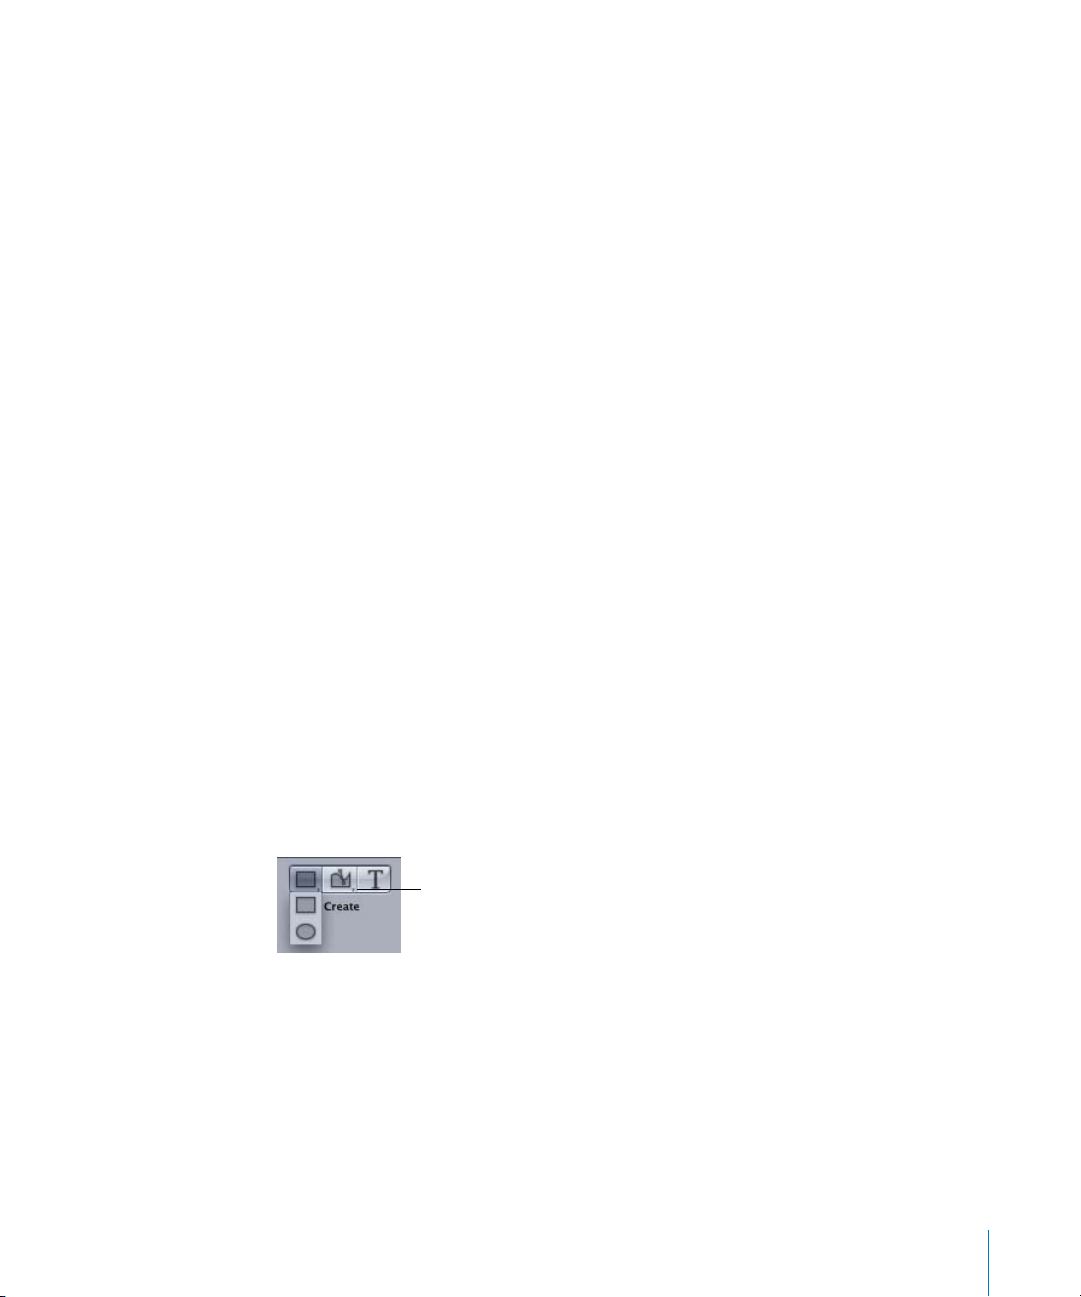
Tools are grouped in different ways. Several tools have multiple modes or options, such
as Shape tools which can be either a rectangle or a circle. The Circle tool is hidden until
you click and hold the Rectangle tool. Tools with additional states are indicated with a
tiny downward arrow on the lower-right corner of the tool.
Arrow indicates hidden tool states.
Chapter 1 Getting To Know Motion 27
Tools are also grouped into categories of use. The first set of tools is called the View set
because they deal with changing the view and manipulation method in the Canvas.
The second category is called Create, and contains tools that add new content to the
project such as text and shapes. The Mask category contains tools that add a mask to
an existing object.
Controls can also be grouped through the use of separators. For example, Interface
icons appear on the right side of the Toolbar. These hide and show the various panes,
tabs, and windows that comprise the Motion interface. They are grouped through the
use of a separator bar.
The following table itemizes each of the tools in the default tool set broken up into
groups. The first group is the View set. The first eight tools are all hidden under the first
button. Once any tool in that set is selected, you can switch between the tools by
pressing the Tab key. Press Shift+Tab to cycle through the tools in the reverse order.
Button Tool name Keyboard shortcut Description
Select/
Transform Tool
(arrow)
Adjust Anchor
Point Tool
Adjust Shear
Too l
Adjust Drop
Shadow Tool
S (Ta b cycles
through tools.)
S (Ta b cycles
through tools.)
S (Ta b cycles
through tools.)
S (Ta b cycles
through tools.)
The default tool is the Select/Transform tool. This tool
selects and moves objects in the Canvas. You can scale
objects by dragging their corner points or rotate an
object by dragging its center point.
Changes the point around which an object scales or
rotates. To use it, drag the current anchor point to a
new position.
Distorts an object by moving two adjacent corners at
the same time, leaving the other two corners locked
into place.
Changes the direction and offset of an object’s drop
shadow. This tool never moves the object itself.
Adjust Four
Corner Tool
Adjust Crop
Too l
Adjust Control
Points Tool
Adjust Item
Too l
28 Chapter 1 Getting To Know Motion
S (Ta b cycles
through tools.)
S (Ta b cycles
through tools.)
S (Ta b cycles
through tools.)
S (Ta b cycles
through tools.)
Allows you to distort an object by moving one of the
corner points, leaving the other three corners locked
into place. The image is stretched and distorted to fit
the shape you create.
Allows you to hide portions of an image by dragging
the edge or corner of the object.
Allows you to modify points and Bezier handles for
masks, shapes, and motion paths.
Allows you to modify special controls such as the
center point of a Circle Blur, or the shape of a particle
emitter or replicator, or the start and end points of a
gradient.
Button Tool name Keyboard shortcut Description
Pan Tool H Allows you to drag your view of the Canvas in
different directions. The Pan tool never moves
individual objects.
To reset the pan, double-click the Pan tool.
To pan the Canvas without selecting the Pan tool,
press the Space bar and drag in the Canvas.
Zoom Tool Z Allows you to zoom in and out on the Canvas. Click
the point in the Canvas that you want to zoom around
and drag to the left to zoom in on that point or drag
right to zoom out around that spot.
To reset the zoom, double-click the Zoom tool.
To zoom into a specific area of the Canvas, press
Command+Space bar and drag an area of the Canvas.
While still pressing the keys, click to zoom in to the
Canvas in 50 percent increments of the current zoom
level. Press Command+Option+Space bar and click in
the Canvas to zoom out in 50 percent increments.
The second group of tools is the Create set. These are tools that generate new objects.
You can modify the attributes for the newly created objects in the Inspector.
Button Tool name Keyboard shortcut Description
Rectangle Tool R Creates a new rectangular-shape object in the Canvas.
Click at the position where you want one corner to
appear and drag to the position of the opposite
corner. Pressing Shift while you drag constrains the
object to a square.
Circle Tool C Creates a new circle-shape object in the Canvas. Click
at the position where one edge of the circle should
begin and drag toward the opposite edge. Pressing
Shift while you drag constrains the shape to a circle.
Bezier Tool B
Toggles Bezier/
B-Spline
Creates a new freeform shape with Bezier point
vertices. To create a shape, click repeatedly in the
Canvas to add points to your shape. To close the shape,
click the first point of the shape or press C. To create an
open-ended shape, double-click the last point.
Chapter 1 Getting To Know Motion 29
Button Tool name Keyboard shortcut Description
B-Spline Tool B
Toggles Bezier/
B-Spline
Tex t Tool T Creates new text objects and lets you edit the text of
Creates a new freeform shape with B-Spline vertices.
To create a shape, click repeatedly in the Canvas to
add points to your shape. To close the shape, click the
first point of the shape or press C. To create an openended shape, double-click the last point.
existing text objects. To create a text object, click the
tool in the Canvas at the position where you want the
text to appear, then begin typing. Choose the Select/
Transform tool (or press Esc) to grab or move the new
text object. To change the text of an existing text
object, select the Text tool, then click the text. The text
becomes editable.
The third set, the Mask tools, can only be accessed when another object is selected.
Using a Mask tool creates a new mask that hides portions of the selected object. The
area inside the mask remains visible. Masks have their own set of controls available in
the Inspector.
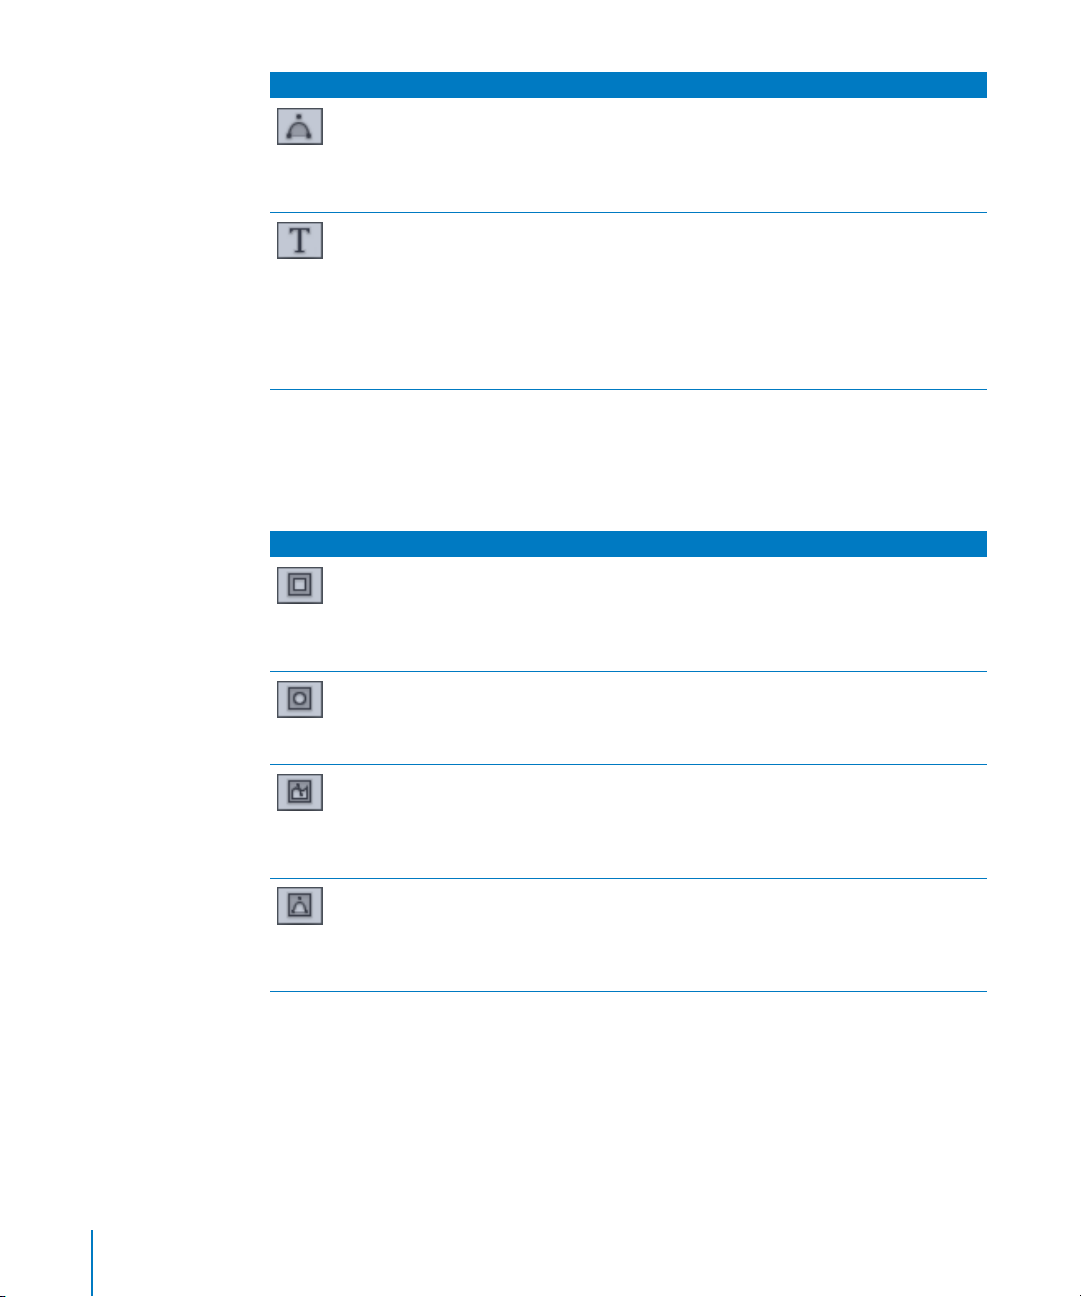
Icon Tool Name Keyboard Shortcut Description
Rectangle
Mask Tool
Circle Mask
Too l
Bezier Mask
Too l
B-Spline Mask
Too l
Option+R Creates a new rectangular mask in the Canvas. Click at
the position where you want one corner to appear
and drag to the position of the opposite corner.
Pressing Shift while you drag constrains the mask to a
square.
Option+C Creates a new circular mask in the Canvas. Click at the
position where one edge of the mask should begin
and drag toward the opposite edge. Pressing the Shift
key while dragging constrains the mask to a circle.
Option+B
Toggles Bezier/BSpline Mask Tools
Option+B
Toggles Bezier/
B-Spline Mask Tools
Creates a new freeform mask with Bezier point
vertices. To create a mask, click repeatedly in the
Canvas to add points to your mask. To close the mask,
click the first point of the mask or press C. To create an
open-ended mask, double-click the last point.
Creates a new freeform mask with B-Spline vertices. To
create a mask, click repeatedly in the Canvas to add
points to your mask. To close the mask, click the first
point of the shape or press C. To create an openended shape, double-click the last point.
30 Chapter 1 Getting To Know Motion
Loading...