


For tips about searching the Internet, visit www.google.com/help/features.html or help.yahoo.com/us/yahoo/search/basics.
Find the search word or phrase on the current webpage: At the bottom of the
TGUWNVU NKUV VCR VJG GPVT[ DGNQY 1P 6JKU 2CIG VQ °PF VJG °TUV QEEWTTGPEG QH C YQTF QT RJTCUG 6Q °PF UWDUGSWGPV QEEWTTGPEGU VCR 0GZV CV VJG DQVVQO QH VJG UETGGP
$[ FGHCWNV 5CHCTK UGCTEJGU WUKPI )QQING 6Q EJCPIG VJG FGHCWNV VQ C FKÒGTGPV UGCTEJ engine, in Settings, choose Safari > Search Engine, and choose a search engine.
Bookmarks
You can bookmark a webpage you want to return to later.
Bookmark a webpage: Open the page and tap  . Then tap Add Bookmark.
When you save a bookmark, you can edit its title. By default, bookmarks are saved at
VJG VQR NGXGN QH $QQMOCTMU 6CR $QQMOCTMU VQ EJQQUG C FKÒGTGPV HQNFGT
If you use Safari on a Mac, or Safari or Microsoft Internet Explorer on a PC, you can sync bookmarks with the web browser on your computer.
Sync bookmarks with your computer:
1Connect iPad to your computer.
2In iTunes, select iPad in the sidebar.
3Click the Info tab, select “Sync Safari bookmarks” under Other, then click Apply. For more information, see “Syncing with iTunes” on page 24.
Sync bookmarks with MobileMe: In Settings on iPad, select Bookmarks in your MobileMe account. See “Setting Up MobileMe Accounts” on page 31.
Open a bookmarked webpage: Tap  , then choose a bookmark or tap a folder to see the bookmarks inside.
Edit a bookmark or bookmark folder: Tap  , choose the folder that has the bookmark or folder you want to edit, then tap Edit. Then do one of the following:
To make a new folder, tap New Folder.
To delete a bookmark or folder, tap  , then tap Delete.
To reposition a bookmark or folder, drag  .
.
6Q GFKV VJG PCOG QT CFFTGUU QT VQ RWV KV KP C FKÒGTGPV HQNFGT tap the bookmark or folder.
9JGP [QW °PKUJ VCR &QPG
Chapter 4 Safari |
51 |
|
|
Web Clips
Add web clips to the Home screen for fast access to your favorite webpages. Web clips appear as icons on the Home screen, and you can arrange them along with the app icons. See “Rearranging App Icons” on page 38.
Add a web clip: Open the webpage and tap  . Then tap “Add to Home Screen.”
When you open a web clip, Safari automatically zooms and scrolls to the area of the webpage that was displayed when you saved the web clip. The displayed area is also used to create the icon for the web clip on your Home screen, unless the webpage comes with its own custom icon.
When you add a web clip, you can edit its name. If the name is too long (more than about 10 characters), it may appear abbreviated on the Home screen.
Web clips aren’t synced by MobileMe or iTunes, but they are backed up by iTunes.
Delete a web clip:
1 6QWEJ CPF JQNF CP[ KEQP QP VJG *QOG UETGGP WPVKN VJG KEQPU UVCTV VQ LKIING
2Tap  in the corner of the web clip you want to delete.
3Tap Delete, then press the Home  button to save your arrangement.
52 |
Chapter 4 Safari |
|
|

5 |
|
|
|
|
|
About Mail
Read this chapter to learn how to use Mail to read your email messages and compose new messages.
You can view messages from all your email accounts at once, and Mail displays message threads so it’s easy to follow a conversation. You can send or receive embedded photos and graphics, and view PDFs and other attachments. Use AirPrint to print messages and their attachments.
Mail works with MobileMe, Microsoft Exchange, and many of the most popular email services—including Yahoo! Mail, Google email, and AOL—as well as other industry-standard POP3 and IMAP email services.
To send or receive messages in Mail, iPad must have an Internet connection. See “Connecting to the Internet” on page 29.
Setting Up Email Accounts
You can set up email accounts on iPad in either of the following ways:
Set up an account directly on iPad. See “Adding Mail, Contacts, and Calendar Accounts” on page 31.
In iTunes, use the iPad settings panes to sync email accounts settings from your computer. See “Syncing with iTunes” on page 24.
53
Sending Email
You can send an email message to anyone who has an email address.
Compose and send a message: 1 Tap  at the top of the screen.
2 6[RG C PCOG QT GOCKN CFFTGUU KP VJG 6Q °GNF QT VCR  to add a name from your contacts.
As you type an email address, matching email addresses from your contacts list appear. Tap an address to add it. To add more names, tap  .
.
Note: If you’re composing a message from your Microsoft Exchange account and have access to your enterprise Global Address List (GAL), matching addresses from the
EQPVCEVU QP K2CF CRRGCT °TUV HQNNQYGF D[ OCVEJKPI )#. CFFTGUUGU
3Tap Cc/Bcc/From if you want to copy or blind copy the message to others, or change the account you send the message from. If you have more than one email account,
[QW ECP VCR VJG (TQO °GNF VQ EJCPIG VJG CEEQWPV [QW¨TG UGPFKPI HTQO
4 'PVGT C UWDLGEV VJGP [QWT OGUUCIG
;QW ECP VCR 4GVWTP VQ OQXG HTQO VJG 5WDLGEV °GNF VQ VJG OGUUCIG °GNF
5 Tap Send.
Send a photo in an email message |
In Photos, choose a photo, tap , then tap Email Photo. |
|
|
To send multiple photos in the same message, tap |
|
|
when viewing thumbnails in an album. You can also copy |
|
|
and paste photos. |
|
|
The photo is sent using your default email account. To |
|
|
change your default sending account, see “Mail, Contacts, |
|
|
Calendars” on page 163. |
|
|
|
|
Save a draft of a message to |
Tap Cancel, then tap Save. The message is saved in the |
|
complete later |
Drafts mailbox. To quickly open the most recently saved |
|
|
draft, touch and hold . |
|
|
|
|
Reply to a message |
Open a message and tap |
. Tap Reply to reply only |
|
to the sender or Reply All to reply to the sender and all |
|
|
recipients. Type your return message, then tap Send. |
|
|
Files or images attached to the initial message aren’t |
|
|
sent back. |
|
|
|
|
Forward a message |
Open a message and tap |
, then tap Forward. Add one |
|
or more email addresses, type your message, and then |
|
|
tap Send. |
|
|
9JGP [QW HQTYCTF C OGUUCIG [QW ECP KPENWFG VJG °NGU QT |
|
|
images attached to the original message. |
|
|
|
|
Share contact information |
In Contacts, choose a contact, then tap Share. Add one or |
|
|
more email addresses, type your message, then tap Send. |
|
|
|
|
54 |
Chapter 5 Mail |
|
|

Checking and Reading Email
The Mail icon shows the total number of unread messages in all your inboxes. You may have other unread messages in other mailboxes.
5\TILY VM \UYLHK TLZZHNLZ PU `V\Y PUIV_LZ
Check for new messages: Choose a mailbox, tap Inbox, or tap  .
.
On each account screen, you can see the number of unread messages in each mailbox. Tap a mailbox to see its messages. Unread messages have a blue dot  next to them.
If you have more than one mail account, tap Mailboxes to switch between accounts.
6Q XKGY CNN QH [QWT OGUUCIGU KP C WPK°GF KPDQZ VCR #NN +PDQZGU
5\TILY VM
\UYLHK TLZZHNLZ
<UYLHK TLZZHNLZ
Related messages are grouped together in a thread 1PN[ VJG °TUV OGUUCIG KU FKURNC[GF in the inbox, and the number of related messages is indicated. To view the thread, tap
KV 6Q VWTP OGUUCIG VJTGCFU QÒ IQ VQ 5GVVKPIU ¥/CKN %QPVCEVU %CNGPFCTU¦ CPF VWTP QÒ
“Organize by Thread.”
9JGP [QW QRGP C OCKNDQZ /CKN NQCFU VJG PWODGT QH OQUV TGEGPV OGUUCIGU URGEK°GF in your Mail settings, if the messages haven’t already been loaded automatically. See “Mail, Contacts, Calendars” on page 163.
Chapter 5 Mail |
55 |
|
|

Load additional messages: Scroll to the bottom of the list of messages and tap Load More Messages.
Read a message: Tap a mailbox, then tap a message. Within a message, tap  or
or  to see the next or previous message.
Rotating iPad between portrait and landscape orientation lets you focus on a single message, or see all the messages so you can quickly scan and view the ones you’re most interested in.
56 |
Chapter 5 Mail |
|
|

Zoom in on part of a message |
Double-tap the area to zoom in. Double-tap again to |
|
zoom out. |
|
|
4GUK\G CP[ EQNWOP QH VGZV VQ °V |
Double-tap the text. |
the screen |
|
|
|
Resize a message |
Pinch to zoom in or out. |
|
|
Follow a link |
Tap the link. |
|
Text links are typically underlined and blue. Many images |
|
are also links. A link can take you to a webpage, open a |
|
map, or open a new preaddressed email message. |
|
Web and map links open Safari or Maps on iPad. To return |
|
to Mail, press the Home button and tap Mail. |
|
|
See a link’s destination address |
Touch and hold the link. You can open the link in Safari or |
|
copy the link address to the clipboard. |
|
|
iPad displays picture attachments in many commonly used formats (JPEG, GIF, and TIFF) inline with the text in email messages. iPad can play many audio attachments
UWEJ CU /2 ##% 9#8 CPF #+(( ;QW ECP FQYPNQCF CPF XKGY °NGU UWEJ CU 2&( webpage, text, Pages, Keynote, Numbers, and Microsoft Word, Excel, and PowerPoint documents) attached to messages you receive.
1RGP CP CVVCEJGF °NG Tap the attachment to download it to iPad and then open it.
+H K2CF FQGUP¨V UWRRQTV VJG HQTOCV QH CP CVVCEJGF °NG [QW ECP UGG VJG PCOG QH VJG °NG but you can’t open it.
1RGP CP CVVCEJGF °NG YKVJ C FKÒGTGPV CRR Touch and hold the attachment, then choose an app. If you don’t have any apps that can open the attachment, you can
XKGY KV RTQXKFGF KV¨U C °NG V[RG VJCV K2CF UWRRQTVU
For a list of supported document formats, see “Email Attachment Won’t Open” on page 185.
Save an attached photo to your Saved Photos album: Tap the photo, then tap Save Image.
See all the recipients of a message |
Tap Details at the top of the screen. |
|
|
Tap a name or email address to see the recipient’s contact |
|
|
information. Tap the email address to contact the person. |
|
|
Tap Hide to hide the recipients. |
|
|
|
|
Add an email recipient to your |
Tap the message and tap Details to see the recipients. |
|
contacts list |
Then tap a name or email address and tap Create New |
|
|
Contact or “Add to Existing Contact.” |
|
|
|
|
Mark a message as unread |
Open the message and tap “Mark as Unread” next to the |
|
|
UWDLGEV NKPG |
|
|
A blue dot |
appears next to the message in the mailbox |
|
list until you open it again. |
|
|
|
|
Chapter 5 Mail |
57 |
|
|

Open a meeting invitation: Tap the invitation.
You can get contact information for the organizer and other invitees, set an alert, add notes to the event, and add comments that are included in your response emailed to the organizer. You can accept, tentatively accept, or decline the invitation. See “Responding to Meeting Invitations” on page 89.
Save an attached photo to Photos: Tap the photo, then tap Save Image.
Searching Email
;QW ECP UGCTEJ VJG 6Q (TQO CPF 5WDLGEV °GNFU QH GOCKN OGUUCIGU /CKN UGCTEJGU VJG downloaded messages in the currently open mailbox. For MobileMe, Exchange, and some IMAP mail accounts, you can also search messages on the server.
Search email messages: Open a mailbox, scroll to the top, and enter text in the Search
°GNF 6CR (TQO 6Q 5WDLGEV QT #NN (TQO 6Q CPF 5WDLGEV VQ EJQQUG YJKEJ °GNFU [QW want to search. (Tap the status bar to scroll quickly to the top of the list and reveal the
UGCTEJ °GNF
Search results for the messages already downloaded to iPad appear automatically as you type. Tap Search to dismiss the keyboard and see more of the results.
Delete or move found messages: After completing a search, tap Edit, then select the messages you want to delete or move. A checkmark appears next to each message you select. To delete the messages, tap Delete. To move the messages, tap Move, then tap a destination folder.
Search messages on the server: Tap “Continue Search on Server” at the end of the search results.
Note: Search results of messages on servers may vary, because some servers search only whole words.
58 |
Chapter 5 Mail |
|
|
Printing Messages and Attachments
You can use AirPrint to print email messages, and attachments that iPad can view.
Print an email message: Tap  , then tap Print. Select the print options you want, then tap Print.
To print an image without the rest of the email message, save the image (tap the image and tap Save Image), then open Photos and print the image from your Saved
Photos album.
Print an attachment: Tap the attachment to view it, then tap  and tap Print. Select the options you want, then tap Print.
For information about using AirPrint printers see “Printing” on page 40.
Organizing Email
You can delete messages one at a time, or select a group to delete all at once. You can also move messages from one mailbox or folder to another.
Delete a message: Open the message and tap  . Or, swipe left or right over the message title in the message list, then tap Delete.
Delete multiple messages: When viewing a list of messages, tap Edit, select the messages you want to delete, then tap Delete. You can also search for messages and choose the ones you want to delete. See “Searching Email” on page 58.
/QXG C OGUUCIG VQ C FKÒGTGPV OCKNDQZ QT HQNFGT When viewing a message, tap  , then choose a mailbox or folder.
Move multiple messages: When viewing a list of messages, tap Edit, select the messages you want to move, then tap Move and select a mailbox or folder. You can also search for messages and choose the ones you want to move. See “Searching Email” on page 58.
Chapter 5 Mail |
59 |
|
|

Camera |
6 |
|
|
|
|
About Camera
With iPad, you have a great still camera and video camera wherever you go. iPad has a
DCEM ECOGTC VJCV VCMGU RJQVQU CPF JKIJ FG°PKVKQP XKFGQ CPF C HTQPV ECOGTC VJCV NGVU you make FaceTime video calls and take photos and videos of yourself.
Use the screen to control the back camera and to see the photo or video you’re
VCMKPI ;QW ECP VCR CP[YJGTG QP VJG UETGGP VQ UGNGEV C URGEK°E QDLGEV QT CTGC CPF CWVQOCVKECNN[ CFLWUV VJG GZRQUWTG DCUGF QP VJCV RCTV QH VJG KOCIG #WVQHQEWU WR VQ about 4 inches or 10 cm) and a 5x digital zoom let you take great close-ups.
If you have an Internet connection and location services is turned on, photos and videos are tagged with location data. You can use location data with some apps and photo-sharing websites to track and post where you took the photos. For example, the Photos app organizes photos by location.
Note: +H NQECVKQP UGTXKEGU KU VWTPGF QÒ YJGP [QW QRGP %COGTC [QW OC[ DG CUMGF VQ turn it on. If you don’t want to include location data with your photos and videos, you can use Camera without turning on location services. See “Location Services” on page 153.
60
Taking Photos and Recording Videos
Taking photos and recording videos with iPad is as easy as pointing and tapping. Make sure the Camera/Video switch is set to  .
.
Take a photo: Aim iPad and tap  .
.
When you take a photo or start a video recording, iPad makes a shutter sound. You can use the volume buttons to control the volume of the shutter sound. You don’t hear a sound if you set the Side Switch to silent. See “Buttons” on page 10.
Note: +P UQOG TGIKQPU VJG UQWPF GÒGEVU HQT %COGTC CTG RNC[GF GXGP KH VJG 5KFG 5YKVEJ is set to silent.
Record a video: Slide the Camera/Video switch to The record button blinks while you record. Tap 
 , then tap
  to start recording. again to stop recording.
Change the focus area and set the exposure: Tap where you want to focus or set the
GZRQUWTG %COGTC CFLWUVU VJG GZRQUWTG HQT VJG UGNGEVGF CTGC QH VJG KOCIG
Zoom in or out: Tap the screen, then drag the slider at the bottom to zoom in or out (back camera, in camera mode only).
Switch between the front camera and back camera: Tap  in the upper-right corner of the screen.
Review a photo or video you’ve just taken: Tap the thumbnail of your last shot, in the lower-left corner of the screen.
Use the left and right arrows at the bottom of the screen to review other photos and
XKFGQU KP VJG %COGTC 4QNN QT LWUV ±KEM NGHV QT TKIJV 6CR &QPG VQ TGVWTP VQ ECOGTC QT video mode. If you don’t see the controls, tap the screen to display them.
Delete a photo or video: Tap  . If you don’t see
  , tap the screen to display the controls.
Take a screenshot: Quickly press and release both the Sleep/Wake button and the
*QOG DWVVQP 6JG UETGGP ±CUJGU YJGP VJG UETGGPUJQV KU VCMGP CPF VJG UETGGPUJQV KU added to the Camera Roll album.
Chapter 6 Camera |
61 |
|
|
Viewing and Sharing Photos and Videos
The photos and videos you take with Camera are saved in the Camera Roll album on iPad. You can view the Camera Roll album from either Camera or Photos.
View photos and videos in the Camera Roll album: In Camera, tap the thumbnail image in the lower-left corner of the screen. In Photos, tap the Camera Roll album. Tap
VJG NGHV QT TKIJV DWVVQP QT ±KEM NGHV QT TKIJV VQ ±KR VJTQWIJ VJG RJQVQU CPF XKFGQU
When viewing a photo or video in the Camera Roll album, tap the screen to display the controls.
For more information about viewing and sharing photos and videos, see:
“Viewing Photos and Videos” on page 70
“Sharing Photos” on page 73
Trimming Videos
;QW ECP VTKO VJG HTCOGU HTQO VJG DGIKPPKPI CPF GPF QH C XKFGQ VJCV [QW LWUV TGEQTFGF or any other video in the Camera Roll album. You can replace the original video or save the trimmed version as a new video clip.
Trim a video:
1While viewing a video, tap the screen to display the controls.
2Drag either end of the frame viewer at the top of the video, then tap Trim.
3Tap Trim Original or “Save as New Clip.”
Important: If you choose Trim Original, the trimmed frames are permanently deleted from the original video. If you choose “Save as New Clip,” a new trimmed video clip is
UCXGF KP VJG %COGTC 4QNN CNDWO CPF VJG QTKIKPCN XKFGQ KU WPCÒGEVGF
Uploading Photos and Videos to Your Computer
You can upload the photos and videos you take with Camera to photo applications on your computer, such as iPhoto on a Mac.
Upload photos and videos to your computer: Connect iPad to your computer.
Mac: Select the photos and videos you want and click the Import or Download button in iPhoto or other supported photo application on your computer.
PC: Follow the instructions that came with your photo application.
If you delete the photos and videos from iPad when you upload them to your computer, they’re removed from the Camera Roll album. You can use the Photos settings pane in iTunes to sync photos and videos (videos can be synced with Macs only) to the Photos app on iPad.
62 |
Chapter 6 Camera |
|
|
FaceTime |
7 |
|
|
|
|
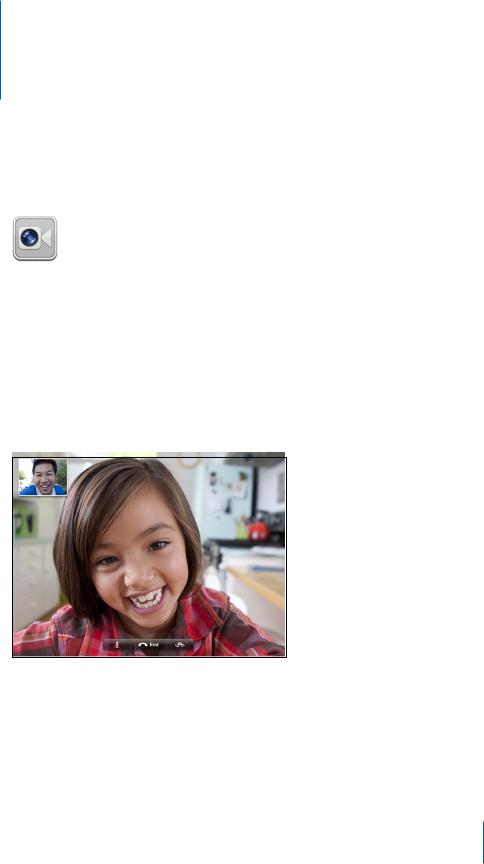
About FaceTime
FaceTime lets you make video calls over Wi-Fi. Use the front camera to talk face-to-face, or the back camera to share what you see around you.
To use FaceTime, you need iPad 2 and a Wi-Fi connection to the Internet. The person you call must also have a device or computer that works with FaceTime. For more information, see “FaceTime” on page 169.
Note: FaceTime may not be available in all countries or regions.
63
Signing In
To use FaceTime, you need an Apple ID. If you have an iTunes Store account, MobileMe account, or other Apple account, you can use that Apple ID with FaceTime. If you don’t have an Apple ID, you can create one when you open FaceTime.
You don’t need to sign in or out every time you use FaceTime. Once you sign in, you can start a FaceTime call right away.
Sign in to FaceTime:
1Open FaceTime, enter your Apple ID and password, then tap Sign In. If you don’t already have an Apple account, you can tap Create New Account and set one up now.
2On the FaceTime screen, enter the email address others should use to call you in
(CEG6KOG VJGP VCR 0GZV +H VJKU KU VJG °TUV VKOG [QW¨XG WUGF VJKU CFFTGUU HQT (CEG6KOG [QW OC[ PGGF VQ EJGEM HQT PGY GOCKN KP VJCV CEEQWPV CPF TGRN[ VQ VJG EQP°TOCVKQP OGUUCIG HTQO #RRNG +H [QW¨XG CNTGCF[ CFFGF VJG CEEQWPV VQ /CKN QP K2CF XGTK°ECVKQP is automatic.)
Now you can choose a contact and start a FaceTime call, and others can call you using the email address you provided. If you use more than one email address, you can add the others as described below.
Create a new account:
1Open FaceTime and tap Create New Account.
2Follow the onscreen instructions. The email address you enter will be the Apple ID for the new account.
3On the FaceTime screen, enter the email address you want others to use to call you. This address doesn’t need to be the same as the address you entered for your Apple ID, but it must be a working email address.
4 4GRN[ VQ VJG EQP°TOCVKQP GOCKN UGPV HTQO #RRNG VQ VJG GOCKN CFFTGUU [QW GPVGTGF KP the previous step.
If you have more than one email address, you can let people call you using any of them.
Add email addresses: Choose Settings > FaceTime, then tap Add Another Email.
Sign out: ;QW FQP¨V PQTOCNN[ PGGF VQ UKIP QWV QH (CEG6KOG LWUV UKIP KP QPEG and open FaceTime later without being asked to sign in again. You can’t receive FaceTime calls while you’re signed out. But if you do need to sign out, choose Settings > FaceTime, then tap Account.
6WTP QÒ (CEG6KOG If you don’t want to receive FaceTime calls, choose Settings >
(CEG6KOG CPF VWTP QÒ (CEG6KOG
64 |
Chapter 7 FaceTime |
|
|
Making a FaceTime Call
To make a FaceTime call, open the FaceTime app, then choose someone from your contacts, favorites, or list of recent calls.
Call a contact: Tap Contacts, choose a name, then tap the email address or phone number they use with FaceTime.
Add a contact: Tap Contacts, tap  , then enter the person’s name and their email address or phone number. For a contact outside your region, be sure to enter
the complete number, including country code and area code—for example, +1 (408) 555-1234 in the United States.
Restart a recent call: Tap Recents, then choose a name or number. Call a favorite: Tap Favorites, then tap a name in the list.
While You’re Talking
While talking to someone in FaceTime, you can switch cameras, change camera orientation, mute your microphone, move your picture-in-picture display, open
CPQVJGT CRRNKECVKQP CPF °PCNN[ GPF [QWT ECNN
Switch between the front and back cameras: Tap 
 .
.
Change camera orientation: Rotate iPad. The image your friend sees changes to match.
To avoid rotating the screen as you move the camera around, turn on the orientation lock. See “Viewing in Portrait or Landscape” on page 16.
Mute your microphone: Tap  . Your friend can still see you, and you can still see and hear your friend.
Move your picture-in-picture display: Drag the small window to any corner.
Use another application during a call: Press the Home  button, then tap an application icon. You can still talk with your friend, but you can’t see each other. To return to the video, tap the green bar at the top of the screen.
End the call: Tap 

 .
.
Chapter 7 FaceTime |
65 |
|
|
 Loading...