


AEG MC1761E-B, MC1761E-D, MC1751E-D, MC1751EA, MC1761E-W Manual
...MC1751E / MC1761E
Microwave oven Mikrowellengerät Four à micro-ondes Magnetronoven Mikrovågsugn
Operating instructions Gebrauchsanweisung Notice d’utilisation Gebruiksaanwijzing Bruksanvisning
UK
D
F
NL
S

Dear Customer,
Thank you for buying an AEG-Electrolux microwave oven and putting your trust in the AEG-Electrolux brand name.
Before using your AEG-Electrolux microwave oven for the first time, please read the instruction book thoroughly. This will enable you to take advantage of all the features that the appliance offers. It will also ensure trouble-free operation and minimize unnecessary service calls.
Important information concerning your safety or the operation of your appliance is noted by this symbol and/or mentions words such as «Warning», «Take care». Be sure to follow all instructions carefully.
Throughout the manual, this symbol guides you step by step when operating the appliance.
This symbol indicates further information concerning the use of the appliance.
The clover indicates energy-saving tips and hints for environmentally friendly use of your appliance.
In the event of malfunctioning, please follow the instructions given in the section «What to do if...»

|
UK |
Contents |
|
Important safety instructions . . . . . . . . . . . . . . . . . . . . . . . . . . . . . . . . . . . . . . . . . . . . . . . |
. . .2 - 3 |
Oven & accessories . . . . . . . . . . . . . . . . . . . . . . . . . . . . . . . . . . . . . . . . . . . . . . . . . . . . . . . . |
. . . . . .4 |
Control panel . . . . . . . . . . . . . . . . . . . . . . . . . . . . . . . . . . . . . . . . . . . . . . . . . . . . . . . . . . . . . . |
. . . . .5 |
Before operation . . . . . . . . . . . . . . . . . . . . . . . . . . . . . . . . . . . . . . . . . . . . . . . . . . . . . . . . . . . |
. . . . .6 |
Setting the clock . . . . . . . . . . . . . . . . . . . . . . . . . . . . . . . . . . . . . . . . . . . . . . . . . . . . . . . . . . . |
. . . . .6 |
What are microwaves? . . . . . . . . . . . . . . . . . . . . . . . . . . . . . . . . . . . . . . . . . . . . . . . . . . . . . . |
. . . . .7 |
Suitable ovenware . . . . . . . . . . . . . . . . . . . . . . . . . . . . . . . . . . . . . . . . . . . . . . . . . . . . . . . . . . |
. . . . .7 |
Tips & advice . . . . . . . . . . . . . . . . . . . . . . . . . . . . . . . . . . . . . . . . . . . . . . . . . . . . . . . . . . . . . . |
.8 - 10 |
Microwave power levels . . . . . . . . . . . . . . . . . . . . . . . . . . . . . . . . . . . . . . . . . . . . . . . . . . . . . |
. . . .11 |
Manual operation . . . . . . . . . . . . . . . . . . . . . . . . . . . . . . . . . . . . . . . . . . . . . . . . . . . . . . . . . . |
. . . .11 |
Other convenient functions . . . . . . . . . . . . . . . . . . . . . . . . . . . . . . . . . . . . . . . . . . . . . . . . . . |
12 - 13 |
Automatic operation . . . . . . . . . . . . . . . . . . . . . . . . . . . . . . . . . . . . . . . . . . . . . . . . . . . . . . . . |
. . . .14 |
Automatic charts . . . . . . . . . . . . . . . . . . . . . . . . . . . . . . . . . . . . . . . . . . . . . . . . . . . . . . . . . . . |
15 - 16 |
Recipes for automatic AC-6 & AC-7 . . . . . . . . . . . . . . . . . . . . . . . . . . . . . . . . . . . . . . . . . . . |
. . . .17 |
Cooking charts . . . . . . . . . . . . . . . . . . . . . . . . . . . . . . . . . . . . . . . . . . . . . . . . . . . . . . . . . . . . . |
18 - 19 |
Recipes . . . . . . . . . . . . . . . . . . . . . . . . . . . . . . . . . . . . . . . . . . . . . . . . . . . . . . . . . . . . . . . . . . . |
19 - 22 |
Care & cleaning . . . . . . . . . . . . . . . . . . . . . . . . . . . . . . . . . . . . . . . . . . . . . . . . . . . . . . . . . . . . |
. . . .23 |
What to do if... . . . . . . . . . . . . . . . . . . . . . . . . . . . . . . . . . . . . . . . . . . . . . . . . . . . . . . . . . . . . . |
. . . .23 |
Service & spare parts . . . . . . . . . . . . . . . . . . . . . . . . . . . . . . . . . . . . . . . . . . . . . . . . . . . . . . . . |
. . . .24 |
Guarantee conditions . . . . . . . . . . . . . . . . . . . . . . . . . . . . . . . . . . . . . . . . . . . . . . . . . . . . . . . |
. . . .24 |
Specifications . . . . . . . . . . . . . . . . . . . . . . . . . . . . . . . . . . . . . . . . . . . . . . . . . . . . . . . . . . . . . . |
. . . .25 |
Important information . . . . . . . . . . . . . . . . . . . . . . . . . . . . . . . . . . . . . . . . . . . . . . . . . . . . . . |
. . . .25 |
Installation . . . . . . . . . . . . . . . . . . . . . . . . . . . . . . . . . . . . . . . . . . . . . . . . . . . . . . . . . . . . . . . . |
26 - 27 |
The symbol  on the product or on its packaging indicates that this product may not be treated as household waste. Instead it shall be handed over to the applicable collection point for the recycling of electrical and electronic equipment. By ensuring this product is disposed of correctly, you will help prevent potential negative consequences for the environment and human health, which could otherwise be caused by inappropriate waste handling of this product. For more detailed information about recycling of this product, please contact your local city office, your household waste disposal service or the shop where you purchased the product.
1

 Important safety instructions
IMPORTANT SAFETY INSTRUCTIONS: READ CAREFULLY AND KEEP FOR FUTURE REFERENCE
To avoid the danger of fire.
The microwave oven should not be left unattended during operation. Power levels that are too high, or cooking times that are too long, may overheat foods resulting in a fire.
The electrical outlet must be readily accessible so that the unit can be unplugged easily in an emergency.
The AC power supply must be 230 V, 50 Hz, with a minimum 10 A distribution line fuse, or a minimum 10 A distribution circuit breaker.
It is recommended that a separate circuit serving only this appliance be provided.
Do not store or use the oven outdoors.
If food being heated begins to smoke, DO NOT OPEN THE DOOR. Turn off and unplug the oven and wait until the food has stopped smoking. Opening the door while food is smoking may cause a fire.
Only use microwave-safe containers and utensils. See Page 7.
Do not leave the oven unattended when using disposable plastic, paper or other combustible food containers.
Clean the waveguide cover, the oven cavity, the turntable and turntable support after use. These must be dry and free from grease. Built-up grease may overheat and begin to smoke or catch fire.
Do not place flammable materials near the oven or ventilation openings. Do not block the ventilation openings.
Remove all metallic seals, wire twists, etc., from food and food packages. Arcing on metallic surfaces may cause a fire.
Do not use the microwave oven to heat oil for deep frying. The temperature cannot be controlled and the oil may catch fire.
To make popcorn, only use special microwave popcorn makers.
Do not store food or any other items inside the oven. Check the settings after you start the oven to ensure the oven is operating as desired.
See the corresponding hints in operation manual.
To avoid the possibility of injury
WARNING:
Do not operate the oven if it is damaged or malfunctioning. Check the following before use:
a)The door; make sure the door closes properly and ensure it is not misaligned or warped.
b)The hinges and safety door latches; check to make sure they are not broken or loose.
c)The door seals and sealing surfaces; ensure that they have not been damaged.
d)Inside the oven cavity or on the door; make sure there are no dents.
e)The power supply cord and plug; ensure that they are not damaged.
Never adjust, repair or modify the oven yourself. It is hazardous for anyone other than a competent person to carry out any service or repair operation which involves the removal of a cover which gives protection against exposure to microwave energy.
Do not operate the oven with the door open or alter the door safety latches in any way.
Do not operate the oven if there is an object between the door seals and sealing surfaces.
Do not allow grease or dirt to build up on the door seals and adjacent parts. Follow instructions for “Care and Cleaning”, Page 23. Failure to maintain the oven in a clean condition could lead to a deterioration of the surface that could adversely affect the life of the appliance and possibly result in a hazardous situation.
Individuals with PACEMAKERS should check with their doctor or the manufacturer of the pacemaker for precautions regarding microwave ovens.
To avoid the possibility of electric shock
Under no circumstances should you remove the outer cabinet.
Never spill or insert any objects into the door lock openings or ventilation openings. In the event of a spill, turn off and unplug the oven immediately and call an authorised AEG-Electrolux service agent.
Do not immerse the power supply cord or plug in water or any other liquid.
Do not allow the power supply cord to run over any hot or sharp surfaces, such as the hot air vent area at the top rear of the oven.
Do not attempt to replace the oven lamp yourself or allow anyone who is not authorised by an AEGElectrolux service agent to do so. If the oven lamp fails, please consult your dealer or an authorised AEGElectrolux service agent.
If the power supply cord of this appliance is damaged, it must be replaced with a special cord. The exchange must be made by an authorised AEG-Electrolux service agent.
2

UK
 Important safety instructions
To avoid the possibility of explosion and sudden boiling:
WARNING: Liquids and other foods must not be heated in sealed containers since they are liable to explode.
Never use sealed containers. Remove seals and lids before use. Sealed containers can explode due to a build up of pressure even after the oven has been turned off.
Take care when microwaving liquids. Use a widemouthed container to allow bubbles to escape.
Microwave heating of beverages can result in delayed eruptive boiling, therefore care has to be taken when handling the container.
To prevent sudden eruption of boiling liquid and possible scalding:
1.Stir liquid prior to heating/reheating.
2.It is advisable to insert a glass rod or similar utensil into the liquid whilst reheating.
3.Let liquid stand for at least 20 seconds in the oven at the end of cooking time to prevent delayed eruptive boiling.
Do not cook eggs in their shells, and whole hard boiled eggs should not be heated in microwave ovens since they may explode even after microwave cooking has ended. To cook or reheat eggs which have not been scrambled or mixed, pierce the yolks and the whites, or the eggs may explode. Shell and slice hard boiled eggs before reheating them in the microwave oven.
Pierce the skin of such foods as potatoes, sausages and fruit before cooking, or they may explode.
To avoid the possibility of burns
Use pot holders or oven gloves when removing food from the oven to prevent burns.
Always open containers, popcorn makers, oven cooking bags, etc., away from the face and hands to avoid steam burns.
To avoid burns, always test food temperature and stir before serving and pay special attention to the temperature of food and drink given to babies, children or the elderly.
Temperature of the container is not a true indication of the temperature of the food or drink; always check the food temperature.
Always stand back from the oven door when opening it to avoid burns from escaping steam and heat.
Slice stuffed baked foods after heating to release steam and avoid burns.
Keep children away from the door to prevent them burning themselves.
To avoid misuse by children
Warning: Only allow children to use the oven without supervision when adequate instructions have been given so that the child is able to use the oven in a safe way and understands the hazards of improper use.
Do not lean or swing on the oven door. Do not play with the oven or use it as a toy.
Children should be taught all important safety instructions: use of pot holders, careful removal of food coverings; paying special attention to packaging (e.g. self-heating materials) designed to make food crisp, as they may be extra hot.
Other warnings
Never modify the oven in any way.
This oven is for home food preparation only and may only be used for cooking food. It is not suitable for commercial or laboratory use.
To promote trouble-free use of your oven and avoid damage.
Never operate the oven when it is empty.
When using a browning dish or self-heating material, always place a heat-resistant insulator such as a porcelain plate under it to prevent damage to the turntable and turntable support due to heat stress. The preheating time specified in the dishes instructions must not be exceeded.
Do not use metal utensils, which reflect microwaves and may cause electrical arcing. Do not put cans in the oven. Only use the turntable and the turntable support designed for this oven. Do not operate the oven without the turntable.
To prevent the turntable from breaking:
(a)Before cleaning the turntable with water, leave the turntable to cool.
(b)Do not put hot foods or hot utensils on a cold turntable.
(c)Do not put cold foods or cold utensils on a hot turntable.
Do not place anything on the outer cabinet during operation.
NOTE:
If you are unsure how to connect your oven, please consult an authorised, qualified electrician.
Neither the manufacturer nor the dealer can accept any liability for damage to the oven or personal injury resulting from failure to observe the correct electrical connection procedure.
Water vapour or drops may occasionally form on the oven walls or around the door seals and sealing surfaces. This is a normal occurrence and is not an indication of microwave leakage or a malfunction.
3
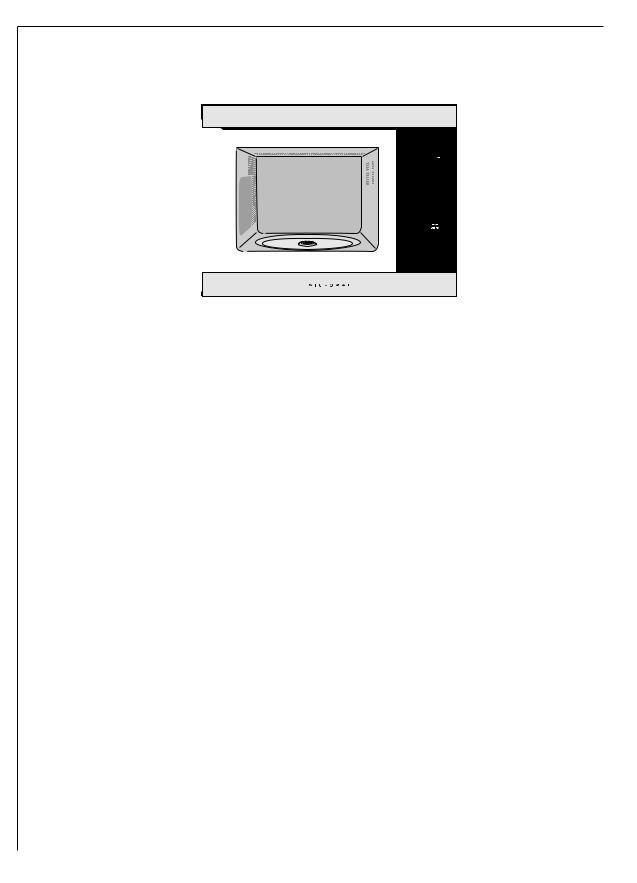
Oven & accessories
1.Front trim
2.Oven lamp
3.Control panel
4.Door opening button
5.Waveguide cover
6.Oven cavity
7.Seal packing
8.Door seals and sealing surfaces
9.Fixing points (4 points)
10.Ventilation openings
11.Outer cover
12.Rear cabinet
13.Power supply cord support clip
14.Power supply cord
|
|
1 |
|
|
|
|
2 |
|
|
|
3 |
|
|
|
4 |
8 |
7 |
6 |
5 |
|
|
|
9 |
|
14 |
|
|
|
13 |
|
10 |
|
|
|
|
|
|
|
11 |
|
|
|
12 |
ACCESSORIES:
Check to make sure the following accessories are provided:
(15) Turntable (16) Turntable support (17) 4 fixing screws (not shown).
•Place the turntable support in the seal packing on the floor of the cavity.
•Then place the turntable on the turntable support.
•To avoid turntable damage, ensure dishes or containers are lifted clear of the turntable rim when removing them from the oven.
NOTE: When you order accessories, please mention two items: part name and model name to your dealer or an authorised AEG-Electrolux service agent.
15
16
4
|
UK |
|
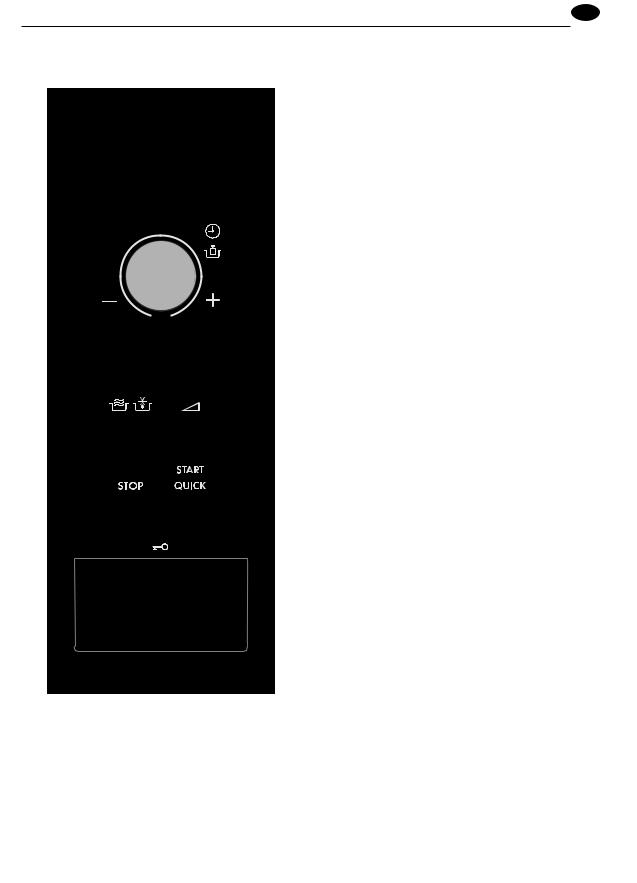
Control panel |
|
|
1 |
Digital Display |
|
2 |
Indicators |
|
|
The appropriate indicator will flash or light up, just |
|
1 |
above each symbol according to the instruction. |
|
When an indicator is flashing, press the appropriate |
||
|
||
|
button (having the same symbol) or carry out the |
|
2 |
necessary operation. |
|
Stir |
||
|
||
|
Turn over |
|
|
Weight |
|
|
Microwave power level |
|
3 |
Cooking in progress |
|
3 |
TIMER/WEIGHT knob |
|
4 MICROWAVE POWER LEVEL button |
||
5 |
AUTOMATIC PROGRAMMES button |
|
|
Press to select one of the 12 automatic programmes. |
|
6 |
START/QUICK button |
|
7 |
STOP button |
|
8 |
DOOR OPEN button |
|
4 |
|
|
5 |
|
|
6 |
|
|
7 |
|
|
8 |
|
|
5

 Before operation
Plug in the oven.
1.The oven display will flash:
2.Touch the STOP button the display will show:

 x1
x1
To set the clock, see below.
Using the Stop button
Use the STOP button to:
1.Erase a mistake during programming.
2.Stop the oven temporarily during cooking.
3.Cancel a programme during cooking, touch twice.
 Setting the clock
There are two setting modes: 12 hour clock and 24 hour clock.
1.To set the 12 hour clock, hold the MICROWAVE POWER LEVEL button down for 3 seconds.  will appear in the display.
2.To set the 24 hour clock, press the MICROWAVE POWER LEVEL button once more after Step 1, in the example below  will appear in the display.
To set the clock, follow the example below.
Example: To set the 24 hour clock to 23:35.
1. Choose the clock |
Choose the 24 hour |
2. Set the hours. |
||||
function. (12 hour |
clock. |
Rotate the TIMER/WEIGHT |
||||
clock) |
|
|
|
knob until the correct hour is |
||
|
|
|
|
|
|
displayed (23). |
|
|
|
|
|
|
|
|
|
|
|
|
|
|
x1and hold for 3 |
x1 |
secs. |
|
x1 and hold for
3secs.
3.Press the MICROWAVE POWER LEVEL button to change from hours to minutes.
x1
4. Set the minutes. Rotate the |
5. Press the MICROWAVE POWER |
Check the display. |
|||
TIMER/WEIGHT knob until the |
LEVEL button to start the clock. |
||||
|
|||||
correct minute is displayed (35). |
|
|
|
|
|
|
|
|
|
|
|
|
|
|
|
|
|
x1
NOTE:
1.You can rotate the TIMER/WEIGHT knob clockwise or counter-clockwise.
2.Press the STOP button if you make a mistake during programming.
3.If the electrical power supply to your microwave oven is interrupted, the display will intermittently
show  after the power is reinstated. If this occurs during cooking, the programme will be erased. The time of day will also be erased.
4.When you want to reset the time of day, follow the above example again.
6

UK
 What are microwaves?
Microwaves are generated in the microwave oven by a magnetron and cause the water molecules in the food to oscillate. Heat is generated by the friction which is caused, with the result that the food is thawed, heated or cooked.
 Suitable ovenware
Glass & ceramic glass |
Browning dish |
Heat-resistant glass utensils are very suitable. The cooking process can be observed from all sides. They must not, however, contain any metal (e.g. lead crystal), nor have a metallic overlay
(e.g. gold edge, cobalt blue finish).
Ceramics
Generally very suitable. Ceramics must be glazed, since with unglazed ceramics moisture can get into the ceramic. Moisture causes the material to heat up and may make it shatter. If you are not certain whether your utensil is suitable for the microwave, carry out the utensil suitability test.
Porcelain
Very suitable. Ensure that the porcelain does not have a gold or silver overlay and that it does not contain any metal.
Plastic & paper utensils
Heat resistant plastic utensils which are suitable for use in the microwave can be used to thaw, heat and cook food. Follow the manufacturer's recommendations. Heat-resistant paper made for use in a microwave oven is also suitable. Follow the manufacturer's recommendations.
Kitchen paper
can be used to absorb any moisture which occurs in short heating methods, e.g. of bread or products in bread crumbs. Insert the paper between the food and the revolving plate. The surface of the food will stay crispy and dry. Covering greasy food with kitchen paper will catch splashes.
Microwave cling film
This, or heat-resistant film, is very suitable for covering or wrapping. Please follow the manufacturer's recommendations.
Roasting bags
Can be used in a microwave oven. Metal clips are not suitable for fastening them since the roasting bag foil might melt. Fasten the roasting bag with string and pierce it several times with a fork. Non heat-resistant food wraps are not recommended for use in a microwave oven.
A special microwave dish made from ceramic glass with a metal alloy base, which allows food to be browned. When using the browning dish a suitable insulator, e.g. a porcelain plate, must be placed between the turntable and the browning dish. Be careful to adhere exactly to the pre-heating time given in the manufacturer's instructions. Excessive pre-heating can damage the turntable and the turntable stand or can trigger the safety-device which will switch off the oven.
Metal
Generally speaking, metal should not be used, since microwaves do not pass through metal and therefore cannot reach the food. There are, however, exceptions: small strips of aluminium foil may be used to cover certain parts of the food, so that these do not thaw too quickly or begin to cook (e.g. chicken wings). Small metal skewers and aluminium containers (e.g. of readycooked meals) can be used. They must, however, be small in relation to the food, e.g. aluminium containers must be at least 2/3 to 3/4 filled with food. It is recommended that you transfer the food into a dish suitable for use in the microwave. When using aluminium containers or other metal utensils there must be a gap of approx. 2 cms between them and the walls of the cooking area, otherwise the walls could be damaged by possible arcing.
No utensil should have a metal overlay - parts such as screws, bands or handles.
Utensil suitability test
If you are not sure whether your utensil is suitable for use in your microwave oven, carry out the following test: Place the utensil into the oven. Place a glass container filled
with 150 ml of water on or next to the utensil. Switch on the oven at 800 W power for 1 to 2 minutes. If the utensil stays cool or just warm to the touch, it is suitable. Do not use this test on a plastic utensil. It could melt.
7

 Tips & advice
Time settings
In general the thawing, heating and cooking times are significantly shorter than when using a conventional cooker or oven. For this reason you should adhere to the recommended times given in this book. It is better to set the times too short, rather than too long. Test the food after it has been cooked. It is better to have to cook something for a little longer than to overcook it.
Initial temperatures
Thawing, heating and cooking times are dependent upon the initial temperature of the food. Deep-frozen food and food stored in a refrigerator, for example, requires longer than food which has been stored at room temperature.
For heating and cooking, normal storage temperatures are assumed (refrigerator temperature approx. 5° C, room temperature approx. 20° C). For thawing the temperature of the deep freeze is assumed to be - 18° C.
Cooking times
All the times given in this book are guidelines, which can be varied according to the initial temperature, weight and condition of the food (water or fat content etc.).
Salt, spices & herbs
Food cooked in your microwave retains its individual flavour better than it does when conventional preparation methods are used. For this reason you should use salt very sparingly and normally add it only after cooking. Salt absorbs liquid and dries out the outer layer of the food. Herbs and spices can be used as normal.
Addition of water
Vegetables and other foods with a high water content can be cooked in their own juice or with the addition of a little water. This ensures that many vitamins and minerals are preserved.
Food in skins or shells
Food such as sausages, chickens, chicken legs, baked potatoes, tomatoes, apples, egg yolks or such like should be pricked or pierced with a fork or small wooden skewer. This will enable the steam which forms to dissipate without splitting the skin or shell.
Large & small quantities
Microwave times are directly dependent upon the amount of food which you would like to thaw, heat or cook. This means that small portions cook more quickly than larger ones.
As a rule of thumb:
TWICE THE AMOUNT = ALMOST TWICE THE TIME HALF THE AMOUNT = HALF THE TIME
Deep & shallow containers
Both containers have the same capacity, but the cooking time is longer for the deeper one. You should therefore choose as flat a container as possible with a large surface area. Only use deep containers for dishes where there is a danger of overcooking, e.g. for noodles, rice, milk etc.
Round & oval containers
Food cooks more evenly in round or oval containers than in containers with corners, since the microwave energy concentrates in the corners and the food in these areas could become overcooked.
Covering
Covering the food retains the moisture within it and shortens the cooking time. Use a lid, microwave cling film or a cover. Foods which are to be crispy, e.g. roasts or chickens, should not be covered.
As a general rule, whatever would be covered in a conventional oven should also be covered in a microwave oven. Whatever would be uncovered in a conventional oven can also be left uncovered in a microwave oven.
Turning
Medium-sized items, such as hamburgers and steaks, should be turned over once during cooking, in order to shorten the cooking process. Large items, such as roasts and chickens, must be turned, since the upper side receives more microwave energy and could dry out if not turned.
Standing time
Keeping to the standing time is one of the most important rules with microwaves. Almost all foods, which are thawed, heated or cooked in the microwave, require a certain amount of time to stand, during which temperature equalisation takes place and the moisture in the food is evenly distributed.
8
 Loading...