


KB9810E
User manual |
Electric built-in oven |

2 Contents
Thank you for choosing one of our high-quality products.
To ensure optimal and regular performance of your appliance please read this instruction manual carefully. It will enable you to navigate all processes perfectly and most efficiently. To refer to this manual any time you need to, we recommend you to keep it in a safe place. And please pass it to any future owner of the appliance.
We wish you much joy with your new appliance.
Contents
Operating instructions |
2 |
Safety information |
2 |
Electrical safety |
3 |
Children's safety |
3 |
Safety during use |
3 |
Microwave |
3 |
How to avoid damage to the appliance |
4 |
|
|
Do not use the appliance |
5 |
Description of product |
6 |
General view |
6 |
Control panel |
6 |
Oven layout |
7 |
Accessories Oven |
7 |
Before using for the first time |
8 |
Setting and changing the time |
8 |
Cleaning for the first time |
9 |
Getting to know the appliance |
9 |
Operating the oven |
10 |
Oven Functions |
12 |
Inserting the oven shelf and baking tray |
16 |
|
|
Additional functions |
17 |
Clock functions |
19 |
Other functions |
25 |
Usage, tables and tips |
26 |
Operating instructions
Safety information
Baking |
26 |
Roasting |
31 |
Single Economy Grill |
33 |
Rotitherm cooking |
33 |
Defrosting |
34 |
Drying |
34 |
Making preserves |
35 |
Microwave |
36 |
Programmes |
43 |
Cleaning and care |
45 |
The outside of the appliance |
46 |
Oven interior |
46 |
Accessories |
46 |
Side rails |
46 |
Oven lighting |
47 |
If something is wrong… |
47 |
Installation instructions |
48 |
Safety instructions for the installer |
49 |
Disposal |
53 |
Customer service |
53 |
Guarantee/Customer Service |
54 |
GREAT BRITAIN & IRELAND |
54 |
European Guarantee |
55 |
www.electrolux.com |
55 |
Subject to change without notice
Important safety instructions!

Safety information |
3 |
|
|
Read carefully and keep for future use!
Electrical safety
•This appliance must only be connected by a qualified installation engineer .
•In the event of a fault or damage to the appliance: Take the fuses out or switch off.
•Should the door seal and the door seal surfaces be damaged, the appliance must not be operated until they are repaired.
• Repairs to the appliance must only be carried out by qualified service engineers . Considerable danger may result from improper repairs. If repairs become necessary, please contact our Customer Care Department or your dealer.
Children's safety
•Small children must be kept away from the appliance. Make sure that children do not touch the appliance when playing.
•Always heat baby food in jars or bottles with the lid or top off. After heating, stir or shake well, so that the heat is equally distributed. Before you give the baby food to the child, please be sure to test the temperature.
•When operating the grill (alone or in combination with the microwave) the viewing window becomes hot. Therefore keep small children away from the door of the appliance.
•Never leave children unsupervised while the appliance is operating.
•This appliance is fitted with a child safety device.
Safety during use
•This appliance should be used only for normal domestic cooking, roasting and baking of food.
•Be careful if connecting electrical appliances to sockets near to this appliance. Electrical leads must not be caught under the hot oven door.
•Warning: Risk of burns! The interior surfaces of the oven become very hot during use.
•If you use ingredients containing alcohol in the oven, a slightly flammable mixture of alcohol and air may ensue. In this case, be careful when opening the door. Do not handle any sources of heat, sparks or naked flames when doing so.
•People (including children), who, because of their physical, sensory or mental capabilities or their inexperience or ignorance, are not able to use the appliance safely, should not use this appliance without supervision by or instruction from a responsible person.
Information on acrylamides
According to the latest scientific knowledge, intensive browning of food, especially in products containing starch, can constitute a health risk due to acrylamides. Therefore we recommend cooking at the lowest possible temperatures and not browning foods too much.
Microwave
•Only switch the appliance on when there is food inside it. With no food in it, the appliance could be overloaded.
•Only use microwave safe cookware (see section Uses, Tables and Tips: Suitable cookware and materials).
•To protect the interior or the door of the appliance from corrosion through escaping steam (condensed water), please dry the appliance thoroughly with a cloth after each use.
4Safety information
•Do not leave the appliance unattended, if food is being heated or cooked in disposable containers made of plastic, paper or other flammable materials.
•If smoke appears, keep the appliance closed. Switch off the appliance and disconnect from the power supply. Do not use the appliance under any circumstances, if it is no
longer working correctly.
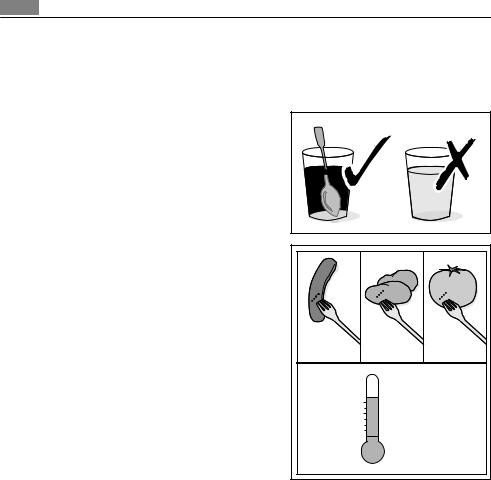
•When heating liquids always put a coffee spoon or a glass rod in the container to avoid boiling delay. With boiling delay the boiling temperature is reached without the typical steam bubbles rising.
If the container is shaken even slightly the liquid can suddenly boil over or spray violently. Risk of burns!
•Prick food with "skin" or "peel", such as potatoes, tomatoes, sausages, with a fork several times before cooking so that the food does not burst.
•Ensure that a minimum temperature of 70°C is reached when cooking/heating food. For this please refer to the power and time data in the tables. Never use mercury or liquid thermometers to measure the temperature of the food.
•Foods heated with microwaves give off heat to the cookware. Use oven gloves or something similar!
•Do not overcook the dishes by using powers and times that are too high. The food can dry out, burn or set itself alight in certain places.
70
min 70 C
C
0
•The interior of the oven, the grill heating element and the accessories become hot when the appliance is operating. Please be careful when handling them and use oven gloves or similar for this reason. Risk of burns!
•Metal objects must be at least 2 cm from the walls of the oven interior and the oven door. Otherwise spark discharges may be caused and the appliance can be damaged
•If not advised otherwise, do not use aluminium foil.
•Do not get anything caught between the door and the door frame.
•Always keep the door seal, the door seal surfaces and the interior clean. Lack of cleanliness in the appliance can lead to dangerous situations.
•Do not store any flammable materials inside the oven. These could ignite when the oven is switched on.
How to avoid damage to the appliance
•Do not line the oven with aluminium foil and do not place a baking tray or saucepan etc. on the floor, as otherwise the oven enamel will be damaged by the heat build-up.
•Fruit juices dripping from the baking tray will leave stains, which you will not be able to remove. For very moist cakes, use a deep tray.
Safety information |
5 |
|
|
•Do not put any strain on the oven door when open.
•Never pour water directly into the oven when it is hot. This could cause damage to and discoloration of the enamel.
•Rough handling, especially around the edges of the front panel, can cause the glass to break.
•Do not store any flammable materials inside the oven. These could ignite when the oven is switched on.
•Do not store any moist foods inside the oven. This could cause damage to the enamel.
•Do not leave dishes uncovered in the oven after switching off the cooling fan. Moisture may form inside the oven or on the glass door and also get onto the units.
Information on the oven enamel
Changes to the colour of the oven's enamel surface as a result of use do not affect the appliance's suitability for normal and correct use. They therefore do not constitute a defect in terms of warranty law.
Do not use the appliance
... for cooking eggs in their shells (with fried eggs, pierce the yolks first) and snails, as otherwise these burst.
Cooking oil (fondue, deep frying) and drinks with high alcohol content: Spontaneous ignition!
Risk of explosion!
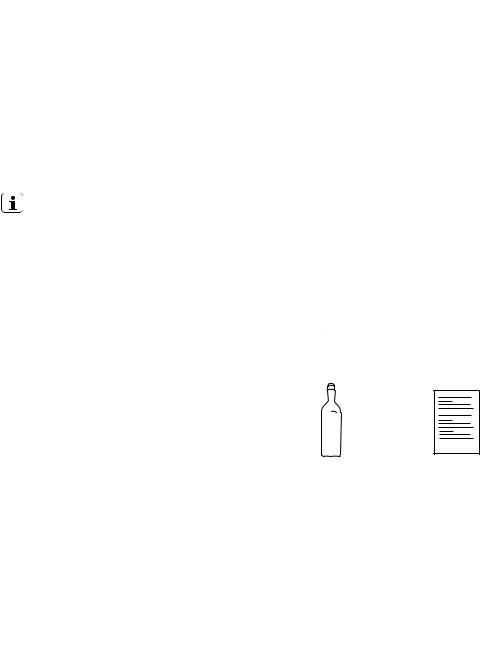
... for heating tightly closed containers, e. g. tins, bottles, screw top jars.
... for drying animals, textiles, grain pillows and gel cushions and other flammable materials: Risk of fire!
... for cookware made of porcelain, ceramic or earthenware that has small holes, e. g. on handles or unglazed bottoms. Moisture penetrating holes can cause the cookware to crack when it is heated.
6 Description of product
Description of product
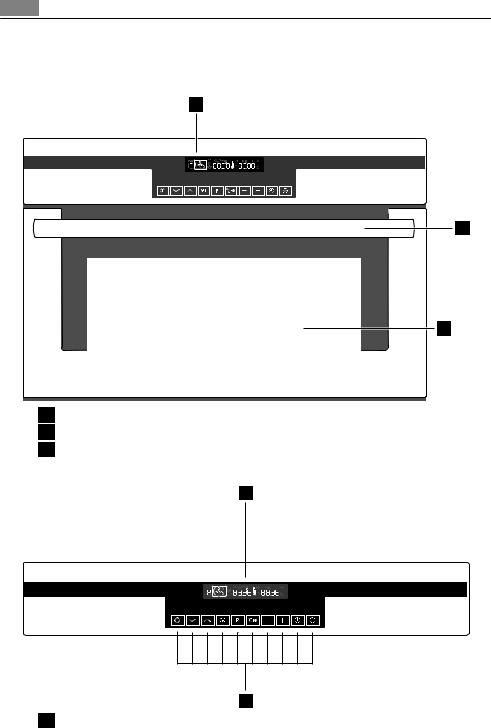
General view
1
2
3
1Control Panel
2Door handle
3Full glass door
Control panel
1
2
1 Oven displays
Description of product |
7 |
|
|
2 Oven functions buttons
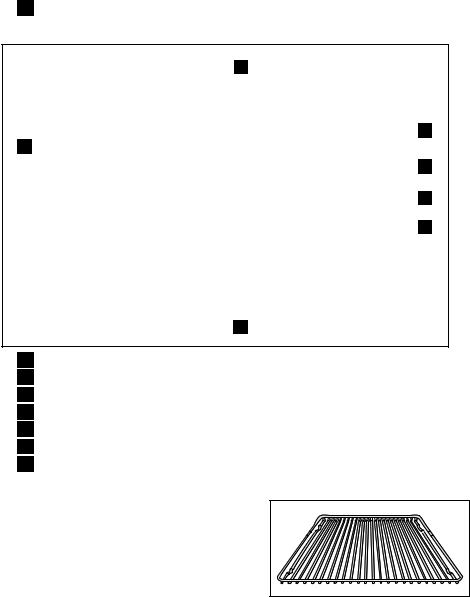
Oven layout
|
|
1 |
|
|
2 |
7 |
3 |
|
|
2 |
3 |
|
|
|
|
|
4 |
|
1 |
5 |
6
1Grill element
2Microwave generator
3Light in the oven
4Rear heating panel Oven lighting
5Glass base, removable
6Side rails, removable
7Oven shelf levels
Accessories Oven
Oven shelf
For cookware, cake tins, roasts and grilling food.
8 Before using for the first time
Baking tray
For cakes and biscuits.
(not suitable for microwave mode)
Before using for the first time
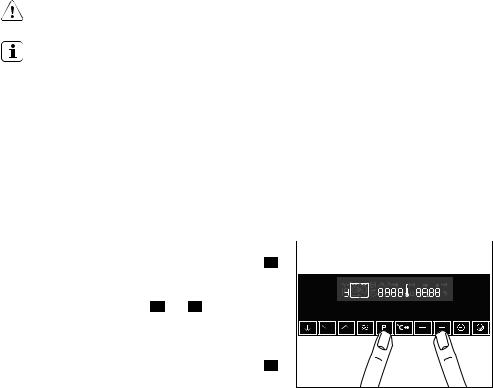
Setting and changing the time
The oven only operates when the time has been set.
When the appliance has been connected to the electrical supply or when there has been a power cut, the symbol for the time  automatically flashes.
1. To change a time that has already been set, press the clock functions button repeatedly until the symbol for the time
  flashes.
2.Using the or
or button, set the current time.
After approx. 5 seconds, the flashing stops and the clock displays the time set.
The appliance is now ready to use.
The time can only be modified, if the child safety device is deactivated, none of the clock functions Countdown , Cook Time
 or End Time
  and none of the oven functions are set.
Before using for the first time |
9 |
|
|
Cleaning for the first time
Before you use the oven for the first time, you should clean it thoroughly.
Do not use any sharp or abrasive cleaning tools or materials! These could damage the surface.
For metal fronts, use normal commercially available cleaning agents.
1.Open the oven door.
The lighting in the oven is switched on.
2.Remove all accessories and side rails and clean with a warm solution of water and washing-up liquid.
3.Also wipe the oven out with a warm solution of water and washing-up liquid and then dry it.
4.Wipe the front of the appliance with a damp cloth.
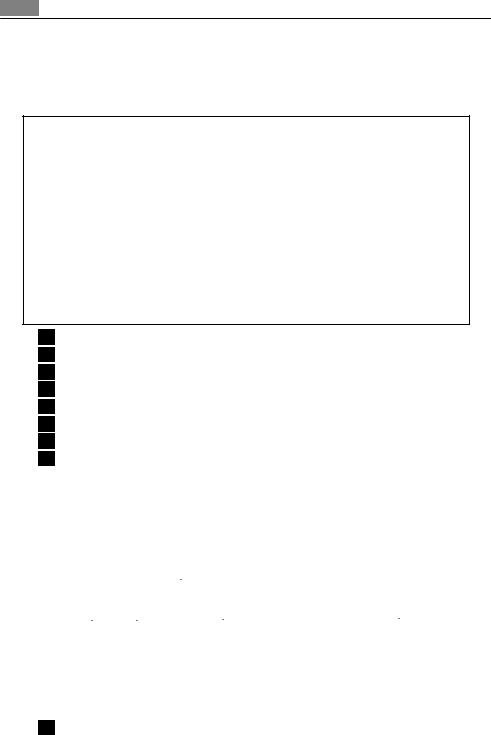
Getting to know the appliance
The appliance can be operated in test mode to test or demonstrate all operating steps. The |
|||||
oven does not heat up. |
|||||
Test mode Switching on |
|
|
|
|
|
1. |
Switch off the appliance using the Stop |
||||
|
button . |
|
|
||
2. |
Press and hold the Baking/Roasting Pro- |
|
|
||
|
|||||
|
grammes buttons and at the same time |
||||
|
until a signal sounds and "d" lights up in the |
||||
|
display. |
||||
Switching test mode off |
|||||
1. |
Switch off the appliance using the Stop |
||||
|
button . |
||||
2.Press and hold the Baking/Roasting Pro-
grammes buttons  and
and  at the same time until a signal sounds and "d" goes out in the display.
10 Operating the oven
Operating the oven
The electronic oven controls
The display field
1 |
2 |
3 |
|
4 |
8 |
|
7 |
6 |
5 |
1Memory: P / Test: d
2Microwave function
3Temperature/Time/Microwave Power
4Weight display
5Time functions Length of operation
6Thermometer symbol
7Baking/Roasting Programmes
8Oven functions
The control panel
|
|
|
|
|
|
|
|
|
|
|
|
|
|
||||
1 |
|
|
|||||||||||||||
|
2 |
|
3 |
|
|
4 |
|||||||||||
|
|
|
|
|
|
|
|
|
|
|
|
|
|
|
|
|
|
|
|
|
|
|
|
|
|
|
|
|
|
|
|
|
|
|
|
|
|
|
|
|
|
|
|
|
|
|
|
|
|
|
|
|
|
|
|
|
|
|
|
|
|
|
|
|
|
|
|
|
|
|
|
|
|
|
|
|
|
|
|
7 |
|||||||
8 |
6 |
5 |
1 Start button
Operating the oven 11
2Microwave button
3Fast Warm Up
4Stop button / Restore settings
5Clock functions
6Selector buttons
7Baking/Roasting Programmes
8Oven functions
General instructions
•Always confirm the selected function with the Start button  . If the selected function is not started within 30 seconds, the appliance switches itself off.
•When the selected function is started, the oven begins to heat up or the time set begins to count down.
•If the oven door is opened during operation, the function stops. After closing the door
continue with the Start button . If the Start button
 is not started within 30 seconds, the appliance switches itself off.
•The oven light is switched on as soon as an oven function is started or the oven door is opened. The oven light goes off after 10 minutes when the door is open and the appliance switched off.
•Stop operation with the Stop  button, continue operation with the Start button
  . Switch the appliance off by pressing the Stop button
  again.
Selecting the oven function
1.Press the or
or button repeatedly until the desired oven function appears.
– A suggested temperature appears in the temperature display.
2. Press the Start button to start the function that has been set.
Changing the oven temperature
Press the  or
or  button to raise or lower the temperature.
The setting changes in 5 °C steps.
12 Operating the oven
Thermometer symbol
•The slowly rising thermometer symbol  indicates how far the oven has heated up.
•The three segments of the thermometer symbol flashing one after the other show that Fast Warm Up is on.
Switching the oven off
To switch the oven off, press the Stop  button repeatedly until only the time and any residual heat is displayed.
Cooling fan
The fan switches on automatically to keep the appliance surfaces cool. When the oven is switched off, the fan continues to run to cool the appliance down and then switches itself off.
Fast Warm Up
After an oven function has been selected, the empty oven can be pre-heated in a relatively short time using the additional function Fast Warm Up.
CAUTION!
Please do not put the food to be cooked into the oven, until Fast Warm Up is completed and the oven is operating using the desired function.
1.Set desired oven function. If necessary, change the suggested temperature.
2.Press the Fast Warm Up button . The symbol for
 lights up. When the bars flash one after another this shows that Fast Warm Up is operating.
When the temperature set is reached, the bars of the heat indicator are lit. A signal sounds. The symbol for  goes out.
The oven now continues heating according to the pre-set oven function and temperature. You can now place the food in the oven.
Oven Functions
Oven function |
Use |
||
|
|
|
|
|
|
Fan oven with circular |
For roasting and baking on up to two levels at the same |
|
|
heating element |
time. |
|
|
|
|
|
|
Rotitherm roasting |
For roasting larger pieces of meat or poultry on one oven |
|
|
|
level. The function is also suitable for gratinating and |
|
|
|
browning the top of dishes. |
|
|
|
|
|
|
Single economy grill |
For grilling flat foodstuffs and for toasting . |
|
|
|
|
|
|
Defrosting/drying |
To defrost or dry herbs, fruit and vegetables. |
|
|
|
|
Microwave 
In microwave mode, the heat is created directly in the food. For heating ready meals and drinks, for defrosting meat or fruit and for cooking vegetables and fish.
Combi Function
Operating the oven 13
For the style of heating for the oven function(s), the Microwave  function can be switched on The dishes are cooked in the shortest time and browned at the same time.
Microwave  Quick Start
Quick Start of the maximum microwave power when the appliance is switched off using the Start button  .
.
Operating time from 30 seconds to 7 minutes. Each press of the button adds 30 seconds to the operating time displayed.
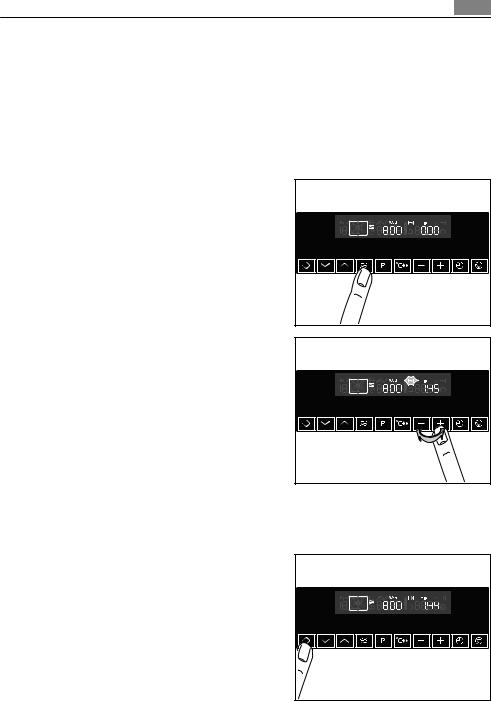
Microwave
1.Switch off the appliance using the Stop  button, if necessary.
2.By repeatedly pressing the Microwave
 button, set the desired microwave power.
– The settings options are in 100 Watt steps from 1,000 Watt to 100 Watt.
– Repeatedly pressing the Microwave  button makes the power display be-
gin again at 1,000 Watt.
3.Using the or
or button, set the desired cook time. The symbol for Cook Time
 flashes.
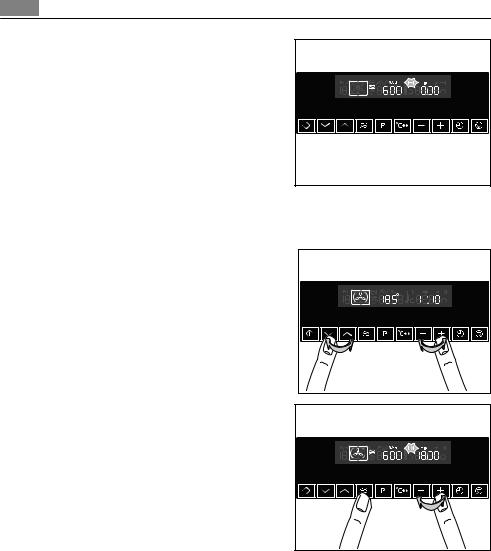
– The cooking times can be set as follows:
– from 0 to 2 min. in 5 second steps,
– from 2 to 5 min. in 10 second steps,
– from 5 to 10 min. in 20 second steps,
– from 10 to 20 min. in 30 second steps,
–from 20 min. onwards in 1 minute steps.
–The maximum length of operation that can be set is:
–At 700 Watt to 1,000 Watt 0 to 7 min. 40 seconds,
–at 100 Watt to 600 Watt 0 to 59 min.
4.When the Start  button is pressed, the time set begins to count down. The symbol for Cook Time
 lights up.
– While the time counts down, the power can be changed using the Microwave  button.
14 Operating the oven
– While the time counts down, using the clock functions buttons  and
and  the cooking time can be increased or
  reduced.
When the time has elapsed, a signal sounds for 2 minutes. The microwave switches itself off. The symbol for Cook Time
 flashes and the time display appears.
To turn off the signal: Press any button.
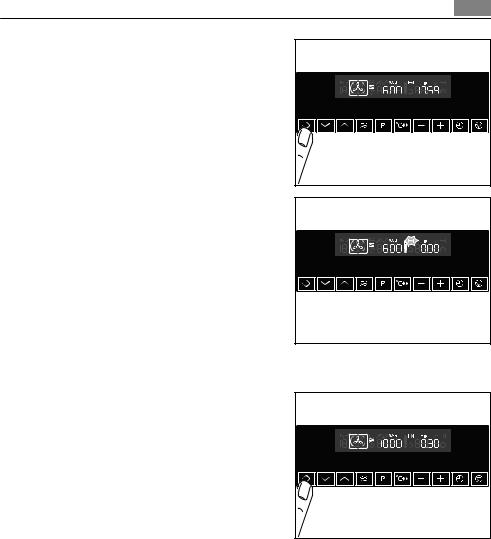
Combi Function
You will find a selection of dishes in the chapter "Uses, Tables and Tips: Combi Function.
1.Switch off the appliance using the Stop  button, if necessary.
2.Press the  or
or  button repeatedly until the desired oven function appears.
3.Using the  or
or  button set the desired
temperature.
4. By repeatedly pressing the Microwave
 button, set the desired microwave power (max. 600 Watt).
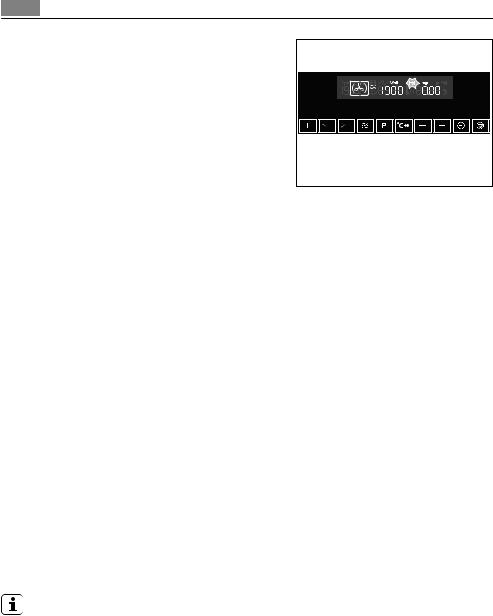
5. Using the or
or button, set the desired cook time. The symbol for Cook Time
 flashes.
– The cooking times can be set as follows:
– from 0 to 2 min. in 5 second steps,
–from 2 to 5 min. in 10 second steps,
–from 5 to 10 min. in 20 second steps,
–from 10 to 20 min. in 30 second steps,
–from 20 min. onwards in 1 minute steps.
The maximum length of operation that can be set is 59 min.
Operating the oven 15
6.When the Start  button is pressed, the time set begins to count down. Oven and microwave are on. The symbol for Cook Time
 lights up.
–While the time counts down, the power can be changed using the Microwave  button.
–While the time counts down, using the
 and
and  buttons the cooking time can be increased or
  reduced.
When the time has elapsed, a signal sounds for 2 minutes. The appliance switches itself off. The symbol for Cook Time
 flashes and the time display appears.
To turn off the signal: Press any button.
Microwave Quick Start
1.Switch off the appliance using the Stop  button, if necessary.
2.Press the Start button  repeatedly until the desired period of operation appears. The appliance switches itself on at maxi-
mum microwave power.
–Each press of the button adds 30 seconds to the cooking time displayed. Maximum 7 min. at maximum microwave power.
–While the time counts down, using the
clock functions buttons  and
and  the cooking time can be increased or
  reduced.
–By repeatedly pressing the Microwave button  , the microwave power can be changed.
–By pressing the Stop button  once, operation can be interrupted. Continue operation using the Start button
  . Pressing the Stop button
  twice switches the appliance off.
16 Operating the oven
When the time has elapsed, a signal sounds for 2 minutes. The appliance switches itself off. The symbol for Cook Time
 flashes and the time display appears.
To turn off the signal: Press any button.
Information on power settings
The overview indicates at which power setting certain processes can be performed. The powers given are guidelines.
Microwave Power |
|
|
Suitable for |
|
|
|
|
1,000 Watt |
|
• |
Heating liquids |
900 Watt |
|
• |
Searing at the beginning of a cooking process |
800 Watt |
|
• |
Cooking vegetables |
700 Watt |
|
• |
Cooking foodstuffs |
|
|
• |
Melting gelatine and butter |
|
|
|
|
600 Watt |
|
• |
Defrosting and heating frozen meals |
500 Watt |
|
• |
Heating one-plate meals |
|
|
• |
Simmering stews |
|
|
• |
Cooking egg dishes |
|
|
|
|
400 Watt |
|
• |
Continuing to cook meals |
300 Watt |
|
• |
Cooking delicate foodstuffs |
200 Watt |
|
• |
Heating baby food |
|
|
• |
Simmering rice |
|
|
• |
Heating delicate foods |
|
|
• |
Melting cheese |
|
|
|
|
100 Watt |
|
• |
Defrosting meat, fish, bread |
|
|
• |
Defrosting cheese, cream, butter |
|
|
• |
Defrosting fruit and cakes (gateaux) |
|
|
• |
Raising yeast dough |
|
|
• |
Warming up cold dishes and drinks |
|
|
|
|
Inserting the oven shelf and baking tray
Shelf runner safety and anti-tip device
To increase shelf runner safety, all insertable components have a small curved indentation at the bottom on the right and left-hand edge.
Always insert insertable components so that this indentation is at the back of the oven interior. This indentation is also important for preventing the insertable components from tipping.

Operating the oven 17
Baking tray :
Push the baking tray between the guide bars of the selected oven level.
Oven shelf :
Insert the oven shelf so that the feet point downwards.
Push the oven shelf between the guide bars of the selected oven level.
The high rim around the oven shelf is an additional device to prevent cookware from slipping off.
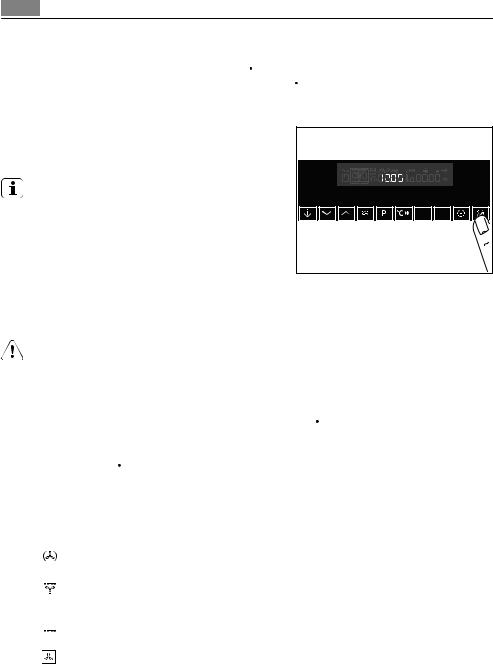
Additional functions
Microwave Programmes
For this function, use the pre-set programmes (see section "Uses, Tables and Tips: Programmes).
Selecting a programme
1.Switch off the appliance using the Stop  button, if necessary.
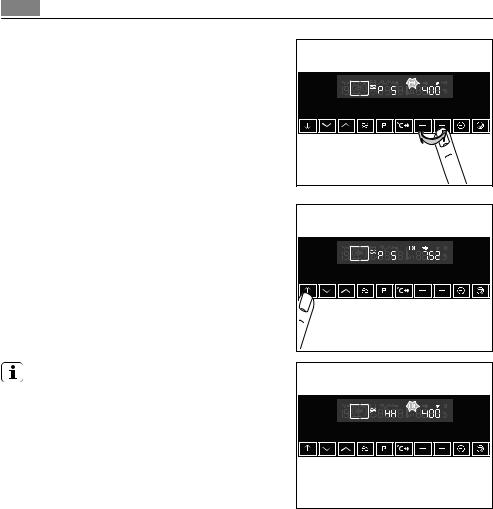
2.Press the Baking/Roasting Programmes
button  then press the
  or
or  button repeatedly, until the desired programme appears in the display (P1 to P12).
– In the display the preset weight "gr" is displayed. The symbol for Cook Time 
 flashes. Weight = Cook Time
18Operating the oven
3.By pressing the button  or
or  , the weight display can be adapted to the
weight of the food, minimum 100 g, maximum 1,500 g (P 5 to P12 maximum 1,000 g).
– Inputting the weight automatically controls the length of time the microwave operates.
–Always input the lower weight, e. g. bread weighs 460 g: Set the weight to 400 g.
4.When the Start  button is pressed, the time set begins to count down. The symbol for Cook Time
 and "min" light up.
– When the time has elapsed, a signal sounds for 2 minutes. The oven switches itself off. The symbol for Cook Time 
 flashes.
With some programmes, after the time has elapsed a Keep Warm function is started. A signal sounds and "HH" lights up in the display.
After the Keep Warm function has ended, a signal sounds for 2 minutes. The oven switches itself off. The symbol for Cook Time 
 flashes and the time display appears.
To turn off the signal: Press any button.
Memory function
The Memory function can be used to save one setting which is used very frequently.
1.Set oven function, temperature and the clock functions Cook Time 
 and/or End Time
  , if necessary
 .
.
 Loading...