

ENGLISH
ENGLISH
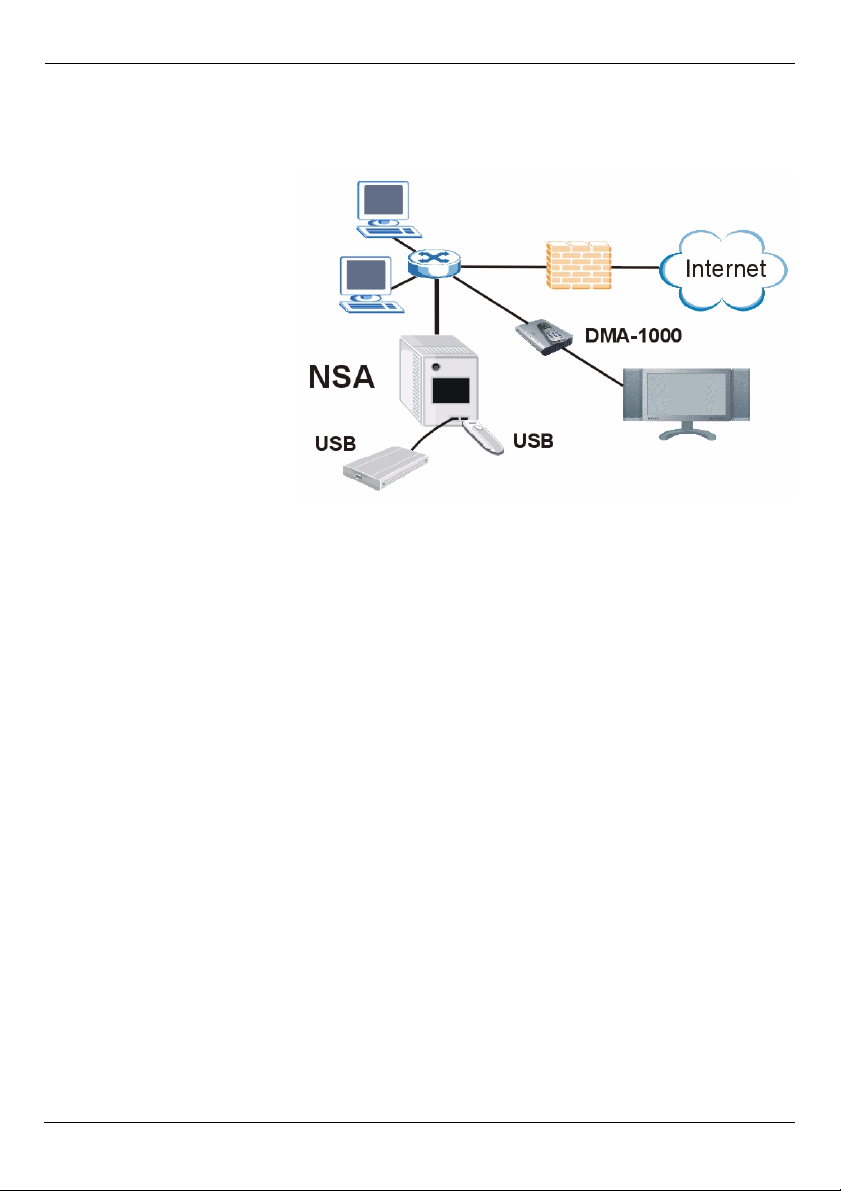
The NSA-220 lets you share files and back up data on your home network. Media clients
can also play video, music, and photo content files stored on the NSA-220. This guide
covers how to:
1 Install hard drives.
2 Connect the NSA.
3 Access the NSA.
4 Create a volume.
5 Map the NSA to a
computer network drive.
6 Use the NSA-220 as a
multi-media server.
7 Back up files using
Memeo Autobackup.
See the User’s Guide on the
included CD for details on
configuring all of the NSA220’s features.
Requirements
You need the following before you start:
• NSA-220
• Included CD containing the NSA discovery Utility, the Memeo Autobackup program, media
client software, and User’s Guide
• Power cord and power supply (external)
• Included gray (Ethernet) cable
• One or two SATA I or SATA 3.0 Gbit/s (Serial Advanced Technology Attachment) compatible hard disk(s) with 15-pin SATA power connectors
• Philips screwdriver to install hard disks in the disk trays
• USB cable (optional: you only need this if you want to expand storage capacity by connecting compatible USB (version 2) drives). It is recommended that the USB device use it’s own
external power adaptor if it has one.
• Computer with Network Interface Card (NIC) and TCP/IP installed
• Network device such as a switch, router, or hub
1
ENGLISH
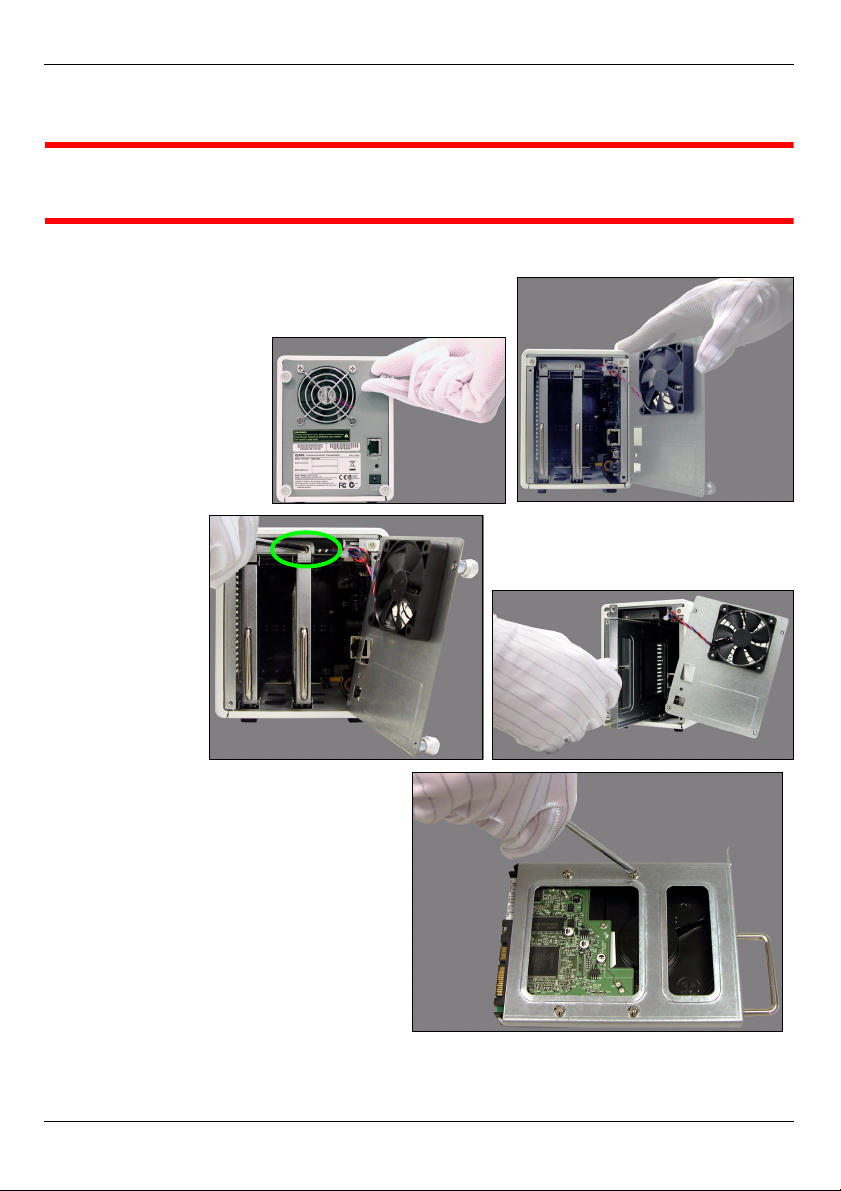
1 Install Hard Drives
1 Hard drives are NOT hot swappable. The NSA-220 must be turned off
before you remove or install hard drive(s).
1 Make sure the power and Ethernet cords are disconnected from the NSA-220.
2 Loosen the
thumbscrews on the
rear panel and open
it.
3 Use a
screwdriver to
remove the
retaining
screw from a
disk tray.
4 Slide the disk
tray out.
5 Place the disk
on a flat surface with the screw holes
facing up. Place the disk tray on top of
it and secure it with the screws as
shown.
2
ENGLISH
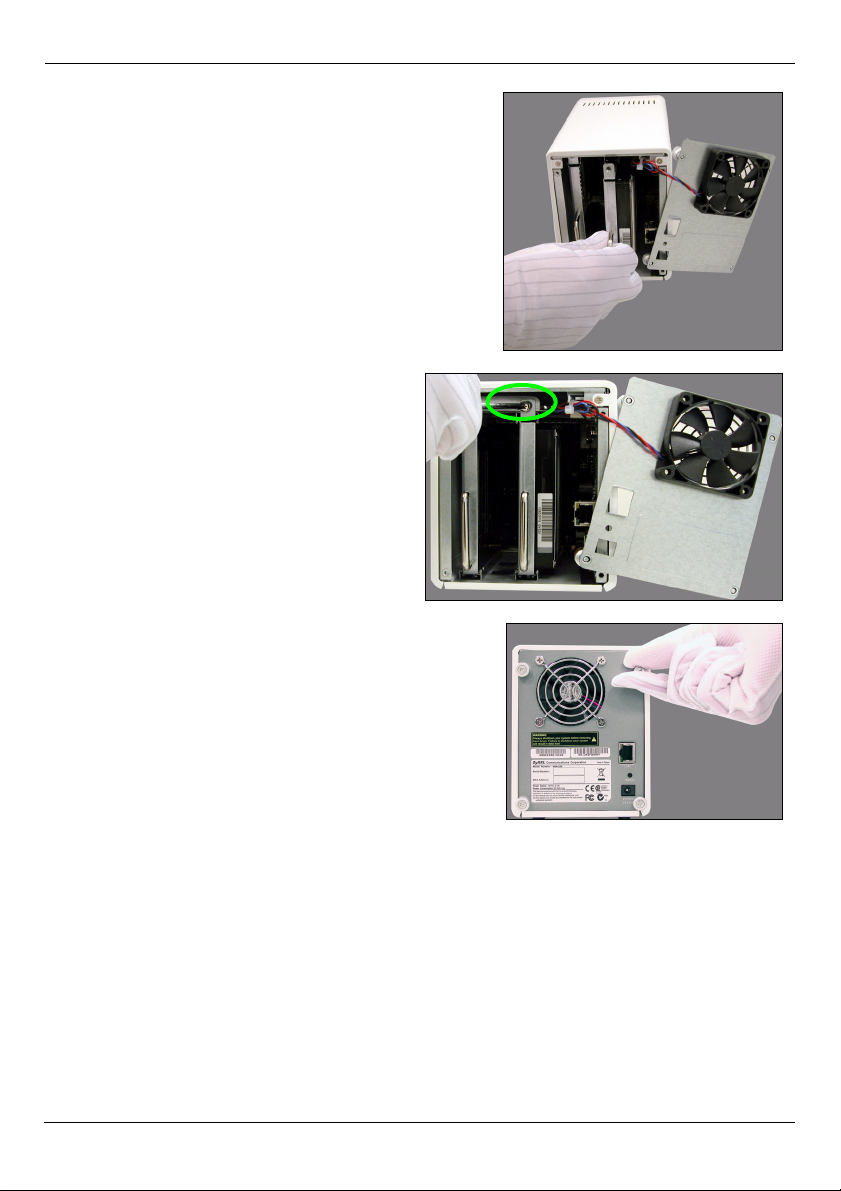
6 Slide the tray back into the disk bay. Make sure
the screw hole is at the top. Push the tray in all
the way so the screw hole at the top is flush with
the internal frame.
7 Put the disk tray retaining screw back in.
8 Repeat steps 3 to 7 for a second hard
drive if you have one.
9 Put the rear panel back on and tighten
the thumbscrews.
3
ENGLISH
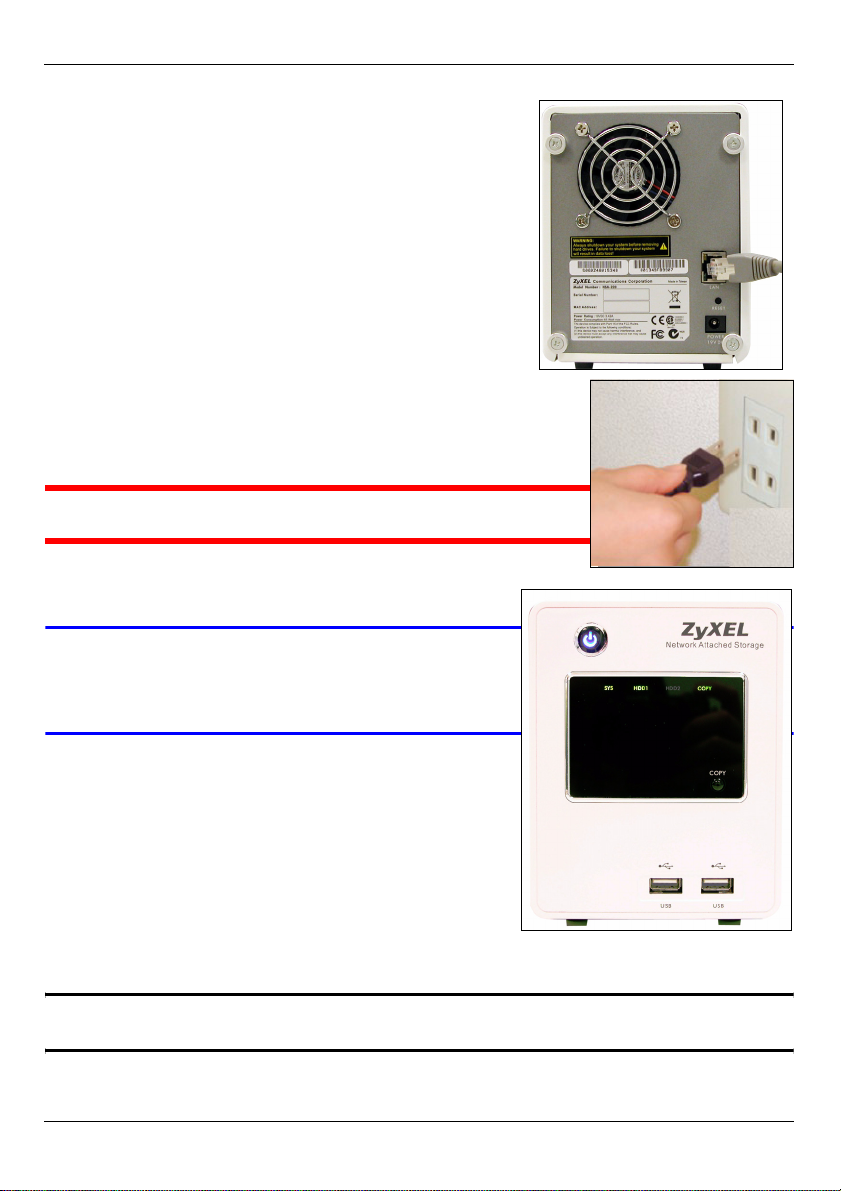
2 Connect the NSA-220
1 Use the included gray (Ethernet) cable to connect the
LAN port on the rear of the NSA-220 to a computer,
switch, or router on your network.
2 Connect one end of the power cord to the POWER
socket on the rear of the NSA-220 and the other end to the
external power supply. Connect the external power supply to
a power outlet.
1 Use ONLY the included power supply.
3 Press the power button on the front of the NSA-
220 to turn it on. Look at the front panel lights.
V If no lights turn on, make sure the power
cord is not loose and that the power
source is turned on.
• The power button light turns steady blue.
• The SYS light turns steady green after a successful startup (it takes about 50 seconds).
• The HDD lights come on if the NSA-220 detects
hard drives in the disk bays.
• The rear panel LAN port has a light that turns on
if the Ethernet port is properly connected to
your network. It blinks while sending or receiving traffic.
" To turn off the NSA-220, press the power button in once only.
4
ENGLISH
3 Access the NSA-220
For a Windows computer, use section 3.1.
For another type of computer (like Mac or Linux), use section 3.2.
3.1 Using the discovery Utility to Access the NSA-220
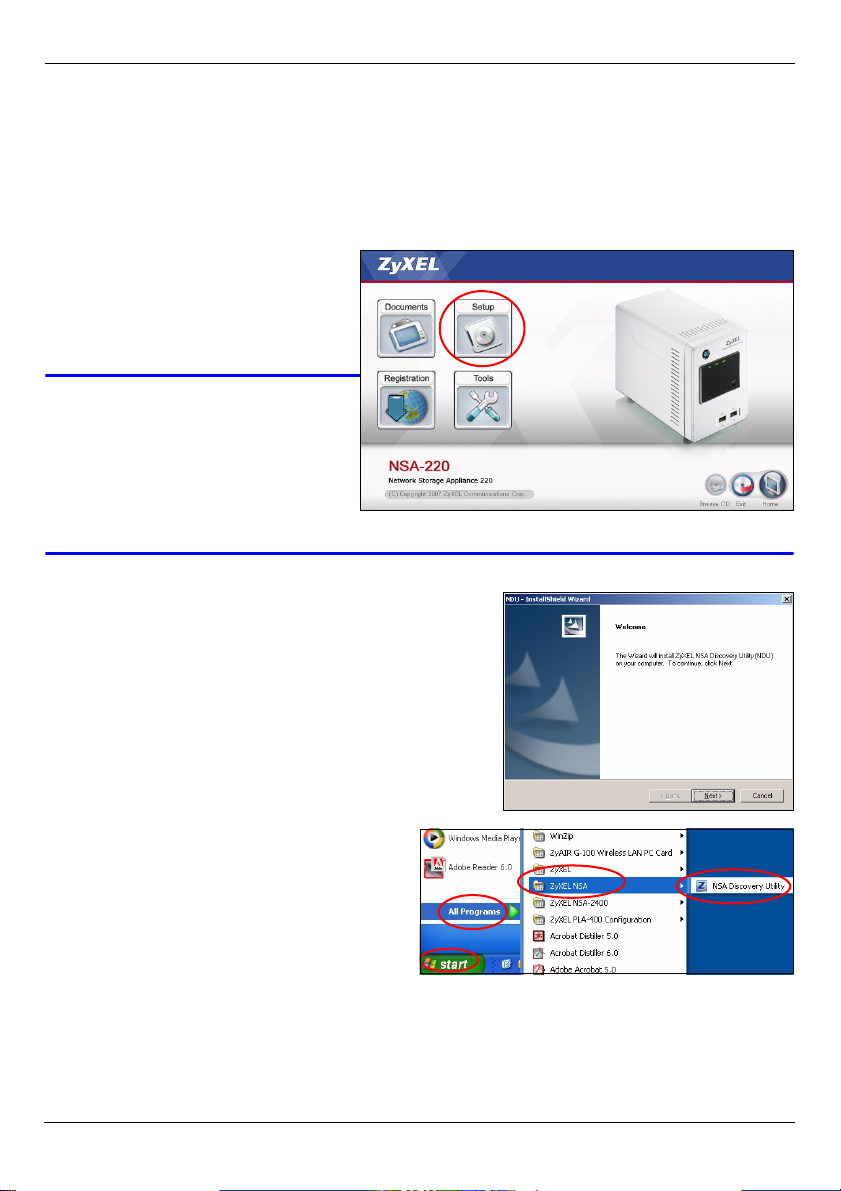
1 Insert the included CD into your
CD-ROM drive. Click Setup in
the screen that displays. Then
click the NSA-220 Discovery
Utility link.
V If this screen does not
display, use Windows
Explorer (My Computer)
to go to the CD-ROM
(commonly drive D).
Double-click setup.exe.
2 The installation wizard begins. Follow the installer
instructions. Click Finish to complete the
installation.
3 In Windows, click start > All Programs >
ZyXEL NSA > NSA discovery Utility to
run the discovery utility. If your computer
has more than one network card, then
you will be prompted to select one.
5
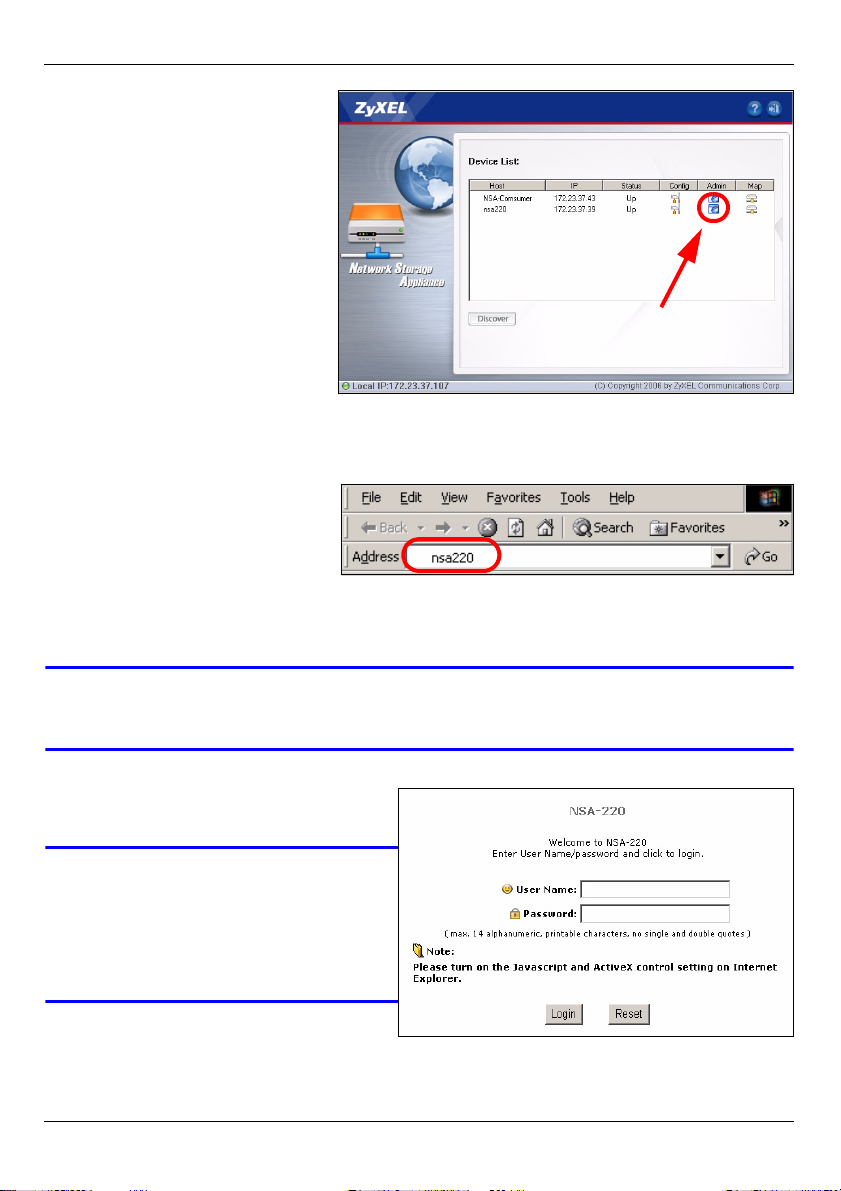
4 The utility lists the NSAs in
your network.
5 Click the Admin icon to see
the web configurator login
screen (see section 4).
• If you need to change the
NSA-220 IP address, click
the icon under Config.
• To map the NSA-220 to a
Windows network drive,
click the icon under Map
(see section 6).
• To refresh the screen, click
discover.
3.2 Direct Access
Open Internet Explorer (or
another web browser like Firefox).
Type ‘nsa220’ as the web site
address and press [Enter] or click
Go.
4 NSA-220 Login
ENGLISH
V If you cannot get to the login screen, see the troubleshooting section at the
end of this guide.
1 Enter the default user name ‘admin’
and password ‘1234’ and click Login.
V The user name and
password are case sensitive.
You may need to make sure
you don’t have the caps lock
on.
6
 Loading...