


Quick Guide
© 2018 ZOOM CORPORATION
Copying or reprinting this manual in part or in whole without permission is prohibited.
Product names, registered trademarks and company names in this document are the property of their respective companies. All
trademarks and registered trademarks in this document are for identification purposes only and are not intended to infringe on the
copyrights of their respective owners.
You might need this manual in the future. Always keep it in a place where you can access it easily.
The contents of this manual and the specifications of the product could be changed without notice.
The Operation Manual can be downloaded from the ZOOM website
(https://www.zoom.jp/docs/L-20).
You must r ea d th e Us ag e an d Sa fe ty P re ca ut io ns b ef or e us e.
2
Turning the power on and off
2、6
1、7
4
5
3
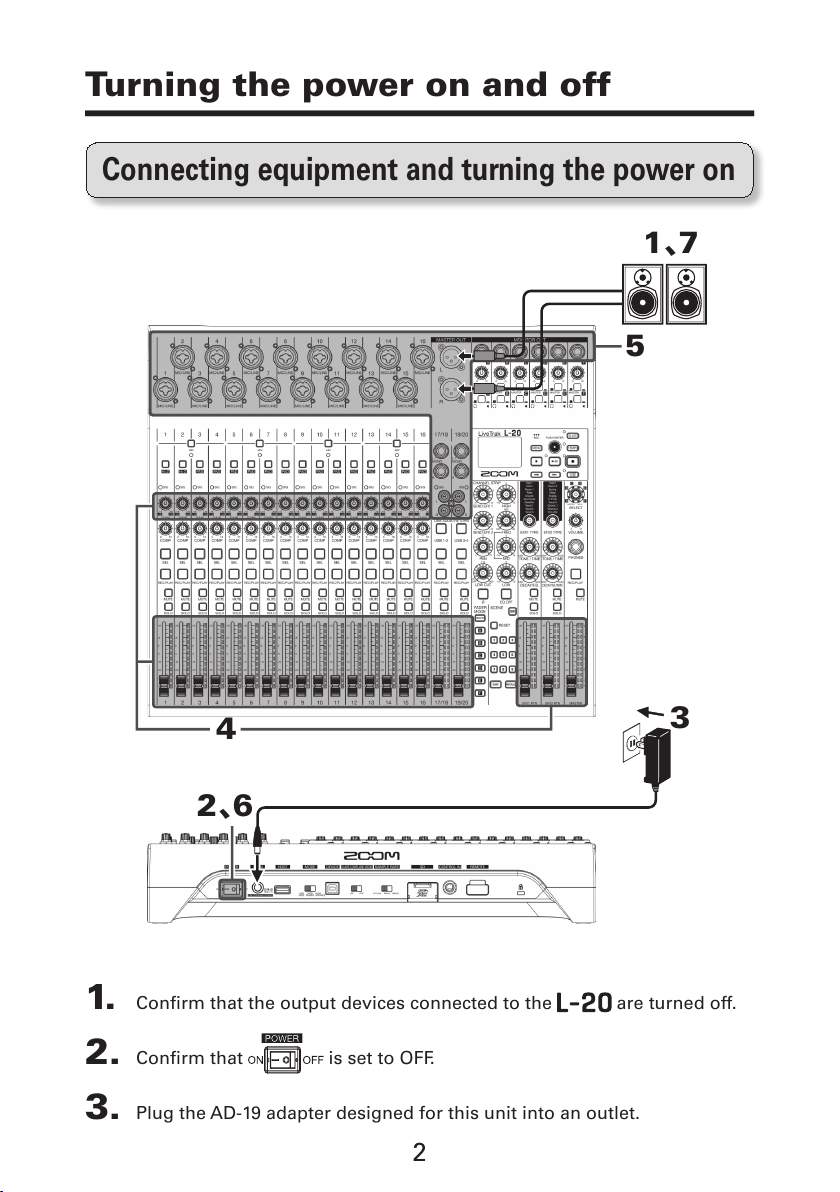
1. Conrm that the output devices connected to the are turned off.
2. Conrm that is set to OFF.
3. Plug the AD-19 adapter designed for this unit into an outlet.
Connecting equipment and turning the power on
3
Turning the power on and off
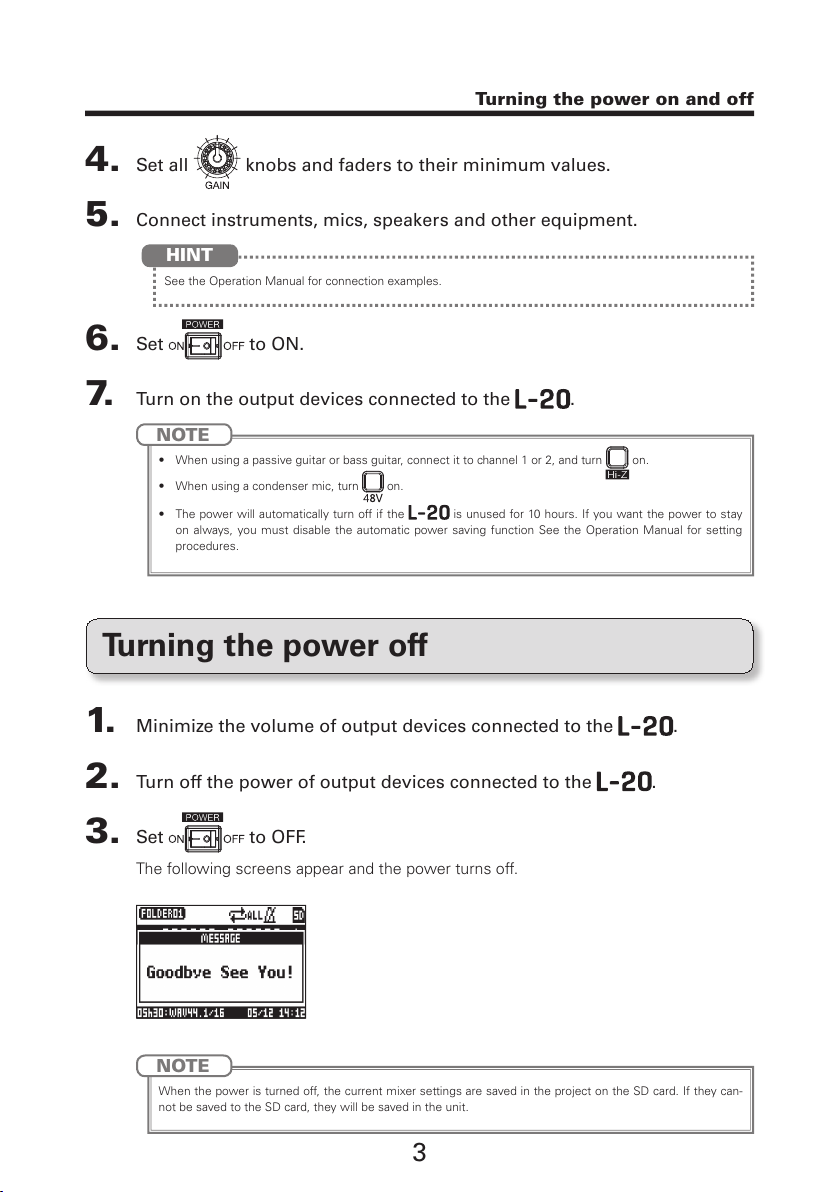
4. Set all knobs and faders to their minimum values.
5. Connect instruments, mics, speakers and other equipment.
See the Operation Manual for connection examples.
HINT
6. Set to ON.
7. Turn on the output devices connected to the .
NOTE
• When using a passive guitar or bass guitar, connect it to channel 1 or 2, and turn on.
• When using a condenser mic, turn
on.
• The power will automatically turn off if the
is unused for 10 hours. If you want the power to stay
on always, you must disable the automatic power saving function See the Operation Manual for setting
procedures.
Turning the power off
1. Minimize the volume of output devices connected to the .
2. Turn off the power of output devices connected to the .
3. Set to OFF.
The following screens appear and the power turns off.
NOTE
When the power is turned off, the current mixer settings are saved in the project on the SD card. If they can-
not be saved to the SD card, they will be saved in the unit.
4
Setting the date and time
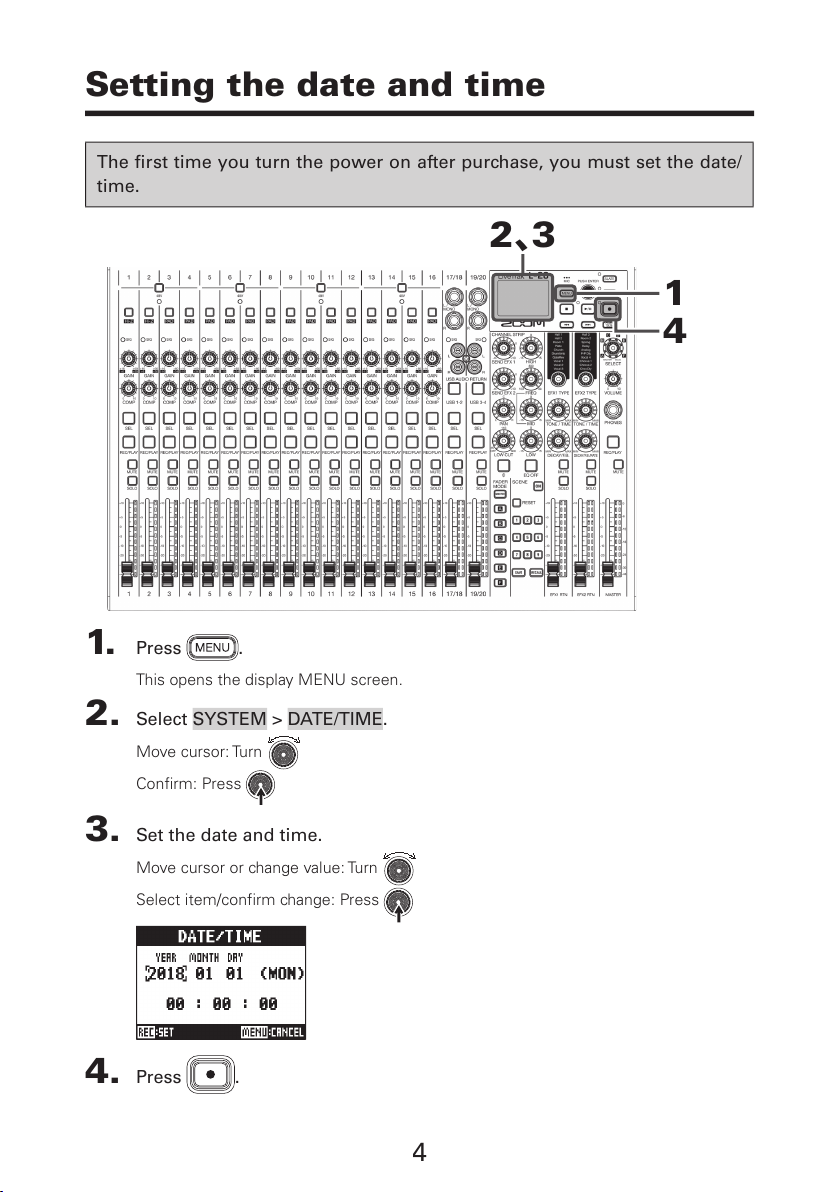
The rst time you turn the power on after purchase, you must set the date/
time.
4
1
2、3
1. Press .
This opens the display MENU screen.
2. Select SYSTEM > DATE/TIME.
Move cursor: Turn
Confirm: Press
3. Set the date and time.
Move cursor or change value: Turn
Select item/confirm change: Press
4. Press .

5
Outputting input sounds from output devices
1
2
2
4
3、5
1. Use to adjust the input signals while inputting sound from instru-
ments and mics.
NOTE
Set them so that SIG indicators do not light red.
SIG indicator
2. Turn off (unlit) for the MASTER and the channels with sound you
want to output.
3. Set the MASTER fader to 0.
4. Use the channel faders to adjust the volumes.
5. Use the MASTER fader to adjust the overall volume.
Outputting sound from speakers
 Loading...