


Westinghouse WLE620WA, WLE646WA, WLE626WA, WLE625WA, WLE622WA User Manual
...USER MANUAL
600mm Upright Cooker
WLE620WA, WLE622WA, WLE624WA, WLE625WA, WLE626WA,WLE644WA, WLE645WA, WLE646WA

CONGRATULATIONS
Congratulations and thank you for choosing our cooker. We are sure you will find your new appliance a pleasure to use. Before you use the appliance, we recommend that you read through the entire user manual, which provides the description of the appliance and its functions.
To avoid the risks that are always present when you use an electrical appliance, it is important that the appliance is installed correctly and that you read the safety instructions carefully to avoid misuse and hazards.
We recommend that you keep this instruction booklet for future reference and pass it on to any future owners.
After unpacking the appliance, please check that it is not damaged. If in doubt, do not use the appliance but contact your local customer care centre.
Conditions of use
This appliance is intended to be used in household and similar applications such as:
•Staff kitchen areas in shops, offices and other working environments
•Farm houses
•By clients in hotels, motels and other residential type environments
•Bed and breakfast type environments
•Catering and similar non-retail applications
Please ensure you read the instruction manual fully before you call for service, or a full service fee could be applicable.
Record model and serial number here:
Model number:.....................................................
Serial number:......................................................
CONTENTS |
|
Important safety instructions......................................... |
3 |
Installation............................................................... |
4 |
Controls.................................................................. |
8 |
Understanding the cooker......................................... |
12 |
Using the hotplates.................................................. |
14 |
Understanding the functions....................................... |
15 |
Cooking guide for ovens.......................................... |
17 |
Get to know your oven............................................. |
19 |
Handling baking & grilling problems........................... |
20 |
Clocks.................................................................. |
21 |
Cleaning and caring for the cooker............................ |
23 |
Cleaning and caring for the oven............................... |
24 |
Installation............................................................. |
24 |
Solving problems.................................................... |
27 |
Warranty............................................................... |
30 |
The symbols you will see in this booklet have these meanings:
 WARNING
This symbol indicates information concerning your personal safety.
 CAUTION
This symbol indicates information on how to avoid damaging the appliance.
IMPORTANT
This symbol indicates tips and information about use of the appliance.
ENVIRONMENT
This symbol indicates tips and information about economical and ecological use of the appliance.
IMPORTANT
Check for any damage or marks
If you find the appliance is damaged or marked, you must report it within 7 days if you wish to claim for damage/ marks under the manufacturer’s warranty. This does not affect your statutory rights.
ENVIRONMENT
Information on disposal for users
•Most of the packing materials are recyclable. Please dispose of those materials by contacting your local authorities and ask for the correct method of disposal.
CONTENTS 2

IMPORTANT SAFETY INSTRUCTIONS
Before you use the appliance, we recommend that you read through the relevant sections of this manual, which provides the description of your appliance and its functions.
To avoid the risks that are always present when you use an appliance, it is important that the appliance is installed correctly and that you read the safety instructions carefully to avoid misuse and hazards.
This appliance complies with the requirements of Australian/New Zealand Standard AS/NZS 60335.2.6
 WARNING
•Cooker is designed to be placed on the floor. It should not be placed on a base.
•This appliance is not suitable for use by young children or infirm persons, without supervision.
•Young children should be supervised to ensure they do not play with this appliance.
•During use, this appliance becomes hot. Care should be taken to avoid touching hot surfaces.
•This appliance must not be used as a space heater.
•Keep vents clear of obstructions.
•In order to avoid a fire, the appliance must be kept clean and vents kept unobstructed.
•Do not spray aerosols in the vicinity of the appliance when it is in operation.
•Do not store flammable materials in or under the appliance, e.g. aerosols.
•Accessible parts will become hot when in use. To avoid burns and scalds children should be kept away.
•If the supply cord is damaged it must be replaced by a suitably qualified person in order to avoid a hazard.
•Oven gloves should be worn when accessing hot internal parts.
•The warming drawer must not be used to warm, heat or preheat food due to health regulations.
Grill
•Always turn the grill off immediately after use as fat left there may catch fire.
•Do not cover the insert with foil, as fat left there may catch fire.
•Always keep the grill dish clean as any fat left may catch fire.
•Do not leave the grill on unattended.
•To avoid a fire, ensure that grill trays and fittings are always inserted into the appliance in accordance with the instructions.
•Do not place thick portions of food under the grill. Foods may curl, catch and ignite.
•Do not store flammable materials in the grill.
Oven
•During use the appliance becomes hot. Care should be taken to avoid touching hot surfaces inside the oven.
•Switch the appliance off before removing the oven light glass for globe replacement.
•To avoid an accident, ensure that oven shelves and fittings are always inserted into the appliance in accordance with the instructions.
•Do not use the oven door as a shelf.
•Do not push down on the open oven door.
Hotplates (Generally)
•Do not allow pots to boil dry, as damage to both pan and hotplate may result.
•Do not operate the hotplates for an extended period of time without a utensil on the hotplate.
•Do not allow large cookware to overhang the hob onto the adjacent benchtop. This will cause scorching to the benchtop surface.
•Do not allow cooking utensils to intrude into the area which is close to the controls.
Ceramic Glass
•If the ceramic glass is accidentally cracked switch off the appliance to avoid the possibility of electric shock.
•Do not place heat resistant mats, wire mats or aluminium foil under pots or pans.
•Do not cook food directly on the ceramic glass surface.
•Do not use round bottom woks or similar utensils which could lead to over heating of hotplates and possible damage to the cooking surface.
•Do not use the ceramic cooktop as extra bench space or as a cutting board.
Installation, Cleaning and Servicing
•An authorised person must install this appliance. (Certificate of Compliance to be retained).
•Before using the appliance, ensure that all packing materials are removed from the appliance.
•In order to avoid any potential hazard, the enclosed installation instructions must be followed.
•Ensure that all specified vents, openings and airspaces are not blocked.
•In order to avoid accidental tipping of the appliance (for example, by a child climbing onto the open oven door), the anti-tilt bracket must be installed.
•Where the appliance is built into a cabinet, the cabinet material must be capable of withstanding 85˚C.
•Only authorised personnel should carry out servicing. (Certificate of Compliance to be retained).
•Always ensure the appliance is switched off before cleaning or replacing parts.
•This appliance contains aluminium fittings. Do not use caustic based cleaners.
•Do not use steam cleaners, as this may cause moisture build up.
•Always clean the appliance immediately after any food spillage.
•Do not use harsh abrasive cleaners or sharp metal scrapers to clean the oven door glass since they can scratch the surface, which may result in shattering of the glass.
•To maintain safe operation, it is recommended that the product be inspected every five years by an authorised service person.
•This appliance must be earthed.
 CAUTION
•Separate grill model - grill with door open.
•Grill in oven model - grill with door closed.
3 |
SAFETY |
INSTALLATION
 WARNING
This appliance must be installed by an authorised person in compliance with local municipal building codes and any other relevant statutory regulation.
Wiring connections must be made in accordance with: New Zealand & Australian requirements, including AS/NZS 3000 WIRING RULES.
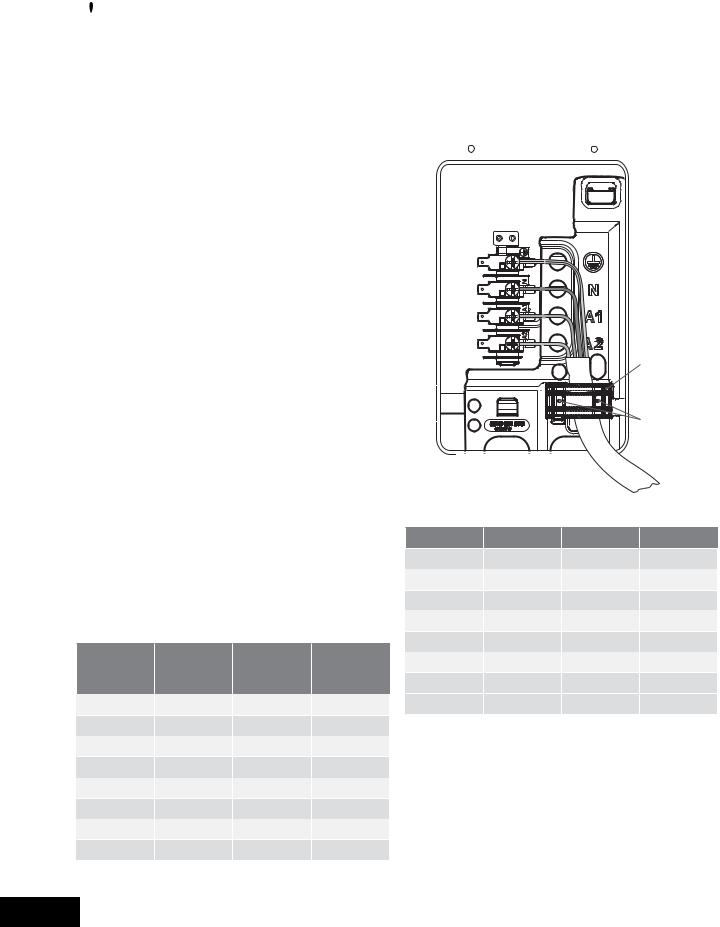
Hard wiring detail
1.Remove terminal cover plate from rear panel of appliance.
2.Fit wires through hole in cover plate and make connections to terminals.
3.Engage wires into plastic clip. Secure plastic clip with two long silver screws (supplied in separate bag).
4.Replace cover plate onto rear panel.
Refer to data plate for rating information. The data plate is positioned on the bottom of the oven front, viewable with the oven door open.
•Electrical connection is 230–240 volts AC 50 Hz.
•To gain access to the mains connection terminals, remove the rear cover by unscrewing the two assembly screws.
•The cooker requires a means of all pole disconnection incorporated into the fixed wiring. This MUST have a disconnection gap of 3mm.
•The cooker MUST be earthed. Any damage caused by failure to earth will not be covered by warranty.
•This range must be connected with cable of 75°C rating minimum.
•This product has passed the insulation resistance test after manufacture. If the resistance reading is low at installation, it is probably caused by moisture from the atmosphere being absorbed by the elements after the range has been produced. (Pass at 0.01MΩ AS/NZS 3000 Wiring Rules Clause 8.3.6.2).
NOTE: Where connection is made to a multi-phase 220/240V supply, the bridge piece must be removed from between the active connections on the main terminal block.
Plastic clip
Plastic clip |
securing points |
Fuse (for New Zealand only) |
Rated Power Input |
|
Should the fuse need servicing it is accessible through the fuse opening located in the back cover. The Cooking range must be connected to the supply by a supply cord fitted with the appropriately rated plug with the socket-outlet fitted to the final sub-circut in the fixed wiring that is intended to supply this cooking range. See table below.
Supply cord specifications |
|
|
|
MODEL |
CURRENT |
WIRE |
MINIMUM |
|
RATING |
SECTION |
TEMP |
|
(AMPS) |
(MM2) |
RATING (°C) |
WLE620WA |
25 |
2.5 |
75 |
WLE622WA |
32 |
4.0 |
75 |
WLE624WA |
32 |
4.0 |
75 |
WLE625WA |
32 |
4.0 |
75 |
WLE626WA |
32 |
4.0 |
75 |
WLE644WA |
32 |
4.0 |
75 |
WLE645WA |
32 |
4.0 |
75 |
WLE646WA |
32 |
4.0 |
75 |
MODEL |
TOTAL kW |
A1 kW |
A2 kW |
WLE620 |
9.7 |
3.1 |
6.6 |
WLE622 |
11.7 |
5.1 |
6.6 |
WLE624 |
12.1 |
5.5 |
6.6 |
WLE625 |
10.7 |
4.1 |
6.6 |
WLE626 |
12.1 |
5.5 |
6.6 |
WLE644 |
11.4 |
5.0 |
6.4 |
WLE645 |
10.5 |
4.1 |
6.4 |
WLE646 |
11.8 |
5.4 |
6.4 |
INSTALLATION 4

INSTALLATION
 CAUTION
5mm Clearance min. |
|
|
|
596mm |
|
5mm Clearance min. |
||||||
|
|
|
|
|
|
|
|
|
|
|
|
|
|
|
|
|
|
|
|
|
|
|
|
|
|
|
|
|
|
|
|
|
|
|
|
|
|
|
Installation dimensions
 WARNING
Installers responsibility
In ALL cases the anti-tilt bracket MUST be securely anchored to the floor with suitable fasteners, and the stability bolt fixed.
The anti-tilt bracket is a mandatory safety restraint.
In order to prevent accidental tipping of the appliance; for example by a child climbing onto the open door, the anti-tilt bracket supplied with the cooker MUST be installed. ALWAYS ensure that the cooker is located so that the anti-tilt bracket is engaged into the cooker.
Step 1: Positioning
Choose the most practical bracket mounting option for your cooker. The anti-tilt bracket can be floor mounted or floor and skirting mounted depending on the location of the range plug/socket/connection.
3 Fastenersfasteners
Minimum
A
detailDetailAA
Step 2: Fixing anti-tilt bracket
Position the anti-tilt bracket so that it will fully engage into the slot at the rear of the cooker. The bracket is mounted centrally at the rear of the cooker. Anchor the bracket into position using appropriate fasteners.
The appliance must not be installed in a corner. It must be installed at least 100mm from the side wall.
Minimum
100
5 INSTALLATION
INSTALLATION
 WARNING
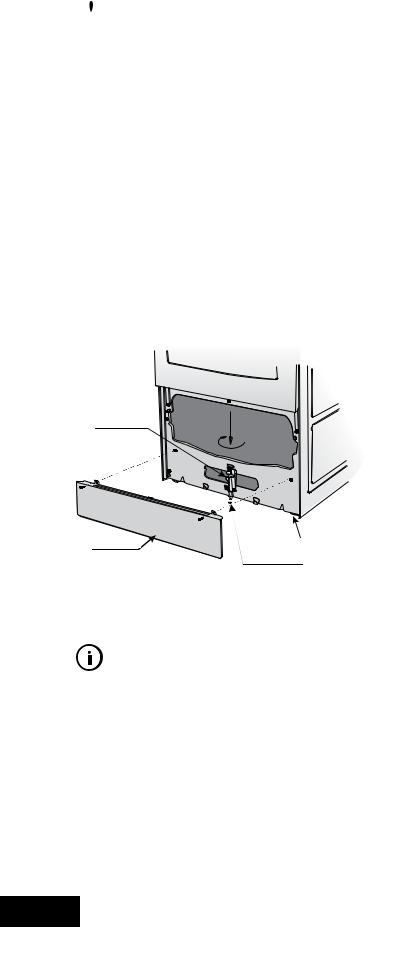
Step 3: Stability bolt
1.Remove oven door – to be done by qualified personnel only. (Refer to procedure).
2.Remove screws from kick panel. To remove kick panel lift kick panel upwards to release the two Location Tabs from the holes in the bottom of the panel.
3.Position the cooker into the anti-tilt bracket.
4.Remove the tape from the stability bolt.
5.Rotate the stability bolt 180˚ clockwise until it is pointing to the left like the picture below.
6.The stability bolt should now be able to drop to the floor.
7.Mark the position for the stability bolt on the floor.
8.Pull the cooker out and drill the bolt hole, using a 6.5mm masonry or wood drill. Minimum 30mm deep for concrete.
9.Reposition the cooker back into place, then fit the stability bolt into the drilled hole.
Stability bolt
Front adjustable feet
Kick panel |
ø6.5mm drilled |
|
location hole |
IMPORTANT
Setting the time
If you have purchased a model fitted with an electronic or programmable clock, you MUST set the time of day before you can operate your appliance.
INSTALLATION 6

INSTALLATION
 WARNING
Fitting oven shelves
1.Ensure shelf orientation is correct (refer to diagram below).
2.Slide oven shelves onto oven supports (side runners) at an angle until raised back of shelf is past the stop on oven supports (side runners).
3.Lower front of shelf and push in until stop is reached.
4.To remove oven shelves, withdraw to the stop and raise the front of shelf to clear the stop.
Fitting the grill dish supports
•Insert the rear hook into the rear hole.
•Align the front peg to the front hole and push in firmly.
Fitting the grill dish
Separate grill
Ensure rear of the dish is engaged with the side support before sliding backwards. To remove, simply pull forwards and upwards.
Engagement of
rear dish
Note the orientation of the side and rear features
Not a shelf position
5
4
3
2
1
5 shelf positions
NOTE: The top ledge is not a shelf position. There are no stops for shelf withdrawal.
Assemble grill tray handle
 Assemble grill tray handle as shown
Grill in oven
(Refer to Fitting Oven Shelves)
The grill dish with wire insert can be used in any of the two upper height positions (shelf positions 4 and 5) between the runners.
NOTE: You must remove the grill dish when baking in the oven.
Grill dish insertion
Grill dish final position
7INSTALLATION

CONTROLS
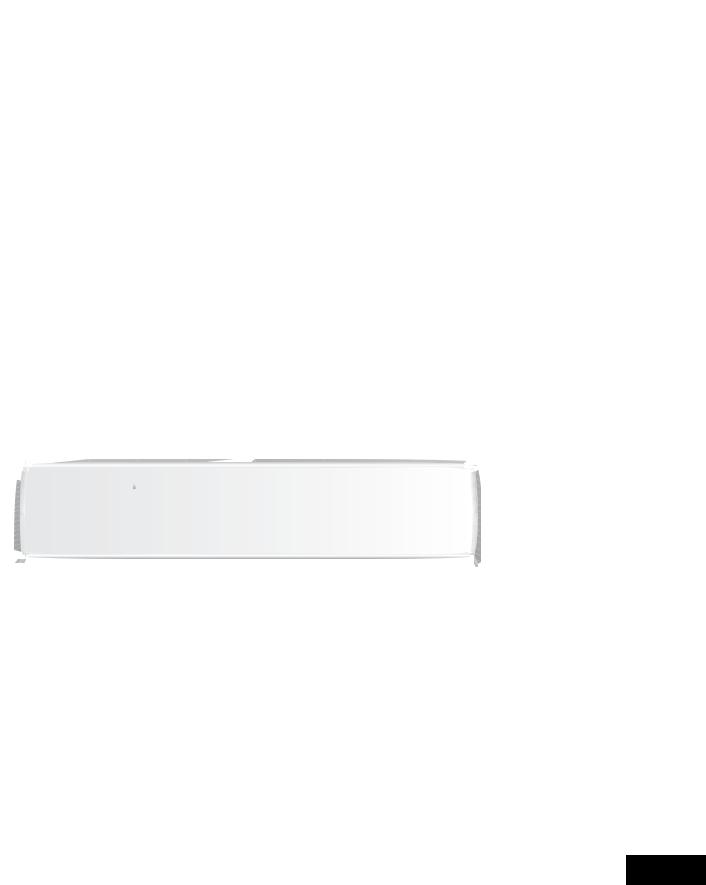
WLE620WA – Mercury
2 |
4 |
|
1 |
3 |
5 |
1. |
Hotplate Control Knobs |
4. |
Oven Indicator Lamp |
|
• Adjusts temperature of hotplate. |
|
• Comes on when you operate |
|
Can be rotated in either direction. |
|
the oven temperature control |
2. |
Hotplate Indicator Lamp |
|
knob. Cycles on and off |
|
• Comes on when you turn a hotplate on. |
|
automatically when you are |
3. |
Temperature Control Knob |
|
cooking/baking. |
|
• Sets temperature for baking. |
5. |
Function Switch |
|
|
|
• Sets oven functions. |
|
|
|
Bake - with light |
|
|
|
Grill - with light |
|
|
|
Light - light only |
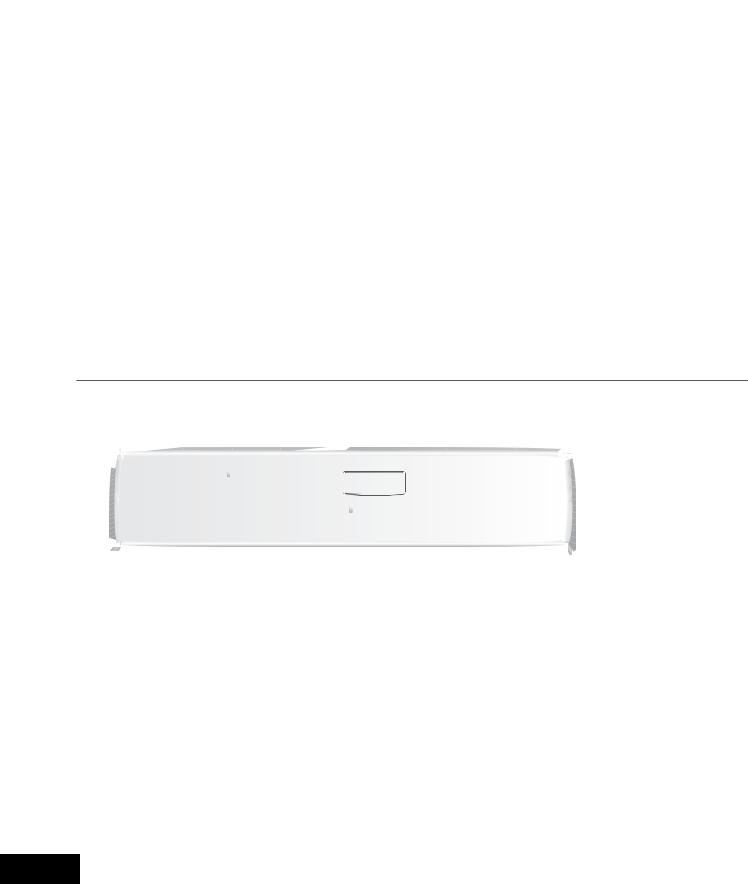
WLE622WA – Columbo
2 |
4 |
7 |
7 |
|
1 |
3 |
|
5 |
6 |
1. |
Hotplate Control Knobs |
5. |
Function Switch |
|
|
|
• Adjusts temperature of hotplate. |
|
• |
Sets oven functions. |
|
|
Can be rotated in either direction. |
|
|
Bake - with light |
|
2. |
Hotplate Indicator Lamp |
|
|
Grill - with light |
|
|
• Comes on when you turn a hotplate on. |
|
|
Light - light only |
|
3. |
Temperature Control Knob |
6. |
Timer |
|
|
|
• Sets temperature for baking. |
|
• |
Sets reminder time. |
|
4. |
Oven Indicator Lamp |
7. |
General Purpose Outlet Switch |
||
•Comes on when you operate the oven temperature control knob. Cycles on and off automatically when you are cooking/baking.
CONTROLS 8
CONTROLS
WLE624WA – Neptune
2 |
3 |
5 |
7 |
||
8 |
|
|
|
|
8 |
|
|
|
|
||
|
1 |
4 |
6 |
1. |
Hotplate Control Knobs |
5. |
Oven Indicator Lamp |
|
• Adjusts temperature of hotplate. |
|
• Comes on when you operate |
|
Can be rotated in either direction. |
|
the oven temperature control |
2. |
Hotplate Indicator Lamp |
|
knob. Cycles on and off |
|
• Comes on when you turn a hotplate on. |
|
automatically when you are |
3. |
Programmable Clock |
|
cooking/baking. |
|
• Sets baking/grilling reminder times. |
6. |
Function Switch |
|
• Sets automatic cooking duration and stop time. |
|
• Sets oven functions. |
|
NOTE: Clock time must be set before oven |
|
Bake - with light |
|
can operate. |
|
Grill - with light |
4. |
Temperature Control Knob |
|
Light - light only |
|
• Sets temperature for baking. |
7. |
Warming Drawer Switch |
|
|
|
• Turns warming drawer on/off. |
|
|
8. |
General Purpose Outlet Switch |
|
|
|
|
WLE625WA
2 |
4 |
6 |
|
1 |
3 |
5 |
7 |
1. |
Hotplate Control Knobs |
5. |
Grill Temperature |
|
|
• Adjusts temperature of hotplate. |
|
Control Knob |
|
|
Can be rotated in either direction. |
|
• Sets grilling temperature for |
|
2. |
Hotplate Indicator Lamp |
|
separate grill. Can be rotated |
|
|
• Comes on when you turn a hotplate on. |
|
in either direction. |
|
3. |
Temperature Control Knob |
6. |
Grill Indicator Lamp |
|
|
• Sets temperature for baking. |
|
• Comes on when you are grilling. |
|
4. |
Oven Indicator Lamp |
7. |
Timer |
|
|
• Comes on when you operate the oven temperature |
• |
Sets reminder time. |
|
|
control knob. Cycles on and off automatically |
|
|
|
|
when you are cooking/baking. |
|
|
|
9CONTROLS
CONTROLS
WLE626WA – Saturn
2 |
3 |
5 |
8 |
|
8 |
1 |
4 |
6 |
7 |
1.Hotplate Control Knobs
•Adjusts temperature of hotplate. Can be rotated in either direction.
2.Hotplate Indicator Lamp
•Comes on when you turn a hotplate on.
3.Programmable Clock
•Sets baking/grilling reminder times.
•Sets automatic cooking duration and stop time.
NOTE: Clock time must be set before oven can operate.
4.Temperature Control Knob
•Sets temperature for baking.
5.Oven Indicator Lamp
•Comes on when you operate the oven temperature control knob. Cycles on and off automatically when you are cooking/baking
6.Function Switch
• Sets oven functions (all functions include oven light)
Fan Bake
Bake
Maxi Grill
Fan Grill
Defrost
7.Warming Drawer Switch
• Turns warming drawer on/off.
8.General Purpose Outlet Switch
WLE644WA – Jupiter
2 |
3 |
5 |
||
7 |
|
|
|
7 |
|
|
|
||
|
|
|
||
|
1 |
4 |
6 |
1. |
Hotplate Control Knobs |
5. |
Oven Indicator Lamp |
|
• Adjusts temperature of hotplate. |
|
• Comes on when you operate |
|
Can be rotated in either direction. |
|
the oven temperature control |
2. |
Hotplate Indicator Lamp |
|
knob. Cycles on and off |
|
• Comes on when you turn a hotplate on. |
|
automatically when you are |
3. |
Programmable Clock |
|
cooking/baking. |
|
Sets baking/grilling reminder times. |
6. |
Function Switch |
|
• Sets automatic cooking duration and stop time. |
|
• Sets oven functions. |
|
NOTE: Clock time must be set before oven |
|
Bake - with light |
|
can operate. |
|
Grill - with light |
4. |
Temperature Control Knob |
|
Light - light only |
|
• Sets temperature for baking. |
7. |
General Purpose Outlet Switch |
CONTROLS 10
 Loading...