


93400
Portable Diagnostic Set
Part No. 92000
Juego de diagnóstico portátil
No. de pieza 92000
Trousse de diagnostic portable
N° de référence 92000
C
OMPAC
S
ET
Portable Ophthalmic Set
Part No. 93400
Juego oftálmico portátil
No. de pieza 93400
Trousse ophtalmique portable
N° de référence 93400
Operating
Instruction
Manual
English. . . . . . . . . . . . . . . 2
Manual de instrucciones
de operación
Español. . . . . . . . . . . . . . . . . . . 12
Manuel d’instructions
de fonctionnement
Français . . . . . . . . . . . . . . . . . . 22
WAM600-9407-CompSet 12/7/01 10:58 AM Page 1

Thank you for purchasing the Welch Allyn CompacSetTM.
This manual is intended for both the Ophthalmic and Diagnostic
model CompacSets. To ensure accurate and reliable performance, please follow the operating and maintenance instructions found in this
manual. Read these instructions thoroughly
before use.
Contents
General Information . . . . . . . . . . . . . . . . . . . . . . . . . . . . . . . . . 3
CompacSet Ophthalmoscope . . . . . . . . . . . . . . . . . . . . . . . . .5
Ophthalmoscope Features . . . . . . . . . . . . . . . . . . . . . . . . . . .5
Ophthalmoscope Lens Instructions . . . . . . . . . . . . . . . . . . . .5
CompacSet Otoscope . . . . . . . . . . . . . . . . . . . . . . . . . . . . .. . 6
Otoscope Features . . . . . . . . . . . . . . . . . . . . . . . . . . . . . .. . 6
Throat Illuminator . . . . . . . . . . . . . . . . . . . . . . . . . . . . . . . .. . 6
CompacSet Retinoscope . . . . . . . . . . . . . . . . . . . . . . . . . . .. . 7
Retinoscope Features . . . . . . . . . . . . . . . . . . . . . . . . . . .. . 7
Retinoscope Operation . . . . . . . . . . . . . . . . . . . . . . . . . . .. . 7
CompacSet Power Handle . . . . . . . . . . . . . . . . . . . . . . . . . .. . 7
Recharging Nickel Cadmium Batteries . . . . . . . . . . . . . . . .. . 7
Changing Batteries . . . . . . . . . . . . . . . . . . . . . . . . . . . . . .. . 8
Cleaning Recommendations . . . . . . . . . . . . . . . . . . . . . . . .. . 8
Lamp Replacement . . . . . . . . . . . . . . . . . . . . . . . . . . . . . . . .. . 9
Replacement Parts . . . . . . . . . . . . . . . . . . . . . . . . . . . . . . . .. 11
Symbols . . . . . . . . . . . . . . . . . . . . . . . . . . . . . . . . . . . . . . . . .. 11
2
WAM600-9407-CompSet 12/7/01 10:58 AM Page 2
General Information
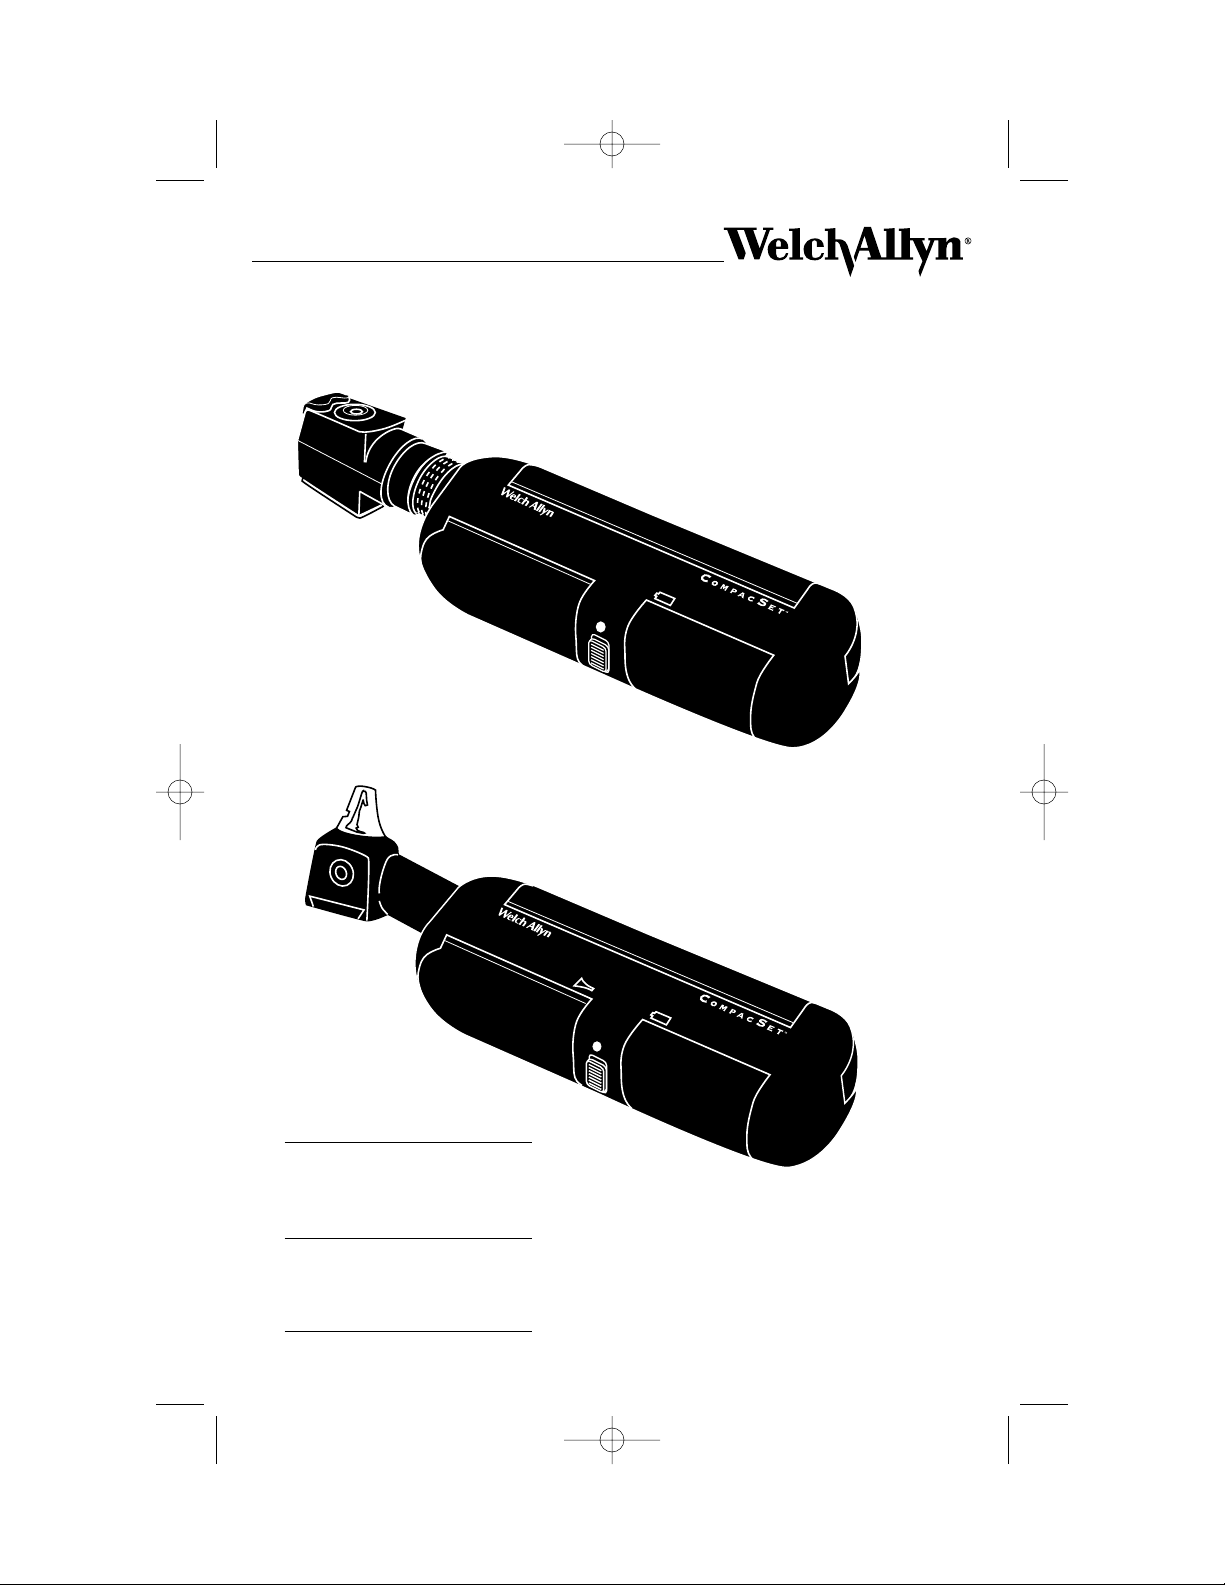
Both the CompacSetTMPortable Diagnostic Set and the Portable
Ophthalmic Set from Welch Allyn are the first diagnostic sets offering a
unique compact handle that houses both the instrument heads and the
power source. The Diagnostic Set comes with an otoscope
and ophthalmoscope while the Ophthalmic
Set is equipped with a retinoscope, oph-
thalmoscope and transilluminator.
Both sets have been designed to be
lightweight and highly portable.
Plus, they deliver all the high-quality
performance you expect from Welch
Allyn instruments.
3
NOTE: The retinoscope must be telescoped out by pulling in an outward
direction. The retinoscope can only be
used if this operation is performed.
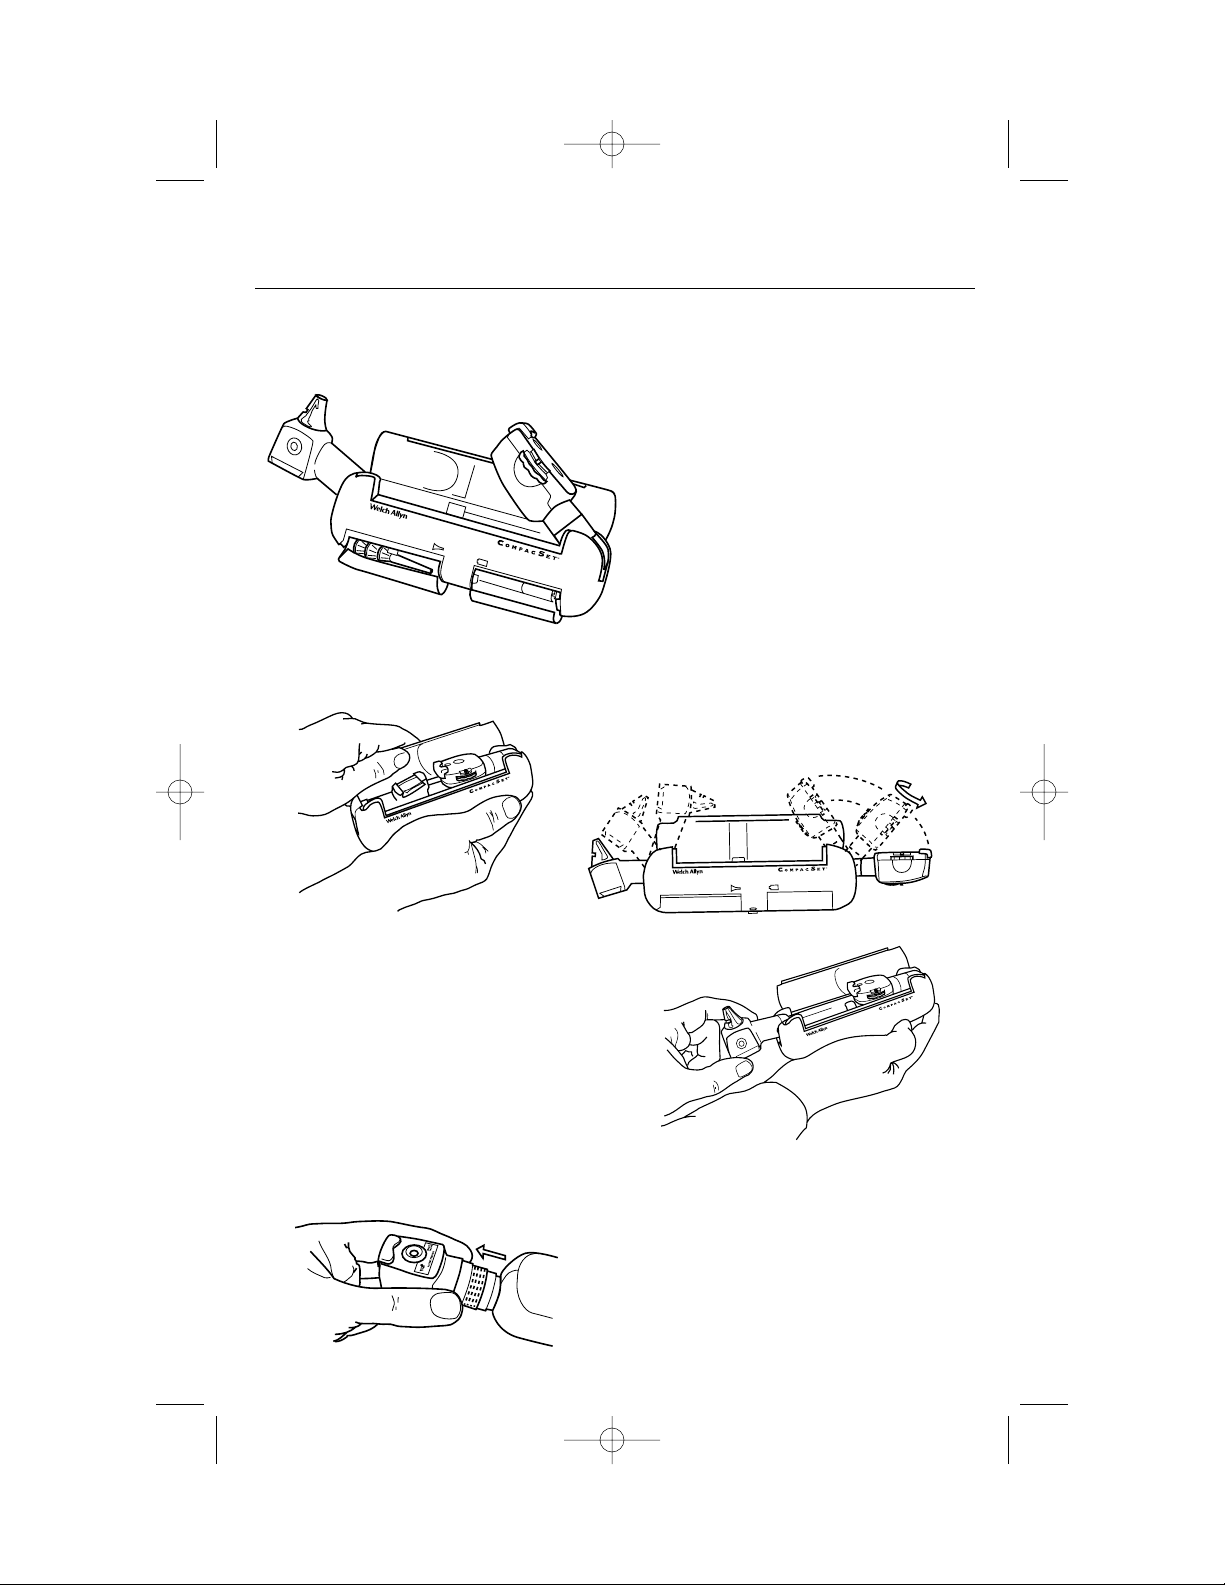
How to Open the Set
The instruments are housed inside the door with the long green stripe.
To open the door, simply put your thumb or
your forefinger on top of the green stripe and
pull open.
Positioning the Instruments
Once opened, extend the instrument you wish to use
until it locks into its upright position. For
best results, have only one instrument out
at a time. Having both instruments out at
the same time decreases light intensity
and wears down the battery. Once the
instrument is in the up position, it may be
swiveled in a clockwise direction to any
position that is comfortable for the examiner. (If swiveled in a counterclockwise direction, the head will unthread for lamp replacement.)
WAM600-9407-CompSet 12/7/01 10:58 AM Page 3
On/Off Switch
To turn the power on, move the switch on the side to either the low (•) or
high (•) intensity setting.
Closure
When finished using an instrument, open the door and fold it back
into the handle. If you have swiveled the instrument, return it to its original
position by rotating clockwise. You will know the scope is in the correct
position for folding by the feel of the detent. If you do not feel the detent,
the heads will not be in the right position and will not fold down properly.
Note: The retinoscope must be retracted before folding the instrument head down! If you forget to turn off your instruments before closing
them, the will automatically shut off once back inside the handle.
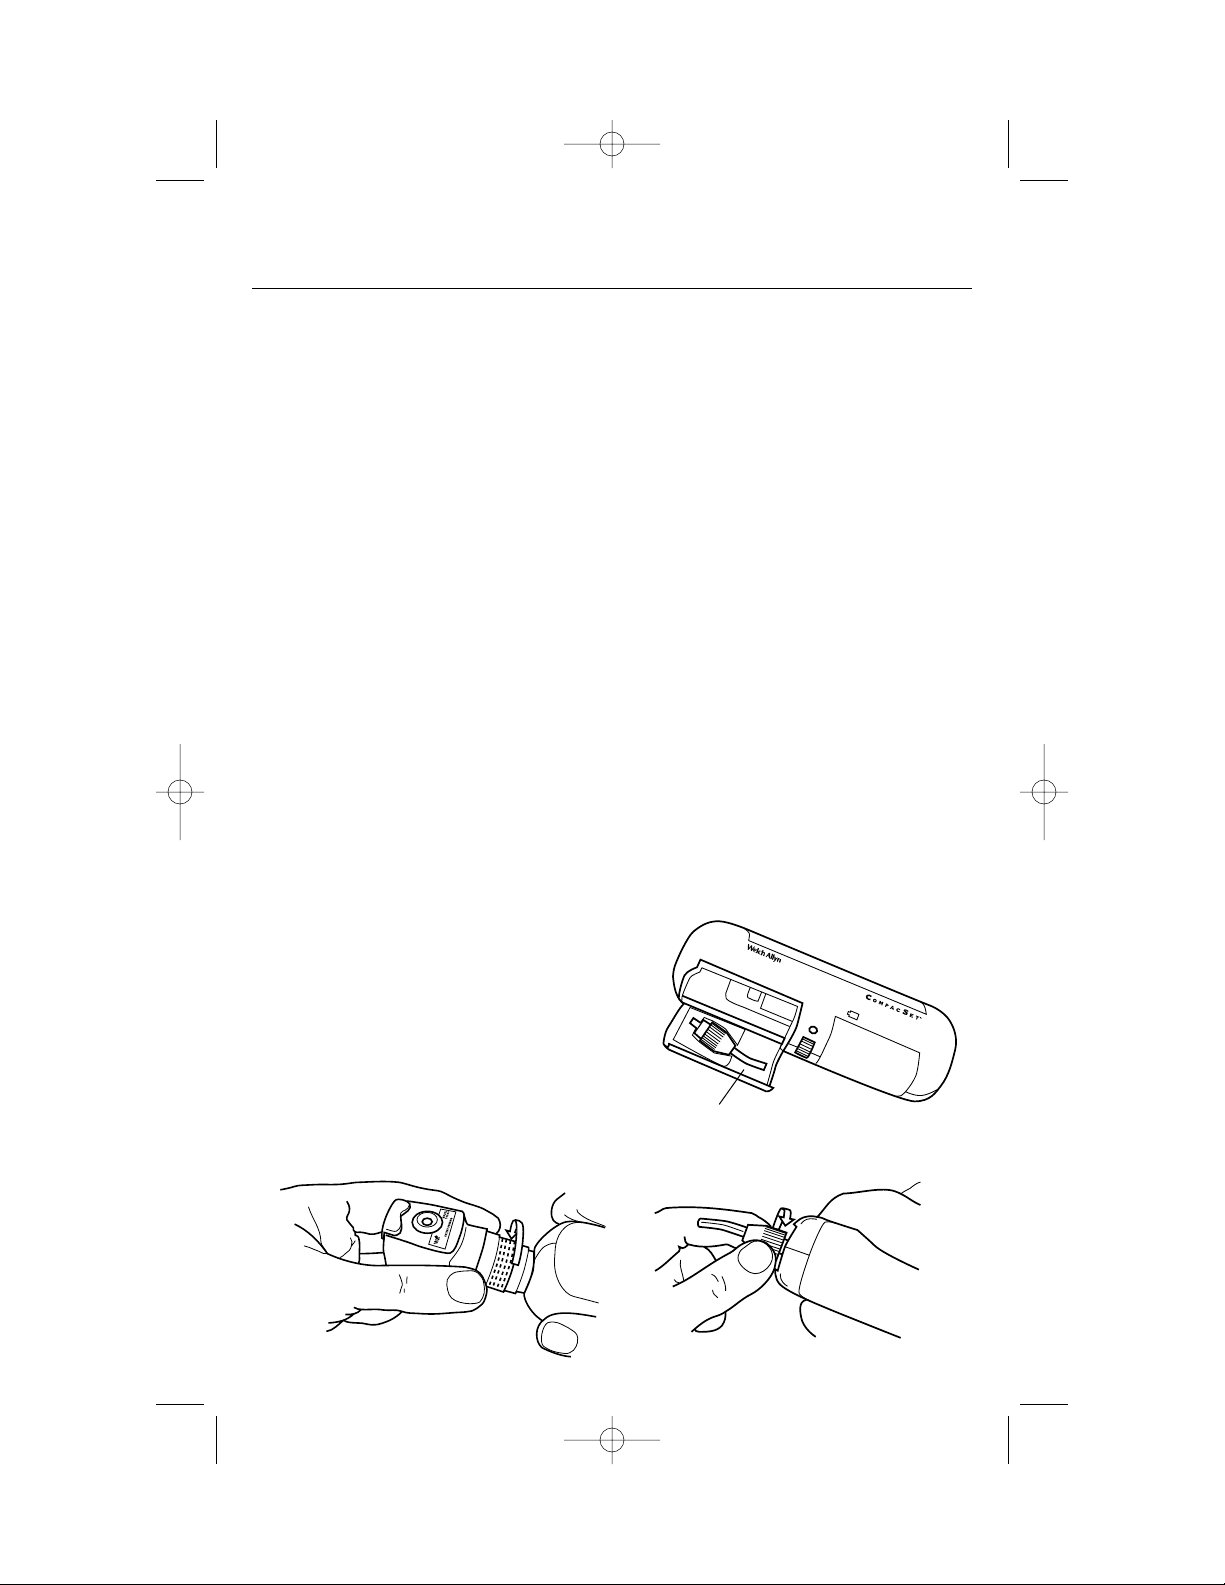
Accessory Compartment
Otoscope Specula (with CompacSet Portable Diagnostic Set only)
Otoscope specula are essential to every ear exam. For convenience, a
special compartment will hold one set of reusable Polypropylene specula
(#24400) or four KleenSpec
®
disposable specula.
To open the specula compartment, put your thumb or forefinger on
top of the door with the shorter green stripe and pull it open. To remove
the specula, slide them off the clip. When closing the specula door, be
sure the specula on the clip are pushed as far back as possible so they do
not obstruct door closure.
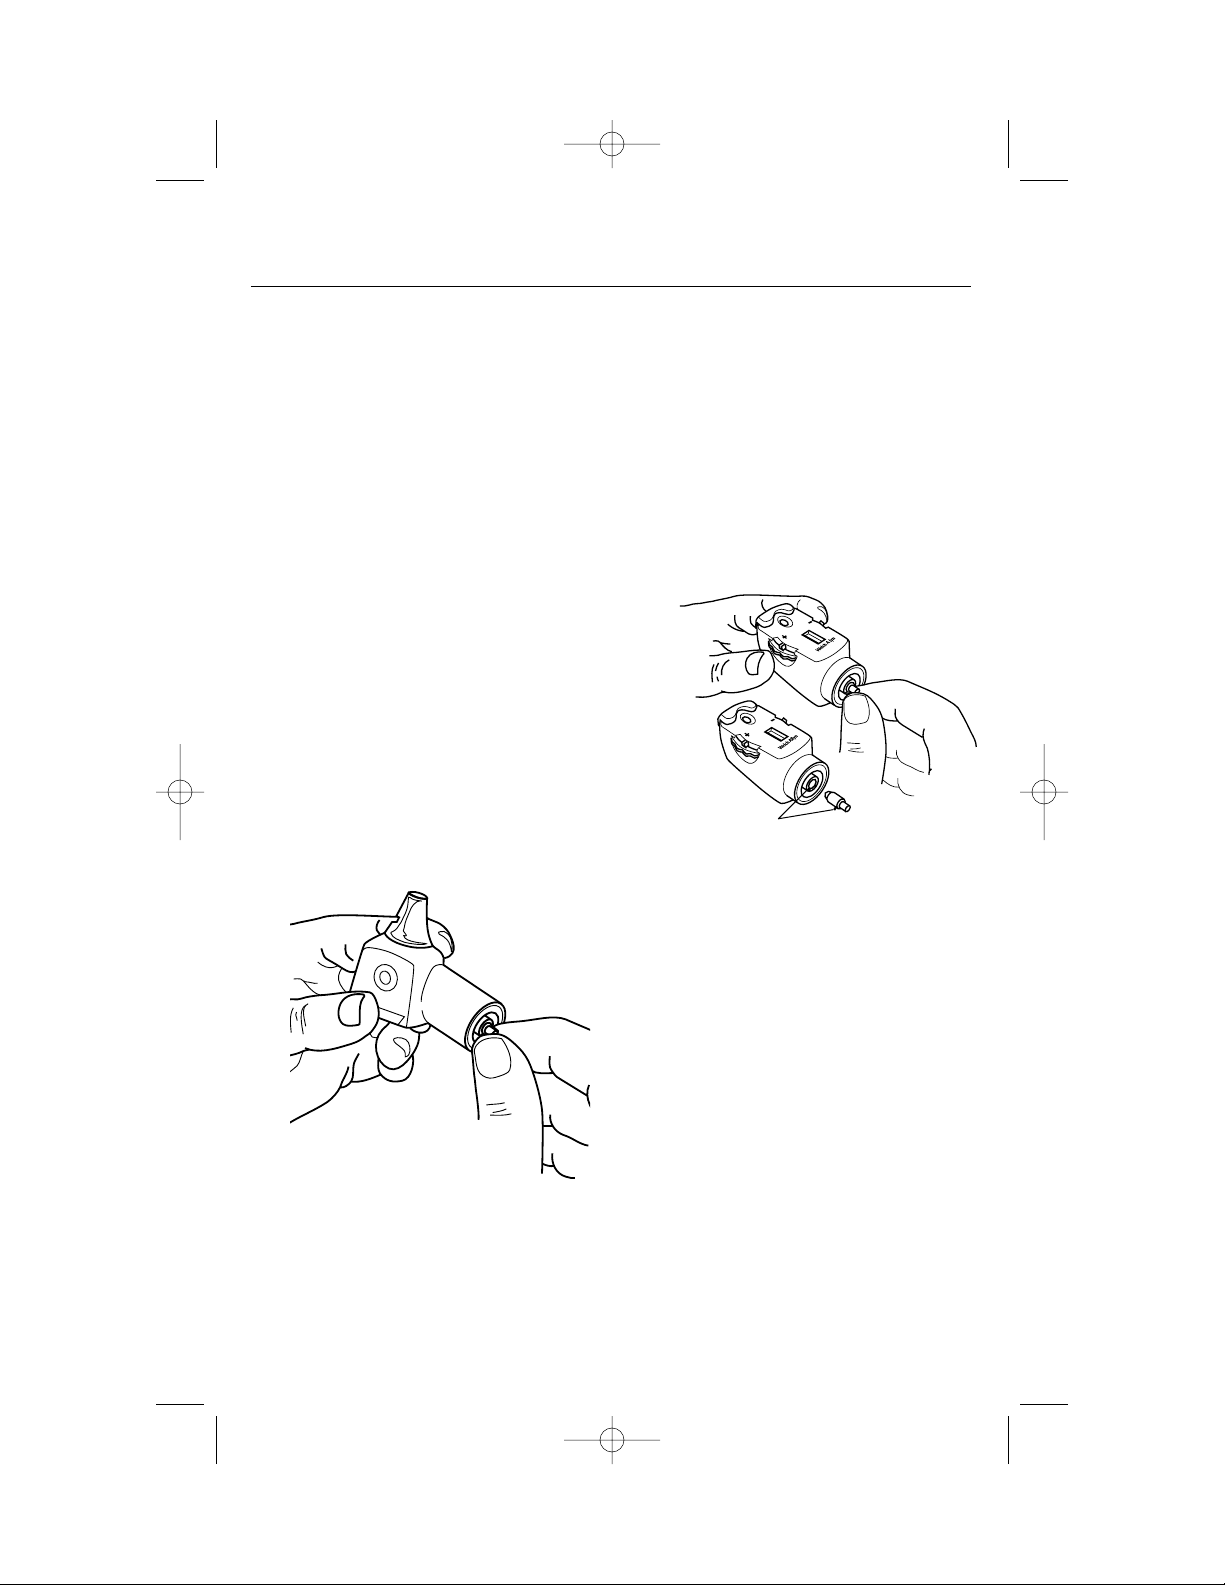
Transilluminator (with CompacSet Portable
Ophthalmic Set only)
The transilluminator can be found
in the accessory compartment (as
shown). Remove the retinoscope by
turning the instrument in a counterclockwise direction. Place the transilluminator
on the power source turning clockwise.
To reattach the retinoscope, reverse the
above steps.
4
Accessory Compartment
WAM600-9407-CompSet 12/7/01 10:58 AM Page 4
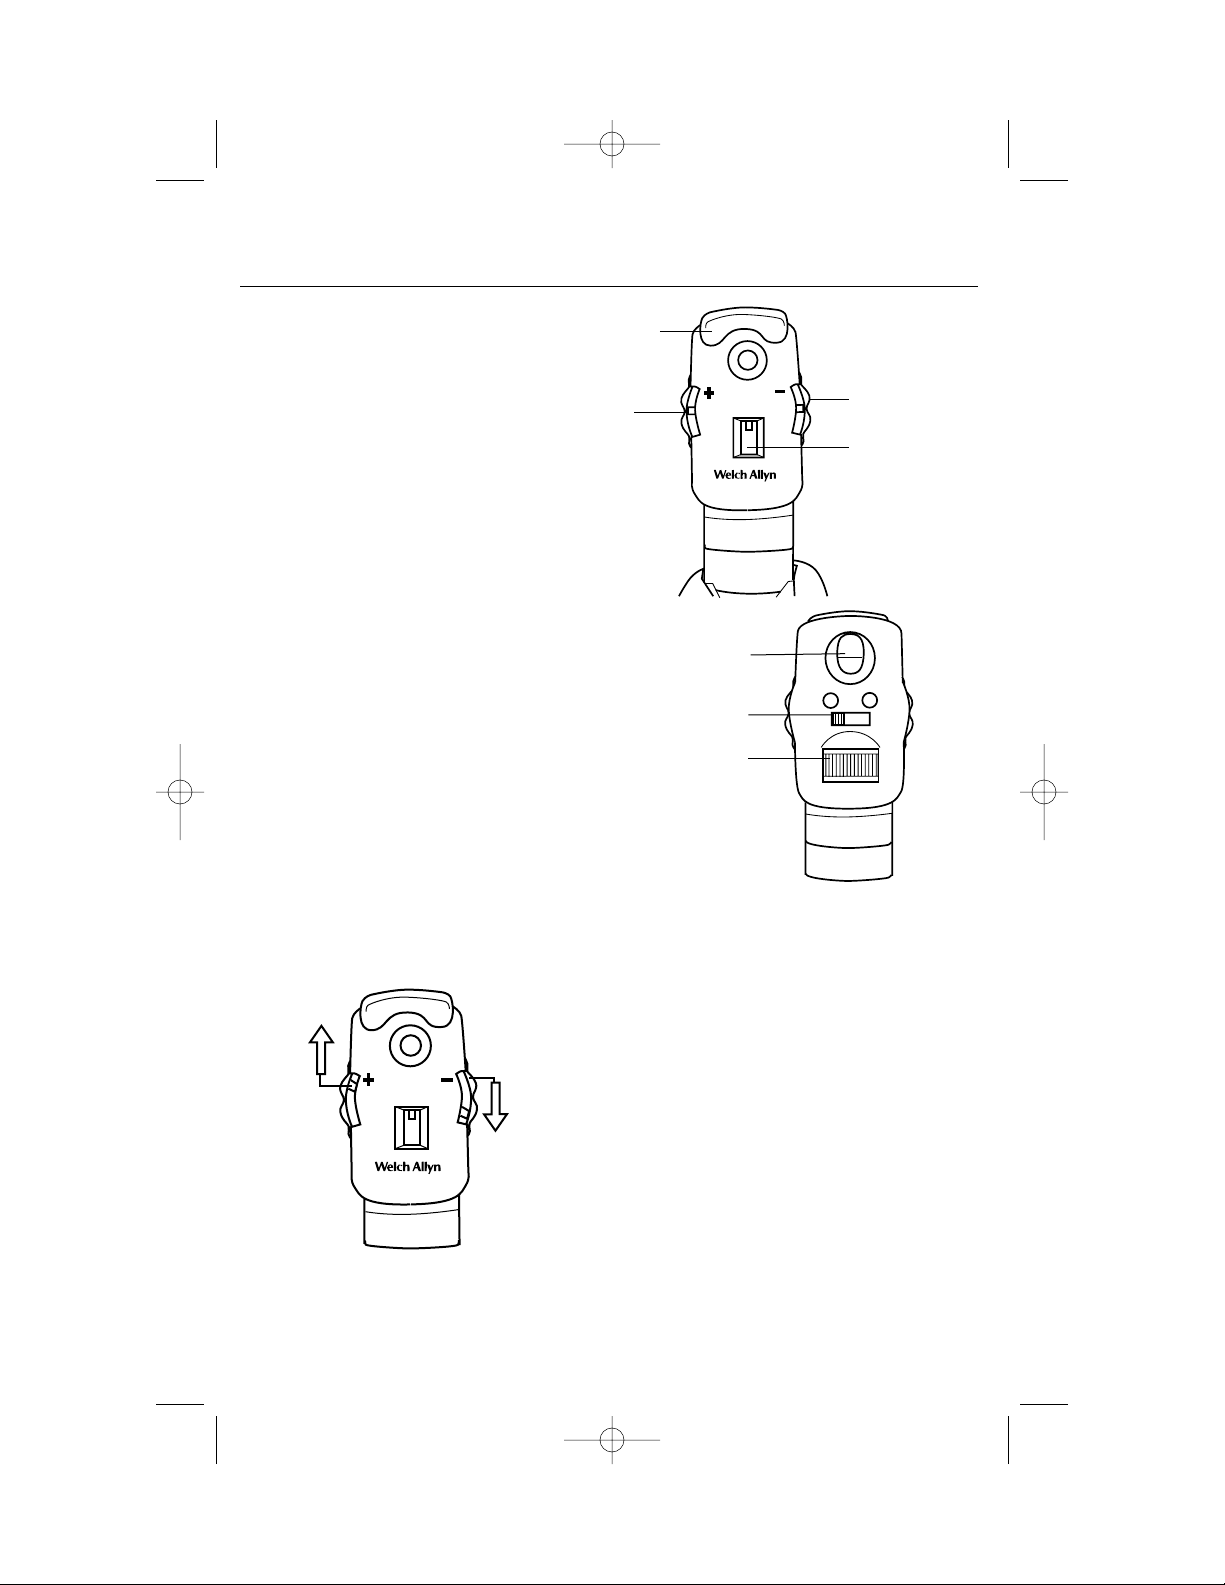
Ophthalmoscope (with both CompacSet Portable Sets)
Ophthalmoscope Features
• Rubber brow rest.
• Aperture selection dial with continuous rotation: Allows access to
microspot, small, large, fixation,
slit and cobalt blue.
• Two-position filter switch: Engage
either open or red-free filter.
• Larger spot size for wider field
of view.
• Sealed optics.
• Lens selection dial: When used with
multiplier, allows single diopter
steps through 48 lens combinations
(from +22 to -25 diopters).
• Diopter display window: Displays
direct reading of diopter values
(positive values displayed in green;
negative values displayed in red).
Ophthalmoscope Lens Instructions
To move through the range on the plus (+) side:
Rotate lens selection dial clockwise. At +6 diopters
move lens dial clockwise again. Then move multiplier
lever to “+” position. Continue moving lens dial in
same clockwise direction to access +7 through +22
diopters. To move through the range on the nega-
tive (-) side: Rotate lens selection dial counterclock-
wise. At -9 diopters move lens dial counterclockwise
again. Then move multiplier lever to “ - ” position.
Continue moving lens dial in same counterclockwise
direction to access -10 to -25 diopters.
5
Rubber
brow rest
Lens
multiplier
Lens
selection
dial
Diopter
display
window
Filter
Aperture
selection
dial
Two-Position
Filter switch
13010
WAM600-9407-CompSet 12/7/01 10:58 AM Page 5
13010

6
Throat Illuminator
To convert otoscope to throat illuminator, unscrew otoscope head in
counterclockwise direction.
NOTE: Illuminator section can become hot. Avoid direct skin contact.
Do not use for transillumination.
Otoscope
(with CompacSet Portable Diagnostic Set only)
Otoscope Features
•360° ring of cool halogen fiber-optic light
prevents shadows, reduces glare,
and is easy to clean.
• Airtight system with flush-mounted port for
pneumatic otoscopy.
• Wide-angle, sliding magnifying lens to
improve view of the
tympanic membrane.
• Built-in throat illuminator.
WAM600-9407-CompSet 12/7/01 10:58 AM Page 6

Retinoscope (with CompacSet Portable Ophthalmic Set only)
Retinoscope Features
• External focusing sleeve allows for easy
adjustment no matter what size hand or
how instrument is held. Continuous 360˚
rotation.
• Dust free optics to keep instrument
clean longer.
• Fixation cards that easily attach for use
during dynamic retinoscopy.
• Collapsable head for compact size (protection against damaging optics).
Retinoscope Operation
The operator will note that the width of the streak varies as the sleeve is
raised and lowered. When the operating sleeve is in the lowest posi-
tion, the light rays emitted are slightly divergent.
Here the instrument acts with a plano mirror effect, which
reflects divergent rays that will never come to a focus. As the
sleeve is raised, the streak focuses. With the sleeve all the way
up, the retinoscope acts with a concave mirror effect,
where the light rays cross, the eye’s reflex moves in
opposite directions with the concave mirror
effect as compared to the plano mirror effect.
The rotary movement of the control sleeve
mechanism allows the streak to rotate 360˚ to ascertain the axis of astigmatism.
CompacSet Power Handle
Recharging Nickel Cadmium Batteries
1. Plug charger into the appropriate outlet and plug other end into the
receptacle on the handle. Use Welch Allyn 710 Series Charger only.
2. To ensure full charge and long lamp life, turn on/off switch to off position
(center) or be sure both heads are folded in.
3. Insert the charger cord into the receptacle near the battery compartment of
the power handle.
NOTE: AA batteries or other manufacturers’ rechargeable batteries will not
charge in this handle. The Welch Allyn battery #72610 is the only battery that
will recharge in this handle.
Dust free
optics
Rubber
brow rest
Focusing
sleeve
7
WAM600-9407-CompSet 12/7/01 10:58 AM Page 7
PATENTS 5, 189, 449 & PENDING

8
Changing Batteries
1. Insert a small coin into the groove of the battery cover to remove the
cover.
2. Remove batteries.
3. Insert new batteries.
For rechargeable battery #72610: The rechargeable battery cover has
positive (+) and negative (-) markings. Align these with the markings on the
circuit board. Also align charge tab of battery with circuit board pad.
For AA cells: Use alkaline cells for best performance. Note the location
of the positive (+) and negative (-) signs on the circuit board. Install the
batteries accordingly.
Welch Allyn now employs the services of an agency which can disassemble and
recycle all components of nickel-cadmium batteries so that nothing gets land-filled
or incinerated. Should you wish to dispose of your expended Welch Allyn rechargeable battery via recycling (in the U.S. and Canada only), please send to:
Welch Allyn Welch Allyn Canada
RECYCLE BATTERY RECYCLE BATTERY
4341 State Street Road 160 Matheson Blvd. East
Skaneateles Falls, NY Mississauga, Ontario
13153-0220 CANADA L4Z 1V4
For locations outside the U.S. and Canada consult the local recycling authority for
proper disposal of expended batteries.
Cleaning Recommendations
Ophthalmoscope
Cleaning (and repair) should be performed at Welch Allyn. DO NOT apply
alcohol to mirror or lenses as this may degrade optical quality.
Otoscope
Do not use abrasive cleaners, alcohol, or other chemicals. Lens may be
cleaned with warm water and soap.
Retinoscope
Do not use abrasive cleaners, alcohol, or other chemicals. Lens may be
cleaned with warm water and soap.
Transilluminator
Do not use abrasive cleaners, alcohol, or other chemicals. Lens may be
cleaned with warm water and soap.
Charger
DO NOT autoclave charger, instruments, or handle.
Handle
The CompacSet handle wipes clean with a damp cloth.
Transport/Storage
-4˚F (-20˚C) to 120˚F (+49˚C) 95% RH Max.
WAM600-9407-CompSet 12/7/01 10:58 AM Page 8
9
Lamp Replacement
NOTE: If lamp surface is touched or becomes smudged, wipe clean with a soft
cloth. This will assure longer lamp life and higher output. Lamps can be very
hot. Be sure lamp is cool before touching. For guaranteed performance, use
only genuine Welch Allyn lamps.
NOTE: When adequately tightened, instruments will be able to be swiveled in
both directions. After changing a lamp, to achieve the ability to swivel in both
directions, press firmly with thumb on the knurled portion of the instrument
adaptor while giving the instrument a sharp twist in the clockwise direction.
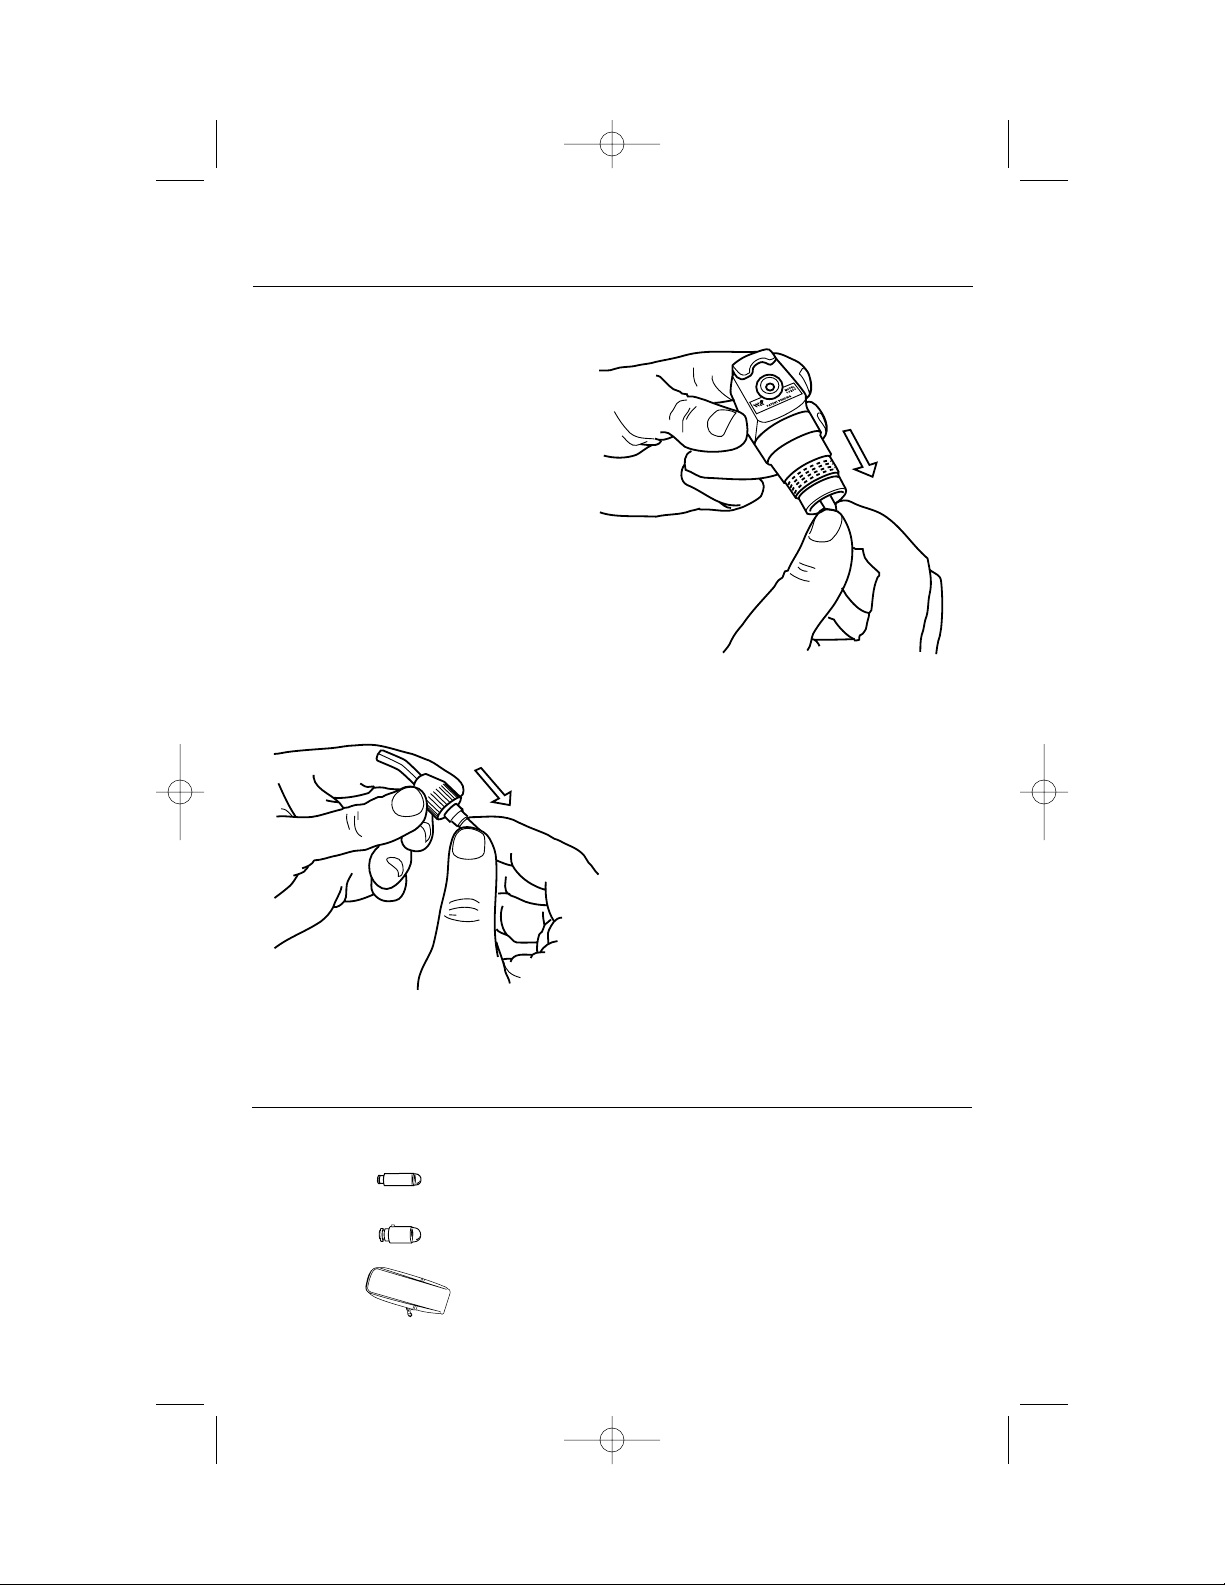
Ophthalmoscope Lamp Replacement
1. Place thumb on knurled ring at the base
of the instrument. Unscrew ophthalmoscope head in a counterclockwise
direction.
2. Grasp end of lamp and pull out (use
nail file or similar object, if necessary).
3. Insert replacement lamp (#03900) by
carefully aligning pin on lamp shaft with
slot in ophthalmoscope head. Push lamp
in until firmly seated.
Align Pins
Otoscope Lamp Replacement
1. Place thumb on knurled ring at the
base of the instrument. Unscrew
scope head in a counterclockwise
direction and remove.
2. Grasp base of lamp and pull out of
instrument.
3. Insert replacement lamp (#03400)
by reversing above process.
WAM600-9407-CompSet 12/7/01 10:58 AM Page 9
10
Retinoscope Lamp Replacement
Place thumb on knurled ring at
base of instrument.
1. Unscrew retinoscope head in a
counterclockwise direction.
2. Grasp end of lamp and pull out
(use nail file or similar object, if
necessary).
3. Insert replacement lamp (08400)
by carefully aligning pin on lamp
shaft with slot in retinoscope head.
Push lamp in until firmly seated.
Transilluminator Lamp
Replacement
Place thumb on knurled ring at base
of instrument.
1. Unscrew transilluminator in a counterclockwise direction.
2. Grasp end of lamp and pull out (use
nail file or similar object, if necessary).
3. Insert replacement lamp (03400).
Push lamp in until firmly seated.
REPLACEMENT PARTS
Use the following numbers to order replacement parts:
03400 Otoscope Lamp/Transilluminator Lamp
03900 Ophthalmoscope Lamp
05920 Carrying Case
WELCH
ALLYN
39000
WELCH ALLYN
03400
WAM600-9407-CompSet 12/7/01 10:58 AM Page 10
 Loading...