


2-515-510-32 (1)
FM/AM
Compact Disc
Player
Operating Instructions
Инструкция по эксплуатации
GB
RU
For installation and connections, see the supplied installation/connections manual.
Перед установкой и подсоединениями прочитайте прилагаемую инструкцию по установке и подсоединению.
CDX-R3350EE
CDX-R33EE
© 2005 Sony Corporation
Welcome !
Thank you for purchasing this Sony Compact Disc Player. You can enjoy your drive with the following functions.
•CD playback:
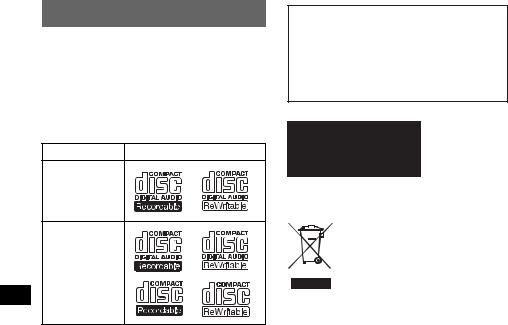
You can play CD-DA (also containing CD TEXT*), CD-R/CD-RW (MP3 files also containing Multi Session (page 11)) and ATRAC CD (ATRAC3 and ATRAC3plus format (page 12)).
Type of discs |
Label on the disc |
CD-DA
MP3
ATRAC CD
•Radio reception:
–You can store up to 6 stations per band (FM1, FM2, FM3, AM1 and AM2).
–BTM (Best Tuning Memory) function: the unit selects strong signal stations and stores them.
*A CD TEXT disc is a CD-DA that includes information such as disc, artist and track name.
Warning if your car’s ignition has no ACC position
After turning the ignition off, be sure to press and hold (OFF) on the unit until the display disappears.
Otherwise, the display does not turn off and this causes battery drain.
This label is located on the bottom of the chassis.
Disposal of Old Electrical & Electronic Equipment (Applicable in the European Union and other European countries with separate collection systems)
This symbol on the product or on its packaging indicates that this product shall not be treated as household waste. Instead it shall be handed over to the applicable collection point for the recycling of electrical and electronic equipment. By ensuring this product is disposed of correctly, you will help prevent potential negative consequences for the environment and human health, which could otherwise be caused by inappropriate waste handling of this product. The recycling of materials will help to conserve natural resources. For more detailed information about recycling of this product, please contact your local Civic Office, your household waste disposal service or the shop where you purchased the product.
SonicStage and its logo are trademarks of Sony Corporation.
ATRAC, ATRAC3, ATRAC3plus and their logos are trademarks of Sony Corporation.
2

Table of Contents
Getting Started
Resetting the unit . . . . . . . . . . . . . . . . . . . . . . . . 4 Setting the clock . . . . . . . . . . . . . . . . . . . . . . . . 4 DEMO mode . . . . . . . . . . . . . . . . . . . . . . . . . . . 4 Detaching the front panel . . . . . . . . . . . . . . . . . 4 Attaching the front panel . . . . . . . . . . . . . . . 4 Inserting the disc in the unit . . . . . . . . . . . . . . . 5 Ejecting the disc . . . . . . . . . . . . . . . . . . . . . . 5
Other functions
Changing the sound settings . . . . . . . . . . . . . . . 9 Adjusting the sound characteristics
— BAL/FAD/SUB . . . . . . . . . . . . . . . . . . . 9 Adjusting the equalizer curve — EQ3 . . . . 9 Adjusting setup items — SET . . . . . . . . . . . . . 9 Using optional equipment . . . . . . . . . . . . . . . . 10 Rotary commander RM-X4S . . . . . . . . . . 10
Location of controls and basic operations
Main unit . . . . . . . . . . . . . . . . . . . . . . . . . . . 6 Card remote commander RM-X151 . . . . . . 6
CD
Display items . . . . . . . . . . . . . . . . . . . . . . . . 8 Repeat and shuffle play . . . . . . . . . . . . . . . . 8
Radio
Storing and receiving stations . . . . . . . . . . . . . . 8 Storing automatically — BTM . . . . . . . . . . 8 Storing manually . . . . . . . . . . . . . . . . . . . . . 8 Receiving the stored stations . . . . . . . . . . . . 8 Tuning automatically . . . . . . . . . . . . . . . . . . 8
Additional Information
Precautions . . . . . . . . . . . . . . . . . . . . . . . . . . . 11 Notes on discs . . . . . . . . . . . . . . . . . . . . . . 11 About MP3 files . . . . . . . . . . . . . . . . . . . . 11 About ATRAC CD . . . . . . . . . . . . . . . . . . 12 Maintenance . . . . . . . . . . . . . . . . . . . . . . . . . . 12 Removing the unit. . . . . . . . . . . . . . . . . . . . . . 13 Specifications . . . . . . . . . . . . . . . . . . . . . . . . . 13 Troubleshooting . . . . . . . . . . . . . . . . . . . . . . . 14 Error displays/Messages . . . . . . . . . . . . . . 15
3
Getting Started
Resetting the unit
Before operating the unit for the first time, or after replacing the car battery or changing the connections, you must reset the unit.
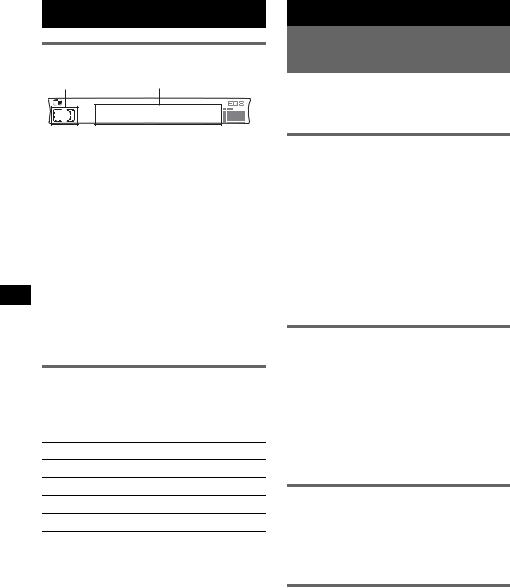
Detach the front panel and press the RESET button with a pointed object, such as a ballpoint pen.
RESET button
Note
Pressing the RESET button will erase the clock setting and some stored contents.
Setting the clock
The clock uses a 24-hour digital indication.
1Press and hold (SEL).
The setup display appears.
2Press (SEL) repeatedly until “CLOCK-
ADJ” appears.
3Press (DSPL).
The hour indication flashes.
4Press the volume +/– button to set the hour and minute.
To move the digital indication, press (DSPL).
5Press (SEL).
The clock starts and the next setup display appears.
6Press and hold (SEL).
The setup is complete.
To display the clock, press (DSPL). Press (DSPL) again to return to the previous display.
With the card remote commander
In step 4, to set the hour and minute, press M or m.
DEMO mode
When the unit is turned off, the clock is displayed first, then demonstration (DEMO) mode starts the demonstration display.
To cancel the DEMO mode, set “DEMO-OFF” in setup (page 9) while the unit is turned off.
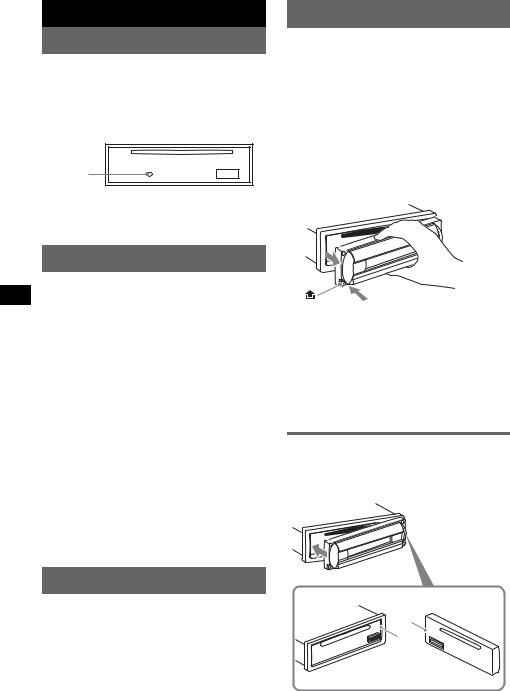
Detaching the front panel
You can detach the front panel of this unit to prevent theft.
Caution alarm
If you turn the ignition switch to the OFF position without detaching the front panel, the caution alarm will sound for a few seconds. The alarm will only sound if the built-in amplifier is used.
1Press (OFF).
The unit is turned off.
2Press  , then pull it off towards you.

 (OFF)
(OFF)
Notes
•Do not drop or put excessive pressure on the front panel and display window.
•Do not subject the front panel to heat/high temperature or moisture. Avoid leaving it in a parked car or on a dashboard/rear tray.
Tip
When carrying the front panel, use the supplied front panel case.
Attaching the front panel
Engage part A of the front panel with part B of the unit, as illustrated, and push the left side into position until it clicks.
A
B
|
Note |
|
4 |
Do not put anything on the inner surface of the front |
|
panel. |
||
|

Inserting the disc in the unit
1 Open the shutter.
2 Insert the disc label side up.
Playback starts.
3 Close the shutter.
Ejecting the disc
1 Open the shutter.
x
2 Push down the shutter until it clicks.
Click
x
The disc is ejected.
Notes
•While ejecting or inserting the disc, do not close the shutter. The disc may be caught and damaged.
•The disc may be ejected if you open the shutter forcefully.
Tip
The disc can be played with the shutter opened or closed.
5

Location of controls and basic operations
Main unit
1 2 3 4 5 6 7 8
ATT |
|
OFF |
|
OPEN |
|
DSPL |
|
SEEEK |
|
EQ3 |
|
DIM |
|
|
– GP/DISC + |
REP |
SHUF |
SOURCE |
MODE |
SEL |
1 |
2 |
3 |
4 |
5 |
6 |
SENS |
SCRL |
BTM |
|
|
|
CDX-R3350EE |
9 |
0qaqs qd |
qf |
qg qh qj CDX-R33EE qk |
Card remote commander RM-X151
7
0 ql
3
w;
OFF |
|
ATT |
SOURCE |
SEL |
MODE |
+
–
DSPL |
|
SCRL |
1 |
2 |
3 |
4 |
5 |
6 |
+
 VOL
VOL
–
2 qs qa
wa
qh
ws
6

Refer to the pages listed for details. The corresponding buttons on the card remote commander control the same functions as those on the unit.
a Volume +/– button
To adjust volume.
bATT (attenuate) button
To attenuate the sound. To cancel, press
again.
cDSPL (display)/DIM (dimmer) button
4, 8
To change display items (press); change the display brightness (press and hold).
dOPEN shutter, disc slot (located behind the shutter) 5
e Display window
fEQ3 (equalizer) button 9
To select an equalizer type (XPLOD, VOCAL, CLUB, JAZZ, NEW AGE, ROCK,
CUSTOM or OFF). g OFF button
To power off/stop the source.
hSEEK +/– button
Radio:
To tune in stations automatically (press); find a station manually (press and hold).
CD:
To skip tracks (press); skip tracks continuously (press, then press again within about 1 second and hold); fast-forward/
reverse a track (press and hold).
i  (front panel release) button 4 j SOURCE button
To power on/change the source (Radio/CD). k MODE button 8
To select the radio band (FM/AM). l SEL (select) button 4, 9
To select items.
m RESET button (located behind the front panel) 4
nNumber buttons
Radio:
To receive stored stations (press); store stations (press and hold).
CD:
(1)/(2): GP/DISC –/+
To skip groups (press); skip groups continuously (press and hold).
(3): REP 8
(4): SHUF 8 o SENS button
To improve weak reception: LOCAL/ MONO.
p SCRL (scroll) button 8
To scroll the display item.
qBTM button 8
To start the BTM function. (press and hold)
rReceptor for the card remote commander
The following buttons on the card remote commander have also different buttons/functions from the unit.
s < (.)/, (>) buttons
To control radio/CD, the same as (SEEK) +/– on the unit. (For details of other operations, see “With the card remote commander” on each pages.)
t VOL (volume) +/– button
To adjust volume.
uM (+)/m (–) buttons
To control CD, the same as (1)/(2) –/+ on
the unit. (For details of other operations, see “With the card remote commander” on each pages.)
vNumber buttons
To receive stored stations (press); store stations (press and hold).
Note
If the unit is turned off and the display disappears, it cannot be operated with the card remote commander unless (SOURCE) on the unit is pressed, or a disc is inserted to activate the unit first.
Tip
For details on how to replace the battery, see “Replacing the lithium battery of the card remote commander” on page 12.
7
CD
Display items
AB
A Source
BTrack number/Elapsed playing time, Disc/artist name, Group number*1,
Group name, Track name, Text information*2, Clock
*1 Group number is displayed only when the group is changed.
*2 When playing an MP3, ID3 tag is displayed and when playing ATRAC CD, text information written by SonicStage, etc. is displayed.
To change display items B, press (DSPL); scroll display items B, press (SCRL) or set “A.SCRL-ON” (page 9).
Tip
Displayed item will differ, depending on the disc type and recorded format. For details on MP3, see
page 11; ATRAC CD, see page 12.
Repeat and shuffle play
1During playback, press (3) (REP) or
(4) (SHUF) repeatedly until the desired setting appears.
Select |
To play |
REP-TRACK track repeatedly.
REP-GP* group repeatedly.
SHUF-GP* group in random order.
SHUF-DISC disc in random order.
* When an MP3/ATRAC CD is played.
To return to normal play mode, select “REPOFF” or “SHUF-OFF.”
8
Radio
Storing and receiving stations
Caution
When tuning in stations while driving, use Best Tuning Memory (BTM) to prevent an accident.
Storing automatically — BTM
1Press (SOURCE) repeatedly until
“TUNER” appears.
To change the band, press (MODE) repeatedly. You can select from FM1, FM2, FM3*, AM1 or AM2.
2Press and hold (BTM) until “BTM” flashes.
The unit stores stations in order of frequency on the number buttons.
A beep sounds when the setting is stored.
* FM3 tuning range is 65 to 74 MHz (at 30KHz step).
Storing manually
1While receiving the station that you want to store, press and hold a number button ((1) to (6)) until
“MEM” appears.
The number button indication appears in the display.
Note
If you try to store another station on the same number button, the previous stored station will be replaced.
Receiving the stored stations
1Select the band, then press a number button ((1) to (6)).
With the card remote commander
To select preset stations, press M or m.
Tuning automatically
1Select the band, then press (SEEK) +/– to search for the station.
Scanning stops when the unit receives a station. Repeat this procedure until the desired station is received.
Tip
If you know the frequency of the station you want to listen to, press and hold (SEEK) +/– to locate the approximate frequency, then press (SEEK) +/– repeatedly to fine adjust to the desired frequency (manual tuning).

Other functions
Changing the sound settings
Adjusting the sound characteristics — BAL/FAD/SUB
You can adjust the balance, fader and subwoofer volume.
1Press (SEL) repeatedly until “BAL,”
“FAD” or “SUB” appears.
The item changes as follows:
LOW*1 t MID*1 t HI*1 t
BAL (left-right) t FAD (front-rear) t SUB (subwoofer volume)*2
*1 When EQ3 is activated (page 9).
*2 When the audio output is set to “SUB” (page 9). “ATT” is displayed at the lowest setting, and can be adjusted up to 20 steps.
2Press the volume +/– button repeatedly to adjust the selected item.
After 3 seconds, the setting is complete and the display returns to normal play/reception mode.
Note
Adjust within 3 seconds of selecting the item.
With the card remote commander
In step 2, to adjust the selected item, press <, M, ,,
or m.
Adjusting the equalizer curve
— EQ3
You can adjust and store the equalizer settings for different tone ranges.
1Select a source, then press (EQ3) repeatedly to select the EQ3 type.
2Press (SEL) repeatedly until “LOW,”
“MID” or “HI” appears.
3Press the volume +/– button repeatedly to adjust the selected item.
The volume level is adjustable in 1 dB steps, from –10 dB to +10 dB.
Repeat steps 2 and 3 to adjust the equalizer curve.
To restore the factory-set equalizer curve, press and hold (SEL) before the setting is complete.
After 3 seconds, the setting is complete and the display returns to normal play/reception mode.
With the card remote commander
In step 3, to adjust the selected item, press <, M, ,,
or m.
Adjusting setup items
—SET
1Press and hold (SEL).
The setup display appears.
2Press (SEL) repeatedly until the desired item appears.
3Press the volume +/– button to select the setting (example “ON” or “OFF”).
4Press and hold (SEL).
The setup is complete and the display returns to normal play/reception mode.
Note
Displayed items will differ, depending on the source and setting.
With the card remote commander
In step 3, to select the setting, press < or ,.
The following items can be set (follow the page reference for details):
“z” indicates the default settings.
CLOCK-ADJ |
(page 4) |
(Clock Adjust) |
|
|
|
BEEP |
To set “BEEP-ON” (z) or |
|
“BEEP-OFF.” |
|
|
SUB/REAR*1 |
To switch the audio output. |
|
– “SUB” (z): to output to a |
|
subwoofer. |
|
– “REAR”: to output to a |
|
power amplifier. |
DIM (Dimmer) To change the brightness of the display.
–“DIM-ON”: to dim the display.
–“DIM-OFF” (z): to deactivate the dimmer.
DEMO*1 To set “DEMO-ON” (z) or (Demonstration) “DEMO-OFF” (page 4).
A.SCRL To scroll long displayed items (Auto Scroll) automatically when the group/
track is changed.
–“A.SCRL-ON”: to scroll.
–“A.SCRL-OFF” (z): to not scroll.
continue to next page t
9
LPF*2 (Low |
To select the cut-off frequency |
|
Pass Filter) |
“78HZ,” “125HZ” or “OFF” |
|
|
|
(z). |
|
|
|
*1 |
When the unit is turned off. |
|
*2 |
When the audio output is set to “SUB.” |
|
Using optional equipment
Rotary commander RM-X4S
(CDX-R3350EE only)
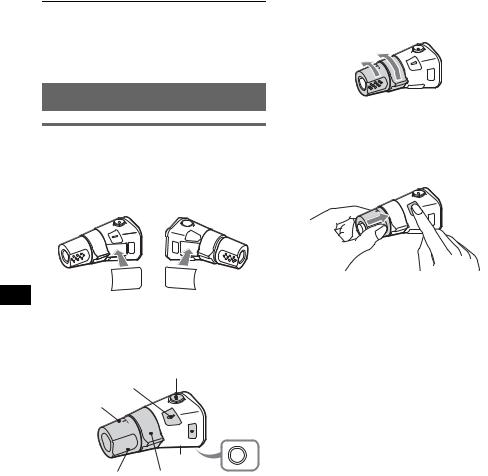
Attaching the label
Attach the indication label depending on how you mount the rotary commander.
Changing the operative direction
The operative direction of the controls is factoryset as shown below.
To increase

 To decrease
If you need to mount the rotary commander on the right hand side of the steering column, you can reverse the operative direction.
1While pushing the VOL control, press and hold (SEL).
SEL MODE DSPL
DSPL MODE SEL
Location of controls
The corresponding buttons on the rotary commander control the same functions as those on this unit.
ATT
SEL
PRESET
 MODE
MODE
SOURCE 

 DSPL
DSPL
VOL SEEK/AMS |
OFF |
OFF
The following controls on the rotary commander require a different operation from the unit.
•PRESET/DISC control
To select preset stations; control CD, the same as (1)/(2) –/+ on the unit (push in and rotate).
•VOL control
The same as the volume +/– button on the unit (rotate).
•SEEK/AMS control
The same as (SEEK) +/– on the unit (rotate, or rotate and hold).
10
 Loading...