


CR324A8
Always unplug the refrigerator before replacing any light bulbs, then follow the relevant instructions in
accordance with the type of lighting fitted in your appliance.
Only use bulbs of the same type, which can be requested from the After-Sales Service and authorised
dealers.
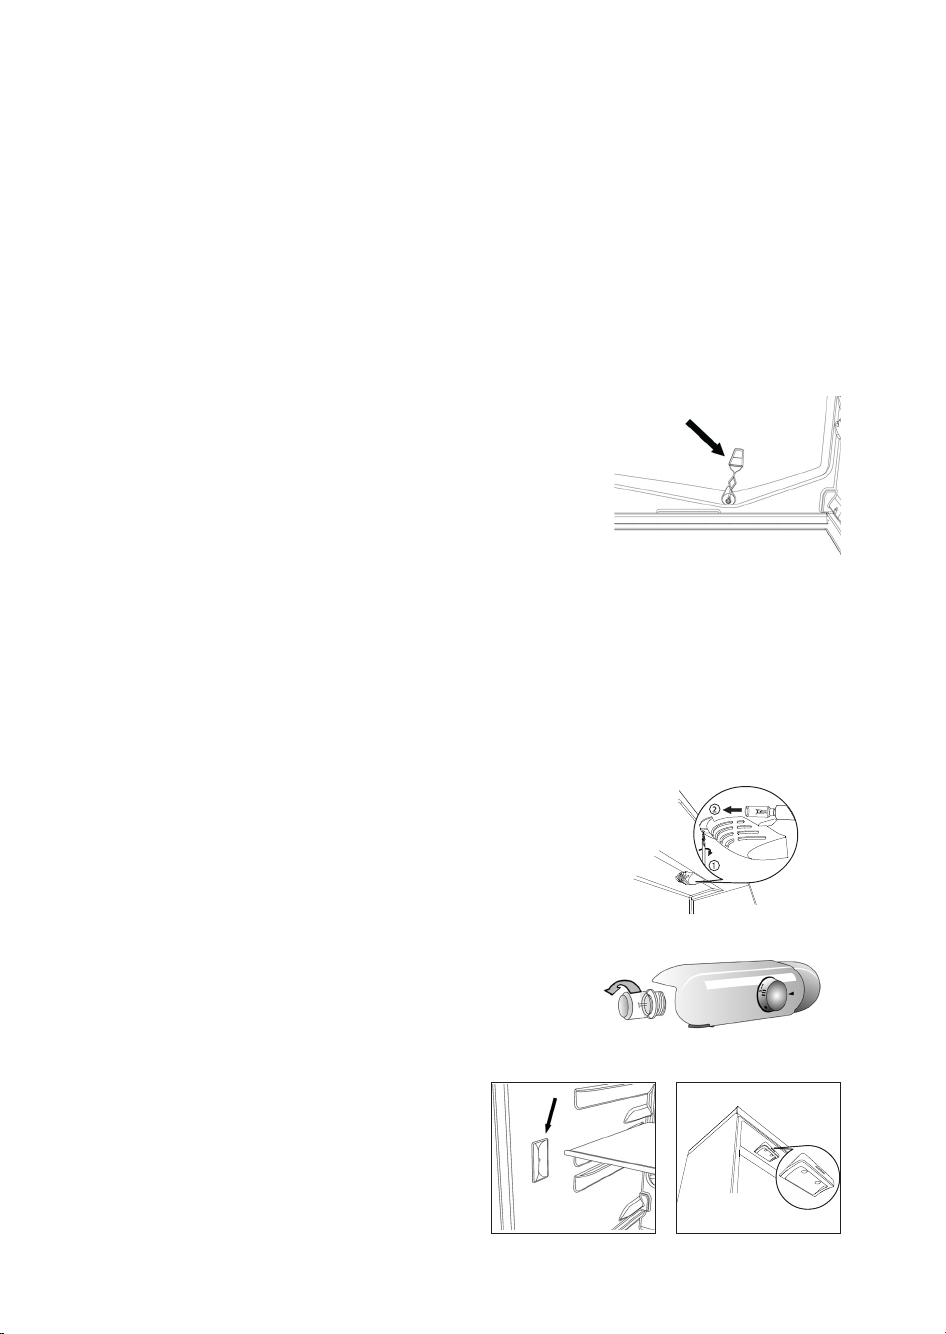
Lighting type 1)
1. Loosen the screws and take off the lamp cover.
2. The lamp has a bayonet bulb and needs to be pulled out, not
unscrewed, following the directions of the arrows as
indicated.
3. After the new bulb has been inserted, replace the lamp cover
and wait five minutes before plugging the appliance back in.
Lighting type 2)
To remove the light bulb, turn anticlockwise as shown in the figure.
Wait for 5 minutes before reconnecting the appliance.
Lighting type 3)
If the product has LED lighting which is in need of
replacing, contact the After-Sales Service for assistance.
LED lights last longer than normal bulbs, they illuminate
better and are more environmentally friendly
10
Clean the appliance regularly using a cloth and a solution of lukewarm
water and neutral detergent specifically formulated for refrigerator
interiors. Never use abrasive detergents. Clean inside the defrost water
drain outlet on the rear wall of the refrigerator (near the fruit and
vegetable crisper drawer) regularly, using the tool supplied with the
appliance so as to ensure defrost water is removed correctly (see figure).
Before all cleaning or maintenance procedures, unplug the appliance from
the mains or disconnect the electricity supply.
Connect the appliance to the mains power supply.
A beep may be emitted by some models, to indicate that the temperature alarm has intervened: press and
hold the button to switch off acoustic alarms. As applicable, insert the anti-bacterial/anti-odour filter into
the fan as indicated on the filter package.
Note: after switching on, the refrigerator needs approximately 4/5 hours to reach the correct
temperature for storing a normal fridge load of food.
FIRST USE
APPLIANCE MAINTENANCE
AND CLEANING
CHANGING THE BULB OR LED
(depending on the model)
2
1

11
Unplug the appliance from the mains, then empty, defrost (if necessary) and clean it. Leave the doors ajar,
so that air can circulate inside the compartments. This will prevent the formation of mould and bad
odours.
WHEN THE APPLIANCE IS NOT IN USE
Keep the doors closed to allow the stored food to stay cold as long as possible. Do not refreeze partially
thawed food. If the blackout persists, the blackout alarm may sound (depending on the model).
DURING BLACKOUTS
The refrigerator compartment is designed for the storage of fresh food and beverages.
Refrigerator compartment defrosting is completely automatic.
Droplets of water on the rear wall of the compartment indicate that the periodic automatic defrost cycle
is in progress. The defrost water is automatically routed to a drain outlet and into a container from which
it evaporates.
Depending on the model, the appliance may have a special box ("Meat & Fish" or "Zero Degrees") which is
ideal for the storage of fresh meat and fish.
Important: refrigerator accessories must not be washed in a dishwasher.
Note: the ambient temperature, the door opening frequency and the position of the appliance may affect
temperatures inside the two compartments. Set the temperature in accordance with these factors.
Note: when there is a lot of moisture inside the refrigerator compartment and on the glass shelves in
particular, condensation may form. In this case, we recommend closing any liquid-filled containers (e.g.:
saucepans full of stock), wrapping foods with a high liquid content (e.g.: vegetables) and setting the
temperature to a warmer value.
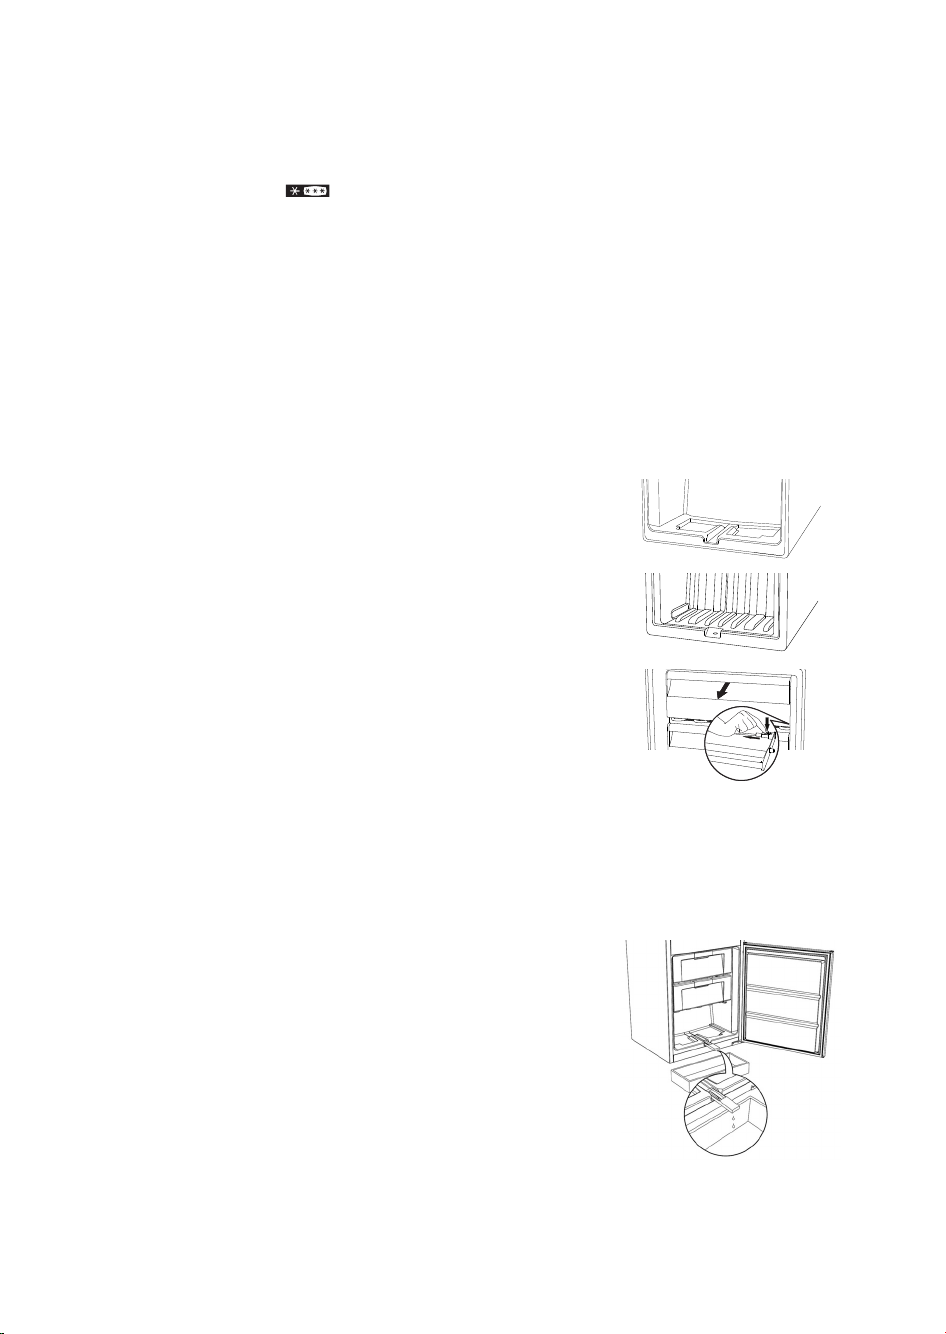
Removing the crisper drawer (depending on the model)
If your product only has a crisper drawer, to facilitate its removal we recommend emptying (and, if
necessary, removing) the two lower door trays beforehand.
Fan and anti-bacterial/anti-odour filter (depending on the model)
The fan will ensure uniform air circulation inside the compartment, for improved food storage and excess
moisture reduction. Do not obstruct the fan inlet. The fan can be activated/deactivated manually (see
Quick Start Guide); when activated, it works automatically as necessary.
REFRIGERATOR COMPARTMENT
The freezer compartment stores frozen food (for the period indicated on the package) and freezes
fresh food. The amount of fresh food that can be frozen in 24 hours is shown on the rating plate; place the
food in the freezer compartment (see Quick Start Guide), leaving leaving enough space around the packages
to allow air to circulate. Refreezing partially thawed food is not recommended. It is important to wrap food so
that no water, moisture, or vapour may penetrate.
To save energy and prolong the life of the appliance, make sure hot foods are never placed inside it.
Note: the ambient temperature, door opening frequency and position of the appliance can affect the
temperatures inside the two compartments. Set the temperature based on these factors.
Making ice cubes
Fill the ice cube tray (where provided) 2/3 full and place it in the freezer compartment. Never use sharp
or pointed objects to remove the ice.
Removing drawers (depending on model)
Pull the drawers all the way out, lift them up a little and remove. To create more space, the freezer
compartment can also be used as follows:
A) If the freezer compartment base resembles figure A, remove the
upper drawers and/or lids. The lower drawer should be left in position.
Make sure that, once the food has been placed on the racks/shelves, the
door closes properly.
B) If the freezer compartment base resembles figure B, remove all
drawers or lids. Make sure that, once the food has been placed on the
racks/shelves, the door closes properly.
Removing the lid (if present)
Open the lid and remove the pin, as illustrated in figure C.
12
No Frost models do not need defrosting.
For other models, if frost forms in the freezer compartment, we
recommend it is defrosted twice a year or whenever an excessive
amount of frost has formed (3 mm thickness).
It is perfectly normal for frost to form.
The amount of frost which forms and the rate at which it builds up
depends on room temperature and humidity, and on how often the door
is opened. To defrost, unplug the appliance and remove all foodstuffs.
Leave the door ajar to allow the frost to melt. For products with a
freezer compartment below the refrigerator compartment, the defrost
water drain pipe can be removed (see figure) and a recipient placed
underneath.
After defrosting, replace the drain pipe, making sure that no water is left in it. Clean inside the freezer
compartment and dry carefully.
Switch the appliance back on and place the food back inside.
DEFROSTING THE FREEZER
COMPARTMENT
(depending on the model)
FREEZER COMPARTMENT
A
B
C
 Loading...