


INSTRUCTION MANUAL
EM-D9553N EM-D9553SN
Microwave Oven With Super Showerwave,
Fan Oven AndPow


Read these instructions carefully before use. |
EUK |
If you follow these instructions, your Microwave |
|
Oven will serve you long and well. |
English |
|
|

TABLE OF CONTENTS
Oven Specification |
4 |
Safety Instructions |
|
How To Use Your Oven Safely |
4 |
Other Important Safety Instructions |
5 |
Setting Up & Getting To Know Your Oven |
|
Installation |
6 |
Oven Parts and Accessories |
7 |
Oven Control Panel |
8 |
Setting the Language |
9 |
Setting The Clock |
10 |
Child Lock Out / Demonstration Mode |
10 |
How to use Kitchen Timer |
11 |
Quick Start |
11 |
MAFF Rating |
11 |
Suitable Cookware |
12-13 |
Operating Instructions |
|
Quick Reference Guide to 8 Way Cooking |
14 |
Manual Operation |
|
High and Variable Power Cooking |
15 |
Grill Cooking and Thermal Grill Cooking |
16 |
Convection Cooking |
17 |
Dual Cooking |
18-19 |
Multi Stage Cooking |
20 |
Automatic Operation |
|
Automatic Thermal Weight Defrost & Charts |
21-24 |
Direct Access, Direct Access Charts & Recipes 25-44 |
|
Slow Cooking & Recipes |
45-52 |
Care Of Your Microwave Oven |
|
Questions and Answers |
53 |
Care and Cleaning |
54 |
Before Calling For Service |
54 |
Imperial to Metric Conversion Table |
55 |
Warranty |
55 |
Automatic Program Guide |
59 |
Easy Use Chart |
60 |

SPECIFICATIONS
|
EM-D9553N / D9553SN |
|
|
Power Source |
230 V |
|
|
Maximum Output Power |
900 W* |
|
|
Power Grill |
1200 W |
|
|
Convection Heater |
1200 W |
|
|
Oven Capacity |
1.1 cu. ft. (32 L) |
|
|
Outside Dimensions (W x D x H) |
550 x 487 x 355 |
|
|
Net Weight |
24 Kg |
|
|
MAFF Rating |
900 / E |
|
|
*According to IEC 705 test procedures.
HOW TO USE YOUR OVEN SAFELY (MICROWAVE)
1.When boiling water or other liquids, be sure to use a wide mouthed container, this will allow air bubbles to escape freely and prevent boiling over. Overheating the liquid beyond boiling point can occur without the evidence of bubbling. This could result in a sudden boil over of the hot liquid.
2.Do not attempt to operate the oven while empty as this will cause damage.
3.Do not deep fry in the microwave oven as the temperature of the oil cannot be controlled and it may overheat.
4.Never completely seal containers in the microwave oven. Coverings are necessary but containers must not be airtight.
5.Small quantities of food with low moisture content or high fat or sugar content can burn, dry out or catch fire if cooked or re-heated too long. Please note that the heating / cooking period required is extremely short: for example it only takes approximately 15 seconds to heat one mince pie or similar.
6.Always pierce food which has a skin or membrane, for example, potatoes, tomatoes, apples, sausages etc. If you don't pierce them steam will build up inside and they may explode.
7.When disposable containers of plastic, paper or other combustible materials are used to reheat food, it is advisable to check from time to time during the cooking cycle.
NOTE
It is quite normal for steam to be emitted around the door, for misting to occur on the door, or even for water droplets to appear below the door during the cooking cycle. This is merely condensation from the heat of the food and does not affect the safety of your oven.The door is not
intended to seal the oven cavity completely but its special SANYO design contributes to the complete safety of the appliance.
ALTHOUGH YOUR OVEN IS PROVIDED WITH SAFETY FEATURES,
IT IS IMPORTANT TO OBSERVE THE FOLLOWING:
a.Do not tamper with safety interlocks.
b.Do not place any object between the oven and the door or allow any food residue to accumulate on sealing surfaces. Wipe the door sealing area frequently with a mild detergent, rinse and wipe dry. Never use abrasive powders or pads.
c.When opened, the door must not be subjected to strain, for example, a child hanging on an opened door may cause the oven to fall forward resulting in injury.
d.If any damage is apparent, do not operate the oven. Contact your nearest SANYO SERVICE CENTRE.
e.Children may use the appliance only without supervision as long as instructions had been given which enables the child for safe operation and makes the child aware of the dangers of false operation.
4

OTHER IMPORTANT SAFETY INSTRUCTIONS
The following safety precautions should be followed when using this appliance:
1.Read all instructions before first use.
2.When using the grill and / or convection function for the first time, smoke and odour may be given off for a few minutes. This is normal during first operation, and is no cause for alarm.
3.As with most cooking appliances, close supervision is necessary.
If a fire should start:
*Keep the oven door closed.
*Turn the oven off.
*Disconnect the power cord or shut off the power at the mains.
Other important safety points to remember are:
WHEN COOKING BY MICROWAVE:
1.Do not use wire ties in the oven. Be sure to inspect purchased items for wire ties and remove before placing food in the oven.
2.It is important to keep the oven interior clean. Food particles left on the oven walls reduce the efficiency of the microwaves.
3.Do not heat foods or liquids in bottles or jars with lids on. Air must be allowed to escape from the container.
4.Milk or food for babies should be heated on 450W. It should then be stirred thoroughly and tested to ensure that it is at the correct temperature before giving it to the baby.
5.Care must be taken when removing cups of hot liquid from the turntable. Cups should be lifted not slid to the edge of the turntable to prevent tipping.
WHEN COOKING BY GRILL / CONVECTION:
1.Take care not to spill water on the glass viewing window during or immediately after cooking as it may crack.
2.Be sure to use an oven glove when loading and unloading the oven. Care should be taken to avoid touching cavity walls inside oven.
3.Be careful not to touch the viewing window when loading or unloading the oven.
4.The top of the cabinet gets very hot, therefore do not place items on the oven.
WARNING
(a)Do not adjust or repair microwave oven yourself. Do not operate the oven if it is damaged, until it has been repaired by a service engineer trained by the manufacturer.
(b)It is dangerous for anyone other than a properly qualified engineer trained by the manufacturer to carry out adjustments or repairs.
(c)If the power supply cord is damaged, it must be replaced by the manufacturer or its service agent or a similarly qualified person in order to avoid a hazard.
(d)On no account remove or interfere with any parts or screws.
THIS COULD PROVE VERY DANGEROUS.
SAVE THESE INSTRUCTIONS
5
INSTALLATION
CONNECTING TO THE MAINS
Before you use your oven, check that the voltage shown on the data label located on the face of the oven conforms with your mains supply. The mains lead is fitted with a 13 amp plug containing a 13 amp fuse. If the fuse requires replacing at any time, the fuse cover should be removed using a small screwdriver to lever it out. The old fuse should be replaced by a 13 amp fuse and the fuse cover must be refitted before the plug is used again.
If the plug supplied on the mains lead is not suitable for the socket in your home, it should be cut off and disposed of safely, or destroyed, to avoid any possible shock hazard resulting from the plug being inserted into a 13 amp socket elsewhere in the house. A suitable replacement plug should then be fitted. (If a 13 amp plug and socket are not used, the circuit supplying the oven should contain a 13 amp fuse).
If the fuse cover is lost or damaged, the plug must not be used until a replacement is obtained. Replacement fuse covers are available from SANYO SERVICE CENTRES. It is important that the colour of the replacement fuse cover corresponds with the coloured insert or as embossed in words on the base of the plug.
WARNING - THIS APPLIANCE MUST BE
EARTHED
IMPORTANT The wires in this mains lead are coloured in accordance with the following code: Green-and-yellow: Earth. Blue: Neutral. Brown: Live.
As the colours of the wires in the mains lead of this appliance may not correspond with the coloured markings identifying the terminals in your plug, proceed as follows:
The wire which is coloured green-and-yellow must be connected to the terminal in the plug which is marked with the the letter E or by the earth symbol  or coloured green or green-and-yellow.
The wire which is coloured blue must be connected to the terminal which is marked with the letter N or coloured black.
The wire which is coloured brown must be connected to the terminal which is marked with the letter L or coloured red.
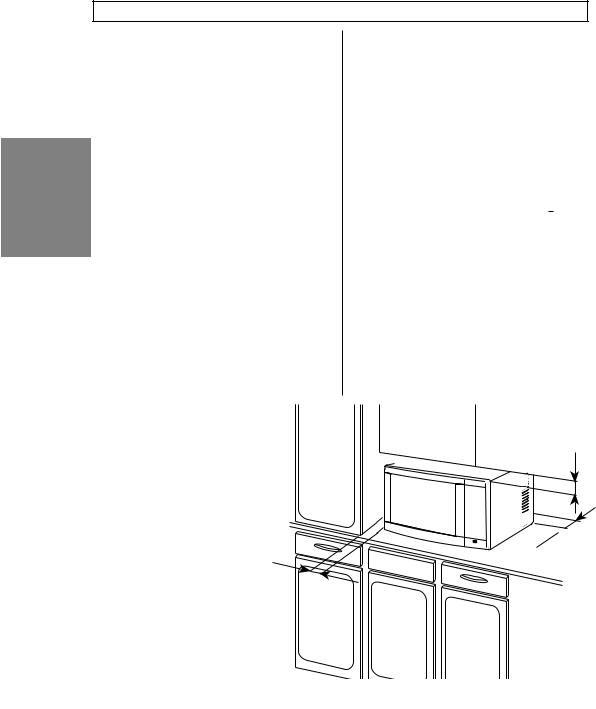
OVEN POSITIONING
1.Install the oven on a flat, level surface strong enough to safely bear the weight of the oven.
2.Do not locate the oven near areas where heat and moisture are generated as this may lower oven efficiency.
3.Covering the air vents may lead to malfunctioning, therefore a minimum clearance of 5cm is required to each side, and to
the rear and 5cm above.
4.This oven conforms to EMC Radio interference Directive 89/336/EEC, however some interference may occur if it is placed too close to a radio or TV, so keep them as far apart as possible.
5.The oven must be positioned so that the supply plug is easily accessible.
 cm5
cm5


 5cm
5cm 5 cm
5 cm 
6

OVEN PARTS AND ACCESSORIES
Your oven is supplied with the following accessories:
Turntable |
1 |
Instruction manual |
Turntable roller rest |
1 |
|
Metal rack |
2 |
|
Vents
Safety Interlock System
Turntable
Roller Rest
Turntable
1
Keyboard
Vents
Door Release
Button
Metal Rack (High)
Metal Rack (Low)
Turntable
Roller Rest
Turntable Shaft 
TURNTABLE INSTALLATION
1.Place the roller rest on the cavity bottom.
2.Place the turntable on top of the roller rest as shown in the diagram. Make sure the turntable hub is securely locked in the turntable shaft. Never place the turntable upside down.
•Both turntable and roller rest must always be used during cooking.
•All food and containers of food are always placed on
this turntable for cooking.
•This turntable rotates clockwise and anticlockwise; this is normal.
•This turntable returns to its original starting position when cooking is finished.
7
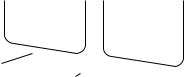
OVEN CONTROL PANEL
2 |
1 |
|
|
3 |
|
|
7 |
8 |
|
9 |
|
5 |
|
|
|
|
4 |
|
10 |
6 |
|
11 |
|
|
|
|
|
12 |
13 |
|
14 |
|
|
15 |
1. Display Window. Cooking |
5. Kitchen Timer key. |
11. Dual Cook. |
mode and short messages are |
|
|
displayed. |
6. Auto Defrost. |
12. Quick Start. |
2. Function Indicator. |
7. Convection Temperature. |
13. Time and Weight set. |
3. Direct Access menu keypad. |
8. Micro Power. |
14. Clear / Stop. |
4. More / Less key:- Allows |
9. Grill only. |
15. Start. |
you to slightly increase or |
|
|
decrease cooking time of |
10. Slow Cook. |
|
automatic programs. |
|
|
8
SETTING THE LANGUAGE
Your new microwave oven comes with a five language
Word Prompt system. Languages available are English, German, Spanish, Portugese and French.
When your oven is plugged in for the first time or when power resumes after a power interruption, the display will show
“WELCOME TO SANYO - REFER TO INSTRUCTIONS BEFORE USE.”
By pressing “Start” it is possible to select the different languages.
When you have selected your required language press “Clear / Stop” to hold that language, the numbers in the display then reset to 0: and you will be prompted to set the time of day.
To set English:
1.
To set German:
1.
2.
To set Spanish:
1.
2.
To set Portugese:
1.
2.
To set French:
1.
2.
This oven is preset to English therefore it is only necessary to touch "Clear / Stop"once.
Touch "Start" key once, the display will show
“HERZLICH WILLKOMMEN - VOR GEBRAUCH DIESES GERAETES BITTE DIE GEBRAUCHSANLEITUNG LESEN.”
Touch "Clear / Stop"once to select and hold language.
Touch "Start" key twice, the display will show “BIENVENIDO A
SANYO - ANTES DE UTILIZAR EL HORNO LEER EL MANUAL DE INSTRUCCIONES.”
Touch "Clear / Stop"once to select and hold language.
Touch "Start" key three times, the display will show “BEMIVINDO A
SANYO - LEIA AS INSTRUCOES ANTES DE USAR”
Touch "Clear / Stop"once to select and hold language.
Touch "Start" key three times, the display will show “BIENVENU
CHEZ SANYO - VEUILLEZ LIRE LE MODE DEMPLOI AVANT DUTILISER VOTRE FOUR”
Touch "Clear / Stop"once to select and hold language.
9

SETTING THE CLOCK
When your oven is plugged in |
Example: To set 4:30: |
|
|
|
|
for the first time or when |
|
|
power resumes after a power |
1. |
|
interruption, the display |
|
|
resets to setting the language |
|
|
procedure on Pg 9. |
|
|
To set the clock follow |
2. |
|
adjacent procedure. |
|
|
|
3. |
|
|
|
|
|
|
|
|
4. |
|
|
|
|
|
|
|
|
|
|
0: and “SET HOUR” shows in display and the clock symbol flashes. Touch "Down / Up" until 4: is indicated in the display window.
“PRESS START” shows in display and the start symbol flashes.Touch "Start" Key. This locks in the hour setting. “SET MINUTES” shows in display and time indicator begin to flash.
To set the minutes Touch "Down / Up" keys until 4:30 is indicated in the display window.
“PRESS START” shows in display and the start symbol flashes.Touch "Start" Key to lock in the time and start the clock running.
CHILD LOCK-OUT AND DEMONSTRATION MODE
Child Lock-Out:
This oven has a safety feature which prevents the accidental running of the oven by a child.
Demonstration Mode:
After the demonstration mode has been set, the oven will appear to operate normally if the keys are pressed. However the oven will produce NO actual microwave power. When in demonstration mode, you can work through the cooking procedure.
To set child lock-out.
1.
Press and hold "Clear / Stop" Key for 3 seconds. Indicator LOCK is indicated. Now the oven cannot be operated.
To cancel child lock simply repeat setting procedure. Indicator LOCK disappears and clock display reappears. After 3 seconds the oven will beep twice, this indicates that the child lock is cancelled and the oven is now fully operational again.
To set demonstration mode. |
|
1. |
Press and hold "More / Less" Key |
for 3 seconds. Indicator L lights |
|
|
up and clock display reappears. |
To cancel demonstration mode simply repeat setting procedure. Indicator L disappears and clock display reappears. The oven is now fully functional once again. After 3 seconds the oven will beep twice, this indicates that the demonstration mode is cancelled and the oven is now fully operational again.
10
HOW TO USE THE KITCHEN TIMER
The oven may be used as a useful automatic kitchen timer. It may be set from 10 secs to 90 mins. This function operates independantly of the cooking functions, therefore the oven may be operated at the same time as the kitchen timer. The cooking time will be indicated in the display window. To check the time remaining on the kitchen timer, press "Kitchen Timer".
Example: To set kitchen timer for 5mins 30secs:
1. |
Touch "Kitchen Timer".“KITCHEN |
|
TIMER - SET TIME-” shows in dis- |
|
play. |
Touch "Down / Up" until 5:30 K (K 2. represents Kitchen Timer) is indicated
in the display window.
Touch "Start" Key. The Kitchen Timer will begin counting down. To
3. 
 cancel kitchen timer press "Clear / Stop". If the start key is not pressed immediately the Kitchen Timer will begin counting down after 10 seconds.
Note:
To cancel the kitchen timer whilst the oven is operating, press “Kitchen Timer” followed by “Clear/Stop”.
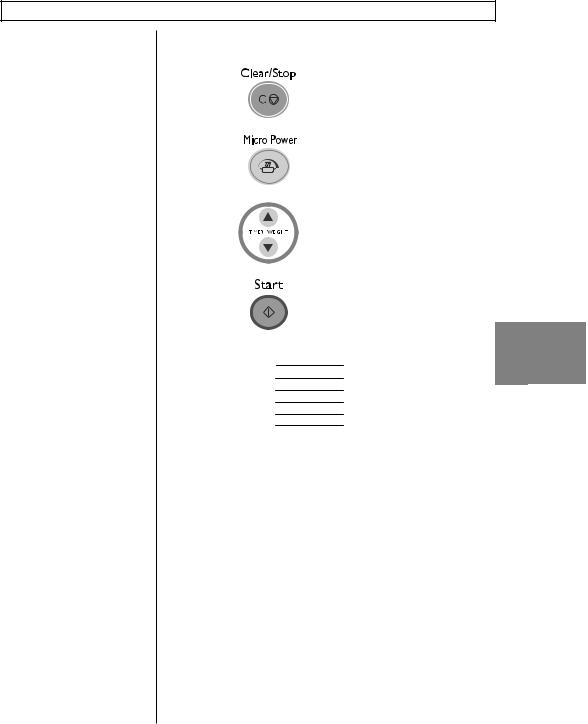
QUICK START
The Quick Start function allows the oven to begin cooking immediately on full power 900W.
NOTE:
The Quick Start key has been pre-programmed to increase in increments of 30 secs. up to a maximum time of 10 minutes.
Example: Set oven to start cooking on Full Power 900W for 2 minutes.
1. 


 Touch "Quick Start" Key 4 times. The microwave indicator
  lights up and the oven begins to operate immediately.
11

SUITABLE COOKWARE
MATERIAL |
MICROWAVE |
GRILL / THERMAL |
CONVECTION |
|
|
GRILL ONLY |
ONLY |
|
|
|
|
Turntable |
Yes |
Yes |
Yes |
|
|
|
|
Metal Racks |
Yes - Low Rack |
Yes |
Yes |
|
should be used |
|
|
|
for defrosting. |
|
|
|
|
|
|
Metal Drip Tray |
No |
Yes |
Yes |
|
|
|
|
Heat & Grill Resistant |
Yes |
Yes |
Yes |
Ceramic & Glass. |
|
|
|
|
|
|
|
China - Without |
Yes |
Yes |
Yes |
Metal Decoration. |
|
|
|
|
|
|
|
Plastic- |
Yes |
No |
No |
microwave proof |
|
|
|
cookware. |
|
|
|
|
|
|
|
Plastic cling film, |
Yes - With care. |
No |
No |
microwave wrap, |
Pierce film. |
|
|
microwave roasting |
Do not fit film skin |
|
|
bags. (Do not use |
tight.Do not allow |
|
|
metal twist ties.) |
film to touch food. |
|
|
|
|
|
|
Metal Cookware |
No |
Yes |
Yes |
e.g baking tins, trays |
|
|
|
Aluminum Foil |
Yes - With care. |
Yes |
Yes |
|
Small pieces may be |
|
|
|
used for shielding. |
|
|
|
Over use may |
|
|
|
cause arcing. |
|
|
|
|
|
|
Paper |
Yes - With care. |
No |
Yes - With care. |
Greaseproof paper, |
Paper may be |
|
Greaseproof paper |
Kitchen Paper, |
used to absorb |
|
may be used to |
plates or cups. |
moisture or fat. |
|
line dishes. |
|
Overheating could |
|
|
|
cause fire. |
|
|
|
|
|
|
Wood / Straw |
Yes - With care. |
No |
No |
|
For warming food |
|
|
|
for a very short |
|
|
|
time only. |
|
|
|
|
|
|
12

SUITABLE COOKWARE (CONT.)
MATERIAL |
DUAL COOKING |
DUAL COOKING |
DUAL COOKING |
|
GRILL & MICROWAVE |
CONVECTION & |
CONVECTION & |
|
|
MICROWAVE |
GRILL |
|
|
|
|
Turntable |
Yes |
Yes |
Yes |
|
|
|
|
Metal Racks |
Yes |
Yes |
Yes |
|
|
|
|
Metal Drip Tray |
Yes |
Yes |
Yes |
|
|
|
|
Heat Resistant |
Yes |
Yes |
Yes |
Ceramic & Glass. |
|
|
|
|
|
|
|
China - Without |
Yes |
Yes |
Yes |
Metal Decoration. |
|
|
|
|
|
|
|
Plastic- |
No |
No |
No |
microwave proof |
|
|
|
cookware. |
|
|
|
|
|
|
|
Plastic cling film, |
No |
No |
No |
microwave wrap, |
|
|
|
microwave roasting |
|
|
|
bags. (Do not use |
|
|
|
metal twist ties.) |
|
|
|
Metal Cookware |
Yes - With care. |
e.g baking tins, trays |
Do not place metal |
|
cookware on metal |
|
racks or on metal |
|
drip tray. |
Yes - With care. |
Yes |
Do not place metal |
|
cookware on metal |
|
racks or on metal |
|
drip tray. |
|
Aluminum Foil |
Yes - With care. |
|
Small pieces may be |
|
used for shielding. |
|
Over use may |
|
cause arcing. |
Yes - With care. |
Yes |
Small pieces may be |
|
used for shielding. |
|
Over use may |
|
cause arcing. |
|
Paper |
No |
Yes - With care. |
No |
Greaseproof paper |
|
Greaseproof paper |
|
Kitchen Paper, |
|
may be used to |
|
plates or cups. |
|
line dishes. |
|
|
|
|
|
Wood / Straw |
No |
No |
No |
13

QUICK REFERENCE GUIDE TO 8 WAY COOKING
COOKING MODE |
ACCESSORIES TO USE |
SUGGESTED USE |
Microwave Only |
Place dish directly on turntable. |
80, 150, 300, 450, |
Place dish on low rack for |
750 & 900W. |
optimum defrost results. |
Defrosting, reheating, cooking vegetables, rice, pasta, fish, casseroles, sponge puddings.
Grill Only |
Place high rack on turntable. |
For toasting bread, muffins etc. |
(1 Setting) |
|
|
|
|
|
Thermal Grill |
Place high rack on turntable. |
For cooking small chops, |
(1 Setting) |
|
sausages, fish fingers etc. |
Convection Only |
Place dish directly on turntable or |
(including 2 Level |
on low rack. |
Convection Cooking.) |
|
(40 - 250°C) |
|
|
2 Level Convection - Place dishes/ |
|
trays on low and high rack. Change- |
|
over position halfway through |
|
cooking for best result. |
For cooking meringues, biscuits, scones, bread, Yorkshire Puddings, pastry items e.g pies, tarts etc.
2 Level Convection - For batch baking of biscuits, scones, cakes etc. on two levels.
Thermal Grill & 80, 150, 300 or 450W Microwave.
Place high or low rack on turntable.
For faster cooking of traditionally grilled foods e.g chops, sausages, chicken pieces etc.
Convection & Microwave |
Place dish directly on low rack. |
For faster cooking of many |
(Variable combinations |
|
traditionally baked foods e.g baked |
of convection temperature |
|
potatoes,pizza, roast poultry / joints, |
100 - 250°C with 80, 150, |
|
roast potatoes, some cakes, au |
300 or 450W microwave power. |
gratin dishes, frozen crispy crumb |
|
|
|
convenience foods. For crisp |
|
|
reheating of pastry items. |
Convection with Grill |
Place on a metal baking on high rack. |
(210 - 250°C) |
|
For fast cooking and crisping of small items e.g frozen potato products, fish fingers, chicken nuggets etc.
(For details of suitable cookware please see pages 12 - 13.)
14
HIGH AND VARIABLE POWER COOKING
This basic microwave cooking method allows you to cook food for a desired time. In addition to the maximum power level, you can select different microwave power from 5 other levels, 80W to 750W for the foods that require slower cooking.
Foods with high moisture content should be cooked on maximum power, as this is the fastest cooking method and best maintains the natural flavour and texture of the foods.
Manual Defrosting
For manual defrosting (without using Auto Defrost features), use 150W. To speed up the defrosting of dense foods over 450g (1Ib), the oven may start on full power for 1-3 minutes, then be reduced to 150W until defrosting is complete.
NOTE:
The time increments for the Up / Down keys are as follows:
TIME |
INCREMENT |
0-5 min. |
15 secs. |
5-10 min. |
30 secs. |
10-30 min. |
1 min. |
30-90 min. |
5 min. |
Example: To cook at 450W for 1 min 30 secs
1. |
Touch "Clear / Stop". |
|
Touch "Power" Key 3 |
2. |
times. “450W SET TIME-” |
|
shows in display. |
||
|
Touch "Down / Up" until 3. 1.30 is indicated in the
display window. “PRESS START” shows in display.
4. |
Touch "Start". |
To set the variable cooking levels the Power key should be touched as follows:
900W |
ONCE |
750W |
2 TIMES |
450W |
3 TIMES |
300W |
4 TIMES |
150W |
5 TIMES |
80W |
6 TIMES |
|
|
POWER SETTING |
SUGGESTED USE |
|
|
80 W |
Softening cream cheese. |
|
|
150 W |
Keeping foods warm, defrosting. |
|
|
300W |
Completing the cooking cycle of pot |
|
roasts. |
|
Completing the cooking cycle of |
|
some casseroles and stews. |
|
Baked custards and cheese cakes. |
|
|
450 W |
Roasting meats. |
|
|
750 W |
Baking cakes. |
|
Reheating precooked foods. |
|
|
900 W |
Boiling liquids. |
|
Baking fish, vegetables. |
|
|
15

GRILL COOKING
Grill 1
This method is ideal for toasting bread or muffins. Remember the oven will be hot. Place all food on high grilling rack.
Grill cooking time can be set to a maximum of 90 minutes.
Example: Set oven to Grill for 15 minutes.
1. |
|
Touch "Clear / Stop". |
|


 Touch "Grill" key. The Grill 2. indicator lights up “GRILL -
SET TIME” shows in display.
Touch "Down/Up" until 3. 15.00 is indicated in the
display window. “PRESS START” shows in display.
4. |
Touch "Start". |
THERMAL GRILL COOKING
Grill 2
During thermal grill cooking, both fan and grill element operate together to circulate hot air around the food to assist the cooking process.
This method is ideal for small items such as sausages which you would usually grill. Place food on the high grill rack on the turntable. Do not use thermal grill for toasting bread as the result will be rather dry. The grill cooking time can be set to a maximum of 90 minutes.
Example: Set oven to Thermal Grill for 15 minutes.
1. |
|
|
|
|
Touch "Clear / Stop". |
|
|||||
|
|
|
|
|
Touch "Grill" key twice. |
|
|
|
|
||
2. |
|
|
|
|
“GRILL 2 - SET TIME” |
|
|
|
|
|
shows in display. |
|
|
|
|
|
Touch "Down/Up" until |
3. |
|
|
|
|
15.00 is indicated in the |
|
|
|
|
display window. “PRESS |
START” shows in display.
4. |
Touch "Start". |
16

CONVECTION COOKING
This oven can be used as a conventional oven by using the fan assisted convection function. The temperature range is 40 - 250°C.
For recipes which require higher temperatures e.g pastries, scones or Yorkshire puddings, best results are obtained if the oven is preheated first.
Note:
When preheating is completed. Immediately place the food in the oven, set the convection cooking temperature, time and begin cooking.
This function is ideal for cooking meringues, biscuits, scones, bread, Yorkshire puddings, large fruit cakes and all pastries. It can also be used for proving bread at 40°C. The convection cooking time can be set for a maximum of 90 minutes.
One or two level convection cooking;
Convection cooking can be done on one or two levels using the two racks provided. If cooking on one level, place food on low rack. If cooking on two levels (ie batch baking) swap position of food halfway through cooking to get the most even result.
As there is no microwave energy being used you can place metal tins directly onto the metal racks with no danger of arcing.
Example: Set oven to Preheat to 200°C.
(The oven is preheated before the food is added)
1. |
|
Touch "Clear / Stop". |
|
||
|
|
|
|
|
Press "Convec.Temp" key twelve |
2. |
|
times. The Convection indicator |
|
lights up and "200 C" is displayed. |
|
|
|
Press "Start". The oven will now |
|
|
preheat. When the correct |
3. |
|
temperature is reached the oven |
|
will beep 3 times and |
|
|
|
"PREHEATING COMPLETED - |
|
|
|
|
|
200 C" will appear in the display. |
|
|
You may now place the food in the |
|
|
oven, set the convection cooking |
|
|
temperature and time as below and |
|
|
begin cooking immediately. |
Example: To then set the preheated oven to cook using Convection for 20 minutes, at 200°C.
4. |
|
Touch "Clear / Stop", once. |
|
||
|
|
“200 C - SET TIME” shows |
|
|
in display place food on the |
|
|
low rack in the oven. |
5. |
|
Touch "Down/Up" until |
|
20.00 is indicated in the |
display window.
6. |
Touch "Start". |
17
DUAL COOKING
This oven offers you a choice of three methods of Dual cooking;
1.Convection + Microwave - For baking and roasting.
2.Thermal Grill + Convection - For fast crisping.
3.Thermal Grill + Microwave - For fast grilling.
Convection + Microwave
This function allows you to combine convection operation with any one of the four (80W, 150W, 300W, 450W) microwave power levels to produce traditional baked or roasted results in less time. This function has many uses, particularly roasting meat and poultry, cooking pizza, baked potatoes, roast potatoes, baking some cakes, frozen and crispy crumb foods and reheating pastries.
When cooking with dual convection + microwave it is not necessary to preheat the oven.
Food should be placed on the low rack or on the turntable.
Do NOT place metal cookware directly on the low rack when using this function as arcing may occur.
The Dual Convection + Microwave function can be set for a maximum of 90 minutes.
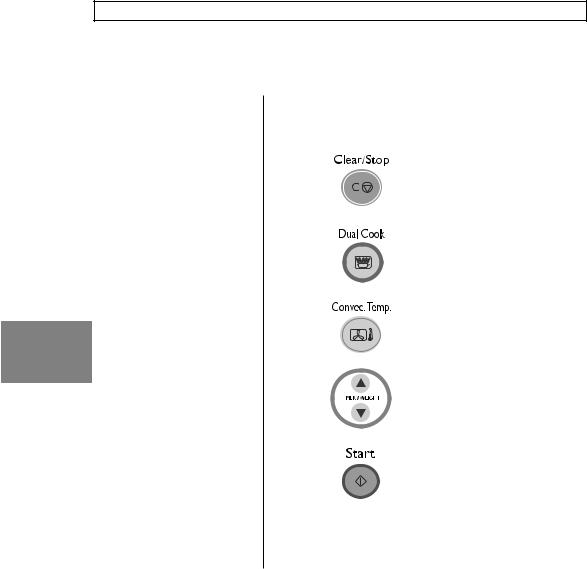
Example:
1.
2.
3.
4.
5.
Set oven to Convection + Microwave
for 15 minutes, at 220°C and 450W microwave power.
Touch "Clear / Stop".
Press "Dual Cook" key once. The Convection and Micro indicator light up and "DUAL 1 200C 450W - SET TIME" is displayed.
Press "Convec.Temp." once - "210 C" is displayed.
Touch "Down/Up" until 15.00 is indicated in the display window.
Touch "Start".
18
 Loading...