


S9000sci-Front.fm Page 1 Wednesday, September 22, 1999 2:38 PM
INSTRUCTION MANUAL
AND COOKING GUIDE
EM-S9000
Over-The-Range Microwave Oven
Read these instructions carefully before using your microwave oven.
If you follow the instructions, your oven will provide you with many years of good service.
SAVE THESE INSTRUCTIONS
1
S9000sci-Front.fm Page 2 Wednesday, September 22, 1999 2:38 PM
PRECAUTIONS TO AVOID
POSSIBLE EXPOSURE TO
EXCESSIVE MICROWAVE
ENERGY
(a)Do not attempt to operate this oven with the door open since opendoor operation can result in harmful exposure to microwave energy. It is important not to defeat or tamper with the safety interlocks.
(b)Do not place any object between the oven front face and the door or allow soil or cleaner residue to accumulate on sealing surfaces.
(c)Do not operate the oven if it is damaged. It is particularly important that the oven door close properly and that there is no damage to the:
(1)DOOR (bent)
(2)HINGES AND LATCHES (broken or loosened)
(3)DOOR SEALS AND SEALING SURFACES
(d)The oven should not be adjusted or repaired by anyone except properly qualified service personnel.
SPECIFICATIONS
Model: |
EM-S9000 |
|
|
Power Source: |
AC 120 V, 60 Hz |
|
|
Power Consumption: |
1500 W |
|
|
Maximum Output: |
1000 W* |
|
|
Oven Capacity: |
1.5 cu. ft. |
|
|
Turntable Diameter: |
10-13/16" (275 mm) |
Dimensions: (w x h x d) |
29-7/8" x 17" x 14-1/8" (759 x 432 x 359 mm) |
Weight: Approx. |
61.5 lbs. (28 kg) |
|
|
Specifications subject to change without notice.
*According to IEC-705 test procedure. The IEC-705 test procedure is an internationally recognized method of rating microwave wattage output.
Please record your product’s information
When you call to request service, you need to know your complete model number and serial number. Please fill in the information below. Please also record purchase date, price and where purchased.
Model Number: |
(Located on the front of the oven) |
Serial Number: |
(Located on the front of the oven) |
|
|
Date of Purchase: |
|
|
|
Purchase Price: |
|
|
|
Where Purchased: |
|
|
|
2
S9000sci-Front.fm Page 3 Wednesday, September 22, 1999 2:38 PM
TABLE OF CONTENTS
SAFETY
■ Proper and Safe Use of Your Oven . . . . . . . . . . . . . . . . . . . . . . 4
■ Important Safety Instructions . . . . . . . . . . . . . . . . . . . . . . . . . . 4
■ Grounding Instructions . . . . . . . . . . . . . . . . . . . . . . . . . . . . . . . 6
■ Utensils . . . . . . . . . . . . . . . . . . . . . . . . . . . . . . . . . . . . . . . . . . . 6
SETTING UP YOUR OVEN
■ Names of Oven Parts and Accessories. . . . . . . . . . . . . . . . . . . 8
■ Turntable Installation . . . . . . . . . . . . . . . . . . . . . . . . . . . . . . . . 9
■ Charcoal Filter Installation. . . . . . . . . . . . . . . . . . . . . . . . . . . . . 9
■ Grease Filter Installation . . . . . . . . . . . . . . . . . . . . . . . . . . . . . . 9
OPERATION
■ Control Panel and Features . . . . . . . . . . . . . . . . . . . . . . . . . . . . 10 ■ Selecting Ventilation Direction . . . . . . . . . . . . . . . . . . . . . . . . . 12 ■ Setting Clock . . . . . . . . . . . . . . . . . . . . . . . . . . . . . . . . . . . . . . . 12 ■ Child Lock-Out . . . . . . . . . . . . . . . . . . . . . . . . . . . . . . . . . . . . . . 12 ■ Kitchen Timer . . . . . . . . . . . . . . . . . . . . . . . . . . . . . . . . . . . . . . . 13 ■ Add 30 Seconds . . . . . . . . . . . . . . . . . . . . . . . . . . . . . . . . . . . . . 13 ■ Time Cooking . . . . . . . . . . . . . . . . . . . . . . . . . . . . . . . . . . . . . . . 14 ■ Auto Sensor Microwaving . . . . . . . . . . . . . . . . . . . . . . . . . . . . . 15 ■ Optional Settings . . . . . . . . . . . . . . . . . . . . . . . . . . . . . . . . . . . . 17 ■ Temperature Cooking . . . . . . . . . . . . . . . . . . . . . . . . . . . . . . . . 18 ■ Automatic Defrost By Weight . . . . . . . . . . . . . . . . . . . . . . . . . . 20 ■ Setting Metric or Imperial System . . . . . . . . . . . . . . . . . . . . . . 21 ■ Quick-On Cooking. . . . . . . . . . . . . . . . . . . . . . . . . . . . . . . . . . . . 22 ■ Custom Programs. . . . . . . . . . . . . . . . . . . . . . . . . . . . . . . . . . . . 23 ■ Turntable Setting . . . . . . . . . . . . . . . . . . . . . . . . . . . . . . . . . . . . 24 ■ Fan Speed Control . . . . . . . . . . . . . . . . . . . . . . . . . . . . . . . . . . . 24 ■ Light. . . . . . . . . . . . . . . . . . . . . . . . . . . . . . . . . . . . . . . . . . . . . . . 24 ■ Beep/Melody Selection . . . . . . . . . . . . . . . . . . . . . . . . . . . . . . 25 ■ Delay Off . . . . . . . . . . . . . . . . . . . . . . . . . . . . . . . . . . . . . . . . . . . 25
COOKING GUIDE
■ Cooking Principles and Techniques. . . . . . . . . . . . . . . . . . . . . . 26 ■ Cooking with Metal Rack . . . . . . . . . . . . . . . . . . . . . . . . . . . . . . 27 ■ Auto Sensor Cooking Guide . . . . . . . . . . . . . . . . . . . . . . . . . . . 28 ■ Sensor Cooking Recipes . . . . . . . . . . . . . . . . . . . . . . . . . . . . . . 30 ■ Temperature Cooking Guide . . . . . . . . . . . . . . . . . . . . . . . . . . . 32 ■ Appetizers and Snacks . . . . . . . . . . . . . . . . . . . . . . . . . . . . . . . . 33 ■ Rice . . . . . . . . . . . . . . . . . . . . . . . . . . . . . . . . . . . . . . . . . . . . . . . 33 ■ Vegetables. . . . . . . . . . . . . . . . . . . . . . . . . . . . . . . . . . . . . . . . . . 34 ■ Meats, Poultry and Fish . . . . . . . . . . . . . . . . . . . . . . . . . . . . . . . 35 ■ Eggs. . . . . . . . . . . . . . . . . . . . . . . . . . . . . . . . . . . . . . . . . . . . . . . 37 ■ Baked Goods and Desserts. . . . . . . . . . . . . . . . . . . . . . . . . . . . . 38
MAINTENANCE
■ Troubleshooting . . . . . . . . . . . . . . . . . . . . . . . . . . . . . . . . . . . . . 39
■ Questions and Answers. . . . . . . . . . . . . . . . . . . . . . . . . . . . . . . 41
■ Care and Cleaning . . . . . . . . . . . . . . . . . . . . . . . . . . . . . . . . . . . 42
■ Warranty . . . . . . . . . . . . . . . . . . . . . . . . . . . . . . . . . . . . . . . . . . . 43
3
MAINTENANCE GUIDE COOKING OPERATION UP SET SAFETY
S9000sci-safety.fm Page 4 Wednesday, September 22, 1999 2:38 PM
SAFETY
PROPER AND SAFE USE OF YOUR OVEN
•The oven must be level.
•The turntable and turntable roller rest must be in the oven during cooking.
•Place the cookware gently on the turntable and handle it carefully to avoid possible breakage.
•Incorrect use of browning dish may cause the turntable to break. See page 7.
•When using the Popcorn feature of this microwave oven, use only the bag sizes specified in the instruction manual.
•The oven has several built-in safety switches to ensure that the power remains off when the door is open. Do not tamper with these switches.
•Do not operate the microwave oven when empty. Operating the oven with no food or food that is extremely low in moisture can cause fire, charring or sparking.
•Do not cook bacon directly on the turntable. Excessive local heating of the turntable may cause it to break.
•Do not heat baby bottles or baby food in the microwave oven. Uneven heating may occur and could cause physical injury.
•Do not heat narrow-necked containers, such as syrup bottles.
•Do not attempt to deep-fry in your microwave oven.
•Do not do home canning in this microwave oven as it is impossible to be sure all contents of the jar have reached boiling temperature.
•Do not use this microwave oven for commercial purposes. This microwave oven is made for household use only.
•To prevent delayed eruptive boiling of hot liquids and beverages or scalding yourself, stir liquid before placing the container in the oven and again halfway through cooking time. Let stand in the oven for a short time and stir again before removing the container.
•The metal rack must be removed from the oven when the rack is not used for cooking.
•Do not leave the temperature probe unplugged in the cavity when operating the oven.
•Do not let the temperature probe touch the side walls, turntable or door of the cavity when in use.
•Do not plug the pointed end of the temperature probe into the socket inside the cavity.
•Do not use the temperature probe in a regular oven. This probe is designed for microwave oven use only.
IMPORTANT SAFETY INSTRUCTIONS
To reduce the risk of fire, electric shock, injury to persons, or exposure to excessive microwave energy when using your appliance, follow basic precautions, including the following :
1. Read all instructions before using the appliance.
2. Read and follow the specific “PRECAUTIONS TO AVOID POSSIBLE EXPOSURE TO EXCESSIVE MICROWAVE ENERGY” on page 2.
4

S9000sci-safety.fm Page 5 Wednesday, September 22, 1999 2:38 PM
Keep in mind the following rules at all times:
a.Do not overcook food. Carefully attend the appliance if paper, plastic, or other combustible materials are placed inside the oven to facilitate cooking.
b.Do not use the oven cavity for storage purposes. Do not store combustible items such as bread, cookies, paper products, etc. inside the oven. If lightning strikes the power line, the oven may turn on by itself.
c.Remove wire twist-ties and metal handles from paper or plastic containers/bags before placing them in the oven.
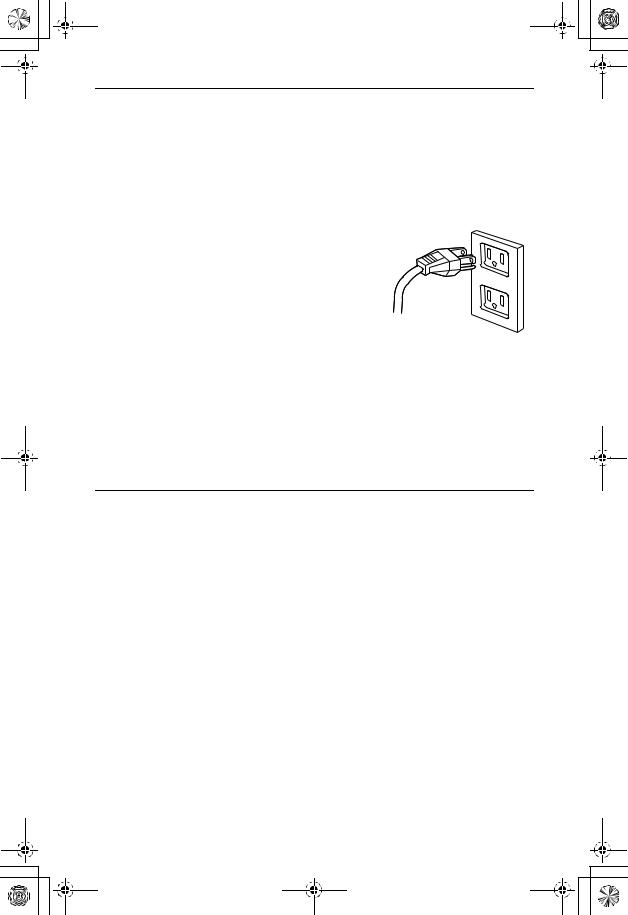
4.This oven must be grounded. Connect only to properly grounded outlet. See “GROUNDING INSTRUCTIONS” on page 6.
5.Install or locate this oven only in accordance with the installation instructions provided on page 9 as well as in the separate Installation Instruction booklet.
6.Some products such as whole eggs, water with oil or fat, sealed containers and closed glass jars may explode and therefore should not be heated in this oven.
7.Use this appliance only for its intended uses as described in the manual. Do not use corrosive chemicals or vapors in this appliance. This oven is specifically designed to heat or cook food. It is not designed for industrial or laboratory use.
8.As with any appliance, close supervision is necessary when used by children.
9.Do not operate this oven if it has a damaged cord or plug, if it is not working properly or if it has been damaged or dropped.
10.This appliance should be serviced only by qualified service technicians. Contact the nearest SANYO authorized service facility for examination, repair or adjustment.
11.Do not cover or block any vents on the oven.
12.Do not store or use this appliance outdoors.
13.Do not use this oven near water, near a kitchen sink, in a wet basement or near a swimming pool.
14.Do not immerse cord or plug in water.
15.Keep cord away from heated surfaces.
16.Do not let cord hang over edge of table or counter.
17.When cleaning door and oven surfaces that meet when door is closed, use only mild, nonabrasive soaps or detergents applied with a sponge or soft cloth. (See “Cleaning” instructions on page 43.)
18.Do not mount over a sink.
19.This oven is suitable for use above both gas and electric cooking equipment.
20.This oven is intended to be used above ranges with maximum width 36 inches.
21.Clean the underside of the microwave oven often. Do not allow grease to build up on the microwave oven or the fan filters.
22.When flaming foods under the hood, turn the fan on.
23.Use care when cleaning the venthood filters. Corrosive cleaning agents, such as lye-based oven cleaners, may damage the filter.
SAVE THESE INSTRUCTIONS
5
SAFETY
S9000sci-safety.fm Page 6 Wednesday, September 22, 1999 2:38 PM
GROUNDING INSTRUCTIONS
 DANGER
Electric Shock Hazard
•Touching some of the internal components can cause serious personal injury or death. Do not disassemble
this appliance.
 WARNING
Electric Shock Hazard
•Improper use of the grounding plug can result in electric shock. Do not plug into an outlet until appliance is properly installed and grounded.
UTENSILS
This appliance must be grounded. In the event of an electrical short circuit, grounding reduces the risk of electric shock by providing an escape wire for the electric current. This appliance is equipped with a cord that has a grounding wire with a grounding plug. The plug must be plugged into an outlet that is properly installed and grounded.
Consult a qualified electrician or serviceman if the grounding instructions are not completely understood or if doubt exists as to whether the appliance is properly grounded.
Do not use an extension cord. If the power supply cord is too short, have a
qualified electrician or serviceman install an outlet near the appliance.
NOTE: If your electric power line or outlet voltage is less than 110 volts, cooking times may be longer. Have a qualified electrician check your electrical system.
 CAUTION
Personal Injury Hazard
•Tightly-closed utensils could explode. Closed containers are opened and plastic pouches pierced before cooking.
See next page for further instructions "Materials you can use in microwave oven or to be avoided in microwave oven."
There may be certain non-metallic utensils that are not safe to use for microwaving. If in doubt, you can test the utensil in question following the procedure below.
Utensil Test:
1.Fill a microwave-safe container with 1 cup of cold water (250 mL) and place it in the oven along with the utensil in question.
2.Cook on maximum power (P100) for 1 minute.
3.Carefully feel the utensil.
If the empty utensil is warm, do not use it for microwave cooking.
Do not exceed 1 minute testing time.
6

S9000sci-safety.fm Page 7 Wednesday, September 22, 1999 2:38 PM
Materials you can use in microwave oven
Utensils |
Remarks |
Aluminum foil |
Shielding only. Small smooth pieces can be used to cover |
|
thin parts of meat or poultry to prevent overcooking. Arcing |
|
can occur if foil is too close to oven walls. The foil should |
|
be at least 1 inch (2.5 cm) away from oven walls. |
Browning dish |
Follow manufacturer's instructions. The bottom of |
|
browning dish must be at least 3/16 inch (5 mm) above the |
|
turntable. Incorrect usage may cause the turntable to break. |
Dinnerware |
Microwave-safe only. Follow manufacturer's instructions. |
|
Do not use cracked or chipped dishes. |
Glass jars |
Always remove lid. Use only to heat food until just warm. |
|
Most glass jars are not heat resistant and may break. |
Glassware |
Heat-resistant oven glassware only. Make sure there is no |
|
metallic trim. Do not use cracked or chipped dishes. |
Oven cooking bags |
Follow manufacturer's instructions. Do not close with metal |
|
tie. Make slits to allow steam to escape. |
Paper plates and |
Use for short-term cooking/warming only. Do not leave |
cups |
oven unattended while cooking. |
Paper towels |
Use to cover food for reheating and absorbing fat. Use with |
|
supervision. For short-term cooking only. |
Parchment paper |
Use as a cover to prevent spattering or as a wrap for |
|
steaming. |
Plastic |
Microwave-safe only. Follow the manufacturer's |
|
instructions. Should be labeled “Microwave Safe”. Some |
|
plastic containers soften as the food inside gets hot. |
|
“Boiling bags” and tightly closed plastic bags should be |
|
slit, pierced or vented as directed by package. |
Plastic wrap |
Microwave-safe only. Use to cover food during cooking to |
|
retain moisture. Do not allow plastic wrap to touch food. |
Thermometers |
Microwave-safe only (meat and candy thermometers). |
Wax paper |
Use as a cover to prevent splattering and to retain |
|
moisture. |
Materials to be avoided in microwave oven
Utensils |
Remarks |
Aluminum tray |
May cause arcing. Transfer food into microwave-safe dish. |
Food carton with |
May cause arcing. Transfer food into microwave-safe dish. |
metal handle |
|
Metal or metal- |
Metal shields the food from microwave energy. Metal trim |
trimmed utensils |
may cause arcing. |
Metal twist ties |
May cause arcing and could cause a fire in the oven. |
Paper bags |
May cause a fire in the oven. |
Plastic foam cups |
Plastic foam may melt or contaminate the liquid inside |
|
when exposed to high temperature. |
Wood |
Wood will dry out when used in the microwave oven and |
|
may split or crack. |
7
SAFETY
S9000sci-assembly.fm Page 8 Wednesday, September 22, 1999 2:38 PM
SET UP
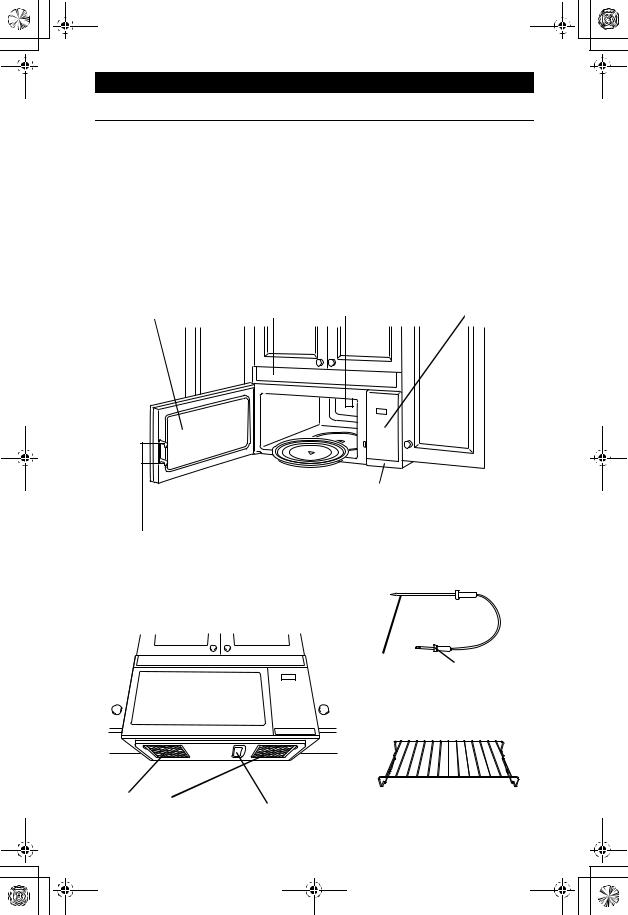
NAMES OF OVEN PARTS AND ACCESSORIES
Remove the oven and all materials from the carton.
Your oven comes with the following materials and accessories:
Turntable |
|
1 |
Grease filter |
2 |
Turntable roller rest |
1 |
Charcoal filter |
2 |
|
Instruction Manual |
1 |
Damper assembly |
1 |
|
Installation Instructions |
1 |
Hardware package |
1 |
|
Cookbook |
|
1 |
Metal rack |
1 |
Upper cabinet template |
1 |
Temperature probe |
1 |
|
Wall template |
1 |
|
|
|
|
Louver |
|
|
|
|
Louver will automatically |
|
|
|
|
open when oven or hood |
Interior light |
Control panel |
|
Door |
fan is in operation. |
|
||
|
|
|
||
Safety interlock system
Shuts off oven power if door is opened during operation.
Door release button
•Press the button to open door.
•When you open the door during the cooking process, cooking will stop but the program will not be canceled. Close the door and touch START to resume cooking.
Temperature probe
Probe sensor
|
The pointed |
Plug |
|
Plug into the |
|
|
metal portion of |
|
|
socket on right |
|
|
the probe which |
|
|
inside wall. |
|
|
is placed into the |
|
|
|
|
|
food. |
|
|
|
|
|
|
|
Grease filters |
Cooktop light |
Metal rack |
Do not run the fan |
Use to cook two or three dishes at |
|
without grease filters. |
|
the same time. |
8
S9000sci-assembly.fm Page 9 Wednesday, September 22, 1999 2:38 PM
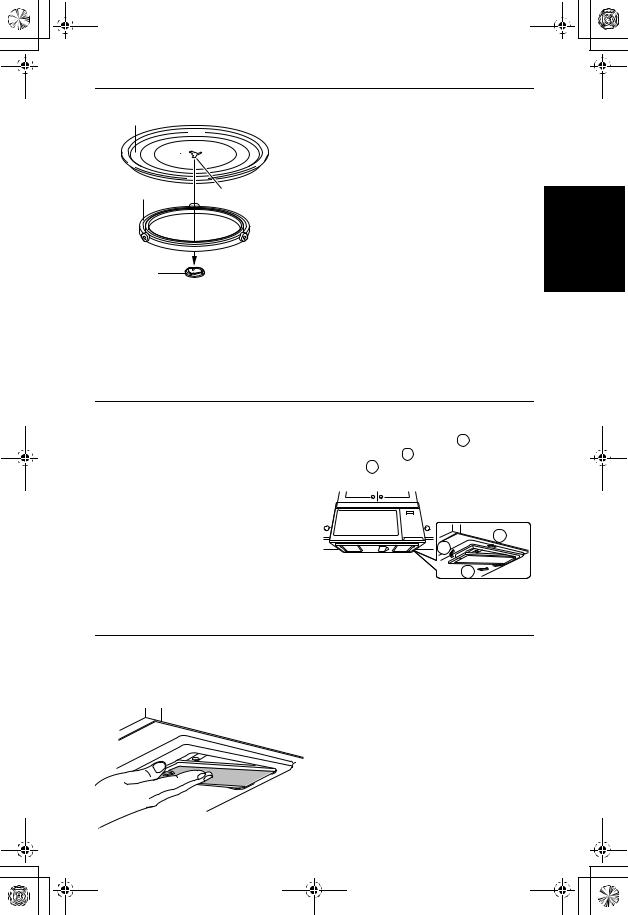
TURNTABLE INSTALLATION
Turntable
Roller rest |
Hub (underside) |
Receptacle
1.Place the roller rest on the cavity bottom.
2.Place the turntable on top of the roller rest as shown in the diagram. Make sure the turntable hub is securely locked in the receptacle.
•Never place the turntable upside down. The turntable should never be restricted.
•Both turntable and roller rest must always be used during cooking.
•All food and containers of food must always be placed on the turntable for cooking.
•The turntable returns to its original starting position when cooking is finished. The light and fan will remain on but microwave power is turned off.
•The turntable rotates clockwise and counterclockwise; this is normal.
•If turntable or roller rest cracks or breaks, contact your nearest authorized service center for more information regarding replacement.
CHARCOAL FILTER INSTALLATION
If the microwave oven has been installed for room venting, the air vented by the fan will be recirculated back into the room through a pair of disposable charcoal filters that help to remove smoke and odors. If these filters become excessively dirty or discolored, they should be replaced. Under normal conditions, these filters should be replaced once every 6 to 12 months.
Charcoal Filter Kit (EMA-400)
If replacement charcoal filters are not available from an authorized dealer in your area, call 1-800-263-2244 for parts ordering information. (See page 44 for more details).
1.Disconnect the power supply.
2.Insert one end of the filter into the back of the opening 1 .
3.Push it up 2 and slide it towards
you 3 until it hangs in place.
3
2
1
Fig
GREASE FILTER INSTALLATION
The reusable metal grease filters trap grease released by food on the cooktop. They also prevent flames from food on the cooktop from damaging the inside of the oven.
1.Disconnect the power supply.
2.Hold the filter with the ring end facing you.
3.Insert the other end into the back of the opening.
4.Slide the filter towards the front and side until it is securely in place.
UP SET
9

S9000sci-oper.fm Page 10 Wednesday, September 22, 1999 2:39 PM
OPERATION
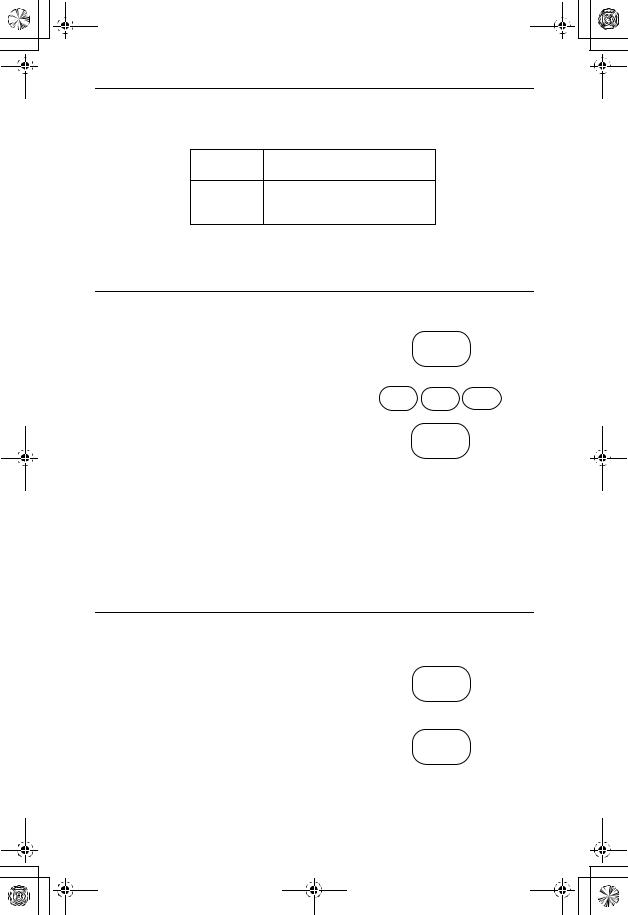
CONTROL PANEL AND FEATURES
Remember: After connecting power supply cord, follow word prompts for setting proper ventilation direction.
The oven will not operate until ventilation direction is selected.
2 |
1 |
|
|
||
|
20 |
|
|
19 |
|
|
18 |
|
3 |
17 |
|
16 |
||
|
15 |
|
|
14 |
|
4 |
13 |
|
|
||
5 |
12 |
|
11 |
||
6 |
||
|
||
7 |
10 |
|
|
||
8 |
9 |
Beep Sound
A beep sounds to confirm your key entry when a keypad is pressed.
10
S9000sci-oper.fm Page 11 Wednesday, September 22, 1999 2:39 PM
CONTROL PANEL AND FEATURES (CONT.)
(1)Display Window
Upper line: Counts down cooking time in minutes and seconds or shows food temperature. Shows clock time when oven is not in use.
The word prompt scrolls to guide you when setting the clock and at every operation stage.
Lower line: Shows power level when using Timed Cooking. Shows Kitchen Timer time when this feature is selected.
(2)Indicators
Indicators light or flash in the display window.
STEP 1/ 2/ 3: Lights to indicate current cooking stage.
DEF: Lights during Auto Defrost. LOCK: Lights to indicate the Child Lock-Out feature is set.
SENSOR: Flashes during Sensor cooking.
MORE/LESS: Lights to indicate MORE/LESS has been entered.
TURNTABLE OFF: Lights when turntable is set not to rotate.
DELAY OFF: Lights to indicate the
DELAY OFF has been selected.
FAN HI/LOW: Shows selected fan speed, High or Low.
START: Flashes to prompt you to
press START.
(3) Auto Sensor keypads (page 15)
CHILLED ENTREE
FROZEN ENTREE PIZZA SLICE POPCORN POTATO
FRESH VEGETABLE
FROZEN VEGETABLE
These Sensor keypads provide accurate and fast microwaving for a variety of popular foods with no guesswork.
SOUP/BEVERAGE
This selection requires entry of number of servings.
MORE/LESS
Used to adjust cooking time for
Auto Sensor cooking.
(4) TURNTABLE ON/OFF (page 24)
To turn turntable on or off.
(5) MELODY/BEEP (page 25)
To change end-of-cooking sound.
(6) KITCHEN TIMER (page 13)
(7)STOP/CLEAR
Clears all previous settings if pressed before cooking starts. Press once to stop oven during cooking. Press twice to stop and
clear all entries. (8) FAN (page 24)
To increase or decrease fan speed. (9) LIGHT (page 24)
To turn the regular light or night light on and off.
(10) DELAY OFF (page 25)
To turn off fan automatically at your selected time.
(11)START
•To start cooking.
•To set and cancel child lock-out.
(12)OPTIONS (page 17)
Allows you to customize the following oven feature settings: word prompt on/off, clock on/off, beep on/off, word speed, language selection, weight selection and turbo exhaust for room venting.
(13)CLOCK (page 12)
(14)Number keys
(15)POWER LEVEL (page 13)
(16)QUICK ON (page 22)
Used with a number key, this feature allows for the immediate start of one of 10 preset times from
30 seconds to 9 minutes.
(17)AUTO DEFROST (page 20)
Provides two options. Press once to set Quick Defrost, twice to set Total
Defrost.
TOTAL DEFROST: Provides thorough defrosting results. QUICK DEFROST: Provides faster defrosting results. This option is excellent for thawing items such as ground meat for use in spaghetti sauce or for tacos.
(18)ADD 30 SEC. (page 21)
(19)TEMP COOK/ROAST (page 18) Used to cook food by temperature.
(20)CUSTOM PROGRAMS (page 23)
11
OPERATION
S9000sci-oper.fm Page 12 Wednesday, September 22, 1999 2:39 PM
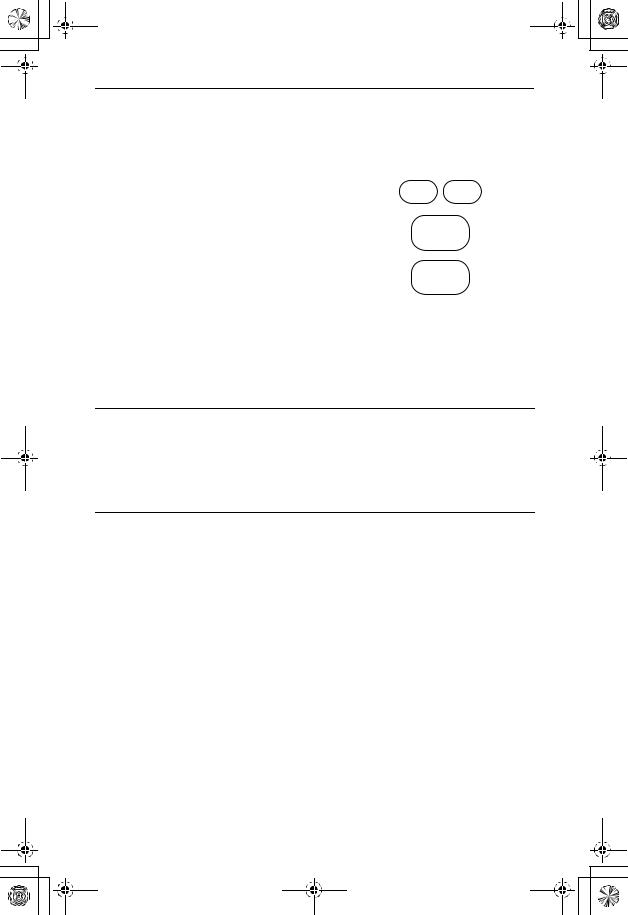
SELECTING VENTILATION DIRECTION
After connecting power supply cord, you must select proper ventilation direction. If your microwave oven has been installed for room venting, press number 1. If your oven has been installed for roof or wall venting, press number 2. This is to be sure to vent exhaust air correctly.
Press |
Vent direction |
1Room Venting
2Roof or Wall Venting
Note: • If you do not select a ventilation direction, you cannot use the oven.
• After a power interruption, reset the proper ventilation direction.
SETTING CLOCK
To set the correct time of day, follow the steps below.
Example: To set 3:15:
1 |
Press CLOCK. |
|
|
|
|
|
CLOCK |
|
|
|
|
|
|
|
|
|
|
|
|
2 |
Press 3, 1 and 5 to enter time of |
3 |
1 |
5 |
day. |
||||
|
|
|
|
|
3 |
Press CLOCK. |
|
|
|
The clock begins counting. |
|
CLOCK |
|
|
|
|
|
|
|
Note: • If the clock (or display) shows any abnormality, unplug the oven from the AC outlet. Plug it in again and then reset the ventilation direction and the clock.
•When your oven is plugged in for the first time or after a power interruption, reset the clock.
•This is a 12-hour clock.
•You can use the oven without setting the clock.
•The clock display can be turned off. See page 17 (Optional Settings) for more details.
CHILD LOCK-OUT
The oven has a safety feature which prevents use by children. This feature locks the operation of the oven until canceled.
To set:
1 |
Press START and hold for 4 seconds. |
|
LOCK appears in the display. |
START |
|
|
|
|
|
|
|
To cancel: |
|
|
|
|
|
1 |
Press START and hold for 4 seconds. |
|
LOCK disappears from the display. |
START |
|
|
||
|
|
|
12

S9000sci-oper.fm Page 13 Wednesday, September 22, 1999 2:39 PM
KITCHEN TIMER
You can set and use the Kitchen Timer function independently, or while a cooking program is in progress. The Kitchen Timer will be displayed on the lower line of the display.
Example: To set timer for 3 minutes:
1 |
Press KITCHEN TIMER. |
|
KITCHEN |
|
|
|
|
||
|
|
TIMER |
|
|
|
|
|
|
|
2 |
Press 3, 0 and 0 to set 3 minutes. |
3 |
0 |
0 |
(up to 99 minutes 99 seconds can be |
||||
|
set.) |
|
|
|
3 |
Press START. |
|
|
|
The timer starts counting and oven will |
|
START |
|
|
|
|
|
||
|
beep for 7 seconds when time is up. |
|
|
|
Note: • To clear a Kitchen Timer setting, press STOP/CLEAR.
If you are using both Kitchen Timer and cooking, press KITCHEN TIMER.
Press STOP/CLEAR while Kitchen Timer indication is flashing in the display. The Kitchen Timer will stop but the oven continues cooking to the end.
•To stop Kitchen Timer beeping, touch KITCHEN TIMER.
•Kitchen Timer will not beep if the oven beeps at the same time to indicate the end of another oven operation.
•If you do not enter a timer time for 10 seconds after step 1, the setting is cleared with a beep.
•If cooking finishes while you are setting the Kitchen Timer, all settings are cleared. Restart from step 1.
•If no key is touched for 5 seconds after the last key entry at step 2 above, the timer automatically starts.
ADD 30 SECONDS
This feature provides 2 functions:
•Allows you to cook for only 30 seconds on P100 (maximum power).
•Allows you to extend a cooking time by 30 seconds during Time Cooking without pressing START. You can repeat this option up to 3 times.
Example: To set 30-second cooking:
1 |
Press ADD 30 SEC. once. |
ADD |
|
||
|
30 SEC. |
|
|
|
|
2 |
Press START. |
|
The display shows time countdown. |
START |
|
|
|
|
Note: This feature cannot be used during Auto Sensor Microwaving or Auto Defrost by Weight.
13
OPERATION
S9000sci-oper.fm Page 14 Wednesday, September 22, 1999 2:39 PM
TIME COOKING
This basic microwave cooking method allows you to cook food for a desired time. The oven can be programmed to cook for up to 99 minutes 99 seconds. In addition to the maximum power level (P100), you can select different microwave power from 10 levels, P0 to P90 (0-90% of total power level). Example: To cook at power level P80 for 40 seconds:
1 |
Enter 40 seconds by pressing 4 and 0. |
4 |
0 |
|
|||
|
|
|
|
2 |
Press POWER LEVEL until P80 appears |
|
POWER |
in the display. |
|
||
|
LEVEL |
||
|
|
|
|
3 |
Press START. |
|
|
|
|
START |
|
|
|
|
|
|
|
|
|
Note: • If no power level is entered, the power level will always be P100 (100%).
•Foods with high moisture content should be cooked on P100 power.
•To check the power level during cooking, press POWER LEVEL.
•To change power level during cooking, Press POWER LEVEL. Power level indication in the display flashes for 3 seconds. During this time, press POWER LEVEL repeatedly until your desired power appears.
POWER LEVEL SETTING GUIDE
P100 • Cooking poultry, vegetables, and |
P50 Medium |
most casseroles. |
• Cooking custards or pasta. |
• Boiling water. |
• Cooking rump roast, ham, veal, lamb. |
• Preheating a browning dish. |
|
P90 • Reheating rice or pasta.
P40 • Cooking less tender cuts of meat in liquid or slow-cooking dishes.
•Completing the cooking cycle of less tender roasts.
P80 |
• Reheating precooked or prepared |
P30 |
Med. Low |
|
food quickly. |
|
• Completing the cooking cycle of |
|
• Cooking fish. |
|
casseroles, stews, sauces. |
|
|
|
• Time defrosting. |
P70 |
Med. High |
P20 |
• Softening chocolate. |
|
• Cooking cheese dishes. |
|
• Clarifying butter. |
|
|
|
• Heating breads, rolls, pancakes, |
|
|
|
tacos, tortillas, French toast. |
P60 |
• Cooking scrambled eggs. |
P10 |
• Softening cream cheese, butter. |
|
• Baking cakes. |
|
• Keeping casseroles warm. |
Time Defrosting:
Use power level P30 (Medium Low). For most frozen foods, allow approximately 5 minutes per 500 g. To speed up the defrosting of dense foods over 500 g, you may start on P100 for 2 minutes. Then reduce to the power level P30 and enter remaining time.
Multistage Cooking:
You can program oven for 3 cooking stages. Each stage can be programmed with a different power level and time. To program 2-stage or 3-stage cooking, repeat the Time cooking steps 1 and 2 and press START. The oven will automatically proceed to the end of cooking stages.
Delay Start Cooking:
You can delay the time when you want cooking to start. Cooking can be delayed up to 99 minutes and 99 seconds. To delay cooking start, follow procedure for multistage cooking, but for stage 1 use power level P 0.
14
 Loading...