


UC360
Table of contents
 Loading...
MITEL
UC360 COLLABORATION POINT
USER GUIDE

NOTICE
The information contained in this document is believed to be accurate in all respects but is not warranted
®
by Mitel Networks™ Corporation (MITEL
). The information is subject to change without notice an d should
not be construed in any way as a commitment by Mitel or any of its affiliates or subsidiaries. Mitel and its
affiliates and subsidiaries assume no responsibility for any errors or omissions in this document. Revisions
of this document or new editions of it may be issued to incorporate such changes.
No part of this document can be reproduced or transmitted in any form or by any means - electronic or
mechanical - for any purpose without written pe rmission from Mitel Networks Corporation.
Trademarks
Mitel, UC360 are trademarks of Mitel Networks Corporation.
Adobe Acrobat Reader is a registered trademark of Adobe Systems Incorporated.
Other product names mentioned in this document may be trademarks of their respective companies and
are hereby acknowledged.
UC360 User Guide
Release 2.1, SP1
June 2014
®,™ Trademark of Mitel Networks Corporation
© Copyright 2014, Mitel Networks Corporation
All rights reserved
ii

Table of Contents
iii
Chapter 1: UC360 New features
UC360 Release 2.1 New Features and Enhancements. . . . . . . . . . . . . . . . . . . . . . . . . . . . . . . . . 3
Release 2.1, SP1 . . . . . . . . . . . . . . . . . . . . . . . . . . . . . . . . . . . . . . . . . . . . . . . . . . . . . . . . . . . . .3
Release 2.1 . . . . . . . . . . . . . . . . . . . . . . . . . . . . . . . . . . . . . . . . . . . . . . . . . . . . . . . . . . . . . . . . . 3
Chapter 2: Introduction
Introduction. . . . . . . . . . . . . . . . . . . . . . . . . . . . . . . . . . . . . . . . . . . . . . . . . . . . . . . . . . . . . . . . . . . 7
UC360 Product Variants. . . . . . . . . . . . . . . . . . . . . . . . . . . . . . . . . . . . . . . . . . . . . . . . . . . . . . . . . 8
UC360 Collaboration Point - Audio Enabled Conferencing . . . . . . . . . . . . . . . . . . . . . . . . . . . . . 8
UC360 Collaboration Point - Video Enabled Conferencing . . . . . . . . . . . . . . . . . . . . . . . . . . . . . 8
About This Document. . . . . . . . . . . . . . . . . . . . . . . . . . . . . . . . . . . . . . . . . . . . . . . . . . . . . . . . . . 10
Related Documentation . . . . . . . . . . . . . . . . . . . . . . . . . . . . . . . . . . . . . . . . . . . . . . . . . . . . . . . . 10
Chapter 3: About the UC360
About the UC360 . . . . . . . . . . . . . . . . . . . . . . . . . . . . . . . . . . . . . . . . . . . . . . . . . . . . . . . . . . . . . 13
Main Screen - Conference App . . . . . . . . . . . . . . . . . . . . . . . . . . . . . . . . . . . . . . . . . . . . . . . . . . 14
Function Keys . . . . . . . . . . . . . . . . . . . . . . . . . . . . . . . . . . . . . . . . . . . . . . . . . . . . . . . . . . . . . .14
Menu Bar . . . . . . . . . . . . . . . . . . . . . . . . . . . . . . . . . . . . . . . . . . . . . . . . . . . . . . . . . . . . . . . . . .15
Action and Display Control Icons . . . . . . . . . . . . . . . . . . . . . . . . . . . . . . . . . . . . . . . . . . . . . . . .16
Status Bar . . . . . . . . . . . . . . . . . . . . . . . . . . . . . . . . . . . . . . . . . . . . . . . . . . . . . . . . . . . . . . . . .17
Network Health . . . . . . . . . . . . . . . . . . . . . . . . . . . . . . . . . . . . . . . . . . . . . . . . . . . . . . . . . . . . .18
Ethernet Trace . . . . . . . . . . . . . . . . . . . . . . . . . . . . . . . . . . . . . . . . . . . . . . . . . . . . . . . . . . . . . .18
Using Gestures. . . . . . . . . . . . . . . . . . . . . . . . . . . . . . . . . . . . . . . . . . . . . . . . . . . . . . . . . . . . . . . 19
Customizing the UC360 . . . . . . . . . . . . . . . . . . . . . . . . . . . . . . . . . . . . . . . . . . . . . . . . . . . . . . . . 19
Activating the UC360 Display . . . . . . . . . . . . . . . . . . . . . . . . . . . . . . . . . . . . . . . . . . . . . . . . . .19
Adjusting the In-Call Volume . . . . . . . . . . . . . . . . . . . . . . . . . . . . . . . . . . . . . . . . . . . . . . . . . . .19
Adjusting the Ringer Volume . . . . . . . . . . . . . . . . . . . . . . . . . . . . . . . . . . . . . . . . . . . . . . . . . . .19
Adjusting Brightness . . . . . . . . . . . . . . . . . . . . . . . . . . . . . . . . . . . . . . . . . . . . . . . . . . . . . . . . . 19
Optional Settings . . . . . . . . . . . . . . . . . . . . . . . . . . . . . . . . . . . . . . . . . . . . . . . . . . . . . . . . . . . .20
Sound/Keyboard Click . . . . . . . . . . . . . . . . . . . . . . . . . . . . . . . . . . . . . . . . . . . . . . . . . . . . .20
Keypad Home Screen . . . . . . . . . . . . . . . . . . . . . . . . . . . . . . . . . . . . . . . . . . . . . . . . . . . . .20
Using Clean Mode . . . . . . . . . . . . . . . . . . . . . . . . . . . . . . . . . . . . . . . . . . . . . . . . . . . . . . . . . . . . 21
Unmounting Media . . . . . . . . . . . . . . . . . . . . . . . . . . . . . . . . . . . . . . . . . . . . . . . . . . . . . . . . . . . . 21

UC360 User Guide
iv
Using the Keyboard . . . . . . . . . . . . . . . . . . . . . . . . . . . . . . . . . . . . . . . . . . . . . . . . . . . . . . . . . . . 21
Chapter 4: Conference App
Introduction. . . . . . . . . . . . . . . . . . . . . . . . . . . . . . . . . . . . . . . . . . . . . . . . . . . . . . . . . . . . . . . . . . 25
Emergency Calls . . . . . . . . . . . . . . . . . . . . . . . . . . . . . . . . . . . . . . . . . . . . . . . . . . . . . . . . . . . .25
Accessing Help . . . . . . . . . . . . . . . . . . . . . . . . . . . . . . . . . . . . . . . . . . . . . . . . . . . . . . . . . . . . .25
Making a Conference Call. . . . . . . . . . . . . . . . . . . . . . . . . . . . . . . . . . . . . . . . . . . . . . . . . . . . . . . 26
Preparing for a Video Call . . . . . . . . . . . . . . . . . . . . . . . . . . . . . . . . . . . . . . . . . . . . . . . . . . . . .26
Activating the HDMI Display . . . . . . . . . . . . . . . . . . . . . . . . . . . . . . . . . . . . . . . . . . . . . . . . .26
Adjusting the Camera . . . . . . . . . . . . . . . . . . . . . . . . . . . . . . . . . . . . . . . . . . . . . . . . . . . . . .26
Making an Audio or Video Conference Call . . . . . . . . . . . . . . . . . . . . . . . . . . . . . . . . . . . . . . . .27
Using Redial . . . . . . . . . . . . . . . . . . . . . . . . . . . . . . . . . . . . . . . . . . . . . . . . . . . . . . . . . . . . . . . .27
Using Camera Control . . . . . . . . . . . . . . . . . . . . . . . . . . . . . . . . . . . . . . . . . . . . . . . . . . . . . . . .28
Adding Calls to a Conference. . . . . . . . . . . . . . . . . . . . . . . . . . . . . . . . . . . . . . . . . . . . . . . . . . . . 29
About Incoming Calls . . . . . . . . . . . . . . . . . . . . . . . . . . . . . . . . . . . . . . . . . . . . . . . . . . . . . . . . .30
Placing a Conference Call on Hold. . . . . . . . . . . . . . . . . . . . . . . . . . . . . . . . . . . . . . . . . . . . . . . . 31
To talk with a caller privately . . . . . . . . . . . . . . . . . . . . . . . . . . . . . . . . . . . . . . . . . . . . . . . . . . .32
Muting a Conference Call . . . . . . . . . . . . . . . . . . . . . . . . . . . . . . . . . . . . . . . . . . . . . . . . . . . . . . . 33
Ending a Conference Call. . . . . . . . . . . . . . . . . . . . . . . . . . . . . . . . . . . . . . . . . . . . . . . . . . . . . . . 34
Cleaning Up after a Conference Call . . . . . . . . . . . . . . . . . . . . . . . . . . . . . . . . . . . . . . . . . . . . . . 35
Additional Information You May Need to Know . . . . . . . . . . . . . . . . . . . . . . . . . . . . . . . . . . . . . . 36
Audio Calls . . . . . . . . . . . . . . . . . . . . . . . . . . . . . . . . . . . . . . . . . . . . . . . . . . . . . . . . . . . . . . . . .36
Video Calls . . . . . . . . . . . . . . . . . . . . . . . . . . . . . . . . . . . . . . . . . . . . . . . . . . . . . . . . . . . . . . . . .36
Conference Call Avatar . . . . . . . . . . . . . . . . . . . . . . . . . . . . . . . . . . . . . . . . . . . . . . . . . . . . . . .37
Chapter 5: Contacts App
About Contacts . . . . . . . . . . . . . . . . . . . . . . . . . . . . . . . . . . . . . . . . . . . . . . . . . . . . . . . . . . . . . . . 41
Finding Contacts. . . . . . . . . . . . . . . . . . . . . . . . . . . . . . . . . . . . . . . . . . . . . . . . . . . . . . . . . . . . . . 41
Calling a Contact . . . . . . . . . . . . . . . . . . . . . . . . . . . . . . . . . . . . . . . . . . . . . . . . . . . . . . . . . . . . . 42
Searching for a Contact . . . . . . . . . . . . . . . . . . . . . . . . . . . . . . . . . . . . . . . . . . . . . . . . . . . . . . . . 43
Using the Keypad . . . . . . . . . . . . . . . . . . . . . . . . . . . . . . . . . . . . . . . . . . . . . . . . . . . . . . . . . . . . . 44
Dialing a URI. . . . . . . . . . . . . . . . . . . . . . . . . . . . . . . . . . . . . . . . . . . . . . . . . . . . . . . . . . . . . . . . . 45
What is a URI? . . . . . . . . . . . . . . . . . . . . . . . . . . . . . . . . . . . . . . . . . . . . . . . . . . . . . . . . . . . . . .45

Table of Contents
v
Chapter 6: Desktop Apps
About Using Desktop Applications . . . . . . . . . . . . . . . . . . . . . . . . . . . . . . . . . . . . . . . . . . . . . . . . 49
Displaying and Sharing Presentations . . . . . . . . . . . . . . . . . . . . . . . . . . . . . . . . . . . . . . . . . . . .49
Display a Presentation on a Video Call . . . . . . . . . . . . . . . . . . . . . . . . . . . . . . . . . . . . . . . . . . . . 50
Displaying your presentation . . . . . . . . . . . . . . . . . . . . . . . . . . . . . . . . . . . . . . . . . . . . . . . . . . .50
Using the Presentation Controls . . . . . . . . . . . . . . . . . . . . . . . . . . . . . . . . . . . . . . . . . . . . . . . .51
Selecting What Participants See on the Display . . . . . . . . . . . . . . . . . . . . . . . . . . . . . . . . .52
More About Video Calls . . . . . . . . . . . . . . . . . . . . . . . . . . . . . . . . . . . . . . . . . . . . . . . . . . . .52
Tips on Presentation Sharing and Video . . . . . . . . . . . . . . . . . . . . . . . . . . . . . . . . . . . . . . .53
Paused Applications . . . . . . . . . . . . . . . . . . . . . . . . . . . . . . . . . . . . . . . . . . . . . . . . . . . . . .53
Accessing More Functionality While in Applications . . . . . . . . . . . . . . . . . . . . . . . . . . . . . . . 54
Using MiCollab Conference . . . . . . . . . . . . . . . . . . . . . . . . . . . . . . . . . . . . . . . . . . . . . . . . . . . .55
Using the Browser . . . . . . . . . . . . . . . . . . . . . . . . . . . . . . . . . . . . . . . . . . . . . . . . . . . . . . . . . . .56
Opening Attachments from Web-based Email . . . . . . . . . . . . . . . . . . . . . . . . . . . . . . . . . . .57
Support for Web-Based Media . . . . . . . . . . . . . . . . . . . . . . . . . . . . . . . . . . . . . . . . . . . . . . .58
Dialing Phone Numbers from the Web Browser . . . . . . . . . . . . . . . . . . . . . . . . . . . . . . . . . .58
Settings and Privacy . . . . . . . . . . . . . . . . . . . . . . . . . . . . . . . . . . . . . . . . . . . . . . . . . . . . . . . . . 59
Using SmartOffice . . . . . . . . . . . . . . . . . . . . . . . . . . . . . . . . . . . . . . . . . . . . . . . . . . . . . . . . . . .60
Launching SmartOffice . . . . . . . . . . . . . . . . . . . . . . . . . . . . . . . . . . . . . . . . . . . . . . . . . . . . .60
Clicking Web Links in Smart Office Documents . . . . . . . . . . . . . . . . . . . . . . . . . . . . . . . . . .61
Limitations of Using Picsel SmartOffice and Google Docs on the UC360 . . . . . . . . . . . . . .61
Using Cisco WebEx . . . . . . . . . . . . . . . . . . . . . . . . . . . . . . . . . . . . . . . . . . . . . . . . . . . . . . . . . .62
Using Join.Me . . . . . . . . . . . . . . . . . . . . . . . . . . . . . . . . . . . . . . . . . . . . . . . . . . . . . . . . . . . . . .63
Limitations of Using join.me . . . . . . . . . . . . . . . . . . . . . . . . . . . . . . . . . . . . . . . . . . . . . . . . .63
Some Practical Applications for join.me . . . . . . . . . . . . . . . . . . . . . . . . . . . . . . . . . . . . . . . .63
Using Remote RDP . . . . . . . . . . . . . . . . . . . . . . . . . . . . . . . . . . . . . . . . . . . . . . . . . . . . . . . . . .64
Setting Up Your Computer to Use Remote Desktop . . . . . . . . . . . . . . . . . . . . . . . . . . . . . . 64
Launching Your RDP Session . . . . . . . . . . . . . . . . . . . . . . . . . . . . . . . . . . . . . . . . . . . . . . .65
Pre-Saved Remote Computer . . . . . . . . . . . . . . . . . . . . . . . . . . . . . . . . . . . . . . . . . . . . . . .67
Using Remote VNC . . . . . . . . . . . . . . . . . . . . . . . . . . . . . . . . . . . . . . . . . . . . . . . . . . . . . . . . . .68
Basic Rules on How Presentation Sharing Works . . . . . . . . . . . . . . . . . . . . . . . . . . . . . . . . . . .69
Appendix A : External Keyboard - Supported Keys
External Keyboard - Supported Keys . . . . . . . . . . . . . . . . . . . . . . . . . . . . . . . . . . . . . . . . . . . . . . 73
Qwerty Keyboard Support . . . . . . . . . . . . . . . . . . . . . . . . . . . . . . . . . . . . . . . . . . . . . . . . . . . . .74
Azerty Keyboard Support . . . . . . . . . . . . . . . . . . . . . . . . . . . . . . . . . . . . . . . . . . . . . . . . . . . . . .76

UC360 User Guide
vi
Appendix B : Using Picsel SmartOffice
Using Picsel SmartOffice . . . . . . . . . . . . . . . . . . . . . . . . . . . . . . . . . . . . . . . . . . . . . . . . . . . . . . . 81
UC360 SmartOffice Support . . . . . . . . . . . . . . . . . . . . . . . . . . . . . . . . . . . . . . . . . . . . . . . . .81
Editing User Interface Basics . . . . . . . . . . . . . . . . . . . . . . . . . . . . . . . . . . . . . . . . . . . . . . . .82

CHAPTER 1
UC360 NEW FEATURES

UC360 User Guide
2

UC360 New features
3
UC360 Release 2.1 New Features and Enhancements
This section of the document briefly describes the new features and enhancements availab le
on the Mitel
®
UC360 Collaboration Point with Release 2.1 software.
Release 2.1, SP1
The following features are introduced in Mitel UC360 Collaboration Point, Release 2.1, SP1:
• The Redial feature stores the last 5 numbers dialed from the keypad or the number of a
dialed contact. See “Using Redial” on page 27.
• Y ou can add a + char acter as the first digit for international dialing. See “Using the Keyp ad”
on page 44.
• New Camera Control functionality
- You can change the status of the camera at any point during a call. See “Using
Camera Control” on page 28.
- New camera status icons in the upper right corner indicate whether the ca mer a is on
or off. See “Status Bar” on page 18.
Release 2.1
The following features are being introduced in Mitel UC360 Collaboration Point, Release 2.1.
• UI Improvements
- The UC360 product variant is indicated on the main screen: Video Enabled
Conferencing or Audio Enabled Conferencing. See “Main Screen - Conference App”
on page 14.
- New icons for one-touch access to make calls, access contacts, start a presentation,
enable self view, and close all apps. See “Action and Display Control Icons” on
page 16.
- On-line help is now available — press on any active screen.
• Support for two extension microphones.
• Sound — this option can be enabled by you r administrator a nd allows you to hea r audible
clicks for selections and keyboard input. See “Sound/Keyboard Click” on page 21.
• Incoming and Outgoing Call Improvements -an inco ming call appears on a conference
avatar instead of the call fly-out bar. The call fly-out bar has been removed. See “Adding
Calls to a Conference” on page 29.
• Mute/Light Indicator — you will see a red light displayed above the mute button while it’s
muted. See “Muting a Conference Call” on page 33.
• New Presentation Controls window/overlay — when you launch an application, you will see
the Presentation Controls window that allows you to change the display mode, close all
apps, launch a new application, and move the overlay up or down. See “Using the Presentation Controls” on page 51.

UC360 User Guide
4
• Default Dial Pad display — an option that allows the dial pad to be the main window
displayed. This option is enabled by your administrator. See “Keypad Home Screen” on
page 21.
• New desktop applications:
- The MiCollab Conference icon provides access to easily launch MiCollab
Conference. See “Using MiCollab Conference ” on pag e 55.
- The Files icon provides one-touch access to open files in Smart Office 2. See
“Using SmartOffice” on page 60.
- The Remote VNC icon provides remote access for Mac or Linux desktops. See
“Using Remote VNC” on page 68.
- The Cisco WebEx™ Meetings icon provides a simple screen sharing tool to
share your desktop. See “Using Cisco WebEx” on page 62.

CHAPTER 2
INTRODUCTION

UC360 User Guide
6
Introduction
7
Introduction
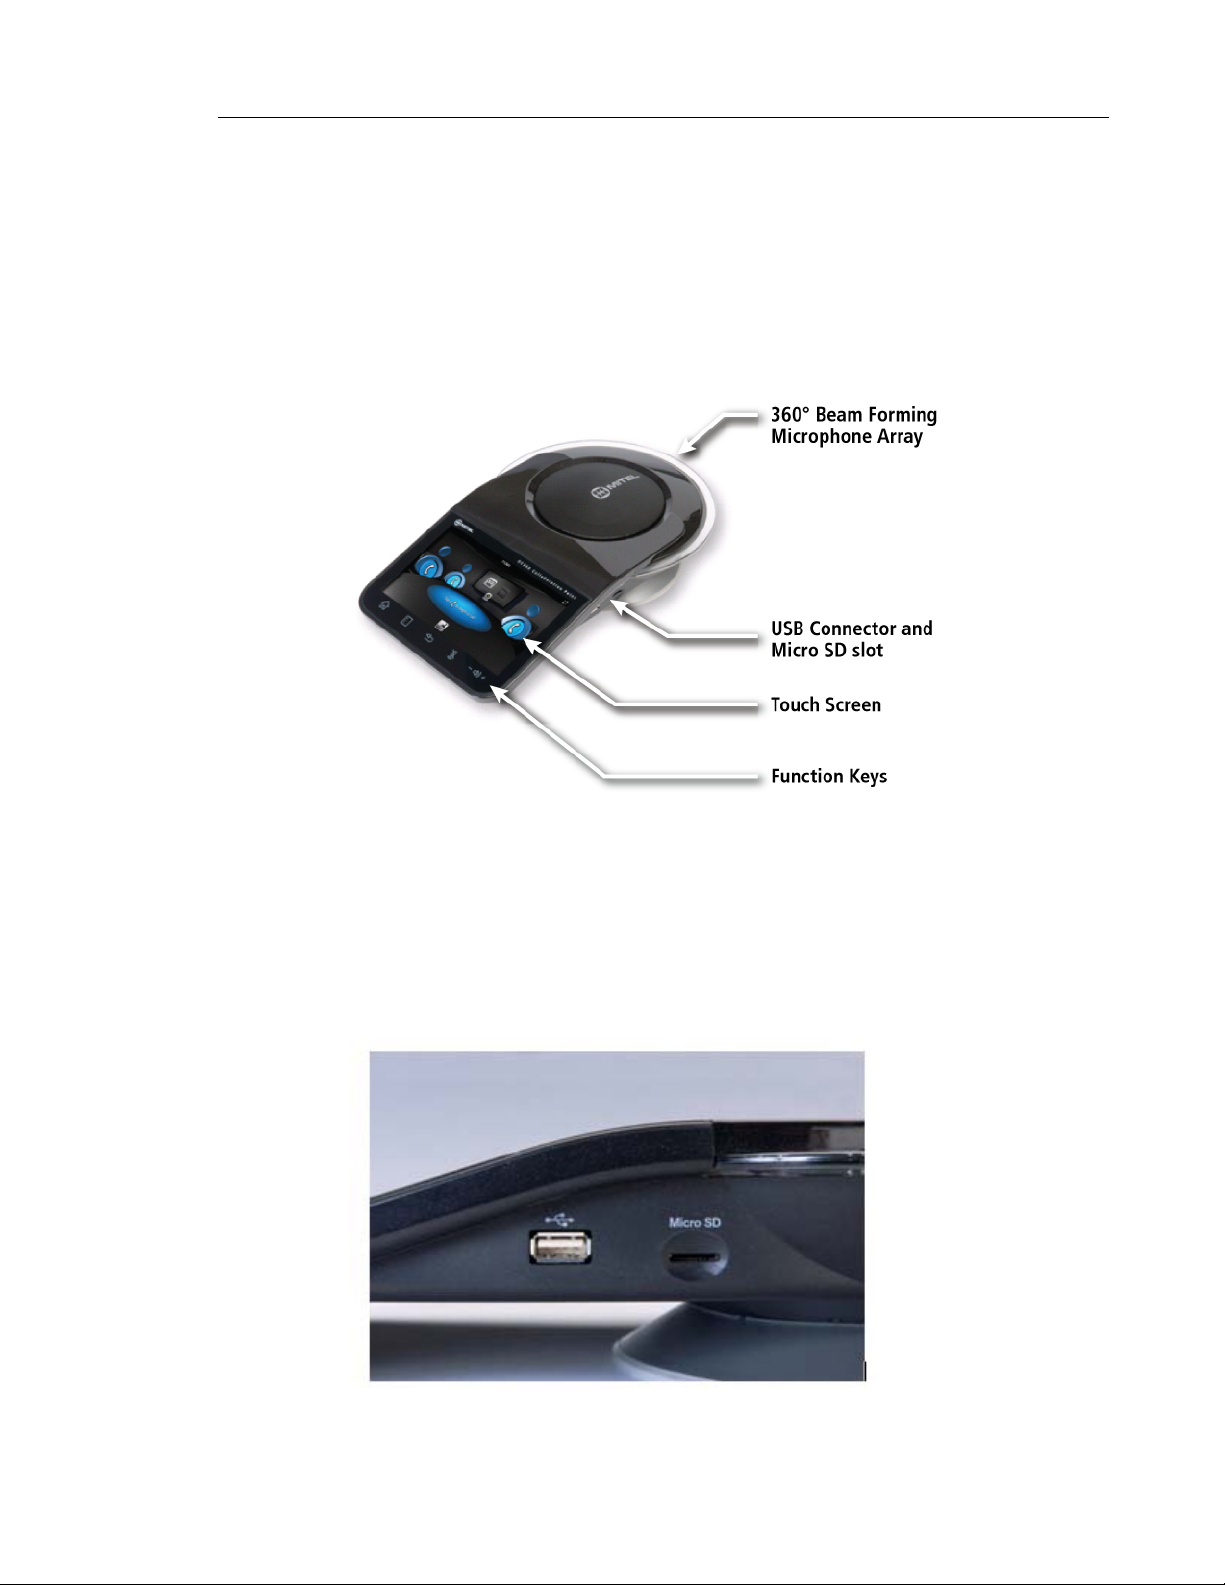
Mitel's UC360™ Collaboration Point is an all-in-one multimedia collaboration appliance that
provides multi-party audio and video conferencing, in-room presentation display, and remote
collaboration for personal office meeting areas and conference rooms.
The UC360 has a large 7-inch color multi-touch display screen. The LCD display has a
resolution of 1024 x 600 and has a backlight with adjustable brightness.
It has a patented beam forming microphone array that delivers 360° audio clarity for all
participants. It automatically locates the talker in the room and attenu ates background noise
by adjusting the microphone sensitivity towards the current talker. It provides visual indication
of the active speaker.
USB and Micro SD connectors are provided on the side of unit for quickly accessing files and
presentations.

UC360 User Guide
8
UC360 Product Variants
The UC360 Collaboration Point comes in two product variants:
• MiVoice Conference Unit
• MiVoice Video Unit
The product variant is indicated on the main UC360 screen: Video Enabled Conferencing or
Audio Enabled Conferencing. These product variants are described below.
UC360 Collaboration Point - Audio Enabled Conferencing
Audio Enabled Conferencing allows you to have up to a 4-party (UC360 and 3 parties) audio
conference call and make in-room presentations to the HDMI device. In summary, it provides
• HD audio with 4-party audio bridge
• 16 beam forming microphones
• In-room presentation display (Mitel MiCollab Conference , Browser, Picsel® Sm artOffice™,
Cisco WebEx™ Meetings, join.me™ and Remote RDP)
UC360 Collaboration Point - Video Enabled Conferencing
Video Enabled Conferencing provides the same functionality as the Audio Enabled
Conferencing. It also allows you to have up to a 4-party (UC360 and 3 parties) vid eo conference
call and to share a presentation with other remote participants. In summary, it provides
• HD audio with 4-party audio and HD video bridge
• Presentation display to remote participants
• Point-to-point video
This document includes procedures for bo th UC360 product variants.
In summary, the UC360 Collaboration Point provides:
• Superior audio conferencing capability, including a beam forming microphone array
• Built-in presentation display capability via HDMI interface that supports connection to high
definition LCD display/projector
• Built-in compatible MS Office readers and editors
• Access to the Browser for Gmail and Outlook Web Access, and for web-based content
• Access to simple screen sharing tools (Mitel MiCollab Conference, Cisco WebEx™ Meetings and join.me™)
• Remote desktop access (no need to bring laptop to give a presentation)
• Support for multiple file access methods, including USB Flash Drive, micro SD Card,
Dropbox™ , Google® Docs, and Box.net

Introduction
9
• Audio conferences for up to four parties
• High Definition video conferencing for up to four parties with an integr ated conference bridge
• Support for integration with Active Directory and LDAP
• Ability to display remote presentations

UC360 User Guide
10
About This Document
This document contains the following information :
• a general description of the UC360 Collaboration Point, its interface, menu bars, and icons
• additional user information not covered in the Quick Reference Card
Related Documentation
See the following documents for more information on the UC360 Collaboration Point.
• UC360 Installation Guide - this guide provides instr uctions on how to physically conne ct
the UC360.
• UC360 Universal Camera Mount Installation Guide — this guide provides instructions
on how to mount the UC360 universal camera mounting bracket a nd camera to the display
monitor.
• Revolabs Dual Channel System Microphones Installatio n Guide — this guide provides
instructions on how to install and pair extension microphones for the UC360.
• UC360 Quick Reference - this guide provides basic procedur es on ho w to ma ke
conference calls, handle calls, and do in-room and remote presentations.
• UC360 Administration Guide - this guide provides information on how to configure the
UC360 and how to configure the settings in MiVoice Business and the 5000 CP.
• UC360 Engineering Guidelines - this guide provides information on the UC360
engineering requirements.
• MiV o ic e Bu sines s Sy st em Admi nist rat ion Tool Online Help - Refer to this online help
system for instructions on how to program SIP devices on the MiVoice Business system.
To access UC360 and system-specific documentation:
1. In your browser, go to http://www.edocs.mitel.com.
2. Select a documentation suite from the following drop-down menus:
- Applications -> Conferencing and Collaboration -> UC360 Collaboration Point
- End User Documents
3. Log in if asked to do so.
4. To view a document, click on the document title.

CHAPTER 3
ABOUT THE UC360

UC360 User Guide
12

About the UC360
13
About the UC360
Read this chapter to learn more about the UC360 and how to use it.
The UC360 has the following applications:
• Conference App — see “Conference App” on page 23
• Contacts App — see “Contacts App” on page 39
• MiCollab Conference — see “Using MiCollab Conference” on page 55
• Browser — see “Using the Browser” on page 56
• Picsel SmartOffice 2 — see “Using SmartOffice” on page 60
• Cisco WebEx Meeting — see “Using Cisco WebEx” on page 62
• join.me — see “Using Join.Me” on page 63
• Remote (RDP) — see “Using Remote RDP” on page 64
• Remote VNC — see “Using Remote VNC” on page 68
UC360 User Guide
14
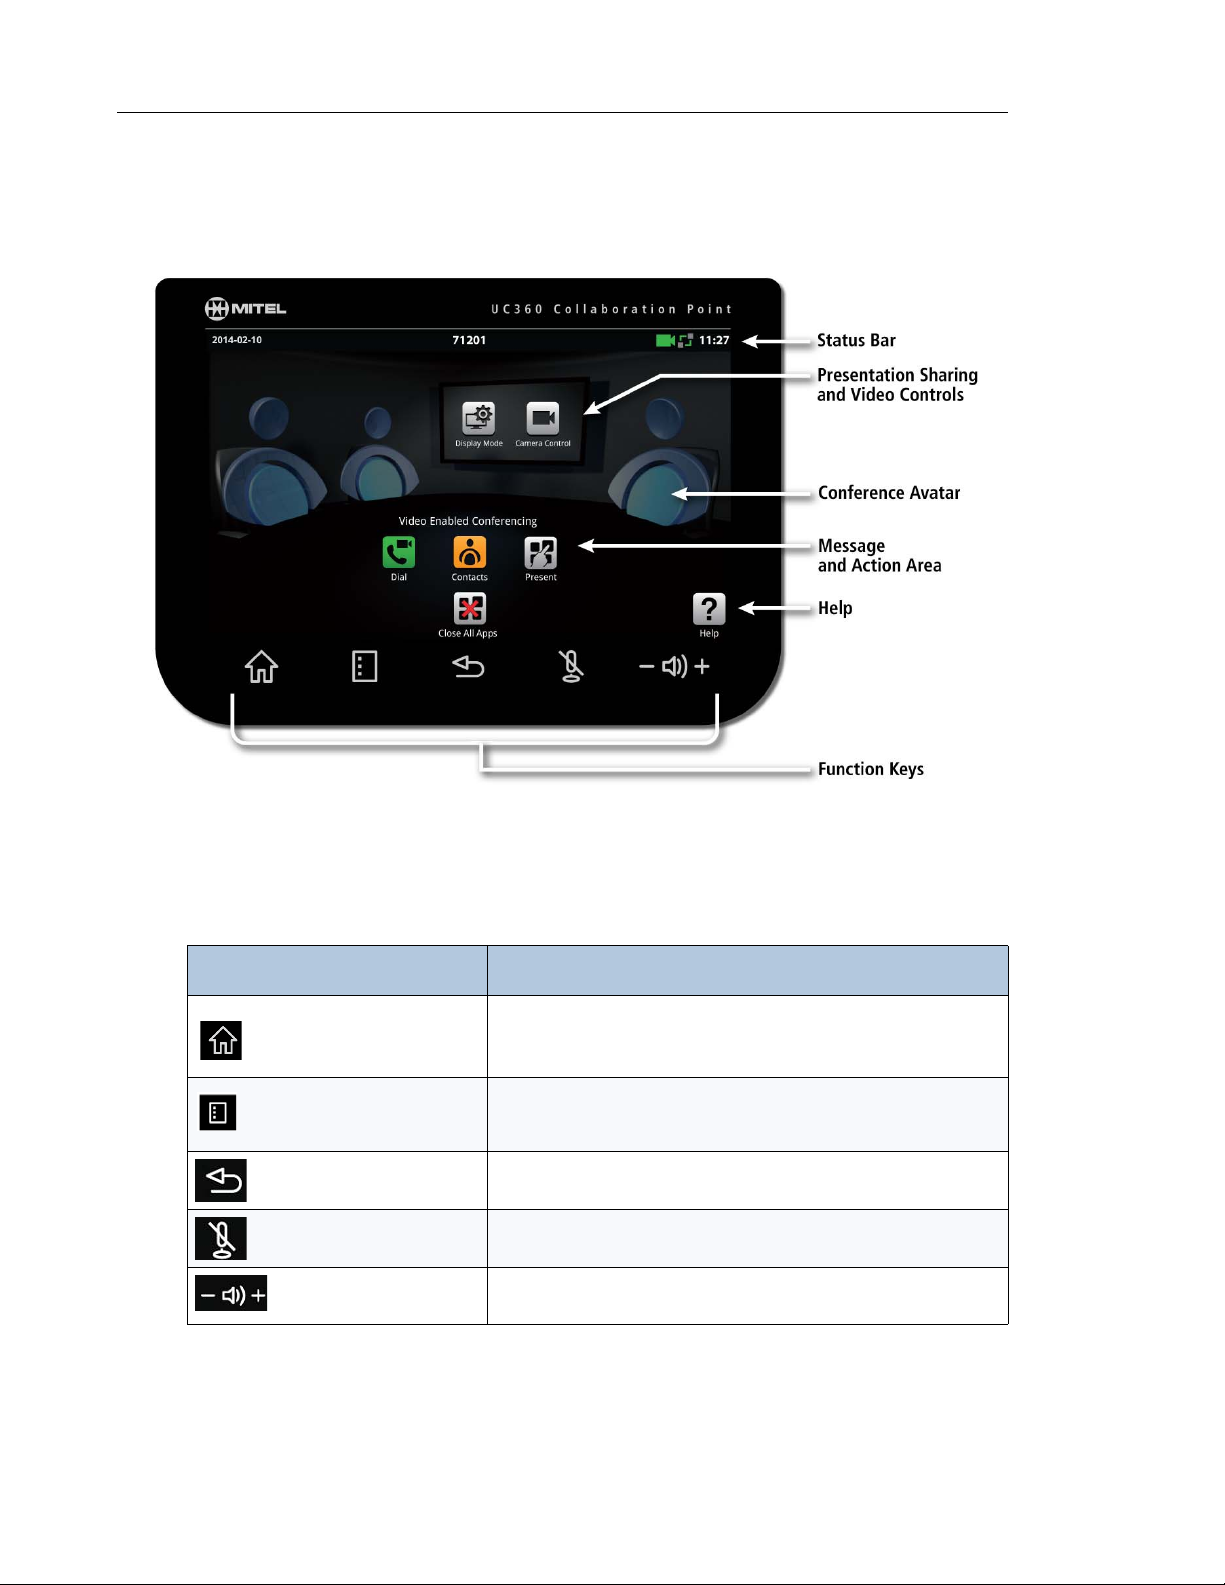
Main Screen - Conference App
The high-resolution touch screen and simple finger gestures make it easy to use the UC360.
Function Keys
Function Button Press to ...
Home
Menu
Back
Mute
Volume
Go to the Home screen
Display the Menu bar. See the “Menu Bar” on page 15
Go back one menu or to the previous screen
Turn the microphone on or off
Increase or decrease the volume
About the UC360
15
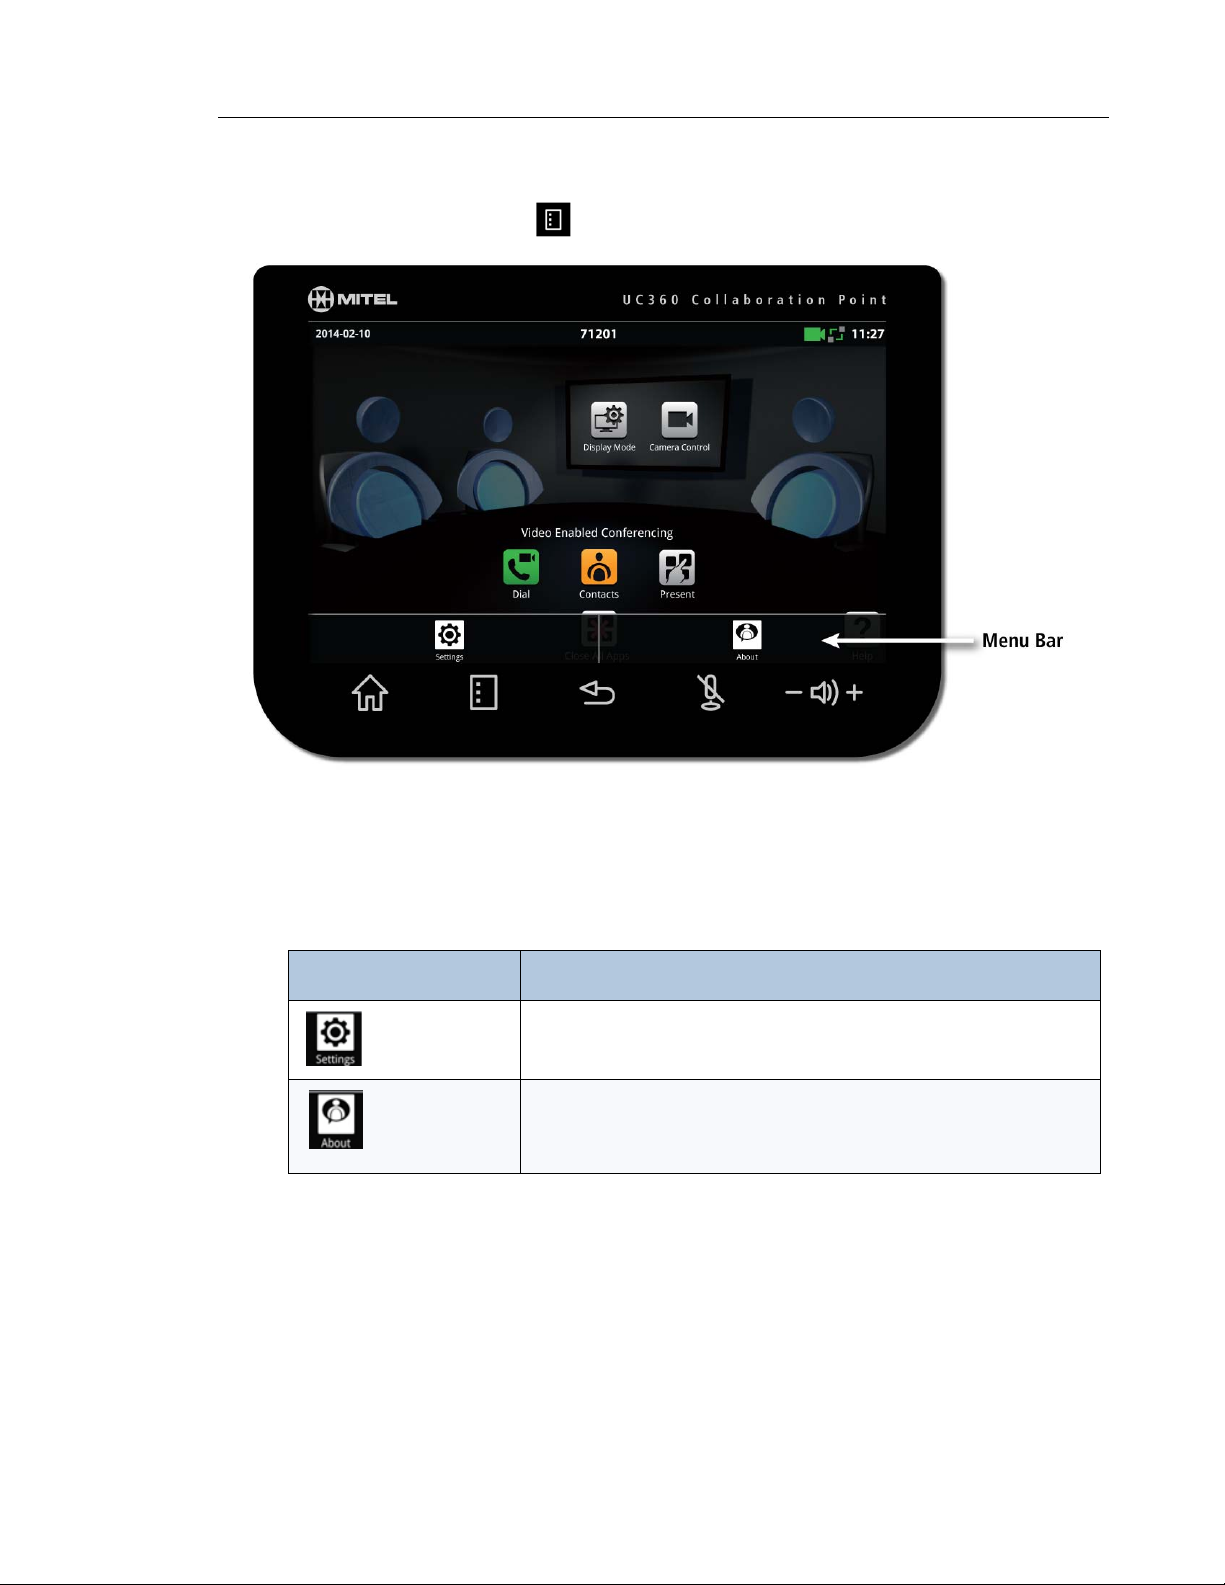
Menu Bar
When you press the Menu button, the menu bar is displayed.
Menu Button Press to ...
Settings
About
Open the Settings menu
Display information about the UC360 and the product variant, hardware
and software version.
UC360 User Guide
16
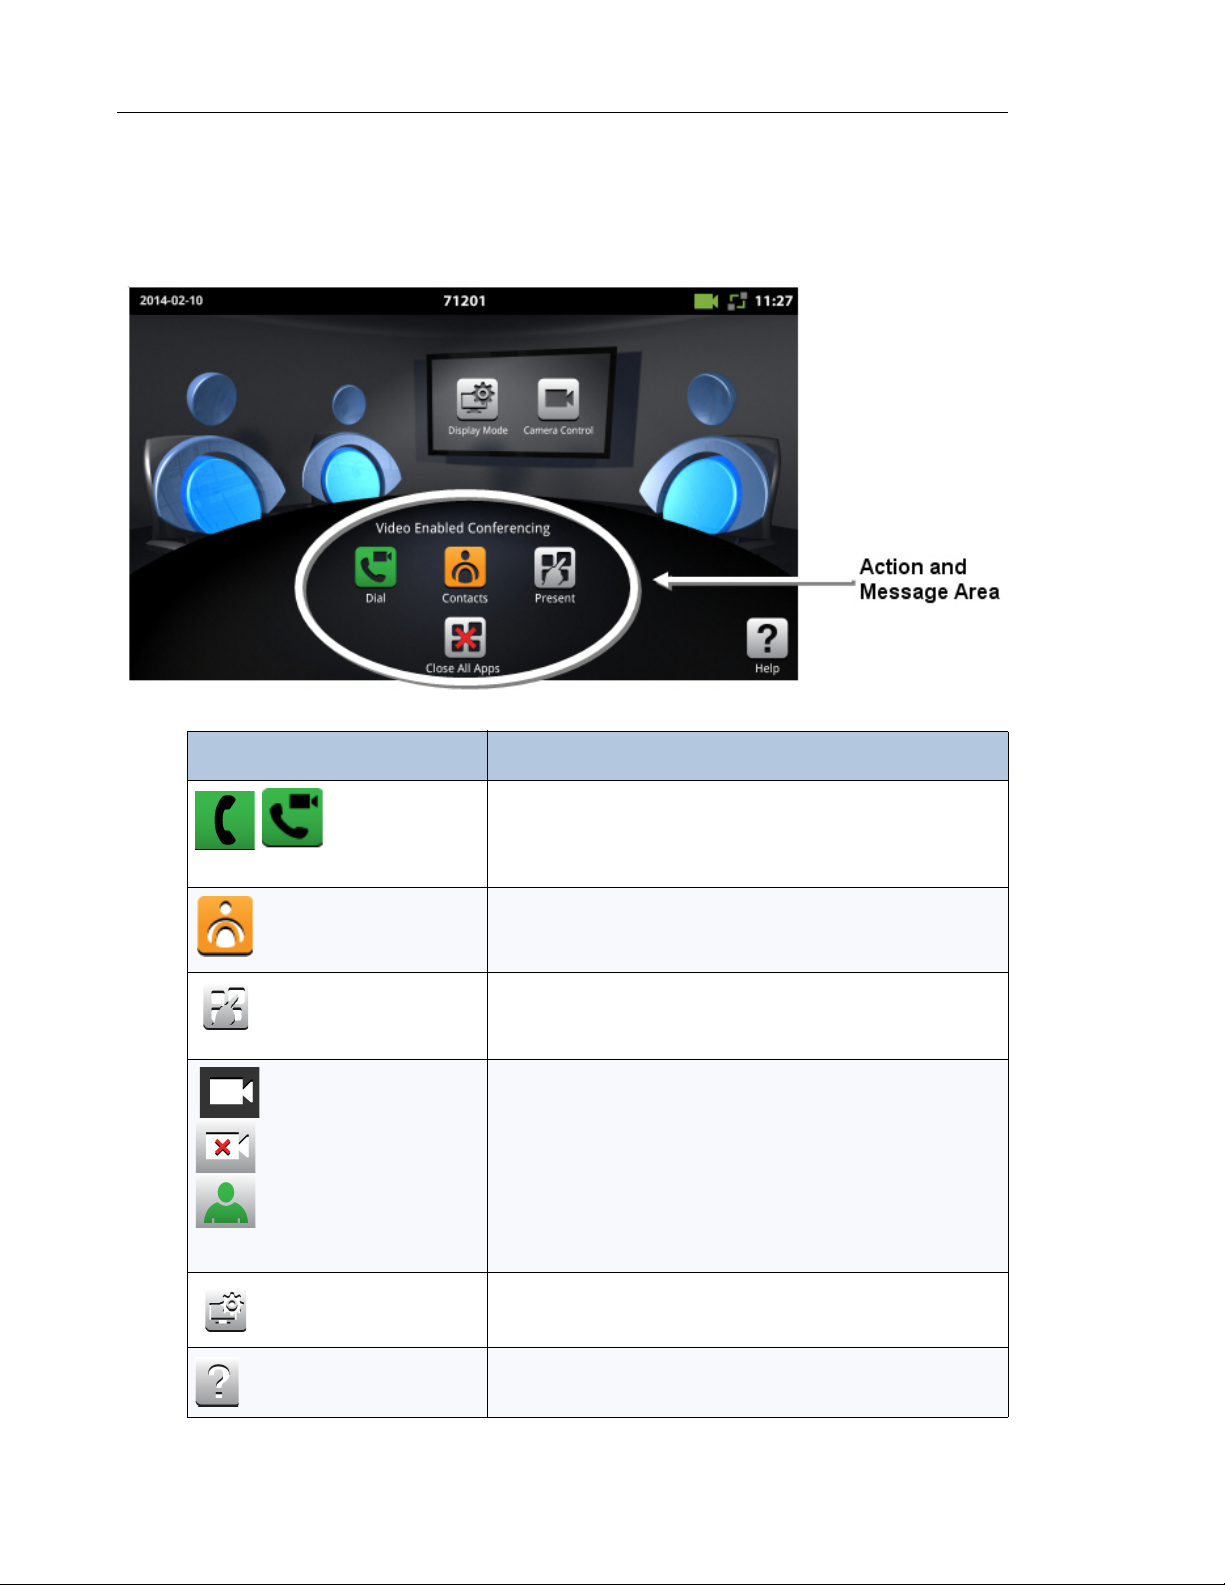
Action and Display Control Icons
The icons on the UC360 display screen allow you to quickly and easily make calls, access
contacts, share presentations, control the camera and access Help.
Icon Press to ...
Phone only - Tap to open the keypad and enter numbers to
make an audio call
Phone and camera - Tap to open the keypad to make a
audio/video call
Tap to open the Contacts App, select a contact and make a call
Launch an application for a presentation
This icon is available if the HDMI monito r is turned on and the
camera is configured.
Tap to open the Camera Control dialog.
Tap to Turn Camera Off
Tap to Turn Self View On
.
Note: For an Audio-Enabled UC360, the Camera Control icon
is not available.
Select what participants will see: App Only, App & Video, Video
Only, Nothing
Opens help on any active screen
About the UC360
17
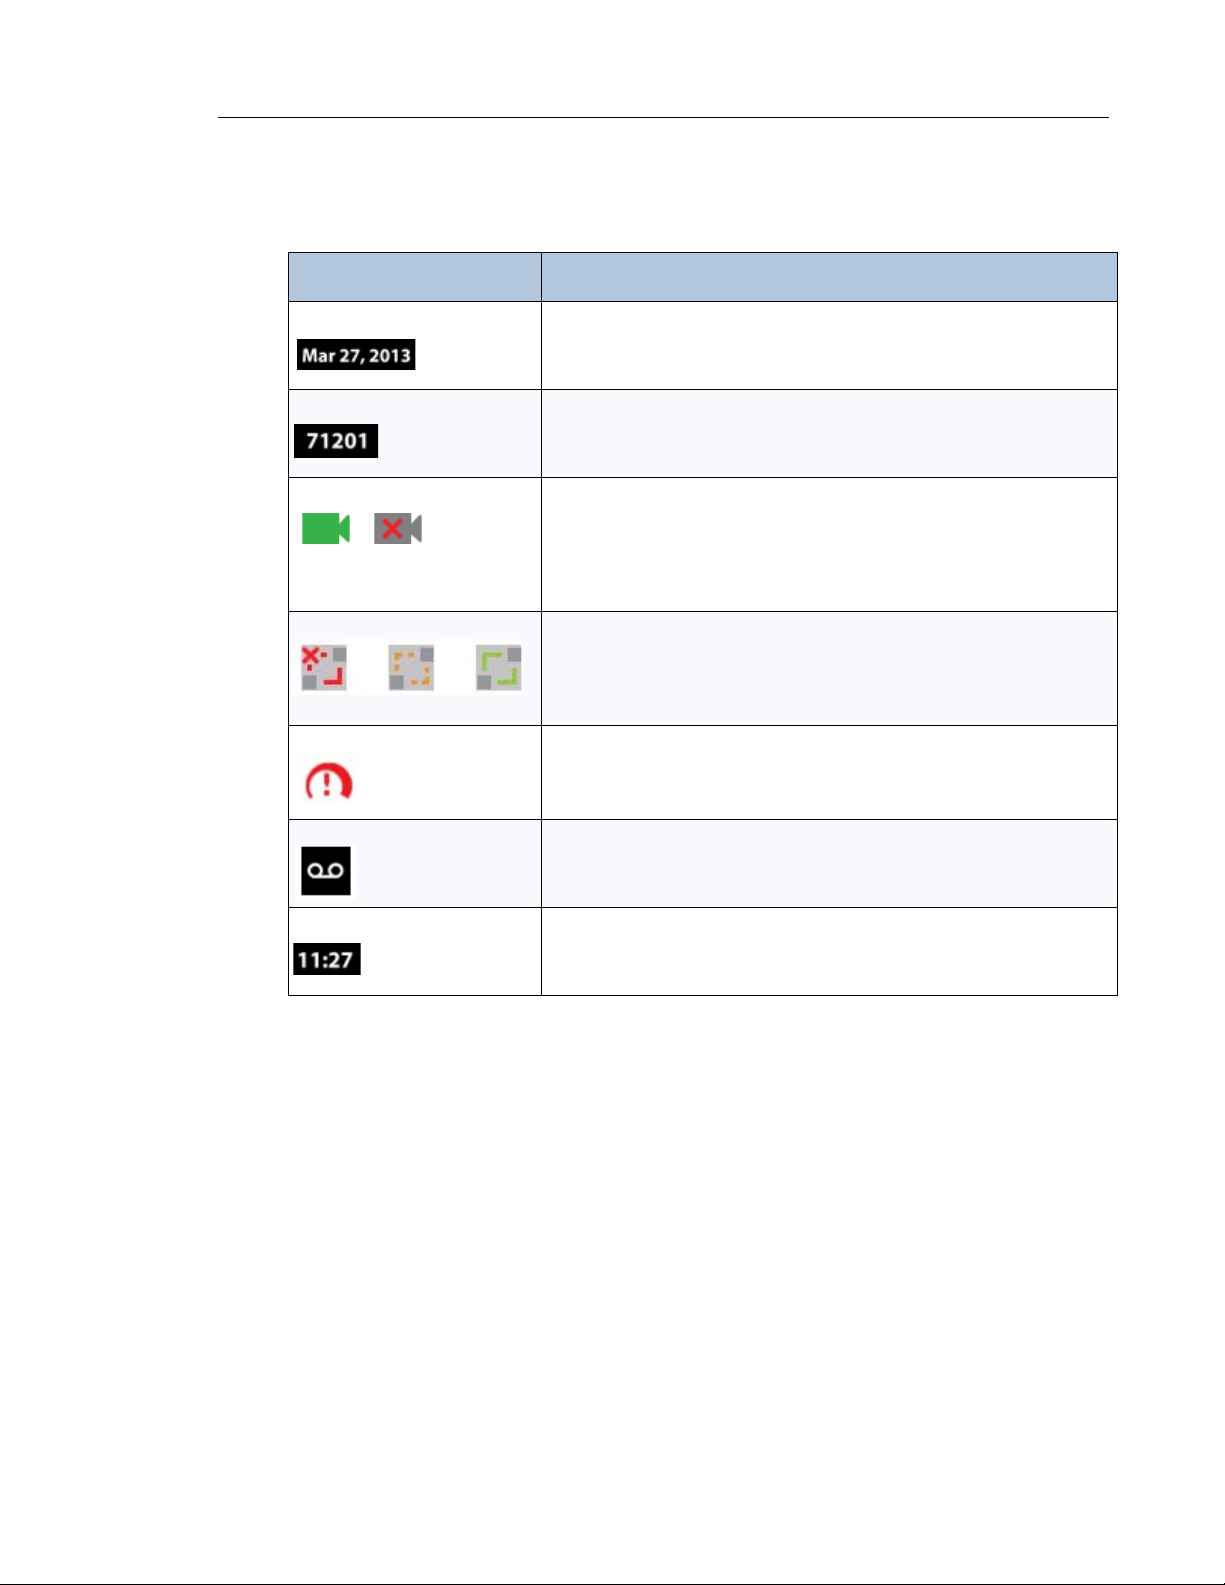
Status Bar
The status bar at the top of the screen displays information about the UC360 and its network.
Status Icon/Information What it means
Date
Extension number - The number comes from the username field under
SIP settings.
Green - the camera is on.
Red - the camera is off.
Note that for an Audio-Enabled UC360, the Camera Status icons are
not available.
Network connectivity
Red: UC360 is disconnected from the network
Amber: UC360 is attempting to register with the SIP server
Green: UC360 is successfully registered with the SIP server
Network Health Icon (see “Network Health” on page 19)
Indicates when the alarm threshold is reached for packet loss on both
audio and video calls.
Ethernet trace icon (see “Ethernet Trace” on page 19)
Current time
UC360 User Guide
18
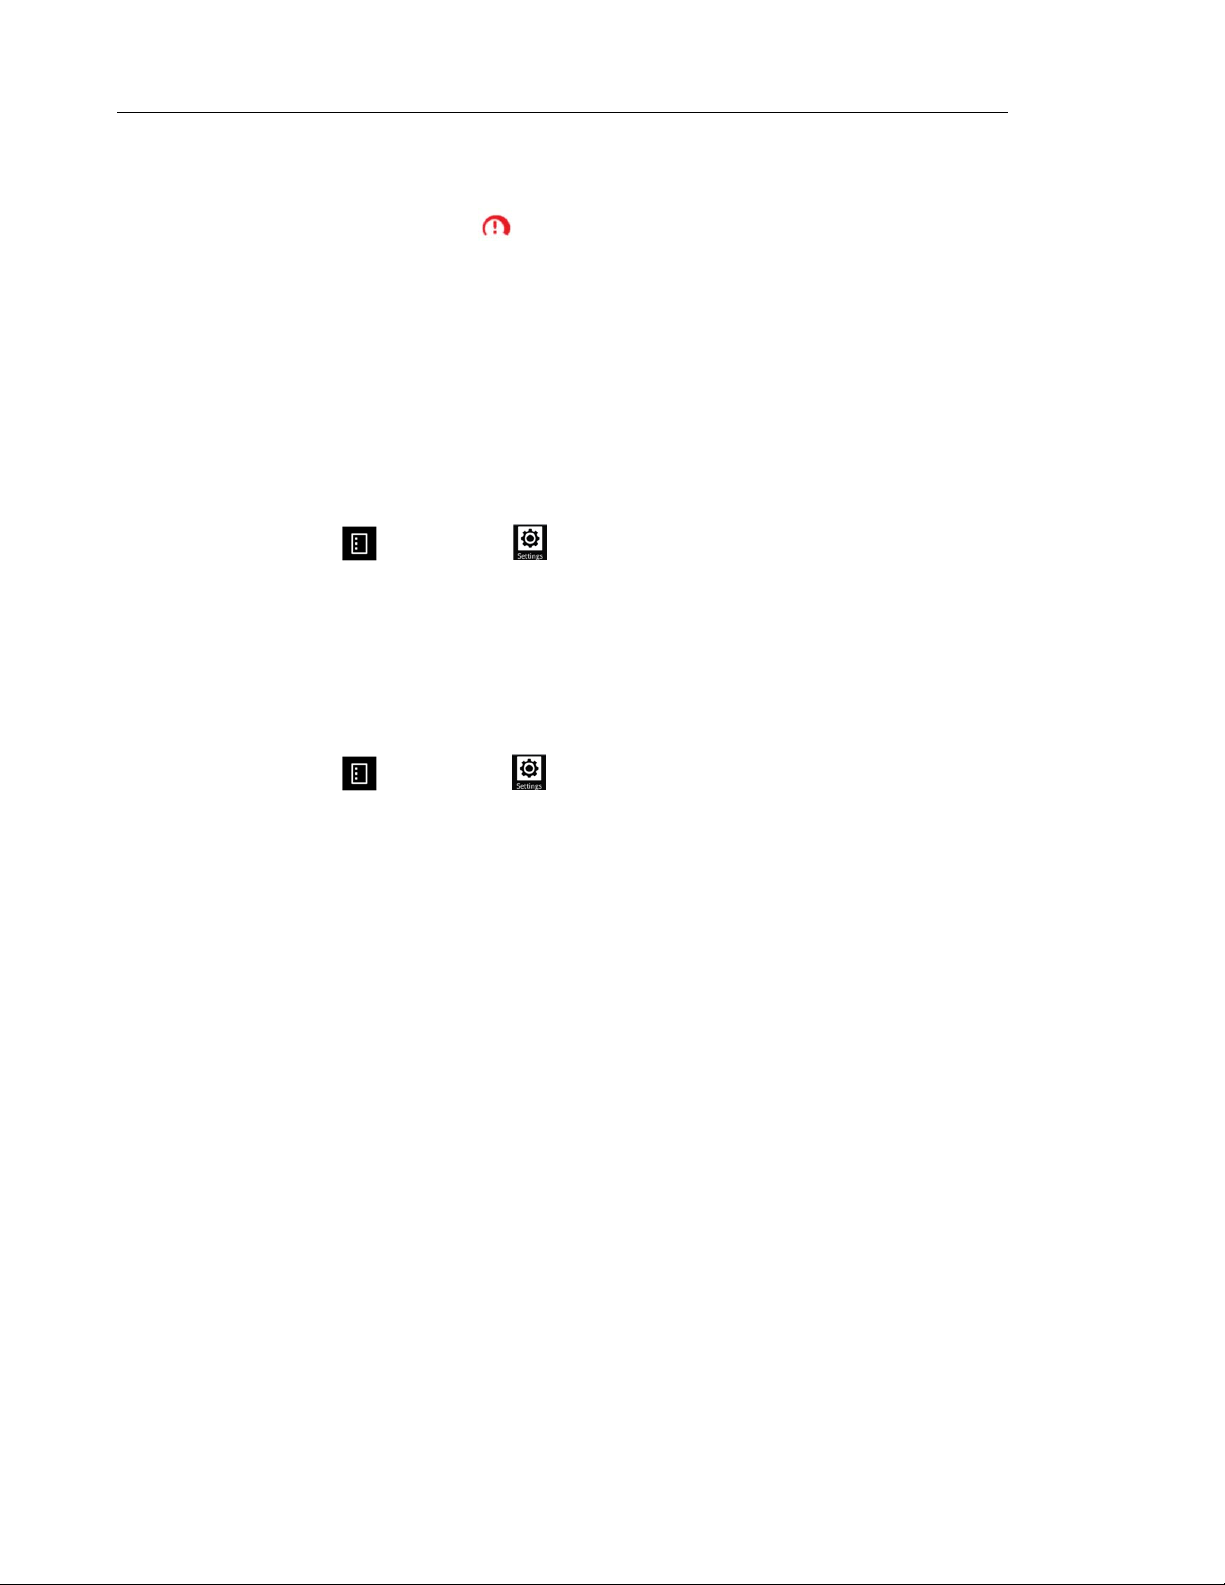
Network Health
Y ou will see a network health icon displayed when the alarm threshold is reached for p acket
loss on both audio and video calls.
The icon appears in the following locations:
• upper right hand corner next to the Network Status icon
• on a conference participant
The icon will only appear if there is congestion. If the packet loss falls below the alarm threshold
during the call, the network congestion icon will disappear.
To see details while network congestion is occurring:
1. Press Menu then Settings .
2. Tap Network Congestion Info.
Ethernet Trace
The UC360 is configured to allow you to manually capture traces when network impairment or
voice quality issues are present.
1. Press Menu then Settings .
2. Tap Start Ethernet Trace.
When the St art Ethernet Trace option is se lected, a trace icon appears next to the network icon
in the upper right hand corner. The trace icon will be visible for the duration of the trace, which
is one minute.
Contact the System Administrator with details of the UC360 issue. Y our administrator can also
set an option so ethernet traces are captured automatically when network congestion occurs.
About the UC360
19
Using Gestures
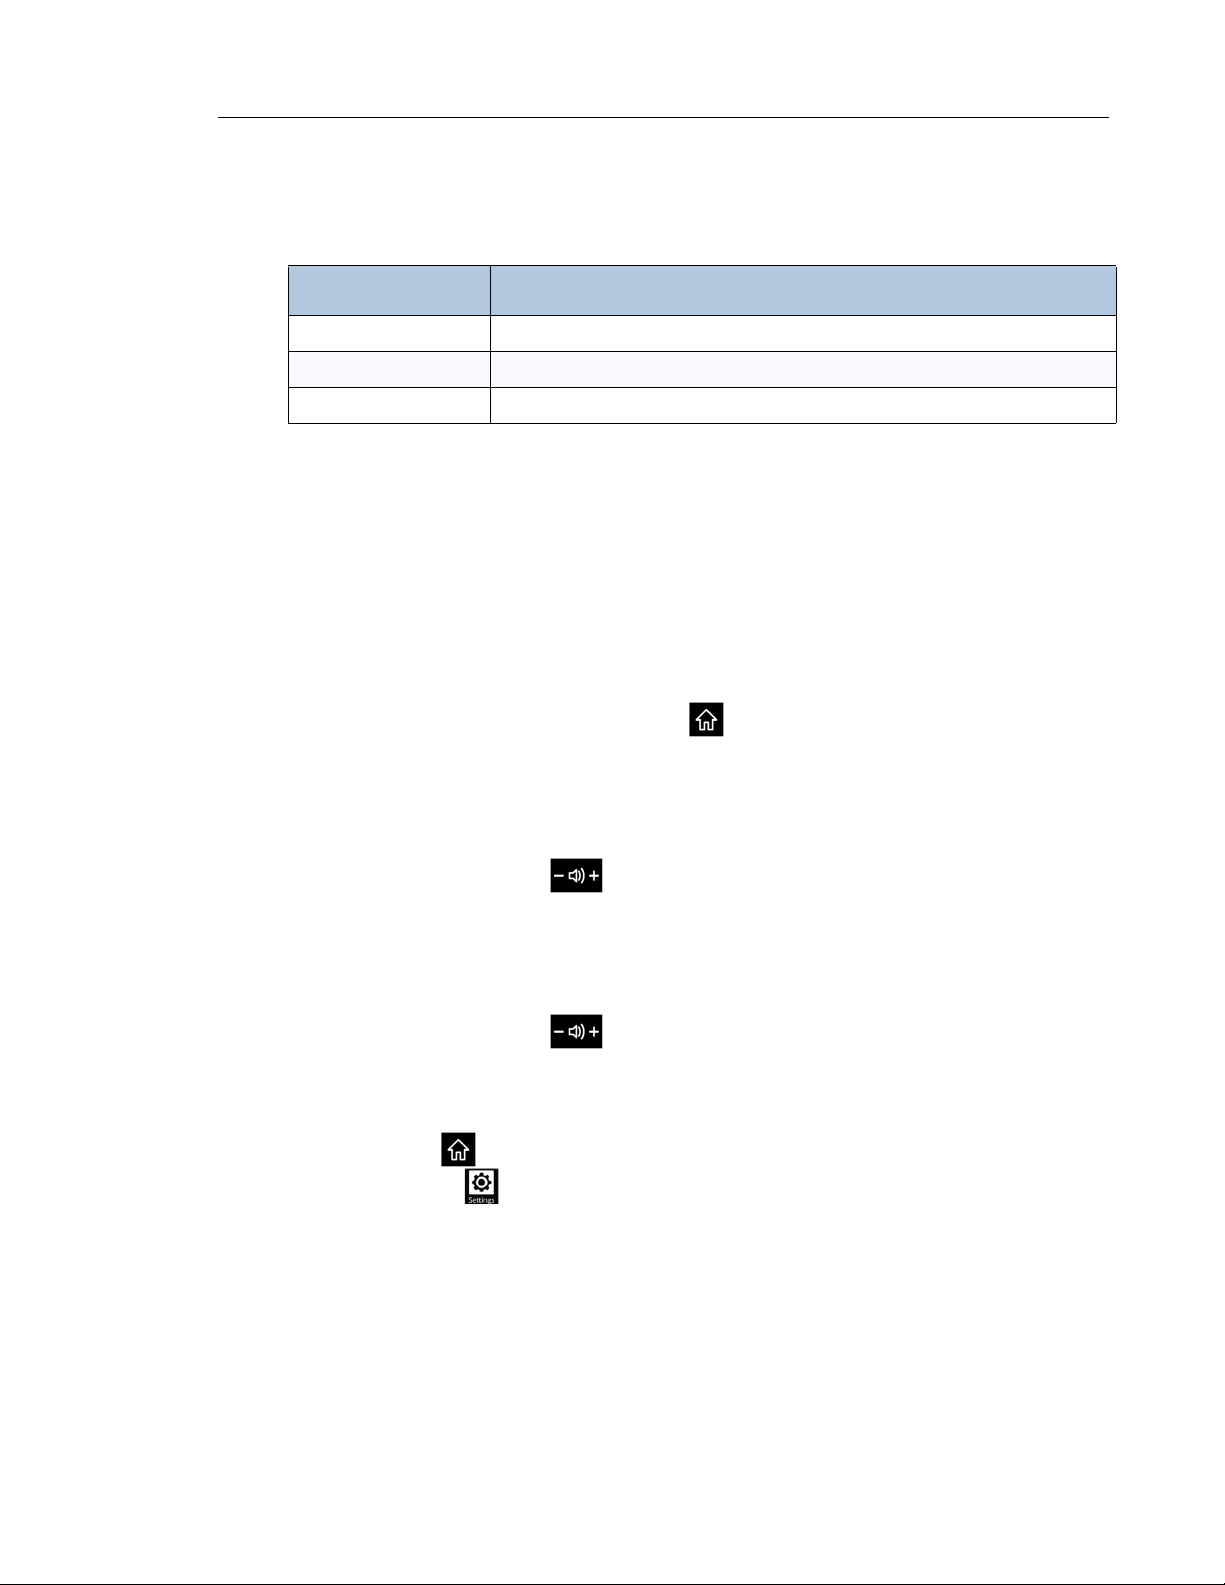
You can use the following gestures on the UC360 touch screen:
Gesture What it does
Tap
Drag
Scroll
The UC360 does not support the two-finger pinch or zoom.
Simply tap your finger on what you want to interact with
Place your finger and drag across the screen
Move page up or down quickly, right or left
Customizing the UC360
Follow the procedures below to customize the UC360.
Activating the UC360 Display
• If the UC360 screen is dark, press Home .
Note: If a mouse is attached, the mouse does not activate the display.
Adjusting the In-Call Volume
• Press the volume button during a call.
Note: The default setting for the In-call volume is restored after only after a reboot.
Adjusting the Ringer Volume
• Press the volume button during ringing or idle.
Adjusting Brightness
1. Press Home to display the Menu bar.
2. Press Settings .
3. Tap Brightness.
4. Drag the brightness slider to the desired brightness.
UC360 User Guide
20
Optional Settings
You can have your administrator configure optional settings for your UC360.
Sound/Keyboard Click
Y our administrator can configure your UC360 with Sound so that you hear audible clicks for all
selections and keyboard input.
Keypad Home Screen
Y our UC360 can be configured with the keyp ad as the Home screen. See the guidelines below .
• Y ou can close the keypad by pressing the X in upper right corner or by pressing the Home
or Back button.
• If the Contacts App is displayed and pressing Home or Back returns to the Conference
App, then the Conference App remains displayed. The home screen does not return to the
keypad.
• The keypad home screen will be displayed if you do any of the following:
- Close All Apps
- Close All Apps in the Launch Application screen
- Select "Nothing" in the Display Mode dialog.
After a dialog closes, the default keypad will display. You can close a dialog in various ways
and return to the Keypad Home screen:
• Close the box at upper right
•Back
•Home
•Menu
• Incoming call
• Time-out (in the case of some of the error message dialogs)
in the main conference view
About the UC360
21
Using Clean Mode
Use Clean Mode to clean the UC360 touch screen.
1. Press to display the Menu bar.
2. Press Settings .
3. Tap Clean Mode.
4. When the screen is clean, hold for 3 seconds to exit Clean Mode.
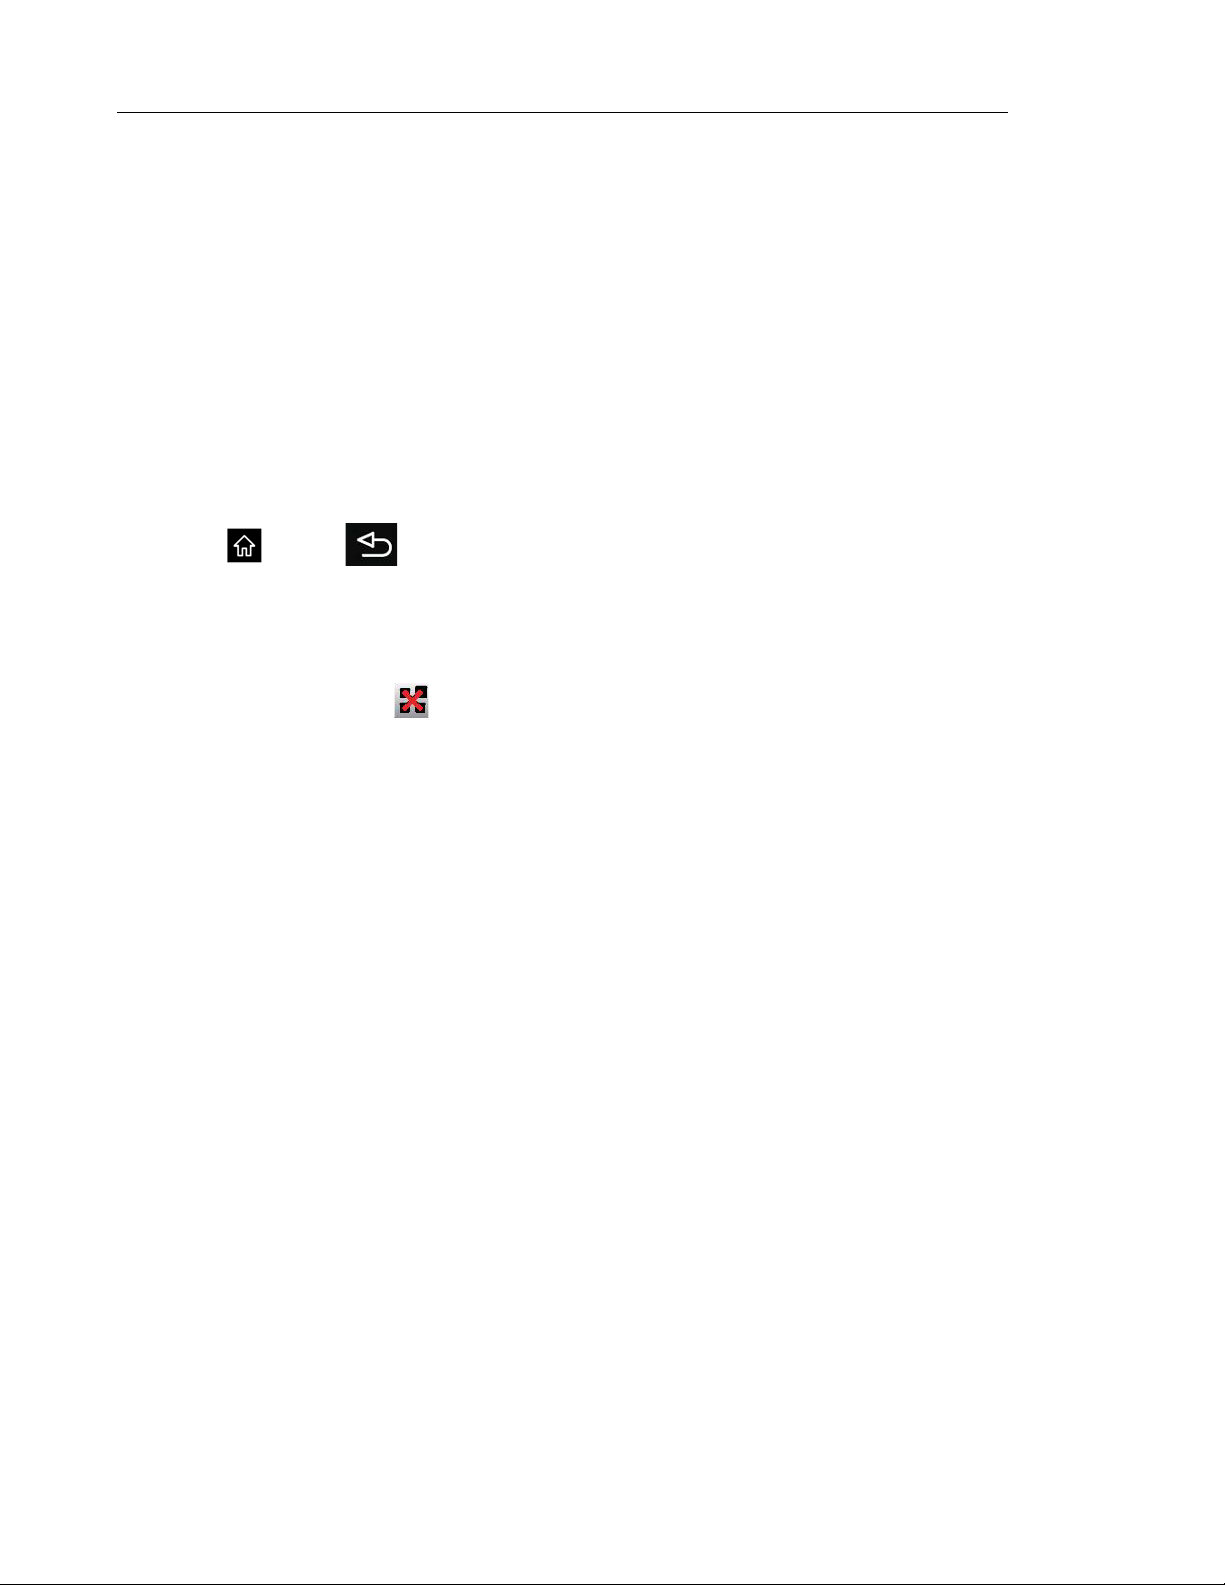
Unmounting Media
If you use a USB flash drive or SD card, unmount it before removing it.
1. Press Settings .
2. Select Unmount Media.
3. Select SD Card or USB Flash Drive.
4. Remove the SD card or USB Flash Drive.
Note: If you remove a device without properly unmounting it first, you will see an icon (yellow
triangle with an exclamation mark) in the status bar in the upper right corner.
The UC360 Android operating system only supports FAT formatted USB drives. USB drives
with U3 formatting will not be recognized by the UC360.
Using the Keyboard
It is recommended that you attach a physical keybo ard and mouse to the UC360. The UC3 60
supports only one physical keyboard and mouse. The on-screen keyboard is disabled in most
cases if you have a USB keyboard and mouse attached.
Note: If you have a USB keyboard attached, the Num Lock on the numeric keypad does not
work. Num Lock keypad presses are not read by the applications.
It is best to connect the external keyboard while th e UC360 is powered of f. Then power on the
UC360. Alternatively, you can reboot the UC360 after the keyboard has been connected.
If a you select French (France) as the language, the AZERTY keyboard is the only sup ported
external keyboard. If French language and an external QWERTY keyboard are desired, you
MUST switch language to French (Canada), or it won’t be supported.
If you have not attached a keyboard, the on-screen keyboard appears automatically anytime
you need to type. Use the keyboard to enter text, such as contact names and IP addresses.
See “External Keyboard - Supported Keys” on page 73 for information on the keys supported.
Loading...