


 Loading...
Operating and installation instructions
Built-in coffee machine
To avoid the risk of accidents or damage to the appliance, it is essential to read these instructions before it is installed and used for the first time.
en – AU, NZ |
M.-Nr. 11 203 130 |

Caring for the environment
Disposal of the packing
material
The transport and protective packaging has been selected from materials which are environmentally friendly for disposal, and can normally be recycled.
Recycling the packaging reduces the use of raw materials in the manufacturing process and also reduces the amount of waste in landfill sites. Ensure that any plastic wrappings, bags etc. are disposed of safely and kept out of the reach of babies and young children. Danger of suffocation.
Disposing of your old
appliance
Electrical and electronic appliances often contain valuable materials. They also contain specific materials, compounds and components, which were essential for their correct function and safety. These could be hazardous to human health and to the environment if disposed of with your domestic waste or if handled incorrectly. Please do not, therefore, dispose of your old appliance with your household waste.
Disposing of cleaning and
descaling cartridges |
Please dispose of it at your local |
|
community waste collection / recycling |
||
|
||
Dispose of the Miele cleaning and |
centre for electrical and electronic |
|
descaling cartridges in the household |
appliances. You are also responsible for |
|
waste after use. |
deleting any personal data that may be |
|
|
stored on the appliance prior to |
|
|
disposal. Please ensure that your old |
|
|
appliance poses no risk to children |
|
|
while being stored prior to disposal. |
2

|
Contents |
Caring for the environment .................................................................................. |
2 |
Warning and Safety instructions.......................................................................... |
7 |
Guide to the appliance ....................................................................................... |
17 |
Operating principles............................................................................................ |
19 |
Touch display ........................................................................................................ |
19 |
Operating actions .................................................................................................. |
20 |
Symbols in the display .......................................................................................... |
23 |
Miele@home......................................................................................................... |
24 |
Before using for the first time ............................................................................ |
25 |
Before using for the first time................................................................................ |
25 |
Switching on for the first time ............................................................................... |
25 |
Setting up the bean system .................................................................................. |
28 |
Bean system ........................................................................................................ |
30 |
Changing bean system settings (Type of beans)................................................... |
30 |
Renaming type of beans .................................................................................. |
30 |
Changing the allocation of the bean containers............................................... |
31 |
Filling the water container.................................................................................. |
32 |
Switching on and off ........................................................................................... |
33 |
Spout adjustment ................................................................................................ |
34 |
Making drinks ...................................................................................................... |
35 |
Making coffee drinks with and without milk.......................................................... |
35 |
Preparing hot milk ................................................................................................. |
36 |
Making a coffee drink............................................................................................ |
37 |
Cancelling preparation .......................................................................................... |
37 |
DoubleShot............................................................................................................ |
37 |
Making two portions ........................................................................................ |
37 |
Coffee pot.............................................................................................................. |
38 |
Tea......................................................................................................................... |
39 |
TeaTimer........................................................................................................... |
40 |
Making tea........................................................................................................ |
40 |
Teapot............................................................................................................... |
41 |
Preparing warm and hot water .............................................................................. |
41 |
Expert mode......................................................................................................... |
42 |
Grinder setting..................................................................................................... |
43 |
3

Contents |
|
Parameters........................................................................................................... |
44 |
Displaying and changing parameters.................................................................... |
44 |
Amount of coffee................................................................................................... |
44 |
Brewing temperature ............................................................................................. |
44 |
Pre-brewing ground coffee.................................................................................... |
44 |
Type of beans ........................................................................................................ |
45 |
Portion size .......................................................................................................... |
46 |
Resetting drink settings...................................................................................... |
47 |
User profiles......................................................................................................... |
48 |
Creating a profile ................................................................................................... |
48 |
Processing profiles ................................................................................................ |
48 |
Setting change of profile ....................................................................................... |
48 |
Profiles: creating and processing drinks .......................................................... |
49 |
MyMiele ................................................................................................................ |
50 |
MobileStart ..................................................................................................... |
51 |
Settings ................................................................................................................ |
52 |
Displaying and changing settings ......................................................................... |
52 |
Language............................................................................................................... |
52 |
Time of day............................................................................................................ |
52 |
Date ....................................................................................................................... |
52 |
Start screen ........................................................................................................... |
52 |
Timer ..................................................................................................................... |
53 |
Appliance timer ................................................................................................ |
53 |
Maintenance timer............................................................................................ |
53 |
TeaTimer........................................................................................................... |
54 |
Volume................................................................................................................... |
54 |
Display................................................................................................................... |
54 |
Display brightness............................................................................................ |
54 |
Colour scheme ................................................................................................. |
54 |
QuickTouch ...................................................................................................... |
54 |
Lighting.................................................................................................................. |
54 |
Info (display information) ....................................................................................... |
54 |
Mains water ........................................................................................................... |
54 |
Altitude .................................................................................................................. |
54 |
4

Contents |
|
Performance mode................................................................................................ |
55 |
Eco mode ......................................................................................................... |
55 |
Barista mode .................................................................................................... |
55 |
Latte mode ....................................................................................................... |
55 |
Party mode ....................................................................................................... |
55 |
Water hardness ..................................................................................................... |
55 |
Proximity sensor.................................................................................................... |
56 |
System lock ...................................................................................................... |
57 |
Miele@home .......................................................................................................... |
57 |
Remote control...................................................................................................... |
57 |
SuperVision ........................................................................................................... |
57 |
RemoteUpdate ...................................................................................................... |
58 |
Software version.................................................................................................... |
59 |
Legal information................................................................................................... |
59 |
Showroom programme (Demo mode)................................................................... |
59 |
Factory default settings......................................................................................... |
59 |
Cleaning and care ............................................................................................... |
60 |
Cleaning intervals - Quick guide ........................................................................... |
60 |
Cleaning by hand or in the dishwasher ................................................................. |
61 |
Unsuitable cleaning agents ................................................................................... |
62 |
Cleaning the drip tray and waste container........................................................... |
64 |
Cleaning the drip tray cover .................................................................................. |
66 |
Cleaning the water container ................................................................................ |
66 |
Cleaning the central spout .................................................................................... |
66 |
Cleaning the cup rim sensor ................................................................................. |
68 |
Cleaning the milk flask with lid.............................................................................. |
69 |
Cleaning the milk valve.......................................................................................... |
70 |
Cleaning the bean containers................................................................................ |
70 |
Removing the brew unit and cleaning by hand..................................................... |
71 |
Cleaning the interior, the inside of the appliance door and the drip catcher ........ |
73 |
Cleaning the appliance front ................................................................................. |
74 |
Maintenance programmes..................................................................................... |
74 |
Rinsing the appliance............................................................................................ |
74 |
Rinsing the milk pipework ..................................................................................... |
75 |
Maintenance programme – Clean the milk pipework............................................ |
75 |
Degreasing the brew unit and cleaning the interior............................................... |
76 |
Descaling the appliance ........................................................................................ |
78 |
Automatic cleaning and descaling .................................................................... |
81 |
What to ensure before and during automatic maintenance programmes............. |
81 |
Automatic cleaning................................................................................................ |
82 |
The Miele cleaning cartridge ................................................................................. |
82 |
5

Contents |
|
Replacing the cleaning cartridge........................................................................... |
83 |
Automatic descaling.............................................................................................. |
84 |
The Miele descaling cartridge ............................................................................... |
84 |
Maintenance timer................................................................................................. |
86 |
Cancelling automatic cleaning and descaling....................................................... |
87 |
Problem solving guide ........................................................................................ |
88 |
Messages in the display........................................................................................ |
88 |
Unusual performance of the coffee machine ........................................................ |
91 |
Faults with automatic cleaning and/or descaling .................................................. |
94 |
Unsatisfactory results............................................................................................ |
96 |
Cleaning the milk valve.......................................................................................... |
99 |
After sales service and warranty ..................................................................... |
102 |
Accessories ....................................................................................................... |
103 |
Installation.......................................................................................................... |
104 |
Mains water connection ...................................................................................... |
104 |
Electrical connection ........................................................................................... |
106 |
Building-in dimensions........................................................................................ |
107 |
Building in the coffee machine............................................................................ |
109 |
Door opening limiters .......................................................................................... |
110 |
Copyright and licences ..................................................................................... |
112 |
6

Warning and Safety instructions
This coffee machine complies with all current local and national safety requirements. However, inappropriate use can lead to personal injury and damage to property.
Read the Operating instructions carefully before using the coffee machine. They contain important information on the safety, installation, use and maintenance of the appliance. Familiarity with these instructions will help to prevent personal injury and damage to property.
In accordance with standard IEC 60335-1, Miele expressly and strongly advises that you read and follow the instructions in “Installation”, as well as in the “Warning and Safety instructions”. Miele cannot be held liable for damage caused by non-compliance with these instructions.
Keep these instructions in a safe place and pass them on to any future owner.
7

Warning and Safety instructions
Correct application
The coffee machine is intended for use in private households.
The coffee machine is not suitable for outdoor use.
This coffee machine must not be used at altitudes above 2,000 m.
The machine is intended only for the preparation of drinks such as
espresso, cappuccino, latte macchiato, tea etc. Any other usage is at the owner's risk.
This appliance is not intended for use by persons (including children) with reduced physical, sensory or mental capabilities, or lack of experience and knowledge, unless they have been given supervision or instruction concerning its use by a person responsible for their safety, and are able to recognise the dangers of misuse.
8

Warning and Safety instructions
Safety with children
Danger of burning and scalding on the dispensing spouts. Children's skin is far more sensitive to high temperatures than that of adults.
Ensure children do not touch hot surfaces of the coffee machine or place parts of their body under the dispensing spouts.
Install the coffee machine out of reach of children.
Young children must not be allowed to use this appliance.
Older children may only use the coffee machine if its operation has been clearly explained to them and they are able to use it safely. They must be aware of the potential dangers caused by incorrect operation.
Children should be supervised when they are near the coffee machine. Do not allow them to play with it or to use the controls.
Young children must not be allowed to clean the coffee machine. Cleaning may only be carried out by older children under the supervision of an adult.
Remember that coffee and espresso are not suitable drinks for children.
Danger of suffocation! Whilst playing, children may become entangled in packaging material (such as plastic wrapping) or pull it over their head with the risk of suffocation. Keep packaging material away from children.
9

Warning and Safety instructions
Technical safety
Repairs and installation work by unqualified persons could be dangerous. The manufacturer cannot be held liable for unauthorised work. Installation work and repairs to electrical appliances must only be carried out by a Miele approved service technician.
A damaged appliance is dangerous. Check it for any visible damage. Never install or attempt to use a damaged appliance.
Before connecting the appliance to the mains supply, make sure that the rating on the data plate corresponds to the voltage and frequency of the household supply. This data must correspond in order to avoid the risk of damage to the appliance. Consult a qualified electrician if in any doubt.
The electrical safety of this appliance can only be guaranteed when continuity is complete between it and an effective earthing system. It is most important that this basic safety requirement is present and tested regularly and, where there is any doubt, the household wiring system should be inspected by a qualified electrician.
Reliable and safe operation of the coffee machine can only be guaranteed if it is connected to the mains electrical supply.
Do not connect the machine to the mains electricity supply by a multi-socket adapter or an extension lead. These do not guarantee the safety of the appliance (e.g. danger of overheating).
This appliance must not be installed and operated in mobile installations (e.g. on a ship).
For safety reasons, this appliance may only be used when it has been built in.
If the coffee machine is to be built in above another appliance, there must be a full-width, closed shelf between them (except in combination with a built-in warming drawer).
10
Warning and Safety instructions
Only use the coffee machine in rooms where the ambient temperature is between +16 °C and +38 °C.
A minimum installation height of 850 mm must be maintained.
This coffee machine must not be installed behind a closed furniture door. Heat and moisture can build up behind the closed furniture door. This can result in damage to the appliance and/or furniture unit.
Before any repair work is carried out, the appliance must be completely disconnected from the electricity supply.
The appliance is only completely isolated from the electricity supply when:
–it is switched off at the circuit breaker, or
–the mains connection cable is disconnected from the power supply.
Pull the plug, not the cord, to disconnect the appliance from the power supply.
The manufacturer's warranty will be invalidated if the appliance is not repaired by a Miele approved service technician.
Miele can only guarantee the safety of the appliance when original Miele spare parts are used. Faulty components must only be replaced by original Miele spare parts.
Never open the outer casing of the machine. Tampering with electrical connections or components and mechanical parts is highly dangerous to the user and can cause operational faults or electric shock.
Only use original Miele accessories. If other parts are used, warranty, performance and/or product liability claims will be invalidated.
11

Warning and Safety instructions
Mains water connection
Do not connect the coffee machine to a warm water connection.
The protective sleeve of the water inlet hose must not be damaged or become kinked. This will cause it to leak.
The integrated water protection system offers protection from water damage, provided the following conditions are met:
–The machine is correctly installed (connected to the electricity supply) and plumbed in.
–The machine is properly maintained and parts are replaced where it can be seen that this is necessary.
–The tap has been turned off when the appliance is not going to be used for a longer period of time (e.g. during holidays).
12
Warning and Safety instructions
Correct use
Danger of burning and scalding on the dispensing spouts. The liquids and steam dispensed are very hot.
Keep well away from the area underneath the spouts when hot liquids and steam are being dispensed.
Do not touch hot components.
Hot liquid or steam could spatter from the spouts. Ensure that the central spout is clean and fitted correctly.
If there is a cup or container underneath the central spout, make sure that you remove this before opening the appliance door.
Water in the drip tray can also be very hot. Take care when emptying it.
Risk of injury to the eyes!
Never look directly at the lighting or use optical instruments (magnifying glass or similar) to look at it.
Please note the following regarding water:
–When using the water container: Only use cold, fresh tap water to fill the water container. Hot or warm water or other liquids can damage the coffee machine.
–Change the water every day to prevent a build-up of bacteria. When using mains water: Empty the water container once a day.
–Do not use carbonated water.
Only put roasted coffee beans in the bean container. Do not put coffee beans containing additives or ground coffee in the bean containers.
Do not fill the bean container with any type of liquid.
13

Warning and Safety instructions
Do not use green (unroasted) coffee beans or mixtures of coffee beans which contain green coffee beans. Green coffee beans are very hard and still contain residual moisture. These can damage the coffee machine grinder as soon as grinding begins.
Do not use coffee beans which have been treated with caramel, sugar or other substances. Sugar will damage the coffee machine.
If decaffeinated coffee beans are used after dispensing a drink with caffeinated beans, there may still be residues from the caffeinated beans in the grinder or brew chamber. Discard the first coffee drink when using decaffeinated coffee.
Only use milk without additives. Additives in milk usually contain sugar and this will stick to the milk pipework.
If using cow's milk, only use pasteurised milk to prevent a buildup of bacteria in the appliance.
When making tea, please follow the instructions on the packaging.
Do not place flaming alcohol mixtures underneath the central spout. The flames could ignite plastic components and cause them to melt.
Do not swing from or hang anything on the appliance door when it is open as this could damage the hinges on the coffee machine.
The machine must not be used for cleaning objects.
14

Warning and Safety instructions
Cleaning and care
Clean the coffee machine and the milk flask daily, particularly before using for the first time.
All parts of the milk system need to be cleaned thoroughly and regularly. Milk contains bacteria which proliferate rapidly with inadequate cleaning.
Avoid spillage on appliance connectors.
If you do not utilise automatic descaling and cleaning, you will need to carry out the maintenance programmes for cleaning the milk pipework, the brew unit and descaling the coffee machine manually on a regular basis. Miele cannot be held liable for damage resulting from not cleaning and/or descaling the machine, using the wrong cleaning/descaling agent or an unsuitable concentration.
Do not clean the machine with a steam cleaner or immerse it in water as this will damage the machine. Steam or water could reach the electrical components and cause a short circuit.
Used coffee grounds should be disposed of with the organic rubbish or on the compost heap. Do not empty them down the sink, as they could block it.
15

Warning and Safety instructions
The following applies to appliances with stainless steel
surfaces:
Do not adhere stickers, adhesive tape or any other adhesive materials to stainless steel surfaces. The coating on the stainless steel surfaces will become damaged and lose its protective properties against soiling.
Stainless steel scratches very easily and even magnets can cause damage to the surface.
16

Guide to the appliance
Exterior view
1 |
2 |
3 |
4 |
5 |
6 |
7 |
|
8 |
11 |
9 |
|
|
|
10 |
a On/Off sensor
b Optical interface (for Miele Service technicians only)
c MobileStart sensor control
d Proximity sensor
e “Back” sensor
f Touch display
g “Lighting” sensor control
h Door handle
i Automatic height-adjustable central spout with lighting
j Drip tray cover
k Milk flask
17

Guide to the appliance
Interior view
a Bean container 1 b Milk valve
c Automatic height-adjustable central spout with lighting d Grinder setting
e Bean containers 2 and 3 f Fan outlet
g Water container h Drip tray with lid i Brew unit
j Waste container
k Maintenance container
l Holders for cleaning and descaling cartridges (including plug) m Drip catcher
18

Operating principles
Touch display
The sensitive touch display can be scratched by pointed or sharp objects, e.g. pens.
Only touch the display with your fingers.
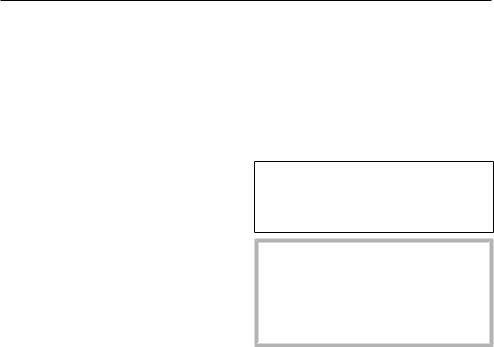
The touch display is divided into multiple areas.
Miele |
12:00 |
|
|
|
|
|
|
Ristretto |
Espresso |
Coffee |
Long coffee |
|
|
|
|
User profiles |
The menu path appears on the left of the header. If you touch a menu name in the header, the display will switch to that menu. To switch to the start screen, touch .
The time of day is shown on the right of the header. Additional symbols may also appear, e.g. TeaTimer .
The current menu and menu options are shown in the centre. You can scroll to the right or left by swiping your finger across the display to the right or left.
Depending on the menu, various operating options appear in the footer, e.g. DoubleShot , Save or OK.
19

Operating principles
Operating actions
All selectable options are displayed in either white or black, depending on which colour scheme has been selected.
Each touch of a possible selection colours the relevant character (word and/or symbol) orange.
Selecting the menu option
Touch the desired field or value in the touch display.
Scrolling
You can scroll left or right.
Swipe across the screen. To do this, place your finger on the touch display and swipe it in the direction you want.
The bar at the bottom of the display shows you your position in the current menu.
Exiting a menu
Touch the sensor. Alternatively, you can touch the upper level menu name in the menu path.
Entries made before this which have not been confirmed with OK will not be saved.
Useful tip: If you touch the sensor three times in succession, you will return to the drinks menu.
Entering numbers with the roller.
Swipe the roller up or down until the number you want is located in the centre and coloured orange. Confirm with OK.
Entering numbers using the numerical keypad
Touch the orange coloured value in the centre until the numerical keypad appears.
20
Operating principles
OK
Select the desired value: as soon as a valid value has been entered, OK is highlighted green. Use the arrow to delete the last entered number.
Confirm with OK.
Entering a name
Letters are entered using a keyboard. It is best to select short, memorable names.
Touch the letters or characters you want.
Useful tip: Use the arrow to delete the last entered character.
Touch Save.
Displaying a context menu
In some menus you can display a context menu, e.g. to configure drinks.
Touch and keep your finger on a drink name, for example, until the context menu opens.
Touch the touch display outside of the menu window to close the context menu.
Moving entries
You can change the order of the entries in the drinks menu to User profiles and
MyMiele.
Touch and hold an entry until the context menu appears.
Select Move.
An orange frame will appear around the entry.
Touch the highlighted entry and hold your finger on the display. Drag the entry to the required position.
21

Operating principles
Help
Context-sensitive help is available for certain functions. Help appears on the bottom line.
Touch Help to display information in text and pictures.
Touch Close to return to the previous menu.
Pull-down menu
In the pull-down menu you will find, for example, the schematic representation of the bean containers and the Expert mode.
Touch the top edge of the screen on the orange line and drag down with your finger.
Active settings are highlighted in orange.
To close the pull-down menu, touch the display outside of the menu window or slide the pull-down menu up.
22
Operating principles
Symbols in the display
In addition to text, symbols are shown in the display, e.g. symbols for the various drinks. Some symbols are explained below.
Symbol Explanation
This symbol indicates that there is additional information and advice about using the coffee machine. Select OK to confirm the information.
This symbol indicates the “Settings” menu and the “Language” menu option.
This symbol appears if the system lock is activated. Operation is locked.
This symbol and the desired switching on time appear in the display up to 23:59 hours before the coffee machine is due to switch on if the On at timer and the time display are activated (see “Settings - Timer”).
This symbol appears during the Clean the milk pipework maintenance programme and during automatic cleaning. (This symbol can also be found on the water container: fill up to this mark with water.)
This symbol appears while the appliance is being descaled. (This symbol can also be found on the water container: fill up to this mark).
This symbol and a fault code will appear if a fault occurs.
If Miele@home is activated for the coffee machine, the Wi-Fi
connection is indicated with these symbols. The symbols
indicate the strength of the Wi-Fi connection in gradations
from strong to not connected.
The “Remote control” symbol appears if Miele@home has been set up for the coffee machine and the Remote control |
On setting has been selected.
The “SuperVision” symbol appears if Miele@home has been
set up for the coffee machine and the SuperVision |
SuperVision display | On setting has been selected.
23

Miele@home
Your coffee machine is equipped with an integrated Wi-Fi module.
In order to use it you need:
–a Wi-Fi network
–the Miele@mobile App
–a Miele user account. The user account can be created via the Miele@mobile App.
The Miele@mobile App will guide you as you connect your coffee machine to your home Wi-Fi network.
Once your coffee machine is connected to your Wi-Fi network, you can use the App, for example, to carry out the following activities:
–Call up information on the operating status of your coffee machine
–Change the settings of your coffee machine
–Operate your coffee machine remotely
Connecting your coffee machine to your Wi-Fi network will increase energy consumption, even when the coffee machine is switched off.
Before installing the coffee machine in its final location, ensure the signal strength of your Wi-Fi network is sufficient.
Availability of the Wi-Fi
connection
The Wi-Fi connection shares a frequency range with other appliances (including microwave ovens and remote control toys). This may result in sporadic or even complete connection failures. Therefore, a constant availability of featured functions cannot be guaranteed.
Miele@home availability
The ability to use the Miele@mobile App depends on the availability of the Miele@home service in your country.
The Miele@home service is not available in every country.
For information about availability, please visit www.miele.com.
Miele@mobile App
You can download the Miele@mobile App from the Apple App Store® or the Google Play Store™ free of charge (only functional in selected countries).
24

Before using for the first time
Before using for the first time
Connect the coffee machine to the mains water supply and the mains electricity supply.
Install the coffee machine.
Remove any protective foil and stickers from the machine. Exception: Please do not remove any labels (e.g. the data plate) which are visible when you open the appliance door.
Remove the protective foil from the drip tray cover.
Clean the appliance thoroughly before filling it with coffee beans and making drinks (see “Cleaning and care”).
Clean the coffee machine (see “Cleaning and care”).
Before using the appliance for the first time, you will need:
–Miele cleaning cartridge
–Miele descaling cartridge
Switching on for the first time
Touch the On/Off sensor.
Selecting the display language and country
The country that is selected determines the time display, e.g. 12 or 24-hour format, or the units etc. displayed.
Select the required display language.
Then select the country.
Setting up the network (Miele@home)
You can connect your coffee machine to your local Wi-Fi network.
The following appears in the display
during set-up: Set up Miele@home?
Useful tip: You can also set up Miele@home for your coffee machine at a later time. Then select Skip.
Make sure that the signal of your WiFi network is sufficiently strong in the place where you want to set up your coffee machine.
Touch Continue.
Select the connection method you wish to use.
Follow the instructions in the coffee machine display and in the Miele@mobile App.
Connection successfully established
appears in the display.
Touch Continue to continue with the set-up.
Setting the date
Enter the current date and touch OK.
Setting the time of day
Enter the current time of day and touch OK.
If you have connected the coffee machine to a Wi-Fi network and have signed it on in the Miele@mobile App, the time will be synchronised based on the country setting in the Miele@mobile App.
25
Before using for the first time
Setting the water hardness level
Contact your local water supplier to find out your local water hardness range if necessary.
See “Settings - Water hardness” for more information.
Enter the local water hardness level (in °dH) and confirm with OK.
Selecting the water supply (Mains water)
The coffee machine is intended to be operated with a mains water connection. You can select from one of the following water supply options:
–On: The water container is automatically filled with fresh tap water via the mains water connection.
–Off: You need to fill the water container manually. A message appears in the display to inform you of this.
Select the desired option.
Setting up automatic cleaning and descaling
Information about automatic cleaning and descaling is shown in the display.
Confirm with OK.
Useful tip: Touch Help to get illustrated instructions in the display.
Fitting the cleaning cartridge
You will now be prompted to fit a cleaning cartridge.
Open the appliance door of the coffee machine.
Remove the maintenance container on the left.
26
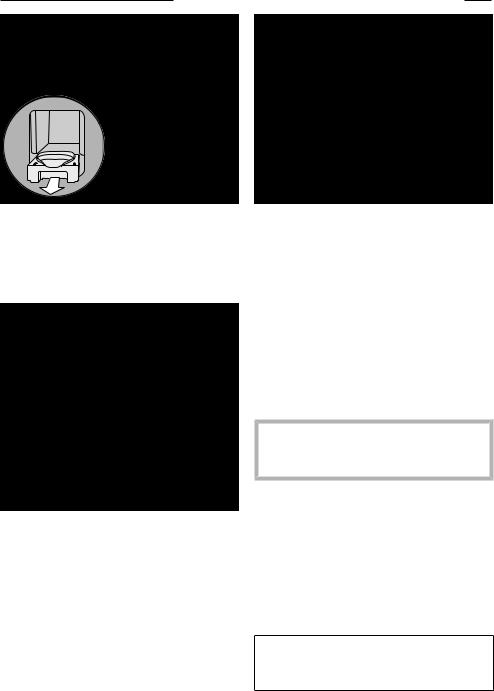
Pull the cleaning cartridge holder forwards and take it out.
Remove the cleaning cartridge from its packaging and unscrew the cap. The cap is no longer required.
Screw in the cleaning cartridge upside down.
Push the holder with the cartridge into the coffee machine until it clicks into place.
Before using for the first time
Pull the descaling cartridge holder forwards.
Insert the descaling cartridge and push it upwards as far as it will go.
Push the descaling cartridge holder back in.
Insert the maintenance container and close the appliance door.
The descaling cartridge will fill with water the next time the machine is switched off.
Wait until the coffee machine switches itself off. Do not force the machine to switch off.
If the cleaning and descaling cartridges are fitted, a message about the set start time of automatic cleaning and descaling will appear.
If you want to change the start time, touch Timer and select the required time.
Fitting the descaling cartridge |
Confirm with OK. |
Remove the descaling cartridge from its packaging.
You can also set the start time for automatic cleaning and descaling at a later time.
27
Before using for the first time
Selecting Performance mode
Select the most suitable mode depending on your coffee preferences (see “Settings - Performance mode”).
–Eco mode: This is an energy saving mode.
–Barista mode: This mode is optimised for perfect coffee enjoyment.
–Latte mode: In this mode drinks with milk can be made significantly faster.
Select the required mode.
The coffee machine is now successfully set up for use. You can now fill the bean system.
Setting up the bean system
After setting up the coffee machine, you will be prompted to set up the bean system. The coffee machine will assist you when first filling and naming the bean containers.
Touch Yes.
If you select No, the assistant for setting up the bean system will not be shown again.
Filling the bean containers
There are two bean container drawers at the top right and left of the coffee machine.
Open the appliance door.
Pull out the coffee bean containers and remove their lids.
Fill the containers with roasted coffee beans.
Close the bean containers with their respective lids.
Push the coffee bean containers back into the coffee machine. Close the appliance door.
Useful tip: Make a note of each type of bean.
After filling the bean containers, you can now name the types of beans.
Naming the types of beans
The 3 bean containers are shown in the display as follows and are pre-named.
Type of beans
Type A |
Type B |
Type C
28
Before using for the first time
If you rename the bean containers, please note the following:
–It is best to select short, memorable names.
–If you are using the same type of beans in two or three bean containers at the same time (for instance, because you only use one type of bean), make sure you name them in the same way exactly.
Name type of beans for bean container?
appears in the display and Type A is highlighted orange.
Touch Yes.
The editor will open in the display.
Enter the name you want for the bean container and then touch Save.
Now name the other two bean containers.
Allocate <Type XY> appears in the
header line.
Allocating bean types
Bean types are now allocated to coffee drinks. Selected drinks are highlighted orange.
Now select the drinks that are to be prepared with this type of bean. Confirm your selection with OK.
The next type of bean is now allocated and any unallocated coffee drinks are displayed.
Select the drinks that are to be prepared with this type of bean. Confirm with OK.
Any remaining drinks which have not been selected will be allocated to the third bean type.
You have set up the bean system and you can now prepare drinks.
Useful tip: All coffee drinks are highlighted if you touch All drinks. Unwanted drinks can be deselected.
If you do not allocate bean containers to the drinks, you will be asked during drink preparation which type of bean you want to use.
To ensure that any coffee residues from the factory testing process are removed from the brewing system, please throw away the first two cups of coffee when using the coffee machine for the first time.
29

Bean system
Coffee or espresso can be made from whole roasted coffee beans which are freshly ground for each portion.
Your coffee machine has a bean system with three bean containers which can be filled with different types of beans or even just one type. You can allocate bean types to individual coffee drinks as you wish. Alternatively, you can create profiles with your own coffee drinks and allocate other bean types to these drinks which are different to the Miele profiles.
Risk of damage to the grinder due to incorrect operation.
The coffee machine will be damaged if the bean container is filled with unsuitable substances such as liquids, ground coffee or coffee beans treated with sugar, caramel or similar.
In addition, green (unroasted) coffee beans or mixtures of coffee beans which contain green coffee beans can damage the grinder. Green coffee beans are very hard and still contain residual moisture. These can damage the coffee machine grinder as soon as grinding begins.
Only put roasted coffee beans in the bean container.
If decaffeinated coffee beans are used after dispensing a drink with caffeinated beans, there may still be residues from the caffeinated beans in the grinder or brew chamber. Please be aware that minimal residues of caffeinated beans may be present in the next drink that you make.
Changing bean system
settings (Type of beans)
The drinks menu is displayed.
Touch the sensor.
Select Settings and then Type of beans.
The schematic representation of the bean containers will be displayed.
Type of beans
Type A |
Type B |
Type C
Select a bean type.
You can now change the name of the type of bean or change the allocation.
Useful tip: If you want to allocate another type of bean to a coffee drink, you can also do this under “Change parameters” (see “Parameters - Type of beans”).
Renaming type of beans
Touch Change name.
The editor will open in the display.
If you rename the type of beans, please note the following:
–It is best to select short, memorable names.
–If you are using the same type of beans in two or three bean containers at the same time (for instance, because you only use one type of bean), make sure you name them in the same way exactly.
30
Loading...