


5KCM0802EAC

KCM0802
Downloaded from www.vandenborre.be
INSTRUCTIONS
INSTRUCTIONS
INSTRUCCIONES
PROOF OF PURCHASE & PRODUCT REGISTRATIONPROOF OF PURCHASE & PRODUCT REGISTRATION
Downloaded from www.vandenborre.be
WELCOME TO THE WORLD OF KITCHENAID.
We’re committed to helping you
create a lifetime of delicious meals for
family and friends. To help ensure the
longevity and performance of your
appliance, keep this guide handy. It will
empower you with the best way to
use and care for your product. Your
satisfaction is our #1 goal. Remember
to register your product online at
www.kitchenaid.com, or by
mail using the enclosed
Product Registration Card.
Join us in the kitchen at www.kitchenaid.com.
USA: 1.800.541.6390
Canada: 1.800.807.6777
2
KitchenAid.com
KitchenAid.ca

POUR OVER COFFEE BREWER INSTRUCTIONS
PROOF OF PURCHASE & PRODUCT REGISTRATIONPROOF OF PURCHASE & PRODUCT REGISTRATION
Downloaded from www.vandenborre.be
TABLE OF CONTENTS
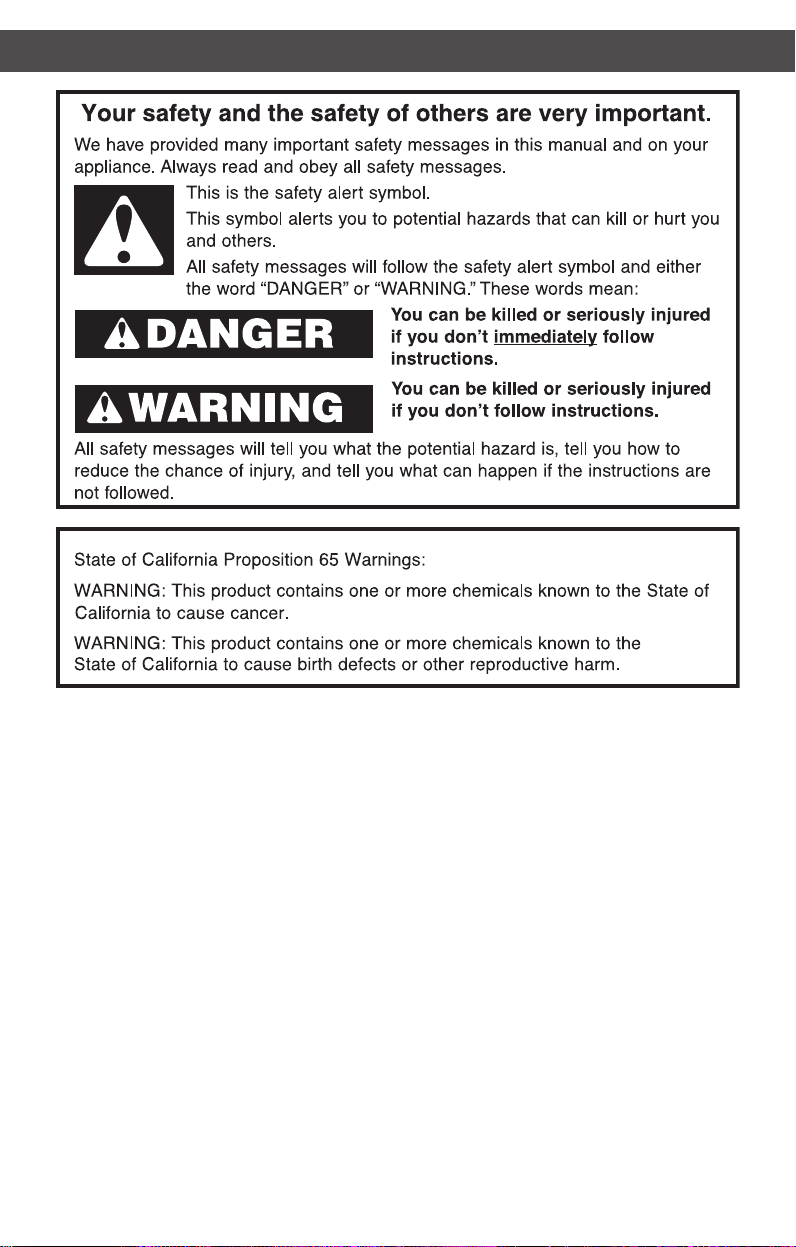
COFFEE BREWER SAFETY
Important safeguards .........................................................................................4
Electrical requirements .....................................................................................5
PARTS AND FEATURES
Parts and accessories .........................................................................................6
Display and control panel features ....................................................................7
How pour over coffee is different .....................................................................7
ASSEMBLING THE COFFEE BREWER
Preparing the Coffee Brewer for use ................................................................8
OPERATING THE COFFEE BREWER
Programming the clock .....................................................................................8
Selecting number of cups to brew .....................................................................9
Setting brew strength ......................................................................................10
Setting up the Delay start feature ....................................................................10
Filling the water tank .......................................................................................11
Filling the brew basket ....................................................................................12
Coffee dosage guide ........................................................................................12
Brewing coffee ................................................................................................13
CARE AND CLEANING
Cleaning the Coffee Brewer ............................................................................15
TROUBLESHOOTING ........................................................................................16
WARRANTY AND SERVICE ..............................................................................17
English
Always keep a copy of the itemized sales receipt showing the date of purchase of your
Coffee Brewer. Proof of purchase will assure you of in-warranty service. Before you use
your Coffee Brewer, please ll out and mail your product registration card packed with
the unit, or register online at www.kitchenaid.com. This card will enable us to contact you
in the unlikely event of a product safety notication and assist us in complying with the
provisions of the Consumer Product Safety Act. This card does not verify your warranty.
Please complete the following for your personal records:
Model Number _____________________________________________________________________
Serial Number _____________________________________________________________________
Date Purchased ____________________________________________________________________
Store Name _______________________________________________________________________
3
Downloaded from www.vandenborre.be
IMPORTANT SAFEGUARDS
When using electrical appliances, basic safety precautions should always
be followed, including the following:
1. Read all instructions.
2. Do not touch hot surfaces. Use handles or knobs.
3. To protect against electrical shock, do not immerse cord, plugs,
or Coffee Brewer in water or other liquid.
4. Close supervision is necessary when any appliance is used by
or near children.
5. Unplug Coffee Brewer from outlet when not in use and before cleaning.
Allow to cool before putting on or taking off parts, and before cleaning the
appliance.
6. Do not operate any appliance with a damaged cord or plug or after the
appliance malfunctions or has been damaged in any manner. Return
appliance to the nearest Authorized Service Facility for examination,
repair or adjustment.
7. The use of accessory attachments not recommended by the appliance
manufacturer may cause injuries.
8. Do not use outdoors.
9. Do not let cord hang over edge of table or counter, or touch hot surfaces.
4
COFFEE BREWER SAFETYCOFFEE BREWER SAFETY
Downloaded from www.vandenborre.be
10. Do not place on or near a hot gas or electric burner, or in a heated oven.
11. Do not use appliance for other than intended use.
12. Do not use appliance without lid properly placed on container (carafe).
13. The container (carafe) is designed for use with this appliance. It must never
be used on a range top or in a microwave oven.
14. Do not set a hot container (carafe) on a wet or cold surface.
15. Do not use a cracked container (carafe) or a container having a loose
or weakened handle.
16. Do not clean container (carafe) with abrasive cleaners, steel wool pads,
or other abrasive material.
SAVE THESE INSTRUCTIONS
This product is designed for household use only.
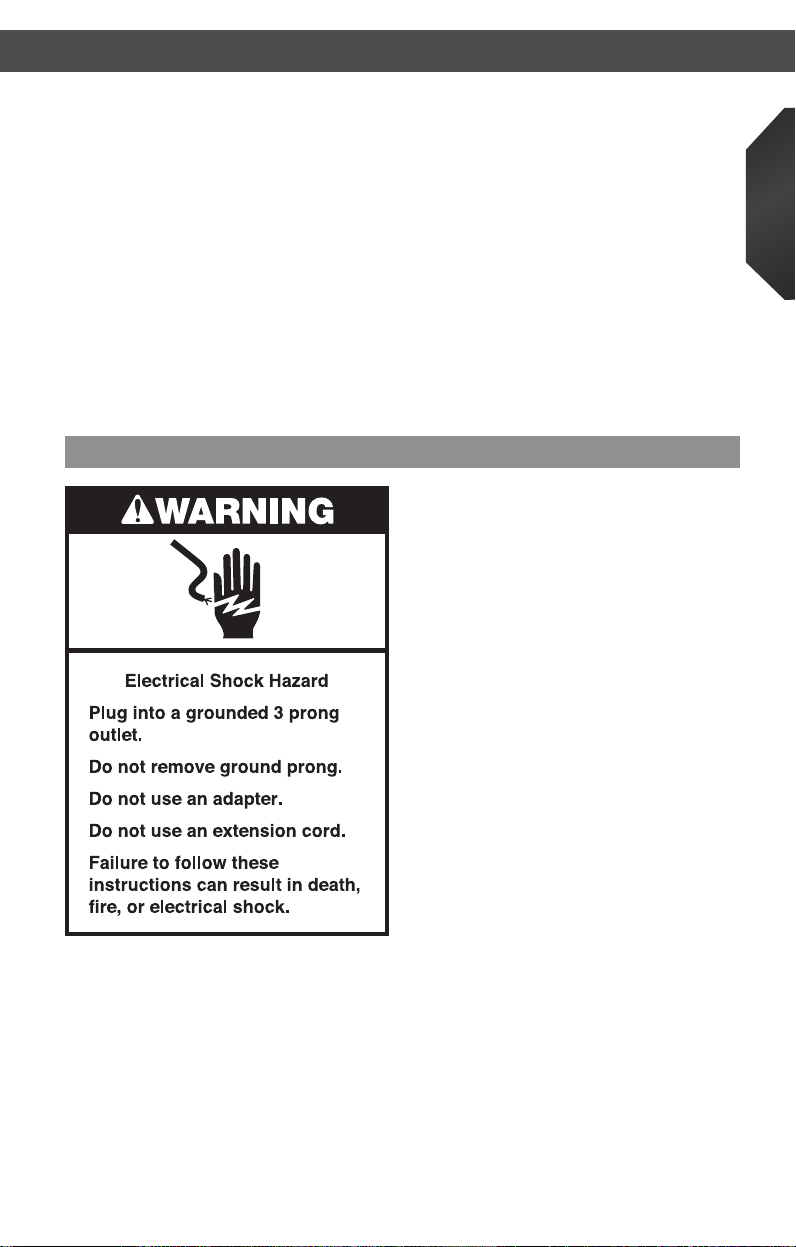
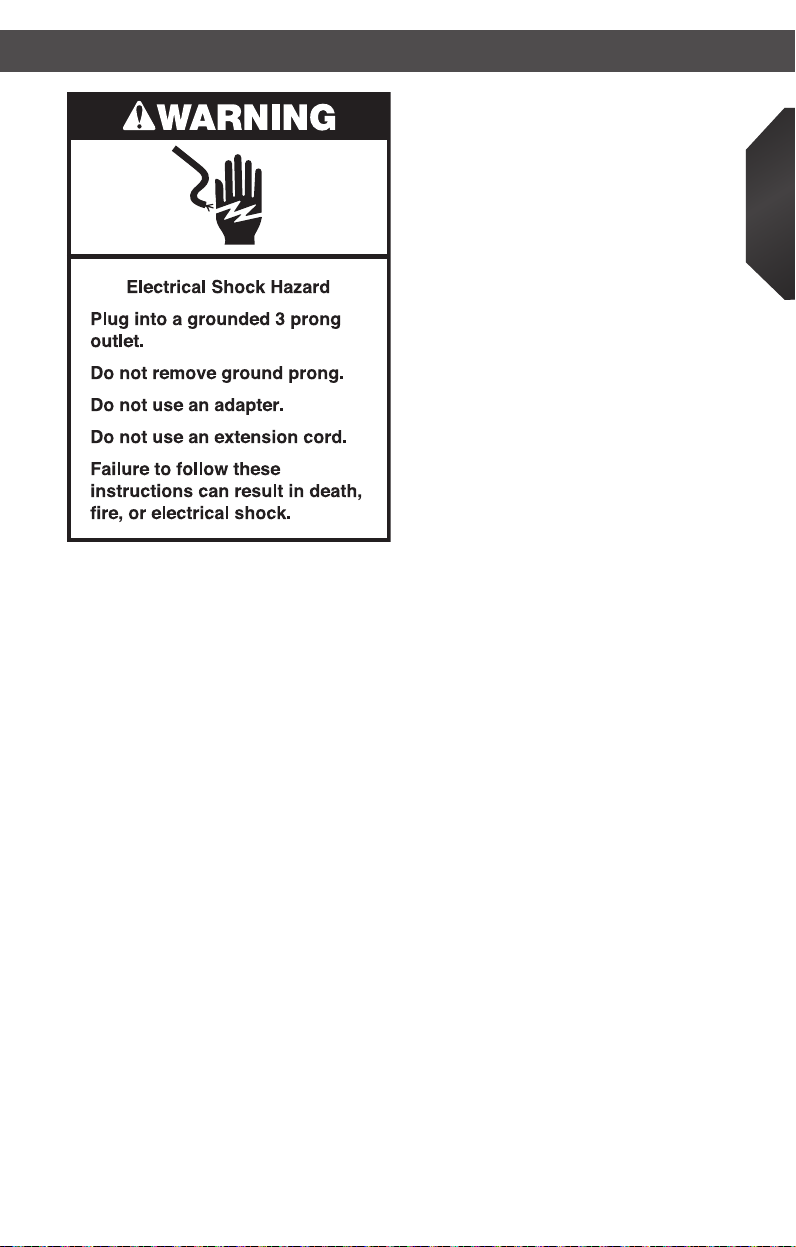
Electrical requirements
Voltage: 120 VAC
Frequency: 60 Hz
Wattage: 1250 Watts
NOTE: This Coffee Brewer has a 3-prong
grounded plug. To reduce the risk of
electrical shock, this plug will fit in an outlet
only one way. If the plug does not fit in the
outlet, contact a qualified electrician. Do not
modify the plug in any way.
Do not use an extension cord. If the power
supply cord is too short, have a qualified
electrician or serviceman install an outlet
near the appliance.
English
5
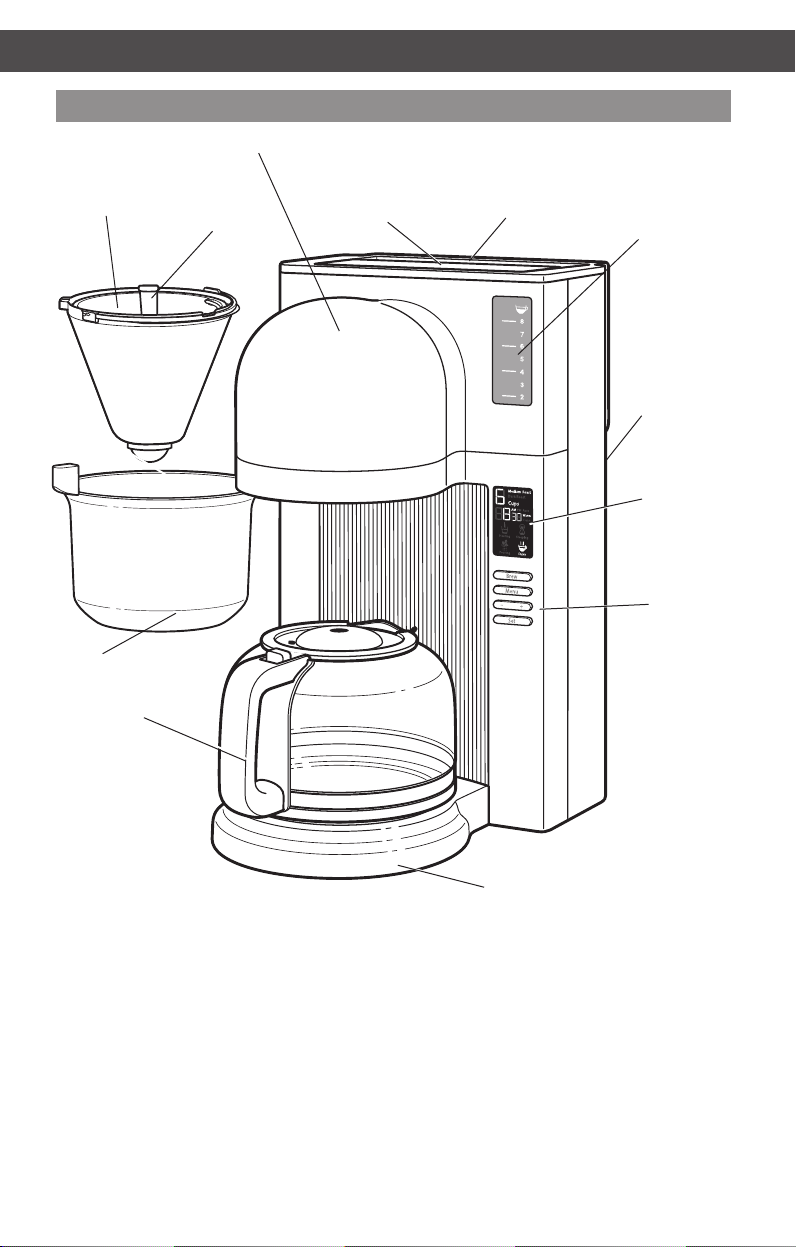
Parts and accessories
Downloaded from www.vandenborre.be
#4 Paper
lter (cone)
in Filter
basket
Brew
basket
Brew head
Filter clip
Water tank
lid
Water tank
Cup/Water
tank view
Cord wrap
(not shown)
Programmable
display
Control
panel
Glass carafe
6
Warming
plate

PARTS AND FEATURESPARTS AND FEATURES
Downloaded from www.vandenborre.be
Display and control panel features
Cup selection
indicator
Clock display
Heating
indicator
Medium/Dark
roast indicators
Delay Start
(Auto) indicator
Warm indicator
Clean indicator
Steeping indicator
English
Pouring
indicator
How pour over coffee is different
Traditional coffee brewing often doesn’t
bring out the best avor of your coffee
beans. We often settle for the usual drip
coffee maker for the sake of time and
convenience.
The ancient art of pour over coffee brewing
has recently gained popularity because the
technique of slowly pouring water over
the ground beans extracts excellent avor.
But, we usually don’t have time to perform
the ritual.
The KitchenAid
brings together the clean, complex avors
that are created with a traditional cup
of pour over coffee with the ease and
convenience of an automatic machine.
Instead of continuously ooding the brew
basket with water, the Pour Over Coffee
Brewer pulses the ow of water, precisely
controlling the extraction, allowing the
grounds to “bloom.”
®
Pour Over Coffee Brewer
Brewing complete/
Enjoy indicator
Brew button
Menu button
“- and +” toggle bar
Set button
In addition, the Pour Over Coffee Brewer
heats all of the water at once to the optimal
brewing temperature instead of one drop at
a time like conventional drip coffee makers.
You’ll notice the difference in the caramel
color and the complex layers of avor.
Precise water
ow control
This gear inside your Pour Over Coffee Brewer precisely
controls water ow, for ideal avor extraction.
7
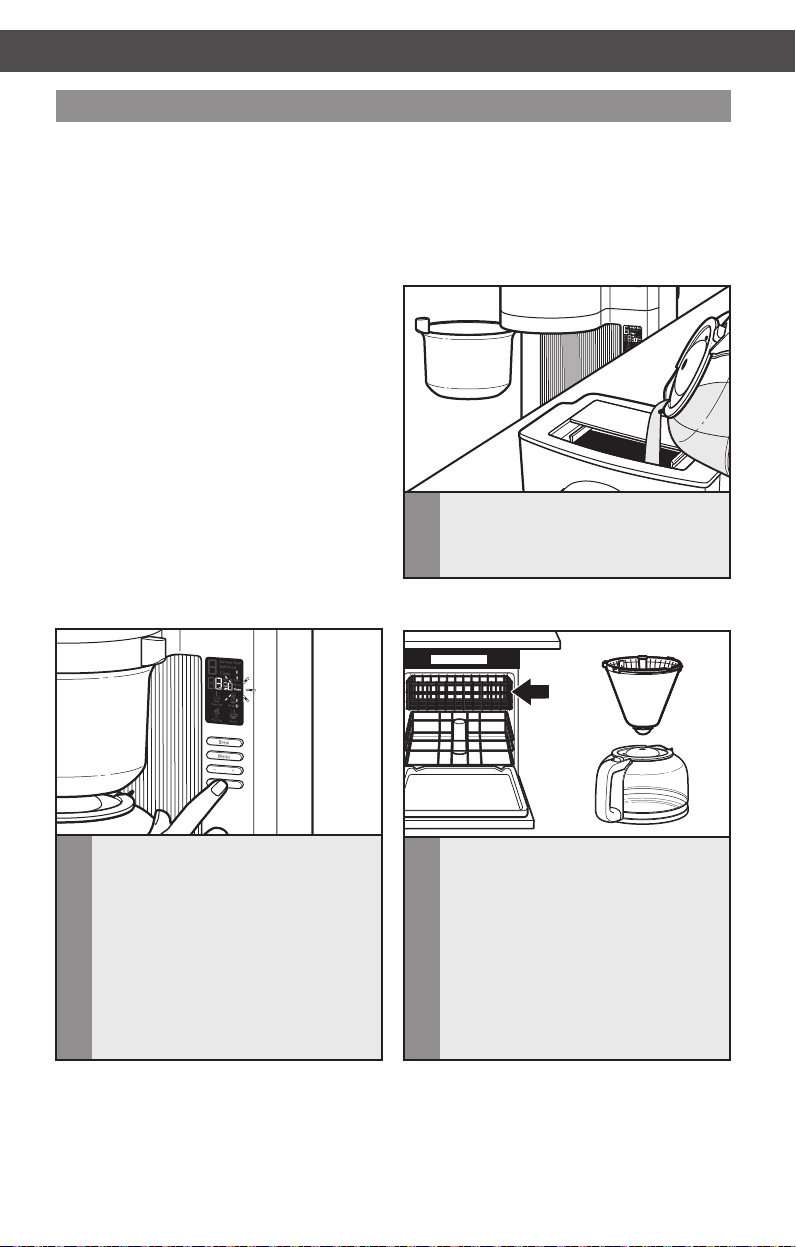
Preparing the Coffee Brewer for use
Downloaded from www.vandenborre.be
Before rst use
Before using your Coffee Brewer for the first time, wash the brew basket, filter clip,
and carafe in hot, soapy water, then rinse with clean water and dry.
Do not use abrasive cleaners or scouring pads.
NOTE: These parts can also be washed in the top rack of the dishwasher.
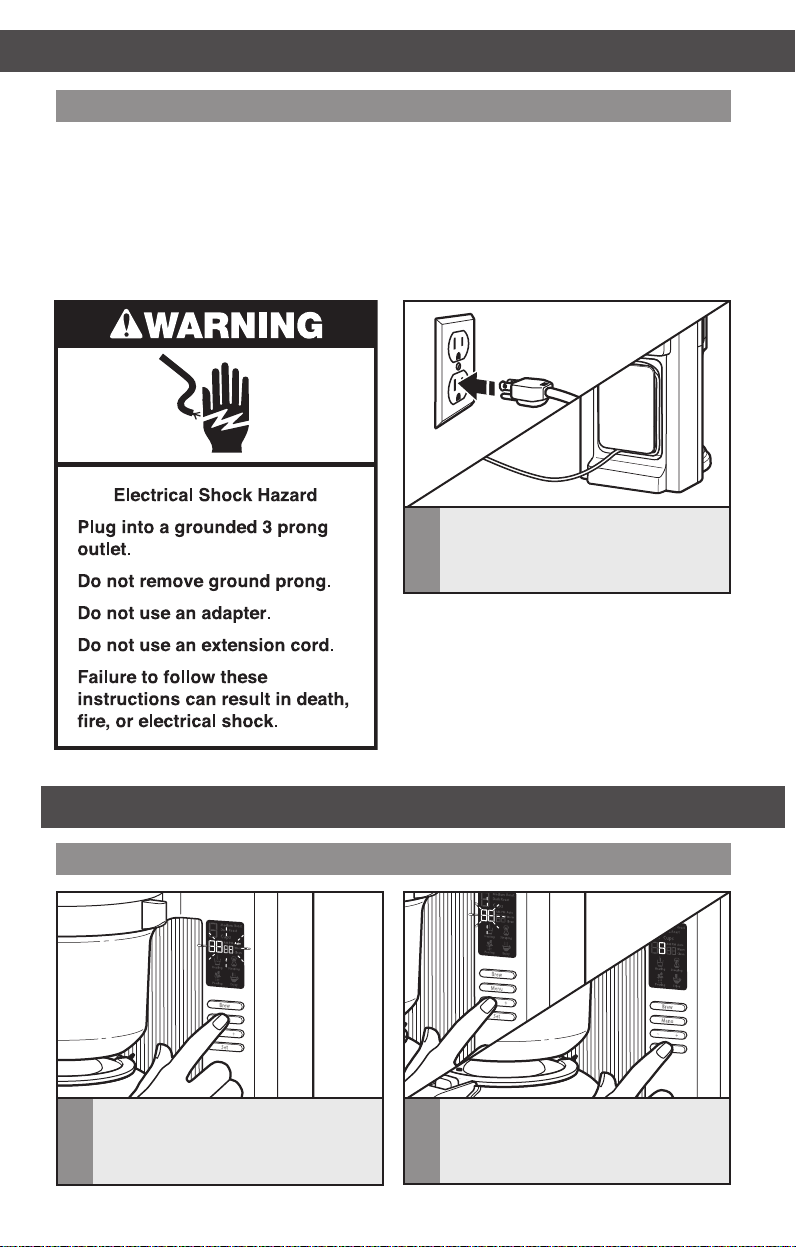
Plug the Coffee Brewer into a 3-prong
1
grounded outlet. If desired, wrap excess
cord around the cord holder on the back
of the Coffee Brewer.
OPERATING THE COFFEE BREWER
Programming the clock
When the Coffee Brewer is plugged in,
1
the clock display will begin to flash.
8
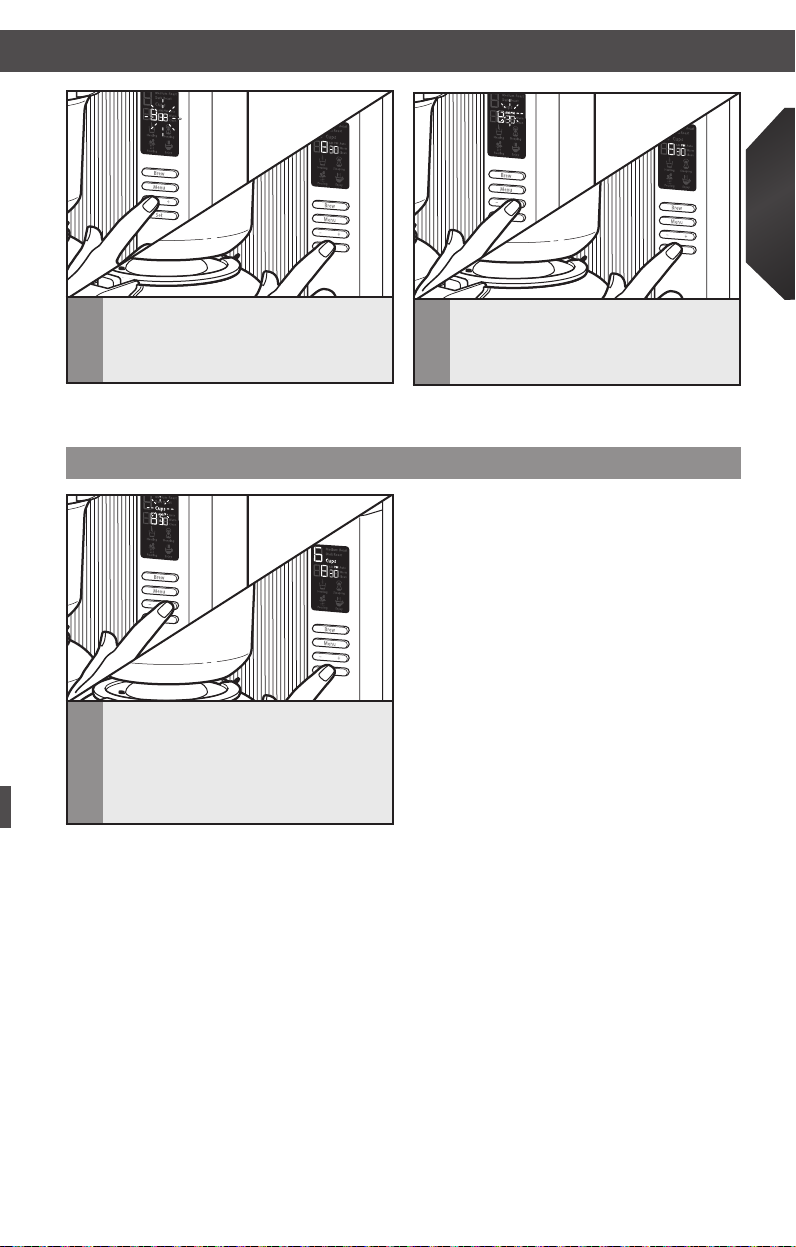
2
With the hour display flashing, use the
“+” or “-” toggle bar to choose the
correct hour setting. Then press SET
to make your selection.
OPERATING THE COFFEE BREWERASSEMBLING THE COFFEE BREWER
Downloaded from www.vandenborre.be
English
The minute display will start to flash
3
next. Use the “+” or “-” toggle bar to
choose the correct minute setting, then
press SET to make your selection.
NOTE: To go directly to the clock display menu, when the Coffee Brewer is already on,
press the MENU button four times, until the hour display begins to flash.
The AM/PM display will flash last. Use
4
the “+” or “-” toggle bar to choose the
correct AM/PM setting, then press SET
to go back to the programming menu.
Selecting number of cups to brew
NOTE: 8 Cups is the default setting.
NOTE: If the water in the tank has been
sitting for awhile and you wish to start
fresh, select 8 cups and press the BREW
button (without coffee in the brew basket).
This will cycle through any stale water
in the tank.
From the main menu, use the “+” or
1
“-” toggle button to choose the number
of cups you want to brew, between
2 and 8. When the desired number is
displayed, you are ready to brew.
9
Setting brew strength
Downloaded from www.vandenborre.be
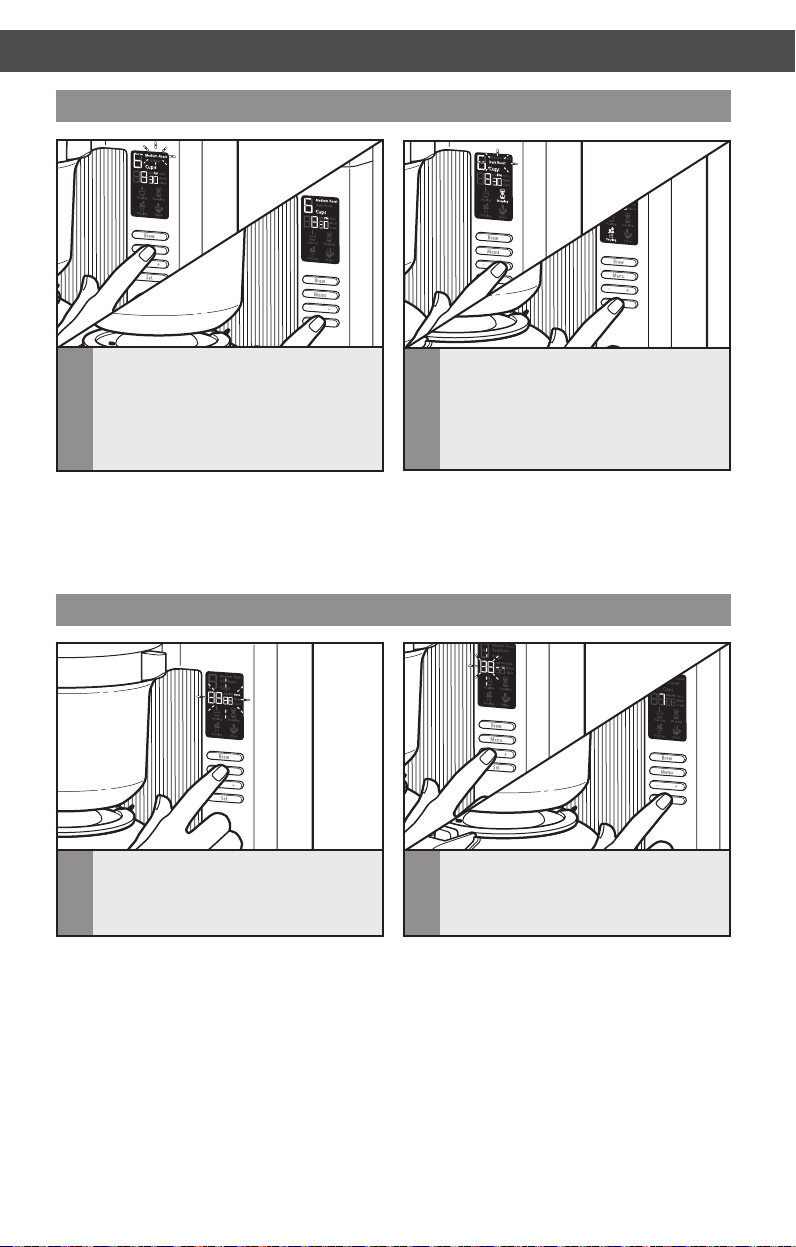
To set the machine to brew a light
1
or medium roasted coffee, press the
MENU button until the MEDIUM roast
indicator begins to flash on the display,
then press SET. Medium roast is the
default setting.
HELPFUL TIP: In order to brew according to Specialty Coffee Association of America
fundamentals, brew your coffee using the medium roast setting (also ideal for light roasted
coffee). The Medium roast setting brews coffee at a slightly higher temperature than the
dark roast setting - extracting exceptional flavor out of each type of roast.
To choose a dark roasted coffee, use
2
the “+” or “-” toggle bar to switch
settings. When DARK roast begins
to flash, push SET.
Setting up the Delay start feature
To set up the Delay start feature, press
1
the MENU button twice, until the Auto
indicator is flashing on the display.
Use the “+” or “-” toggle bar to choose
2
the hour you want the Coffee Maker to
begin brewing, then press SET. Then, do
the same to set the minutes and AM/PM.
10

OPERATING THE COFFEE BREWEROPERATING THE COFFEE BREWER
Downloaded from www.vandenborre.be
English
After pressing SET to choose AM or PM
3
for your Delay start brew time, 2 beeps
will sound and you will be returned to
the programming menu. The Delay start
program is ready to use.
NOTE: You must complete step 4 each time you wish to enable the Delay start feature.
You can use the same Delay start brew time
again by pressing the menu button twice, then
pressing SET three times before brewing. To
cancel the Delay start feature at any time,
press the BREW button two times.
Filling the water tank
The water tank holds between 2 and 8 cups
of water (5 oz. each) for brewing. Since you
are able to select the number of cups you’d
like to brew each time, you do not have to
fill the water tank with the exact amount of
water you need. The Coffee Maker will use
the correct amount of water for the number
of cups you select.
Slide the water tank lid back, and fill
1
the water tank with fresh, filtered water
to the desired cup level as indicated on
the water tank view. Because of the
design of this Coffee Brewer, it may take
a moment for the water to enter the
place in the tank where you can view the
water level. Close the water tank lid.
NOTE: If the water in the tank has been sitting for awhile and you wish to start fresh,
select 8 cups and press the BREW button (without coffee in the brew basket). This will
cycle through any stale water in the tank.
HELPFUL TIP: For best taste and brewing results, make sure you have enough water in
the tank for the number of cups you want to brew.
11

OPERATING THE COFFEE BREWER
Downloaded from www.vandenborre.be
Filling the brew basket
Lift the filter clip and place a #4 paper
1
coffee filter in the brew basket. Press
the paper filter in to the sides of the
brew basket and clip it into place with
the filter clip. Should you prefer to brew
without the filter clip, you can easily
remove it by snapping it out of place.
NOTE: Pre-wetting the paper filter is
not required.
Coffee dosage guide
For best results, when lling the brew basket with coffee grounds, use
coffee ground slightly ner than the typical medium grind. If you have
a kitchen scale, you can use the chart below to determine how much
coffee to use for the number of cups you wish to brew. Or, use the
indicators on the lter clip (see at left) as a rough guide.
8
6
4
2
NOTE: Filter clip dosage recommendations based on medium
ground, medium roasted coffee.
Cups Grind # of oz (water) # of grams (coffee)
2
ner than
3
4
5
6
Slightly
medium
(see
example
of grind
size at
left)
Using the dosage recommendation on
2
the filter clip (or the chart below), fill
the paper filter with the desired amount
of ground coffee. Then, close the brew
basket door.
10
15
20
25
30
17
25.5
34
42.5
51
7
8
12
35
40
59.5
68
CMD + SHIFT CLICK TO CHANGE COPY
Downloaded from www.vandenborre.be
OPERATING THE COFFEE BREWER
Brewing coffee
English
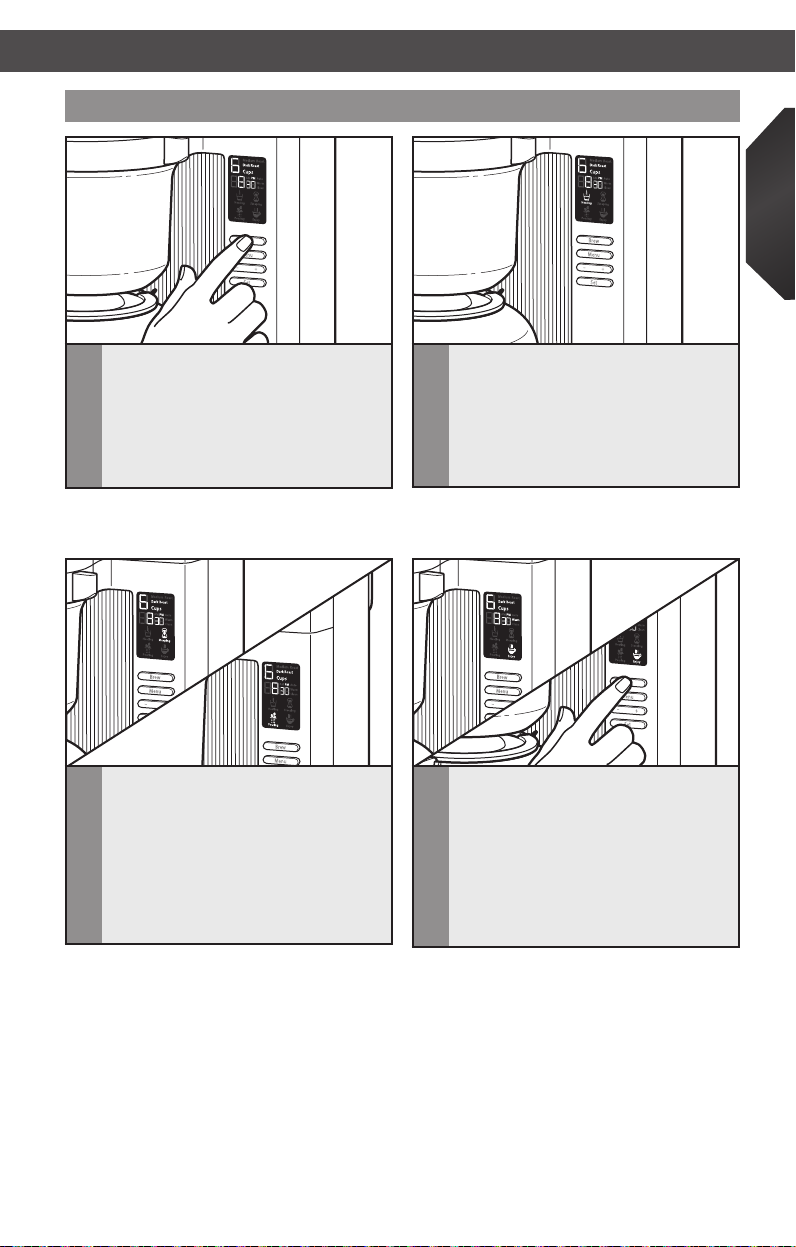
After selecting the number of cups you
1
want to brew, and the strength of the
coffee you want to brew, press the
BREW button.
NOTE: If you wish to cancel the Brew cycle
at any time, press the BREW button.
After all the water is heated, the Coffee
3
Brewer will begin to alternately shower
the grounds with water, and allow the
coffee to steep. This happens in stages
until the cycle is over, and you will see
the Pouring and Steeping indicators
alternately light up during this segment
of the cycle.
The Coffee Brewer will heat all the
2
water needed to brew at the beginning
of the cycle. You will see the Heating
indicator light up during this segment
of the cycle. This process takes
approximately 6 minutes for 8 cups
of coffee.
When the cycle is complete, the Enjoy
4
indicator will light up and 3 beeps will
sound. The Warming plate will then
keep the coffee at optimum temperature
for 1 hour after brewing. However, for
best results, it is recommended that
coffee is consumed within 30 minutes
after brewing. To cancel the Warm cycle
at any time, press the BREW button.
HELPFUL TIP: It is recommended to allow the brewing cycle to complete for the
selected number of cups prior to tasting to extract the maximum avor from the
pour over brewing method.
13
CARE AND CLEANING
Downloaded from www.vandenborre.be
Cleaning the Coffee Brewer
Descaling the Coffee Brewer
Calcium deposits (scale) from water will build up in the Coffee Brewer over time and impair
brewing efficiency and coffee quality. If you notice that it takes longer than usual to brew,
or that the Coffee Brewer is making unusual noises, then it is time to descale. The “Clean”
indicator will flash when the Coffee Brewer needs to be cleaned. Descaling should be done
as soon as possible to preserve the performance and life of your Coffee Brewer.
NOTE: The Coffee Brewer can be
descaled by using a packaged descaling
agent, which can be found at various
retail stores or online.
Follow the directions on the package for
the recommended ratios of descaling agent
and water to use.
The Coffee Brewer should be run through
a complete Clean cycle using a full tank of
the descaling solution.
NOTE: The Clean cycle can be completed
at regular intervals, if desired, without
the “Clean” indicator needing to light up.
Follow step 1, then press MENU three
times and nally SET to manually activate
the Clean cycle.
Before descaling, make sure the brew
1
basket contains no coffee or coffee
filters, and fill the tank with fresh water
to the 8 cup fill line.
When the “Clean” indicator begins to
2
flash: Press the SET button. The “Clean”
indicator will turn on while the cycle
runs. In Clean mode, the Coffee Brewer
will empty the water tank, no matter
how many Cups were selected from
previous cycle settings. When the
Clean cycle is complete (approximately
9 minutes), the “Clean” indicator will
turn off. The Coffee Brewer is ready
to use again.
14
Wash the brew basket, carafe, and filter
3
clip in the top rack of the dishwasher, or
wash by hand in hot, soapy water, then
rinse with warm water. Dry all parts
thoroughly before reassembling the
Coffee Brewer.
1. If the display is not illuminated:
Downloaded from www.vandenborre.be
• Check to see whether the Coffee
Brewer is plugged into a grounded
3-prong outlet. If it is, check the fuse
or circuit breaker on the electrical circuit
the Coffee Brewer is connected to and
make sure the circuit is closed.
2. If only a portion of the water added
to the Coffee Brewer actually brews:
• The Coffee Brewer requires immediate
descaling. Please refer to “Descaling
the Coffee Brewer” in the “Care and
cleaning” section.
3. If the entire display ashes:
• There is no water in the water tank.
Press BREW to cancel the ashing and
let the Coffee Brewer cool down for
approximately 10 minutes. Fill the water
tank to the desired number of cups with
fresh, ltered water and continue with
the brewing cycle as described in the
“Brewing coffee” section.
4. If the problem cannot be corrected:
• See the “Warranty and service” section.
Do not return the Coffee Brewer to the
retailer; retailers do not provide service.
English
15

WARRANTY AND SERVICE
Downloaded from www.vandenborre.be
KitchenAid® Coffee Brewer Warranty for the 50 United States,
the District of Columbia, Puerto Rico, and Canada
This warranty extends to the purchaser and any succeeding owner for Coffee Brewers
operated in the 50 United States, the District of Columbia, Puerto Rico, and Canada.
Length of Warranty: One Year Full Warranty from date of purchase.
KitchenAid Will Pay Hassle-Free Replacement of your Coffee Brewer.
for Your Choice of: See the next page for details on how to arrange for service,
or call the Customer eXperience Center toll-free at
1-800-541-6390.
OR
The replacement parts and repair labor costs to correct
defects in materials and workmanship. Service must be
provided by an Authorized KitchenAid Service Center.
KitchenAid Will A. Repairs when Coffee Brewer is used in other than
Not Pay for: normal single family home use.
B. Damage resulting from accident, alteration, misuse
or abuse.
C. Any shipping or handling costs to deliver your Coffee
Brewer to an Authorized Service Center.
D. Replacement parts or repair labor costs for Coffee
Brewers operated outside the 50 United States,
District of Columbia, Puerto Rico, and Canada.
DISCLAIMER OF IMPLIED WARRANTIES; LIMITATION OF REMEDIES
IMPLIED WARRANTIES, INCLUDING TO THE EXTENT APPLICABLE WARRANTIES
OF MERCHANTABILITY OR FITNESS FOR A PARTICULAR PURPOSE, ARE
EXCLUDED TO THE EXTENT LEGALLY PERMISSIBLE. ANY IMPLIED WARRANTIES
THAT MAY BE IMPOSED BY LAW ARE LIMITED TO ONE YEAR, OR THE SHORTEST
PERIOD ALLOWED BY LAW. SOME STATES AND PROVINCES DO NOT ALLOW
LIMITATIONS OR EXCLUSIONS ON HOW LONG AN IMPLIED WARRANTY
OF MERCHANTABILITY OR FITNESS LASTS, SO THE ABOVE LIMITATIONS OR
EXCLUSIONS MAY NOT APPLY TO YOU.
IF THIS PRODUCT FAILS TO WORK AS WARRANTED, CUSTOMER’S SOLE AND
EXCLUSIVE REMEDY SHALL BE REPAIR OR REPLACEMENT ACCORDING TO THE
TERMS OF THIS LIMITED WARRANTY. KITCHENAID AND KITCHENAID CANADA
DO NOT ASSUME ANY RESPONSIBILITY FOR INCIDENTAL OR CONSEQUENTIAL
DAMAGES. This warranty gives you specic legal rights and you may also have other
rights which vary from state to state or province to province.
16
 Loading...