

Page 1
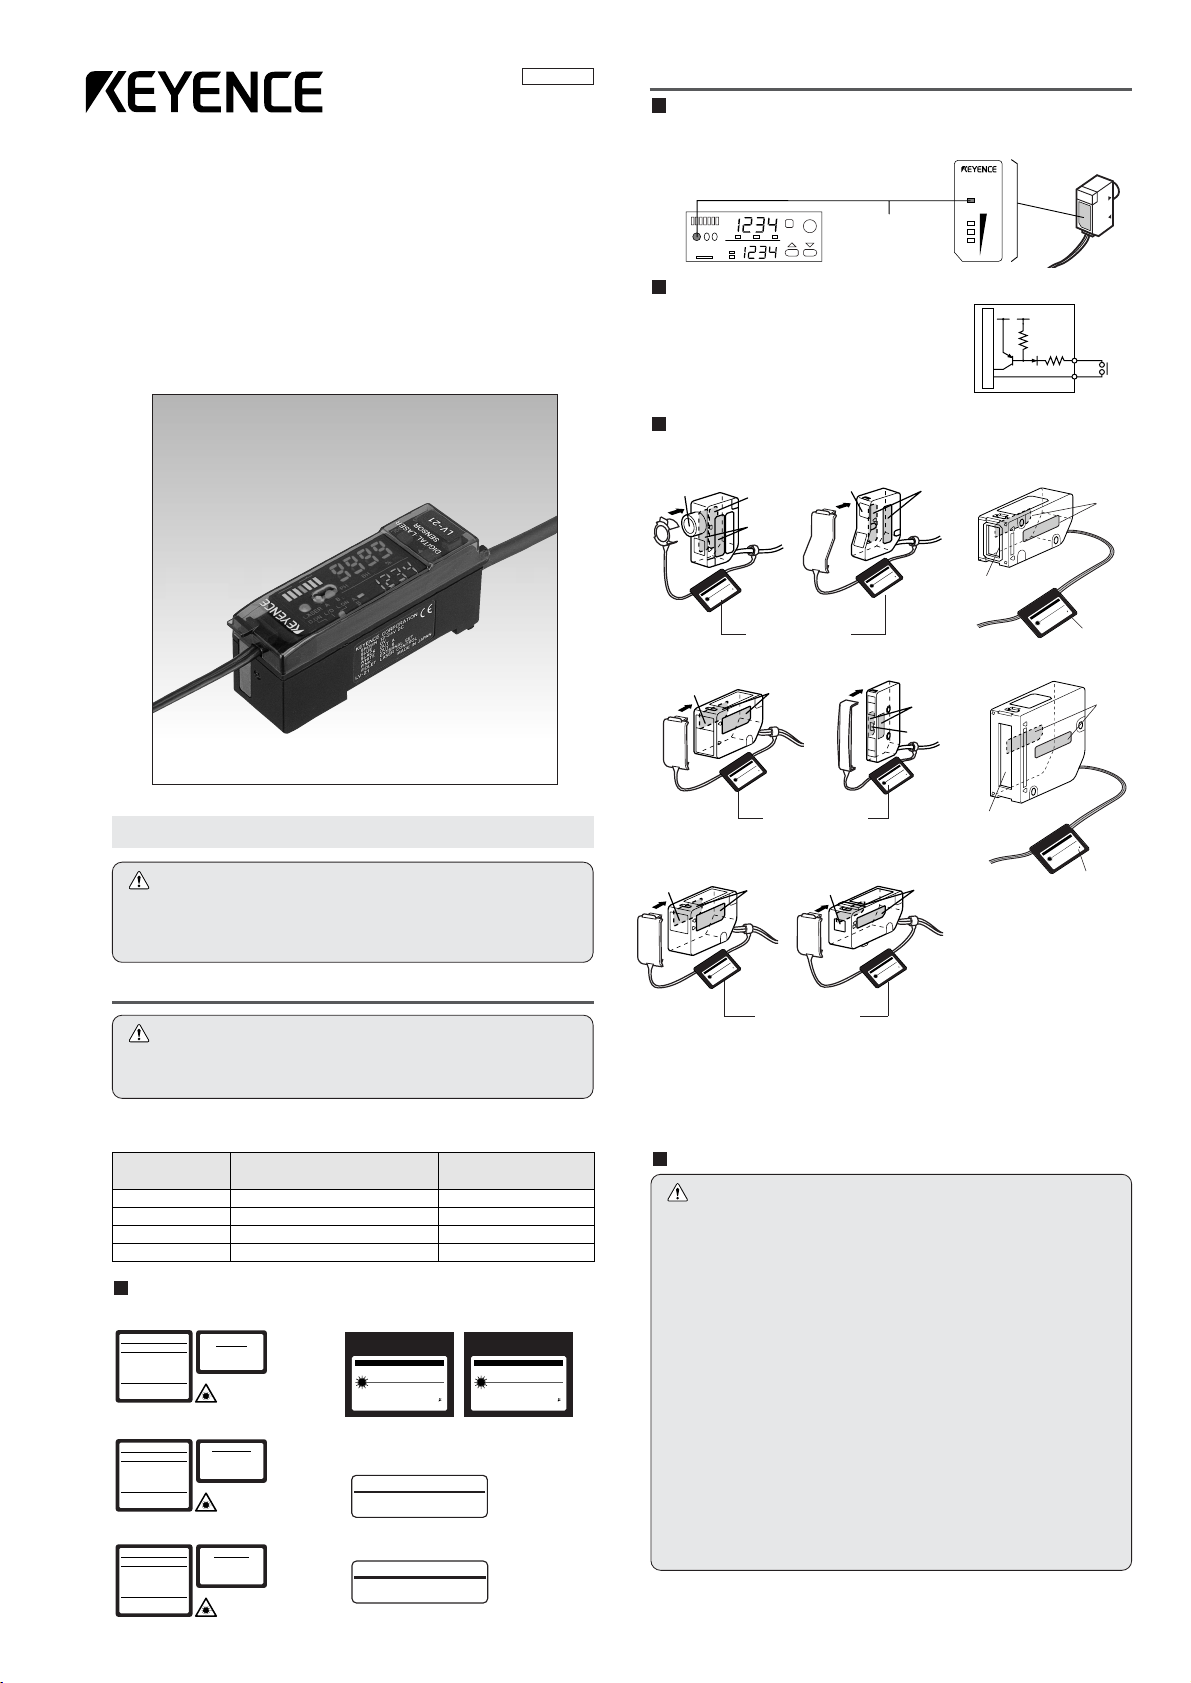
1
General Purpose Digital Laser Sensor
LV Series
Instruction Manual
Specifications of the laser diode change depending on the model.
Refer to the tables below.
Laser safety precautions
Sensor head
Wavelength
Maximum output
FDA class
IEC class
650 nm
3 mW
II
2
I
1
785 nm
2.5 mW
LV-H32, H37, H42, H52, H62, H67
H47, H35, H64, H65, H100, H300
LV-H41, H51
Safety consideration
•
Use of controls or adjustments, or the performance of procedures other than those specified
herein, may result in hazardous radiation exposure.
• The LV series product uses a laser diode as a light source.
Follow the safety precautions below to ensure operator safety:
• Operate the LV Series only according to the procedures described in this instruction
manual.
Otherwise, injury may occur due to exposure to the laser beam.
• Do not disassemble the sensor head.
Laser emission from the LV Series is not automatically stopped if the sensor head is
disassembled. If you disassemble the sensor head for inspection or repair, you may be
exposed to the laser beam. If the LV Series malfunctions, contact KEYENCE
immediately.
•Do not look directly at the laser beam.
Looking directly at the laser beam may result in serious eye injury.
• Protective enclosure
It is recommended that you install a protective enclosure around the sensor head to
prevent any person from getting near the sensor head during operation.
• Protective goggles
It is recommended that you wear protective goggles when using the LV Series.
•Stop laser emissions before cleaning the laser emission port.
Failure to stop the laser emission may expose eyes or skin to the laser beam.
• Check the laser beam path.
To prevent exposure to the laser beam due to specular or diffuse reflection, install a
screen which offers the appropriate reflectance and temperature characteristics to
interrupt the reflected laser beam. Do not install the LV Series in such a way that the
laser beam passes at eye height.
Label location
Warning labels are attached to the sensor head, as shown below.
¡LV-H32
¡LV-H42 ¡LV-H52
¡
Laser CLASS II warning labels(FDA CLASS II)
¡Aperture label
¡Protective housing label
LASER RADIATION
DO NOT STARE INTO BEAM.
SEMICONDUCTOR LASER
MAXIMUM OUTPUT
PULSE DURATION
CLASS II LASER PRODUCT
650nm
3mW
3.5 s
CAUTIONTION
THIS PRODUCT COMPLIES WITH
21 CFR 1040.10 AND 1040.11
LASER RADIATION
DO NOT STARE INTO BEAM.
SEMICONDUCTOR LASER
MAXIMUM OUTPUT
PULSE DURATION
CLASS II LASER PRODUCT
650nm
3mW
3.5 s
CAUTIONTION
1-3-14,Higashi-Nakajima,Higashi
-Yodogawa-ku,Osaka,533-8555,JAPAN
L
A
S
E
R
R
A
D
I
A
T
I
O
N
-
D
O
N
O
T
S
T
A
R
E
IN
T
O
B
E
A
M
.
S
E
M
I
C
O
N
D
U
C
T
O
R
L
A
S
E
R
M
A
X
I
M
U
M
O
U
T
P
U
T
P
U
L
S
E
D
U
R
A
T
IO
N
C
L
A
S
S
I
I
L
A
S
E
R
P
R
O
D
U
C
T
6
5
0
n
m
3
m
W
3
.
5
s
CAUT
I
O
N
TION
T
H
I
S
P
R
O
D
U
C
T
C
O
M
P
L
I
E
S
W
I
T
H
2
1
C
F
R
1
0
4
0
.
1
0
A
N
D
1
0
4
0
.
1
1
Aperture
label
Aperture
AVOID EXPOSURE
LASER RADIATION IS EMITTED
FROM THIS APERTURE.
CAUTION
LASER RADIATION WHEN OPEN.
DO NOT STARE INTO BEAM.
L
A
S
E
R
R
A
D
IA
T
IO
N
-
D
O
N
O
T
S
T
A
R
E
IN
T
O
B
E
A
M
.
S
E
M
I
C
O
N
D
U
C
T
O
R
L
A
S
E
R
M
A
X
I
M
U
M
O
U
T
P
U
T
P
U
L
S
E
D
U
R
A
T
I
O
N
C
L
A
S
S
I
I
L
A
S
E
R
P
R
O
D
U
C
T
6
5
0
n
m
3
m
W
3
.
5
s
CAUT
IO
N
TION
T
H
I
S
P
R
O
D
U
C
T
C
O
M
P
L
I
E
S
W
I
T
H
2
1
C
F
R
1
0
4
0
.
1
0
A
N
D
1
0
4
0
.
1
1
Aperture
label
Aperture
L
A
S
E
R
R
A
D
I
A
T
I
O
N
-
D
O
N
O
T
S
T
A
R
E
I
N
T
O
B
E
A
M
.
SE
M
IC
O
N
D
U
C
TO
R
L
AS
E
R
M
A
X
IM
U
M
O
U
T
P
U
T
P
U
L
S
E
D
U
R
A
T
IO
N
C
L
A
S
S
II L
A
S
E
R
P
RO
D
U
C
T
6
5
0
n
m
3
m
W
3
.
5
s
CAUT
IO
N
TION
T
H
IS
P
R
O
D
U
C
T C
O
M
P
L
IE
S
W
IT
H
2
1
C
F
R
1
04
0
.
1
0
A
N
D
1
0
40
.1
1
Aperture
label
Protect
housing
label
Aperture
¡IEC CLASS 2
LASERSTRAHLUNG
NICHT IN DEN STRAHL BLICKEN
Wellenlänge
Maximalen Leistung
Impulsdauer
650nm
3mW
3.5µs
LASER KLASSE 2
nach Entwurf DIN EN 60825-1 1998-01
VORS I CH T
Laserstrahlung wenn
Abdeckung geöffnet.
Nicht in den Strahl blicken.
RAYONNEMENT LASER
NE PAS REGARDER DANS LE FAISCEAU
Longueur d´onde èmise
Puissance maximale
Durèe de l´impulsion
650nm
3mW
3.5µs
APPAREIL À LASER DE CLASSE 2
conforme à CEI 60825-1 1998-01
ATTE NTION
Rayonnement laser en cas
d´ouverture.
Ne pas regarder dans le
faisceau.
LASER RADIATION
DO NOT STARE INTO BEAM
Wavelength
Maximum output
Pulse duration
650nm
3mW
3.5µs
CLASS 2 LASER PRODUCT
in conformity to IEC 60825-1 1998-01
CAUTION
Laser radiation when open.
Do not stare into beam.
The FDA warning label has already
been stuck.
LV-H32 only
LV-H32 only
LV-H32 only
Laser ON alarm indicator
The laser ON alarm indicator will start flashing after power is turned on. The lamp will
remain ON for as long as the laser light is emitting. This alarm indicator can be seen even
when wearing protective goggles.
Laser emission stop input (LV-21A/21AP/51M/51MP/11A)
Laser emission can be stopped by short-circuiting
between the purple and blue (GND) wires when LV-21A,
LV-51M or LV-11A used. When LV-21AP or 51MP is used,
short-circuit between the purple and brown (12 to 24 V
DC) wires to stop laser emission.
Safety features
LASER
ON
PH
A
B
BH
MODE SET
%
Laser ON alarm indicator
LV-21A/11A/51M
¡LV-H35/H62/H67 ¡LV-H64/H65
¡LV-H100 (Transmitter side)
¡LV-H300 (Transmitter side)
L
A
S
E
R
R
A
D
IA
T
I
O
N
-
D
O
N
O
T
S
T
A
R
E
I
N
T
O
B
E
A
M
.
S
E
M
I
C
O
N
D
U
C
T
O
R
L
A
S
E
R
M
A
X
I
M
U
M
O
U
T
P
U
T
P
U
L
S
E
D
U
R
A
T
I
O
N
C
L
A
S
S
I
I
L
A
S
E
R
P
R
O
D
U
C
T
6
5
0
n
m
3
m
W
3
.
5
s
CAUT
IO
N
TION
T
H
I
S
P
R
O
D
U
C
T
C
O
M
P
L
I
E
S
W
I
T
H
2
1
C
F
R
1
0
4
0
.
1
0
A
N
D
1
0
4
0
.
1
1
Aperture
label
Aperture
L
A
S
E
R
R
A
D
I
A
T
I
O
N
-
D
O
N
O
T
S
T
A
R
E
I
N
T
O
B
E
A
M
.
S
E
M
I
C
O
N
D
U
C
T
O
R
L
A
S
E
R
M
A
X
I
M
U
M
O
U
T
P
U
T
P
U
L
S
E
D
U
R
A
T
I
O
N
C
L
A
S
S
I
I
L
A
S
E
R
P
R
O
D
U
C
T
6
5
0
n
m
3
m
W
3
.
5
s
CAUT
IO
N
TION
T
H
I
S
P
R
O
D
U
C
T
C
O
M
P
L
I
E
S
W
I
T
H
2
1
C
F
R
1
0
4
0
.
1
0
A
N
D
1
0
4
0
.
1
1
Aperture
label
Aperture
¡LV-H37/H47
96M0994
L
A
S
ER
R
A
D
IA
T
IO
N
-
D
O
N
O
T
S
T
A
R
E
IN
T
O
B
E
A
M
.
S
E
M
I
C
O
N
D
U
C
T
O
R
L
A
S
E
R
M
A
X
I
M
U
M
O
U
T
P
U
T
P
U
L
S
E
D
U
R
A
T
I
O
N
C
L
A
S
S
I
I
L
A
S
E
R
P
R
O
D
U
C
T
6
5
0
n
m
3
m
W
3
.5
s
CAUT
IO
N
TION
T
H
IS
P
R
O
D
U
C
T
C
O
M
P
L
IE
S
W
I
T
H
2
1 C
F
R
1
0
4
0
.1
0
A
N
D
1
0
4
0
.1
1
Aperture
Aperture
label
LA
S
E
R
R
A
D
IA
T
IO
N
-
D
O
N
O
T
S
T
A
R
E
IN
T
O
B
E
A
M
.
S
E
M
IC
O
N
D
U
C
T
O
R
L
A
S
E
R
M
A
X
IM
U
M
O
U
T
P
U
T
P
U
L
S
E
D
U
R
A
T
IO
N
C
L
A
S
S
I
I L
A
S
E
R
P
R
O
D
U
C
T
6
5
0
n
m
3
m
W
3
.5
s
CAUT
IO
N
TION
T
H
I
S
P
R
O
D
U
C
T
C
O
M
P
L
I
E
S
W
I
T
H
2
1
C
F
R
1
0
4
0
.
1
0
A
N
D
1
0
4
0
.
1
1
L
A
S
E
R
R
A
D
IA
T
IO
N
-
D
O
N
O
T
S
T
A
R
E
I
N
T
O
B
E
A
M
.
S
E
M
IC
O
N
D
U
C
T
O
R
L
A
S
E
R
M
A
X
IM
U
M
O
U
T
P
U
T
P
U
L
S
E
D
U
R
A
T
IO
N
C
L
A
S
S
II
L
A
S
E
R
P
R
O
D
U
C
T
6
5
0
n
m
3
m
W
3
.5
s
CAUT
IO
N
TION
T
H
I
S
P
R
O
D
U
C
T
C
O
M
P
L
I
E
S
W
I
T
H
2
1
C
F
R
1
0
4
0
.
1
0
A
N
D
1
0
4
0
.
1
1
Laser CLASS II warning label
Laser CLASS II warning label
Laser CLASS II warning label
Laser CLASS II
warning label
Aperture
Aperture
label
Aperture
Aperture
label
Laser CLASS II
warning label
•
This is the product for detecting the target object. Do not use it in the safety circuit such as the
human body protection circuit.
•
This product does not have the explosion-proof construction Do not use it in the inflammable
atmosphere such as atmosphere gas, liquid or dust.
Warning labels
¡DIN Klasse 2
¡IEC (French) CLASS 2
Safety Precautions
5 V DC
Purple
Main circuit
(Short circuit current 1 mA max.)
Blue
Warning
Warning
Warning
Page 2
When A, which is closer to the amplifier, is ON, the monitor displays
the excess gain of output A. When B is ON, the monitor displays the
excess gain of output B.
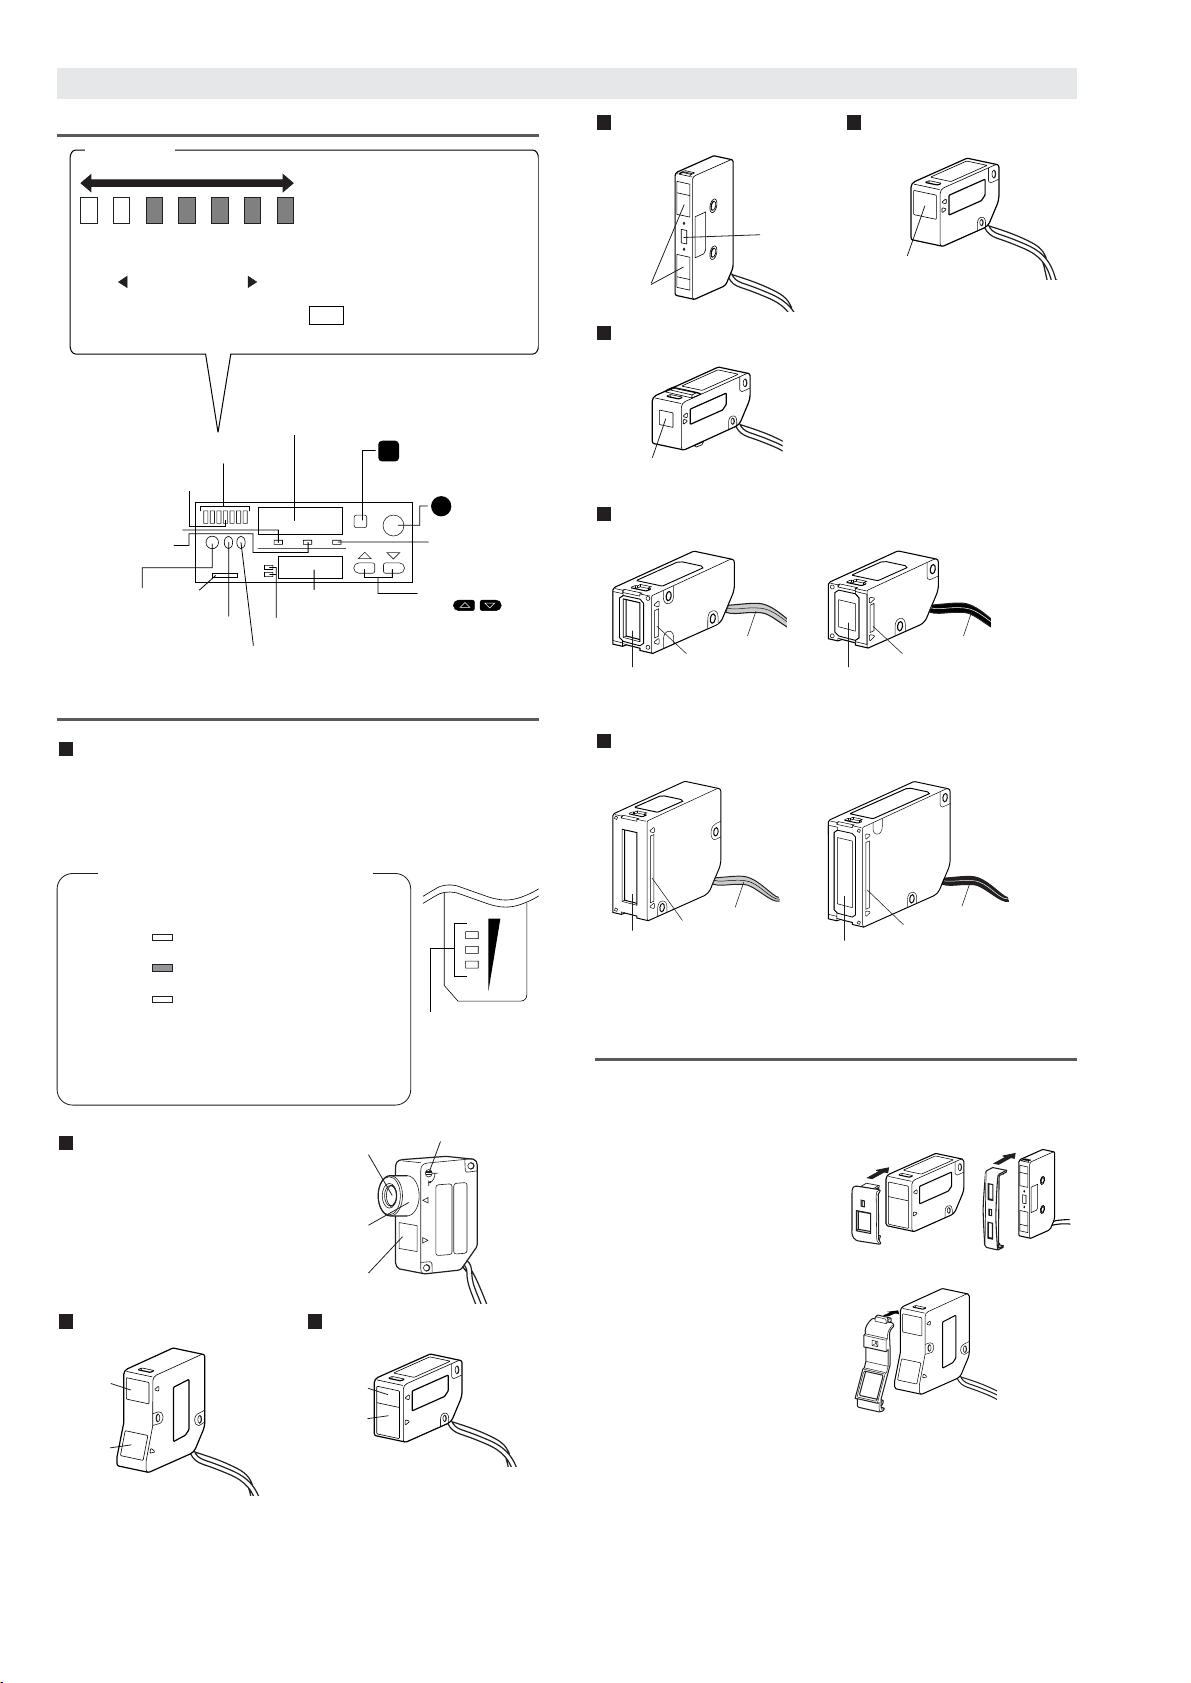
2
Amplifier
Part Names
LV-H51/H52
LV-H32
Adjust the beam spot size by
turning the focus ring. After
completing the adjustment, fix by
turning the focus lock screw.
LV-H41/H42
Sensor head
Transmitter
Receiver
Transmitter
Receiver
Focus lock
Focus ring
Slit for sensor head (Option for LV-H41/H42/H47/H51/H52)
If detection becomes unstable (light cannot be "steadily
received" or "steadily interrupted") due to a change in the
surroundings or the target, or for any other reason, readjust
the sensitivity.
Bar Graph LED monitor
(Interlocked with amplifier)
Bar LED monitor (sensor head)
The indicator turns on according
to the difference between the
received light intensity and the
setting value. The current level
of detection stability can be
determined from this difference.
Light is steadily
received
Setting value
Light is steadily
interrupted
+10%
−
-10%−
LV-H37/H47
LV-H300
LV-H100
LV-H35/H62/H67
LV-H64/H65
Transmitter side (T)
Red
Transmitter
Gray cable
Receiver side (R)
Blue
Receiver
Black cable
Transmitter side (T)
Red
Transmitter
Gray cable
Receiver side (R)
Blue
Receiver
Black cable
PH
A
B
BH
MODE SET
%
15%– 10%– 5%–
-5%–
-10%– -15%–
S
M
Bar LED monitor
Displaying excess gain
Calibration indicator
Peak hold display indicator
Output B
indicator
Channel
indicator
Setting monitor
• Displaying
setting values
• Displaying
settings
UP/DOWN
button
• Changing
setting values
• Selecting
between
various settings
Excess gain
indicator
SET button
Set up sensitivity
MODE button
• Switching displays
• Switching channels
• Displaying various settings
Received light intensity monitor
• Displaying received light
intensity
• Displaying excess gain
• Displaying the hold value
Setting
value
Bar LED Monitor
Light is
steadily
received
Light is
irregularly
received
Light is
irregularly
interrupted
Light is
steadily
interrupted
The current value of received light intensity
is displayed relative to the setting value,
within the range -15% to +15%.
Detection is generally stable when the
received light intensity is at least ±10%
different to the setting value, which is
represented by the center bar of the
LED monitor.
NOTENOTE
The illustration shows an example
of a received light intensity of +5%.
Bottom hold
display indicator
Laser ON
alarm
indicator
Output
button
Output A
indicator
Use in accordance with the distance and target.
¡
Attaching the slit
Attach the slit to the transmitter
¡
Removing the slit
Remove the slit by lifting up the
pin on the slit with a
screwdriver.
¡
LV-H41/H42
¡
LV-H51/H52
¡
LV-H47
Transmitter, Receiver
Transmitter, Receiver
Display excess
gain on Bar LED monitor
L
O
C
K
Transmitter
Receiver
Transmitter
Receiver
Page 3
3
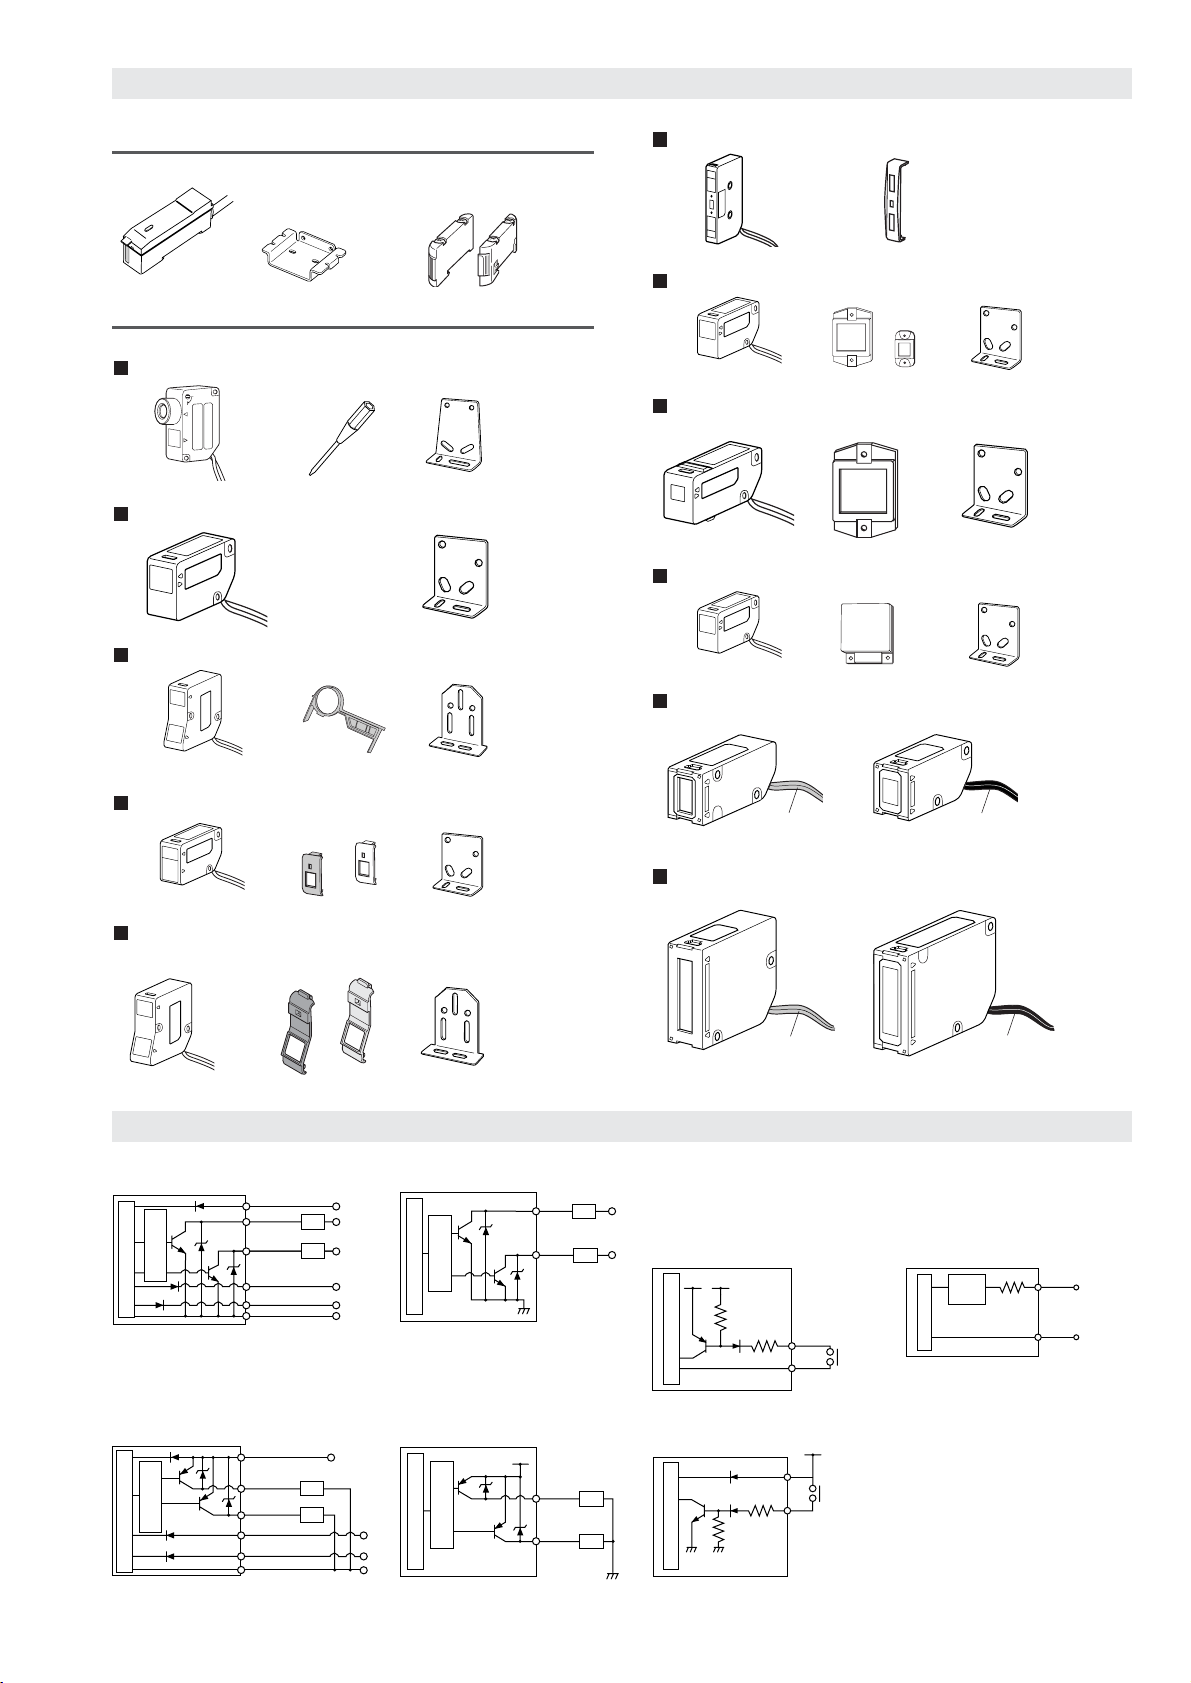
Accessories
Amplifier
Sensor head
LV-H32
LV-H41/H42
LV-H51/H52
Amplifier Mounting bracket
(LV-21A/21AP/51M/51MP/
11A only)
End unit
(LV-22A/22AP/52/52P
only)
Plastic driver
Mounting bracket
Slit (black, gray) Mounting bracket
L
O
C
K
Slit
Mounting bracket
main body
Board nut
M3 x 18 screw:2
Mounting bracket
main body
Board nut
M3 x 18 screw:2
LV-H37
Magnifying glass Mounting bracket
Mounting bracket
main body
Board nut
M3 x 18 screw:2
LV-H62
Reflector Mounting bracket
Mounting bracket
main body
Board nut
M3 x 18 screw:2
LV-H67
Reflector Mounting bracket
Mounting bracket
main body
Board nut
M3 x 18 screw:2
LV-H47
Slit (black, gray) Mounting bracket
Mounting bracket
main body
Board nut
M3 x 18 screw:2
LV-H35
LV-H64/H65
Mounting bracket
Mounting bracket
main body
Board nut
M3 x 18 screw:2
Mounting bracketReflector
Mounting bracket
main body
Board nut
M3 x 18 screw:2
Input/Output Circuit Diagram
¡LV-11A/21A/51M
Blue
Purple(Laser radiation interruption input)
Brown
12 to 24 V DC
5 to 40 V DC
5 to 40 V DC
0 V DC
Pink(External tuning input)*
White
(Control output A)
Black
Main circuit
Overcurrent
protection circuit
Load
Load
(Control output B)
¡LV-22A/52
White
(Control
output A)
Black
5 to 40 V DC
5 to 40 V DC
Main circuit
Overcurrent
protection circuit
Load
Load
(Control
output B)
¡
Laser radiation interruption
(Main unit only)
External tuning input circuit
diagram
¡Analog output circuit
diagram for monitor
(LV-51M/51MP)
(Short circuit current
1 mA max.)
Blue
Purple or Pink
5 V DC
Main circuit
¡LV-21AP/51MP
Blue
Purple
Brown
12 to 24 V DC
0 V DC
Pink*
White
(Control output A)
Black
Main circuit
Overcurrent
protection circuit
Load
Load
(Control output B)
(Laser radiation interruption input)
(External tuning input)
¡LV-22AP/52P
White
(Control
output A)
Black
12 to 24V DC
Main circuit
Overcurrent
protection circuit
Load
Load
(Control
output B)
LV-21AP/51MP
LV-21A/11A/51M
(Short circuit current
2 mA max.)
Brown
Purple or Pink
12 to 24 V DC
Main circuit
0 V
Main circuit
Protection
circuit
Orange
Blue
Output for
monitor
(1 to 4 V)
LV-H300
LV-H100
Transmitter side (T)
Gray cable
Receiver side (R)
Black cable
Transmitter side (T)
Gray cable
Receiver side (R)
Black cable
* LV-51M (monitor output) only is orange.
* LV-51MP (monitor output) only is orange.
Page 4

4
Mounting and detaching amplifiers to and from
the DIN rail mounting bracket
Hook the claw on the rear of the amplifier onto the mounting bracket
of the DIN rail, then hook the front claw on the bracket while pressing
the amplifier forward. To detach the amplifier, unhook the front claw
by simultaneously lifting and pushing the amplifier forward.
Mounting Detaching Side mounting
Mounting additional amplifiers
The number of expansion units that can be mounted to the side of
main unit (LV-11A/21A/51M) is as shown below.
Remove the protective cover on the
side of the amplifier.
Mount expansion units one by one to
the DIN rail.
Slide one expansion unit toward the
main unit or other unit. Align the front
claws of the units and push them
together until you hear a click.
Secure the units together by pushing
the end units (included with the
expansion unit) from both sides.
1
2
3
4
* The sticker on the right is included
with the expansion unit. Attach this
sticker near the amplifier.
Mounting Amplifiers
Removethe
protectivecover
Align the claws.
End unit. (incl. with
expansion units)
Main unit
Expansion
units
Up to 14 expansion units can be added.
• When connecting several amplifiers, always use a DIN rail
and end unit.
•
Take care to turn the power off before connecting/disconnecting
amplifiers.
• Do not remove the protective cover from the expansion
connector of the outermost unit.
• Do not detach multiple units from the DIN rail while they are
still connected to each other.
• If several units are connected, check that the ambient
temperature is appropriate. “Specifications” (page 8).
Important
Detaching amplifiers
Take off the end unit.
Slide the expansion units. Remove them one by one from the DIN
rail.
1
2
Process the end of the cable as shown below.
1
To shorten the sensor head cable
Tilt the top in the direction of the arrow on the left side of the top,
then open the connector.
2
Insert the cable with the shield wire bent at 90°, then bend the
shield wire in the direction of the arrow along the groove. Match
the color of the connector to the color of the shield wire.
3
Red
White
Close the connector, and lock it by pushing down the top.
4
Using nippers or a similar tool, trim the wires sticking out from the
connectors.
5
Mounting the reflection type
Insert the connector into the amplifier and lock it with the lever.
Pass the cable underneath the lever and close the dust cover.
1
Mounting the transmission type
Insert the two connectors into the amplifier unit and lock them
with the lever. Insert the transmitter side connector (with gray
cable) into the light gray lever side, and insert the receiver side
connector (with black cable) into the dark gray lever side. Route
the cable underneath the lever and close the dust cover.
1
PH
A
B
BH
M
%
Receiver side
(black cable)
Transmitter side
(gray cable)
Shield wire
Cable
core
90°
10 mm min.
Mounting the Senser Head
Up to 7
LV-22A, LV-52, AP-V42
Up to 14
FS-T2/M2/V12/V22/PS-T2/ES-M2
Page 5

5
Sensitivity Adjustment
MAX
MIN
Received light
intensity
Setting
value
Time
The setting value is
adjusted to the midpoint
of the difference in
received light intensity
when the target is
absent and present.
Automatic tuning
Pass a target through the optical
axis while pressing the button.
S
1
Confirm that the calibration
indicator (orange LED) and setting
monitor (green LED) are flashing.
2
Release the button.
S
3
PH
A
B
BH
MODE SET
%
Maximum sensitivity setting
For the reflection type sensor, adjust the sensitivity without using
target. For the transmission type sensor, adjust the sensitivity by
using target.
If the setting does not work well, perform the two-point tuning.
Received light
intensity
Setting
value
Time
The setting value is
adjusted to the
midpoint of the
difference in received
light intensity when the
target is absent and
present.
Two-point tuning
With no target in place, press the
button lightly.
S
1
Put a target in place and press the
button again lightly.
S
2
PH
A
B
BH
MODE SET
%
PH
A
B
BH
MODE SET
%
The setting value
is displayed.
PH
A
B
BH
MODE SET
%
The setting value
is displayed.
Received light
intensity
Setting
value
Time
The setting value is
adjusted to turn on the
sensor when the target
arrives at the place
where it should stop.
Positioning tuning
With no target in place, press the
button lightly (orange LED
lights up).
S
1
Place a target in the position where
it should stop.
2
Press the button for 3 seconds
or more until the calibration
indicator (orange LED) and setting
monitor (green LED) are flashing.
S
3
Differentiation Mode
(page 6)
Setting sensitivity
Output state
Received light intensity monitor
The received light intensity monitor displays the amount of
differentiation. Use hold mode switching with hold display ON.
D.ON
L.ON
N.C. output
N.O. output
N.C. output
N.O. output
UP edge DOWN edge
If you press the button accidentally while performing a
fine adjustment of your setting values, a sensitivity
calibration will start automatically and prevent you from
continuing your fine adjustment until the calibration is
completed. If this happens, press the button again to
cancel the setting and start your fine adjustment again.
The value may not change by 1 digit during fine-tuning
adjustments. This is not a malfunction.
S
S
Note
The values displayed on the calibration LED monitor can be
changed by pressing (to increase sensitivity) or (to decrease
sensitivity). This allows you to fine-tune your setting values.
Fine Adjustment of Setting Values
Selecting Display Modes
The display changes each time the MODE button is pressed.
The received light intensity/excess gain hold display appears only
after peak/bottom hold is selected in the hold mode.
M
Light intensity display
Excess gain
old display
When hold display
is selected
Display Peak
or Bottom
Excess gain display(%)
PH BH
%
PH BH
%
PH BH
%
PH BH
%
Light intensity
hold display
Press this button once.
M
Press this button once.
M
Press this button once.
M
Press this button once.
M
• Setting value display
Displays setting value.
• Received light intensity display
Displays received light intensity.
• Excess gain display
Shows the received light intensity as a percentage of the setting
value (setting value = 100%).
This display cannot be shown when the standard light intensity
display is selected.
The displayed value for excess gain is 0 when the excess
gain is less than 1%.
Note
According to the directions on the
left, press the button for 3
seconds or more.
S
1
Confirm that the calibration
indicator (orange LED) and setting
monitor (green LED) are flashing.
2
Release the button.
S
3
For more information about hold display, refer to "Mode Setting" (p. 6).
You cannot select the excess gain display when the standard light intensity is set.
Quickly press once, to set sensitivity to its maximum value.
Perform fine-tuning adjustments using or , or refer to the
details on hold display below.
S
Reference:
Differentiation Mode Detection (UP/DOWN edge)
Detects only sudden changes in received light intensity within a certain time interval.
• UP edge detection: Output is turned ON when light intensity increases by
more than the setting value within a fixed time interval.
• DOWN edge detection: Output is turned ON when light intensity decreases by
more than the setting value within a fixed time interval.
To achieve stable detection in differentiation mode, changes in received light
intensity resulting from the presence or absence of the target must be greater than
the changes in received light intensity resulting from dust or vibration.
Reflection type
No target
Transmission type
PH
BH
%
A
B
Target is used.
PH
A
B
BH
%
MODE SET
MODE SET
MODE SET
PH
BH
%
A
B
MODE SET
PH
BH
%
A
B
Page 6

6
If you press the button for three seconds or more when either or is displayed, you can display the values of various settings.
Each setting can be adjusted separately for channel A and channel B.
Received light
intensity
Light intensity
hold display
M
Reference:
When the button is pressed for 3 seconds or more during mode setting, the display returns to the received light intensity display.
M
NOTE
A
B
2.
Selecting power mode
1. Initial display
*LV-51M/52/51MP/52P only
3.
Selecting detection method
• FINE
• TURBO
• SUPER
•
STANDARD 1
•
STANDARD 2
•
DIFFERENTIATION
(UP edge detection)
•
DIFFERENTIATION
(DOWN edge detection)
Set to this mode for detecting
high-speed targets.
Set to this mode for
regular detection work.
Set to this mode when
there is insufficient light.
Set this mode for regular
detection work.
Use this mode to increase
hysteresis.
Detects the UP edge of
received light change.
Detect the DOWN edge
received light change.
4.
Selecting display shift
5.
Selecting hold mode
1-1. Setting the standard
light intensity
1-2. Registering the standard
light intensity
• NO HOLD
Display is not held
Peak value is held
on the display
Set to this mode for
regular detection work.
Use for output OFF
delay
Use for output ON
delay
Use for one-shot output
Minimum value is held
on the display
• PEAK HOLD
• BOTTOM HOLD
•
NO TIMER
•
OFF DELAY
•
ON DELAY
•
ONE SHOT
6.
Selecting timer mode
Selecting no timer
7. Timer setting
Received light
intensity after shift
Amount of shift
PH
A
B
BH
MODE SET
%
2.
Switching power mode:(
for both outputs A and B )
3. Switching detection mode:(Skipped during the
standard light intensity setting is in progress.)
4. Switching display shift
5. Hold mode switching
6. Switching timer mode
7. Timer setting
Min. 1 ms to max. 9999 ms
Select a power mode to use for or .
Select a detection mode to use for or .
Select a hold mode to use for or .
Select a timer mode to use for or .
Set the timer for or .
Be sure to adjust the sensitivity again after switching
POWER mode.
Differentiation Mode Detection (page 5)
Setting values will also shift.
By pressing
once, the received light intensity
display will shift to a value of 0. Also, fine adjustments
of display shift can be done using or .
*To set the shift value to 0, press and
together.
A
B
1-3. Changing the number
of display digits
A
B
1-3. Changing the number of display digits
:(
for both outputs A and B )
PH
A
B
BH
MODE SET
%
PH
A
B
BH
MODE SET
%
PH
A
B
BH
MODE SET
%
PH
A
B
BH
MODE SET
%
PH
A
B
BH
MODE SET
%
PH
A
B
BH
MODE SET
%
PH
A
B
BH
MODE SET
%
PH
A
B
BH
MODE SET
%
PH
A
B
BH
MODE SET
%
PH
A
B
BH
MODE SET
%
PH
A
B
BH
MODE SET
%
PH
A
B
BH
MODE SET
%
PH
A
B
BH
MODE SET
%
PH
A
B
BH
MODE SET
%
PH
A
B
BH
MODE SET
%
PH
A
B
BH
MODE SET
%
PH
A
B
BH
MODE SET
%
PH
A
B
BH
MODE SET
%
PH
A
B
BH
MODE SET
%
PH
A
B
BH
MODE SET
%
PH
A
B
BH
MODE SET
%
PH
A
B
BH
MODE SET
%
PH BH
PH BH
PH BH
PH
A
B
BH
MODE SET
%
M
Press for three seconds or more.
M
Press once lightly.
M
Press once lightly.
M
Press once lightly.
M
Press once lightly.
M
Press once lightly.
M
Press once lightly.
M
Press once lightly.
M
Press once lightly.
M
Press once lightly.
1-1. Setting the standard light intensity
:(
for both
outputs A and B )
1) 2)
State
A-5
Displays the received
light intensity
b-5
Displays the interrupted
light intensity
Receive all light
500
0
Interrupt half light
250 250
Interrupt all light
0
500
1) A: Displays the data in accordance with
the received light intensity
b: Displays the data in accordance with
the interrupted light intensity
2) 5: Standard light intensity is set to 500.
10: Standard light intensity is set to 1000.
20: Standard light intensity is set to 2000.
30: Standard light intensity is set to 3000.
Ex. When the standard light intensity is 500.
The last digit of digital display can be set to
non-display.
To "2. Selecting power mode"
PH
A
B
BH
MODE SET
%
PH
A
B
BH
MODE SET
%
PH
A
B
BH
MODE SET
%
Press the button in the state that no target is set.
When the SET indication flashes quickly, the setting
is completed.
S
Select a standard light intensity by using or .
When you select OFF and press once lightly,
the menu moves to 2.
M
PH
A
B
BH
MODE SET
%
PH
A
B
BH
MODE SET
%
Select a value to be displayed in the digital display
(green) by using or .
Ex. When A-5 is selected in 1-1
PH
A
B
BH
MODE SET
%
A
B
1-2. Registering the standard light intensity
:(
for both outputs A and B )
S
Mode Setting
*It is possible to perform detection work while changing mode settings.
To do this, switch the monitor to display received light intensity.
When the standard light intensity is set, the detection
mode is fixed to "Standard Detection 1"
Note
Page 7

7
Initializing Settings (Initial Reset)
All settings can be reset to their original values (factory defaults).
This can be done only when the operation button is not locked.
In the state of the received light intensity display, press five
times, while pressing .
1
2
When is displayed on the digital LED monitor, press
once.
(When is pressed here instead of , the monitor returns to
the received light intensity display without being reset)
is displayed on the setting monitor for three seconds and
then is displayed. Initialization is now complete. The
received light intensity display will appear on the monitor again.
3
Power mode*2
Detection methods
Display shift
Hold mode
Timer mode
Timer
Output setting
TURBO
Standard output 1
Shift value: 0
No hold display
No timer
D. ON: 46, L. ON: 50 (52 for LV-H62)
10 ms
Output A / Output B
OFF
Standard light intensity setting*1
PH
A
B
BH
MODE SET
%
PH
A
B
BH
MODE SET
%
Initial settings
PH
A
B
BH
MODE SET
%
PH
A
B
BH
MODE SET
%
*1: LV-51M/52/51MP/52P only
*2: For LV-51M/52/51MP/52P, FINE only
Problem description Countermeasures
Error message
The sensor head is not connected,
sensor is inserted in a wrong
connector, or the sensor head cable
has an open circuit.
Excessive current in output
cable.
Check for an open circuit in the head
cable, and that the sensor is connected
to the correct connector.
Check the load and adjust to
within rated values.
Data error
Perform the initial reset.
Error Messages
If any of the following errors appear on the LED display, check the
amplifier or sensor unit according to the countermeasures listed below.
If an error message other than the above is displayed, contact KEYENCE.
The LV Series can perform two different types of sensitivity settings.
Press or quickly
while holding down .
1
Channel indicator for
set up mode starts
flashing.
2
Release .
3
Selecting Channels
PH
A
B
BH
MODE SET
%
Three types of output modes can be selected.
Selecting Output Mode
PH
A
B
BH
MODE SET
%
Switch
D.ON
(Output ON when light is received)
(Output ON when
light is received)
(Output ON when
light is interrupted)
(Output ON when light is interrupted)
Output B
L.ON
L.ON
D.ON
Output A
Outputswitches
Oneofthetwochannelindicators
willstartflashing.
Adjusting Sensitivity via External Signals (External Tuning)
Lock the operation button
1
Connect the pink cable to a switch or PLC.
2
Making a short circuit between the pink cable and blue cable has
the same effect as pressing .
3
Brown
Blue
+V
0V
Pink
Brown
Pink
Blue
+V
0V
PH
A
B
BH
MODE SET
%
LV-21A/11A LV-21AP
The operation button can be locked to prevent anyone accidentally
touching the operation button and changing settings.
This is the function of the LV-11A/21A/21AP. You cannot use this
function with LV-51M/51MP.
When Key Lock is on, all settings except selecting display, selecting
output and display settings remain disabled until Key Lock is released.
Press or for three seconds or more while pressing .
will start flashing on the display.
Turning on Key Lock
Releasing Key Lock
Press or for three seconds or more while pressing .
will start flashing on the display.
Key Lock
SMS
S
The value for the timer is only effective when timer mode is
set to a setting other than “NO TIMER (OFF).”
Note
Minimum input time is 20 ms.
Note
The operation button must be locked to perform external
tuning.
Important
While tuning sensitivity or setting modes such as power
mode, it is not possible to select channels.
Note
M
M
M
M
S
Page 8

8
Caution on usage of QL (LV-20A only)
Interruption of Laser Radiation
A short circuit between the purple and blue conductors will cause
laser radiation to be interrupted (min. input time: 20 ms).
(Short circuit current 1 mA max.)
5 V DC
Main circuit
Purple
Brown
12-24 V DC
Main circuit
(Short circuit current 2 mA max.)
Purple
Brown
LV-11A/21A/51M
LV-21AP/51MP
Mutual Interference Suppression
The LV Series is equipped with a mutual interference suppression
function. Please note, however, that this mutual interference suppression
function will not work when two main units are used together.
(1)
For use with FS-R0 as main unit. If you wish to use the QL-R01 as the main unit, contact KEYENCE.
(2)
No control output cable for LV-20A
(3)
The power for LV-20A/22A/22AP/52/52AP is supplied from the main unit.
(4)
With additional units connected, the allowable ambient temperature range varies as follows.
2 to 5 units connected: -10 to +50°C (14 to 122°F)
6 to 7 units connected: -10 to +45°C (14 to 113°F)
To connect additional units they must be mounted on a DIN rail (metal DIN rail). Make sure that output current is 20 mA. max.
Note also that the expansion unit cannot be used as it is.
Model
Supported senser head
FDA class
IEC class(JIS)
class 2 class 2class 1
Main unit
Main unit/expansion unit
Response time
FINE: 80
µ
s
TURBO: 500 µs
SUPER: 4 ms
280 µs to 4.7 ms(1)
FINE: 500 µs
TURBO: 2 ms
SUPER: 8 ms
FINE : 80 µs
TURBO: 500 µs
SUPER: 4 ms
Operation mode LIGHT-ON/DARK-ON (switch selectable)
Output display x 2, Digital LED monitor (light intensity monitor, setting monitor), Bar LED monitor, Laser ON alarm indicator
Indicators
Detection modes
Timer function
Laser emission stop input
External tuning input
Analog output for monitor
Protection circuit
1 to 4 V voltage output, 1 to 4 V across load resistance of at least 20 kΩ for FINE indication 0 to 3000 (LV-51M/51MP only)
Reverse-polarity protection, overcurrent protection, surge absorber
DC 12 to 24V ±10% max., Ripple (P–P) 10% max.
(3)
1.5 W (12 V:125 mA, 24 V:62.5 mA)
Control output
(2)
STANDARD 1, STANDARD 2, UP edge, DOWN edge, separate settings for ch A/B
(Except the mode in which the standard light intensity setting is in progress)
OFF DELAY/ON DELAY/ONE SHOT, separate settings for ch A/B, timer 1 to 9999 ms variable
Non-voltage input, stop during laser radiation, input time: at least 20 ms.(Main unit only)
Non-voltage input, input time: at least 20 ms (LV-51M/51MP do not support this item)
NPN output
PNP output
NPN output
PNP output
Rating
Power voltage
Power consumption
(current consumption)
Environmental
resistance
Ambient temperature
Relative humidity
Vibration resistance
-10 to +55 °C (14 to 131 °F), No freezing
(4)
35 to 85%, No condensation
10 to 55 Hz, 1.5 mm double-amplitude in X, Y, and Z direction: 2 hours per axis
Materials Main body & cover: Polycarbonate
Weight (incl. 2-m cable)
NPN open-collector x 2 ch, max. 100 mA (40 V max.), residual voltage 1 max.
PNP open-collector x 2 ch, max. 100 mA (30 V max.), residual voltage 1 max.
LV-21A
LV-21AP
LV-22A
LV-22AP
LV-20A
_
Main unit
Expansion unit (1 line) Expansion unit (0 line)
LV-11A
_
LV-H41/H51 LV-H100/H300
LV-51M
LV-51MP
LV-52
Approx. 120 g Approx. 75 g Approx. 35 g Approx. 120 g Approx. 120 g
Approx. 75 g
LV-52P
Main unit
Expansion unit (1 line)
LV-H32/H35/H37/H42/H47/H52/H62/H64/H65/H67
class
class class
Specifications
Amplifier
When additional sensor head units are installed, mutual
interference suppression allows the units to be positioned
close together. The number of units with which mutual
interference suppression will work depends on the selected
power mode.
* Total (main unit plus expansion units)
Note
This function is available only with the main unit.
Even when expansion units (LV-22A/22AP/52/52P) are
connected, laser radiation stops only from the main unit.
Note
• When you want to monitor the received light intensity in a PLC
using the KEYENCE QL-R01, note that the indication will be
limited in the range of 0 to 4095, and that the threshold value
that can be written in LV using the QL-R01 is up to 4095
(common to all of FINE, TURBO and SUPER TURBO).
• Monitoring of the received light intensity and writing of the
threshold value using QL-R01 are possible in the LV-20A only.
• Up to eight expansion units can be mounted on the QL-R01
provided all the expansion units are the LV-20A. Refer to
"Mounting additional amplifier" (page 4) and the instruction
manual for the QL-R01.
• LV requires two QL channels because a single LV unit has two
output channels.
• Restrictions due to compliance with EMC Directive:
When linking four LVs or more to the QL-R01, install a ferrite
core to the root of the QL-R01 cable.
Important
No. of units free
FINE
Not possible
TURBO
2 *
SUPERPower mode
4 *
Page 9

9
Specifications
Materials
Model
Light source
Supported amplifier unit
FDA class
IEC class(JIS)
LV-H32 LV-H35 LV-H37 LV-H42 LV-H47 LV-H52
Visible red semiconductor laser, Wavelength: 650 nm, 3 mW max.
LV-21A / 22A / 20A / 21AP / 22AP
class II
class 2
Laser ON alarm indicator: green LED, Lebel indicator: green x 2, red x 1 (lebel indicator displays excess gain from 90 to 110%)
Incandescent light: 10,000 lux max. Sunlight: 20,000 lux max.
-10 to +55˚C (14 to 131˚F), No freezing
35 to 85%, No condensation
10 to 55 Hz, 1.5 mm double amplitude in X, Y and Z directions: 2 hours per direction
30 to 250 mm
30 to 500 mm
30 to 1000 mm
150 mm
300 mm
70±15 mm 55 to 85 mm
600 mm
250 mm
(Slit black: 150 mm)
(Slit gray: 100 mm)
15 to 120 mm
(Slit: 20 to 60 mm)
15 to 180 mm
(Slit: 20 to 80 mm)
approx. 55 gapprox. 45 g
500 mm
(Slit black: 300 mm)
(Slit gray: 200 mm)
1000 mm
(Slit black: 600 mm)
(Slit gray: 400 mm)
Detection distance max. 300 mm
Spot diameter: 0.8 mm max.
approx. ø2 mm
approx. ø50 µm
(distance 70 mm)
approx. 21 mm
(distance 70 mm)
Detection distance
35 mm
Area width: approx. 25 mm
(Slit: approx.9 mm)
Detection distance 150 mm
Area width: approx. 37mm
(Slit black:
approx. 19 mm)
(Slit gray:
approx. 7 mm)
Thickness: 1 mm max.
Detection
distance
Beam spot
shape
Environmental
resistance
FINE
TURBO
SUPER
Ambient
illumination
Ambient
temperature
Relative
humidity
Vibration
resistance
Indicator
Weight (incl. 2-m cable)
15 to 240 mm
(Slit: 20 to 100 mm)
Case
Accessories
Glass-reinforced resin
Lens (cover)
Transmitter: Acrylic
Receiver: Polyalylate
Transmitter: Glass
Receiver: Polyalylate
Acrylic
Polyalylate
Accessories
Polyalylate
Transmitter: Glass
Receiver: Polyalylate
_
Model
Light source
Supported amplifier unit
FDA class
IEC z )
LV-H62 LV-H67 LV-H64 LV-H65 LV-H41 LV-H51 LV-H100 LV-H300
Visible red semiconductor laser, Wavelength: 650 nm, 3 mW max.
LV-21A / 22A / 20A / 21AP / 22AP
classII
class2
LV-11A
classI
class1
Invisible infrared semiconductor laser
Wavelength: 785 nm, 2.5 mW max.
LV-51M / 52 / 51MP / 52P
classII
class2
Visible red semiconductor laser,
Wavelength: 650 nm, 3 mW max.
Incandescent light; 10,000 lux max. Sunlight: 20,000 lux max.
-10 to +55˚C (14 to 131˚F), No freezing
10 to 55 Hz, 1.5 mm double amplitude in X, Y and Z directions: 2 hours per direction
30 to 250 mm
30 to 500 mm
30 to 1000 mm
20 m
30 m
250 mm
(Slit black: 150 mm)
(Slit gray: 100 mm)
15 to 120 mm
(Slit: 20 to 60 mm)
15
to
180 mm
(Slit: 20 to 80 mm)
15
to
240 mm
(Slit: 20 to 100 mm)
2000 mm
(Detection width
10 mm)
2000 mm
(Detection width
30 mm)
Approx. 100 gApprox. 80 gApprox. 55 g
500 mm
(Slit black: 300 mm)
(Slit gray: 200 mm)
1000 mm
(Slit black: 600 mm)
(Slit gray: 400 mm)
100 mm
(When OP-51428 is
used: 150 mm)
10 to 150 mm
(When OP-51428 is
used: 10 to 250 mm)
100 to 200 mm
(When OP-51428 is
used: 150 to 350 mm)
100 to 500 mm
(When OP-51428 is
used: 100 to 700 mm)
200 to 850 mm
(When OP-51428 is
used: 300 to 1100 mm)
400 to 1200 mm
(When OP-51428 is
used: 600 to 1500 mm)
30m
(When OP-51428 is
used: 50 m)
approx. ø1.5 mm
(Distance 1 m
max)
Area width: 40 mm
(Distance 300 mm)
Area width: 50 mm
(Distance 100 mm)
Area width
approx. 12 mm
Area width
approx. 32 mm
Detection distance 35 mm
Area width: approx.
25 mm(Slit: approx. 9 mm)
<Typical>
20 m
approx.10x3 cm
30 m
approx.15x4 cm
Detection distance150 mm
Area width: approx. 38 mm
(Slit black: approx.19 mm)
(Slit gray: approx.7 mm)
Thickness: 1.3 mm max.
Detection
distance
Beam spot shape
FINE
TURBO
SUPER
Ambient
illumination
Ambient
temperatture
Vibration
resistance
Indicator
Weight(incl. 2-m cable)
Materials
Case Glass-reinforced resin
Lens (cover)
Acrylic PolyalylateNorbornene resin Transmitter: Glass, Receiver: Polyalylate
Accessories Reflector: Acrylic, Polycarbonate Slit: Polyacetal -
Approx. 45 g
Laser ON alarm indicator, Power indicator*: green LED, Lebel indicator: green x 2, red x 1 (lebel indicator displays excess gain from 90 to 110%)
* The power indicator is installed only in the receiver of the LV-H100/H300.
Environmental
resistance
Sensor head specifications1
Sensor head specifications 2
Page 10

10
Hints on Correct Use
・
To extend the ampliffiler cable length, use a cable that has a crossectional area of at last aa 0.3 mm
2
. Limit the length of cable
extensions to 100 m. (For further information on connecting several
units contact KEYENCE)
・
Placing the amplifier cable together in the same conduit with power
lines or high voltage lines may cause detection errors due to
interference or sensor damage. For this reason, always isolate the
amplifier cable from these lines.
・
If using a commercial switching regulator, make sure to ground
both the frame ground terminal and ground terminal.
・
Do not use the LV Series outdoors, or in any location where
extraneous light can directly enter the light receiving surface.
・
At the maximum sensitivity setting, detection distance may vary
somewhat due to slight differences in the characteristics of individual units.
・
Improper wiring may cause the amplifier to become hot or alter
sensitivity. (Input/Output Circuit Diagram: page 7)
・
Do not use connectors for sensor head-to-amplifier connections
more than 100 times.
・
Displayed values may vary due to surrounding conditions (e.g.
temperature changes, dust)
Cautions on using the LV-H62/H67
・
Use FINE mode when there are any white or mirror-surfaced objects
near the sensor head.
・
When the output is unstable in standard 1 mode (Std),
change the detection mode to standard 2 (Std2).
Reflector
・
The values on the received light intensity display may vary depending on the surface condition of the reflector.
•Use the exclusive bracket (optional LV-B101, LV-B102, LV-B301,
LV-B302) to mount the sensor. Adjust the light axis of the transmitter
and receiver in both the vertical and horizontal directions without
any target in the detection area. Then, mount the sensor while
maximizing the value displayed on the amplifier. (Adjust the light
axis so that the transmitter beam is at the center of the receiver
block)
•When mounting the sensor, mount the transmitter and receiver so
that their sides on which the indicator is mounted face the same
direction.
WARRANTIES (MUST ACCOMPANY THE PRODUCTS): KEYENCE,
at its sole option, will refund, repair or replace at no charge any
defective Products within 1year from the date of shipment. Unless
stated otherwise herein, the Products should not be used internally in
humans, for human transportation, as safety devices or fail-safe
systems. EXCEPT FOR THE FOREGOING, ALL EXPRESS, IMPLIED
AND STATUTORY WARRANTIES, INCLUDING WARRANTIES OF
MERCHANTABILITY, FITNESS FOR A PARTICULAR PURPOSE AND
NON-INFRINGEMENT OF PROPRIETARY RIGHTS, ARE EXPRESSLY
DISCLAIMED. KEYENCE SHALL NOT BE LIABLE FOR ANY DIRECT,
INDIRECT, INCIDENTAL, CONSEQUENTIAL OR OTHER DAMAGES,
EVEN IF DAMAGES RESULT FROM THE USE OF THE PRODUCTS
IN ACCORDANCE WITH ANY SUGGESTIONS OR INFORMATION
PROVIDED BY KEYENCE. In some jurisdictions, some of the
foregoing warranty disclaimers or damage limitations may not apply.
Warranties
Cautions on Usage the LV-H100/H300
The side on which the indicator is mounted The side on which the indicator is mounted
The side on which the indicator is mounted
The side on which the indicator is mounted
KEYENCE CORPORATION
1-3-14, Higashi-Nakajima, Higashi-Yodogawa-ku,
Osaka, 533-8555, Japan
Phone: 81-6-6379-2211 Fax: 81-6-6379-2131
AFFILIATED COMPANIES
KEYENCE CORPORATION OF
AMERICA
Phone: 201-930-0100 Fax: 201-930-0099
KEYENCE DEUTSCHLAND GmbH
Phone: 06102-36 89-0 Fax: 06102-36 89-100
KEYENCE (UK) LIMITED
Phone: 01908-696900 Fax: 01908-696777
KEYENCE FRANCE S.A.
Phone: 01 47 92 76 76 Fax: 01 47 92 76 77
KEYENCE SINGAPORE PTE LTD.
Phone: 6392-1011 Fax: 6392-5055
KEYENCE (MALAYSIA) SDN BHD
Phone: 03-2092-2211 Fax: 03-2092-2131
KEYENCE (THAILAND) CO., LTD.
Phone: 02-369-2777 Fax: 02-369-2775
KEYENCE TAIWAN CO., LTD.
Phone: 02-2627-3100 Fax: 02-2798-8925
KEYENCE (HONG KONG) CO., LTD.
Phone: 3104-1010 Fax: 3104-1080
KEYENCE INTERNATIONAL
TRADING (SHANGHAI) CO., LTD.
Phone: 021-68757500 Fax: 021-68757550
KEYENCE KOREA CORPORATION
Phone: 02-563-1270 Fax: 02-563-1271
KEYENCE CORPORATION, 2003
0053-1 Printed in Japan
Specifications are subject to change without notice.
 Loading...